# Genviral, full text
> Genviral is an AI social media platform that creates the content and then schedules it, across TikTok, Instagram, YouTube, LinkedIn, Pinterest, Facebook, X, and Bluesky. It is operable by humans in a web app and by AI agents over an MCP server and a Partner REST API.
Every public Genviral marketing page as markdown, in one document. The index version is at https://www.genviral.io/llms.txt, and the HTML page at each canonical address stays authoritative.
# Genviral blog
Guides on creating and scheduling social media content: platform how-tos, posting strategy, and product walkthroughs across TikTok, Instagram, YouTube, LinkedIn, Pinterest, Facebook, X, and Bluesky.
## Every page in this section (84)
- [7 Best LinkedIn Schedulers in 2026 (Researched & Ranked)](https://www.genviral.io/blog/best-linkedin-scheduler): I reviewed the best LinkedIn schedulers in 2026 and ranked the top 7 options for creators, founders, agencies, and B2B teams. AuthoredUp is my top pick if you want a LinkedIn-only tool, while Genviral is the strongest AI-assisted alternative.
- [15 Best OpenClaw Skills for Social Media Marketing in 2026](https://www.genviral.io/blog/best-openclaw-skills-social-media): A curated list of the best OpenClaw skills for social media marketing - from automated posting and AI video creation to analytics and brand voice management.
- [9 Best Pinterest Schedulers in 2026 (Researched & Ranked)](https://www.genviral.io/blog/best-pinterest-scheduler): I researched the best Pinterest schedulers in 2026 and ranked the top 9 options for creators, brands, and agencies. Genviral is my pick if you want Pinterest content creation, scheduling, and automation in one workflow.
- [10 Best Social Media APIs for Posting & Automation](https://www.genviral.io/blog/best-social-media-apis): Compare the best social media APIs for developers and businesses. From unified posting APIs to analytics endpoints - find the right API for scheduling, cross-platform publishing, and content automation.
- [6 Best Social Media CLI Tools for Posting & Automation](https://www.genviral.io/blog/best-social-media-cli): The best social media CLI tools in 2026. We tested 6 command-line tools that genuinely install and run in your terminal - so you can post, schedule, and automate social media from the shell, CI/CD, or an AI agent.
- [Best Social Media Data APIs in 2026 (Compared for Developers)](https://www.genviral.io/blog/best-social-media-data-apis): Compare the best social media data APIs in 2026 for profiles, posts, comments, and video metadata, with pricing, coverage, and developer trade-offs.
- [12 Best TikTok Schedulers in 2026 (Tested & Compared)](https://www.genviral.io/blog/best-tiktok-scheduler): We tested the 12 best TikTok schedulers in 2026 - from Genviral's TikTok-first creation and posting workflow to all-in-one suites like Hootsuite and Sprout, and TikTok's own native scheduler. Compare features, pricing, and which one actually wins on TikTok.
- [Claude Facebook Automation: How to Schedule Posts with Claude Cowork](https://www.genviral.io/blog/claude-facebook-automation): Connect Claude to Facebook with Genviral, schedule a reviewed video post, and turn the tested workflow into a recurring Claude Cowork task.
- [How to Connect Claude to Instagram and Automate Posting](https://www.genviral.io/blog/claude-instagram-automation): Connect Claude to Instagram with Genviral, create or reuse media, schedule posts, and build a safer recurring workflow with Claude Cowork.
- [Claude YouTube Automation: Schedule Shorts with Claude Cowork](https://www.genviral.io/blog/claude-youtube-automation): Connect Claude to YouTube with Genviral, alternate videos from named folders, write YouTube metadata, and schedule recurring Shorts with Claude Cowork.
- [How to Create TikTok Slideshow Images with AI (2026 Guide)](https://www.genviral.io/blog/create-tiktok-slideshow-images-with-ai): Learn how to generate unique AI images for TikTok slideshows using Genviral's AI Studio with Seedream 4. Create 4K images, variations, and stand out from the competition with unique visuals.
- [How to Automate Facebook Posting with Hermes Agent](https://www.genviral.io/blog/hermes-agent-facebook): Learn how to use Hermes Agent for Facebook social media automation. This step-by-step guide covers API keys, connected accounts, folder-based reposting, confirmations, logging, and Facebook reauthentication.
- [How to Automate Instagram Posting with Hermes Agent](https://www.genviral.io/blog/hermes-agent-instagram): Learn how to use Hermes Agent for Instagram social media automation. This step-by-step guide covers connected accounts, API keys, media-library folders, duplicate-prevention, and using Genviral naturally as the publishing layer.
- [How to Automate Pinterest Posting with Hermes Agent](https://www.genviral.io/blog/hermes-agent-pinterest): Learn how to use Hermes Agent for Pinterest social media automation. This step-by-step guide covers endpoint-specific API docs, connected accounts, board setup, reference-image debugging, GPT Image 2 settings, and manual warmup habits.
- [Hermes Agent Social Media: How to Automate Posting](https://www.genviral.io/blog/hermes-agent-social-media): Learn how to use Hermes Agent for social media automation. This step-by-step guide covers the official Hermes workflow, Discord and cron setup, and a Pinterest example that uses Genviral as the posting layer.
- [How to Automate TikTok Posting with Hermes Agent](https://www.genviral.io/blog/hermes-agent-tiktok): Learn how to use Hermes Agent for TikTok social media automation. This step-by-step guide covers slideshow workflows, draft vs automatic posting, AI image generation, and using Genviral as the publishing layer.
- [How to Automate YouTube Shorts Posting with Hermes Agent](https://www.genviral.io/blog/hermes-agent-youtube): Learn how to use Hermes Agent for YouTube Shorts social media automation. This step-by-step guide covers connected accounts, API keys, media-library folders, logging, confirmations, and using Genviral naturally as the publishing layer.
- [How to Hide Your Following List on Instagram (2026 Guide)](https://www.genviral.io/blog/hide-instagram-following-list): How to hide your Instagram following list. The only method that works, what "private account" actually means, and managing who sees your connections.
- [How Many Photos Can You Post on Instagram? (2026 Update)](https://www.genviral.io/blog/how-many-photos-can-you-post-on-instagram): Instagram now allows up to 20 photos or videos per carousel post. Learn the current limits, why some accounts still have 10, and how to post multiple photos.
- [How Often Should You Post on Instagram in 2026?](https://www.genviral.io/blog/how-often-should-you-post-on-instagram): Optimal Instagram posting frequency based on 2+ million posts. How often to post Reels, Stories, and feed content to maximize reach in 2026.
- [How to Add Admin to Facebook Page (Desktop & Mobile 2026)](https://www.genviral.io/blog/how-to-add-admin-to-facebook-page): How to add admins to your Facebook Page using Page Settings and Meta Business Suite. Step-by-step instructions for desktop and mobile.
- [How to Add Link to TikTok Bio (2026 Guide)](https://www.genviral.io/blog/how-to-add-link-to-tiktok-bio): Learn how to add a clickable link to your TikTok bio. Step-by-step instructions, requirements, and what to do if you don't have 1,000 followers yet.
- [How to Block Someone on TikTok (2026 Guide)](https://www.genviral.io/blog/how-to-block-someone-on-tiktok): Quick guide on how to block someone on TikTok. Simple steps for mobile, desktop, and bulk blocking to protect your privacy and improve your experience.
- [How to Change Email on Facebook (2026 Quick Guide)](https://www.genviral.io/blog/how-to-change-email-on-facebook): How to change your email on Facebook. Step-by-step instructions for desktop and mobile, including setting a new primary email and removing old ones.
- [How to Change Name on Facebook (Desktop & Mobile 2026)](https://www.genviral.io/blog/how-to-change-name-on-facebook): How to change your name on Facebook in 2026. Step-by-step instructions, name policy rules, verification process, and how to add nicknames.
- [How to Change TikTok Account Region](https://www.genviral.io/blog/how-to-change-tiktok-account-region): TikTok doesn't officially allow manual region changes. Learn how TikTok determines your region, why you can't easily change it, and what actually works.
- [How to Clear Facebook Cache (2026 Guide for Phone and PC)](https://www.genviral.io/blog/how-to-clear-facebook-cache): Free up gigabytes of phone memory by clearing your Facebook cache. Full step-by-step guide for iPhone, Android, and PC - including the in-app browser cache most people miss.
- [How to Clear Instagram Cache (2026 Guide for Phone and PC)](https://www.genviral.io/blog/how-to-clear-instagram-cache): Free up gigabytes of phone memory by clearing your Instagram cache. Full step-by-step guide for iPhone, Android, and PC - including the offload trick on iPhone and how to load less data into the app.
- [How to Clear TikTok Cache (2026 Guide for Phone and PC)](https://www.genviral.io/blog/how-to-clear-tiktok-cache): Free up gigabytes of phone memory by clearing your TikTok cache. Full step-by-step guide for iPhone, Android, and PC - including the hidden Watch History trick.
- [How to Comment Anonymously on Facebook (2026 Guide)](https://www.genviral.io/blog/how-to-comment-anonymously-on-facebook): Learn how to comment anonymously on Facebook groups with this complete 2026 guide. Includes step-by-step instructions, limitations, and what admins can see.
- [How to Create Infographics with AI: Step-by-Step Guide](https://www.genviral.io/blog/how-to-create-infographics-with-ai): Learn how to create stunning infographics with AI using Genviral's AI Studio. From recipe cards to marketing visuals - generate professional, consistent infographics in seconds with no design skills.
- [How to Delete a Board on Pinterest (Desktop & Mobile)](https://www.genviral.io/blog/how-to-delete-a-board-on-pinterest): Step-by-step guide to delete Pinterest boards permanently. Learn the difference between deleting and archiving, plus what happens to your pins.
- [How to Delete a Pinterest Pin (Single or Bulk)](https://www.genviral.io/blog/how-to-delete-a-pinterest-pin): Quick guide to delete Pinterest pins one by one or in bulk. Learn what happens when you delete a pin and how to organize your boards efficiently.
- [How to Delete Instagram Account (Permanent & Temporary)](https://www.genviral.io/blog/how-to-delete-instagram-account): Step-by-step guide to permanently delete or temporarily deactivate your Instagram account. Learn about the 30-day grace period and what happens to your data.
- [How to Delete Your TikTok Account (2026 Guide)](https://www.genviral.io/blog/how-to-delete-tiktok-account): Step-by-step guide to permanently delete your TikTok account on mobile and desktop. Includes the 30-day grace period, what gets removed, and what to do before you delete.
- [How to Find Drafts on Facebook (2026 Guide)](https://www.genviral.io/blog/how-to-find-drafts-on-facebook): Learn how to find drafts on Facebook for personal profiles and Pages. Step-by-step instructions for Android, iPhone, and desktop with Meta Business Suite.
- [How to Find Group Boards on Pinterest (2026 Complete Guide)](https://www.genviral.io/blog/how-to-find-group-boards-on-pinterest): How to find group boards on Pinterest in 2026. Six proven methods with step-by-step instructions and tips for evaluating boards before joining.
- [How to Get Spark Code on TikTok (2026 Guide)](https://www.genviral.io/blog/how-to-get-tiktok-spark-code): Learn how to get a TikTok Spark Code to authorize brands to promote your videos as Spark Ads. Step-by-step instructions for creators and brands.
- [How to Lock Facebook Account (Profile Lock Guide 2026)](https://www.genviral.io/blog/how-to-lock-facebook-account): How to lock your Facebook profile in 2026. Step-by-step instructions, what changes when locked, regional availability, and alternatives.
- [How to Make a Board on Pinterest Private](https://www.genviral.io/blog/how-to-make-a-board-on-pinterest-private): Step-by-step guide to make a Pinterest board private using secret boards. Convert existing boards, create new ones, invite collaborators, and reverse it - on desktop, iOS, and Android.
- [How to Make a Pin on Pinterest (Complete 2026 Guide)](https://www.genviral.io/blog/how-to-make-a-pin-on-pinterest): Step-by-step guide to creating Pinterest pins from desktop and mobile. Learn official methods, best practices, optimal sizes, and design tips for 2026.
- [How to Make a Reel on Instagram (2026 Complete Guide)](https://www.genviral.io/blog/how-to-make-a-reel-on-instagram): Learn how to create engaging Instagram Reels step-by-step, including tips for using photos, music, and templates. Plus, discover how Genviral's AI can automate the entire process.
- [How to Make TikTok Slideshows On Your PC (2026 Guide)](https://www.genviral.io/blog/how-to-make-a-slideshow-on-tiktok-pc): Learn how to create professional TikTok slideshows on PC using Genviral's text overlay tool. No mobile app needed - create viral slideshow content directly from your computer.
- [How to Make Money with Facebook: 8 Proven Methods (2026)](https://www.genviral.io/blog/how-to-make-money-with-facebook): Learn how to make money on Facebook using the Content Monetization Program, Marketplace, Groups, Reels, and more. Strategies for 2026.
- [How to Make Money with Instagram: 11 Proven Methods (2026)](https://www.genviral.io/blog/how-to-make-money-with-instagram): How to make money on Instagram using subscriptions, brand partnerships, affiliate marketing, Instagram Shop, and more. Strategies for 2026.
- [How to Make Money with LinkedIn: 9 Proven Methods (2026)](https://www.genviral.io/blog/how-to-make-money-with-linkedin): Learn how to make money on LinkedIn using consulting, freelancing, brand partnerships, newsletters, and more. Practical strategies that work in 2026.
- [How to Make Money with Pinterest: 7 Proven Methods (2026)](https://www.genviral.io/blog/how-to-make-money-with-pinterest): Learn how to make money with Pinterest using affiliate marketing, digital products, brand partnerships, and more. Practical strategies that work in 2026.
- [How to Make Money with TikTok: 9 Proven Methods (2026)](https://www.genviral.io/blog/how-to-make-money-with-tiktok): Learn how to make money on TikTok using the Creator Rewards Program, TikTok Shop, brand deals, affiliate marketing, and more.
- [How to Make Pinterest Collage (2026 Complete Guide)](https://www.genviral.io/blog/how-to-make-pinterest-collage): How to make Pinterest collages using the built-in collage tool. Step-by-step instructions for mobile and desktop, plus design tips.
- [How to Merge Pinterest Boards (and Sections): Step-by-Step](https://www.genviral.io/blog/how-to-merge-pinterest-boards): Step-by-step guide to merge Pinterest boards and sections on Web, iOS, and Android. Includes the critical caveats Pinterest doesn't warn you about - followers, privacy, and reversibility.
- [How to Pin a Comment on TikTok in 2026](https://www.genviral.io/blog/how-to-pin-a-comment-on-tiktok): TikTok removed the Pin comment option in 2025. Here's what changed, why "Pin comment" is gone from the long-press menu, and the new "First Comment" workaround creators are using to land their CTA at the top of the comments tab.
- [How to Recover Deleted Pinterest Boards (7-Day Window)](https://www.genviral.io/blog/how-to-recover-deleted-pinterest-boards): Deleted a Pinterest board? You have 7 days to restore it. Learn the official recovery process, alternatives, and what happens after the deadline.
- [How to Repost on TikTok (2026 Guide)](https://www.genviral.io/blog/how-to-repost-on-tiktok): Learn how to repost videos on TikTok to share content with your followers. Step-by-step instructions, how to remove reposts, and what happens when you repost.
- [How to Repost a Story on Instagram (3 Methods That Work)](https://www.genviral.io/blog/how-to-repost-story-on-instagram): Learn how to repost Instagram stories when tagged, from your archive, or when not tagged. Step-by-step guide with official methods and workarounds.
- [How to See Liked Pins on Pinterest](https://www.genviral.io/blog/how-to-see-liked-pins-on-pinterest): Pinterest removed the traditional "like" button in 2017. Learn how to view reactions, saved pins, and your Pinterest activity history instead.
- [How to See Saved Videos on TikTok (2026 Guide)](https://www.genviral.io/blog/how-to-see-saved-videos-on-tiktok): Quick guide on how to see your saved videos on TikTok. Find your Favorites and organize saved content with Collections for easy access.
- [How to See Who Shared My Post on Facebook (2026 Guide)](https://www.genviral.io/blog/how-to-see-who-shared-my-post-on-facebook): How to see who shared your Facebook post. Step-by-step methods, privacy limitations, and troubleshooting for when names don't appear.
- [How to Turn Off AI Posts on Pinterest (2026 Update)](https://www.genviral.io/blog/how-to-turn-off-ai-posts-on-pinterest): Step-by-step guide to reduce AI-generated content on Pinterest using the current AI content settings. Learn how to filter out AI images from your feed.
- [How to Turn Off Profile Views on Instagram (2026 Guide)](https://www.genviral.io/blog/how-to-turn-off-profile-views-on-instagram): Instagram does not have a TikTok-style profile views toggle. Learn what people can actually see and which privacy settings to change instead.
- [How to Turn Off Profile Views on TikTok (2026 Guide)](https://www.genviral.io/blog/how-to-turn-off-profile-views-on-tiktok): Step-by-step guide to turn off TikTok Profile view history, stop your profile visits from showing, and understand what profile views do and do not hide.
- [How to Unsave Pins on Pinterest (2026 Quick Guide)](https://www.genviral.io/blog/how-to-unsave-pins-on-pinterest): Learn how to unsave (delete) pins on Pinterest in seconds. Quick step-by-step instructions for desktop and mobile, plus how to delete multiple pins at once.
- [How to Use OpenClaw to Automate Your Social Media](https://www.genviral.io/blog/how-to-use-openclaw): Guide to using OpenClaw to generate content, post to multiple platforms, track analytics, and build a self-improving social media pipeline.
- [How to View Blocked Facebook Friends (2026 Quick Guide)](https://www.genviral.io/blog/how-to-view-blocked-facebook-friends): Learn how to view your blocked friends list on Facebook. Quick step-by-step instructions for desktop and mobile, plus how to unblock people.
- [How to Automate Facebook Posting with OpenClaw](https://www.genviral.io/blog/openclaw-facebook): Learn how to set up an OpenClaw agent that automatically creates and publishes Facebook posts using the Genviral API. We use this to keep our brand page active before running ads - here's exactly how.
- [How to Automate Instagram Posting with OpenClaw](https://www.genviral.io/blog/openclaw-instagram): Learn how to set up an OpenClaw agent that automatically creates and publishes Instagram content using the Genviral API. We use this to pre-fill our brand pages with infographics before running ads - here's exactly how.
- [How to Automate LinkedIn Posting with OpenClaw](https://www.genviral.io/blog/openclaw-linkedin): Learn how to set up an OpenClaw agent that automatically creates and publishes posts to your LinkedIn profile using the Genviral API. No need to log into LinkedIn - your agent handles everything from content creation to publishing.
- [How to Automate Pinterest Posting with OpenClaw](https://www.genviral.io/blog/openclaw-pinterest): Learn how to set up an OpenClaw agent that automatically creates and publishes pins to Pinterest using the Genviral API. We run 4-5 accounts this way - here's exactly how.
- [How to Automate TikTok Posting with OpenClaw](https://www.genviral.io/blog/openclaw-tiktok): Learn how to set up an OpenClaw agent that automatically creates and publishes TikTok slideshows and videos using the Genviral API. We use this to run automated cookbook recipe accounts - here's exactly how.
- [How to Automate YouTube Posting with OpenClaw](https://www.genviral.io/blog/openclaw-youtube): Learn how to set up an OpenClaw agent that automatically posts videos and Shorts to YouTube using the Genviral API. Most of our customers use this to cross-post content from TikTok and Instagram - here's exactly how.
- [Pinterest Posting Strategy 2026: How Often Should You Post?](https://www.genviral.io/blog/pinterest-posting-strategy): Optimal Pinterest posting frequency for new and established accounts, seasonal timing strategies, and batch workflows that drive traffic.
- [Pinterest Tips and Tricks 2026: 15 Proven Strategies](https://www.genviral.io/blog/pinterest-tips-and-tricks): 15 proven Pinterest tips for 2026. Create fresh pins, optimize text overlays, use keywords strategically, and leverage timing to drive traffic.
- [How to Schedule Posts to Mastodon (2026 Guide)](https://www.genviral.io/blog/schedule-to-mastodon): Mastodon has no native post scheduling, so you need a third-party tool. This step-by-step guide shows how to connect your Mastodon account and schedule posts with Genviral.
- [How to Schedule Posts to Telegram (2026 Guide)](https://www.genviral.io/blog/schedule-to-telegram): Learn how to schedule Telegram channel and group posts natively, where native Telegram scheduling falls short, and how to connect Telegram to Genviral for a cleaner content calendar.
- [How to Switch to Personal Account on Instagram (2026 Guide)](https://www.genviral.io/blog/switch-to-personal-account-instagram): Step-by-step guide to switch from Business or Creator account to Personal account on Instagram. Learn what features you'll lose and how to switch back.
- [How to Target US Users on TikTok (2026 Ultimate Guide)](https://www.genviral.io/blog/target-us-users-on-tiktok): Learn how to reliably reach the US TikTok audience with this step-by-step device setup and account warm-up guide, tested across multiple phones using VPNs. No US phone number needed.
- [TikTok Growth Strategies for SaaS Products](https://www.genviral.io/blog/tiktok-growth-strategies-for-saas): Learn proven TikTok marketing strategies that helped SaaS companies scale from $0 to $20K+ MRR in just 30-90 days. Discover content formats, creator collaboration tactics, and measurement approaches.
- [How to Warm Up an Instagram Account (2026 7-Day Guide)](https://www.genviral.io/blog/warm-up-instagram-account): The 2026 Instagram warm-up playbook. A day-by-day 7-day cycle covering profile setup, follow/like/Story cadence, when to publish your first Reel, action-block recovery, and when it is safe to schedule. Built for brand-new accounts.
- [How to Warm Up a TikTok Account (2026 Complete Guide)](https://www.genviral.io/blog/warm-up-tiktok-account): Learn the 5-day TikTok account warm-up process for brand-new accounts. This guide covers genuine-user signals, following and bio health checks, burned-account warnings, and when to start posting or automating.
- [Where to Find Scheduled Posts on Facebook (2026 Guide)](https://www.genviral.io/blog/where-to-find-scheduled-posts-on-facebook): Learn exactly where to find your scheduled Facebook posts. Quick guide covering Meta Business Suite Planner, Content tab, mobile app, and third-party tools.
- [Where to Find TikTok Drafts (2026 Quick Guide)](https://www.genviral.io/blog/where-to-find-tiktok-drafts): Quick guide on where to find your TikTok drafts. Simple steps to locate, access, and manage your saved TikTok videos in the Drafts folder.
- [Why Can't I Follow People on TikTok? 2026 Guide](https://www.genviral.io/blog/why-cant-i-follow-people-on-tiktok): Discover why TikTok blocks you from following others, including daily limits, lifetime caps, spam filters, and simple fixes to resolve following issues.
- [Viktor](https://www.genviral.io/blog/author/viktor): Co-founder of Genviral. Occasional writer, sometimes even funny. Also loves to start conmpanies (weird, I know).
- [Fekri](https://www.genviral.io/blog/author/fekri): Co-founder of Genviral. Builder, founder, father
- [Miguel](https://www.genviral.io/blog/author/miguel): Co-founder effortlessbacklinks.com. Co-founder effortlessbacklinks.com
---
Canonical HTML: https://www.genviral.io/blog
# Genviral features
Genviral generates social media content and schedules it. The features below cover AI image and video generation, carousels, a viral content library, a content calendar, scheduling, analytics, and a media library.
## Every page in this section (16)
- [Genviral AI Content Studio](https://www.genviral.io/features/ai-content-studio): Genviral's AI Content Studio runs face swaps, AI headshots, brainrot videos, faceless reels, AI product photography, infographics, OG images, and more - all on the latest frontier image and video models, in one workspace.
- [Genviral AI Carousel Generator](https://www.genviral.io/features/ai-carousel-generator): Turn a single prompt into a finished, swipeable carousel. AI writes the hooks, generates the slides, and adds text overlays - then schedule to TikTok, Instagram, Pinterest, Facebook, and LinkedIn or download every slide.
- [Genviral Social Media Content Library](https://www.genviral.io/features/social-media-content-library): Search and filter a library of 12,000+ viral TikTok posts. Filter by niche, monetization, date, and slide count. Copy any viral slideshow into the editor with one click.
- [Genviral Social Media Scheduling](https://www.genviral.io/features/social-media-scheduling): Schedule social media posts to TikTok, Instagram, YouTube, Pinterest, X, LinkedIn, Bluesky, Mastodon, Telegram, and Facebook from one composer. Smart presets, per-platform options, and full queue control.
- [Genviral Content Calendar](https://www.genviral.io/features/content-calendar): Plan, schedule, and reshuffle posts across TikTok, Instagram, YouTube, Facebook, X, LinkedIn, Pinterest, Bluesky, Mastodon, and Telegram from one drag-and-drop calendar. Month, week, and day views - with timezones, queues, and auto-retry built in.
- [Genviral Social Media Analytics](https://www.genviral.io/features/social-media-analytics): Track followers, views, likes, comments, shares, engagement rate, and top-performing posts across TikTok, Instagram, and YouTube. Auto-refreshed daily with a 90-day timeline.
- [Genviral Media Library](https://www.genviral.io/features/media-library): Genviral's Media Library keeps every AI image, AI video, slideshow, upload, music track, image pack, and character in one place - organized into folders, shared with your team, and one click away from the scheduler composer.
- [AI Headshot Generator](https://www.genviral.io/features/ai-content-studio/ai-headshot-generator): Generate professional AI headshots for LinkedIn, resumes, and business profiles. Create studio-quality portrait photos without a photographer — free to try.
- [AI Product Photography Generator](https://www.genviral.io/features/ai-content-studio/ai-product-photography): Generate professional product photography with AI. Studio-quality lighting, backgrounds, and compositions — no photographer or studio needed. Free to try.
- [AI Thumbnail Maker](https://www.genviral.io/features/ai-content-studio/ai-thumbnail-maker): Create eye-catching AI thumbnails for YouTube, podcasts, and social media in seconds. No design skills needed — generate click-worthy thumbnails free with Genviral.
- [AI Infographic Generator](https://www.genviral.io/features/ai-content-studio/ai-infographic-generator): Create professional infographics with AI — recipes, fitness routines, skincare guides, marketing visuals, and more. No design skills needed. Free to try.
- [AI OG Image Generator](https://www.genviral.io/features/ai-content-studio/ai-og-image-generator): Generate stunning Open Graph images for link previews on Twitter, Facebook, Slack, Discord, and LinkedIn. AI creates professional OG images and social cards in seconds — no design skills needed.
- [Consistent AI Character Generator](https://www.genviral.io/features/ai-content-studio/consistent-character-generator): Generate images of the same AI character across different scenes, poses, and outfits. Train on your own face or any character — consistent identity in every image. Free to try.
- [AI Video Translation](https://www.genviral.io/features/ai-content-studio/ai-video-translation): Translate any video to 180+ languages with AI lip-sync. Automatic voice cloning, natural lip movements, and studio-quality dubbing — no editing skills required.
- [AI Ad Generator](https://www.genviral.io/features/ai-content-studio/ai-ad-generator): Create product ads and social video ads with AI. Turn product shots and ad concepts into high-converting creative drafts for TikTok, Instagram, and Meta.
- [AI Brainrot Video Generator](https://www.genviral.io/features/ai-content-studio/brainrot-generator): Generate viral brainrot videos with AI — gameplay backgrounds, auto-captions, AI voiceover, and scroll-stopping scripts. Create TikTok-ready split-screen videos in one click.
---
Canonical HTML: https://www.genviral.io/features
# Genviral: the agentic social media scheduler that runs itself
Genviral is an agentic social media scheduler for businesses. Tell it what you want in plain words: it creates the posts and publishes them to TikTok, Instagram, YouTube, LinkedIn, Pinterest, Facebook, X, Bluesky, Telegram, and Mastodon, on a schedule or completely on its own. It also tracks analytics across every connected account.
## What Genviral is
The agentic social media scheduler that runs itself. You've got a business to run, not a content team to manage. Tell Genviral what you want: it makes the posts, ships them to all 10 platforms, and keeps them coming. With you, or completely on its own.
- Post to: TikTok, Instagram, YouTube, LinkedIn, Pinterest, Facebook, X, Bluesky, Telegram, and Mastodon.
- Drive it from any agent: Genviral (built in), OpenClaw, Hermes Agent, Claude Code, ChatGPT, Gemini, Copilot, Cursor, Codex, + any AI agent.
- Free to sign up. No credit card required. Cancel anytime.
## Showing up everywhere is a full-time job, and you already have one.
To do it yourself, you're paying for ten tools and logging into all of them: a scheduler, a video maker, a slideshow app, an editor, an analytics dashboard. Around $600 a month, and you're the one holding it together. Every week. One chat replaces all of it.
## Genviral is the content team you could never afford to hire.
Tell it what your business does, in plain words. It studies your niche, makes the posts, and queues a week across all 10 platforms. You approve them, or you don't even do that.
## You tell Vira what you want, and it makes the posts.
Make any kind of content and post it across every platform, whether in the app, on a schedule, or from your own code. Or just tell Vira the goal and let it run the whole thing.
## Distribute: Post everywhere, from one place.
Every scheduled and published post in one calendar. Edit what's upcoming, track what's live, or hand it to Genviral.
## Scheduler: Write it once, post everywhere.
Write your post once, tweak it per platform, preview, and schedule everywhere. Post manually, queue weeks ahead, or hand the whole calendar to Genviral.
- Drafts & approvals: Review and approve every post before it goes live.
- Tailor per platform: Tweak the caption and media for each network.
- Workspace teams: Roles and permissions for your whole team.
## Unified Analytics: See what's working, across every account.
Compare every account and platform side by side. Track competitors and your own posts in one view. Genviral tells you what to clone next.
- Every account, one view: Compare platforms and accounts side by side.
- Competitor tracking: Watch any public account next to your own.
- Clone what works: Genviral tells you which hook to copy next.
## Hosted Accounts: Run more accounts, without touching a phone.
Real phones, clean residential IPs, and account warm-up are a full-time job. We do all of it for you: every account runs on a real iPhone or Android we provision, warm up, and post from daily.
- No phones to buy: We provision a real iPhone or Android per account.
- No VPNs to set up: Each device runs on its own clean residential IP.
- No warm-up to run: We warm up every account to post safely & with maximum reach.
- No shadowbans to fear: Shadowbanned accounts are replaced for free. An account counts as shadowbanned when each of its last 10 posts scored below 100 views.
## Create any format.
200+ templates and 30+ frontier AI models, one canvas. No prompt skills, no After Effects, no agency. Done in minutes.
## AI Studio: Describe it, or pick a template.
One canvas for any image or video. Type what you want in plain English, or start from a proven template.
- Plain-English prompts: Describe what you want. No prompt skills needed.
- 200+ proven templates: Start from a format that already went viral.
- 30+ frontier models: Nano Banana Pro, Veo 3, Kling, and 27 more, one tap.
- Post straight from Studio: Schedule or publish any result without leaving the canvas.
## Formats you can ask Genviral for
Each format is one plain-words request in chat, and the result goes straight into the calendar.
- Viral Library: "what's working in my niche right now?"
- Slideshows: "make me two weeks of slideshows"
- AI UGC: "have AI creators promote my product"
- Product Photos & Videos: "shoot my product like a pro"
- Video Cloner: "put my AI creator in this viral reel"
- Infographics: "turn this into an infographic"
- Train Your Own AI: "place me in a fashion photoshoot"
- App Store: "redo my App Store screenshots"
## Connect every platform into Genviral.
Connect each account once. Genviral creates, schedules, and publishes out to all ten natively, so you never log back in.
- TikTok: Video & slideshows.
- Instagram: Reels, posts & stories.
- YouTube: Shorts & uploads.
- LinkedIn: Company & personal.
- Pinterest: Pins & idea pins.
- Facebook: Pages & video.
- X: Posts & threads.
- Bluesky: Posts & threads.
- Telegram: Channels & broadcast.
- Mastodon: Toots & media.
## Run it any way you want.
Also an API, a CLI, and an agent skill. Ask Genviral and it runs everything in-app. Let it run on its own, every day, hands off. Or drive the same engine from your own code: every capability is also a clean REST endpoint, a CLI command, and a drop-in agent skill.
## Capabilities: Post, create, and measure.
Every Genviral capability is a clean REST endpoint. Schedule and publish across every connected account, generate post-ready media from 30+ frontier models, and pull native analytics, all from one key. Endpoints: POST /v1/posts, POST /v1/generate, GET /v1/analytics.
- Social posting: Schedule or publish video, slideshow, and text to every account.
- Content creation: Image and video from Genviral Studio, plus prompt-to-slideshow.
- Analytics: Native metrics for your accounts and the rivals you track.
- Hosted accounts: Publish through your dedicated hosted accounts with the same key.
## Automation: Hand off the whole loop.
Let Vira run your content on its own, every day, hands off. Script the same engine from any shell or CI with the CLI. Or drop the open-source skill into the agent you already use. Install: npm i -g genviral, git clone genviral-skill.
- Vira autopilot: Scheduled, recurring runs. Genviral handles the whole loop for you.
- Genviral CLI: 60+ commands, built for cron jobs and CI.
- Drop-in agent skill: One repo that plugs into any AI agent you already run.
- Delegated tasks: Hand longer jobs to Vira; it reports back when the work is done.
## Drop Genviral into any agent.
Clone the open-source skill and hand your whole content loop to the agent you already use. One repo, every major runtime. The skill is open source at https://github.com/fdarkaou/genviral-skill.
## Thousands of founders already let Genviral run their entire presence.
No team. No agency. One agent posting, every day, across every platform: and the people who handed it the keys keep coming back to say so. I tried Genviral to automate my proven TikTok slideshow posts and it made things way easier. Ended up getting 2.2M views from 90 posts in 60 days. (Sharie, Founder, Cart AI)
## Who builds Genviral
We built Genviral because we needed it ourselves. You ask for what you want in plain English, and it does the work. Nothing to learn, no dashboard to wrestle with: you talk to it the way you'd brief a person. Signed Fekri & Viktor, Ghent and Ciudad de México. Ships weekly. No outside money.
## Tell Genviral what you want, and get back to your business.
One sentence in, a week of posts out across every platform. It runs itself from here. Free to sign up. No credit card required. Cancel anytime.
## What is Genviral?
Genviral is a social media management tool for teams and AI agents. You can create content, schedule posts, publish, and track performance directly inside the Genviral platform, or do the same work with the help of AI agents and integrations. Whether you want to make the content in Genviral or simply schedule and post content you already have, Genviral gives you one system for TikTok, Instagram, YouTube, Facebook, Pinterest, LinkedIn, X, Bluesky, Mastodon, and Telegram.
## Who is Genviral for?
Anyone who wants to create content and grow on social media. Mobile app developers and studios use it to market their apps, e-commerce brands to showcase products, and service businesses - from handymen and pool cleaners to architecture firms - to win local customers. Content creators, bloggers, and freelancers use it to grow their audience and their clients' accounts. If your business benefits from showing up on social media consistently, Genviral fits your workflow.
## What social media platforms are supported?
Genviral supports posting and scheduling to TikTok, Instagram (Reels and feed posts), YouTube (Shorts and long-form), Facebook (Reels and feed), Pinterest, LinkedIn (personal profiles and public pages), X, Bluesky, Mastodon, and Telegram. The unified analytics dashboard tracks your accounts on TikTok, Instagram, YouTube, Pinterest, Facebook, LinkedIn, and X; competitor tracking covers TikTok, Instagram, and YouTube.
## How much does Genviral cost?
Plans start at $29/month for the Creator plan, which includes AI generation credits, unlimited scheduling and posting, analytics, API access, and access to every AI model. The Professional plan ($49/month) adds more credits, more social accounts, Vira automations, and up to 3 workspaces with 3 team members each. The Business plan ($99/month) adds still more credits and accounts, plus unlimited workspaces and team members. Agencies running many brands can go with the Scale plan at $199/month. Annual billing gives you two months free - about 17% off. No contracts - cancel anytime.
## Is there a free trial?
No, Genviral does not offer a free trial right now. A big reason is that the platform includes AI content tools with real underlying model and infrastructure costs, including video, image, and other generation workflows. We keep plans paid from the start so we can support those costs while giving every customer access to the full product.
## Can I use Genviral with AI agents like OpenClaw or Hermes Agent?
Yes. Genviral has first-class integrations with OpenClaw, Claude Code, Hermes Agent, and Codex. The open-source skill provides 42+ commands for autonomous content creation, scheduling, analytics, and strategy optimization. You can also use the REST API to build custom integrations with any AI agent or automation framework.
## Can Genviral actually replace my entire content stack?
That's the goal. Most teams pay $500+/month cobbling together separate tools for AI generation, video editing, scheduling, analytics, and team management. Genviral consolidates all of that: AI Studio for creation, a content calendar for scheduling, unified analytics, team workspaces, and hosted accounts for safe distribution. One login, one bill.
## What content can I create and post?
You can bring your own content or create it inside Genviral. That includes slideshows in our free editor, hundreds of slideshows and carousels with our automation feature, AI-generated content in AI Studio, and edits in our dedicated video editor. Once your content is ready, you can post as much as you want across your connected platforms - Genviral does not impose limits on how much content you can publish.
## How quickly can I get started?
Under 5 minutes. Sign up, connect your social accounts (one-click OAuth for each platform), and you're ready to create and schedule. No software to install, no complex onboarding. The AI Studio, content calendar, and analytics are immediately available.
## Can my team collaborate on content?
Yes, on Professional and up. Professional includes up to 3 workspaces with 3 team members each, and Business and Scale are unlimited (Creator is a single solo workspace). Create workspaces for different brands or clients, invite team members with role-based permissions, and share a unified media library - all without sharing social media passwords. Your VAs and editors can create, review, and schedule content from their own accounts.
---
Canonical HTML: https://www.genviral.io/
# Genviral for AI agents
Genviral is a social media platform that AI agents can operate directly. An agent can generate images, videos, and slideshows, then schedule and publish them to TikTok, Instagram, YouTube, LinkedIn, Pinterest, Facebook, X, and Bluesky, using either a Model Context Protocol server or a REST API.
## Two ways to connect
Assistants connect over MCP. Code connects over REST. Both hit the same backend services, so anything one can do, the other can too.
- MCP server at https://mcp.genviral.io/mcp — add Genviral as a connector in Claude, ChatGPT, or any MCP client. Authorization is OAuth, scoped per permission.
- Partner REST API — authenticate with an API key and call the documented endpoints directly. Reference at https://docs.genviral.io.
- Discovery — clients that support it can read /.well-known/mcp/server-card.json to find the endpoint, tools, and scopes automatically.
## What an agent can do
Every tool below executes real work against your account. There are no stubs that return a link and ask a human to finish the job.
- Read accounts, posts, and analytics: Show Studio artwork, Show content calendar, Show video project, Show content library, Show viral content references, Show analytics, Show TikTok account posts, Browse music, Get Genviral context, List posts, Get analytics, Research social trends, Research Reddit discussions, Analyze hooks and find viral references, Search the viral content library, Browse content library, Search stock images for slides, Get job status.
- Create and edit content: Manage music, Use Studio creations, Upload media, Manage content library, Manage packs and templates, Manage slideshows, Manage analytics targets, Prepare a post, Manage scheduled posts.
- Schedule and publish posts: Schedule video versions, Publish or retry a post.
- Generate images and videos: Edit video, Find and import remix sources, Generate or render a slideshow, Generate Studio media.
## How permissions work
An MCP connection grants scopes explicitly, and a token can only call the endpoints its scopes cover. Publishing is separated from content creation, so an agent can be allowed to draft without being allowed to post.
- context:read — read accounts, scheduled posts, and analytics.
- content:write — create slideshows, edit drafts, and manage media.
- posts:publish — schedule or publish to a connected account.
- media:generate — run image and video generation.
## A typical run
Ask for a week of content and the agent generates the media, writes the captions, schedules each post to the right account at the right time, and reports back what it queued. It reads analytics on the next run and adjusts.
## Can an AI agent post to social media on my behalf?
Yes. Genviral exposes scheduling and publishing as MCP tools and REST endpoints, so an agent can publish to a connected account once you grant the posts:publish scope.
## Which social platforms can an agent publish to through Genviral?
TikTok, Instagram, YouTube, LinkedIn, Pinterest, Facebook, X, Bluesky, and Telegram.
## Does Genviral have an MCP server?
Yes. Genviral publishes an MCP server with OAuth authorization and a discovery document at /.well-known/mcp/server-card.json.
## Can an agent generate the content, or only schedule it?
Both. Agents can generate images, videos, and multi-slide carousels through the same interface they use to schedule, which is the main difference from scheduler-only tools.
---
Canonical HTML: https://www.genviral.io/agents
# Claude social media automation
Connect Claude to Genviral through the Partner REST API, or install the open source Genviral skill so Claude Code, the Cowork tab, or an Agent SDK build shells out to the `genviral` CLI. One scoped API key lets Claude generate slideshows, images, and video, then schedule and publish across 10 connected platforms including TikTok, Instagram, and YouTube.
## Ways to connect Claude
Every Claude surface that can run a shell command or make an HTTP request reaches the same Genviral accounts, media, and scheduling.
- Claude Code (Skill + CLI): Anthropic's terminal and IDE agent. Drop the Genviral skill into ~/.claude/skills and Claude Code shells out to the `genviral` CLI for accounts, slideshows, posts, and analytics.
- Cowork (CLI + API): The autonomous background tab in the Claude desktop app. Hand it a recurring brief and it runs the CLI or Partner API in its own environment — dispatch hands-off social work without keeping a window open.
- Claude Agent SDK (CLI + API): Build your own headless Claude agent in TypeScript or Python. Call the `genviral` CLI from its Bash tool or hit the Partner REST API directly — then wire it into cron, CI, or a GitHub Action.
- Claude + MCP / API (REST API): Any Claude that can make an HTTP request talks to the Genviral Partner API directly with a Bearer key — through an MCP server or inline fetch, no CLI install required.
## What Genviral executes for Claude
Genviral is the execution layer Claude calls into; Claude keeps the reasoning and conversational handoff.
- Connected social accounts: TikTok, Instagram, YouTube, Pinterest, LinkedIn, Facebook, X, Bluesky, Mastodon, and Telegram behind one API key — no Meta or TikTok partner approval wait.
- AI media generation: Slideshows, images, and videos rendered through Genviral's AI Studio. No separate model wiring — Claude calls one endpoint and gets a finished asset.
- Cross-platform scheduling: One queue, every platform. Idempotent posting via `external_id`, retry-safe drafts, and per-account cooldowns Claude can drive from one endpoint.
- Analytics feedback loop: Genviral feeds last-30-day performance back to Claude so the next batch rewrites hooks against whichever format actually outperformed.
## Setup in five steps
Each step links to the real surface in the Genviral dashboard. Run them once, then let Claude take the recurring work.
- Drop the Genviral skill into Claude's skills folder. Claude Code and Cowork auto-load skills from your local skills directory. The Genviral skill ships an opinionated SKILL.md, slideshow workflow, defaults file, and a feedback loop tuned for social — no manual wiring required. Building on the Agent SDK instead? Point its Bash tool at the same CLI.
- Install the Genviral CLI. The skill shells out to `genviral`, the same CLI any agent uses. Claude's tool calls run shell, the shell runs `genviral`, and Genviral does the rest. Prefer pure HTTP? Skip the CLI and call the Partner REST API directly.
- Create a scoped API key. Create one key per workspace Claude is allowed to drive. Drop it into `GENVIRAL_API_KEY` in your shell profile so the skill picks it up on every session — or pass it as a Bearer token when you call the API directly.
- Connect your social accounts in Genviral. Connect TikTok, Instagram, YouTube, Pinterest, LinkedIn, Facebook, X, Bluesky, Mastodon, and Telegram once in the dashboard. Claude never touches OAuth — it just reads the account list and uses the IDs.
- Ask Claude to draft one sample post. From Claude Code, the Cowork tab, or your own Agent SDK build, ask Claude to generate one slideshow, review it, and create a draft post. Claude uses the skill end-to-end — you watch it work before promoting anything to public.
## Recurring Claude workflows by platform
Each workflow follows the same loop: Claude plans, Genviral renders and publishes, analytics feeds the next session.
- TikTok: Daily slideshows from a fixed format. Ask Claude once; it composes a 4-slide carousel, drafts it as a MEDIA_UPLOAD post, and waits for your thumbs-up before publishing.
- Pinterest: Recurring infographic pins. Claude pulls a recipe from your blog, generates an infographic, and ships the pin to a chosen board — every 8 hours, with confirmations in chat.
- YouTube: Shorts from a shared queue. Claude pulls the next approved Short, fills `settings.youtube` from metadata, and publishes on the cadence you set in chat.
- Instagram: Reels from an approved media folder. Point Claude at a Genviral media-library folder; new uploads get captioned, hashtagged, and queued without ever leaving the approval pipeline.
- LinkedIn: Posts from release notes & drafts. Claude summarizes engineering output into voice-matched posts; Genviral publishes under the company page on a weekly cadence.
- Facebook: Cross-post filler for brand-page trust. Claude mirrors the day's TikTok onto the Facebook page 30 minutes later, keeping the brand page warm so paid traffic and approvals stay healthy.
## Why Claude still needs an API layer
You could wire Claude into every platform's API yourself. In practice that is slow and breaks often.
- Meta and TikTok partner approvals can take months -> Genviral fronts those approvals so Claude posts on day one
- Every platform has its own auth, post settings, and quirks -> One endpoint per concept; Genviral maps it per platform
- AI assets need separate model providers and plumbing -> Genviral's AI Studio ships slideshows, images, and video in-API
- Scaling to many accounts gets you shadowbanned and locked out -> Hosted, pre-warmed accounts keep posting reliable past the early stage
## Which Claude surfaces does this work with?
All of them that can run a shell command or make an HTTP request. Claude Code (terminal and IDE) and the Cowork background tab in the desktop app load the Genviral skill and shell out to the `genviral` CLI. The Claude Agent SDK can call the CLI from its Bash tool or hit the Partner API directly. And any Claude with HTTP access — including via an MCP server — can call the Genviral Partner API with a Bearer key. Same accounts, same endpoints, no per-surface rebuild.
## How does Claude post to social media?
Claude itself doesn't ship with platform connectors. You either install the Genviral skill plus the `genviral` package, or point Claude at the Partner REST API. Claude then drives commands for accounts, slideshows, posts, analytics, and trends — Genviral handles auth, rendering, scheduling, and publishing to every supported network.
## Do I need the Genviral skill, the CLI, or the API?
It depends on the surface. For Claude Code and Cowork, install the skill (SKILL.md, slideshow workflow, defaults, feedback loop) and the CLI it shells out to — that's the smoothest path. For headless Agent SDK builds or any MCP/HTTP integration, you can skip the CLI entirely and call the Partner REST API directly with your Bearer key.
## Can I dispatch Claude to run social tasks autonomously?
Yes. The Cowork background tab runs in its own cloud environment, so you can hand it a recurring brief and let it execute without keeping a window open. For fully scheduled jobs, run the `genviral` CLI on cron, systemd, or a GitHub Action from an Agent SDK build, or use the Hermes Agent integration, which has native scheduled tasks.
## Which platforms can Claude post to through Genviral?
TikTok, Instagram, YouTube, Pinterest, LinkedIn, Facebook, X, Bluesky, Mastodon, and Telegram. Analytics coverage is strongest for TikTok, Instagram, and YouTube. Claude publishes from your connected accounts via one API key — no Meta or TikTok partner approval wait.
## Does this need an MCP server?
No. With the skill, Claude shells out to `genviral` directly — there's no separate MCP server to operate. MCP is optional: if you prefer it, you can wrap the Partner API in an MCP server and have any Claude surface call it that way instead.
## Should I let Claude publish without confirmation?
Not at first. Post manually for a few days, then have Claude generate one sample post. Review the image, caption, tags, and destination. Only after the sample is right should you let Claude publish without asking. Use draft modes (TikTok MEDIA_UPLOAD, YouTube unlisted, Instagram private) for the first few runs.
---
Canonical HTML: https://www.genviral.io/claude
# Codex social media automation
Install the `genviral` npm package so Codex can shell out to `genviral` from the CLI, IDE extension, desktop app, or Codex Cloud, then scope one API key per workspace. Codex runs `genviral` commands, or its scripted `codex exec` mode, to generate slideshows, images, and video, then schedule and publish across 10 connected platforms.
## What Codex owns
Codex is great at planning, parallel tasks, and running shell commands. Genviral is the only shell command its social workflow needs.
- CLI, IDE, app, or cloud: Codex ships as a CLI, IDE extension, desktop app, and a cloud environment — plus GitHub, Slack, and Linear integrations. The same `genviral` shell call works from every surface.
- Parallel subagents: Codex can fan a job out across sandboxed subagents and Codex Cloud tasks. Run one task per account or one per platform without stomping local state.
- Project-aware via AGENTS.md: Drop conventions, prompts, and standing rules into AGENTS.md and Codex obeys them across runs — the same place you describe your Genviral defaults.
- Scripted via codex exec & GH Action: Codex doesn't own scheduling, but `codex exec` and the official GitHub Action are the recurring units. Wire them into cron, Actions, or any runner you already operate.
## What Genviral executes for Codex
Genviral is the execution layer Codex calls into over one CLI, no separate model or platform wiring.
- Connected social accounts: TikTok, Instagram, YouTube, Pinterest, LinkedIn, Facebook, X, Bluesky, Mastodon, and Telegram behind one API key — no Meta or TikTok partner approval wait.
- AI media generation: Slideshows, images, and videos rendered through Genviral's AI Studio. No separate model wiring — Codex calls one endpoint and gets a finished asset.
- Cross-platform scheduling: One queue, every platform. Idempotent posting via `external_id`, retry-safe drafts, and per-account cooldowns Codex can drive from one endpoint.
- Analytics feedback loop: Genviral feeds last-30-day performance back to Codex so the next batch rewrites hooks against whichever format actually outperformed.
## Setup in five steps
Each step links to the real surface in the Genviral dashboard. Run them once, then let Codex compose the rest.
- Install the Genviral CLI. The npm package publishes the `genviral` binary that Codex shells out to. Codex reasons, then runs shell commands — Genviral is the command surface for everything social.
- Create a scoped API key. Create one key per workspace Codex is allowed to drive. Drop it into `GENVIRAL_API_KEY` in your shell or your project's `.env` so Codex inherits it on every run.
- Connect your social accounts in Genviral. Connect TikTok, Instagram, YouTube, Pinterest, LinkedIn, Facebook, X, Bluesky, Mastodon, and Telegram once in the dashboard. Codex never touches OAuth — it just calls `genviral accounts` and uses the IDs.
- Drop the skill into Codex's skills folder (optional). The Genviral skill ships an opinionated `SKILL.md`, slideshow workflow, and a feedback loop tuned for social. Codex auto-loads it when it lives under `~/.codex/skills/`. Skip this step to use the CLI directly.
- Ask Codex to run one sample post. Have Codex generate one slideshow, render it, and create the post. Review caption, slides, and account before you wire it into a recurring task. Use `codex` for an interactive TUI or `codex exec` for one-shot, scriptable runs.
## Recurring Codex workflows by platform
Each workflow follows the same loop: Codex composes the command, Genviral renders and publishes, analytics feeds the next run.
- TikTok: Daily slideshows from a fixed format. Codex generates a 4-slide carousel from the day's trend brief, drafts it as a MEDIA_UPLOAD post, and stops for review before publishing.
- Pinterest: Recurring infographic pins. Cron-runs Codex every 8 hours: it pulls a recipe, generates an infographic, and ships the pin to a chosen board via `pinterest.board_id`.
- YouTube: Shorts from a shared queue. Codex picks the next approved Short from your queue folder, fills `settings.youtube` from metadata, and publishes on the schedule you set in cron.
- Instagram: Reels from an approved media folder. Codex watches your Genviral Media Library folder; new uploads get captioned, hashtagged, and queued without ever leaving the approval pipeline.
- LinkedIn: Posts from release notes & drafts. Codex summarizes this week's engineering output, voice-matches against `brand-voice.md`, and publishes under the company page on a weekly cron.
- Facebook: Cross-post filler for brand-page trust. Codex mirrors the day's TikTok onto the Facebook page 30 minutes later, keeping the brand page warm so paid traffic and approvals stay healthy.
## Why Codex still needs an API layer
You could wire Codex into every platform's API yourself. In practice that is slow and breaks often.
- Meta and TikTok partner approvals can take months -> Genviral fronts those approvals so Codex posts on day one
- Every platform has its own auth, post settings, and quirks -> One endpoint per concept; Genviral maps it per platform
- AI assets need separate model providers and plumbing -> Genviral's AI Studio ships slideshows, images, and video in-API
- Scaling to many accounts gets you shadowbanned and locked out -> Hosted, pre-warmed accounts keep posting reliable past the early stage
## What is Codex?
Codex is OpenAI's coding agent. It runs as a CLI, an IDE extension (VS Code, JetBrains), a desktop app, in Codex Cloud, and through GitHub, Slack, and Linear integrations. It plans multi-step tasks, runs shell commands inside a sandbox, and reads stdout back into its reasoning. Codex access is included with ChatGPT Plus, Pro, Business, Edu, and Enterprise plans. That same shell-out behavior is exactly how it drives Genviral — by calling the `genviral` binary.
## How does Codex post to social media?
Codex itself doesn't ship with platform connectors. You give it the `genviral` package and an API key. Codex then runs `genviral` shell commands for accounts, slideshows, posts, analytics, and trends — Genviral handles auth, rendering, scheduling, and publishing to every supported network. The same setup works from the Codex CLI, IDE extension, desktop app, or Codex Cloud.
## Do I need the Genviral skill, or just the CLI?
Either works. The CLI alone is enough for one-off tasks or simple scripts. The skill (cloned into `~/.codex/skills/genviral/`) ships an opinionated SKILL.md, slideshow workflow, and feedback loop that Codex auto-loads alongside its other skills, plugins, and subagents — useful once you have a recurring strategy.
## Which platforms can Codex post to through Genviral?
TikTok, Instagram, YouTube, Pinterest, LinkedIn, Facebook, X, Bluesky, Mastodon, and Telegram. Analytics coverage is strongest for TikTok, Instagram, and YouTube. Codex publishes from your connected accounts via one API key — no Meta or TikTok partner approval wait.
## Can Codex run on a schedule?
Codex itself is invoked on demand, but `codex exec` (non-interactive) and the official Codex GitHub Action are the schedulable units. Wire them into cron, systemd, or Actions and Codex can be the one composing each batch on its scheduled run. For built-in scheduling without your own runner, see the Hermes Agent integration.
## Does this need an MCP server?
No. Codex supports MCP natively, but Genviral doesn't require it — Codex calls the `genviral` binary directly over the shell, the same way it runs `git` or `jq`. One less process to keep alive, and no MCP-specific wire format to maintain. If you already operate an MCP server, the CLI still works alongside it.
## What approval mode should I use for posting?
Start with Codex's default approval mode: review every command before it runs. Use draft destinations (TikTok MEDIA_UPLOAD, YouTube unlisted, Instagram private) for the first runs. Only graduate to higher-autonomy modes — including `--dangerously-bypass-approvals` — after you've watched Codex draft a few posts end-to-end without surprises.
---
Canonical HTML: https://www.genviral.io/codex
# Nanoclaw social media automation
Run Nanoclaw as a Docker container, drop the open source Genviral skill into its mounted skills folder, and install the `genviral` CLI inside the container with one scoped API key. Message Nanoclaw from WhatsApp, Telegram, Slack, Discord, or Gmail to generate slideshows, images, and video, then schedule and publish across 10 connected platforms.
## What Nanoclaw owns
Nanoclaw runs container-isolated agents reachable from ordinary chat apps. Genviral is the only skill it needs to do social.
- Container-isolated runtime: Each Nanoclaw group runs in its own Docker sandbox (MicroVM on macOS and Windows). One isolated environment per client means API keys, skills, and memory never bleed between workspaces.
- Chat-app native interface: Talk to Nanoclaw from WhatsApp, Telegram, Slack, Discord, or Gmail. No dashboard to open and no terminal to switch into — the same chat that approves a draft can also publish it.
- Built-in scheduled jobs: Nanoclaw ships with cron-style recurring tasks: 'every Monday at 8am, draft three LinkedIn posts'. No external runner, no GitHub Action, no separate scheduler to keep alive.
- Auto-loading skills: Drop a folder into the skills directory and Nanoclaw discovers it. The Genviral skill, your house-brand voice notes, and any custom helpers all load side-by-side without re-deploying the container.
## What Genviral executes for Nanoclaw
Genviral is the execution layer Nanoclaw's skill calls into from inside its own container.
- Connected social accounts: TikTok, Instagram, YouTube, Pinterest, LinkedIn, Facebook, X, Bluesky, Mastodon, and Telegram behind one API key — no Meta or TikTok partner approval wait.
- AI media generation: Slideshows, images, and videos rendered through Genviral's AI Studio. No separate model wiring — Nanoclaw calls one endpoint and gets a finished asset.
- Cross-platform scheduling: One queue, every platform. Idempotent posting via `external_id`, retry-safe drafts, and per-account cooldowns Nanoclaw can drive from one endpoint.
- Analytics feedback loop: Genviral feeds last-30-day performance back to Nanoclaw so the next batch rewrites hooks against whichever format actually outperformed.
## Setup in five steps
Each step links to the real surface in the Genviral dashboard. Run them once, then let Nanoclaw take the recurring work from chat.
- Start Nanoclaw in a container. Nanoclaw runs as a Docker container that listens for messages on WhatsApp, Telegram, Slack, Discord, or Gmail. Each group lives in its own sandbox, so credentials and skills never leak between clients.
- Drop the Genviral skill into Nanoclaw's skills folder. Nanoclaw auto-discovers skills from its mounted skills directory. The Genviral skill ships an opinionated SKILL.md, slideshow workflow, defaults file, and a feedback loop tuned for social — no manual wiring required.
- Install the Genviral CLI and scope an API key. The skill shells out to `genviral`. Install the CLI inside the container, then create one API key per workspace Nanoclaw is allowed to drive and drop it into the container env so the skill picks it up on every message.
- Connect your social accounts in Genviral. Connect TikTok, Instagram, YouTube, Pinterest, LinkedIn, Facebook, X, Bluesky, Mastodon, and Telegram once in the dashboard. Nanoclaw never touches OAuth — it just reads the account list and uses the IDs from chat.
- Message Nanoclaw from your chat app. Open WhatsApp, Telegram, Slack, Discord, or Gmail and send Nanoclaw a sample request. It plans the work, calls the Genviral skill, renders the asset, and creates a draft post — all from one message thread.
## Recurring Nanoclaw workflows by platform
Each workflow follows the same loop: Nanoclaw plans from chat, Genviral renders and publishes, analytics feeds the next message.
- TikTok: Daily slideshows from a WhatsApp message. Message Nanoclaw once; it composes a 4-slide carousel, drafts it as a MEDIA_UPLOAD post, and waits for your thumbs-up in the same thread before publishing.
- Pinterest: Recurring infographic pins on cron. Set one recurring task and Nanoclaw pulls a recipe, generates an infographic, and ships the pin to a chosen board — every 8 hours, confirmations in chat.
- YouTube: Shorts from a shared queue. Nanoclaw watches the approved-shorts folder, fills `settings.youtube` from sidecar metadata, and publishes on the cadence you set in your Telegram chat.
- Instagram: Reels from an approved media folder. Point Nanoclaw at a Genviral media-library folder; new uploads get captioned, hashtagged, and queued without ever leaving the approval pipeline.
- LinkedIn: Posts from release notes & drafts. Nanoclaw summarizes the week's engineering output into voice-matched posts; Genviral publishes under the company page on a weekly cron.
- Facebook: Cross-post filler for brand-page trust. Nanoclaw mirrors the day's TikTok onto the Facebook page 30 minutes later, keeping the brand page warm so paid traffic and approvals stay healthy.
## Why Nanoclaw still needs an API layer
You could wire Nanoclaw into every platform's API yourself. In practice that is slow and breaks often.
- Meta and TikTok partner approvals can take months -> Genviral fronts those approvals so Nanoclaw posts on day one
- Every platform has its own auth, post settings, and quirks -> One endpoint per concept; Genviral maps it per platform
- AI assets need separate model providers and plumbing -> Genviral's AI Studio ships slideshows, images, and video in-API
- Scaling to many accounts gets you shadowbanned and locked out -> Hosted, pre-warmed accounts keep posting reliable past the early stage
## What is Nanoclaw?
Nanoclaw is a lightweight, container-based AI agent built on the Claude Agent SDK. It accepts natural-language commands from WhatsApp, Telegram, Slack, Discord, or Gmail and executes them inside an isolated Docker sandbox — one container per group or client, so credentials and state never leak between workspaces.
## How does Nanoclaw post to social media?
Nanoclaw itself doesn't ship with platform connectors. You install the Genviral skill into its skills directory and the `genviral` package inside the container. Nanoclaw then runs `genviral` shell commands for accounts, slideshows, posts, analytics, and trends — Genviral handles auth, rendering, scheduling, and publishing to every supported network.
## Do I need the Genviral skill, or just the CLI?
Both. Nanoclaw auto-discovers skills from its mounted skills directory; the Genviral skill ships SKILL.md, a slideshow workflow, defaults, and a feedback loop Nanoclaw loads automatically. The CLI is what the skill actually shells out to, so you install it alongside.
## Which platforms can Nanoclaw post to through Genviral?
TikTok, Instagram, YouTube, Pinterest, LinkedIn, Facebook, X, Bluesky, Mastodon, and Telegram. Analytics coverage is strongest for TikTok, Instagram, and YouTube. Nanoclaw publishes from your connected accounts via one API key — no Meta or TikTok partner approval wait.
## Does this need an MCP server?
No. Nanoclaw shells out to `genviral` directly the same way it runs `git` or `jq`. There is no separate MCP server to operate, no extra process to keep alive, and no MCP-specific wire format to maintain. If you already operate an MCP server, the CLI still works alongside it.
## Can Nanoclaw run on a schedule?
Yes — Nanoclaw has built-in cron-style recurring tasks. Tell it 'every Monday at 8am, draft three LinkedIn posts' from chat and it runs without an external runner. For cross-account fan-out at scale, the Hermes Agent integration is also a good fit.
## Is Nanoclaw safe to run for multiple clients?
Container isolation is the point. Each Nanoclaw group runs in its own Docker sandbox (MicroVM on macOS and Windows), so one client's API keys, skills, and memory can't reach another's. Combined with scoped Genviral API keys — one per workspace — agencies can give each client its own end-to-end environment.
---
Canonical HTML: https://www.genviral.io/nanoclaw
# Hermes Agent social media automation
Create a scoped Genviral API key, then paste it with the Partner API docs URL into Hermes Agent during setup chat in Discord or Telegram. Hermes calls the Genviral REST API directly to generate slideshows, images, and video, then schedule and publish across 11 connected platforms, no CLI or skill install required.
## What Hermes Agent owns
Hermes Agent v0.9.0 (released April 13, 2026) by Nous Research owns memory, prompts, cron, and operator feedback. Genviral is the execution layer it calls into.
- Persistent memory: Bounded MEMORY.md and USER.md plus searchable past sessions. Account rules, board lists, and brand styles survive across runs.
- Built-in cron: Native scheduled tasks accept natural-language intervals or cron expressions, with output delivered to a Discord home channel.
- Skills system: Hermes loads reusable skills on demand. Wrap each recurring Genviral workflow as a skill once.
- Discord & Telegram gateway: Run Hermes inside Discord or Telegram. Each automation gets its own thread; confirmations land in a home channel.
## What Genviral executes for Hermes
Genviral gives Hermes one API surface for account access, content creation, scheduling, publishing, and analytics instead of wiring each platform individually.
- Connected social accounts: TikTok, Instagram, YouTube, Pinterest, LinkedIn, Facebook, Threads, X, Bluesky, Mastodon, and Telegram behind one API key — no Meta or TikTok partner approval waits.
- AI media generation: Slideshows, images, and videos rendered through Genviral's AI Studio. No separate Fal, Replicate, or OpenAI wiring required.
- Cross-platform scheduling: One queue, every platform. Best-time defaults, duplicate guards, and per-account cooldowns Hermes can call from a single endpoint.
- Analytics feedback loop: Genviral feeds last-7-day performance back to Hermes so the next batch rewrites hooks against whichever format actually outperformed.
## Setup in four steps
Each step matches the full walkthrough in the linked guide. Post one sample manually before enabling any recurring task.
- Connect your social accounts in Genviral. Genviral handles the auth flows for TikTok, Instagram, YouTube, Pinterest, LinkedIn, Facebook, Threads, X, Bluesky, Mastodon, and Telegram. Post manually first to confirm the connection.
- Create a scoped API key. Create one key per workspace Hermes is allowed to drive. Pass the key plus the Genviral API docs URL to Hermes in setup chat.
- Set Hermes up in a Discord home channel. Hermes uses @mention mode and auto-threads in shared channels. Your home channel becomes the monitoring surface; every automation keeps its own thread.
- Have Hermes generate one sample before cron. Ask clarifying questions, upload references to the Genviral Media Library, then have Hermes produce ONE post in chat. Only enable recurrence after that sample looks right.
## Recurring Hermes workflows by platform
Each workflow follows the same loop: Hermes prompts, Genviral renders and publishes, analytics feeds the next batch.
- Pinterest: Recurring infographic pins. The exact workflow from Viktor's video — Hermes pulls recipes from a blog, generates infographic-style pins, and Genviral publishes every 8 hours.
- TikTok: Daily slideshows from a fixed format. One prompt to Hermes; Genviral renders 4-slide carousels and ships them at 9 PM in the account's local timezone.
- YouTube: Shorts from a shared queue. Hermes pulls the next approved Short from the workspace queue and Genviral assigns the next publish slot.
- Instagram: Reels from an approved media folder. Point Hermes at a Genviral media-library folder; new uploads get queued without ever leaving the approval pipeline.
- LinkedIn: Posts from release notes & drafts. Hermes summarizes engineering output into voice-matched posts; Genviral publishes under the company page.
- Facebook: Filler content for brand-page trust. Steady cadence of repurposed content keeps the brand page warm so paid traffic and Meta approvals stay healthy.
## Why Hermes still needs an API layer
You could wire Hermes into every platform's API yourself. In practice that is slow and breaks often.
- Meta and TikTok partner approvals can take months -> Genviral fronts those approvals so Hermes posts on day one
- Every platform has its own auth, post settings, and quirks -> One endpoint per concept; Genviral maps it per platform
- AI assets need separate Fal, Replicate, and OpenAI plumbing -> Genviral's AI Studio ships slideshows, images, and video in-API
- Scaling to many accounts gets you shadowbanned and locked out -> Hosted, pre-warmed accounts keep posting reliable past the early stage
## Who makes Hermes Agent?
Hermes Agent is built by Nous Research. The current version is v0.9.0, released April 13, 2026. It positions itself as a self-improving agent with persistent memory, a messaging gateway, built-in skills, and native scheduled tasks — not a chat wrapper or IDE copilot.
## What is Hermes Agent social media automation?
Hermes Agent social media automation means running Hermes as the agent layer that owns memory, prompts, recurring tasks, and operator feedback, while a posting API like Genviral handles the connected accounts, AI media, scheduling, publishing, and analytics. Hermes does the reasoning. Genviral does the execution.
## Does Hermes Agent post directly to social platforms?
No. Hermes plans and reasons but does not ship with platform connectors. You pair it with a posting layer. Genviral gives Hermes one API surface for account access, content creation, scheduling, publishing, and analytics, instead of wiring TikTok, Instagram, YouTube, and the rest individually.
## Which platforms can Hermes Agent post to through Genviral?
TikTok, Instagram, YouTube, Pinterest, LinkedIn, Facebook, Threads, X, Bluesky, Mastodon, and Telegram. Analytics coverage is strongest for TikTok, Instagram, and YouTube. Genviral publishes from connected accounts and feeds performance data back into Hermes for the next cycle.
## Does Hermes Agent have built-in cron?
Yes. Hermes ships with native scheduled tasks that accept natural-language intervals (every 2h, every weekday at 9am) or full cron expressions, and can deliver task output back to a configured Discord home channel. That makes it suitable for recurring social media work without a separate scheduler.
## How do I migrate from OpenClaw to Hermes Agent?
Hermes has a first-party migration command (`hermes claw migrate`) that brings over memory, skills, config, and parts of your existing setup. After that you point Hermes at your Genviral API key and the existing accounts keep working under the new control layer.
## Should I automate immediately?
No. Post manually for a few days, then have Hermes generate one sample post in chat. Review the image, caption, tags, and destination. Only after the sample is right should you enable the cron task. The blog walkthrough makes this explicit because it's the most common mistake.
---
Canonical HTML: https://www.genviral.io/hermes-agent
# The social media MCP server
Genviral's MCP server is a remote endpoint at https://mcp.genviral.io/mcp. Add it as a connector in Claude, ChatGPT, Cursor, or any MCP client, approve the scopes you want, and your assistant can generate images, videos, and slideshows, then schedule and publish them across 10 connected platforms. No install, no API key in a config file.
## Connect it
One remote URL, authorized over OAuth. Discovery clients can read https://www.genviral.io/.well-known/mcp/server-card.json instead of being configured by hand.
- Claude Code: claude mcp add --transport http genviral https://mcp.genviral.io/mcp
- Claude apps: Open Settings, then Connectors. Choose Add custom connector. Paste https://mcp.genviral.io/mcp as the remote MCP server URL. Connect, then approve the permissions you want Claude to have.
- ChatGPT: Open Settings, then Connectors. Choose Create, and select an MCP server. Paste https://mcp.genviral.io/mcp and pick OAuth authentication. Approve the permissions on the Genviral consent screen.
- Cursor: add an mcpServers entry named "genviral" with type "http" and url https://mcp.genviral.io/mcp
- VS Code: add a servers entry named "genviral" with type "http" and url https://mcp.genviral.io/mcp
- Any MCP client: add an mcpServers entry named "genviral" with type "http" and url https://mcp.genviral.io/mcp
## What your assistant owns
The assistant decides what to make and when it goes out. Genviral is the surface it acts through.
- It already knows what you meant: You describe the week you want. The assistant picks the format, writes the captions, and decides what goes where — no command syntax, no dashboard.
- It runs where you already work: Claude, ChatGPT, Cursor, VS Code, and every other MCP client read the same server. Connect once per client, not once per feature.
- It carries your context: Whatever else is in the conversation — a launch doc, a repo, a spreadsheet of hooks — becomes source material for the posts it drafts.
- It closes the loop: Analytics come back through the same connection, so the next batch is written against what actually performed instead of what you hoped would.
## What Genviral executes
Genviral is the execution layer behind the connection — accounts, generation, scheduling, and publishing.
- Connected social accounts: 10 platforms behind one OAuth connection — no Meta or TikTok partner approval wait, and no per-platform tokens in your assistant's config.
- AI media generation: Slideshows, images, and video rendered in Genviral's Studio. The assistant asks for an asset and gets a finished one back — most MCP servers can only schedule what you already made.
- Duplicate-safe publishing: Every write through the MCP server requires an idempotency key, and publishing requires an explicit decision. A retrying agent cannot post the same thing twice.
- Workspaces and teams: Each connection is bound to the personal space or one workspace you pick during consent, so an agency assistant cannot reach a client it was not pointed at.
## Tools and permissions
33 tools, grouped by the 4 OAuth scopes that authorize them. A connection can only call the tools its granted scopes cover.
- context:read — show_studio: Show finished Studio images and videos once they are ready.
- context:read — show_posts: Show your content calendar, or one post in it, when you ask to see it.
- context:read — show_video: Show a video project with a playable preview, and open the full editor from it.
- context:read — show_library: Show a visual preview of your files or slideshows when requested.
- context:read — show_viral_library: Show viral reference cards when you want to browse inspiration.
- context:read — show_analytics: Show an analytics dashboard for your posts or one tracked account when you ask to see it.
- context:read — show_tiktok_account: Paste a TikTok profile link to see that account’s posts and use the one you like as the style for your slideshow.
- context:read — browse_music: Browse the music library and your own uploaded tracks.
- context:read — get_context: Connected accounts, workspaces, plan and credit balance, and the Studio models available to you.
- context:read — list_posts: Scheduled, drafted, and published posts, with per-account delivery status on each one.
- context:read — get_analytics: Post and account performance, plus every account you track for analytics.
- context:read — research_trends: Trend briefs for a niche, and a preview of any public TikTok slideshow before importing it.
- context:read — research_reddit: Search Reddit for source posts, then read bounded comment samples from the threads you choose.
- context:read — analyze_content: Score a hook against real viral posts, suggest proven hook structures, and find viral references for an idea.
- context:read — search_viral_library: Search Genviral's curated library of viral posts, and open any one of them in full.
- context:read — browse_library: Files, folders, influencers (consistent characters), image packs, templates, and slideshows in your content library.
- context:read — search_images: Find image references for your content from public image search.
- context:read — get_job: Status of a running render, generation, or analytics refresh.
- content:write — manage_music: Add, rename, import, and delete your own music tracks.
- content:write — manage_studio: Save Studio creations into your library, delete them, or favorite a template.
- content:write — upload_media: Upload an image or video into your media library.
- content:write — manage_library: Create, move, and delete folders, and move items between them.
- content:write — manage_assets: Create and edit image packs and reusable slideshow templates.
- content:write — manage_slideshow: Duplicate, edit, render, or delete a slideshow, or regenerate a single slide.
- content:write — manage_analytics_targets: Add, edit, remove, and refresh the accounts you track for analytics.
- content:write — create_post: Prepare a post: media, caption, per-platform settings, target accounts, and schedule.
- content:write — update_post: Reschedule, edit, retry, or delete posts you already created.
- posts:publish — schedule_editor_versions: Prepare and schedule rendered versions of a video project across your accounts.
- posts:publish — publish_post: Commit a prepared post — publish it now or hand it to the scheduler.
- media:generate — edit_video: Create and edit video projects: clips, text, captions, and music, then render the final cut.
- media:generate — remix_video: Find source videos to remix, preview them, and import clips into a project.
- media:generate — generate_slideshow: Generate a multi-slide carousel from a brief, or import one from TikTok, then render it.
- media:generate — generate_studio_media: Generate images and videos in AI Studio from a prompt or a reference image.
## Setup in four steps
Connect accounts once, add the server to your client, approve scopes, then start with a draft.
- Connect your social accounts once. Link TikTok, Instagram, YouTube, Pinterest, LinkedIn, Facebook, X, Bluesky, Mastodon, and Telegram in the Genviral dashboard. Your assistant never touches platform OAuth — it reads the account IDs and posts through them.
- Add the server to your client. One remote URL, nothing to install and no process to keep running. Claude Code takes it as a command; Cursor and VS Code take it as four lines of JSON; Claude and ChatGPT take it in their connector settings.
- Approve the permissions you actually want. Signing in opens a Genviral consent screen. Pick the workspace the connection is bound to and grant only the scopes you want it to have — reading and drafting are separate from publishing, and generation is separate again. Revoke any connection later without touching the others.
- Ask for one post and watch it land. Start with a draft rather than a publish, review the caption and media in the dashboard, then let the assistant schedule the rest. Media it generates comes back as a gallery in clients that render MCP resources.
## What people ask it to do
Plain-language requests that map onto real tool calls.
- What did I post last week, and which one did best?
- Generate three TikTok slideshows about morning routines and schedule them for this week.
- Move everything scheduled for Friday to Monday morning.
- Which of my connected accounts hasn't posted in the last 10 days?
- Make a 9:16 video from this image and queue it as an Instagram Reel.
- Draft a LinkedIn post from this changelog, but don't publish it.
## Safety model
Every guarantee below is enforced by the backend, not by the assistant's good behavior.
- OAuth, not a pasted API key: You sign in to Genviral to connect. No long-lived key sitting in a config file, in a shell profile, or in a URL your assistant logs. Revoke a connection and it stops working immediately.
- Permissions you choose per connection: 4 separate scopes, approved on a Genviral consent screen. An assistant can be allowed to draft and never allowed to publish, or to read analytics and nothing else.
- Scoped to one workspace: You pick the personal space or a specific workspace while approving. The connection cannot see, post to, or spend credits from anything outside it.
- Publishing is always deliberate: Publishing takes an explicit publish-or-schedule decision, and every write carries an idempotency key. An agent that retries a failed call does not double-post.
## Why a remote OAuth server
The shape of an MCP integration decides how much of it you have to operate and trust.
- Run a local MCP process per machine and keep it updated -> Remote streamable HTTP server — one URL, nothing installed, always current
- Paste a long-lived API key into every client's config file -> OAuth per connection, scoped at consent time and revocable on its own
- The MCP server can only schedule content you made elsewhere -> Image, video, and slideshow generation are tools on the same connection
- A retrying agent quietly publishes the same post twice -> Idempotency keys are required on writes; publishing needs an explicit decision
- Meta and TikTok partner approvals can take months -> Genviral fronts those approvals for all 10 platforms
## What is MCP?
The Model Context Protocol is an open standard, introduced by Anthropic, for connecting AI assistants to outside tools and data. An MCP server publishes a set of tools; any MCP client — Claude, ChatGPT, Cursor, VS Code, and many others — can call them. It means Genviral only has to expose its capabilities once for every assistant to use them.
## What is the Genviral MCP server URL?
https://mcp.genviral.io/mcp. It is a remote streamable-HTTP server, so there is nothing to install and no local process to keep alive. Clients that support discovery can also read https://www.genviral.io/.well-known/mcp/server-card.json to find the endpoint, the full tool list, and the available scopes automatically.
## How do I authenticate?
With OAuth. When your client first connects, it sends you to a Genviral consent screen where you sign in, choose the workspace the connection is bound to, and approve the permissions you want it to have. There is no API key to generate, copy, or paste into a config file, and you can revoke any single connection later without affecting the others.
## Which AI clients work with it?
Any MCP client that supports remote servers with OAuth. That covers Claude (desktop, web, mobile, and Claude Code), ChatGPT's custom connectors, Cursor, VS Code with Copilot, Windsurf, Cline, Zed, JetBrains IDEs, and anything built on an agent framework with MCP support.
## What can the assistant actually do?
33 tools, covering the whole loop: read your accounts and analytics, browse and manage your content library, generate images, videos, and slideshows in Studio, prepare posts, and schedule or publish them to 10 platforms. Generation is the part most social MCP servers do not have — they can schedule content, but they cannot create it.
## Can it publish without asking me?
Only if you grant it the publish permission, and only to the accounts in the workspace you connected. Reading, drafting, and generating are separate scopes, so a connection can be allowed to build a whole content queue while remaining unable to put any of it live. Publishing also requires an explicit publish-or-schedule decision on every call rather than defaulting to going out immediately.
## Will a retrying agent double-post?
No. Every write through the MCP server requires an idempotency key, so a retried call resolves to the same post instead of creating a second one. That guarantee comes from the same backend the dashboard and Partner API use, not from anything the assistant has to remember to do.
## Do I need a paid plan?
You can create a free Genviral account and connect it. Generating media spends credits, and connected-account limits follow your plan, so heavier automation needs a paid plan the same way it does in the dashboard.
## Should I use MCP or the REST API?
Use MCP when a chat assistant is driving — it is the fastest path from a sentence to a scheduled post. Use the Partner REST API, or the Genviral CLI, when you are writing code, running scheduled jobs, or building a product on top of Genviral. Both hit the same backend services, so nothing is exclusive to one path.
---
Canonical HTML: https://www.genviral.io/mcp
# Genviral pricing
Genviral costs $29 to $199 per month. Creator is $29 with 200 credits and 5 social accounts, Professional $49 with 500 credits and 10 accounts, Business $99 with 1,200 credits and 30 accounts, and Scale $199 with 3,000 credits and 100 accounts. Annual billing is charged as 10 months, so 2 months are free.
## Plans and prices
Every paid plan includes the whole product. Plans differ by scale: monthly credits, connected social accounts, Vira agent usage, workspaces and team members, and media library storage. Annual billing is charged as 10 months, so 2 months are free.
- Creator: $29 per month, or $290 per year (2 months free). Includes 200 credits per month, 5 social accounts, 1 workspace, 1 team member, Vira AI agent: 2M tokens / mo, and Media library (10 GB). Not included: Vira automations (autopilot).
- Professional: $49 per month, or $490 per year (2 months free). Includes 500 credits per month, 10 social accounts, 3 workspaces, 3 team members, Vira AI agent: 6M tokens / mo, 1 Vira automation (autopilot), and Media library (50 GB).
- Business: $99 per month, or $990 per year (2 months free). Includes 1,200 credits per month, 30 social accounts, Unlimited workspaces, Unlimited team members, Vira AI agent: 12M tokens / mo, 3 Vira automations (autopilot), Media library (unlimited), and Priority support.
- Scale: $199 per month, or $1,990 per year (2 months free). Includes 3,000 credits per month, 100 social accounts, Unlimited workspaces, Unlimited team members, Vira AI agent: 20M tokens / mo, 10 Vira automations (autopilot), Media library (unlimited), and Priority support.
## Included in every plan
Capability is not gated by tier. Creator gets the same feature set as Scale.
- All AI models & AI Studio
- AI video generation
- Slideshow & video editor
- Bulk content generation
- Viral content library
- Media library
- Analytics dashboard
- Unlimited scheduling & posting
- Content calendar
- App Store screenshots
- API & CLI access
## How credits work
Credits pay for AI generation inside Genviral. Scheduling and publishing do not cost credits. Credits are not carried over into the next billing period.
- Images can cost between 1-3 credits
- Video starts at 1-5 credits per second of video
- Top-up pack: 50 credits for $10.
- Top-up pack: 250 credits for $30.
- Top-up pack: 500 credits for $45.
## Hosted accounts add-on
Hosted accounts are dedicated managed accounts on real devices in the country you pick, warmed in your niche and wired into your scheduler. They are billed per account on top of a plan.
- Android device: $90 per account per month.
- iPhone device: $120 per account per month.
## How much does Genviral cost?
Genviral costs $29 to $199 per month. Creator is $29 with 200 credits and 5 social accounts, Professional $49 with 500 credits and 10 accounts, Business $99 with 1,200 credits and 30 accounts, and Scale $199 with 3,000 credits and 100 accounts. Annual billing is charged as 10 months, so 2 months are free.
## What is the cheapest Genviral plan?
Creator at $29 per month, or $290 per year (2 months free). It includes 200 credits per month, 5 social accounts, 1 workspace, 1 team member, Vira AI agent: 2M tokens / mo, and Media library (10 GB).
## Is Genviral cheaper billed annually?
Yes. Annual billing is charged as 10 months, so 2 months are free. Creator is $290 per year instead of $348.
## Do Genviral credits roll over?
No. Credits are not carried over into the next billing period. Images can cost between 1-3 credits. Video starts at 1-5 credits per second of video.
## How much do extra credits cost?
Credit top-ups are sold on top of any plan: 50 credits for $10, 250 credits for $30, and 500 credits for $45.
## How much media storage does each Genviral plan include?
Creator includes 10 GB, Professional includes 50 GB, Business has unlimited storage, and Scale has unlimited storage. Storage counts everything in your media library: uploads plus AI-generated images, videos, and audio. Deleting files frees up space.
## How many workspaces and team members does each Genviral plan include?
Creator includes 1 workspace with 1 team member. Professional includes 3 workspaces with 3 team members each. Business and Scale include unlimited workspaces and team members. Team members count the owner, and Professional members get the same rights as Business members.
## How much do hosted accounts cost?
Hosted accounts are an add-on billed per account: $90 per month on an Android device and $120 per month on an iPhone device.
---
Canonical HTML: https://www.genviral.io/pricing
# Changelog
Genviral ships product changes continuously and records every one on its changelog. This page mirrors the 20 most recent entries, newest first, dated from July 4, 2026 through October 8, 2026. Each entry is labeled New, Improved, or Fixed. The full history (83 entries) is at the canonical /changelog page.
## About this list
This mirrors the 20 most recent changelog entries out of 83 total, newest first, covering July 4, 2026 through October 8, 2026. For the complete history, see the canonical changelog at /changelog.
## October 8, 2026: Post animated GIFs
2 changes shipped October 8, 2026.
- New: Schedule and publish animated GIFs. Pick a GIF from your media library or upload one in the composer, and it posts with its animation intact on X, LinkedIn, Pinterest, Mastodon, Reddit, and Telegram. GIFs can be up to 15MB each.
- - X, Reddit, and Telegram take one GIF as the only image in a post; LinkedIn and Pinterest let a GIF sit alongside other images.
- - GIF posting works the same way through the API and MCP.
- - Platforms that cannot play GIFs, such as Instagram, TikTok, Facebook, and Threads, show a clear message before you schedule.
- Fixed: Posts show the right media type after you swap their media. Replacing a video with an image or GIF in the composer now shows the post as an image post everywhere, including the API and MCP.
## October 5, 2026: Our revamped MCP server is here
5 changes shipped October 5, 2026.
- New: Work with Genviral content right inside Claude and ChatGPT. The MCP connector has a complete redesign with interactive content widgets inside your chat. Search the Viral Library for examples in your niche, load more results, play videos, browse slides, and read available transcripts before choosing what to recreate.
- Improved: Generate, recreate, and edit slideshows in chat. Ask your connected assistant to make a slideshow or recreate an example for your product, using the product context already saved in Genviral. Auto image search finds relevant imagery from our image library and the web. Review the slides, ask for edits in chat, or open the slideshow in the Genviral editor.
- Improved: Research Reddit posts and comments. Find conversations about your niche or competitors and read the comments behind them. Bring the same Reddit research available in Genviral into Claude or ChatGPT to uncover questions, complaints, and content ideas.
- New: Have your uploaded videos edited for you. Give your assistant a set of uploaded clips and ask it to build a video. Review the result and ask for different cuts, music, or text overlays. The demo turns clips of sprinting and broad jumps into a 15-second video, then removes the text overlay with one follow-up request.
- Improved: Publish or schedule the finished content. Once you are happy with the result, ask your connected assistant to publish or schedule it to your connected social accounts through Genviral.
## September 22, 2026: Turn slideshows into reels in the video editor
1 change shipped September 22, 2026.
- New: Import any slideshow into the video editor. Click Slides in the editor's tool rail to pick one of your slideshows, drafts included, and set how long each slide should hold. Every slide lands on the timeline back to back as an image clip, so you can trim slides, add music, text, or captions, and export or publish the result as a reel.
- - Draft slideshows bring their text along as editable layers you can rewrite or restyle; rendered slideshows bring their finished images. Filter the picker by drafts or rendered, and sort by newest, oldest, or title.
## September 11, 2026: Reddit Research in Vira, the API, and MCP
1 change shipped September 11, 2026.
- New: Research your audience on Reddit. We just added Reddit Research. Explore the conversations, questions, and pain points your audience shares on Reddit.
- - Run the Reddit Research playbook in Vira to guide your research.
- - Use Reddit Research through the API and MCP to bring the same research into your own workflows.
## September 9, 2026: Visual image editing in AI Studio
2 changes shipped September 9, 2026.
- New: Point to exactly what you want to change. Open Edit on a generated image to draw marks, place comments, or brush over objects you want to remove. Add as many comments, marks, and brush strokes as you need, then generate an updated image with all your instructions together.
- - Generated images reuse their original model and settings. Upload a single image and choose Edit image to work on it with your current model and settings.
- - Enter adds a comment or mark. Click Generate edited image when all your changes are ready.
- - Undo or redo as you work. Your original image stays unchanged.
- New: GPT Image 2.5 Flare and Sunburst are now available. AI Studio now includes GPT Image 2.5 Flare and GPT Image 2.5 Sunburst for generating and editing images. Choose either from the model picker alongside GPT Image 2.
## September 2, 2026: Viral library search by idea, and product tagging in AI Studio
3 changes shipped September 2, 2026.
- New: Search the viral library by idea, not by exact words. Type what you are looking for the way you would say it — "cooking app", "skincare ecommerce", "budgeting app", "side hustle ideas" — and the library finds the posts about it, even when none of those words appear in the caption. Every post now carries a description of what it is, the product it promotes, its niche, and the phrases a marketer would search for, so a recipe app shows up for "cooking app" and a meal-prep creator for "healthy meals on a budget".
- - Results open in a new "Best match" order the moment you type; switch to Most views or any other sort to reorder the same matches.
- - Exact words still win: a creator handle or product name you type always finds its posts.
- - Vira uses the same search when it researches the library for you, so its examples match your niche instead of a keyword.
- New: Reach the viral library through the API and the MCP connector. The same idea-based search now works outside the app. The Partner API gains two read-only endpoints — search the library, and fetch a single post — and the Genviral MCP connector gains a viral library search tool, so a connected AI assistant can research what is working in your niche and read the hooks, captions, metrics and slides of the posts it finds before it writes anything. Nothing here changes your account: both are read-only.
- - Every filter the library page has is available to both: idea or keyword, category, platform, business type, account, product, publish date range and slide count.
- - Results come back in the same Best match order, with each post's hook, hook analysis, engagement numbers and images.
- - Fair-use limits keep the library fast for everyone — up to 200 searches a day per account, and up to 1,000 results per search, so narrow with filters instead of paging deep.
- New: Tag your product with % to brand any template. Type % in the AI Studio prompt to pick one of your products, and the generation adapts the design to it: logo, brand colors, font, website, phone, email, address, and opening hours, taken from the product you already analyzed. Click the green tag to choose exactly which of those to apply, including which logo when your product has more than one. It works alongside @ image tags, so "a photo of someone holding @Image 1 in %Nova Skincare colors" does both.
## August 28, 2026: Image tagging in AI Studio and Vira
1 change shipped August 28, 2026.
- New: Tag attached images with @ in Studio and Home chat. Type @ to reference a specific attached image in AI Studio or the Home Vira composer. Tags appear in Genviral green, preview on hover or keyboard focus, and guide image generation, video generation, and Vira prompts.
## August 27, 2026: Romanian for App Store screenshot translation
1 change shipped August 27, 2026.
- New: Translate screenshots into Romanian. The App Store screenshot translator now offers Romanian alongside the other 35+ supported languages, with the same localized copy conventions applied.
## August 26, 2026: More languages for App Store screenshot translation
1 change shipped August 26, 2026.
- New: Translate screenshots into Hungarian, Croatian, Slovak, Slovenian, and Malaysian. The App Store screenshot translator now offers Hungarian, Croatian, Slovak, Slovenian, and Malaysian alongside Finnish and the other 30+ supported languages, with the same localized copy conventions applied to each.
## August 21, 2026: A photo library built into Slides
2 changes shipped August 21, 2026.
- New: A built-in photo library behind auto image mode. Auto slideshows now draw first from a hand-picked photo library built for vertical slides: portrait crops, and nothing with text already burned into the picture, so your overlay always reads cleanly. Slides the library cannot cover are sourced the way they always were.
- New: Browse the library yourself in the Database tab. The same library is yours to search by hand. In Slides, open a slide’s image picker and choose Database, then search by what is in the picture — try “woman, dog” rather than a filename — and drop any result straight onto the slide.
## August 7, 2026: Seedance 2.5 is available in AI Studio
1 change shipped August 7, 2026.
- New: Generate videos up to 30 seconds with Seedance 2.5. Seedance 2.5 is now selectable in the AI Studio video composer and can be requested in Vira. It takes clips up to 30 seconds in one generation — double the previous limit — with native synchronized audio, spoken dialogue, and lip sync.
- - Attach nothing for text-to-video, a start and end frame for transitions, or reference images, videos, and audio for guided shots.
- - Outputs 480p and 720p in every Studio aspect ratio, including 9:16, 16:9, and 1:1.
- - Seedance 2.0 stays available and remains the default, so existing prompts and automations are unchanged.
## July 28, 2026: A faster way to set up a generation in AI Studio
2 changes shipped July 28, 2026.
- New: Speak your prompt, and pick several images at once. Tap the microphone in the Studio composer and talk instead of typing — your words are added to whatever is already in the box. Selecting images is now a batch too: upload or pick as many as you need and add them in one go.
- New: Remix any result to make a variation. Hover a result and choose Remix to load the prompt, reference images, and settings that made it back into the composer. Change one detail and generate again, without setting it all up from scratch.
## July 25, 2026: Bring images straight from the web into your slides
1 change shipped July 25, 2026.
- New: Swap a slide image by pasting a Pinterest link. Paste a Pinterest pin link in the slide image picker and it replaces the current slide image right away. The image is also saved to your uploads, so you can reuse it across other slideshows.
## July 12, 2026: A new agent-first onboarding experience
3 changes shipped July 12, 2026.
- New: Meet Vira through work made for your product. New workspaces now meet Vira through a guided setup that learns the product, audience, creative direction, and goals before preparing real starter content. The handoff opens into the same Vira conversation you can keep using after onboarding.
- New: Start with production-ready creative directions. Onboarding now turns your answers into product-specific concepts, including a UGC storyboard, influencer directions, and starter slideshows. You can inspect the work as it is prepared instead of waiting through a generic setup screen.
- Improved: Generation failures recover without losing your progress. If a starter storyboard fails, onboarding can rebuild it from the product context already collected and continue in the same authorized Vira thread. Empty or incomplete reveals are no longer treated as finished setup.
## July 10, 2026: Inbox becomes the home for finished Vira work
3 changes shipped July 10, 2026.
- New: Browse everything Vira finished in one searchable feed. Inbox now brings together completed scheduled tasks, delegated research, slideshows, Studio generations, and other background work. Search the feed, open the original conversation, and jump directly into the result without hunting through separate tools.
- New: Preview media and inspect the latest result. Finished work now carries its real preview media and opens in a focused inspector on desktop. The newest result is promoted as the Inbox spotlight, with actions kept local to the item you are reviewing.
- Improved: Automation settings are easier to understand and edit. Recurring Vira automations now use a master-detail view with readable summaries, schedules, status, and editable settings, so you can inspect what will run before changing it.
## July 9, 2026: Vira turns your first week into an actionable plan
3 changes shipped July 9, 2026.
- New: Meet Vira inside your first activation workspace. The post-onboarding experience now opens around your product-specific storyboard and the next decisions needed to move it forward. Vira can continue from the generated context instead of asking you to repeat your brief.
- New: Weekly Briefs become draft content plans. Weekly Briefs now translate performance and content opportunities into concrete drafts you can review and act on, connecting insights to the next piece of work instead of ending at a report.
- Improved: Viral Library searches recover when filters are too narrow. When a category and keyword combination returns no results, Vira now broadens the search in a controlled order while preserving what was changed. Useful inspiration no longer disappears because one filter combination was overly specific.
## July 9, 2026: Competitor suggestions for ecommerce products
1 change shipped July 9, 2026.
- New: See who you're competing with — and what's working for them. Ecommerce products now get automatic competitor suggestions, just like apps already do. Genviral finds real brands in your space, you pick which ones to track, and your product setup surfaces what those competitors are posting so you always have fresh inspiration to work from.
## July 8, 2026: Background work now returns real, openable results
2 changes shipped July 8, 2026.
- Improved: Scheduled and delegated tasks render clickable artifacts. When Vira creates a slideshow, post, or Studio asset in the background, the finished conversation now includes the same rich artifact card as a live chat. Open the result directly instead of searching for it manually.
- New: Understand Vira usage by plan and model. Usage limits now show live per-plan allowances and model cost comparisons, making it clearer how different model choices affect your available Vira budget.
## July 5, 2026: Vira and the editor now work as one surface
3 changes shipped July 5, 2026.
- New: Generate and edit video without leaving the timeline. Vira can generate clips, voiceovers, captions, and timeline changes while the editor stays open as the working surface. Completed video generations appear in the artifact panel and editor-bound work keeps its project context.
- New: Build richer edits with multiple audio layers. Editor projects now support multiple audio clips with per-clip volume, making it possible to combine voiceover, music, and other audio in one editable timeline.
- Improved: Vira's timeline edits stay visibly saved. After Vira changes an open project, the editor now recognizes the server-saved document instead of incorrectly switching back to Unsaved or issuing a redundant save that can race the active turn.
## July 4, 2026: Delegated tasks report back automatically
3 changes shipped July 4, 2026.
- New: Send longer work to the background. Vira can delegate longer research and production tasks to a dedicated background conversation, leaving the main chat free while the work continues with its own context and tool history.
- New: Get an automatic report when the task finishes. Finished delegated tasks now resume the parent conversation with a concise synthesis and proposed next step. You no longer need to send another message just to make Vira notice that its background work completed.
- Improved: Open the full research conversation as an artifact. Background results render as the real read-only conversation—with formatted answers, tool activity, sources, and produced artifacts—rather than a flattened block of raw text.
---
Canonical HTML: https://www.genviral.io/changelog
# Security at Genviral
Genviral protects customer content and connected social accounts with TLS encryption in transit, encryption at rest on SOC 2-certified infrastructure providers, workspace-scoped access control, and continuous monitoring across web, API, and background processing. Billing runs through PCI-compliant providers Polar and Stripe. Genviral is not yet SOC 2 certified; it is actively working toward a SOC 2 examination.
## Encryption everywhere
All traffic is served over TLS. Data is encrypted at rest on infrastructure operated by SOC 2-certified providers, and sensitive credentials are protected with application-level encryption.
## Scoped access control
Every request runs through centralized authentication and workspace-scoped authorization. Access defaults to denied: you only ever reach data inside your own account and workspaces.
## Connected accounts stay yours
Your social account connections are isolated per user and workspace. Tokens are never exposed to the browser, and one customer can never reach another customer's connected accounts.
## Trusted infrastructure
We build on established providers: Supabase for database and authentication, AWS and Cloudflare for storage and delivery, Temporal Cloud for reliable background processing. We do not run our own data centers.
## Continuous monitoring
Errors and anomalies are tracked across our web, API, and background-processing layers in real time, with health checks and structured logging that redact secrets and personal data.
## Payments handled by experts
Billing is processed by PCI-compliant providers (Polar and Stripe). We never see or store full card numbers. Billing webhooks are cryptographically verified before they are trusted.
## Secure development
Changes ship through peer review with automated tests, type checks, and a security-focused review checklist. Secrets are kept out of source code and validated at startup.
## Least privilege
Administrative access is limited to a small, explicit set of people, and internal services authenticate to each other with dedicated secrets rather than shared user credentials.
## Working toward SOC 2
We are actively preparing for a SOC 2 examination. That means formalizing the controls we already operate, encryption, access management, monitoring, change management, and vendor oversight, and documenting them so they can be independently verified. We will update this page as we reach each milestone. Genviral is not yet SOC 2 certified. We are committed to being transparent about our progress rather than overstating it.
## Report a security issue
Found a vulnerability? We want to hear from you. Email our security team and we will respond promptly. We appreciate researchers who report issues responsibly and give us time to fix them before public disclosure. Contact: security@genviral.io.
## Is Genviral SOC 2 certified?
Not yet. Genviral is actively preparing for a SOC 2 examination, formalizing the encryption, access management, monitoring, change management, and vendor oversight controls it already operates so they can be independently verified.
## Where is Genviral's data stored?
Genviral runs on Supabase for database and authentication, AWS and Cloudflare for storage and delivery, and Temporal Cloud for background processing. Genviral does not operate its own data centers.
## How does Genviral handle payment data?
Billing is processed by PCI-compliant providers Polar and Stripe. Genviral never sees or stores full card numbers, and billing webhooks are cryptographically verified before they are trusted.
---
Canonical HTML: https://www.genviral.io/security
# AI Video Generator
Genviral's AI Video Generator turns a prompt or product URL into a finished video: it writes the script and shot plan, generates the scenes and visuals (or uses your own clips), and lets you set aspect ratio, template, music, captions, and brand colors. Render an MP4 to download, or publish directly to TikTok, Instagram, and YouTube.
## Make a video in 3 steps
Create product videos, reels, and ads in minutes
- Describe your video: Enter a prompt or paste a product URL. We generate a script, shot plan, and assets.
- Customize style: Pick aspect ratio, template, music, captions, and brand colors. Swap scenes in one click.
- Generate & publish: Render your video and post directly to TikTok/IG, or download in MP4.
## Benefits
Turn ideas into videos with AI. Generate scripts, scenes, and visuals automatically, then publish to TikTok, Instagram, and YouTube.
- From idea to video in minutes with AI-assisted scripting and scene generation
- Templates optimized for TikTok, Reels, and Shorts
- On-brand outputs with fonts, colors, and caption styles
- Publish directly to social or download high-quality MP4s
## Discover more
Related Genviral tools for generating and scheduling content.
- AI Studio: /studio
- AI Slideshows: /slides
- AI Ad Generator: /features/ai-content-studio/ai-ad-generator
## Can I edit the generated script and scenes?
Yes. You can rewrite lines, replace scenes, and adjust timings before rendering.
## What output formats are supported?
We export MP4 with platform-ready resolutions for TikTok, Instagram, and YouTube.
## Do I need stock assets?
No. We can generate visuals or you can upload your own clips and images.
---
Canonical HTML: https://www.genviral.io/ai-video-generator
# Genviral AI Content Studio
The Genviral AI Content Studio generates images and videos from one workspace: face swaps, AI headshots, brainrot videos, faceless reels, product photography, infographics, OG images, thumbnails, ads, and consistent characters. It routes to frontier image and video models, saves every render to your library, and schedules it to TikTok, Instagram, YouTube, and more.
## One studio. Every format. Frontier AI on tap.
Generate face swaps, AI headshots, brainrot videos, faceless reels, AI product photography, infographics, OG images, and more - all from one studio, on the latest frontier image and video models. Pick a template, tweak a word, ship.
## Don't just look at it. Play with it.
A real slice of the Genviral Studio - right here on this page. Switch between image and video, filter by use case, and pick a template to auto-fill the prompt, model, and reference. No sign-up, no demo call.
## Every kind of content. One studio.
Each use case inside the AI Content Studio comes with its own template library, prompt presets, and reference images - so you can ship the image or video you need without leaving the canvas.
- Consistent Characters (Consistent Character, Image): Same person, any scene — train once, generate forever
- AI Headshots (People & Lifestyle, Image): Professional headshots for LinkedIn and business profiles
- AI Video Translation (Translation, Video): Translate any video to 180+ languages with AI lip-sync
- AI Brainrot Reels (Brainrot, Video): Gameplay backgrounds, AI voiceover, and viral split-screen pacing
- AI Ads (Product Videos, Video): Make product and UGC-style ad drafts with AI
- AI Thumbnails (Youtube Thumbnails, Image): Generate click-worthy thumbnails for YouTube and social media
- AI Product Photography (Product Photography, Image): Studio-quality product photos with AI — no photographer needed
- AI Infographics (Infographics, Image): Stunning infographics for recipes, fitness, skincare & more
- AI OG Images (OG Images, Image): Professional Open Graph images & social cards for link previews
## Three steps from prompt to scheduled post.
Template, generate, ship. No tab-juggling, no copy-paste, no separate scheduler.
- 01. Pick a template or describe what you want: Browse 200+ studio templates across people, products, infographics, OG images, brainrot, ads, and more - or paste your own prompt. The template auto-loads the right model and reference image.
- 02. Pick the model and hit generate: You stay in control. Choose any frontier image or video model - Nano Banana 2, GPT Image, Veo 3, Sora 2, Kling 2.6 Pro - or run a use case like character swap, consistent character, or face swap. Swap between them on the same prompt without losing your work.
- 03. Save, remix, and schedule across platforms: Every render lands in your library. One click to schedule it to TikTok, Instagram, YouTube, Facebook, X, LinkedIn, Pinterest, Bluesky, Mastodon, or Telegram - or send it straight back into the studio for a remix.
## Turn your ideas into scroll-stopping content.
From editorial infographics to vertical reels - every kind of image and video, generated on the latest frontier models.
## What can I generate inside the Genviral AI Content Studio?
Photoreal product shots, AI headshots, lifestyle portraits, infographics, OG images, YouTube thumbnails, brainrot videos, AI ads, AI video translation, and consistent-character images - all from one workspace.
## Which AI models does the studio run on?
The studio routes to the right frontier model for each task - image models like Nano Banana 2, GPT Image, Higgsfield Soul, Seedance, Imagen, and Phota, and video models like Veo 3, Sora 2, Seedance 2.0, Kling 2.6 Pro, WAN 2.6, Luma Ray 2, and Runway Gen-4. You can swap models on any prompt without losing your work.
## Do I need prompt-engineering skills to get good results?
No. Every template in the studio ships with a battle-tested prompt and reference image, so you can copy a winning aesthetic in one click and just tweak the parts that matter - subject, brand, palette. You only write a prompt from scratch if you want to.
## Can I use the studio for image and video?
Yes. The studio has image, video, and use-case modes. Generate a still, then animate the still into a video, or run a use-case workflow like face swap, translation, or consistent character - without leaving the canvas.
## How does the studio connect to scheduling and analytics?
Every render lands in your Genviral content library. From there it's one click to schedule the asset across TikTok, Instagram, YouTube, Facebook, X, LinkedIn, Pinterest, Bluesky, Mastodon, and Telegram - and Genviral tracks analytics for every post that ships.
## Can I keep a consistent character or brand across renders?
Yes. The consistent-character generator trains a likeness once and lets you reuse it in any scene, outfit, or shot. For product brands, upload a reference image and the studio uses it as a visual anchor across product photography, ads, and lifestyle shots.
## How does pricing work for the AI Studio?
The studio is included in every Genviral plan with a monthly pool of generation credits. Higher tiers ship more credits per month and unlock the latest premium models. See the pricing page for current credit allocations and model availability.
## Where do the generated files live?
Every render - image or video - is saved to your Genviral content library, ready to schedule, remix, or download. Nothing is locked in and you can export any asset at any time.
---
Canonical HTML: https://www.genviral.io/features/ai-content-studio
# Genviral AI Carousel Generator
The Genviral AI carousel generator turns one prompt into a finished swipeable carousel: an AI hook slide plus a slide-by-slide narrative, with AI-generated or your own images and drag-and-drop text overlays. Schedule it to TikTok, Instagram, Pinterest, Facebook, and LinkedIn, or download every slide.
## Type a topic. Get a swipeable carousel.
Genviral writes the hook, builds every slide with AI images or your own, and lets you drag text exactly where you want it - then schedules the finished carousel to TikTok, Instagram, and more.
## Build a carousel right here. No sign-up needed.
This is a lightweight demo of the Genviral slides editor. Open the Theme menu to swap between image packs, switch the aspect ratio, and click through every slide - exactly what you get inside the app.
## Everything you need to design carousels fast.
Full creative control over every slide, reusable templates, and AI that finds the right image - so you can post on-brand carousels every day.
- 01. Full control over every slide: Drag-and-drop text and image overlays, multi-image grids, fonts, colors, style presets, filters, and every aspect ratio. Position anything exactly where you want it - all the editing power of a design tool, built right into the carousel editor.
- 02. Save a look as a reusable template: Turn any carousel into a template so your layout, fonts, styling, and structure are ready to reuse in one click. Stop rebuilding from scratch every time - spin up on-brand carousels in seconds, perfect for posting every single day.
- 03. Let AI find the right image for every slide: Auto image search reads each slide of copy and matches the most relevant visual to it. Built-in web search pulls fresh, on-topic images straight from the web - so every slide lands the perfect shot.
## Built for people who post carousels every single day.
Everything you need to go from idea to a finished, on-brand carousel - without juggling a design tool and four apps.
- Hooks that stop the scroll: AI writes a curiosity-driven first slide and a clean slide-by-slide narrative - tuned for the way people actually swipe, with no repetitive templates.
- Your images or ours: Generate slides with frontier image models, pull from your own packs, or upload your own - and mix all three in a single carousel.
- Drag-and-drop text overlays: Position titles, body, and CTAs on a visual canvas with style presets for shadow, outline, and gradient. No design tools, every aspect ratio.
- Bulk, then schedule: Spin up to 200 carousels in one campaign, render them in parallel, and queue them across every connected account from one place.
## What creators say
Daniel Aditya Istyana (@contextbender): "loaded some tiktok slideshows using @genviral_ because my app doesn't market itself."
## What is the AI carousel generator?
It turns a single prompt into a finished, swipeable carousel (also called a slideshow): a scroll-stopping hook slide plus a slide-by-slide narrative, with AI-generated or your own images and text overlays positioned on each slide. Built for TikTok photo posts, Instagram carousels, Pinterest, Facebook, and LinkedIn.
## Where do the slide images come from?
However you like. Generate them with AI using Nano Banana 2, SeeDream 5, or GPT Image 2, pull from your own image packs or community packs, or upload your own - and mix all three in a single carousel. A smart assistant can also match the most relevant image to each slide of copy.
## Which aspect ratios and platforms are supported?
Create in 9:16 (TikTok and Reels), 4:5 (Instagram feed), 3:4 (Pinterest and Threads), or 1:1 (square). From there you can schedule the carousel to TikTok, Instagram, Pinterest, Facebook, and LinkedIn, or download every slide.
## Can I edit the text on each slide?
Yes. Every slide has a drag-and-drop canvas where you position titles, body text, and calls to action, then tune font size, width, and style presets like shadow, outline, and gradient. The AI-written hook and narrative are fully editable - rewrite any line or regenerate the whole set.
## Can I create carousels in bulk?
Yes. Bulk mode generates anywhere from 5 to 200 carousels in one campaign - hooks, images, and text overlays included - then renders them in parallel and queues them across your connected accounts. Ideal for agencies and creators running multiple accounts.
## Can I remix a carousel I saw on TikTok?
Paste a public TikTok slideshow link and Genviral imports its slides and text so you can preview, edit the copy, and regenerate the visuals into your own on-brand version.
## Does it work in other languages?
Yes. The hooks and slide copy can be generated in 30+ languages, so you can produce carousels for audiences in their native language without rewriting anything by hand.
## Is the carousel generator included in every plan?
Carousel creation and the editor are core Genviral features available on every plan. AI image generation uses credits (typically 1 credit per image, 2 for premium models), and higher tiers expand how many you can generate and schedule. See pricing for current limits.
---
Canonical HTML: https://www.genviral.io/features/ai-carousel-generator
# Genviral Social Media Content Library
The Genviral social media content library is a searchable database of viral TikTok posts, slideshows and short-form videos ranked by real engagement. Search hooks, captions, hashtags, creators, and products, filter by niche, monetization, date, and slide count, then copy any slideshow into the editor with one click.
## The social media content library creators copy from.
Search and filter thousands of viral TikTok posts. Stack filters by niche, monetization, date, and slide count - then copy any slideshow into the editor with one click. TikTok is where short-form trends originate, so a post that's gone viral here has a very high chance of going viral on Instagram Reels and YouTube Shorts too. Copy the format once, ship to every platform you've connected.
## The library at a glance
- 12K+ Viral posts indexed
- Daily Refresh cadence
- 9+ Filter dimensions
- 1-click Copy to editor
## Don't just look at it. Play with it.
Real search across hooks, captions, hashtags, creators, and products. Real filters for niche, monetization, slide count, and content type. Click any card to open details and copy it into the editor.
## Search. Filter. Copy. Three steps to your next viral post.
See the real product walk through each step - from keyword to scheduled post.
- 01. Search by keyword across every field: Type any keyword - niche, product, hook, hashtag, or creator. Genviral searches across hooks, captions, accounts, hashtags, categories, and product mentions at the same time. Find every viral post that talks about what you sell.
- 02. Filter by monetization, date, slides, and more: Stack filters: business model (affiliate, SaaS, product, course, service), date published, content type (slideshow or video), niche, creator, slide count, or saved-only. Then sort by views, likes, comments, or recency.
- 03. Copy a viral slideshow with one click: Click 'Use as Template' on any slideshow you want to model. Genviral opens the slideshow editor pre-loaded with the same structure. Swap the images, tweak the captions, schedule across every connected account.
## Built for creators who treat social like a business. Not a guessing game.
- Only what's actually working: Every post in the library is ranked by real engagement - views, likes, comments, shares. Stop guessing what's trending and start studying it.
- Find ideas by keyword: Search across hooks, captions, hashtags, creators, niches, and products. Type 'morning routine' and surface every viral post that mentions it - across thousands of accounts.
- Filter by what matters: Niche, creator, business model, posting date, slide count, content type. Slice the library the way a creator actually thinks - not the way a generic feed works.
- Copy a slideshow in one click: Tap 'Use as Template' on any slideshow and Genviral opens the editor pre-loaded with the same structure. Swap your images, tweak your copy, ship.
## From inspiration to scheduled post in one tool.
Most content libraries hand you a swipe file and stop there. Genviral closes the loop: find a viral slideshow, copy it into the editor, swap your assets, schedule it across every connected account.
- Search by keyword across hooks, captions, hashtags, and creators
- Filter by niche, monetization, date, slide count, or platform
- Sort by the engagement metric that matters to your strategy
- Save winning posts to revisit when you sit down to create
- Copy any slideshow into the editor with one click
- Schedule the result across every connected social account
## What is a social media content library?
A social media content library is a searchable database of viral posts - slideshows and short-form videos - that creators and marketers use as inspiration for what to post next. Instead of scrolling endlessly through TikTok looking for ideas, you search and filter a curated library of posts that have already proven they get views, likes, and comments.
## How does Genviral's content library help me grow on social media?
Growth on short-form is mostly about format and timing - not original ideas. The library surfaces the exact hooks, slideshow structures, and captions that are working right now in your niche. Copy a proven slideshow into the editor, replace the images and copy with yours, and ship across TikTok, Instagram, YouTube Shorts, and the rest of your connected accounts. You skip the guesswork and post things the algorithms already reward.
## Can I search the library by keyword?
Yes. The search bar matches your keyword against hooks (the text on the first slide), captions, hashtags, creator handles, niche categories, and product mentions - all at the same time. Type 'fitness motivation', 'morning routine', or a competitor's product name and instantly see every viral post that mentions it.
## What filters can I apply?
You can filter by content type (slideshow vs. video), niche, creator, product, business model (affiliate, SaaS, app, service, course, product), publish date range, slide count, and saved-only. Stack any combination, then sort by views, likes, comments, recency, or slide count.
## How does the 'Use as Template' copy slideshow feature work?
Every slideshow in the library has a 'Use as Template' button. Click it and Genviral opens the slideshow editor pre-loaded with the same structure as the viral post - same number of slides, same layout. Replace the images with yours, tweak the text, and schedule it across every connected account in minutes.
## Where does the viral content come from?
Genviral indexes high-engagement public posts from TikTok across dozens of niches. We don't currently index Instagram directly - but TikTok is where most short-form trends originate, so a slideshow or video that's gone viral on TikTok has a very high chance of going viral on Instagram Reels too. Use the library to spot the format that's already working, then copy it into the editor and ship the same idea to your Instagram, YouTube Shorts, Facebook Reels, Pinterest, and Telegram accounts in one go.
## Does the library cover Instagram?
Not directly yet - the library currently indexes TikTok. In practice this isn't a real limitation: TikTok is the origin point for almost every short-form trend, and a viral TikTok video usually translates 1:1 to Instagram Reels and YouTube Shorts. Copy the format on TikTok, then publish the same post across every account you've connected, including Instagram.
## Can I save posts I want to come back to?
Yes. Bookmark any post and it appears in your saved-only filter. Use it as a personal swipe file of inspiration to revisit whenever you sit down to create.
## Is the content library included in every plan?
Yes. The social media content library is included in Genviral plans. See the pricing page for current plan tiers and limits.
---
Canonical HTML: https://www.genviral.io/features/social-media-content-library
# Genviral Social Media Scheduling
Genviral social media scheduling publishes from one composer and one queue to TikTok, Instagram, YouTube, Pinterest, Facebook, X, LinkedIn, Bluesky, Mastodon, and Telegram. Pick any set of accounts, attach media once, use each platform's native posting options, and let the queue handle timezones and automatic retries.
## Schedule social posts to every channel, from one composer.
Connect your accounts once, then schedule the next month from one composer. Each platform's native posting options show up where they matter - and the queue retries itself when a network hiccups.
## Click around the composer. No sign-up needed.
A real slice of the Genviral composer - pick platforms, write a caption, tap a schedule preset, hit Schedule, and watch the queue fill up. Reset whenever, schedule as many mock posts as you want.
## Three steps from blank caption to scheduled everywhere.
Write once, schedule smart, ship across every channel - and manage it all from one queue.
- 01. Post to one or many accounts at once: Pick a single account or a whole stack across TikTok, Instagram, YouTube, Pinterest, X, LinkedIn, Bluesky, Mastodon, Telegram, and Facebook - then attach your media right in the composer. No re-uploading per network.
- 02. Native posting options where they matter: The composer surfaces each platform's real settings: TikTok privacy and post-to-draft, Pinterest board and tag picker, YouTube title and category, Instagram Reel cover image. Nothing extra, nothing hidden.
- 03. Post from anywhere in Genviral: Push straight to the composer from the Media Library, AI Studio, slideshow editor, or the queue itself - your media and caption land pre-filled, ready to schedule or ship.
## The scheduler that knows where the content came from.
Most schedulers stop at “queue and post.” Genviral connects the composer directly to Studio (for creation) and Analytics (for outcomes), so you don't have to bounce between tools to ship. Create, schedule, deliver, measure - one tab, one workflow.
- Spot a gap in tomorrow's queue at a glance
- Jump into Genviral Studio to generate the asset
- Drop the asset straight into the composer, no re-export
- Pick the accounts and a smart preset, ship in seconds
- Track performance in Analytics - without ever switching tabs
## Every platform. Every format that matters.
One composer covers the formats your audience actually scrolls - Reels, Shorts, Pins, Carousels, Stories, and more.
- TikTok: Video, Photo
- Instagram: Reel, Story, Carousel, Post
- YouTube: Short, Long video
- Pinterest: Image pin, Video pin
- Facebook: Video, Photo, Text post
- X: Post, Thread
- LinkedIn: Post, Carousel, Thread
- Bluesky: Post, Thread
- Mastodon: Post, Thread
- Telegram: Post, Media, Album
- Coming soon: Threads, Reddit, Snapchat, WhatsApp, Messenger.
## Which social platforms can I schedule with Genviral?
Genviral schedules to TikTok, Instagram (Reels, Stories, Carousels, Posts), YouTube (Shorts and long-form video), Pinterest (image and video pins), Facebook, X (with threads), LinkedIn (with carousels and threads), Bluesky, Mastodon, and Telegram - all from one composer and one queue.
## Can I schedule the same post to multiple platforms at once?
Yes. Write your caption once, attach media once, and pick every account you want to post from. Genviral creates a scheduled delivery per platform with per-platform tweaks (cover image, board, privacy, title, category) where they matter.
## How do the smart scheduling presets work?
The schedule picker offers quick presets like “Today 6 PM”, “Tomorrow 9 AM”, “Tomorrow 12 PM”, and “In 3 days 12 PM”. Tap one to fill the date and time instantly, then nudge the day or hour with +/- buttons. You can always open the full calendar for a custom slot.
## Does Genviral handle timezones automatically?
Yes. You schedule in your local timezone and Genviral posts in each account's timezone. No mental math, no off-by-a-day mistakes when your accounts target audiences in different regions.
## What happens if a scheduled post fails to publish?
Genviral retries automatically on transient errors and surfaces posts that need your attention in the queue. Each failed post shows the platform's reason in plain language, with a one-click reschedule.
## Can I see what's scheduled at a glance?
The queue ships with three views: a visual grid of 4:5 cards, an account-by-account weekly stream, and a full drag-and-drop monthly calendar. Filter by platform, account, or status - your view persists across pages.
## Do I lose my draft if I close the composer?
No. The composer auto-saves your draft every keystroke. Reopen it later and pick up exactly where you left off - caption, media, accounts, schedule, and platform-specific settings all preserved.
## Is social media scheduling included in every plan?
Yes. The composer, scheduler, and queue are core Genviral features available on every plan. Higher tiers expand the number of connected accounts and scheduled posts. See pricing for current limits.
---
Canonical HTML: https://www.genviral.io/features/social-media-scheduling
# Genviral Content Calendar
The Genviral content calendar plans and schedules posts for TikTok, Instagram, YouTube, Facebook, X, LinkedIn, Pinterest, Bluesky, Mastodon, and Telegram from one drag-and-drop view. Switch between month, week, and day while Genviral handles timezones, the delivery queue, and automatic retries on failed posts.
## Plan a month of posts. Ship every single day.
Plan every account across 10 platforms in one drag-and-drop calendar. Switch month, week, or day views while Genviral handles timezones, queues, and retries.
## Don't just look at it. Play with it.
A real, working slice of the Genviral content calendar - right here on this page. Drag posts between days, filter by platform, click a card to edit, or click an empty slot to schedule something new. No sign-up, no demo call.
## Month, week, day. Same posts, the right zoom.
Plan the month, fine-tune the week, execute the day - every view is drag-and-drop and stays in sync.
- Month: See a full month at a glance. Every post pill, every account, every platform - color-coded so you can spot gaps and overlaps instantly.
- Week: Plan a full week in time-slot detail. Stack posts on the right days, drag to reschedule, and keep your prime-time windows full.
- Day: Zoom into a single day for tight ship cadences. Perfect for launch days, live streams, and synchronized cross-platform drops.
## Built for people who post everywhere. And want their Sundays back.
A calendar that does the heavy lifting - so you stop juggling tabs, spreadsheets, and reminders.
- Drag, drop, done: Reshuffle a week in seconds. Grab any post, drop it on a new slot, and Genviral rewires the schedule for the right account, right time, right timezone.
- Every platform, one queue: TikTok, Instagram, YouTube, Facebook, X, LinkedIn, Pinterest, Bluesky, Mastodon, and Telegram - all in the same calendar, never in ten separate browser tabs.
- Timezones that just work: Schedule in your timezone, post in the account's timezone. No mental math, no missed prime-time slots when you fly across the world.
- Auto-retry built in: A flaky upload doesn't blow up your week. Failed posts retry automatically, and you get a clean view of what shipped, what's queued, and what needs your attention.
## Three steps to a calendar that runs itself.
Connect once. Plan once. Filter and reshuffle whenever life happens.
- 01. Connect every account once: Add TikTok, Instagram, YouTube, Facebook, X, LinkedIn, Pinterest, Bluesky, Mastodon, or Telegram. One connection per account - then they're all in the same calendar forever.
- 02. Plan a month, reshuffle in seconds: Drop posts onto the days and times you want. Drag any scheduled post to a new slot and Genviral reschedules across every connected account, in the right timezone.
- 03. Filter and switch views without losing your place: Toggle between month, week, day, account-week, or grid view. Filter by platform - TikTok, Instagram, YouTube, and the rest - or zoom into a single account. Your filters and view persist across pages so you never lose your place.
## A calendar that connects to creation, too.
Most schedulers stop at "queue and post." Genviral connects the calendar directly to creation: spot a gap on Thursday, jump into Genviral Studio to make the asset, then drop it into the slot - without ever leaving the same tab. Plan, create, schedule, ship - one workflow instead of four apps.
- See empty days at a glance and fill them in seconds
- Jump from a blank slot straight into Studio to create the asset
- Drop the new asset into the slot without leaving the calendar
- Schedule once, deliver across every connected account
- Track ship vs. fail vs. queued with one clean view
## Ten platforms. One queue.
Connect every account you run - Genviral schedules to all of them from the same calendar. One calendar for TikTok, Instagram, YouTube, Facebook, X, LinkedIn, Pinterest, Bluesky, Mastodon, and Telegram.
## Which platforms can I schedule from the Genviral content calendar?
TikTok, Instagram, YouTube, Facebook, X, LinkedIn, Pinterest, Bluesky, Mastodon, and Telegram - all from the same calendar. Connect any combination of accounts and view them side-by-side in month, week, or day view.
## Can I drag and drop posts to reschedule them?
Yes. Grab any scheduled post and drop it on a new day or time slot. Genviral re-queues it for the correct account, in the correct timezone, with the same caption, media, and platform-specific settings.
## How does Genviral handle timezones?
You plan in your timezone, and Genviral posts in each account's timezone. No mental math, no off-by-a-day mistakes when your accounts target audiences in different regions.
## What happens if a post fails to publish?
Genviral retries automatically on transient errors and flags posts that need your attention. The calendar surfaces failed and at-risk posts clearly so you can fix and reschedule in one click instead of digging through native dashboards.
## Can I schedule the same post to multiple platforms?
Yes. Pick the accounts, write your caption, attach media once, and Genviral creates a scheduled delivery per platform - with per-platform tweaks where they matter (aspect ratio, caption length, link handling).
## Can I plan a month at a time?
Month view shows every post pill across every account for the full month. Use it to spot empty days, overloaded days, and platform gaps before they happen.
## Does the calendar work with team workspaces?
Yes. Every workspace gets a shared calendar so collaborators see the same schedule, the same accounts, and the same queue. Filter by account or platform to focus on your slice.
## How does pricing work?
The content calendar is included in Genviral plans. Higher tiers expand the number of connected accounts and scheduled posts. See the pricing page for current limits.
---
Canonical HTML: https://www.genviral.io/features/content-calendar
# Genviral Social Media Analytics
Genviral social media analytics tracks followers, views, likes, comments, shares, saves, engagement rate, total posts, and top-performing posts across TikTok, Instagram, and YouTube. Metrics refresh automatically once a day and chart on a rolling 90-day timeline, and any public handle can be tracked without OAuth.
## Every social metric that matters. In one dashboard.
Track followers, views, likes, comments, shares, engagement rate, and top-performing posts across TikTok, Instagram, and YouTube - auto-refreshed daily, charted on a 90-day timeline, and built for creators who want to know what's actually working.
## The full picture, in a single view.
One bento dashboard. Every metric, every account, every platform - surfaced where you can compare them at a glance, sort by what matters, and act on what's working.
## Every metric you'd ever want to track. Visualised the way creators think.
Pick a metric to see exactly what Genviral surfaces and which platforms it's available on. All metrics track automatically - nothing to configure.
## Built for people who post on every platform. And want a clear read.
Without living in spreadsheets, native creator apps, or three browser tabs.
- Every account, one dashboard: Track unlimited TikTok, Instagram, and YouTube accounts side-by-side instead of jumping between native apps and creator tools.
- Auto-refreshed daily: Metrics refresh in the background every day, so what you see is current - no manual exports, no stale CSVs.
- 90-day timeline: Spot momentum and dips across a rolling 90-day window with every core metric charted on a single timeline.
- Top-post leaderboard: Sort your tracked posts by any metric - views, likes, comments, shares, engagement - to instantly see what to repeat.
## Three steps to a real read on what's working.
No CSV exports. No third-party trackers. No copying numbers into a spreadsheet on Sunday night.
- 01. Connect your accounts: Add your TikTok, Instagram, or YouTube handle. No fragile OAuth chains - just the handle is enough to start tracking.
- 02. Rank by every KPI that matters: Sort and compare by views, likes, comments, shares, saves, or engagement rate - whichever KPI you care about - to instantly see what's working and what's not.
- 03. Filter down to exactly what you need: Slice by platform, account, date range, and more - drill from your every-account view down to a single post in seconds.
## Analytics that close the loop with creation.
Most analytics tools tell you what happened and stop there. Genviral connects analytics directly to creation: spot the post that worked, then jump into Genviral Studio to create more of it and schedule it across every connected account. One tool, one workflow, one decision loop - instead of three browser tabs and a spreadsheet.
- See what worked across every account in one view
- Identify top posts by views, engagement, comments, or shares
- Jump straight from a winning post into Studio to make more
- Schedule the next batch across every supported platform
- Track the impact on followers and engagement, automatically
## The platforms creators actually need.
Genviral analytics covers the three platforms where cross-account performance tracking actually moves the needle. More are on the way.
- Available now: TikTok, Instagram, YouTube.
- Coming soon: Facebook, X, LinkedIn, Pinterest, Threads, Bluesky, Mastodon, Telegram. Already supported for scheduling - analytics rolling out next.
## Which platforms does Genviral social media analytics support?
Today, Genviral analytics covers TikTok, Instagram, and YouTube - the platforms where creators get the most value from cross-account performance tracking. Facebook, X, LinkedIn, Pinterest, Threads, Bluesky, Mastodon, and Telegram are on the roadmap.
## Which metrics can I track?
Followers, views (impressions on Instagram), likes, comments, shares, saves (where the platform exposes them), engagement rate, total posts published, top-performing posts, and a 90-day timeline of all of the above.
## How often do metrics refresh?
Analytics refresh automatically once per day for every connected account. You can also manually refresh any account on demand if you just shipped a post and want to see how it's doing.
## Can I track competitor accounts or just my own?
You can track any public TikTok, Instagram, or YouTube handle - your own accounts, competitors, or creators in your niche you want to benchmark against.
## How far back does the data go?
Genviral keeps a rolling 90-day timeline so trends, momentum, and dips are obvious without you scrolling through endless history.
## Do I need to connect my account via OAuth?
No. To track analytics on a public profile, you only need the handle. OAuth is only required for features like scheduling and direct publishing, not analytics.
## Can I compare multiple accounts at once?
Yes. Connect every account you want to track and view them side-by-side in a unified dashboard, so you can compare growth and engagement across brands, channels, or competitors.
## How does pricing work?
Analytics is included in Genviral plans. Higher plans expand the number of tracked accounts and refresh frequency. Check the pricing page for current plan tiers and limits.
---
Canonical HTML: https://www.genviral.io/features/social-media-analytics
# Genviral Media Library
The Genviral Media Library is one workspace-scoped home for every asset you create or upload: AI images, AI videos, slideshows, music, image packs, characters, uploads, and files pulled in from Canva or Dropbox. Organize them into folders and push any asset straight into the scheduler composer.
## Every asset you'll ever make. One organized library.
AI images, videos, slideshows, music, packs, characters, and uploads - organized into folders and one click from the scheduler.
## The library, on this page. Click around.
Switch tabs across AI images, AI videos, uploads, and slideshows. Search the grid, drop into folders, and select assets - the exact same surface you'll get inside Genviral.
## Act. Organize. Connect. Three steps to a working library.
See the real product walk through each step - hover actions, folders, and integrations.
- 01. Hover an asset, run any action: Hover any thumbnail to preview, post to social, download, duplicate, rotate, or delete. Multi-select to bulk-act on dozens of files at once without leaving the grid.
- 02. Folders, subfolders, drag-and-drop: Create folders, nest subfolders, and drag-and-drop assets to organize at scale. Rename in place, reorder, and move items between folders without re-uploading.
- 03. Pull in Canva, Dropbox, and more: Connect Canva and Dropbox once and pull designs and files straight into your library. Google Drive and more integrations are on the way.
## Built for teams who ship a lot of content. Not a digital junk drawer.
- Every asset, one place: AI images, AI videos, slideshows, music, image packs, characters, and uploads all live in the same library. Stop hunting through folders on your desktop and tabs in your browser.
- Folders that scale: Group assets by campaign, client, niche, or account. Drag-and-drop into folders, rename in place, and move items between workspaces without re-uploading.
- Upload anything, fast: Drop files straight from your desktop, or pull them in from Canva and Dropbox. Genviral handles the formats, sizes, and previews so every file is composer-ready.
- Send anywhere in Genviral: Click a thumbnail and push it straight to the AI Studio, the slideshow editor, or the scheduler composer. No re-export, no downloading, no re-uploading.
## The hub that connects creation, organization, and posting.
Most media managers stop at storage. Genviral closes the loop: generate or upload an asset, drop it into a folder, then push it straight to the scheduler composer without leaving the page.
- Generate an asset in Studio, it lands in the library automatically
- Upload a clip from your phone or desktop, ready in seconds
- Drop files into folders to keep campaigns and clients separate
- Build image packs you can reuse across slideshows and posts
- Push any asset into the scheduler composer with one click
- Share assets across your workspace so the whole team is in sync
## What is the Genviral Media Library?
The Media Library is the single home for every asset you create or upload in Genviral - AI images, AI videos, slideshows, music, image packs, characters, uploads, and connected integrations like Canva and Dropbox. Whatever you produce in Studio or upload from your desktop, you'll find it here, ready to drop into the scheduler composer or the slideshow editor.
## What kinds of media can I store in the library?
Images (JPG, PNG, GIF, WEBP), videos (MP4, MOV, WEBM), audio tracks, slideshow projects, AI Studio renders, character models trained on your photos, image packs, and assets pulled in from Canva or Dropbox. Files can be up to 50MB each by default and you can upload up to 20 at once.
## How are folders structured?
Folders work inside each tab - you can create folders for AI Images, AI Videos, Uploads, and Slideshows. Drag and drop assets into folders, rename them in place, and move items between folders without re-uploading. Folders are scoped to your workspace, so everyone on your team sees the same structure.
## What are Image Packs?
Image Packs are reusable bundles of visuals you reach for again and again - think product photos, brand backdrops, or templates. Create your own packs or browse community packs shared inside Genviral. Drop a pack into a slideshow and every slide pulls from it automatically.
## What are Characters?
Characters are AI models trained on a person's photos - yourself, a creator, or a stock face - so Studio can generate consistent images of the same person across different scenes. Upload 5–50 photos, wait about 5–20 minutes for training (depending on how many photos you upload), then generate as many on-character images as you want.
## Can I send media from the library straight to the scheduler?
Yes. Click any asset and push it to the scheduler composer with one tap. Your media, caption, and per-platform options pre-fill, so you can go from library → scheduled post without leaving the page or re-uploading anything.
## Can my whole team see the same library?
Yes. The Media Library is workspace-scoped. Everyone on your workspace sees the same folders, assets, and image packs, and updates show up in real time. Invite teammates from settings, and they'll have the same library on their next login.
## How do integrations like Canva and Dropbox work?
Connect Canva or Dropbox once from the Integrations tab and pull designs and files straight into your library - no manual export-and-upload step. Updated designs in Canva sync back to the library, so your team always works from the latest version.
## Is the Media Library included on every plan?
Yes. The Media Library is a core Genviral feature available on every plan. Higher tiers expand workspace storage, the number of characters you can train, and how many image packs you can save. See pricing for current limits.
---
Canonical HTML: https://www.genviral.io/features/media-library
# Genviral affiliate program
Genviral runs an affiliate program that pays 30% recurring commission for the lifetime of every referred subscription. It covers the Creator ($29/mo), Professional ($49/mo), and Business ($99/mo) plans, tracks referrals with a 30-day cookie, and pays out monthly by PayPal, bank transfer, or cryptocurrency with no minimum payout threshold.
## Commission and terms
The rate is 30% of the subscription price, paid every month for the lifetime of the referred subscription. Commission is calculated on the full standard price, so a referral that signs up with a discount or promotional code earns no commission.
- Creator at $29/mo pays $8.70 per month, every month the referral stays subscribed.
- Professional at $49/mo pays $14.70 per month, every month the referral stays subscribed.
- Business at $99/mo pays $29.70 per month, every month the referral stays subscribed.
- Attribution uses a 30-day cookie, so a click counts if the person signs up within 30 days.
- There is no minimum number of referrals and no cap on earnings.
- Hosted account subscriptions and one-time purchases such as credit top-ups are not eligible for affiliate commission.
## How you get paid
Payouts run monthly, typically within the first 5 business days of each month, via PayPal, bank transfer, or cryptocurrency. There is no minimum payout threshold, so earnings are paid regardless of the amount.
## How to join
Sign up at https://genviral.affonso.io and you get your referral link immediately. The program is global: you can promote Genviral to audiences worldwide, including through paid advertising, though you cannot bid on Genviral branded keywords or run misleading ads. Questions go to support@genviral.com.
- Sign Up: Join in under 2 minutes. Get your unique referral link instantly.
- Share & Promote: Share Genviral with your audience using your referral link and marketing materials.
- Earn Commission: Receive 30% recurring commission for every referral that subscribes.
- Scale Your Income: Build a sustainable income stream that grows with every new referral.
## What affiliates get
Every affiliate gets a tracking dashboard and promotional assets, plus a support channel for strategy questions.
- Lifetime Commissions: Earn 30% for as long as your referrals stay subscribed. No time limits.
- Reliable Tracking: Advanced tracking with 30-day cookie duration. Every referral counted.
- Marketing Materials: Banners, email templates, and content to help you promote effectively.
- Performance Dashboard: Real-time analytics to track referrals, earnings, and conversion rates.
- Real-Time Analytics: Track clicks, conversions, and earnings with a detailed dashboard updated in real-time.
- Global Program: Promote Genviral worldwide. Multiple currencies and languages supported.
- Dedicated Support: Priority support from our affiliate team to help you maximize earnings.
- High Converting Product: Promote a product with industry-leading conversion rates.
## Earnings calculator
The page carries an [interactive earnings calculator](https://www.genviral.io/affiliate#calculator). You set how many referrals you expect on each eligible plan, up to 500 per plan, and it multiplies each count by that plan's monthly commission to show the resulting monthly and yearly recurring earnings. The rates it uses are the per-plan payouts listed above.
## How much can I earn with the affiliate program?
You earn 30% recurring commission on all plans, calculated on the full standard subscription price. For example, if you refer someone to our Pro plan ($49/month), you'll earn $14.70 every month for as long as they remain subscribed. There's no limit to how much you can earn - it depends on how many people you refer and which plans they choose.
## Do I earn commission if my referral used a discount code?
Commissions are only paid on subscriptions at the full standard price. If a referred customer signed up using a discount or promotional code, no commission is earned for that referral. This ensures the program stays sustainable for everyone.
## When and how do I get paid?
Payments are processed monthly via PayPal, bank transfer, or cryptocurrency. There's no minimum payout threshold, so you'll receive your earnings regardless of the amount. Payments are typically processed within the first 5 business days of each month.
## How long do I earn commissions for each referral?
You earn commissions for the lifetime of each customer's subscription. As long as your referred customer remains subscribed to Genviral, you'll continue receiving your 30% commission every month.
## How does the tracking work?
We use advanced tracking technology with a 30-day cookie duration. If someone clicks your affiliate link, they have 30 days to sign up and you'll still get credit. Our system tracks everything automatically with real-time reporting.
## Can I promote Genviral internationally?
Yes! Our affiliate program is global. You can promote Genviral to audiences worldwide. Our platform supports multiple currencies and languages.
## Is there a minimum number of referrals required?
No minimum requirements. Whether you refer 1 person or 100, you'll earn the same 30% commission rate.
## How do I track my performance and earnings?
You'll have access to a comprehensive affiliate dashboard with real-time data including clicks, conversions, earnings, and detailed analytics by traffic source, campaign, and time period.
## Can I use paid advertising to promote Genviral?
Yes, you can use paid advertising including Google Ads, Facebook Ads, and other platforms. However, you cannot bid on Genviral's branded keywords or create misleading ads.
## Which plans are eligible for affiliate commission?
The affiliate program covers our Creator ($29/mo), Professional ($49/mo), and Business ($99/mo) subscription plans. Hosted account subscriptions and one-time purchases such as credit top-ups are not eligible for affiliate commission.
## What support do you provide to affiliates?
We provide dedicated affiliate support including a priority support channel, regular training webinars, marketing strategy guidance, and access to our exclusive affiliate community.
---
Canonical HTML: https://www.genviral.io/affiliate
# Reviews & Testimonials
Genviral customers are mostly founders, marketers, and creators who use it to generate and schedule social content. They describe it as a fast all-in-one tool for TikTok slideshows, AI studio image and video generation, and running several accounts on autopilot. This page collects 35 customer reviews, most of them public posts on X, Product Hunt, and TikTok.
## Where these reviews come from
All 35 reviews below are quoted in full and attributed to the person who wrote them. Where the review was posted publicly, the link to the original post is included.
- X: 27
- No public source link: 5
- Product Hunt: 2
- TikTok: 1
## What Genviral customers say
> setting up my openclaw from scratch to delegate more marketing to it
>
> the genviral team went crazy with their skill
>
> just bought a sub and already loving it
David, App Founder. Posted on X: https://x.com/justddev/status/2031125148724523008
> I absolutely love @genviral_ from @onlinedopamine so much easier to create a daily one or 2 posts as a single dev
Thomas Burkhart, @ThomasBurkhartB. Posted on X: https://x.com/ThomasBurkhartB/status/2081018296711659528
> crazy to see how genviral is developing
Robin Faraj, Founder postel.app. Posted on X: https://x.com/robin_faraj/status/2014790918893715706
> I'm using genviral for the automation
Adrià Martinez, @adriamatz. Posted on X: https://x.com/adriamatz/status/2015666038101119223
> Using Genviral! A man of taste as well
Virgile Rietsch, @virgilerietsch. Posted on X: https://x.com/virgilerietsch/status/2015475007262957780
> Day 16 of building apps to $10,000 MRR
>
> I am now only posting these on X.
>
> > 2 of the 3 subscribers of yesterday have already churned
> > Update in review
> > Trying out genviral by @onlinedopamine and @fekdaoui
>
> Very much a Sunday update and we push on for the rest of the week!
>
> Lighting getting a bit better. New Camera arriving tomorrow as I still don't like the webcam look.
Oliver Henry, App founder. Posted on X: https://x.com/oliverhenry/status/2015508263383556383
> Been using Genviral for a couple of months. It became a great all-in-one tool. For scheduling posts to creating slideshows. Also, the AI studio is just cool. I mean i can use other AI tools or even use the API directly, but this AI studio is just a lot easier to work with so I now just always us that for AI generations. Great UX and easy to switch models. Having everything in one tool is just nice. And any feature request or bug I reported got solved in the next hour. These guys know how to ship.
Jake Prins, Product Hunt. Posted on Product Hunt: https://www.producthunt.com/products/genviral
> Genviral is the GOAT for slideshow automation!
>
> Kudos to Vik and Fekri!
Nigel Yong, Product Hunt. Posted on Product Hunt: https://www.producthunt.com/products/genviral
> Genviral provides insane quality results at a fraction of their competitor's rates. Vik and Fekri are killing it!!
Julian Arthur, TikTok Creator. Posted on TikTok: https://www.tiktok.com/@julianisdoing
> This is how I went from 0 to 260K TikTok views in one month
>
> 8 accounts running
> Automated with Genviral
> One system, zero guesswork
>
> 260K views in 28 days
> No face, no voice
> Just systems applied daily
Adria Martinez, @adriamatz. Posted on X: https://x.com/adriamatz/status/2039313752525361224
> After some testing I noticed that UGC-style videos and slideshows perform especially well. The creatives are quick to produce, easy to change, and deliver consistent results with small budgets. The initial setup takes very little time, and everything runs smoothly after that. If you want to post consistently, test campaigns, or simply save a lot of time, then is Genviral your answer.
Myron, @myrrieee. Posted on X: https://x.com/myrrieee
> i just found this winning format on tiktok.
>
> then i ask cursor to generate a script to download, transcribe then generate a prompt to re-create the format.
>
> schedule 5 posts using @genviral_
>
> all in under 1 hour.
>
> you can just do things.
Daniel Aditya Istyana, @danieladityai. Posted on X: https://x.com/danieladityai/status/1954967516998250644
> Genviral is a game changer if you're busy but want to keep social media accounts active. I've had my Tiktok (2 accounts) and Instagram (1 account) posting 3 times a day for the last 30 days, and it took ~15 minutes to set up. The posts stay on brand, don't appear as obvious AI, and with a few tweaks, I'm convinced will start converting.
Esus, Founder productizedhq.com
> Genviral is so good that it doesn't even need OpenClaw to be honest with you. The automation feature in the tool is amazing.
Odaine McMillan, @uGenesys_. Posted on X: https://x.com/uGenesys_/status/2033963312765911502
> I found a highly effective campaign after testing different audiences and creatives with a $5.10 per signup.
>
> Used AI UGC with @genviral_ (amazing tool) and got great help from @nico_jeannen on the basic setup.
>
> Conversions remain low, as they may take up to 1.5 months from trial to completion.
Maxime, @MaximeMB_. Posted on X: https://x.com/MaximeMB_/status/1946174385548820594
> Generated another cool AI-influencer with Genviral to continue my organic TikTok journey. Who do you find more trustworthy 🤭?
>
> A - 👨⚕️
> B - 👩⚕️
Dmitry Vlasov, @vlasov. Posted on X: https://x.com/vlasov/status/1922624782128087187
> Today I created my first ugc style reel for 2 accounts
>
> I used @genviral_ and @SlideStormAI as I made my first iteration, seeing that my first batch of reels where performing poorly
>
> It took a while but I paid for a @capcutapp sub and stitched together my video.
>
> Once I did it once the next 20 videos were easier.
>
> Gonna test more and see which gets more views, onwards to the first 1k
Tony Tong, @tonytonggg. Posted on X: https://x.com/tonytonggg/status/1965761157962342559
> 📢 Here we go, mid-month update on http://microlaunch.net
>
> 🥇OutlierKit - Youtube Analytics
> 🥈 Rizon - Stablecoin Neobank
> 🥉 Saassy Board - Rank, Earn, Give back
> 4. ScreenCharm - Screen Recording
> 5. Genviral - Viral Content Studio
> 6. GetStory - Pro Documentation
> 7. Feedspace - Testimonials & Reviews
> 8. VoiceCheap - Translate Videos
>
> 12-days left | time to support your preferred apps🔥
> winners showcased on our newsletter, 3k+ readers
>
> let's grow & have fun✌️
>
> @PriyankaSaini28 @ayushtweetshere @onlinedopamine @sergeynazarovx @kevinrss_
Saïd Aitmbarek, @SaidAitmbarek. Posted on X: https://x.com/SaidAitmbarek/status/1968605781038616929
> quick update:
>
> - i now have a page dedicated to using @genviral_ to craft slideshows and infographics to scale some social media
>
> - a people CRM
>
> - a habit tracker
>
> - sync'd all of my strava + hevy data
>
> - uninstalled notion (after over 7 years of heavy usage)
Jon, @jondoescoding. Posted on X: https://x.com/jondoescoding/status/2037933943509377124
> Content creation tools I am actively tinkering with right now:
>
> Ghostfeed
> @meetshukla_
>
> ReelFarm
> @mattwelter
>
> Genviral
> @onlinedopamine
>
> Larry Loop
> @oliverhenry
>
> Slidestorm
> @ewan_tindale
>
> So many cool products and so much potential!
Ben Hatch, @benhatch44. Posted on X: https://x.com/benhatch44/status/2036156541888266667
> Extending the Genviral experiment a bit, for Supplements Tracker. See some traction.
Terekhin Ivan, Mobile App Founder. Posted on X: https://x.com/TerekhinIvan/status/2035880459830513687
> 6个社交平台同时运营,首条视频2.5万播放——一个人+一个AI Skill搞定。
>
> TikTok + Instagram + YouTube + Facebook + Pinterest + LinkedIn
>
> Genviral 出了个 OpenClaw Skill,42个API命令封装好,连接6大社交平台。创作者只要在 Telegram 上发一条指令,AI 自动生成视频、排期发布、跑数据分析。首条 TikTok slideshow,25,000播放。
>
> 以前全平台运营是团队才能做的事。现在一个人+一个Agent就可以。
哈哈du, @duhh4520. Posted on X: https://x.com/duhh4520/status/2029822521755771096
> That's how you create a genius 👀
>
> Did you try things like @genviral_?
Thomas Sanlis, @T_Zahil. Posted on X: https://x.com/T_Zahil/status/1960280699681853792
> my fully automated openclaw setup is slowly getting more and more views
>
> looks like the combo of openclaw + genviral works really well
>
> also warming another tiktok account
>
> i might need another burner iphone soon
David, App Founder. Posted on X: https://x.com/justddev/status/2033568631724912679
> looks impressive, a lot of features packed in there. curious to see how the assistant integrates everything for users. great work!
Alex Prompter, Founder GodOfPrompt.ai
> Builders are about to get some huge burden taken away from their shoulders. Kudos man
Richard, Founder LiftYourSaaS.com
> God damn brother locked in and absolutely smashed it
Abishek, Founder TryNexa.so
> I use Genviral for social media and ad creatives for my backlink service. Saves me 2-3 hours of work a week easily.
Miguel Bandeira, Founder effortlessbacklinks.com
> loaded some tiktok slideshows using @genviral_ because my app doesn't market itself.
Daniel Aditya Istyana, @danieladityai. Posted on X: https://x.com/danieladityai/status/1942610730186117128
> Super easy to connect all your social accounts and get started with publishing content. Using Genviral mostly for TikTok slideshows, saves me tons of time each week to publish them.
Silvestro Zinnanti, Founder of affonso.io. Posted on X: https://x.com/zilvestro
> My go-to recipe for Meta video ads:
>
> - Bold opener (first seconds)
> - UGC creators for social proof feel
> - Visual demo (show product and features)
>
> Simple and works.
>
> Created using @genviral_ 🔥
Maxime, @MaximeMB_. Posted on X: https://x.com/MaximeMB_/status/1945778060403609862
> Got a ton of help from @onlinedopamine this morning. Can't recommend @genviral_ enough. Great team.
Reed Rawlings, @reed_rawlings. Posted on X: https://x.com/reed_rawlings/status/1995912088716460494?s=20
> I built a TikTok AI influencer to promote an app, caracter using @openart_ai and @genviral_ for posting a 30 days AI content automation twice a day. I'm proud of this first attemp big thanks to @alexcooldev I will share a complete tutorial in few hours.
Bechir, @BechirArfaoui. Posted on X: https://x.com/BechirArfaoui/status/2000658316842954844/photo/1
> 😂😂😂 bro just decided to build the everything app for app founders and thought we wouldn't notice
Simonas Dip, Founder Tikomate. Posted on X: https://x.com/SimonasDip/status/2009173242075095222
> I'm going to 10x scale @breathbreak_ app on another TT account.
>
> find viral content > generate slideshow + hook > schedule
>
> using @genviral_ this workflow is < 60s
Yoav Sabag, @yoavsbg. Posted on X: https://x.com/yoavsbg/status/2010287299716841756
---
Canonical HTML: https://www.genviral.io/reviews
# Privacy Policy
Your privacy is important to us. This Privacy Policy explains how we collect, use, and share information about you when you visit or use our AI UGC Content Generator and related services.
Last updated: August 7, 2026
Operated by OD. Media & Technology LLC, License No. 2431901.01, Sharjah Media City, Sharjah, UAE
## 1. Data Collection and Use
We collect personal information to provide our AI UGC Content Generation services. This includes:
- Account information (email addresses, user credentials) for authentication and service provision.
- User-generated content and prompts that you input into our system to generate AI content.
- AI-generated videos, avatars, hooks, and other content created through our platform.
- Product information and target audience data that you provide to tailor content generation.
- Usage data through Posthog Analytics, Meta Pixel, and TikTok Pixels for improving our services.
- Subscription and payment information for account management (processed by our payment providers).
## Genviral Social Lens Browser Extension
Genviral Social Lens inspects a supported public TikTok or Instagram page only after you select the extension. Its data practices are:
- Social Lens uses the activeTab and scripting permissions to access only the active page you ask it to inspect. It does not monitor browsing in the background or request persistent access to every TikTok or Instagram page.
- Website content is processed locally in your browser, including public creator details, content metadata, engagement counts, page capabilities, commercial disclosures, and audio context.
- If embedded information is incomplete, Social Lens may request the same page again from TikTok or Instagram using the browser session already held by that website. The extension does not read or store credentials or cookie values.
- Inspected page snapshots remain in the extension popup and are not sent to Genviral or third parties. They are not sold, used for advertising, or used to train AI models.
- Only selected KPI identifiers by platform and page type are retained in local browser storage. Uninstalling Social Lens removes that extension storage through the browser's normal removal process.
- Social Lens does not collect personally identifiable information, health information, financial or payment information, authentication information, personal communications, location, web history, or user-activity telemetry.
- All executable code is packaged with the extension. Social Lens does not load remote executable code.
## 2. AI Training Data
Our AI models may be further trained or fine-tuned using anonymized, aggregated data derived from user interactions. We take measures to ensure this process does not include personally identifiable information. You can opt-out of having your data used for AI model improvement by contacting us directly.
## 3. Cookies and Tracking
Our website uses cookies and similar technologies to enhance your experience, analyze usage patterns, and improve our services. These technologies collect information about your device, browsing actions, and patterns. You may refuse the use of cookies by selecting the appropriate settings on your browser, but this may affect your experience using our platform.
## 4. Data Storage and Security
User data and AI-generated content are stored securely using industry-standard cloud infrastructure. We implement appropriate technical and organizational measures to protect your personal data against unauthorized access, alteration, disclosure, or destruction. AI-generated content may be stored for the duration of your subscription and a reasonable period afterward to allow for account restoration.
## 5. Data Subject Rights
You have the right to access, rectify, restrict, port, or erase your personal data regardless of your location. To exercise these rights, including requesting the deletion of your account and associated data (such as linked Facebook/Instagram or TikTok account information and related data obtained via Meta or TikTok APIs), please contact us at admin@fddigital.net. We will process your request in accordance with applicable data protection laws, including the UAE Federal Decree-Law No. 45 of 2021 on Personal Data Protection where applicable.
## 6. Data Sharing
We do not sell, trade, or rent your personal identification information to others. We may share your data in the following circumstances:
- With AI service providers (like OpenAI and Replicate) to generate content based on your prompts.
- With cloud storage and database providers to store and manage your data and generated content.
- With analytics and advertising partners to improve our platform and marketing efforts.
- When required by law or to respond to legal processes.
- To protect our rights, property, or safety and that of our users or the public.
## 7. AI Content Usage and Rights
When you use our platform to generate AI content:
- You retain ownership rights to the final AI-generated content created specifically for your account.
- You are responsible for ensuring that your use of the AI-generated content complies with applicable laws and regulations.
- We reserve the right to use anonymized, aggregated data about content generation for improving our models.
- We do not claim ownership of your input data, prompts, or product information.
## 8. Third-Party Services
We use third-party services to power our platform, including:
- AI models from OpenAI and Replicate for content generation.
- Supabase for database and authentication services.
- Posthog Analytics for page view and user journey analytics.
- Meta Pixel and TikTok Pixels for user interaction and advertising analytics.
- Cloud storage providers for hosting generated content.
These services may collect data according to their own privacy policies. We ensure that these third-party policies align with our privacy commitments.
## 9. Security Measures
We implement appropriate physical, electronic, and managerial procedures to safeguard and secure the information we collect online. These include encryption, access controls, and regular security assessments. However, no internet transmission is ever completely secure, so we cannot guarantee the absolute security of your data.
## 10. Age Restrictions
Our service is not directed to children under 13. We do not knowingly collect personal information from children under 13. If we learn that we have collected personal information from a child under 13, we will take steps to delete that information promptly.
## 11. Content Moderation and Prohibited Uses
Our AI systems include content moderation to prevent generation of harmful, illegal, or inappropriate content. You agree not to use our platform to generate content that is illegal, deceptive, harmful, harassing, or in violation of third-party rights. We reserve the right to remove or refuse to generate content that violates these terms.
## 12. External Links
Our website may contain links to external sites that are not operated by us. We have no control over the content and practices of these sites and cannot accept responsibility or liability for their respective privacy policies.
## 13. Changes to This Privacy Policy
We may update this privacy policy from time to time. When we do, we will revise the updated date at the top of this page and notify you of material changes via email or a prominent notice on our platform. We encourage users to frequently check this page for any changes to stay informed.
## 14. Contacting Us
If you have any questions about this Privacy Policy, the practices of this site, or your dealings with this site, please contact us at: admin@fddigital.net. OD. Media & Technology LLC, Sharjah Media City, Sharjah, UAE.
Your continued use of our platform will be regarded as acceptance of our practices around privacy and personal information.
---
Canonical HTML: https://www.genviral.io/privacy
# Terms and Conditions
Please read these terms and conditions carefully before using our AI UGC Content Generator services.
Last updated: 7th March 2026
Operated by OD. Media & Technology LLC, License No. 2431901.01, Sharjah Media City, Sharjah, UAE
Read Genviral's terms of service for using our AI video content creation platform. Understand your rights and obligations when creating AI-generated content.
## 1. Acceptance of Terms
By accessing and using the AI UGC Content Generator available at https://genviral.io, you agree to be bound by these terms of service, all applicable laws and regulations, and you are responsible for compliance with any applicable local laws. If you disagree with any of these terms, you are prohibited from using the service.
## 2. Service Description
The AI UGC Content Generator is a platform that uses artificial intelligence to create user-generated style content for social media and marketing purposes. Our service includes:
- AI-generated video content featuring virtual influencers
- Avatar creation and customization
- Marketing hook and text generation
- Product promotion content creation
- Social media content optimization
## 3. Subscription Plans and Payments
Upon registration, Genviral offers various subscription tiers that provide different levels of access to our AI UGC Content Generator. Each subscription plan has specific usage limits, feature availability, and pricing. By subscribing, you agree to the following terms:
- Payment obligations begin when you complete the subscription purchase
- Subscription fees are charged according to your selected billing cycle
- Usage limits are reset at the beginning of each billing period
- Upgrades to higher-tier plans can be made at any time, with prorated charges
- Downgrades will take effect at the end of the current billing cycle
## 4. AI-Generated Content Ownership and Rights
Ownership and rights regarding AI-generated content:
- You retain ownership rights to the final AI-generated content created specifically for your account using our platform.
- You grant us a non-exclusive, worldwide, royalty-free license to use, reproduce, modify, and display the AI-generated content solely for the purpose of providing and improving our services.
- We retain ownership of our AI models, algorithms, software, and underlying technology used to generate content.
- You are responsible for obtaining necessary rights for any third-party content you incorporate into the AI-generated content.
- We make no guarantees about the uniqueness of generated content, as our AI models may produce similar outputs for similar inputs.
## 5. User Responsibilities and Prohibited Uses
When using our AI UGC Content Generator, you are responsible for:
- Ensuring your use of the AI-generated content complies with all applicable laws, including copyright, trademark, and privacy laws.
- Proper disclosure of AI-generated content where required by law or platform policies.
- Not using our service to create content that is illegal, harmful, defamatory, obscene, or infringing on third-party rights.
- Not attempting to create deepfakes or misleading content depicting real individuals without proper consent.
- Not using our service to generate content that promotes discrimination, violence, or illegal activities.
- Not circumventing our content moderation systems or technical limitations.
- Not redistributing, reselling, or licensing the raw AI-generated content as stock media or AI training data.
## 6. Content Moderation and Removal
We implement content moderation to prevent misuse of our platform. We reserve the right to:
- Review user prompts and generated content for compliance with our terms
- Refuse to generate content that violates our policies or applicable laws
- Remove previously generated content found to be in violation of our terms
- Suspend or terminate accounts that repeatedly attempt to generate prohibited content
- Report illegal content to appropriate authorities when required by law
## 7. Updates and Service Changes
Your subscription includes access to updates and improvements to the AI UGC Content Generator for the duration of your subscription. We reserve the right to modify, update, or discontinue any feature, functionality, or the entire service with reasonable notice. While we strive to improve our service continually, we cannot guarantee that all features will remain available throughout your subscription period.
## 8. Data Security and Privacy
We take data security seriously and implement appropriate measures to protect your information. Your use of our service is also governed by our Privacy Policy, which explains how we collect, use, and protect your data. You acknowledge that no internet transmission is entirely secure, and we cannot guarantee absolute security of your data.
## 9. Refunds
All sales are final. Due to the digital nature of our service, we generally do not offer refunds once you have accessed the AI-related features. Hosted account purchases are refund eligible if the first 10 posts published on the hosted account each receive fewer than 100 views. If any of those first 10 posts receives 100 or more views, the hosted account purchase is not eligible for a refund under this policy. Furthermore, non-utilization of accounts does also not qualify for a refund. We may also consider refund requests in other exceptional circumstances or where required by law. Please contact us at [admin@fddigital.net](mailto:admin@fddigital.net) if you believe you are entitled to a refund.
## 10. Warranty Disclaimer
The AI UGC Content Generator is provided on an "as is" and "as available" basis without any warranties of any kind, whether express or implied. We do not guarantee that:
- The service will meet your specific requirements or expectations
- The AI-generated content will be entirely original or free from unintentional similarities to existing content
- The service will be uninterrupted, timely, secure, or error-free
- The generated content will be of a particular quality, accuracy, or effectiveness for marketing purposes
- All AI-generated content will comply with all platform policies where you intend to publish it
You acknowledge that AI technology has inherent limitations and may produce unexpected results or require human review and editing before use.
## 11. Limitation of Liability
To the fullest extent permitted by law, Genviral, its affiliates, licensors, or service providers shall not be liable for any direct, indirect, incidental, special, consequential, exemplary, or punitive damages arising from:
- Your use of or inability to use the AI UGC Content Generator
- Any content generated by our AI systems
- Any claims related to copyright, trademark, or other intellectual property infringement potentially arising from AI-generated content
- Any legal or regulatory violations resulting from your use of the AI-generated content
- Any business losses, lost profits, data loss, or damage to your computer systems
Our total liability for any claims under these terms shall not exceed the amount you paid for your subscription during the twelve (12) months preceding the claim.
## 12. Indemnification
You agree to indemnify, defend, and hold harmless Genviral, its affiliates, officers, directors, employees, and agents from and against any claims, liabilities, damages, judgments, awards, losses, costs, expenses, or fees (including reasonable attorneys' fees) arising out of or relating to: (a) your use of the AI UGC Content Generator; (b) your violation of these Terms; (c) your violation of any third-party right, including without limitation any intellectual property right or publicity, confidentiality, or privacy right; or (d) any claim that content you created using our service caused harm to a third party.
## 13. Modifications to Terms
Genviral reserves the right to revise these terms of service at any time without notice. By continuing to use the AI UGC Content Generator after any modifications, you agree to be bound by the updated terms. We will make reasonable efforts to notify you of material changes via email or through our platform.
## 14. Governing Law
These terms are governed by and construed in accordance with the laws of the United Arab Emirates and the Emirate of Sharjah, and you irrevocably submit to the exclusive jurisdiction of the courts of Sharjah, UAE for the resolution of any disputes.
## 15. Severability
If any provision of these terms is found to be unenforceable or invalid, that provision will be limited or eliminated to the minimum extent necessary so that the Terms will otherwise remain in full force and effect and enforceable.
## 16. Contact Information
For any inquiries or concerns regarding these terms, please contact us at admin@fddigital.net. OD. Media & Technology LLC, Sharjah Media City, Sharjah, UAE.
By using the AI UGC Content Generator, you acknowledge that you have read, understood, and agree to be bound by these terms and conditions.
---
Canonical HTML: https://www.genviral.io/terms
# OpenClaw + Genviral | Autonomous Social Media Scheduler
Yes. Genviral publishes an open-source OpenClaw skill that gives an OpenClaw agent 42+ shell commands for creating content, scheduling posts, publishing, and reading analytics. The skill is MIT licensed on GitHub and calls the Genviral Partner API, so it needs a Genviral account with an API key.
## What the OpenClaw skill does
Let your OpenClaw agent run your socials. Chat from WhatsApp, Telegram, or wherever you work, and your agent handles the full growth cycle autonomously. The skill is open source at https://github.com/fdarkaou/genviral-skill and authenticates with a Genviral API key set as GENVIRAL_API_KEY.
- Chat from WhatsApp, Telegram, or any app to run your socials.
- Full autonomous loop: research, create, publish, analyze, improve.
- Self-improving: each cycle optimizes based on real performance.
## Why agents stall without an execution layer
Agent automation breaks when your content stack is fragmented. Genviral gives OpenClaw a complete execution layer.
- Too Many APIs, Too Many Failure Points: Most agents fail in production because creation, scheduling, and analytics live in disconnected tools. One broken link kills the whole run.
- No Reliable Autonomous Loop: Generating content is not enough. Agents need a stable loop for scheduling, retries, posting windows, and account-level delivery.
- Output Without Direction: Without trend context and high-quality briefs, agents produce volume but miss outcomes. You need better inputs, not just more drafts.
- No Closed-Loop Improvement: If performance data is separated from creation workflows, agents repeat losing formats. Strategy needs real feedback and adaptation.
- Credential Sharing Nightmares: Agents that share raw credentials across teams create security gaps. Workspace-scoped access is the only safe path.
- Shadowban Risk from VPNs: Agents posting through shared VPNs or cheap proxies get flagged instantly. Platform trust requires dedicated, pre-warmed devices.
## Everything your agent controls
Each capability is a full API surface your OpenClaw agent calls autonomously.
- Content Creation Studio: Generate studio-quality videos and images using top-tier models like Veo 3, Sora 2, and Nano Banana. Access our viral inspiration library or create automated slideshows instantly.
- All your social media platforms in one place: One click schedules months of content. Auto-post to TikTok, Instagram, YouTube, Pinterest, LinkedIn, Facebook, X, Bluesky, Mastodon, and Telegram without lifting a finger.
- Track any account: Connect any TikTok, Instagram, or YouTube account. Track competitors, your own VAs, influencer campaigns, UGC campaigns, and ambassadors in one unified dashboard.
- Slideshow Bulk Creation: Turn your images into viral slideshows automatically. Our AI handles the hooks, captions, and scheduling so you can grow on autopilot.
- Work with your team: Workspace-scoped API keys let each team member run their own agent. Agents inherit workspace permissions automatically.
- Safe & secure posting: Your agent posts through hosted US devices via API, with no manual setup and no VPN risk. Pre-warmed accounts deliver instant platform trust.
## Where the agent can publish
The OpenClaw skill posts and schedules to TikTok, Instagram, YouTube, Facebook, Pinterest, and LinkedIn. Analytics tracking covers TikTok, Instagram, and YouTube. Endpoint-by-endpoint detail is in the Partner API reference at https://docs.genviral.io/api-reference.
## What is OpenClaw Social Media?
OpenClaw Social Media is the official Genviral skill for the OpenClaw framework - an open-source platform for building autonomous AI agents. The OpenClaw Social Media skill gives any OpenClaw agent the ability to create content, post to social media, and track analytics through 42+ shell commands. View the source on [GitHub](https://github.com/fdarkaou/genviral-skill).
## Do I need a Genviral account to use OpenClaw Social Media?
Yes. You need a Genviral account with Partner API access to use the OpenClaw Social Media API. Once you have an account, generate your API key from the dashboard and configure it as an environment variable (`GENVIRAL_API_KEY`). See the [API documentation](https://docs.genviral.io/api-reference) for full setup instructions.
## What platforms does OpenClaw Social Media support?
The OpenClaw Social Media skill supports posting and scheduling to **TikTok**, **Instagram**, **YouTube**, **Facebook**, **Pinterest**, and **LinkedIn**. Analytics tracking is available for TikTok, Instagram, and YouTube. Check the [API reference](https://docs.genviral.io/api-reference) for platform-specific endpoints.
## How does the self-improving mechanism work?
The OpenClaw Social Media skill maintains hook formulas with weighted scores. High-performing hooks get used more, underperformers get retired. A built-in weekly review distills patterns into actionable strategy adjustments - so every content cycle is better than the last. See the [GitHub repo](https://github.com/fdarkaou/genviral-skill) for implementation details.
## How do I install the OpenClaw Social Media skill?
Clone the repo into your OpenClaw skills directory: `git clone https://github.com/fdarkaou/genviral-skill.git genviral`. Then set your API key: `export GENVIRAL_API_KEY="your_public_id.your_secret"`. That's it - 42+ OpenClaw Social Media commands are ready to use. Full installation guide on [GitHub](https://github.com/fdarkaou/genviral-skill). For a complete walkthrough of the setup and full posting pipeline, see our [step-by-step guide](https://www.genviral.io/blog/how-to-use-openclaw).
## Is the OpenClaw Social Media skill free?
The OpenClaw Social Media skill itself is open-source and MIT-licensed. You'll need a Genviral subscription to access the OpenClaw Social Media API that powers it. Check our pricing plans above to find the right fit.
## Can my OpenClaw Social Media agent run fully autonomously?
Yes. The OpenClaw Social Media skill includes cron job definitions for daily content generation (generate → render → review → post), daily performance checks, and weekly strategy reviews. Once configured, your agent operates hands-free. Read the [API docs](https://docs.genviral.io/api-reference) to explore all available endpoints.
---
Canonical HTML: https://www.genviral.io/openclaw
# Schedule TikTok Posts That Go Viral | TikTok Scheduler | Genviral
Yes. Connect your TikTok account to Genviral with official OAuth, then schedule videos or photo carousels from one calendar. Genviral publishes at the time you set, or sends the post to your TikTok drafts. You control the privacy level and the duet, stitch, and comment settings per post.
## How TikTok scheduling works in Genviral
Between filming, editing, captioning, and scheduling, you're spending hours on content that gets buried. Here's how Genviral puts your TikTok on autopilot.
- Connect Your TikTok Account: Securely link your TikTok account in just a few clicks
- Create Unlimited Slideshows: Build viral TikTok slideshows with the most advanced editor. We don't charge for image rendering or posting, so you can post as many slideshows as you want.
- Schedule Your Posts: Plan your content calendar weeks or months in advance
- Bulk Creation: Set up hands-off campaigns that generate and post content automatically
- AI Assistant: Get expert guidance and content ideas from your personal AI assistant
- Viral Inspiration Library: Browse thousands of trending TikTok slideshows and videos. Copy slideshow formats instantly or bookmark videos for inspiration.
- Analyze Content Performance: Track performance across your TikTok accounts and optimize your posting strategy
## What you can schedule to TikTok
One video, a single image, or a photo carousel. Text-only posts are not supported: TikTok requires at least one image or video. Official TikTok OAuth from the Accounts tab. Genviral is authorized to publish on your behalf and never stores your password.
- Privacy level per post: public, mutual friends, followers only, or private.
- Turn duet, stitch, and comments on or off for each scheduled post.
- Publish directly, or send the post to your TikTok drafts to finish in the app.
- Disclosure toggles for branded content, organic brand content, and AI-generated video.
- Analytics: TikTok is covered by the Genviral analytics dashboard.
## What works the same on every platform
Genviral is one workspace for every connected platform: one composer, one calendar, and one media library. Bring your own files, or make them in Genviral with AI Studio, the slideshow editor, or bulk slideshow creation, then schedule the same content to several accounts at once. Scheduling and publishing are unlimited on every plan.
- Connect several accounts on the same platform and publish to all of them from one post.
- Edit, reschedule, or delete any scheduled post before it goes live.
- Team workspaces with role-based permissions and a shared media library, so nobody shares a social password.
- The same scheduling and publishing runs from an AI agent over MCP or the Partner REST API. See [/agents](https://www.genviral.io/agents).
## How does TikTok scheduling work with Genviral?
Genviral's TikTok scheduler allows you to plan and automate your TikTok posts in advance. Simply create your content, set your preferred posting times, and our platform will automatically publish your videos to TikTok at the optimal times for maximum engagement. You can schedule weeks or months of content in just a few minutes.
## Can I schedule different types of TikTok content?
Yes! Our TikTok scheduler supports regular videos, slideshows, and AI-generated videos. You can mix and match different content types in your posting schedule to maintain variety and keep your audience engaged.
## Will my reach be throttled?
No, many of our customers have had no issues with reach throttling. However, we do recommend posting the content as draft as well as logging into the TikTok account every now and then to avoid making TikTok think you are a bot.
## How far in advance can I schedule TikTok posts?
You can schedule content as far ahead as you want. Furthermore, our automations feature allows you to create slideshows for up to 30 days in advance (with 3 slideshows per day that can be maximally scheduled).
## Do I need to manually approve scheduled posts?
No manual approval is required! Once you set up your TikTok account connection and schedule your posts, our platform handles everything automatically. Your content will be published at the scheduled times without any intervention needed. You can always review and modify your scheduled posts before they go live.
---
Canonical HTML: https://www.genviral.io/tiktok-scheduler
# Schedule Instagram Posts | Instagram Scheduler | Genviral
Yes. Connect an Instagram business account with direct Instagram login, no Facebook Page step required, then schedule Reels, single images, carousels, and Stories from one calendar. Genviral publishes automatically at the time you set, with captions up to 2,200 characters, collaborator tags, and a custom Reel cover.
## How Instagram scheduling works in Genviral
Creating posts, designing Reels, writing captions, and scheduling across accounts adds up fast. Here's how Genviral automates your entire Instagram workflow.
- Connect Your Instagram Account: Securely link your Instagram account in just a few clicks
- Create Unlimited Posts & Reels: Post unlimited content with your own media, or use AI Studio to generate images and videos. AI-generated content consumes credits.
- Schedule Your Posts: Plan your content calendar weeks or months in advance
- Bulk Creation: Set up hands-off campaigns that generate and post content automatically
- AI Assistant: Get expert guidance and content ideas from your personal AI assistant
- Analyze Content Performance: Track performance across your Instagram accounts and optimize your posting strategy
## What you can schedule to Instagram
Reels, single images, and multi-image carousels, plus Stories. Text-only posts are not supported: Instagram requires media. Direct Instagram business login over official Instagram OAuth. There is no Facebook Page selection step.
- Captions up to 2,200 characters.
- Choose feed post or Story on each scheduled item.
- Set a custom Reel cover image, or pick the thumbnail frame by offset.
- Tag up to 10 collaborators on a post.
- Analytics: Instagram is covered by the Genviral analytics dashboard.
## What works the same on every platform
Genviral is one workspace for every connected platform: one composer, one calendar, and one media library. Bring your own files, or make them in Genviral with AI Studio, the slideshow editor, or bulk slideshow creation, then schedule the same content to several accounts at once. Scheduling and publishing are unlimited on every plan.
- Connect several accounts on the same platform and publish to all of them from one post.
- Edit, reschedule, or delete any scheduled post before it goes live.
- Team workspaces with role-based permissions and a shared media library, so nobody shares a social password.
- The same scheduling and publishing runs from an AI agent over MCP or the Partner REST API. See [/agents](https://www.genviral.io/agents).
## How does Instagram scheduling work?
Our Instagram scheduler allows you to plan and automate your Instagram posts, stories, and reels in advance. Create your content, set posting times, and our platform automatically publishes to Instagram at optimal engagement times.
## Can I schedule Instagram Stories?
Yes! Our platform supports scheduling Instagram Stories, regular posts, and Reels. You can create a comprehensive content strategy that includes all types of Instagram content in your posting schedule.
## What's the best time to post on Instagram?
Instagram engagement peaks during lunch hours (11 AM - 1 PM) and evening (5-7 PM). Our analytics help you identify the best posting times for your specific audience and schedule content accordingly.
## How many posts can I schedule?
Depending on your plan, you can schedule unlimited posts in advance. Our platform supports bulk scheduling, allowing you to plan entire content campaigns and maintain consistent posting schedules.
## Can I edit scheduled posts?
Yes! You can edit, reschedule, or delete any scheduled posts before they go live. Our dashboard gives you full control over your content calendar and posting schedule.
---
Canonical HTML: https://www.genviral.io/instagram-scheduler
# Schedule YouTube Videos | YouTube Scheduler | Genviral
Yes. Authorize your YouTube channel through Google, then schedule videos and Shorts from one calendar. Genviral uploads and publishes at the time you set, carrying the title, a description of up to 5,000 characters, tags, category, a privacy setting of public, unlisted, or private, and a custom thumbnail.
## How YouTube scheduling works in Genviral
Between editing, creating thumbnails, writing descriptions, and maintaining a consistent schedule, most creators burn out. Here's how Genviral keeps you posting.
- Connect Your YouTube Channel: Securely link your YouTube channel in just a few clicks
- Create Videos & Shorts: Post unlimited content with your own media, or use AI Studio to generate thumbnails and assets. AI-generated content consumes credits.
- Schedule Your Videos: Plan your content calendar weeks or months in advance
- Bulk Creation: Set up hands-off campaigns that generate and post content automatically
- AI Assistant: Get expert guidance and content ideas from your personal AI assistant
- Analyze Content Performance: Track performance across your YouTube channels and optimize your posting strategy
## What you can schedule to YouTube
Video only, one video per scheduled upload. Image posts and text-only posts are not supported: publishing goes through the YouTube upload endpoint, which requires video. Google OAuth. Authorize Genviral, then pick which channel to connect. Several channels can run from one dashboard.
- Title between 2 and 100 characters, description up to 5,000 characters.
- Privacy status per upload: public, unlisted, or private.
- Up to 30 tags, a category, and a made-for-kids declaration.
- Attach a custom thumbnail to the scheduled video.
- Analytics: YouTube is covered by the Genviral analytics dashboard.
## What works the same on every platform
Genviral is one workspace for every connected platform: one composer, one calendar, and one media library. Bring your own files, or make them in Genviral with AI Studio, the slideshow editor, or bulk slideshow creation, then schedule the same content to several accounts at once. Scheduling and publishing are unlimited on every plan.
- Connect several accounts on the same platform and publish to all of them from one post.
- Edit, reschedule, or delete any scheduled post before it goes live.
- Team workspaces with role-based permissions and a shared media library, so nobody shares a social password.
- The same scheduling and publishing runs from an AI agent over MCP or the Partner REST API. See [/agents](https://www.genviral.io/agents).
## How does YouTube scheduling work with Genviral?
Genviral's YouTube scheduler allows you to plan and automate your YouTube videos and Shorts in advance. Create your content, set your preferred posting times, and our platform will automatically publish to your channel at optimal times for maximum views and engagement.
## Can I schedule both Shorts and long-form videos?
Yes! Our YouTube scheduler supports both Shorts and long-form videos. You can mix and match content types in your posting schedule and manage everything from a single content calendar.
## How far in advance can I schedule YouTube videos?
You can schedule content as far ahead as you want. Our automations feature also allows you to create and schedule content for up to 30 days in advance with AI-generated posts.
## Do I need to manually approve scheduled videos?
No manual approval is required. Once you connect your YouTube channel and schedule your videos, our platform publishes at the scheduled times automatically. You can always review and modify scheduled posts before they go live.
## How do I connect my YouTube channel?
Go to the Accounts tab and click the YouTube icon. You'll be redirected to Google to authorize Genviral. We use YouTube's official API, so your connection is secure. You can connect multiple channels from one dashboard.
---
Canonical HTML: https://www.genviral.io/youtube-scheduler
# Schedule LinkedIn Posts | LinkedIn Scheduler | Genviral
Yes. Connect LinkedIn personal profiles and LinkedIn public pages, then schedule text posts, single images, image carousels, and video from one calendar. Genviral publishes at the time you set, with commentary up to 3,000 characters. Profiles and pages connect separately, so you can run both from one workspace.
## How LinkedIn scheduling works in Genviral
Writing posts, managing public pages, and maintaining consistency takes hours every week. Here's how Genviral automates your LinkedIn strategy.
- Connect Your LinkedIn Account: Securely link your LinkedIn personal profile or public page in just a few clicks.
- Create Posts & Content: Post unlimited content with your own media, or use AI Studio to generate images and assets. AI-generated content consumes credits.
- Schedule Your Posts: Plan your content calendar weeks or months in advance
- Bulk Creation: Set up hands-off campaigns that generate and post content automatically
- AI Assistant: Get expert guidance and content ideas from your personal AI assistant
## What you can schedule to LinkedIn
Text-only posts, single images, image carousels, and video. A carousel needs at least two images and cannot mix in video. LinkedIn OAuth. Personal profiles and LinkedIn public pages are separate connections, and connecting a page asks you which page to link.
- Commentary up to 3,000 characters.
- Publish a set of images as a native LinkedIn carousel with its own title.
- Connect several profiles and public pages and schedule across them from one dashboard.
- Analytics: LinkedIn, for both profiles and public pages is covered by the Genviral analytics dashboard.
## What works the same on every platform
Genviral is one workspace for every connected platform: one composer, one calendar, and one media library. Bring your own files, or make them in Genviral with AI Studio, the slideshow editor, or bulk slideshow creation, then schedule the same content to several accounts at once. Scheduling and publishing are unlimited on every plan.
- Connect several accounts on the same platform and publish to all of them from one post.
- Edit, reschedule, or delete any scheduled post before it goes live.
- Team workspaces with role-based permissions and a shared media library, so nobody shares a social password.
- The same scheduling and publishing runs from an AI agent over MCP or the Partner REST API. See [/agents](https://www.genviral.io/agents).
## How does LinkedIn scheduling work with Genviral?
Genviral's LinkedIn scheduler allows you to plan and automate your LinkedIn posts in advance. Create your content, set your preferred posting times, and our platform will automatically publish to LinkedIn at optimal times for professional engagement across personal profiles and public pages.
## Can I connect LinkedIn public pages?
Yes. Genviral now supports both LinkedIn personal profiles and LinkedIn public pages. You can connect multiple profiles and pages from a single dashboard and manage them together.
## Can I schedule to multiple LinkedIn accounts?
Yes. You can connect multiple LinkedIn personal profiles and public pages, then schedule content across all of them from a single dashboard. It's a strong fit for agencies, founders, and teams managing both brand and personal presence.
## What's the best time to post on LinkedIn?
LinkedIn engagement typically peaks on weekdays between 8-10 AM and 12 PM. Our analytics help you identify the best posting times for your specific audience and schedule content accordingly.
## Can I edit scheduled LinkedIn posts?
Yes! You can edit, reschedule, or delete any scheduled posts before they go live. Our dashboard gives you full control over your content calendar.
## How do I connect my LinkedIn account?
Go to the Accounts tab and click the LinkedIn icon. You'll be redirected to LinkedIn to authorize Genviral. We use LinkedIn's official API, so your connection is secure. You can connect personal profiles as well as LinkedIn public pages.
---
Canonical HTML: https://www.genviral.io/linkedin-scheduler
# Pinterest Scheduler - Schedule Pins That Drive Traffic | Genviral
Yes. Connect Pinterest with official OAuth, choose the board each pin belongs to, and schedule image pins from one calendar. Genviral publishes at the time you set, carrying a pin title of up to 100 characters, the description, alt text, and a destination link. Video pins are not supported yet.
## How Pinterest scheduling works in Genviral
Creating pins, writing descriptions, scheduling across boards: it's repetitive work that doesn't scale. Here's how Genviral turns Pinterest into a traffic machine.
- Connect Your Pinterest Account: Securely link your Pinterest account in just a few clicks
- Create Unlimited Pins: Post unlimited pins with your own content, or use AI Studio to generate beautiful infographics. AI-generated pins consume credits.
- Schedule Your Pins: Plan your content calendar weeks or months in advance
- Bulk Creation: Set up hands-off campaigns that generate and post pins automatically
- AI Assistant: Get expert guidance and content ideas from your personal AI assistant
- Canva to Media Library: Upload your content from Canva directly into Genviral and schedule to Pinterest instantly
## What you can schedule to Pinterest
Image pins, single or multiple. Video pins and text-only posts are not supported yet. Pinterest OAuth with board read and write access, so Genviral can list your boards and publish pins to them.
- A destination board is required on every scheduled pin.
- Pin title up to 100 characters and a destination link up to 2,048 characters.
- Alt text up to 500 characters on each pin.
- Schedule to several boards on the same account from one calendar.
## What works the same on every platform
Genviral is one workspace for every connected platform: one composer, one calendar, and one media library. Bring your own files, or make them in Genviral with AI Studio, the slideshow editor, or bulk slideshow creation, then schedule the same content to several accounts at once. Scheduling and publishing are unlimited on every plan.
- Connect several accounts on the same platform and publish to all of them from one post.
- Edit, reschedule, or delete any scheduled post before it goes live.
- Team workspaces with role-based permissions and a shared media library, so nobody shares a social password.
- The same scheduling and publishing runs from an AI agent over MCP or the Partner REST API. See [/agents](https://www.genviral.io/agents).
## How does Pinterest scheduling work with Genviral?
Genviral's Pinterest scheduler allows you to plan and automate your Pinterest pins in advance. Simply create your content, set your preferred posting times, and our platform will automatically publish your pins to Pinterest boards at the optimal times for maximum impressions, saves, and pin clicks.
## Can I schedule pins to different boards?
Yes! Our Pinterest scheduler supports scheduling pins to multiple boards. You can organize your content across different boards and schedule pins to the most relevant boards for better organization and discoverability.
## What metrics can I track for my Pinterest pins?
Pinterest analytics will be added in the coming months. Currently, only YouTube, TikTok, and Instagram tracking are available within Genviral. You can still schedule and publish Pinterest pins, and we're working on bringing comprehensive analytics to help you track impressions, saves, pin clicks, and engagement.
## How far in advance can I schedule Pinterest pins?
You can schedule pins as far ahead as you want. Furthermore, our automations feature allows you to create pins for up to 30 days in advance (with 3 pins per day that can be maximally scheduled).
## Do I need to manually approve scheduled pins?
No manual approval is required! Once you set up your Pinterest account connection and schedule your pins, our platform handles everything automatically. Your content will be published at the scheduled times without any intervention needed. You can always review and modify your scheduled pins before they go live.
## Does it work?
Yes, we are personally scaling two Pinterest accounts, one for [Genviral](https://www.pinterest.com/genviralio/) and one for our app [PantryAI](https://www.pinterest.com/pantryai/), to millions of impressions.
---
Canonical HTML: https://www.genviral.io/pinterest-scheduler
# Schedule Facebook Posts | Facebook Scheduler | Genviral
Yes, for Facebook Pages. Connect through Facebook login and pick which Page to link, then schedule text posts, images, multi-image posts, and Reels from one calendar. Genviral publishes at the time you set. Personal profiles, Groups, and Facebook Stories cannot be scheduled.
## How Facebook scheduling works in Genviral
Between creating posts, scheduling across Pages, and keeping up with algorithms, you're doing busywork instead of growing. Here's how Genviral handles it all.
- Connect Your Facebook Account: Securely link your Facebook Page in just a few clicks
- Create Unlimited Posts: Post unlimited content with your own media, or use AI Studio to generate images and videos. AI-generated content consumes credits.
- Schedule Your Posts: Plan your content calendar weeks or months in advance
- Bulk Creation: Set up hands-off campaigns that generate and post content automatically
- AI Assistant: Get expert guidance and content ideas from your personal AI assistant
- Canva to Media Library: Upload your content from Canva directly into Genviral and schedule to Facebook instantly
- Analyze Content Performance: Track performance across your Facebook Pages and optimize your posting strategy
## What you can schedule to Facebook
Text-only posts, single images, multi-image posts, and video including Reels. Facebook login, then pick which Page to connect. Genviral requests Page management permissions only.
- Facebook Pages only. Personal profiles and Groups cannot be connected.
- Facebook Stories cannot be scheduled.
- Post text up to 63,206 characters.
- Manage several Pages and schedule across them from one dashboard.
- Analytics: Facebook is covered by the Genviral analytics dashboard.
## What works the same on every platform
Genviral is one workspace for every connected platform: one composer, one calendar, and one media library. Bring your own files, or make them in Genviral with AI Studio, the slideshow editor, or bulk slideshow creation, then schedule the same content to several accounts at once. Scheduling and publishing are unlimited on every plan.
- Connect several accounts on the same platform and publish to all of them from one post.
- Edit, reschedule, or delete any scheduled post before it goes live.
- Team workspaces with role-based permissions and a shared media library, so nobody shares a social password.
- The same scheduling and publishing runs from an AI agent over MCP or the Partner REST API. See [/agents](https://www.genviral.io/agents).
## How does Facebook scheduling work?
Our Facebook scheduler allows you to plan and automate your Facebook posts, including text posts, images, videos, and links. Schedule content in advance and our platform automatically publishes at optimal times for maximum reach and engagement.
## Can I schedule Facebook Stories?
We don't support scheduling Facebook Stories right now. You can schedule video (Reels), text posts, and images to your Facebook Page.
## What's the best time to post on Facebook?
Facebook sees peak engagement during weekdays between 1-3 PM and weekends between 12-1 PM. Our analytics help you identify the best posting times for your specific audience and schedule content accordingly.
## Can I schedule to Facebook Pages and Groups?
We support scheduling to Facebook Pages only right now. Groups and personal profiles are not supported. You can manage multiple Facebook Pages and schedule content across all of them from a single dashboard.
## How do I connect my Facebook account?
Go to the Accounts tab and click the Facebook icon. You'll be redirected to Facebook, where you can select the Page you want to connect. We use Facebook's official API, so your connection is secure.
---
Canonical HTML: https://www.genviral.io/facebook-scheduler
# Schedule X Posts | X Scheduler | Genviral
Yes. Connect your X account, then schedule text posts, up to four images, or one video from one calendar. Genviral publishes at the time you set, posts multi-part threads as chained replies, and lets you choose who can reply. Standard posts allow 280 characters, X Premium accounts 4,000.
## How X scheduling works in Genviral
Between threads, media posts, and repeatable content systems, X moves fast. Here's how Genviral helps you keep up without burning out.
- Connect Your X Account: Securely link your X account in just a few clicks.
- Create Posts, Threads & Media: Build fast-moving X content with your own assets or AI-assisted drafting and visuals.
- Schedule Your X Posts: Plan your queue ahead of time so you stay present without posting manually all day.
- Bulk Creation: Build repeatable X workflows for commentary, distribution, and daily audience growth.
- AI Assistant: Generate sharper hooks, cleaner threads, and more repeatable X content systems.
## What you can schedule to X
Text-only posts, up to 4 images, or one video. A single post cannot mix video and images. X OAuth. You connect as the account currently signed in on X, so switch accounts there first if you want a different one.
- 280 characters on standard accounts, 4,000 on X Premium.
- Video up to 140 seconds without Premium.
- Multi-part threads publish as chained replies.
- Reply control per post: everyone, accounts you follow, mentioned accounts, subscribers, or verified accounts.
- Post into an X Community, and flag made-with-AI or paid partnership content.
- Analytics: X is covered by the Genviral analytics dashboard.
## What works the same on every platform
Genviral is one workspace for every connected platform: one composer, one calendar, and one media library. Bring your own files, or make them in Genviral with AI Studio, the slideshow editor, or bulk slideshow creation, then schedule the same content to several accounts at once. Scheduling and publishing are unlimited on every plan.
- Connect several accounts on the same platform and publish to all of them from one post.
- Edit, reschedule, or delete any scheduled post before it goes live.
- Team workspaces with role-based permissions and a shared media library, so nobody shares a social password.
- The same scheduling and publishing runs from an AI agent over MCP or the Partner REST API. See [/agents](https://www.genviral.io/agents).
## How does X scheduling work with Genviral?
Genviral's X scheduler helps you plan and automate posts in advance. Create your content, set posting times, and our platform publishes automatically so you can stay active on X without manually posting throughout the day.
## Can I schedule threads and media posts on X?
Yes. You can schedule single posts, multi-post threads, and media-backed posts from one workflow, which makes it easier to run both fast commentary and more structured content sequences.
## Can I schedule to multiple X accounts?
Yes. You can connect multiple X accounts and schedule content across all of them from one dashboard, making it easy to handle multiple brands, creators, or client accounts.
## What's the best time to post on X?
X tends to reward consistency and relevance more than perfect timing, but weekdays during business hours are a strong baseline. Genviral helps you test timing and maintain enough posting volume to learn quickly.
## Can I edit scheduled X posts?
Yes. You can edit, reschedule, or delete scheduled X posts before they publish, giving you room to react to news cycles and changing priorities.
---
Canonical HTML: https://www.genviral.io/x-scheduler
# Schedule Bluesky Posts | Bluesky Scheduler | Genviral
Yes. Bluesky connects with your handle and an app password rather than OAuth, and you can point Genviral at a custom PDS server. Schedule text, images, and video from the same calendar as your other platforms, and Genviral publishes at the time you set, within the 300 character limit.
## How Bluesky scheduling works in Genviral
Bluesky rewards steady publishing and thoughtful content. Here's how Genviral helps you build that consistency with a calmer workflow.
- Connect Your Bluesky Account: Securely link your Bluesky account in just a few clicks.
- Create Posts, Images & Links: Build Bluesky content with your own media or AI-assisted creative assets and copy.
- Schedule Your Bluesky Posts: Plan your Bluesky presence ahead of time with a simple, visual calendar.
- Bulk Creation: Set up repeatable posting systems so your Bluesky account grows with less manual effort.
- AI Assistant: Get help shaping sharper ideas and better posting systems for Bluesky.
## What you can schedule to Bluesky
Text-only posts, images, and video. Handle plus an app password, not OAuth. The server field defaults to https://bsky.social and accepts a custom PDS host.
- 300 characters per post.
- Multi-part threads publish as chained replies.
- Connect several Bluesky accounts in one workspace.
- Analytics: Bluesky is publish-only today, it is not in the Genviral analytics dashboard.
## What works the same on every platform
Genviral is one workspace for every connected platform: one composer, one calendar, and one media library. Bring your own files, or make them in Genviral with AI Studio, the slideshow editor, or bulk slideshow creation, then schedule the same content to several accounts at once. Scheduling and publishing are unlimited on every plan.
- Connect several accounts on the same platform and publish to all of them from one post.
- Edit, reschedule, or delete any scheduled post before it goes live.
- Team workspaces with role-based permissions and a shared media library, so nobody shares a social password.
- The same scheduling and publishing runs from an AI agent over MCP or the Partner REST API. See [/agents](https://www.genviral.io/agents).
## How does Bluesky scheduling work with Genviral?
Genviral's Bluesky scheduler lets you plan and automate posts ahead of time. Create your content, choose when it should go live, and our platform handles the publishing so you can stay consistent with less effort.
## Can I schedule images and link posts on Bluesky?
Yes. You can schedule text posts, image posts, and link-driven updates for Bluesky from the same publishing workflow you already use for other platforms.
## Can I connect multiple Bluesky accounts?
Yes. You can connect multiple Bluesky accounts and manage them from a single workspace, which is useful for agencies, founders, and teams experimenting with multiple audiences.
## What's the best time to post on Bluesky?
Because Bluesky audiences are still maturing, consistency is often more important than chasing a single perfect hour. Start with weekday morning and afternoon slots, then refine based on your own results.
## Can I edit scheduled Bluesky posts?
Yes. You can update, reschedule, or remove any scheduled Bluesky post before it publishes, so you stay flexible as your content plan evolves.
---
Canonical HTML: https://www.genviral.io/bluesky-scheduler
# Schedule Mastodon Posts | Mastodon Scheduler | Genviral
Yes, on any Mastodon server. Enter your instance, for example mastodon.social, and authorize Genviral there. Then schedule text, images, and video, choose public, unlisted, or followers-only visibility, add a content warning, and mark media sensitive. Genviral reads your instance limits when you connect.
## How Mastodon scheduling works in Genviral
The fediverse rewards a steady, authentic presence. Here's how Genviral helps you plan posts, set visibility and content warnings, and keep your cadence across any instance.
- Connect Your Mastodon Account: Link your account on any Mastodon server in just a few clicks.
- Post & Schedule to Mastodon: Create posts, control how they appear, and publish now or schedule them ahead.
## What you can schedule to Mastodon
Text-only posts, images, and video, with alt text on media. One video per post. Enter your instance host, for example mastodon.social, and authorize Genviral on that server. Genviral registers its own OAuth client per instance, so any standard Mastodon server works.
- Visibility per post: public, unlisted, or followers-only.
- Content warning text up to 500 characters, plus a sensitive-media flag.
- Character and attachment limits are read from your instance when you connect. The fallback is 500 characters and 4 attachments.
- Connect accounts on different servers and run them from one workspace.
- Analytics: Mastodon is publish-only today, it is not in the Genviral analytics dashboard.
## What works the same on every platform
Genviral is one workspace for every connected platform: one composer, one calendar, and one media library. Bring your own files, or make them in Genviral with AI Studio, the slideshow editor, or bulk slideshow creation, then schedule the same content to several accounts at once. Scheduling and publishing are unlimited on every plan.
- Connect several accounts on the same platform and publish to all of them from one post.
- Edit, reschedule, or delete any scheduled post before it goes live.
- Team workspaces with role-based permissions and a shared media library, so nobody shares a social password.
- The same scheduling and publishing runs from an AI agent over MCP or the Partner REST API. See [/agents](https://www.genviral.io/agents).
## How does Mastodon scheduling work with Genviral?
Connect your Mastodon account, create your content, and choose when each post should go live. Genviral stores the schedule and publishes the post to your server at the right time, so you stay consistent without logging in to post manually.
## Does Genviral work with any Mastodon server?
Yes. Genviral connects to any standard Mastodon instance. Just enter your server (for example mastodon.social) when you connect, and we authenticate securely on that server and adapt to its limits automatically.
## Can I schedule images and videos on Mastodon?
Yes. You can schedule text posts, single or multiple images, and video. You can also add alt text to your media for accessibility, all within your server's media limits.
## Can I set visibility and content warnings?
Yes. For each post you can choose public, unlisted, or followers-only visibility, add a content warning or spoiler text, and mark media as sensitive before it publishes.
## Does Genviral respect my server's character limit?
Yes. Mastodon servers can set their own character and media limits. Genviral reads your instance's limits when you connect and keeps your scheduled posts within them so they publish cleanly.
## Can I connect multiple Mastodon accounts?
Yes. You can connect multiple Mastodon accounts across different servers and manage them from a single workspace, which is useful for creators, communities, and agencies.
## Can I post to Mastodon and my other channels together?
Yes. Genviral manages Mastodon alongside TikTok, Instagram, X, Bluesky, LinkedIn, YouTube, and more from one workspace, so you can plan and schedule the same content across the fediverse and your traditional channels without copying and pasting between tools.
## Why use a scheduler for Mastodon?
Mastodon rewards a steady, authentic presence rather than algorithm chasing: timelines are chronological and there are no ads. A scheduler lets you plan ahead, keep a consistent cadence, and own your audience on the open social web instead of logging in to post by hand every day.
---
Canonical HTML: https://www.genviral.io/mastodon-scheduler
# Schedule Telegram Posts | Telegram Scheduler | Genviral
Yes, for Telegram channels. Add the Genviral bot to your channel as an admin with permission to post, then schedule broadcasts from one calendar. Genviral publishes text of up to 4,096 characters, media captions of up to 1,024, albums of two to ten images, and video, at the time you set.
## How Telegram scheduling works in Genviral
Channels live or die by consistency, and subscribers stick around when updates feel steady and intentional. Here's how Genviral plans your Telegram posts and broadcasts them on time, every time.
- Create Your Telegram Bot: Spin up a bot in BotFather and add it to your channel as an admin.
- Connect Telegram to Genviral: Paste your channel ID and access token to link the channel to your workspace.
- Post & Schedule to Telegram: Write broadcasts, attach media, and publish now or schedule them ahead.
## What you can schedule to Telegram
Text broadcasts, single images, albums of 2 to 10 images, and video with a caption. Add the Genviral bot to your channel as an admin with permission to post. There is no OAuth step, and the bot never reads your personal messages.
- Text posts up to 4,096 characters, captions on media up to 1,024.
- MarkdownV2 or HTML formatting, silent delivery, and content protection.
- Spoiler blur on media, and captions placed above the media.
- One inline button with a label and URL, and posting into a forum topic.
- Analytics: Telegram is publish-only today, it is not in the Genviral analytics dashboard.
## What works the same on every platform
Genviral is one workspace for every connected platform: one composer, one calendar, and one media library. Bring your own files, or make them in Genviral with AI Studio, the slideshow editor, or bulk slideshow creation, then schedule the same content to several accounts at once. Scheduling and publishing are unlimited on every plan.
- Connect several accounts on the same platform and publish to all of them from one post.
- Edit, reschedule, or delete any scheduled post before it goes live.
- Team workspaces with role-based permissions and a shared media library, so nobody shares a social password.
- The same scheduling and publishing runs from an AI agent over MCP or the Partner REST API. See [/agents](https://www.genviral.io/agents).
## How does Telegram scheduling work with Genviral?
Connect your Telegram channel through our bot, draft your broadcast, and choose when it should go live. Genviral stores the schedule and publishes the post to your channel at the right time, so you stay consistent without manual posting.
## How do I connect my Telegram channel?
Create or pick a Telegram channel, add the Genviral bot as an admin with permission to post, and the channel will show up in your workspace. The bot only posts on your behalf, and it never reads your personal messages.
## Can I schedule images and videos on Telegram?
Yes. You can schedule text broadcasts, single or multiple images, and video posts with captions. Genviral keeps each broadcast within Telegram's caption and media limits automatically.
## Can I connect multiple Telegram channels?
Yes. You can connect multiple Telegram channels and manage them from a single workspace, which is useful for creators, communities, and agencies running multiple audiences.
## Can I edit or reschedule a Telegram broadcast before it publishes?
Yes. You can update, reschedule, or remove any scheduled Telegram post before it goes live, so you stay flexible as your content plan evolves.
## Can I post to Telegram and my other channels together?
Yes. Genviral manages Telegram alongside TikTok, Instagram, X, Bluesky, LinkedIn, YouTube, Mastodon, and more from one workspace, so you can plan and schedule the same content across all your channels without copying and pasting between tools.
## Why use a scheduler for Telegram?
Telegram channels thrive on consistency: subscribers expect a steady stream of updates. A scheduler lets you batch-create broadcasts, plan ahead, and keep a reliable posting cadence without staying glued to the app.
---
Canonical HTML: https://www.genviral.io/telegram-scheduler
# AI Headshot Generator
Create professional headshots for LinkedIn, resumes, and business profiles — without a photographer. Generate studio-quality AI portraits in seconds.
## Benefits
- Studio-Quality Headshots: Generate professional portraits that look like they were taken by a photographer — lighting, composition, and clarity included.
- Skip the Photographer: Professional headshots cost $150-500+. Generate unlimited AI headshots at a fraction of the cost.
- Ready in Seconds: No scheduling, no studio visit. Describe your style and get professional headshots instantly.
- LinkedIn Optimized: Templates designed for LinkedIn, company websites, and professional profiles — the right dimensions and style.
- Multiple Styles: From corporate formal to creative casual — choose the headshot style that matches your personal brand.
- Unlimited Variations: Generate as many headshot options as you need. Different backgrounds, lighting, and expressions until it's perfect.
## How it works
- 1. Choose a style: Browse professional headshot templates — corporate, creative, casual, or outdoor.
- 2. Describe your look: Tell the AI the style, background, lighting, and mood you want for your headshot.
- 3. Generate & download: Get multiple headshot options in seconds. Download your favorite for LinkedIn, your resume, or website.
## Is the AI headshot generator free?
Yes — you can try the AI headshot generator for free. Sign up to generate your first headshots at no cost. Premium plans give you access to more AI models, higher resolution, and unlimited generations.
## Can I use AI headshots on LinkedIn?
Yes. Our AI generates headshots optimized for LinkedIn profiles, company pages, and professional networking. The images look natural and professional — suitable for any business context.
## How realistic are AI-generated headshots?
Very realistic. Our AI models are trained on millions of professional photos and produce headshots with natural lighting, skin tones, and composition. Many users find them indistinguishable from real photos.
## Can I upload my own photo as a reference?
Yes. Upload a reference photo and the AI will generate new headshots inspired by your appearance, with different backgrounds, lighting, and professional styling.
## What's the best AI headshot generator?
Genviral offers one of the best free AI headshot generators available. With multiple AI models, professional templates, and instant generation, you get studio-quality headshots without the cost of a photographer or dedicated headshot app.
## Can I use AI headshots for my company team page?
Yes. All headshots generated on Genviral are yours to use commercially — on company websites, team pages, business cards, email signatures, and marketing materials.
---
Canonical HTML: https://www.genviral.io/features/ai-content-studio/ai-headshot-generator
# AI Product Photography Generator
Generate studio-quality product photos with AI — professional lighting, backgrounds, and compositions without a photographer or studio. Upload your product and get e-commerce-ready shots in seconds.
## Benefits
- Studio-Quality Shots: AI generates product photos with professional lighting, reflections, and shadow detail — matching what a studio setup produces.
- Skip the Studio: Professional product photography costs $50-500+ per shot. Generate unlimited product images at a fraction of the price.
- Instant Results: No scheduling, shipping, or retouching. Upload your product and get polished photos in seconds.
- Every Background You Need: Lifestyle scenes, clean white, gradient, marble, fabric — swap backgrounds instantly without re-shooting.
- E-Commerce Ready: Templates optimized for Amazon, Shopify, Instagram Shopping, and product listing platforms — correct dimensions and style.
- Unlimited Angles & Variations: Generate as many angles, lighting setups, and compositions as you need until every product looks its best.
## How it works
- 1. Pick a product photography template: Browse templates for different product types — cosmetics, food, electronics, fashion, and more.
- 2. Describe your shot: Tell the AI the background, lighting, angle, and mood you want — or upload a reference image.
- 3. Generate & download: Get multiple product photo options in seconds. Download your favorites for your store, ads, or social media.
## Is the AI product photography generator free?
Yes — you can try the AI product photography generator for free. Sign up to generate your first product photos at no cost. Premium plans unlock more AI models, higher resolution, and unlimited generations.
## What types of products work best?
The AI handles all product categories — cosmetics, skincare, food and beverage, electronics, fashion accessories, footwear, home goods, and more. Upload any product image and choose a template that fits your category.
## Can I use these photos for my online store?
Yes. All product photos generated on Genviral are yours to use commercially — on Shopify, Amazon, Etsy, WooCommerce, social media ads, and any other platform.
## How realistic are AI-generated product photos?
Very realistic. Our AI models produce product shots with natural lighting, accurate reflections, and professional compositions that are indistinguishable from studio photography for most use cases.
## Can I keep my product consistent across different backgrounds?
Yes. Upload your product once and generate it across dozens of different backgrounds and settings — the AI keeps the product accurate while changing the environment around it.
## What's better — AI product photography or a real studio?
For hero shots of a flagship product, a real studio still has the edge. For everything else — catalog images, A/B test variants, social media content, seasonal backgrounds, listing images — AI product photography is faster, cheaper, and produces more variations in minutes than a studio does in a full day.
---
Canonical HTML: https://www.genviral.io/features/ai-content-studio/ai-product-photography
# AI Thumbnail Maker
Generate click-worthy thumbnails for YouTube, podcasts, and social media — no design skills required. AI creates eye-catching thumbnails that drive views.
## Benefits
- Click-Worthy Thumbnails: AI generates thumbnails designed to maximize click-through rates — bold compositions, vibrant colors, and attention-grabbing layouts.
- Ready in Seconds: Skip hours of design work. Describe your video topic and get professional thumbnails instantly — no Photoshop required.
- YouTube Optimized: Templates built for YouTube's recommended 1280×720 dimensions, with high contrast and readable text that pops at any size.
- Endless Styles: From bold gaming thumbnails to clean educational layouts — generate any style to match your channel's brand.
- No Designer Needed: Professional thumbnail designers charge $20-50+ per thumbnail. Generate unlimited options at a fraction of the cost.
- A/B Test Variations: Generate multiple thumbnail options for the same video. Test different styles, colors, and compositions to find what gets the most clicks.
## How it works
- 1. Describe your video: Enter your video topic, the mood you want, any text overlay, and style preferences.
- 2. AI generates thumbnails: The AI creates multiple thumbnail options with bold typography, vivid colors, and click-optimized layouts.
- 3. Download & upload: Pick your favorite, download in high resolution, and upload directly to YouTube, your podcast host, or social media.
## Is the AI thumbnail maker free?
Yes — you can try the AI thumbnail maker for free. Sign up to generate your first thumbnails at no cost. Premium plans unlock more AI models, higher resolution, and unlimited generations.
## What size thumbnails does it generate?
Thumbnails are generated at YouTube's recommended 1280×720 resolution (16:9 aspect ratio). This size also works well for podcast covers, blog featured images, and social media posts.
## Can I add text to my thumbnails?
Yes. Describe the text you want in your prompt and the AI will integrate bold, readable text overlays into the thumbnail design — optimized for visibility at small sizes.
## Do I need design skills?
Not at all. Just describe what you want and the AI handles composition, color, typography, and layout. It's built for creators, not designers.
## What's the best AI thumbnail maker?
Genviral is one of the best free AI thumbnail makers available. Multiple AI models, one-click generation, and templates designed specifically for YouTube and social media thumbnails.
## Can I use these thumbnails on YouTube?
Yes. All thumbnails generated on Genviral are yours to use anywhere — YouTube, podcasts, blogs, social media, and course platforms. No watermarks on downloaded images.
---
Canonical HTML: https://www.genviral.io/features/ai-content-studio/ai-thumbnail-maker
# AI Infographic Generator
Create professional infographics with AI — recipes, workout routines, skincare guides, business visuals, and more. No design skills needed. Generate polished, shareable infographics in seconds.
## Benefits
- Any Topic, Any Style: From recipe cards and workout routines to marketing stats and brand guides — AI generates infographics for any topic with the right layout, icons, and color palette.
- Ready in Seconds: Skip hours of Canva or Illustrator work. Describe your infographic and get a polished, shareable result instantly — no design skills required.
- Professional Design Quality: AI applies proven infographic principles — visual hierarchy, balanced layouts, readable typography, and cohesive color schemes — so every output looks designer-made.
- Templates for Every Category: Browse curated templates for food, fitness, skincare, business, travel, and home — then customize with your own content and branding.
- Social-Media Ready: Infographics are optimized for Instagram, Pinterest, LinkedIn, and blog embeds — the formats that drive the most saves and shares.
- No Designer Needed: Professional infographic designers charge $100-500+ per graphic. Generate unlimited infographics at a fraction of the cost.
## How it works
- 1. Pick an infographic template: Browse templates for recipes, fitness routines, skincare guides, business data, travel packing lists, and more — or start from a blank prompt.
- 2. Describe your content: Tell the AI the topic, data points, style, and layout you want — or upload a reference image for the look you're going for.
- 3. Generate & download: Get multiple infographic options in seconds. Download your favorite for social media, blog posts, presentations, or print.
## Is the AI infographic generator free?
Yes — you can try the AI infographic generator for free. Sign up to create your first infographics at no cost. Premium plans unlock more AI models, higher resolution, and unlimited generations.
## What types of infographics can I create?
The AI handles all infographic categories — recipe cards, fitness workout routines, skincare step-by-step guides, business marketing visuals, brand color palettes, travel packing lists, meal prep guides, mood boards, and more. Choose a template or describe any topic from scratch.
## Can I use these infographics for my business?
Yes. All infographics generated on Genviral are yours to use commercially — on Instagram, Pinterest, LinkedIn, your website, presentations, email newsletters, and any other platform. No watermarks on downloaded images.
## How professional do the infographics look?
Very professional. The AI applies proven design principles — visual hierarchy, balanced layouts, readable typography, cohesive color palettes, and clean iconography. Results are on par with what a graphic designer would produce.
## Do I need design skills to create infographics?
Not at all. Just describe what you want — the topic, the data or steps, and any style preferences. The AI handles layout, typography, colors, and composition automatically. For a detailed walkthrough, check out our guide on how to create infographics with AI.
## What's the best AI infographic generator?
Genviral is one of the best free AI infographic generators available — multiple AI models, curated templates across 6+ categories, and one-click generation. Create polished, shareable infographics in seconds without any design tools.
## Can I customize the style and colors?
Yes. Describe the style you want in your prompt — minimalist, bold, pastel, dark mode, brand colors — and the AI will match it. You can also use reference images to guide the style.
## Which social platforms are infographics best for?
Infographics perform exceptionally well on Pinterest (saves and repins), Instagram (carousel and single posts), LinkedIn (professional content), and blogs (embedded visuals). They're one of the most shared content formats across all platforms.
---
Canonical HTML: https://www.genviral.io/features/ai-content-studio/ai-infographic-generator
# AI OG Image Generator
Create professional Open Graph images for link previews on Twitter, Facebook, Slack, Discord, and LinkedIn. AI generates stunning social cards that make your links stand out — no design skills needed.
## Benefits
- Perfect Link Previews: Generate OG images sized exactly for Open Graph (1200×630) — your links look polished on Twitter, Facebook, Slack, Discord, LinkedIn, and iMessage.
- Ready in Seconds: Skip Figma and Canva. Describe your content, pick a template, and get a professional OG image instantly — no design tools required.
- Higher Click-Through Rates: Posts with custom OG images get up to 2x more clicks than plain links. Stand out in every feed, chat, and search result.
- Every Use Case Covered: Blog posts, SaaS launches, API docs, pricing pages, changelogs, case studies, events — templates for every type of social card.
- Brand-Consistent Cards: Describe your brand colors, typography, and style once. Generate consistent OG images across your entire site — no design system needed.
- A/B Test Variations: Generate multiple OG image options for the same page. Test different layouts, colors, and copy to find what earns the most clicks.
## How it works
- 1. Describe your page: Enter your page title, topic, brand colors, and any text overlay you want on the OG image.
- 2. AI generates OG images: The AI creates professional social cards with bold typography, clean layouts, and optimized contrast for link previews.
- 3. Download & add to your site: Download your OG image in high resolution and add it to your page's meta tags. Every shared link now looks professional.
## What is an OG image?
An OG (Open Graph) image is the preview image that appears when you share a link on social media, Slack, Discord, iMessage, or anywhere else that unfurls URLs. It's defined by the og:image meta tag in your page's HTML. A well-designed OG image dramatically increases click-through rates.
## What size should an OG image be?
The recommended Open Graph image size is 1200×630 pixels (roughly 1.91:1 aspect ratio). This size works best across all platforms — Facebook, Twitter/X, LinkedIn, Slack, Discord, and iMessage. Genviral generates OG images at this exact dimension by default.
## Is the AI OG image generator free?
Yes — you can try the AI OG image generator for free. Sign up and generate your first OG images at no cost. Premium plans unlock more AI models, higher resolution, and unlimited generations.
## Can I use these OG images on my website?
Yes. All OG images generated on Genviral are yours to use anywhere. Download the image, add it to your site's meta tags, and every platform that supports Open Graph will display your custom social card — no watermarks.
## What makes a good OG image?
The best OG images have bold, readable text (even at thumbnail size), a clear visual hierarchy, brand-consistent colors, and a composition that communicates the page's value in under 2 seconds. Our AI templates are designed with these best practices built in.
## Do I need design skills to create OG images?
Not at all. Describe what your page is about, choose a template style, and the AI handles composition, typography, color, and layout. It's built for developers and marketers, not designers.
## Can I create dynamic OG images for multiple pages?
Yes. Use the AI to generate OG images for blog posts, landing pages, documentation, product pages, and more. Generate variations for each page to keep your link previews unique and on-brand across your entire site.
---
Canonical HTML: https://www.genviral.io/features/ai-content-studio/ai-og-image-generator
# Consistent AI Character Generator
Generate images of the same character in any scene, pose, or outfit — with perfect identity consistency. Train a character on your own photos, then create unlimited content starring you. No design skills needed.
## Benefits
- Same Person, Every Scene: Train an AI model on your face or any character — then generate them in any setting, outfit, or pose while the face stays perfectly consistent.
- One-Time Training, Unlimited Images: Upload 5-50 reference photos once. After training (~5-20 minutes, depending on how many photos you upload), generate unlimited images of your character forever — no re-training needed.
- Studio-Quality Output: AI generates photorealistic images with professional lighting and composition. Output up to 4K resolution — ready for social media, ads, or print.
- Any Style, Same Identity: Photorealistic portraits, animated avatars, editorial fashion — switch styles freely while your character's face and identity stay locked in.
- From Character to Video: Take your consistent character images and turn them into short-form videos with AI — ready for TikTok, YouTube Shorts, or Instagram Reels.
- Built for Content Creators: Create recurring characters for faceless channels, brand storytelling, educational series, or personal branding — all with consistent identity across every post.
- Private & Secure: Your training photos are processed securely and never shared. Only you can access your trained character model and generated images.
- Fraction of Photoshoot Cost: Professional photoshoots cost hundreds per session. Generate unlimited character images for a fraction of the price — any location, any outfit, any time.
## How it works
- 1. Train your character: Upload 5-50 clear photos of yourself (or any person) in the Media Library — the more you add, the better. The AI learns the face, features, and identity in about 5-20 minutes, depending on how many photos you upload.
- 2. Describe the scene: Select your trained character and write a prompt describing the scene — e.g. 'sitting at a cafe in Paris with soft afternoon lighting.'
- 3. Generate & use: Get photorealistic images of your character in the described scene. Download for social media, turn into videos, or schedule posts directly.
## How does the consistent AI character generator work?
You upload 5-50 clear photos of a person to train the AI model. The AI learns their face, features, and identity. Once trained (~5-20 minutes, depending on how many photos you upload), you can generate new images of that person in any scene, outfit, or pose — and the face stays perfectly consistent across every generation.
## Do I need to train a model first?
Yes. To generate consistent character images, you first train a character model in the Media Library. Upload 5-50 photos (diverse angles, expressions, and lighting work best), then click 'Train.' It takes about 5-20 minutes (depending on how many photos you upload) and costs 50 credits. Once trained, you can generate unlimited images of that character.
## How many photos do I need to train a character?
You need at least 5 photos of the same person, and you can upload up to 50 — the more you add, the more consistent your character. Use diverse angles, expressions, lighting conditions, and settings, and make sure the face is clearly visible — avoid heavy sunglasses, masks, or extreme motion blur.
## Can I train the AI on my own face?
Yes. Most users train the AI on their own photos for personal branding, social media content, and professional headshots. Upload selfies and photos of yourself, and the AI will learn your face for consistent generation.
## How much does consistent character generation cost?
Training a character model costs 50 credits (one-time). After training, each image generation costs 2 credits at standard resolution or 3 credits at 4K. Plans start at $29/month and include generous credit allowances.
## Is the consistent character generator free?
You can try Genviral free — sign up to explore the AI Studio. Character training costs 50 credits, and each generation uses 2-3 credits. Premium plans include enough credits for regular character content creation.
## What's the difference between this and face swap?
Face swap replaces a face in an existing image or video. Consistent character generation creates entirely new images from scratch — you describe a scene and the AI generates it with your character. The result is a fully new composition, not a modification of an existing photo.
## Can I use the same character across videos too?
Yes. Generate consistent character images, then use Genviral's AI video tools to turn them into short-form videos. Your character stays consistent from static images to video content — perfect for recurring series on TikTok, YouTube, or Instagram.
## How realistic are the generated images?
Very realistic. The AI produces photorealistic output with natural lighting, skin texture, and composition. With good training photos (diverse angles and lighting), the generated images are often indistinguishable from real photography.
## Can I generate different styles with the same character?
Yes. Once your character is trained, you can generate them in any style — photorealistic portraits, editorial fashion, casual lifestyle, professional headshots, or artistic illustrations. The face stays consistent while the style changes.
## What are the best use cases for consistent AI characters?
Popular use cases include: personal branding and LinkedIn headshots, social media content with a recurring character, faceless YouTube/TikTok channels, brand mascot content, children's book illustrations, educational content series, and product/lifestyle marketing with consistent spokesperson imagery.
## Can I train multiple characters?
Yes. You can train as many character models as you need. Each character requires its own set of 5-50 training photos and a one-time 50-credit training cost. Switch between characters in the Studio to generate images of different people.
---
Canonical HTML: https://www.genviral.io/features/ai-content-studio/consistent-character-generator
# AI Video Translation
Translate any video with AI voice cloning and lip-sync — your voice, your face, any language. Go global in minutes, not weeks.
## Benefits
- 180+ Languages: Translate videos into over 180 languages including Spanish, French, German, Japanese, Chinese, Hindi, Arabic, and more — with natural accent support.
- AI Lip-Sync: The translated audio is matched to the speaker's lip movements for a natural, believable result — not just a voiceover.
- Voice Cloning: AI clones the original speaker's voice so the translated video sounds like them — same tone, same energy, different language.
- Fast Processing: Get your translated video in minutes. Upload, choose a language, and download — no manual editing or subtitle work needed.
- Any Video Format: Supports MP4, MOV, and WebM videos up to 60 seconds. Upload files directly or paste a video URL.
- Fraction of Dubbing Cost: Professional dubbing costs thousands per minute. AI video translation delivers studio-quality results at a fraction of the price.
- Full Quality Download: Download your translated video in full resolution — ready for TikTok, YouTube, Instagram, or any global audience.
- Private & Secure: Your videos are processed securely and never stored permanently. All uploads are automatically deleted after processing.
## How it works
- 1. Upload your video: Upload a video with a speaking person — MP4, MOV, or WebM up to 60 seconds. Clear audio works best.
- 2. Choose a language: Select any of 180+ target languages. The AI will clone the speaker's voice and translate the audio.
- 3. Translate & download: The AI translates the speech, lip-syncs the video, and delivers a natural result. Download in full quality.
## How does AI video translation work?
Our AI listens to the original speech, transcribes it, translates the text into your target language, then generates new audio using voice cloning to match the original speaker. Finally, it adjusts the speaker's lip movements to match the translated audio for a natural, believable result.
## How much does AI video translation cost?
Video translation uses 1 credit per second of video. A 30-second clip costs 30 credits, a 60-second clip costs 60 credits. Plans start at $29/month and include generous credit allowances for regular use.
## What languages can I translate videos to?
Genviral supports over 180 languages including English, Spanish, French, German, Portuguese, Japanese, Chinese (Mandarin & Cantonese), Korean, Hindi, Arabic, Italian, Russian, and many more — with regional accent variants for major languages.
## Does it lip-sync the translated video?
Yes. Unlike simple voiceover tools, our AI adjusts the speaker's lip movements to match the translated audio. The result looks natural — as if the speaker is actually speaking the target language.
## Does the translation keep the original voice?
Yes. The AI clones the original speaker's voice — preserving their tone, pitch, and speaking style — and uses it to deliver the translated audio. The result sounds like the same person speaking a different language.
## How long can the video be?
AI video translation supports videos up to 60 seconds. You can also trim the video to a specific segment before translating using the built-in start/end time controls.
## What video formats are supported?
MP4, MOV, and WebM formats are supported. You can upload a file directly or paste a video URL. For the best results, use videos with clear audio and a single speaker.
## Can I translate a video from any language?
Yes. The AI automatically detects the source language from the audio, so you don't need to specify it. It works with any source language and translates to your chosen target language.
## Is AI video translation accurate?
Very accurate for most languages and content types. The AI handles natural speech, interviews, presentations, and social media content well. Complex technical jargon or heavy slang may need a quick review.
## Can I use translated videos for social media?
Yes. All translated videos from Genviral are yours to use commercially — on TikTok, YouTube, Instagram, LinkedIn, or any platform. There are no watermarks and no usage restrictions.
---
Canonical HTML: https://www.genviral.io/features/ai-content-studio/ai-video-translation
# AI Ad Generator
Turn a product shot or ad concept into social-ready creative with AI. Generate product ads, promo videos, and UGC-style drafts without waiting on a full editing workflow.
## Benefits
- High-intent ad workflow: Build creative drafts for paid social and product marketing without starting from a blank timeline.
- Turn product shots into ad creative: Start from still product imagery and generate motion-heavy promo clips that feel more native to social feeds.
- Useful for UGC-style concepts too: Use the same surface to explore testimonial, demo, lifestyle, and creator-inspired ad angles.
- Make more variants faster: Iterate on hooks, offers, and visual framing quickly when you need multiple ad concepts for testing.
- Built for social placements: Generate ad-ready video ideas for TikTok, Instagram, Meta, and other short-form placements where creative freshness matters.
- Shorten the first-draft cycle: Use AI to reach a usable ad draft sooner, then refine the best-performing concept instead of editing everything manually from scratch.
## How it works
- 1. Pick an ad direction: Start from a product-video template and decide whether you want a demo, hero spot, UGC-style angle, or social promo feel.
- 2. Add your offer and audience: Tell the AI what you're selling, who it's for, what hook to use, and what action the viewer should take.
- 3. Generate creative variants: Create the first draft, review the strongest concept, and iterate on messaging or visuals until you have a testable ad direction.
## What is an AI ad generator?
An AI ad generator helps you turn product inputs, offers, and prompts into ad-ready creative drafts. Genviral is focused on visual ad generation for short-form platforms, not just text-only ad copy suggestions.
## Can I use this for product ads?
Yes. The workflow is especially strong when you have product images or a clear product story and need to turn them into motion-first social creative.
## Can I make UGC-style ad concepts?
Yes. Even before the dedicated `Ad Videos` template family is seeded, Genviral can already help you explore UGC-style hooks, demos, and creator-led product angles from prompts and reference media.
## Is the AI ad generator free to try?
Yes. You can start free, test different ad concepts, and scale up once you find the creative directions worth pushing further.
## What platforms is this best for?
The strongest fit is short-form paid social and organic social creative: TikTok, Instagram, Facebook, Reels, and similar placements where fast-moving video concepts perform well.
## Do I need a product video already?
No. A strong product image, offer, and prompt can be enough to create the first ad draft. That is what makes the workflow useful for brands that do not have a fresh bank of edited video ready to go.
---
Canonical HTML: https://www.genviral.io/features/ai-content-studio/ai-ad-generator
# AI Brainrot Video Generator
Create viral brainrot videos with AI — gameplay backgrounds, auto-captions, AI voiceover, and scroll-stopping narration. Pick a template, customize, and generate TikTok-ready split-screen videos in seconds.
## Benefits
- One-Click Brainrot Videos: Pick a template, customize the script, and generate a full brainrot video with gameplay background, AI voiceover, and timed captions — all in one click.
- Gameplay Background Library: Choose from Subway Surfers, Minecraft Parkour, Temple Run, Mario Kart, slime, and soap satisfying clips — the proven backgrounds that keep viewers watching.
- AI Voiceover with Multiple Voices: Select from multiple AI voices with adjustable speed and stability. Deep and dramatic for horror, fast and punchy for facts, calm and authoritative for psychology.
- 17 Caption Presets: Hormozi-style bold highlights, word-by-word pop, cinematic movie captions, floating text — choose the caption style that matches your content.
- Ready in 2 Minutes: AI generates the voiceover, syncs word-level timestamps, and renders the final video with background and captions. From script to finished video in under 2 minutes.
- Post to TikTok, YouTube & Instagram: Generated videos are 9:16 vertical and optimized for TikTok, YouTube Shorts, and Instagram Reels. Schedule and post directly from Genviral.
- Pre-Built Viral Templates: Start from proven templates — dark psychology, scary stories, mind-blowing facts, conspiracy theories, motivational speeches, and more. Customize the script and make it yours.
- No Editing Skills Required: Skip CapCut, Premiere, and hours of manual editing. The AI handles voiceover, caption timing, background syncing, and rendering — you just write the script.
## How it works
- 1. Pick a template or write your script: Browse brainrot templates for instant inspiration — dark psychology, scary stories, mind-blowing facts — or write your own narration script from scratch.
- 2. Choose voice, gameplay & captions: Select an AI voice, pick a gameplay background (Subway Surfers, Minecraft, etc.), and choose your caption style from 17 presets.
- 3. Generate & share: Hit generate and get a finished brainrot video in under 2 minutes — with synced voiceover, timed captions, and looping gameplay. Download or post directly to social media.
## What is a brainrot video?
A brainrot video is a viral short-form video format that combines a narration (voiceover telling a story, facts, or commentary) with a gameplay background (usually Subway Surfers, Minecraft Parkour, or satisfying clips) and large animated captions. The dual-stimulus format holds attention because the gameplay occupies your visual attention while the narration engages your cognitive attention — making it nearly impossible to scroll away.
## Is the brainrot video generator free?
You can try the brainrot generator for free — sign up to generate your first videos. Each brainrot video costs 10 credits. Plans start at $29/month and include generous credit allowances for regular content creation.
## What gameplay backgrounds are available?
The brainrot generator includes Subway Surfers, Minecraft Parkour, Temple Run, Mario Kart, slime, and soap satisfying clips. All clips loop seamlessly to match any video length. You can also upload your own background video.
## How long does it take to generate a brainrot video?
Most brainrot videos generate in under 2 minutes. The AI converts your script to voiceover, extracts word-level timestamps for caption syncing, and renders the final video with your chosen gameplay background and caption style.
## Can I use my own script?
Yes. You can write any narration script from scratch or start from a template and customize it. The AI will generate voiceover audio from whatever script you provide — psychology facts, scary stories, motivational speeches, Reddit stories, or anything else.
## What caption styles are available?
17 caption presets are available — including Hormozi-style bold highlights, word-by-word pop, cinematic movie captions, Ali-style conversational, floating text, beat-synced reveals, and more. Each preset controls font, color, animation, and chunking behavior.
## Can I post brainrot videos directly to TikTok?
Yes. Genviral lets you schedule and post videos directly to TikTok, YouTube Shorts, Instagram Reels, Facebook, Pinterest, and LinkedIn — all from one dashboard. No downloading and re-uploading needed.
## What makes a good brainrot script?
The best brainrot scripts follow a formula: a strong hook in the first sentence (question, bold claim, or shocking fact), rapid information delivery with a new beat every 3-5 seconds, and an abrupt or mind-blowing ending. Keep scripts 30-60 seconds — long enough for a narrative arc, short enough for high completion rates.
## What AI voices are available?
Multiple AI voices with adjustable speed and stability settings. Choose deep dramatic voices for horror and suspense, fast energetic voices for facts and hype, or calm authoritative voices for psychology and education content.
## How is this different from CapCut or Premiere?
Traditional editors require you to record audio separately, manually sync captions word-by-word, find and import gameplay footage, and render everything yourself. Genviral's brainrot generator handles all of this automatically — you write the script, pick your settings, and get a finished video in 2 minutes. No editing skills needed.
## Can I make brainrot videos for my brand or product?
Yes. Brands like Duolingo, Nutter Butter, and Samsung have used brainrot-style content to reach younger audiences. Write a script about your product, niche, or industry and generate brainrot videos that feel native to TikTok and YouTube Shorts.
## What's the best brainrot video generator?
Genviral is the best brainrot video generator available — it combines AI voiceover, automatic word-level caption syncing, a curated gameplay library, 17 caption presets, and pre-built viral templates in one tool. Generate scroll-stopping brainrot videos in under 2 minutes with no editing required.
---
Canonical HTML: https://www.genviral.io/features/ai-content-studio/brainrot-generator
# 7 Best LinkedIn Schedulers in 2026 (Researched & Ranked)
- I reviewed official product pages, pricing pages, and help docs on **April 29, 2026** for AuthoredUp, Taplio, Buffer, SocialBee, Metricool, and LinkedIn's native scheduler before ranking this list.
- **AuthoredUp** is my #1 pick if you want a scheduler that is built only for LinkedIn. It stays focused on the real LinkedIn workflow: writing, formatting, previewing, scheduling, and analytics.
- [Genviral](https://www.genviral.io/linkedin-scheduler) ranks #2 because it is much stronger upstream in the workflow than most LinkedIn schedulers. If your real bottleneck is creating enough good LinkedIn content, especially visual posts, infographic-style assets, and carousels, that matters a lot.
- The rest of the list splits by buyer intent: **Taplio** for personal-brand growth, **Buffer** for simplicity, **SocialBee** for team workflow, **Metricool** for analytics value, and **LinkedIn native** as the free baseline.
- If your goal is not just scheduling but actually building demand from LinkedIn, pair this with our [LinkedIn Scheduler](https://www.genviral.io/linkedin-scheduler), [OpenClaw LinkedIn automation guide](https://www.genviral.io/blog/openclaw-linkedin), and [How to Make Money with LinkedIn](https://www.genviral.io/blog/how-to-make-money-with-linkedin).
Most "LinkedIn schedulers" are not really LinkedIn products.
They are broad social media suites that happen to support LinkedIn.
That is fine if all you need is a calendar and a publish button.
It is not fine if LinkedIn is a serious channel for your business, your personal brand, or your pipeline.
LinkedIn has its own rhythm. The posts that work are often longer, more structured, more readable, and more strategically packaged than what you would publish on most other networks. The workflow is also different. Formatting matters. Document posts matter. Carousels matter. Comments matter. And if you are posting consistently, analytics and reuse matter a lot too.
That is why the best LinkedIn scheduler is not always the biggest social media platform. Sometimes it is the one that understands LinkedIn best. Sometimes it is the one that helps you produce better content. Sometimes it is the one that keeps an agency or team workflow from turning into chaos.
For this guide, I reviewed the official pages and help docs of every tool below on **April 29, 2026**, then ranked them based on what actually matters on LinkedIn: LinkedIn-specific depth, scheduling workflow, formatting and content support, analytics, collaboration, and pricing.
---
## Quick Answer
If you want the short version:
- **Best overall LinkedIn-only scheduler:** [AuthoredUp](https://authoredup.com/)
- **Best AI-assisted LinkedIn scheduler:** [Genviral](https://www.genviral.io/linkedin-scheduler)
- **Best for personal-brand growth:** [Taplio](https://taplio.com/)
- **Best for simplicity:** [Buffer](https://buffer.com/linkedin)
- **Best free baseline:** [LinkedIn native scheduler](https://www.linkedin.com/help/linkedin/answer/a1347212/schedule-posts?lang=en)
Everything else depends on whether your bottleneck is creation, approvals, reporting, or just staying consistent.
---
## What Makes a Good LinkedIn Scheduler?
LinkedIn is one of the few major social platforms where the writing and packaging layer matters almost as much as the timing layer.
The best LinkedIn scheduler should help with:
- **Readable post formatting** so longer posts still feel easy to consume
- **Document, carousel, image, and video support** because LinkedIn is not just a text-post network anymore
- **Preview and editing workflow** so you can catch awkward formatting before it goes live
- **Analytics or post-level feedback** so you know what is actually working
- **Mentions, comments, and collaboration** if LinkedIn is part of a real team workflow
- **Creation support** because a lot of LinkedIn consistency problems are really content-production problems
If your content itself is still the hard part, the tool that helps you create posts can beat the tool with the nicest calendar.
---
## Quick Comparison
| Tool | Best For | LinkedIn-Specific Strength | Pricing Snapshot | Workflow Style |
|---|---|---|---|---|
| **AuthoredUp** | LinkedIn-only creators | Editor, formatting, calendar, analytics | **$19.95/mo** for **1 profile** | LinkedIn-only content studio |
| **Genviral** | AI-assisted creators & operators | AI visuals + scheduling + repurposing | **$29/mo** for **10 social accounts** | Create, schedule, repurpose |
| **Taplio** | Personal-brand growth | AI writing, analytics, viral-post discovery, mentions | Starts around **$39/mo** or **$32/mo** billed yearly | Growth engine |
| **Buffer** | Simplicity | Text, image, carousel, PDF, video, analytics | **Free** for **3 channels**, then **$5/mo per channel** | Minimalist scheduler |
| **SocialBee** | Teams and agencies | Personal + company pages, carousels, approvals, AI | **$29/mo** monthly or about **$24/mo** yearly | Workflow + recycling |
| **Metricool** | Analytics + value | Polls, documents, mentions, first comment, best times | From **$20/mo** for up to **5 brands** | Analytics-first planner |
| **LinkedIn native** | Free baseline | Built directly into LinkedIn | **Free** | Lightweight native scheduling |
---
## 1. AuthoredUp - Best Overall LinkedIn Scheduler
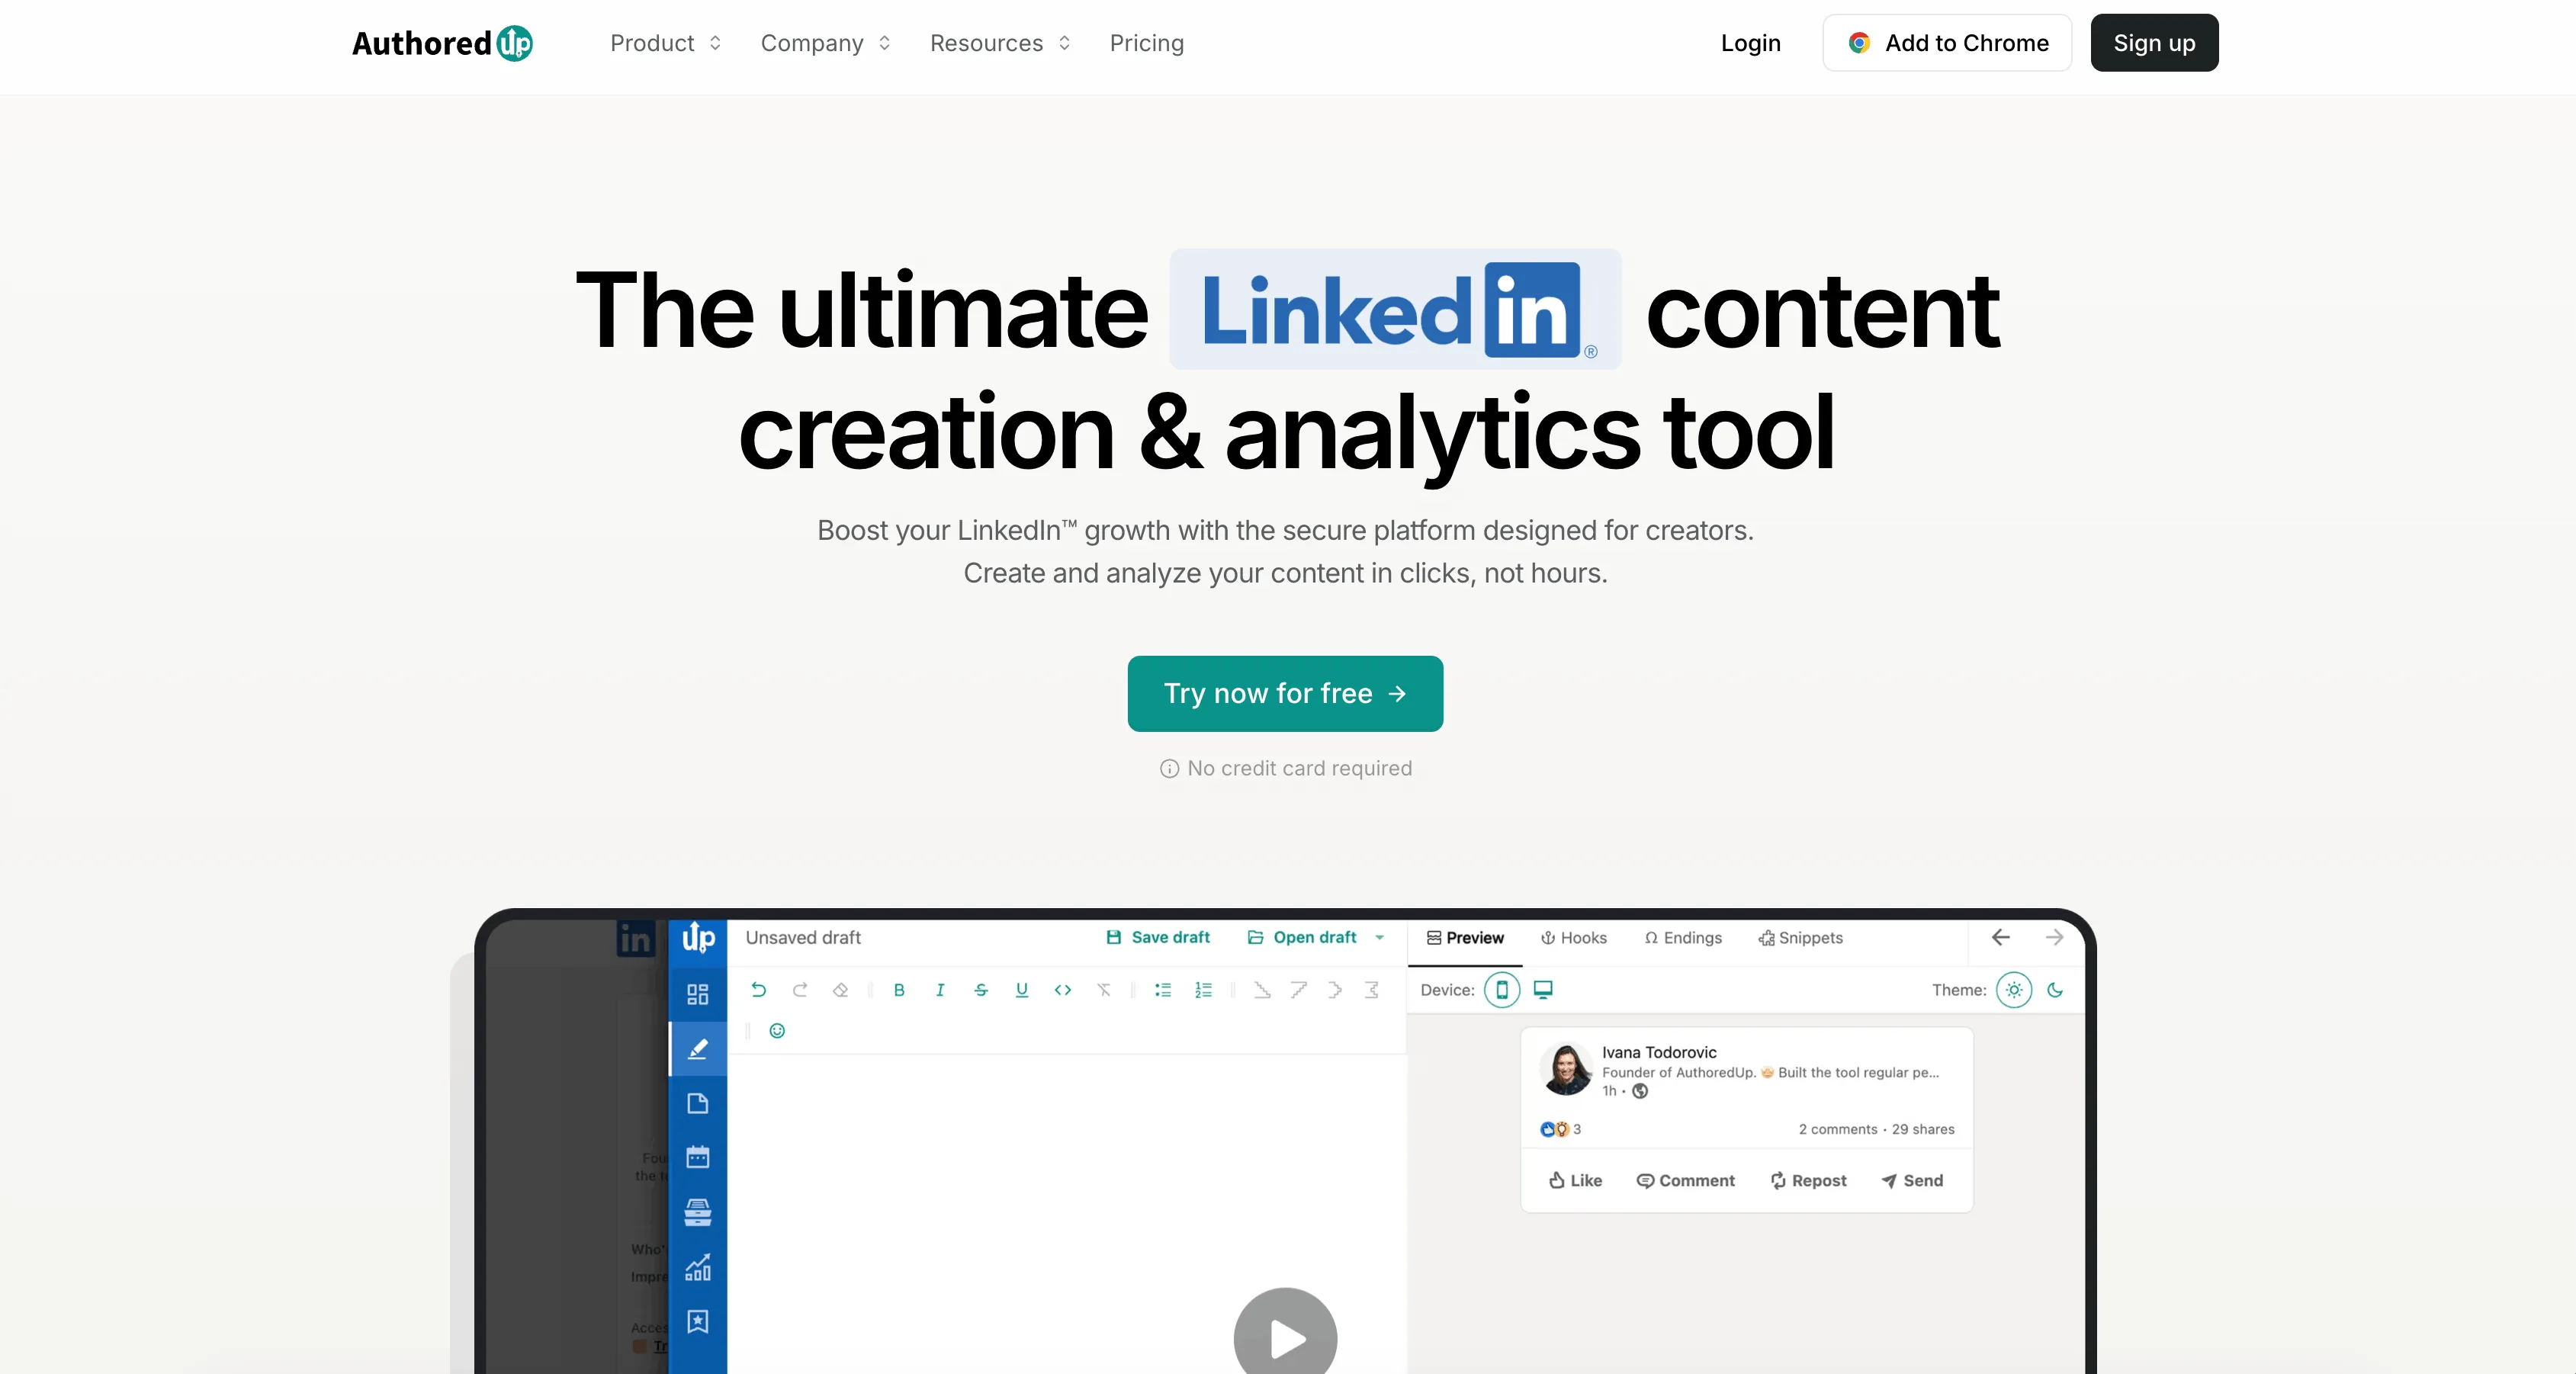
[AuthoredUp](https://authoredup.com/) is the best LinkedIn scheduler on this list if your entire world is LinkedIn.
That sounds obvious, but it matters. AuthoredUp is not trying to be an Instagram planner, a TikTok trend engine, or an all-purpose social media suite. Its product is centered around the LinkedIn content workflow itself: write, format, preview, save drafts, schedule, review analytics, reuse what worked, and keep the whole system tight.
That focus shows up everywhere. The editor is clearly built for LinkedIn readability. The product highlights formatting, hooks, previews, drafts, calendar, posts history, analytics, saved posts, and post reuse. It also stays unusually explicit about trust and safety, which matters in a category where some LinkedIn tools still feel sketchier than they should.
### Why I rank it first
- Built specifically for LinkedIn rather than treating LinkedIn as one channel among many
- Strong editor for formatting, previewing, and tightening posts before publishing
- Calendar, drafts, post history, and analytics all live in one LinkedIn-specific workflow
- Company pages are included in the product story, not treated as an edge case
- Pricing is straightforward for solo creators
The strongest case for AuthoredUp is simple: if your main job is publishing better content on LinkedIn, not running a six-network content machine, it feels more focused than the alternatives.
### Pricing
As of **April 29, 2026**, AuthoredUp's pricing page lists:
- **Individual:** **$19.95/month** for **1 profile**
- **Business:** **$14.95 per profile/month** with a **3-profile minimum**
That is a strong value for a LinkedIn-only product, especially if you care more about quality, formatting, and analytics than about broad multi-platform publishing.
### Best for
Founders, consultants, creators, and B2B operators who treat LinkedIn as a serious primary channel and want the sharpest LinkedIn-specific workflow.
### Weaknesses
- Narrow by design if you also need strong cross-platform scheduling
- Less compelling if your real pain is visual asset creation rather than writing and analytics
---
## 2. Genviral - Best for AI-Assisted LinkedIn Content and Infographics
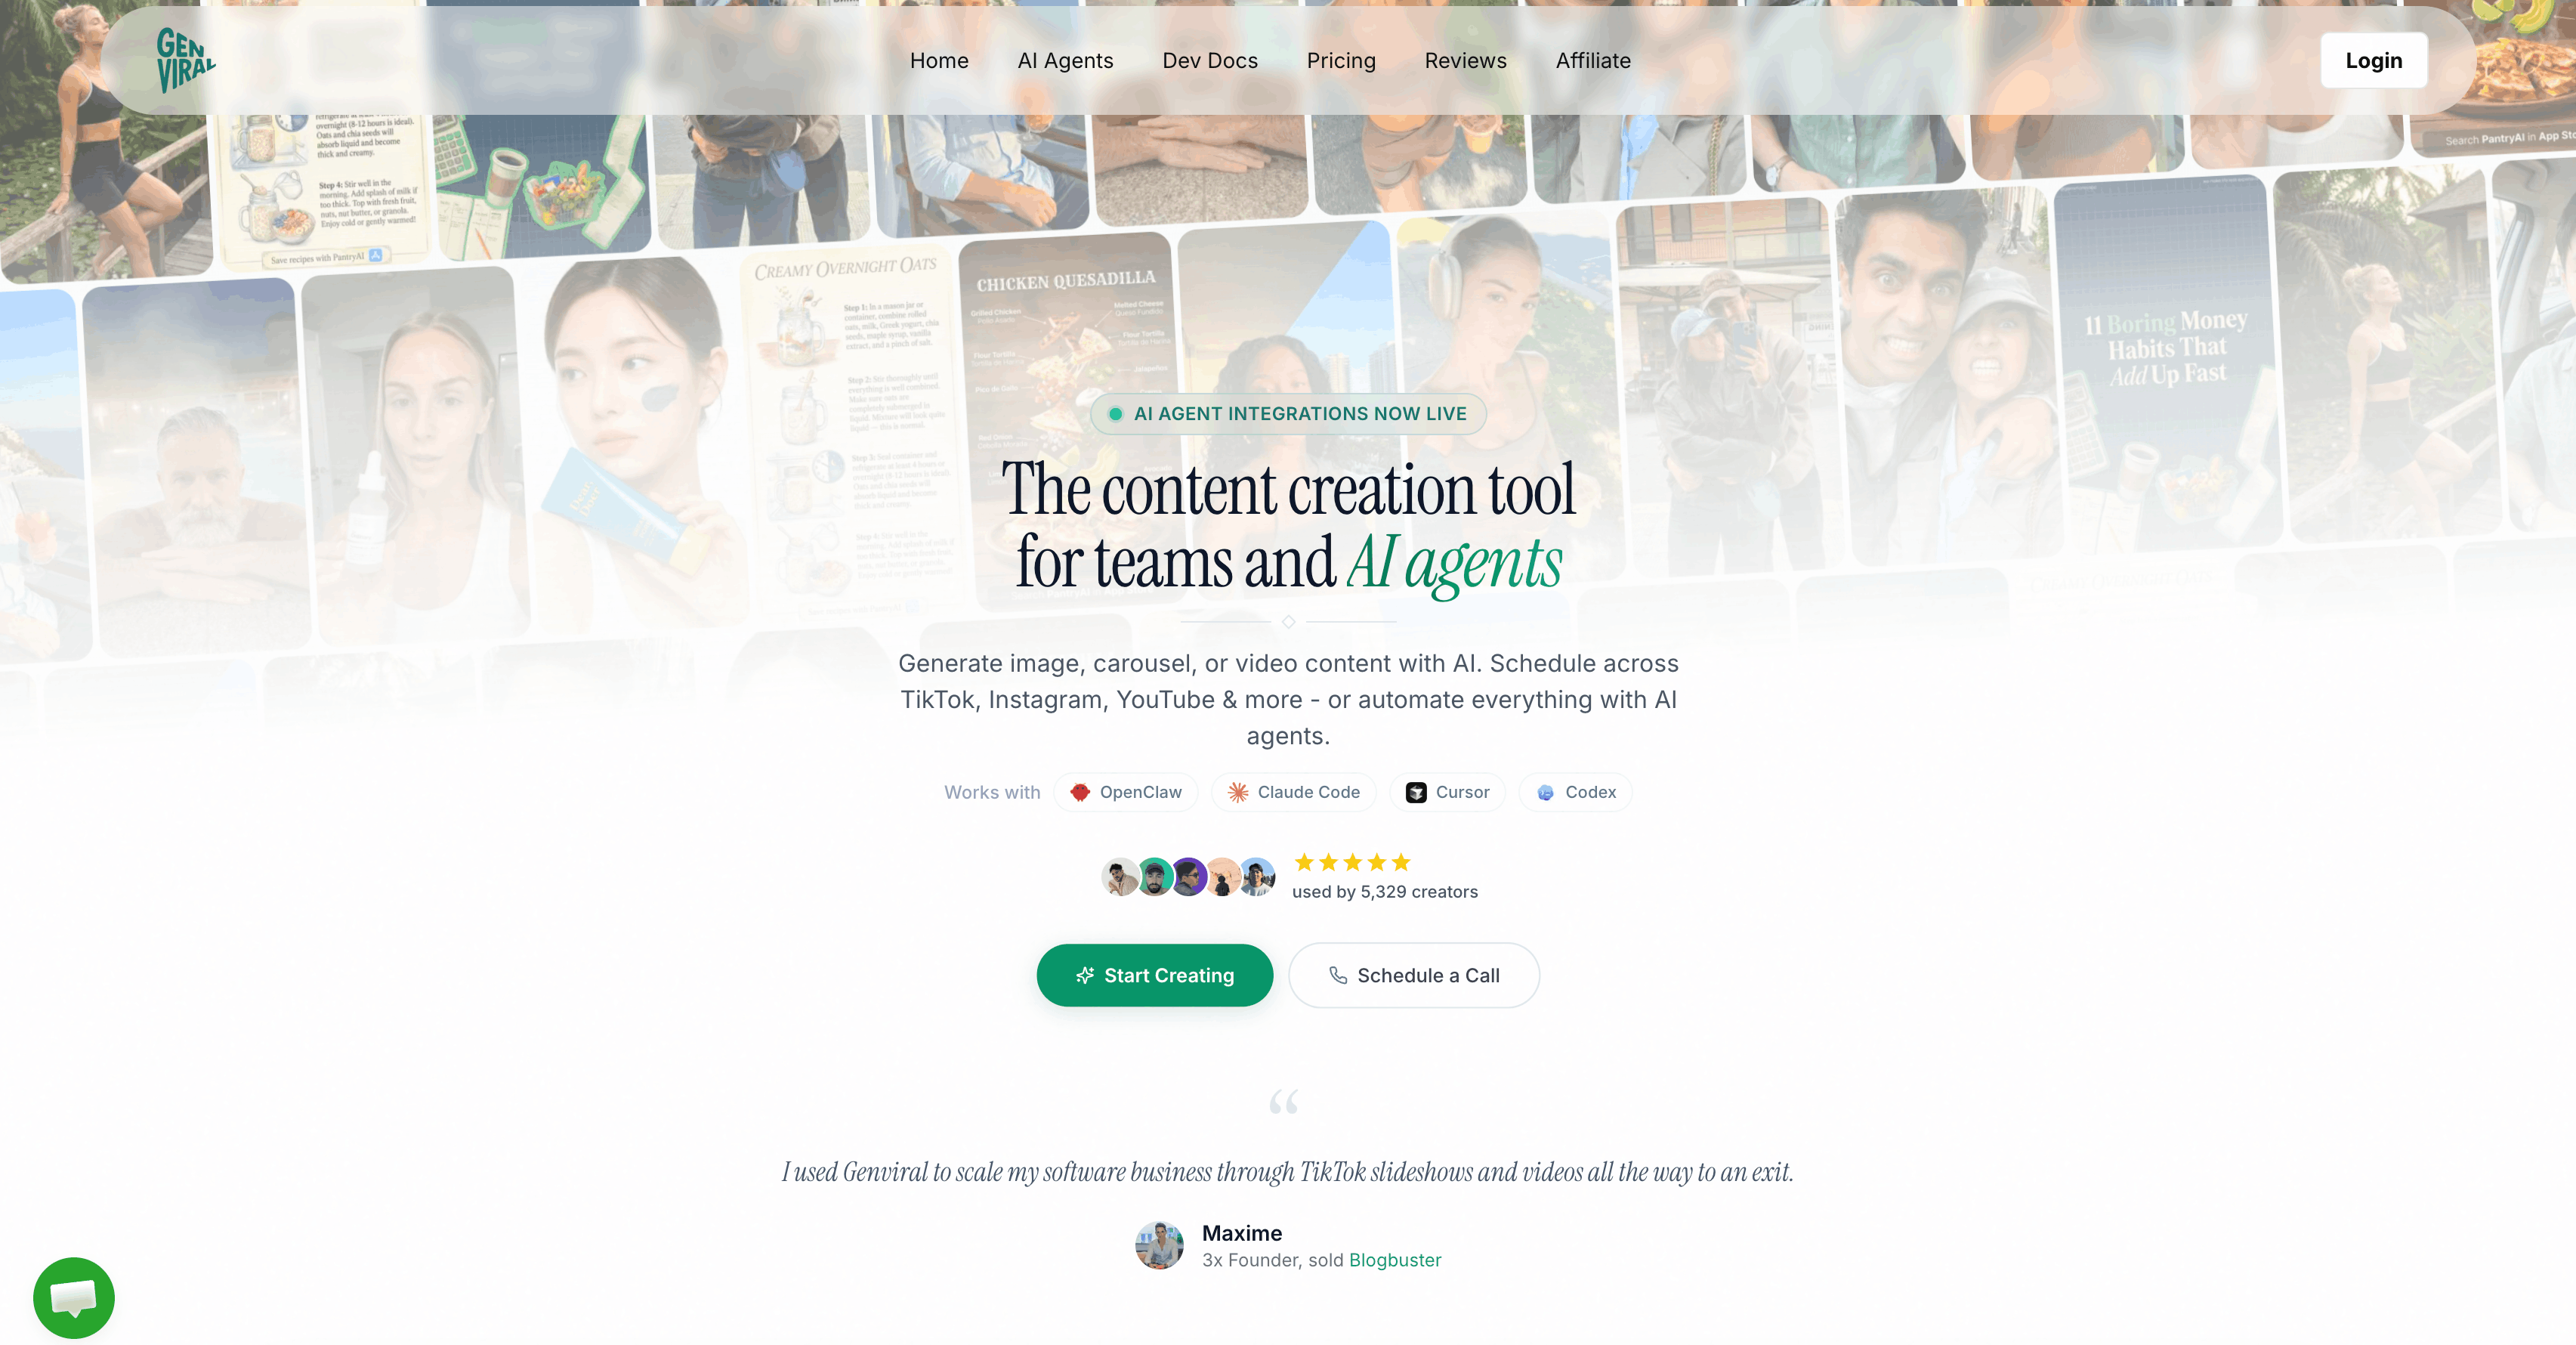
[Genviral](https://www.genviral.io/linkedin-scheduler) is the most interesting tool on this list if your problem is not "how do I click schedule?" but "how do I create enough good LinkedIn content to publish consistently?"
That is why I rank it second.
Most LinkedIn schedulers assume you already have the finished post. Genviral can sit much earlier in the workflow. You can generate visuals in AI Studio, turn ideas into carousel-style assets, create infographic-like posts, schedule them to LinkedIn, and repurpose the same content across other platforms from one system. If you publish educational visuals, thought-leadership carousels, or polished founder content, that is a very different value proposition from a normal scheduler.
It is also a better fit if LinkedIn is only one part of your content machine. You can create once, then adapt for LinkedIn, TikTok, Instagram, YouTube, Facebook, or Pinterest instead of rebuilding everything inside separate tools.
### Why Genviral ranks this high
- AI-assisted content creation is built into the same workflow as scheduling
- Strong fit for visual LinkedIn content such as carousels, documents, and infographic-style posts
- Cross-platform repurposing matters if your content starts on one channel and gets adapted to LinkedIn
- OpenClaw / API automation path exists if you want a more agentic workflow
- Creator pricing is unusually aggressive for the amount of workflow it replaces
I would not rank Genviral above AuthoredUp for pure LinkedIn specialization today. I do rank it above every broader scheduler below because the creation layer is real leverage on LinkedIn.
### Pricing
As of **April 29, 2026**, Genviral starts at **$29/month** and includes **10 social accounts** on the Creator plan.
That is one of the strongest pricing/value differences on this page. A lot of LinkedIn tools are either single-profile tools or channel-based tools. Genviral starts with much more room if your LinkedIn posting lives inside a broader content operation.
### Best for
Creators, founders, operators, and lean teams who want LinkedIn scheduling plus AI-generated content production from the same workflow, especially if visual thought leadership is part of the strategy.
### Weaknesses
- Current LinkedIn fit is strongest for personal-profile workflows rather than company-page-heavy teams
- If you only want a tight LinkedIn-only editor and analytics layer, AuthoredUp is the cleaner answer
If you want the automation angle, read [How to Automate LinkedIn Posting with OpenClaw and Genviral](https://www.genviral.io/blog/openclaw-linkedin).
---
## 3. Taplio - Best for Personal Brand Growth
[Taplio](https://taplio.com/) is probably the most recognizable LinkedIn growth suite after AuthoredUp, but it is optimized for a slightly different job.
Taplio is less "editor + scheduler only" and more "grow your personal brand on LinkedIn from one control panel." Their product leans into AI-assisted writing, post ideas, carousel creation, analytics, scheduling, mentions, smart replies, and even lead-generation features on higher plans.
That makes it very attractive for founders, consultants, sales-led creators, and anyone whose LinkedIn strategy is tightly tied to inbound demand.
### Why Taplio ranks here
- Strong LinkedIn-only positioning
- AI writing support plus a large post-idea library
- Carousel builder and post analytics are included early
- `@mentions` are supported directly from the editor
- Higher tiers extend into engagement and lead workflows
Taplio is excellent, but it feels more like a LinkedIn growth engine than a pure scheduler/editor. That is why I still put AuthoredUp ahead of it for this specific keyword.
### Pricing
As of **April 29, 2026**, Taplio's pricing page lists:
- **Starter:** around **$39/month**, or about **$32/month** billed yearly
- **Growth:** around **$69/month**, or about **$49/month** billed yearly
- **Pro:** around **$199/month**, or about **$149/month** billed yearly
So Taplio becomes expensive faster than AuthoredUp, but the extra growth and engagement tooling is the reason people buy it.
### Best for
Founders, creators, consultants, and sales-led personal brands trying to turn LinkedIn into a bigger growth channel.
### Weaknesses
- More expensive than it first appears once you want the stronger AI and engagement layers
- Less focused than AuthoredUp if your main need is simply writing, scheduling, and analyzing LinkedIn posts cleanly
---
## 4. Buffer - Best for Simplicity
[Buffer](https://buffer.com/linkedin) is still the easiest answer for people who do not want to overthink this category.
Its LinkedIn page is refreshingly direct: schedule your posts, analyze key metrics, save ideas, and cross-post when needed. Buffer also explicitly supports text, image, carousel, PDF, video, and link-preview posts on LinkedIn, which is a stronger LinkedIn feature set than many casual buyers assume.
If your main requirement is "give me something clean, reliable, and not bloated," Buffer is still very hard to beat.
### Why Buffer makes the list
- Very easy to learn and adopt
- Broad LinkedIn post-type support
- Free tier exists for testing
- Analytics are included without turning the product into a monster
- Good fit if LinkedIn is important but not the only network you manage
### Pricing
As of **April 29, 2026**, Buffer's pricing page lists:
- **Free:** up to **3 channels**
- **Essentials:** **$5/month per channel** billed yearly
- **Team:** **$10/month per channel** billed yearly
The free tier is a good starting point, but Buffer stops looking inexpensive once you scale. At **10 connected accounts**, its entry pricing works out to about **$50/month** on Essentials, which is notably higher than Genviral's **$29/month for 10 social accounts**.
### Best for
Solo creators, consultants, and small teams that want a simple LinkedIn scheduler without a lot of extra operational overhead.
### Weaknesses
- Less LinkedIn-specific than AuthoredUp or Taplio
- Less creation-first than Genviral
- Per-channel pricing can get annoying if you manage several accounts
---
## 5. SocialBee - Best for Teams and Approval Workflows
[SocialBee](https://socialbee.com/linkedin/) is a stronger LinkedIn option than many people realize.
Its LinkedIn page is clear about supported post types: text, single image, multiple images, videos, and document carousels built from PDF, DOC, DOCX, PPT, or PPTX files. It also leans into AI content generation, Canva integration, and broader workflow features like approvals and analytics.
That makes it a very practical middle ground between lightweight tools like Buffer and heavier enterprise-style suites.
### Why SocialBee ranks well
- Supports both personal profiles and company pages
- Good post-type coverage, including document carousels
- AI content generation is included in the workflow
- Approval and team features are stronger than most creator-first tools
- Pricing is still reasonable before agency scale
### Pricing
As of **April 29, 2026**, SocialBee's pricing page lists:
- **Bootstrap:** **$29/month** monthly or about **$24/month** billed yearly
- **Accelerate:** **$49/month** monthly or about **$41/month** billed yearly
- **Pro:** **$99/month** monthly or about **$83/month** billed yearly
That is a sensible structure if your LinkedIn workflow already involves more than one person or more than one approval step.
### Best for
Small teams, agencies, and service businesses that need LinkedIn scheduling plus approvals, reusable workflows, and multi-format support.
### Weaknesses
- Less elegant than AuthoredUp for pure LinkedIn writing
- Less upstream AI-creation depth than Genviral
- More workflow-heavy than a solo creator may want
---
## 6. Metricool - Best LinkedIn Analytics + Scheduling Value
[Metricool](https://metricool.com/schedule-linkedin-posts/) is one of the best options here if you care about a clean analytics-and-scheduling combo without paying a premium for a more elaborate suite.
Their LinkedIn help docs are unusually specific, which I like. Metricool supports posts and polls, up to 20 images, one video, documents, alt text, mentions, first comments, and an image-carousel workflow for LinkedIn. Their broader pricing page also makes it clear that LinkedIn connection is included on paid plans and that the entry tier covers more brands than most tools at the same price.
### Where Metricool stands out
- Best-times workflow and analytics are a core part of the product
- Mentions, first comments, alt text, and document support are explicitly documented
- Good fit for people who want measurable LinkedIn output rather than just a queue
- Pricing scales well for multi-brand users
### Pricing
As of **April 29, 2026**, Metricool's pricing page lists:
- **Starter:** from **$20/month** for up to **5 brands**
- **Starter:** up to **10 brands** for **$36/month**
- **Advanced:** from **$53/month**
That is strong value for agencies, consultants, and operators who want analytics with their scheduler, not as a separate purchase.
### Best for
Creators, consultants, and agencies that want LinkedIn scheduling with useful reporting, but do not want to buy an enterprise-grade tool.
### Weaknesses
- LinkedIn is only available on paid plans
- More utilitarian than inspiring
- Less specialized for LinkedIn writing than AuthoredUp or Taplio
---
## 7. LinkedIn Native Scheduler - Best Free Baseline
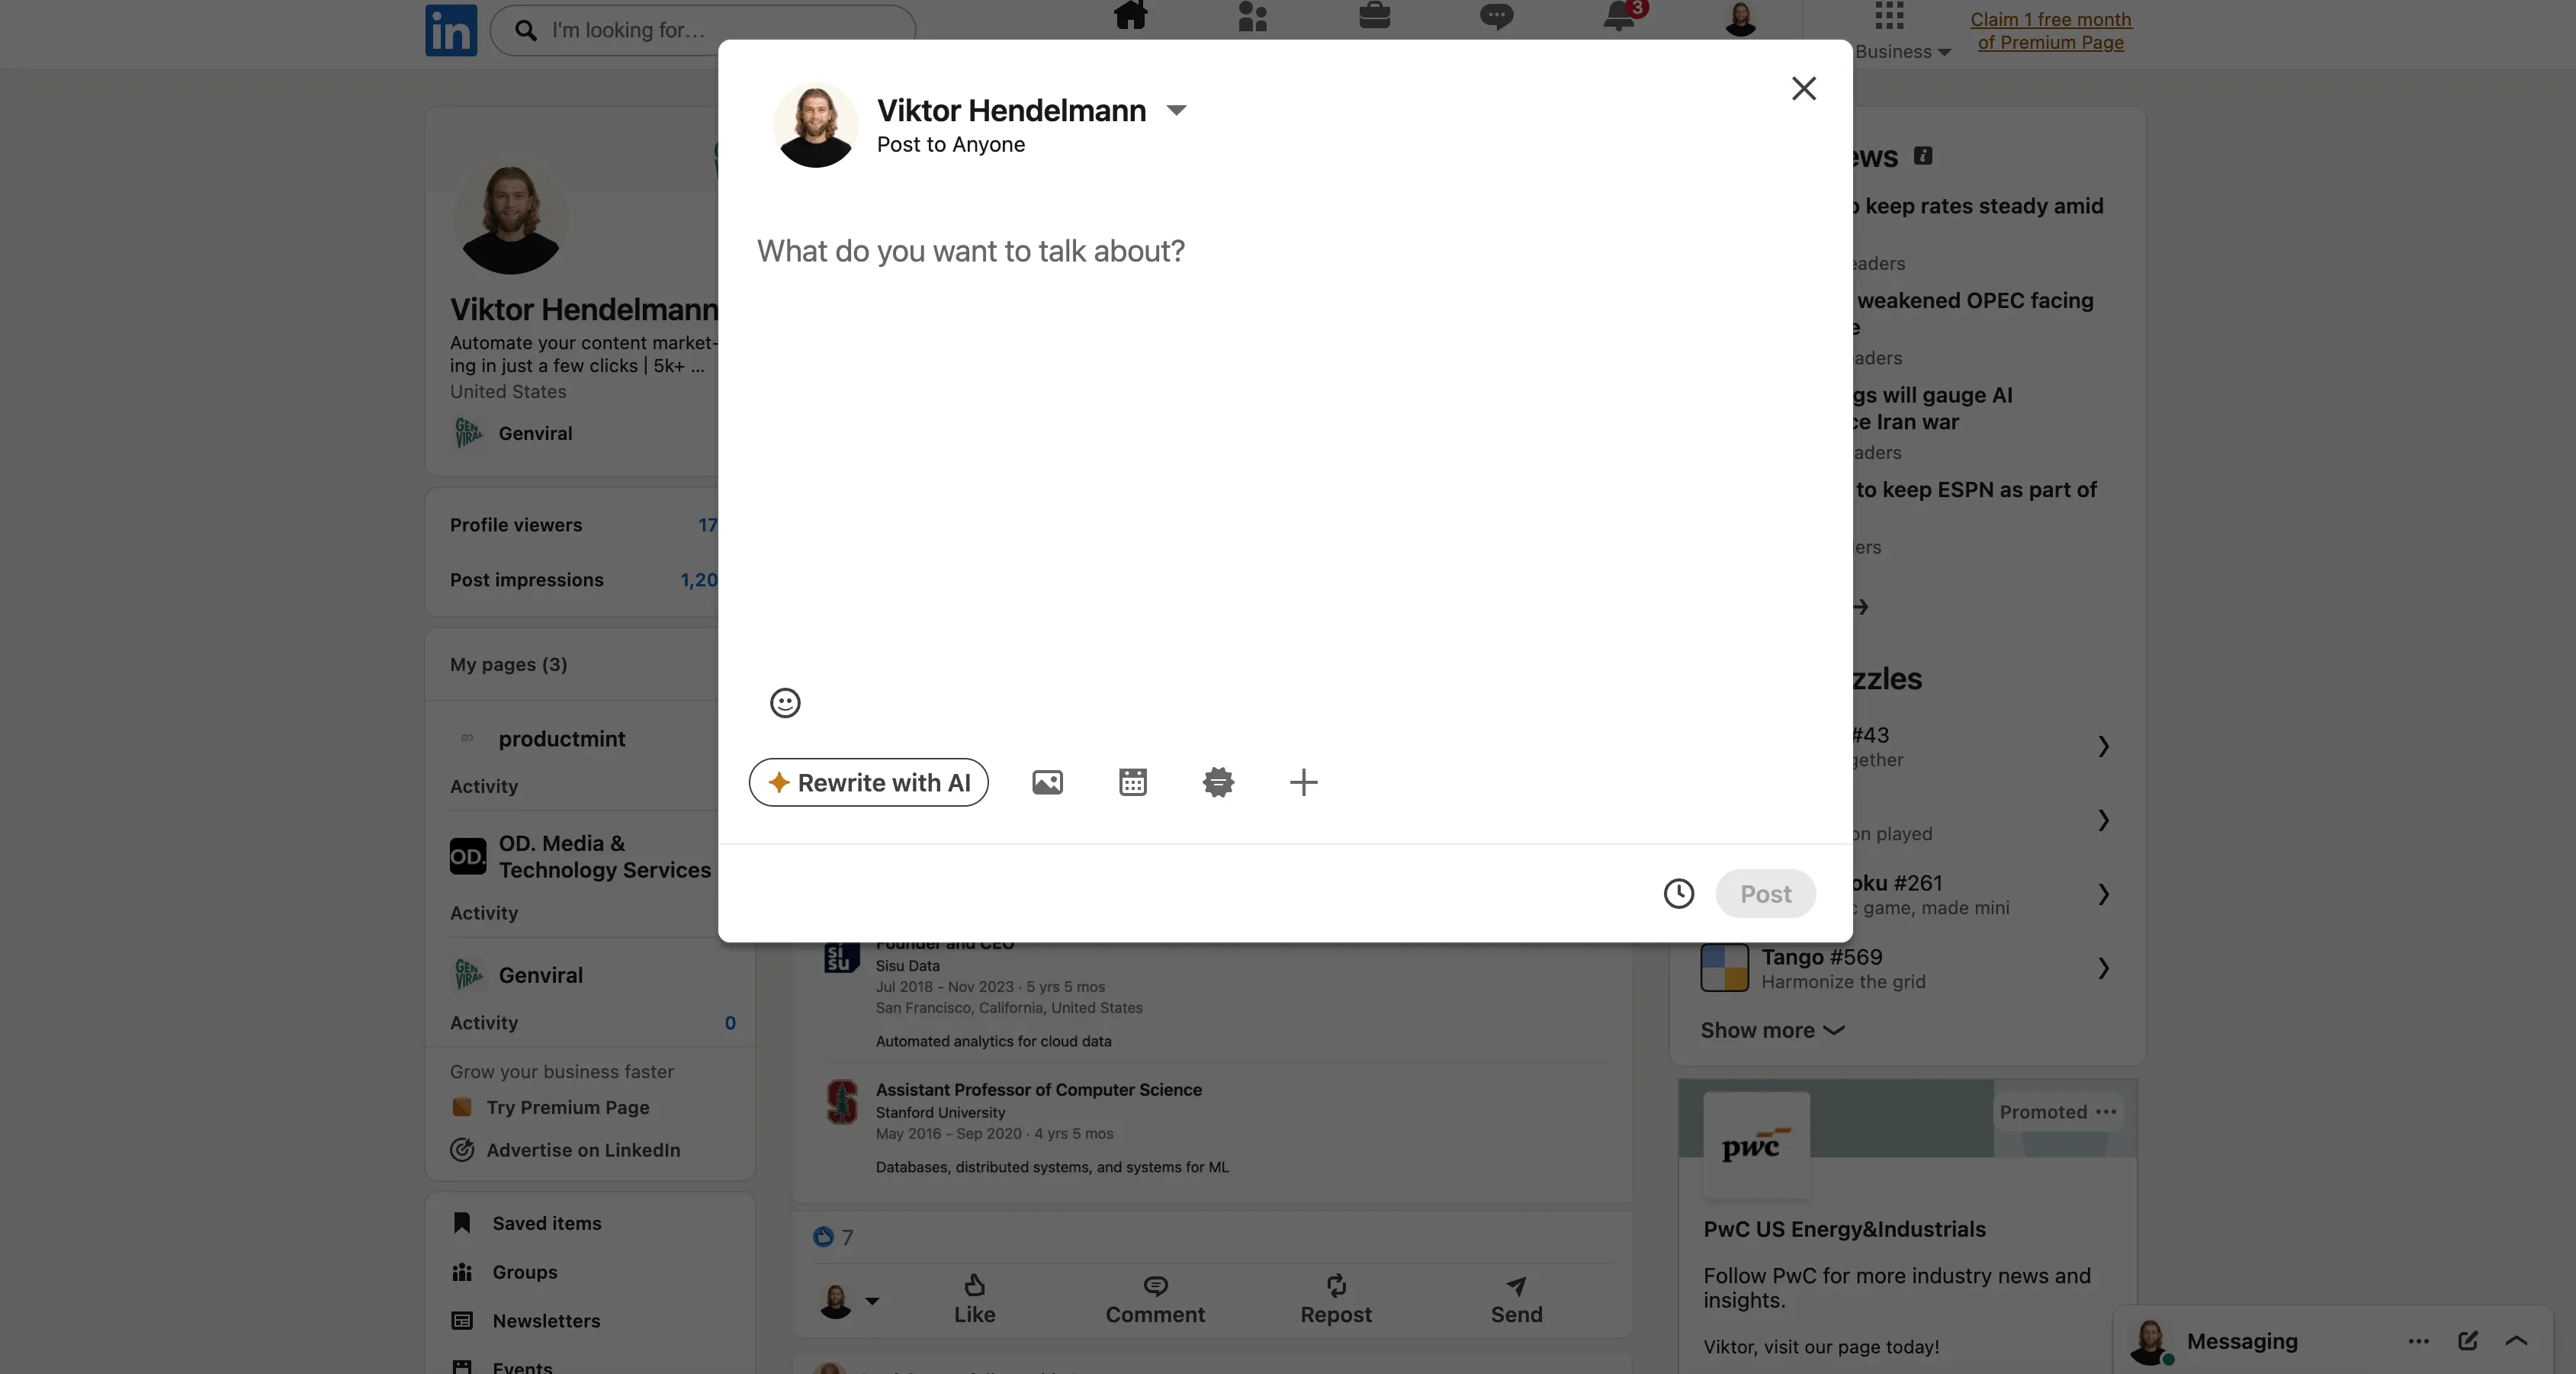
LinkedIn's own built-in scheduler deserves a place on this list because a lot of people do not actually need a third-party tool yet.
If you post occasionally, manage one profile or page, and mostly want to avoid manually hitting publish, the native scheduler is fine. It is simple, free, and already inside LinkedIn.
The tradeoff is that it is clearly a baseline tool, not a full workflow product.
### Why it makes the list
- Free
- Built directly into LinkedIn
- Good enough for light publishing
- No extra tool sprawl if your needs are minimal
### Pricing
- **Free**
### What to know before using it
According to LinkedIn's own help docs:
- Personal-profile posts can be scheduled **within 10 minutes to 3 months** from the current time
- Page posts can be scheduled **from 1 hour to 3 months** in advance
- Profile scheduling does not support **events, jobs, or services**
- Page scheduling does not support **events, multiple photos, reshares, polls, jobs, or service posts**
That is why the native scheduler is useful, but limited. It handles the timing problem. It does not really solve the broader workflow problem.
### Best for
People with one LinkedIn profile or page, no real collaboration needs, and no desire to pay for a scheduler yet.
### Weaknesses
- Short scheduling window compared with third-party tools
- Very limited workflow, analytics, and collaboration
- Quickly outgrown if LinkedIn becomes a real content channel
---
## How to Choose
The right LinkedIn scheduler depends on what you are actually trying to optimize.
**If you want the best LinkedIn-only tool:** pick [AuthoredUp](https://authoredup.com/).
**If you want AI-assisted content production plus scheduling:** pick [Genviral](https://www.genviral.io/linkedin-scheduler).
**If you are building a personal brand and want AI + growth tooling:** pick [Taplio](https://taplio.com/).
**If you want something simple and lightweight:** pick [Buffer](https://buffer.com/linkedin).
**If you need approvals, teams, and document carousels:** pick [SocialBee](https://socialbee.com/linkedin/).
**If analytics and reporting matter most:** pick [Metricool](https://metricool.com/schedule-linkedin-posts/).
**If you just need a free baseline:** start with [LinkedIn native scheduling](https://www.linkedin.com/help/linkedin/answer/a1347212/schedule-posts?lang=en).
---
## FAQ
### What is the best LinkedIn scheduler overall?
For a tool dedicated only to LinkedIn, **AuthoredUp** is the strongest overall choice right now. It is the most focused on the actual LinkedIn publishing workflow: writing, formatting, previewing, scheduling, and analyzing what worked.
### What is the best LinkedIn scheduler if I need help creating content too?
[Genviral](https://www.genviral.io/linkedin-scheduler) is the best fit if the hard part is producing enough good LinkedIn content, not just scheduling it. That is especially true if you publish visual thought leadership, carousels, documents, or infographic-style posts.
### Is there a free LinkedIn scheduler?
Yes. LinkedIn has a built-in native scheduler, and [Buffer](https://buffer.com/pricing) also offers a free tier for up to 3 channels.
### Which LinkedIn scheduler is best for company pages?
Among the tools on this list, **AuthoredUp**, **Buffer**, **SocialBee**, **Metricool**, LinkedIn's own page scheduler, and [Genviral](https://www.genviral.io/linkedin-scheduler) are all viable company-page options. Genviral now supports both personal LinkedIn profiles and LinkedIn public pages, so it fits better when you want one workflow for founder-led and brand-led posting together.
### Can I schedule LinkedIn document or carousel posts?
Yes, but support varies. **Buffer** explicitly supports LinkedIn carousel and PDF posts. **SocialBee** supports PDF, DOC, DOCX, PPT, and PPTX carousel-style posts. **Metricool** supports documents and an image-carousel workflow. If document posts are central to your strategy, check the exact supported formats before committing.
### Do I really need a third-party LinkedIn scheduler?
Not always. If you post occasionally, LinkedIn's native scheduler may be enough. If you care about better formatting, analytics, approvals, content reuse, AI creation, or multi-account workflow, third-party tools become much more worth it.
---
## Key Takeaways
- The best LinkedIn scheduler is not automatically the biggest social media suite.
- **AuthoredUp** wins if you want the strongest LinkedIn-only workflow.
- **Genviral** is the best AI-assisted alternative if content creation is the real bottleneck.
- **Taplio** is strongest when LinkedIn is part of a personal-brand and lead-gen engine.
- **Buffer**, **SocialBee**, and **Metricool** each make sense for very different reasons: simplicity, approvals, and analytics.
- LinkedIn's native scheduler is a good free baseline, but most serious LinkedIn operators outgrow it fast.
---
## Related Guides
- [How to Automate LinkedIn Posting with OpenClaw and Genviral](https://www.genviral.io/blog/openclaw-linkedin)
- [How to Make Money with LinkedIn](https://www.genviral.io/blog/how-to-make-money-with-linkedin)
- [How to Create Infographics with AI](https://www.genviral.io/blog/how-to-create-infographics-with-ai)
- [How to Use OpenClaw to Automate Your Social Media (Full Guide)](https://www.genviral.io/blog/how-to-use-openclaw)
- [10 Best Social Media APIs for Posting, Analytics & Automation in 2026](https://www.genviral.io/blog/best-social-media-apis)
---
Canonical HTML: https://www.genviral.io/blog/best-linkedin-scheduler
# 15 Best OpenClaw Skills for Social Media Marketing in 2026
- OpenClaw's skill ecosystem has 13,700+ community-built skills - finding the right ones for social media marketing takes hours
- We tested and ranked the **15 best skills** for scheduling, content creation, analytics, and platform-specific automation
- [Genviral's skill](https://www.genviral.io/openclaw) is the only one that covers the full loop: create AI content → schedule → post to 6 platforms → track analytics → improve
- Most skills on this list are free and open-source - you can install them in under a minute
OpenClaw changed the way marketers think about automation. Instead of switching between five different dashboards, you tell an AI agent what you want and it handles the rest - content creation, scheduling, posting, analytics, all from a single chat interface.
The problem? There are thousands of skills on [ClawHub](https://clawhub.ai/) and no one has time to test them all. So we did it for you. After running our own OpenClaw automation across multiple accounts, here are the 15 skills worth installing if you do any kind of social media marketing.
## How We Picked These
Every skill on this list meets three criteria:
1. **Actually works** - we installed it, ran it, and verified the output
2. **Relevant to social media marketing** - not developer tools or system utilities
3. **Actively maintained** - recent updates, responsive maintainers, real download numbers
We organized them into four categories: full-cycle automation, content creation, platform-specific tools, and analytics.
---
## Full-Cycle Automation
These skills handle multiple parts of the social media workflow - from content creation to posting to reporting.
### 1. Genviral
**What it does:** Full social media automation - generate AI slideshows and videos from text prompts or image packs, schedule and publish posts, track analytics, and run a self-improving content loop. 42+ commands across 8 categories.
**Platforms:** TikTok, Instagram, YouTube, Facebook, Pinterest, LinkedIn
**Why it's #1:** It's the only skill that covers the entire pipeline. Most skills handle one piece (posting OR analytics OR content). Genviral connects all of them. You can tell your agent "create a slideshow about morning routines, post it to TikTok and Instagram at 9am, and show me how it performs tomorrow" - and it actually does it.
The self-improving loop is the real differentiator. The agent tracks which hooks, formats, and posting times drive the most engagement, then adjusts future content automatically. We run 4-5 Pinterest accounts this way with zero daily input.
**See it in action:**
**Install:**
```bash
npx skills add fdarkaou/genviral-skill
```
**Key commands:**
| Category | Commands |
|----------|----------|
| AI Studio | `studio models`, `studio images generate`, `studio videos generate`, `studio videos status` |
| Slideshows | `slideshow generate`, `slideshow render`, `slideshow review`, `slideshow update` |
| Posts | `post create`, `post update`, `post list`, `post retry`, `post delete` |
| Analytics | `analytics summary`, `analytics posts`, `analytics target add` |
| Trends | `trends brief` - pull trending hashtags, sounds, and posting windows |
[API docs →](https://docs.genviral.io/api-reference/introduction) · [GitHub →](https://github.com/fdarkaou/genviral-skill)
---
### 2. Upload-Post
**What it does:** High-volume multi-platform posting via REST API. Handles videos, photos, carousels, text posts, LinkedIn documents, and scheduling. Includes FFmpeg processing for video format conversion.
**Platforms:** TikTok, Instagram, YouTube, X, LinkedIn, Facebook, Threads, Pinterest, Reddit, Bluesky (10 platforms)
**Why it's good:** Broadest platform coverage of any posting skill. If you need to hit Reddit, Bluesky, or Threads alongside the major platforms, this is your best option. The FFmpeg integration means you don't need to worry about aspect ratios or codec issues - it handles conversion automatically.
**Stats:** 6,100+ downloads, 29 stars on ClawHub
**Best for:** Teams posting the same content across 8+ platforms who need format consistency.
---
### 3. Post Bridge
**What it does:** Autonomous social media manager by Jack Friks. Free OpenClaw skill paired with a lightweight SaaS backend ($14/month).
**Platforms:** Instagram, TikTok, YouTube, X, LinkedIn, Facebook, Threads, Bluesky, Pinterest
**Why it's good:** Good entry point if you want a managed backend without building your own API integration. The agent handles scheduling, queue management, and basic analytics. Low barrier to start.
**Best for:** Solo creators who want a simple, affordable setup without managing API keys across multiple platforms.
---
### 4. Mixpost
**What it does:** Self-hosted, open-source social media management. All credentials and data stay on your own server - nothing passes through third parties.
**Platforms:** Facebook, X, Instagram, LinkedIn, Pinterest, TikTok, YouTube, Mastodon, Google Business Profile, Threads, Bluesky (11+ platforms)
**Why it's good:** If data privacy is non-negotiable, Mixpost is the answer. You host everything yourself, and the OpenClaw skill gives you a chat interface on top. Especially popular with agencies managing client accounts under strict data handling requirements.
**Stats:** 2,400+ downloads on ClawHub
**Best for:** Privacy-conscious teams and agencies with compliance requirements.
---
## Content Creation
These skills help you create better content - from making AI text sound human to generating videos and planning content calendars.
### 5. Humanizer
**What it does:** Rewrites AI-generated text to sound natural by stripping common AI writing patterns - em dashes, stock phrases, promotional inflation, overly formal transitions.
**Stats:** 33,900+ downloads, 297 stars - one of the most popular skills on ClawHub
**Why it's good:** Every marketer using AI for captions and copy hits the same problem: it sounds like AI. Humanizer fixes that. Run your captions through it before posting and they read like something a person actually wrote. Pairs well with any posting skill on this list.
**Best for:** Anyone generating AI captions, tweets, or blog excerpts for social media.
---
### 6. video-editor-ai
**What it does:** Edit videos through chat - cut, trim, merge clips, add background music with auto-ducking, auto-generate subtitles, color grade, and export in platform-specific formats (TikTok 9:16, YouTube 16:9, etc.).
**Why it's good:** Reported to reduce per-video editing time from 63 minutes to 8 minutes. Instead of opening a full NLE, you describe what you want: "trim the first 3 seconds, add subtitles, and export as a vertical TikTok video." The skill handles the rest using FFmpeg under the hood.
**Best for:** Creators who edit short-form video daily and want to skip the editing software.
---
### 7. ai-video-gen
**What it does:** End-to-end text-to-video generation using multiple AI models and FFmpeg for assembly.
**Why it's good:** If you need to go from a text prompt to a finished video without any manual steps, this skill handles the full pipeline - image generation, animation, audio, and final composition.
**Best for:** Batch video creation for content-heavy strategies (faceless accounts, educational content, product demos).
---
### 8. Social Content
**What it does:** Platform-specific content strategy and editorial calendar planning. Generates content ideas, organizes them into a publishing calendar, and suggests optimal formats for each platform.
**Stats:** 2,800+ downloads
**Why it's good:** Strategy before execution. Instead of just posting randomly, this skill helps you build a content plan first - then pair it with a posting skill like Genviral or Upload-Post to execute.
**Best for:** Marketers who want to plan before they post, especially when managing multiple brand accounts.
---
### 9. Brand Voice Profile
**What it does:** Define, store, and enforce a consistent brand voice across all content generated by your OpenClaw agent.
**Why it's good:** Consistency is what separates professional social media from amateur hour. Set up your brand's tone, vocabulary, and style rules once, and every piece of content the agent produces stays on-brand. Particularly useful when multiple team members use the same agent.
**Best for:** Brands and agencies managing a defined voice across channels.
---
### 10. Nano Banana Pro
**What it does:** AI image generation - up to 4K resolution - for social media graphics, thumbnails, and creative assets.
**Stats:** 35,200+ downloads, 158 stars
**Why it's good:** One of the highest-quality image generation skills available. When you need a custom thumbnail, story graphic, or Pinterest pin image and don't want to open a design tool, this handles it from a text prompt.
**Best for:** Visual-first platforms like Instagram and Pinterest where image quality directly impacts engagement.
---
## Platform-Specific Tools
These skills specialize in a single platform - useful when you need deeper functionality than a general posting skill provides.
### 11. Bird
**What it does:** Full X/Twitter CLI - read timelines, search posts, post tweets and replies, manage bookmarks and lists, upload media. Built by steipete (Peter Steinberger, the OpenClaw creator).
**Why it's good:** Built by the person who built OpenClaw. The deepest X integration available - goes well beyond posting to include timeline reading, search, bookmark management, and list curation. Useful for social listening as much as posting.
**Best for:** X/Twitter-heavy strategies where you need to monitor conversations, not just broadcast.
---
### 12. PostFast
**What it does:** Cross-platform scheduling with unusually deep platform-specific settings - TikTok duet/stitch toggles, YouTube playlist targeting, Pinterest board selection, etc.
**Platforms:** Instagram, TikTok, LinkedIn, X, Facebook, YouTube, Threads, Bluesky, Pinterest, Telegram (10 platforms)
**Stats:** 788 downloads on ClawHub
**Why it's good:** Most posting skills treat every platform the same. PostFast exposes the platform-specific controls that actually matter - like choosing which Pinterest board to pin to, or enabling stitching on TikTok. If you're optimizing per-platform, the granularity here is worth it.
**Best for:** Marketers who fine-tune settings per platform rather than cross-posting identical content.
---
## Analytics & Research
These skills help you measure performance, monitor ads, and source content ideas.
### 13. Metricool
**What it does:** Combined scheduling and analytics - check performance metrics alongside your posting calendar.
**Platforms:** LinkedIn, X, Bluesky, Threads, Instagram, Facebook
**Stats:** 2,100+ downloads on ClawHub
**Why it's good:** If you already use Metricool for analytics, this skill brings that data into your OpenClaw workflow. Ask "how did last week's posts perform?" and get a summary without leaving your terminal.
**Best for:** Existing Metricool users who want analytics integrated into their agent workflow.
---
### 14. Meta Ads Report
**What it does:** Monitor Facebook and Instagram ad campaign performance directly through your OpenClaw agent.
**Why it's good:** Paid social is part of most marketing stacks, but checking ad dashboards breaks your flow. This skill lets you ask "what's the ROAS on the spring campaign?" and get an answer in seconds.
**Best for:** Teams running Meta ad campaigns alongside organic social content.
---
### 15. YouTube Transcript
**What it does:** Pull full video transcripts from any YouTube video for content repurposing.
**Stats:** 29,500+ downloads
**Why it's good:** The fastest way to turn a long-form YouTube video into social media content. Pull the transcript, ask your agent to extract the best quotes and talking points, then create short-form clips or carousel posts. Content repurposing in two steps instead of twenty.
**Best for:** Repurposing long-form video content into short-form social posts.
---
## Honorable Mentions
A few more skills worth knowing about:
- **Listing Swarm** - Submit your product to 70+ directories automatically. Great for launch day visibility
- **Ad Ready Pro** - Generate professional ad images from product URLs. Useful for quick A/B test creatives
- **Cold Email** - Hyper-personalized cold email sequences. Not social media, but relevant for outreach-heavy marketing
- **Tavily Web Search** - Real-time web research for trending topics (98,300+ downloads). Useful for trend-jacking content strategies
---
## How to Install Any OpenClaw Skill
Every skill on this list follows the same installation pattern:
```bash
# Install from ClawHub (most skills)
npx skills add creator/skill-name
# Or clone from GitHub
git clone https://github.com/creator/skill-name ~/.openclaw/skills/skill-name
```
After installing, configure any required API keys in your environment variables and restart your OpenClaw agent.
---
## Our Setup
Full disclosure - I'm one of the founders of [Genviral](https://www.genviral.io), so naturally our skill is #1 on this list. But we didn't include it just because it's ours. We built it because nothing else covered the full loop - and after testing every social media skill on ClawHub, that's still the case.
Our daily stack looks like this:
1. **Genviral skill** - content creation, posting, and analytics across 6 platforms
2. **Humanizer** - polish AI-generated captions before posting
3. **YouTube Transcript** - repurpose video content into social posts
4. **Bird** - monitor X conversations and engage with relevant threads
That combination covers creation, publishing, engagement, and analytics with zero manual dashboard switching.
If you want to see it in action, check out our full OpenClaw setup guide or the Pinterest-specific walkthrough linked below.
---
## Related Guides
- [How to Use OpenClaw to Automate Your Social Media (Full Guide)](https://www.genviral.io/blog/how-to-use-openclaw)
- [How to Automate LinkedIn Posting with OpenClaw and Genviral](https://www.genviral.io/blog/openclaw-linkedin)
- [How to Automate Facebook Posting with OpenClaw and Genviral](https://www.genviral.io/blog/openclaw-facebook)
- [How to Automate TikTok Posting with OpenClaw and Genviral](https://www.genviral.io/blog/openclaw-tiktok)
- [How to Automate Pinterest Posting with OpenClaw and Genviral](https://www.genviral.io/blog/openclaw-pinterest)
- [How to Automate Instagram Posting with OpenClaw and Genviral](https://www.genviral.io/blog/openclaw-instagram)
- [How to Automate YouTube Posting with OpenClaw and Genviral](https://www.genviral.io/blog/openclaw-youtube)
- [AI Agents for Social Media](https://www.genviral.io/agents)
---
*Genviral is an AI-powered social media platform with a native OpenClaw skill for autonomous content creation, scheduling, and analytics across TikTok, Instagram, YouTube, Facebook, Pinterest, and LinkedIn.*
---
Canonical HTML: https://www.genviral.io/blog/best-openclaw-skills-social-media
# 9 Best Pinterest Schedulers in 2026 (Researched & Ranked)
- I reviewed official product pages and help docs on April 28, 2026 for Tailwind, Later, Buffer, Hootsuite, Metricool, SocialPilot, Planable, Loomly, and Pinterest's own business guidance before ranking this list.
- [Genviral](https://www.genviral.io/) is my #1 pick if Pinterest is a real growth channel for you, not just another box in a social calendar. It combines creation, scheduling, publishing, and automation in one workflow, which most schedulers do not.
- If you want the most Pinterest-native alternative, Tailwind is still the clearest second choice. If you want a generalist scheduler, Later, Metricool, and SocialPilot are the strongest options.
- Pinterest behaves more like a search engine than a social feed, so the best scheduler is the one that helps you publish consistently, manage boards cleanly, and create fresh pins at scale. If you need the strategy side too, read our [Pinterest posting strategy](https://www.genviral.io/blog/pinterest-posting-strategy) and [Pinterest tips and tricks](https://www.genviral.io/blog/pinterest-tips-and-tricks) guides after this.
Most Pinterest schedulers are just general social media tools with a Pinterest icon added somewhere in the composer.
That is fine if you post one pin every now and then.
It is not fine if Pinterest is actually driving traffic, sales, email signups, or long-tail search discovery for your business.
Pinterest is a different kind of channel. It behaves more like a visual search engine than a social feed. The winning workflow is less about "posting something today" and more about publishing fresh pins consistently, sending them to the right boards, and giving your best content enough repetitions to compound over time.
That is why the best Pinterest scheduler is not always the biggest social media suite. Sometimes it is the tool that understands Pinterest best. Sometimes it is the one that helps your team create more fresh pins. Sometimes it is the one that keeps approvals and board workflows from becoming a mess.
For this guide, I reviewed the official pages and help docs of every scheduler below on **April 28, 2026**, then ranked them based on what actually matters on Pinterest: scheduling depth, board workflow, analytics, collaboration, content creation, and how well each tool fits Pinterest specifically.
If you only post one pin once in a while, almost any scheduler will work. If Pinterest is part of your growth engine, the differences get obvious very quickly.
---
## Quick Answer
If you want the short version:
- **Best overall:** [Genviral](https://www.genviral.io/pinterest-scheduler)
- **Best Pinterest-native alternative:** [Tailwind](https://www.tailwindapp.com/)
- **Best for visual brands:** [Later](https://later.com/pinterest-scheduler)
- **Best lightweight analytics + scheduling combo:** [Metricool](https://metricool.com/pinterest-with-metricool/)
- **Best for agencies:** [SocialPilot](https://www.socialpilot.co/pinterest-scheduler)
Everything else depends on whether your bottleneck is approvals, simplicity, reporting, or content production.
---
## What Makes a Good Pinterest Scheduler?
Pinterest is not TikTok, and it is definitely not X. The best Pinterest scheduler needs to handle a different kind of workflow:
- **Board-level organization** so you can publish to the right board without chaos
- **Fresh-pin consistency** because Pinterest rewards steady output over random bursts
- **Visual planning** since titles, images, and links matter more than conversational posting
- **Traffic thinking** because the point is usually clicks, saves, and long-tail discovery
- **Creation support** because most people need help making more pin variations, not just scheduling finished assets
If you're still building the content side manually, start with [how to make a pin on Pinterest](https://www.genviral.io/blog/how-to-make-a-pin-on-pinterest). If you're already posting consistently and want to scale, this article is the right next step.
---
## Quick Comparison
| Tool | Best For | Pinterest-Specific Strength | Pricing Snapshot | Workflow Style |
|---|---|---|---|---|
| **Genviral** | Pinterest-first growth teams | AI pin creation + scheduling + automation | **$29/mo** for **10 social accounts** | Create, schedule, publish |
| **Tailwind** | Pinterest-native marketers | SmartSchedule, Pin spacing, browser extension | **$29.99/mo** monthly or **$17.99/mo** annual for **1 account** | Pinterest-first scheduling |
| **Later** | Visual brands | Pinterest partner, strong planner, analytics | **$18.75/mo** yearly for **1 Social Set** | Visual calendar |
| **Metricool** | Cross-platform creators | Planner, analytics, UTM-friendly workflows | **Free**, or **$22/mo** Starter for up to **10 brands** | Lightweight all-in-one |
| **SocialPilot** | Agencies on a budget | Bulk scheduling, multiple boards, approvals | **$20/mo** monthly or **$17/mo** annual for **5 accounts** | Agency scheduler |
| **Buffer** | Solo creators | Simple pin scheduling and easy publishing | **Free** for 3 channels, then **$5/mo per channel** | Minimalist scheduling |
| **Hootsuite** | Larger social teams | Approvals, analytics, multi-board publishing | Starts around **$99/mo** | Enterprise suite |
| **Planable** | Content approval teams | Collaboration and approvals around Pinterest posts | **Free** up to 50 posts, then **$39/workspace/mo** | Review-first workflow |
| **Loomly** | Small teams that want structure | Calendar, labels, approvals, asset editing | **$65/mo** monthly or **$49/mo** yearly | Team planning tool |
If pricing is your first filter, the biggest contrast on this page is still the one between **Genviral** and **Tailwind**: Genviral starts at **$29/month for 10 social accounts**, while Tailwind's comparable entry point is still essentially a **1-account** plan.
---
## 1. Genviral - Best Overall Pinterest Scheduler

[Genviral](https://www.genviral.io/pinterest-scheduler) is my pick for the best Pinterest scheduler because it does something most of the category still doesn’t: it treats Pinterest like a real growth channel instead of an afterthought. You can create pins, schedule them, publish them, organize account workflows, and automate production from the same place.
That matters more on Pinterest than people think. Pinterest rewards fresh content, consistent publishing, clean board targeting, and enough volume to let your winners compound over time. If you’re trying to do that seriously, a scheduler alone is not enough. You need a workflow. That’s where Genviral is strongest.
We use it ourselves on our app [PantryAI](https://www.pinterest.com/pantryai/) to promote it via Pinterest. That account has generated over **2 million views**, which is exactly why I care much more about fresh-pin throughput, board workflow, and automation than generic "social media management" checklists.
### Why I rank it first
- AI-assisted content creation for images and visual assets
- Pinterest post scheduling and publishing from one workflow
- Support for multiple accounts and board-based publishing
- Calendar-style planning instead of one-off manual posting
- OpenClaw/API-based automation if you want to publish at scale
The real edge is that Genviral can sit upstream of the scheduler. If you need more fresh pins, you do not have to leave the platform and stitch together Canva, a copy tool, a scheduler, and a spreadsheet. If you want the full automation angle, read [How to Automate Pinterest Posting with OpenClaw and Genviral](https://www.genviral.io/blog/openclaw-pinterest).
I know this product unusually well because I helped build it, which is exactly why I’m careful about how I rank it: if Genviral only did generic scheduling, I would not put it first. It wins because it solves the actual Pinterest workflow, not just the publishing step.
### Pricing
As of **April 28, 2026**, Genviral starts at **$29/month** and includes **10 social accounts** on the Creator plan. That pricing alone makes it unusually strong in this category because most of the Pinterest-focused alternatives either give you just one account, one workspace, or a very limited starter setup at a similar price.
### Best for
Creators, brands, and agencies using Pinterest for traffic, content distribution, or ecommerce discovery, especially if they want to create and schedule pins from one system.
### Weaknesses
- Deeper than a basic scheduler, so it is more than some casual users need
- Better fit for people who care about scale, workflow, or automation than for occasional manual posting
---
## 2. Tailwind - Best Pinterest-Native Alternative
[Tailwind](https://www.tailwindapp.com/) would be the clearest Pinterest-first tool on this list if Genviral didn’t exist. Tailwind has been around Pinterest forever, and it still feels like a product designed by people who actually understand how Pinterest users work.
Its official messaging is still centered around Pinterest: SmartSchedule, pin spacing, the browser extension, bulk pin creation from websites, and a lot of workflow support for keeping a Pinterest account active without overposting the same URL too aggressively.
### Why Tailwind ranks this high
- Long-standing Pinterest partner positioning
- SmartSchedule for spreading pins throughout the day
- Pin spacing rules for the same URL
- Browser extension for scheduling from around the web
- Strong Pinterest-specific creation and workflow language
The main reason I still put it behind Genviral is that Tailwind is excellent at Pinterest scheduling, but weaker if your workflow now includes AI content generation, multi-platform repurposing, or more modern automation paths. Tailwind still feels most natural for traditional Pinterest marketers.
### Pricing
As of **April 28, 2026**, Tailwind's official pricing page lists:
- **Pro:** **$29.99/month** billed monthly, or **$17.99/month** billed annually
- **Included:** **1 account**, 150 posts/month, 1 user
This is the cleanest place where Genviral's value shows up immediately: for basically the same monthly headline price, Genviral starts at **$29/month for 10 social accounts**, while Tailwind's Pro plan is still a **1-account** product.
### Best for
Pinterest-heavy creators, bloggers, and affiliate marketers who want a scheduler built with Pinterest habits in mind.
### Weaknesses
- More Pinterest-specialized than flexible
- Less compelling if your content operation spans multiple formats and automation layers
---
## 3. Later - Best for Visual Brands and Ecommerce Teams
[Later](https://later.com/pinterest-scheduler) is one of the cleaner choices if your brand already lives in a visual-content workflow. Their Pinterest scheduler is well presented, they position themselves as a Pinterest Marketing Partner, and they explicitly highlight video pin scheduling, visual planning, and analytics tied to traffic and growth.
Later makes the most sense if your team already likes a polished visual calendar and wants Pinterest to live beside Instagram, TikTok, and the rest of your organic stack without feeling bolted on.
### Why it works well for Pinterest
- Visual planner and calendar
- Auto-publishing for Pinterest photos and videos
- Mobile and desktop scheduling
- Pinterest analytics focused on clicks, traffic, and growth
- Strong visual brand fit
### Pricing
As of **April 28, 2026**, Later's pricing page lists:
- **Starter:** **$18.75/month** billed yearly
- **Included:** **1 Social Set** and **1 user**
Later defines a Social Set as one profile per supported network, so for Pinterest this is effectively one Pinterest slot inside a broader multi-platform bundle, not a Pinterest-first account model.
### Best for
DTC brands, creators, and ecommerce teams who care a lot about planning visuals and keeping multiple platforms organized in one interface.
### Weaknesses
- More of a polished scheduler than a true Pinterest growth engine
- Less Pinterest-native than Tailwind
- Less creation-and-automation depth than Genviral
---
## 4. Metricool - Best Lightweight Pinterest Analytics + Scheduling Combo

[Metricool](https://metricool.com/pinterest-with-metricool/) is a good middle-ground tool. It is not the most Pinterest-native option, and it is not the most advanced content system, but it is practical. You can schedule pins, analyze results, add UTM links, and keep Pinterest inside a broader cross-platform workflow without a lot of friction.
I especially like Metricool for people who want Pinterest to drive measurable traffic but do not need a heavyweight collaboration layer.
### Where Metricool stands out
- Pinterest scheduling plus analytics in one place
- UTM-friendly workflow for traffic tracking
- Canva and Adobe Express integration language on the official page
- Built-in editor for simple asset handling
- Strong fit for small teams and solo operators
### Pricing
As of **April 28, 2026**, Metricool's official pricing materials list:
- **Free:** 1 brand
- **Starter:** **$22/month** billed monthly or **$18/month** billed annually
- **Included:** up to **10 brands** on Starter
That makes Metricool one of the better value generalist options on this list, especially if you care more about analytics plus scheduling than about creation and automation.
### Best for
Creators, bloggers, and small businesses that want clean scheduling plus enough reporting to see whether Pinterest is actually doing anything.
### Weaknesses
- Less Pinterest-specialized than Tailwind
- Less workflow depth than Genviral, Hootsuite, or Planable
- More functional than inspiring
---
## 5. SocialPilot - Best Value for Agencies
[SocialPilot](https://www.socialpilot.co/pinterest-scheduler) is probably the best fit on this list for agencies that want Pinterest support without paying enterprise-suite money. Their Pinterest page leans into exactly the right things for that audience: publishing to multiple boards, bulk scheduling, approvals, AI-assisted timing, client sharing, and collaboration.
It is not the fanciest tool here, but it is easy to see why agencies buy it.
### Why agencies like it
- Publish to multiple boards inside one account
- Bulk scheduling up to large volumes
- Approval workflows and collaboration
- AI-suggested time slots
- Built-in image editor and alt-text support
### Pricing
As of **April 28, 2026**, SocialPilot's official pricing page lists:
- **Essentials:** **$20/month** billed monthly or **$17/month** billed annually for **5 social accounts**
- **Standard:** **$40/month** billed monthly or **$34/month** billed annually for **10 social accounts**
That is solid agency math, especially compared with tools that charge per seat first and make account growth expensive.
### Best for
Agencies and service businesses managing Pinterest alongside other client channels who want a sensible mix of features and cost control.
### Weaknesses
- More of an agency control panel than a Pinterest growth product
- Not as Pinterest-native as Tailwind
- Not as creation-first as Genviral
---
## 6. Buffer - Best for Simplicity

[Buffer](https://buffer.com/pinterest/) remains the easiest answer for someone who wants a Pinterest scheduler without a learning curve. If your biggest priority is "let me schedule pins quickly and keep the queue moving," Buffer is still very good.
Their Pinterest positioning is simple on purpose: schedule photo and video pins, crosspost when needed, keep ideas organized, and use light analytics. That is enough for a lot of people.
### Why Buffer makes the list
- Very clean and easy UI
- Fast onboarding
- Straightforward queue-based publishing
- Light analytics
- Good for people who hate bloated software
### Pricing
As of **April 28, 2026**, Buffer's official pricing page lists:
- **Free:** up to **3 channels**
- **Essentials:** **$5/month per channel** billed yearly
- **Team:** **$10/month per channel** billed yearly
Buffer looks cheap at first, but its economics change fast once you connect more than a few channels or accounts because the pricing is channel-based rather than workspace-style.
### Best for
Solo creators, small businesses, or anyone who wants the least complicated path to consistent Pinterest publishing.
### Weaknesses
- Minimal Pinterest depth
- Not built for board-heavy, approval-heavy, or automation-heavy workflows
- Better at "posting consistently" than "winning Pinterest strategically"
If you go this route, pair it with a strong strategy. Our [Pinterest tips and tricks](https://www.genviral.io/blog/pinterest-tips-and-tricks) guide will matter more than the tool itself.
---
## 7. Hootsuite - Best for Bigger Teams That Need Process
[Hootsuite](https://www.hootsuite.com/pinterest) is still the enterprise answer when your team cares about governance, approvals, unified planning, and reporting across a lot of channels. Their Pinterest page emphasizes publishing to multiple accounts or boards, calendar planning, approvals, and AI-assisted brainstorming.
That is all useful. It is also more than many Pinterest-first businesses actually need.
### Why Hootsuite ranks here
- Multi-board and multi-account publishing
- Approval workflows
- Calendar-based planning
- Analytics and broader reporting stack
- Strong fit for centralized social teams
### Pricing
As of **April 28, 2026**, Hootsuite's own current plan pages emphasize the feature differences between Standard and Advanced, while official Hootsuite pricing/comparison materials still frame the product as starting around **$99/month** with higher plans above that.
The important practical takeaway is that Hootsuite sits firmly in the premium generalist bucket, not the value bucket.
### Best for
Larger brands and teams already running a broad social stack who want Pinterest managed inside the same operating system.
### Weaknesses
- Often overkill for Pinterest-first users
- Enterprise/generalist feel
- You pay for a lot of cross-platform structure, not just Pinterest performance
---
## 8. Planable - Best for Approval Workflows
[Planable](https://planable.io/pinterest/) is not the most Pinterest-native tool, but it is one of the strongest if the actual bottleneck in your workflow is review and approval. Their Pinterest positioning is all about planning, creating, reviewing, approving, and scheduling inside a collaborative workspace.
That makes it more useful for marketing teams than for solo creators.
### Why Planable deserves a spot
- Strong visual planning
- Feedback directly next to the post
- Approval workflows are a core part of the product
- Media library and editing support
- Good board selection and scheduling support for Pinterest business pages
### Pricing
As of **April 28, 2026**, Planable's pricing materials list:
- **Free:** up to **50 total posts**
- **Basic:** **$39/workspace/month**
- **Pro:** **$59/workspace/month**
Planable is priced more like a collaboration product than a scheduler, which makes sense given where it is strongest.
### Best for
Agencies, in-house content teams, and anyone whose problem is content review, not content generation.
### Weaknesses
- More of a collaboration layer than a Pinterest growth layer
- Less useful if you work alone
- Less Pinterest-specific than Tailwind
If your main headache is getting posts approved, Planable can absolutely beat more "powerful" tools in day-to-day usefulness.
---
## 9. Loomly - Best for Small Teams That Want Structure
[Loomly](https://www.loomly.com/integrations/pinterest) is a solid option for smaller teams that want something more structured than Buffer but less enterprise-heavy than Hootsuite or Sprout-style tools. Their Pinterest messaging is centered on auto-posting image and video pins, content calendars, labels, approvals, and an editing workflow.
I would not call Loomly the sharpest Pinterest specialist, but I would call it dependable and easy to understand.
### Why it rounds out the list
- Auto-post image and video pins
- Calendar planning and previews
- Labels and campaign organization
- Approval workflows for small teams
- Built-in editing and asset support
### Pricing
As of **April 28, 2026**, Loomly's official pricing page lists:
- **Starter:** **$65/month** billed monthly or **$49/month** billed yearly
- **Included:** **12 social accounts** and **3 users**
That makes Loomly more expensive than the lightweight tools, but still easier to justify than a full enterprise suite if your team mostly wants structure and approvals.
### Best for
Small marketing teams, consultants, and agencies that want organized workflows without jumping to a bigger enterprise platform.
### Weaknesses
- Less Pinterest-native than Tailwind
- Less powerful for automation than Genviral
- Less minimalist than Buffer without matching Hootsuite's enterprise breadth
---
## My Honest Ranking
If I had to simplify this entire article into one decision tree, it would be this:
- Choose **Genviral** if you want Pinterest content creation, scheduling, publishing, and automation in one place.
- Choose **Tailwind** if you want the most Pinterest-native alternative.
- Choose **Later** if your team is visual-first and multi-platform.
- Choose **Metricool** if you want practical scheduling plus analytics without a lot of complexity.
- Choose **SocialPilot** if you run Pinterest for clients and need bulk workflows.
- Choose **Buffer** if you want the simplest possible scheduler.
- Choose **Hootsuite**, **Planable**, or **Loomly** if process, approvals, and team structure matter more than Pinterest-native depth.
And if your Pinterest strategy itself still feels messy, fix that before obsessing over tools. Start with:
- [Pinterest Posting Strategy 2026: How Often Should You Post?](https://www.genviral.io/blog/pinterest-posting-strategy)
- [Pinterest Tips and Tricks 2026](https://www.genviral.io/blog/pinterest-tips-and-tricks)
- [How to Make a Pin on Pinterest](https://www.genviral.io/blog/how-to-make-a-pin-on-pinterest)
- [How to Find Group Boards on Pinterest](https://www.genviral.io/blog/how-to-find-group-boards-on-pinterest)
- [How to Make a Board on Pinterest Private](https://www.genviral.io/blog/how-to-make-a-board-on-pinterest-private)
- [How to Merge Pinterest Boards](https://www.genviral.io/blog/how-to-merge-pinterest-boards)
- [How to Make Money with Pinterest](https://www.genviral.io/blog/how-to-make-money-with-pinterest)
---
## Final Verdict
The best Pinterest scheduler in 2026 is the one that matches how serious you are about Pinterest.
If Pinterest is just one more place you repost content, Buffer, Later, or Metricool will probably be enough. If Pinterest is a real acquisition channel and you need more output, better workflows, or automation, [Genviral's Pinterest Scheduler](https://www.genviral.io/pinterest-scheduler) is the strongest option on the market right now.
That is the honest version.
---
Canonical HTML: https://www.genviral.io/blog/best-pinterest-scheduler
# 10 Best Social Media APIs for Posting & Automation
- Unified social media APIs let you post, schedule, and pull analytics across every major platform through a single integration - eliminating the need to maintain six or more platform-specific SDKs, OAuth flows, and approval processes.
- We tested 10 APIs across five criteria: platform coverage, posting capabilities, analytics depth, developer experience, and pricing transparency.
- [Genviral](https://www.genviral.io/agents) is the only API that covers the full pipeline - AI image/video/slideshow generation, cross-platform scheduling, analytics (TikTok, Instagram, YouTube), TikTok trend briefs, and video Bulk Creation - from one REST API plus a 47-command [OpenClaw skill](https://www.genviral.io/openclaw).
- Pricing ranges from free tiers (Upload-Post, SociaVault, Buffer) to usage-based models ($0.01/post on Outstand) to entry-level paid plans (Genviral from $29/mo with API access included) up to enterprise ($199+/seat/month for Hootsuite, $333/month for Socialinsider Advanced).
- If you are building AI agents, creator tooling, or a SaaS product that needs to create AND distribute content, Genviral is the only option on this list that covers the full workflow natively.
If you have ever tried to integrate with TikTok, Instagram, and LinkedIn all at once, you already know the pain. Every platform has its own OAuth flow, its own rate limits, its own content format requirements, and its own developer-program approval process that can drag on for weeks or months. Facebook and Instagram require a video screencast demo to pass app review. TikTok uploads are async and require webhook callbacks and domain verification. LinkedIn's docs still mix v1 and v2 endpoints with confusing scope approval. X/Twitter moved to paid tiers that can reach $42,000/month. Building and maintaining direct integrations across six or more platforms is a full-time engineering job.
That is why **unified social media APIs** exist. Instead of juggling half a dozen platform-specific integrations and dealing with ongoing breakage every time a platform updates its authentication flow or deprecates an endpoint, you use one API to post, schedule, and pull analytics across every major social network.
In this guide, we tested and compared 10 of the best social media APIs available in 2026 - from all-in-one content creation platforms with built-in APIs, to developer-focused posting middleware, to pure analytics APIs that only read data. Whether you are building a SaaS product, running an agency, automating content with AI agents, or feeding social data into an analytics dashboard, there is an API on this list that fits.
---
## What Is a Social Media API?
A **social media API** is a programmatic interface that lets your application interact with social media platforms without a human logging into a dashboard. With an API, your code can:
- Publish posts (text, images, videos, carousels, slideshows, reels, stories).
- Schedule content for future publish times across timezones.
- Retrieve engagement metrics (views, likes, comments, shares, saves, follower growth).
- Manage connected accounts (OAuth tokens, refresh cycles, permissions).
- Listen for webhooks (new comments, post status changes, mention alerts).
- Create, update, and delete content programmatically.
There are two broad categories of social media APIs:
1. **Native platform APIs** - direct integrations with Facebook Graph, TikTok Developers, LinkedIn API, YouTube Data API, Instagram Graph, Pinterest API, and X/Twitter API. These are free or platform-priced, but each has its own auth, schema, and approval process.
2. **Unified / aggregator APIs** - third-party services that wrap all native APIs behind a single consistent interface. You integrate once and the provider handles OAuth flows, schema normalization, rate limiting, and platform-specific quirks.
The 10 APIs below are all unified or aggregator APIs. We also include a reality-check table at the bottom for teams considering going direct to platform.
---
## How We Evaluated
We assessed each API across five criteria:
- **Platform coverage** - How many networks are supported, and which ones? Does the API cover mainstream (TikTok, Instagram, YouTube, Facebook, LinkedIn, X) plus emerging networks (Bluesky, Threads, Mastodon, Reddit, Telegram, Discord)?
- **Posting capabilities** - Can you schedule, publish immediately, post videos, images, carousels, slideshows, stories, and reels? Can you handle multi-media uploads, auto-format adaptation, and draft management?
- **Analytics** - Does the API return engagement metrics, post-level data, account-level insights, competitor data, and historical snapshots? How deep is the data?
- **Developer experience** - Quality of docs, SDKs for popular languages, consistency of response envelopes, idempotency, webhook reliability, and OAuth handling.
- **Pricing transparency** - Is pricing predictable? Does the cost scale reasonably for indie developers, startups, agencies, and enterprises?
We also gave credit for unique capabilities: AI content generation, trend intelligence, workspace isolation for agencies, native AI-agent compatibility (MCP, OpenClaw skills), and multi-region hosting.
---
## Quick Comparison
| API | Platforms | Best For | Posting | Analytics | AI Content | Starting Price |
|---|---|---|---|---|---|---|
| **Genviral** | 6 | All-in-one: create + post + analyze | Yes | Yes (3 platforms) | Yes | $29/mo |
| **Ayrshare** | 13+ | Platform breadth | Yes | Yes | Basic | $24.99/mo |
| **Outstand** | 10+ | Usage-based pricing | Yes | Yes | No | $5/mo + $0.01/post |
| **Upload-Post** | 11 | Budget-friendly posting | Yes | Yes | No | $16/mo |
| **PostForMe** | 9 | Quick SaaS integration | Yes | Yes | No | $10/mo |
| **Buffer API** | 8 | Established scheduling | Yes | Yes | No | $5/mo per channel |
| **Hootsuite API** | 7 | Enterprise management | Yes | Yes | No | $199/seat/mo |
| **Socialinsider** | 6 | Deep analytics data | No | Yes | No | $333/mo (API tier) |
| **Data365** | 6 | Data collection & normalization | No | Yes | No | Custom |
| **SociaVault** | 25+ | Free data extraction | No | Yes | No | 50 free credits |
---
## 1. Genviral - Best All-in-One Social Media API

**Platforms:** TikTok, Instagram, YouTube, Facebook, Pinterest, LinkedIn (posting to all 6; analytics on TikTok, Instagram, and YouTube)
[Genviral](https://www.genviral.io/) positions itself as "the content creation tool for teams and AI agents." It is a dual-mode platform: on one side, a creator-facing app for generating and scheduling content; on the other, a REST API plus [OpenClaw skill](https://www.genviral.io/openclaw) that lets AI agents run the full loop autonomously. Where every other API on this list does one or two parts of the job, Genviral covers trend research, AI content generation, cross-platform publishing, and analytics through a single integration.
### Key Features
- **Cross-platform posting** - Publish or schedule to all 6 platforms with one `POST /posts` call. Supports videos, photo carousels, and slideshows. TikTok photo carousels go up to the platform max of 35 images.
- **AI content generation** - Generate images with Nano Banana (and Pro variants), SeeDream 5, GPT Image 1.5, Higgsfield Soul, Imagen 4, and Phota. Generate videos with Sora 2 (and Sora 2 Pro), Veo 3.1 (and Veo 3.1 Fast), Kling 2.6 Pro (I2V / T2V / Motion), WAN 2.5 / 2.6, Fabric, and Creatify Lipsync. Image generation is synchronous; video generation is async with status polling.
- **TikTok trend briefs** - `GET /trends/brief` returns top hashtags, top sounds, top creators, UTC posting windows, hook angles, and sample videos with engagement metrics for any keyword. Cached 3 hours.
- **Analytics** - Track any TikTok, Instagram, or YouTube handle (yours or competitors). Snapshots include follower counts, engagement rates, views, likes, and post-level metrics. Facebook, Pinterest, and LinkedIn analytics are not yet in the API.
- **Bulk Creation** - Create video Bulk Creation pipelines of 5-200 items per campaign programmatically. The API generates the content; posting is a separate call per account (so you control fan-out).
- **Slideshows, templates, image packs** - All CRUD endpoints exposed. Reusable templates and image collections keep branding consistent across AI-generated content.
- **Workspace vs personal keys** - Each API key is scoped as either workspace or personal (mutually exclusive). Cross-scope access returns 404 - useful for agencies managing multiple clients safely.
- **Response envelope + idempotency** - Every endpoint returns `{ ok, code, message, data }` (plus `error_code` on failures). `POST /posts` accepts an `external_id` for safe retries; duplicate IDs return the original post with `duplicate=true`.
- **Platform-specific settings** - `tiktok` (privacy, commercial-content flags, comment/duet/stitch toggles, MEDIA_UPLOAD for slideshows) and `pinterest` (board_id, title, link, up to 30 tags) settings objects are supported. Other platforms use shared defaults.
- **OpenClaw skill** - Ships an official [OpenClaw social media skill](https://www.genviral.io/openclaw) with 47 commands across Trend Spotting, AI Studio, Accounts, Slideshows, Posts, Image Packs, Templates, and Analytics. Works with Claude Code, Cursor, Codex, and any client that speaks the skill protocol.
- **Dedicated hosted accounts** (optional add-on) - If your use case can't use BYO OAuth accounts, Genviral offers dedicated US-based mobile devices for posting, billed per account.
### Pricing
| Plan | Price (Monthly) | Credits | Social Accounts | API Access |
|---|---|---|---|---|
| Creator | $29/mo ($290/yr) | 200/mo | 10 | Yes |
| Professional | $49/mo ($490/yr) | 500/mo | 15 | Yes |
| Business | $99/mo ($990/yr) | 1,200/mo | 30 | Yes + workspaces |
- **Credit top-ups** - $10 for 50 credits, $30 for 250, $45 for 500. Credits roll over.
- **Hosted accounts** (optional) - $90/month per account, minimum 5 accounts. 6-month prepay drops this to $75/account.
- **30-day money-back guarantee** across all plans.
- **Legacy note** - The old $9/month Scheduler plan is no longer purchasable. Only grandfathered legacy customers still remain on that tier.
Credits cover AI generation and Bulk Creation runs. For example, image generation costs 1-3 credits depending on model, video generation 5-72 credits, and a Bulk Creation campaign starts at 50 credits plus per-item AI/render costs.
### Pros
- Only API on this list with native AI image + video + slideshow generation alongside posting.
- TikTok trend briefs are a rare and useful endpoint.
- Workspace-scoped API keys with strict isolation - good for agency multi-tenancy.
- 47-command OpenClaw skill makes it the most AI-agent-native option in 2026.
- Handles TikTok photo carousels (up to 35 images), which most APIs skip.
### Cons
- 6 platforms only - no Threads, Bluesky, X/Twitter, or Reddit.
- Analytics API covers only TikTok, Instagram, and YouTube today.
- Platform-specific settings are exposed only for TikTok and Pinterest; the other four use shared defaults.
- Idempotency keys are supported on `POST /posts` specifically, not every endpoint.
- Credit-based pricing is a mental-model shift if you're used to flat per-post pricing.
### Best For
Developers and AI agents that need to **create and distribute content from one API** - not just post someone else's. Best for creator tools, AI-agent workflows, and agencies running high-volume slideshow / short-form pipelines with workspace isolation.
---
## 2. Ayrshare - Best for Platform Breadth
**Platforms:** TikTok, Instagram, Facebook, LinkedIn, X/Twitter, YouTube, Pinterest, Reddit, Telegram, Threads, Bluesky, Snapchat, Google Business Profile (13+ total)
[Ayrshare](https://www.ayrshare.com) is the platform-coverage king among posting APIs. If you need to post to Telegram, Discord, Bluesky, or Reddit alongside the usual suspects, Ayrshare is one of the few APIs that supports them all through a single integration.
### Key Features
- **13+ network coverage** - Posting support for every major network plus Telegram, Reddit, Google Business Profile, Snapchat, Threads, and Bluesky.
- **Posting + scheduling** - Create, schedule, and delete posts across all networks simultaneously. History endpoints expose detailed metadata.
- **Comment management** - Retrieve, post, and reply to comments on published content across supported networks.
- **Review management** - Respond to reviews on Facebook Pages and Google Business Profile through the API.
- **Auto-hashtag generation** - Suggests hashtags based on real-time popularity for the content you are publishing.
- **Messaging + webhooks** - Send DMs with text, image, and video. Receive webhook notifications for reactions, read receipts, and message events.
- **Public account lookup** - Retrieve public data for any account, useful for competitor monitoring.
- **SDKs for 8 languages** - Node.js, JavaScript, PHP, Python, C#, Go, Java, and Ruby on Rails.
- **No-code integrations** - Notion, Airtable, Make, Bubble - useful if your team wants to prototype without writing code.
### Pricing
- **Free** - 1 social set, 20 posts/month.
- **Premium** - From $24.99/mo, 1 social set, unlimited posts per month.
- **Business** - From $149/mo, 5 social sets, multi-client/agency features.
- **Enterprise** - Custom, includes higher volumes and SLA.
Pricing scales with the number of active social profiles managed, which is predictable for SaaS products but can compound for agencies.
### Pros
- The widest platform coverage in the "posting API" category (13+).
- Mature product with a long track record of handling platform approvals.
- SDKs in every major language - easy to integrate from any stack.
- Webhook support and message-level features most competitors lack.
### Cons
- Documentation is dense; some endpoints have platform-specific quirks buried in footnotes.
- No native AI content generation (you bring your own).
- API-only - no UI if you also want dashboards for non-technical users.
- Per-profile pricing can escalate for agencies with many clients.
### Best For
SaaS products and agencies that need to cover niche platforms (Telegram, Reddit, Bluesky, Snapchat) alongside mainstream ones, and want an API-first posting layer without opinionated UX.
---
## 3. Outstand - Best for Usage-Based Pricing
**Platforms:** X/Twitter, LinkedIn, Instagram, TikTok, Facebook, Threads, Bluesky, YouTube, Pinterest, Google Business (10+ total)
[Outstand](https://www.outstand.so) is one of the newer entrants but it differentiates sharply on pricing model and technical quality. Pure usage-based pricing with no seat licenses, no tiered plans, and no minimums. You pay a $5/mo base fee that includes 1,000 posts, then $0.01 per post beyond that.
### Key Features
- **Unified JSON schema** - "Same JSON shape whether it came from X or TikTok. No more writing 10 parsers" is the core pitch. Analytics, posts, and metadata are normalized across all platforms.
- **Single API endpoint for cross-posting** - One request fans out to multiple networks simultaneously.
- **Media processing** - Images, videos, carousels, and stories are handled automatically with per-platform format adaptation.
- **Timezone-aware scheduling** - Schedule posts in any timezone; the API handles DST and platform-specific cutoff times.
- **Webhook events** - Real-time notifications for post status, engagement milestones, and OAuth token changes.
- **Intelligent rate limiting** - Automatic queuing and retries when upstream platforms throttle requests.
- **MCP integration** - 25 tools via Model Context Protocol, supporting Claude, Cursor, and Windsurf for AI-agent posting.
- **OAuth and bring-your-own-credentials** - Flexibility for white-label deployments.
### Performance
Outstand publishes operational metrics: 99.92% measured uptime, 180ms average response latency, p50 at 120ms, p99 under 350ms. They claim 12.8M+ posts/month processed across 500+ companies.
### Pricing
- **Base** - $5/month base fee includes 1,000 posts/month.
- **Overage** - $0.01 per post beyond 1,000.
- **No seat licenses, no tiers.** Volume discounts for 500k+ posts/month.
### Pros
- Genuinely simple, predictable pricing ($0.01/post is easy to model).
- Strong MCP/AI-agent support out of the box.
- Clean unified JSON schema across all platforms.
- Published performance metrics (most competitors hide these).
### Cons
- Analytics are aggregation-focused, not deep historical or competitor-level.
- No AI content generation.
- Smaller SDK ecosystem than Ayrshare or Buffer.
### Best For
Startups, indie developers, and apps with variable posting volumes who want to avoid fixed monthly commitments. Also a great pick for AI agent builders who want MCP compatibility.
---
## 4. Upload-Post - Best Budget Option
**Platforms:** TikTok, Instagram, YouTube, Facebook, LinkedIn, X/Twitter, Threads, Pinterest, Reddit, Bluesky, Google Business Profile (11 total)
[Upload-Post](https://www.upload-post.com) offers one of the widest platform coverages at one of the lowest price points. Their free tier includes 10 uploads/month and 2 connected profiles, making it easy to test before committing.
### Key Features
- **Multi-platform distribution** - One API call fans out across all connected networks.
- **FFmpeg video processing** - Built-in video editing API with monthly minute allocations (30-10,000 minutes depending on tier). You can trim, convert formats, apply watermarks, and re-encode without running your own FFmpeg.
- **Auto-format adaptation** - Videos are automatically adapted to each platform's aspect ratio, file size, and caption length requirements.
- **Analytics** - Views, likes, comments, and engagement metrics aggregated across platforms.
- **Security model** - Uses official platform APIs with OAuth, no scraping or grey-area workarounds.
- **Whitelabel support** - Available on Professional and above, letting agencies resell the API under their own brand.
- **No-code integrations** - Official n8n node, Make HTTP module, Zapier app, Airtable connector.
### Pricing
| Plan | Price | Profiles | Uploads | Video Editing |
|---|---|---|---|---|
| Free | $0/mo | 2 | 10/mo | - |
| Basic | $16/mo | 5 | Unlimited | 300 min/mo |
| Professional | $33/mo | 25 | Unlimited | 1,000 min/mo + whitelabel |
| Advanced | $118/mo | 75 | Unlimited | 3,000 min/mo + priority support |
| Business | $350/mo | 225 | Unlimited | 10,000 min/mo + 10 team seats |
### Pros
- Widest platform coverage at the cheapest paid tier ($16/mo for 11 networks).
- Built-in FFmpeg video processing - no need to self-host an encoder.
- Generous free tier for testing.
- No-code integrations (n8n, Make, Zapier) for non-developers.
### Cons
- Analytics are basic (no competitor data, no historical depth).
- No AI content generation.
- UI/dashboard is lightweight compared to Buffer or Hootsuite.
### Best For
Budget-conscious developers, content agencies, and creator tools that need broad platform support without enterprise pricing. Also good for teams that want n8n or Zapier workflows alongside direct API access.
---
## 5. PostForMe - Best for Quick SaaS Integration
**Platforms:** TikTok, Instagram, Facebook, X/Twitter, LinkedIn, YouTube, Threads, Pinterest, Bluesky (9 total)
[PostForMe](https://www.postforme.dev) is built specifically for SaaS developers who need to add social media features to their product fast. The headline claim - "ship social media integrations in hours, not weeks" - reflects their focus on speed-of-integration over feature depth.
### Key Features
- **Two deployment modes** - Quickstart (use PostForMe's managed OAuth credentials for instant access, no platform approval needed) and White Label (bring your own credentials for full brand ownership in the OAuth consent screen).
- **Social media feeds** - Fetch and display content from connected accounts, useful for building creator dashboards or content inbox views.
- **Post analytics** - Track engagement metrics across all connected platforms.
- **Unlimited social accounts** - All plans include unlimited connected accounts, unlimited projects, unlimited API keys, and unlimited team members.
- **Media processing + storage** - Upload once, PostForMe handles platform-specific encoding and format conversion.
- **Real-time webhooks** - Post status changes, engagement updates, and OAuth events.
- **SDKs** - JavaScript, TypeScript, Python, Ruby, and Go.
### Pricing
Pricing scales with total posts per month:
- **$10/mo** - 1,000 posts.
- **Higher tiers** - Scale up to $1,000/mo for enterprise volumes.
Both Quickstart and White Label projects use the same pricing tiers. No per-seat or per-account fees.
### Pros
- Quickstart mode is genuinely useful for MVPs - skip weeks of Facebook and TikTok app review.
- Simple volume-based pricing with no hidden per-account fees.
- Clean developer experience with 5 SDKs.
- Feeds endpoint is a differentiator for creator dashboards.
### Cons
- Fewer platforms than Ayrshare or Upload-Post (9 vs. 11-13).
- No AI content generation.
- Analytics depth is limited compared to Socialinsider or Data365.
### Best For
SaaS builders who want to ship social media posting features quickly without managing OAuth credentials or waiting on platform approvals. Particularly good for B2B SaaS products that add social scheduling as a secondary feature.
---
## 6. Buffer API - Best for Established Scheduling

**Platforms:** Facebook, Instagram, LinkedIn, X/Twitter, TikTok, Pinterest, YouTube, Threads (8 total)
[Buffer](https://buffer.com) has been in the social media scheduling game since 2010 and their API reflects that maturity. Buffer is rebuilding their public API in 2026 (currently in beta) with a cleaner architecture, and paid accounts can generate up to 5 API keys directly from Buffer settings.
### Key Features
- **Content creation** - Create posts with text, media (images and videos), and channel-specific features. Create text and image-only "ideas" (drafts).
- **Queue + scheduling** - Buffer's queue-based scheduling model (set time slots per channel, drop content into the queue) is the gold standard that most competitors copy.
- **Data retrieval** - Fetch profiles, scheduled posts, sent posts, user data, and engagement analytics.
- **Canva integration** - Design graphics in Canva and push directly to Buffer queue.
- **Zapier integration** - Connect Buffer with thousands of apps.
- **OAuth authentication** - Standard OAuth 2.0 flow.
- **Rate limits** - 60 authenticated requests per user per minute (HTTP 429 on overage; higher limits negotiable).
- **JSON-only responses** - `&pretty=true` query string for formatted output during testing.
### Pricing
- **Free** - 3 channels, 10 scheduled posts per channel. 1 API key.
- **Essentials** - $5/mo per channel. Unlimited scheduled posts, advanced analytics. Up to 5 API keys on paid accounts.
- **Team** - $10/mo per channel. Team collaboration, approval workflows.
- **Agency** - Higher tier, custom pricing for client management.
Annual billing gives 20% off.
### Pros
- Proven, reliable scheduling engine - Buffer is the grandfather of scheduling APIs.
- Per-channel pricing keeps costs predictable.
- Mature ecosystem (Zapier, Canva, Integromat/Make integrations).
- Free tier is genuinely useful for testing.
### Cons
- API is built as an extension of the Buffer product, not as a developer-first surface - flexibility is limited.
- Currently rebuilding the public API, so feature parity with the web app is still catching up.
- No AI content generation.
- Per-channel pricing can be expensive for agencies with many clients.
### Best For
Teams that already use Buffer and want to extend it with automation, or developers who want a rock-solid scheduling engine and are willing to work within Buffer's product opinions.
---
## 7. Hootsuite API - Best for Enterprise Management

**Platforms:** Facebook, Instagram, LinkedIn, X/Twitter, TikTok, Pinterest, YouTube (7 total)
[Hootsuite](https://www.hootsuite.com) is one of the oldest and most recognized social media management platforms. Their API bundles with the full Hootsuite platform: scheduling, inbox management, social listening (powered by Talkwalker), employee advocacy, and team collaboration.
### Key Features
- **Full platform integration** - The API is an extension of Hootsuite's enterprise dashboard, so programmatic actions flow through the same workflow, approval chains, and audit logs as manual work.
- **Social listening** - Talkwalker integration for brand monitoring, sentiment analysis, and competitor intelligence.
- **Employee advocacy** - Exclusive tools for programs where employees share company content on their personal accounts (rare feature among APIs).
- **Inbox management** - Unified inbox for comments, messages, and mentions across platforms; respond via API.
- **Approval workflows** - Multi-seat team management with approval chains and compliance features.
- **SSO and SOC 2** - Enterprise-grade security with single sign-on, advanced permissions, and audit logs.
- **Custom API access** - Enterprise tier includes dedicated API support and custom integrations.
### Pricing
- **Standard** - $199/seat/mo (annual) or $249/seat/mo (monthly). Limited API access.
- **Advanced** - $399/seat/mo (annual) or $499/seat/mo (monthly). More API features.
- **Enterprise** - ~$15,000-$16,000/year starting. Custom API access, SSO, SLA, dedicated account manager.
### Pros
- Most mature enterprise feature set: approvals, compliance, audit logs, SSO, SOC 2.
- Social listening and employee advocacy features are rare in API offerings.
- Trusted by large organizations - if your procurement team knows Hootsuite, adoption is smoother.
### Cons
- Expensive. The cheapest plan ($199/seat/mo) is more than most other APIs on this list combined.
- API is an add-on to the platform, not a first-class surface - feature flexibility is limited.
- Best features (custom API access, Employee Advocacy, advanced listening) gated behind Enterprise.
- No AI content generation.
- Per-seat pricing hurts small teams.
### Best For
Large organizations (500+ employees) that already use Hootsuite and want API-level access to their existing workflow, or enterprises with strict compliance, SSO, and audit requirements that smaller APIs can't meet.
---
## 8. Socialinsider - Best for Deep Analytics Data
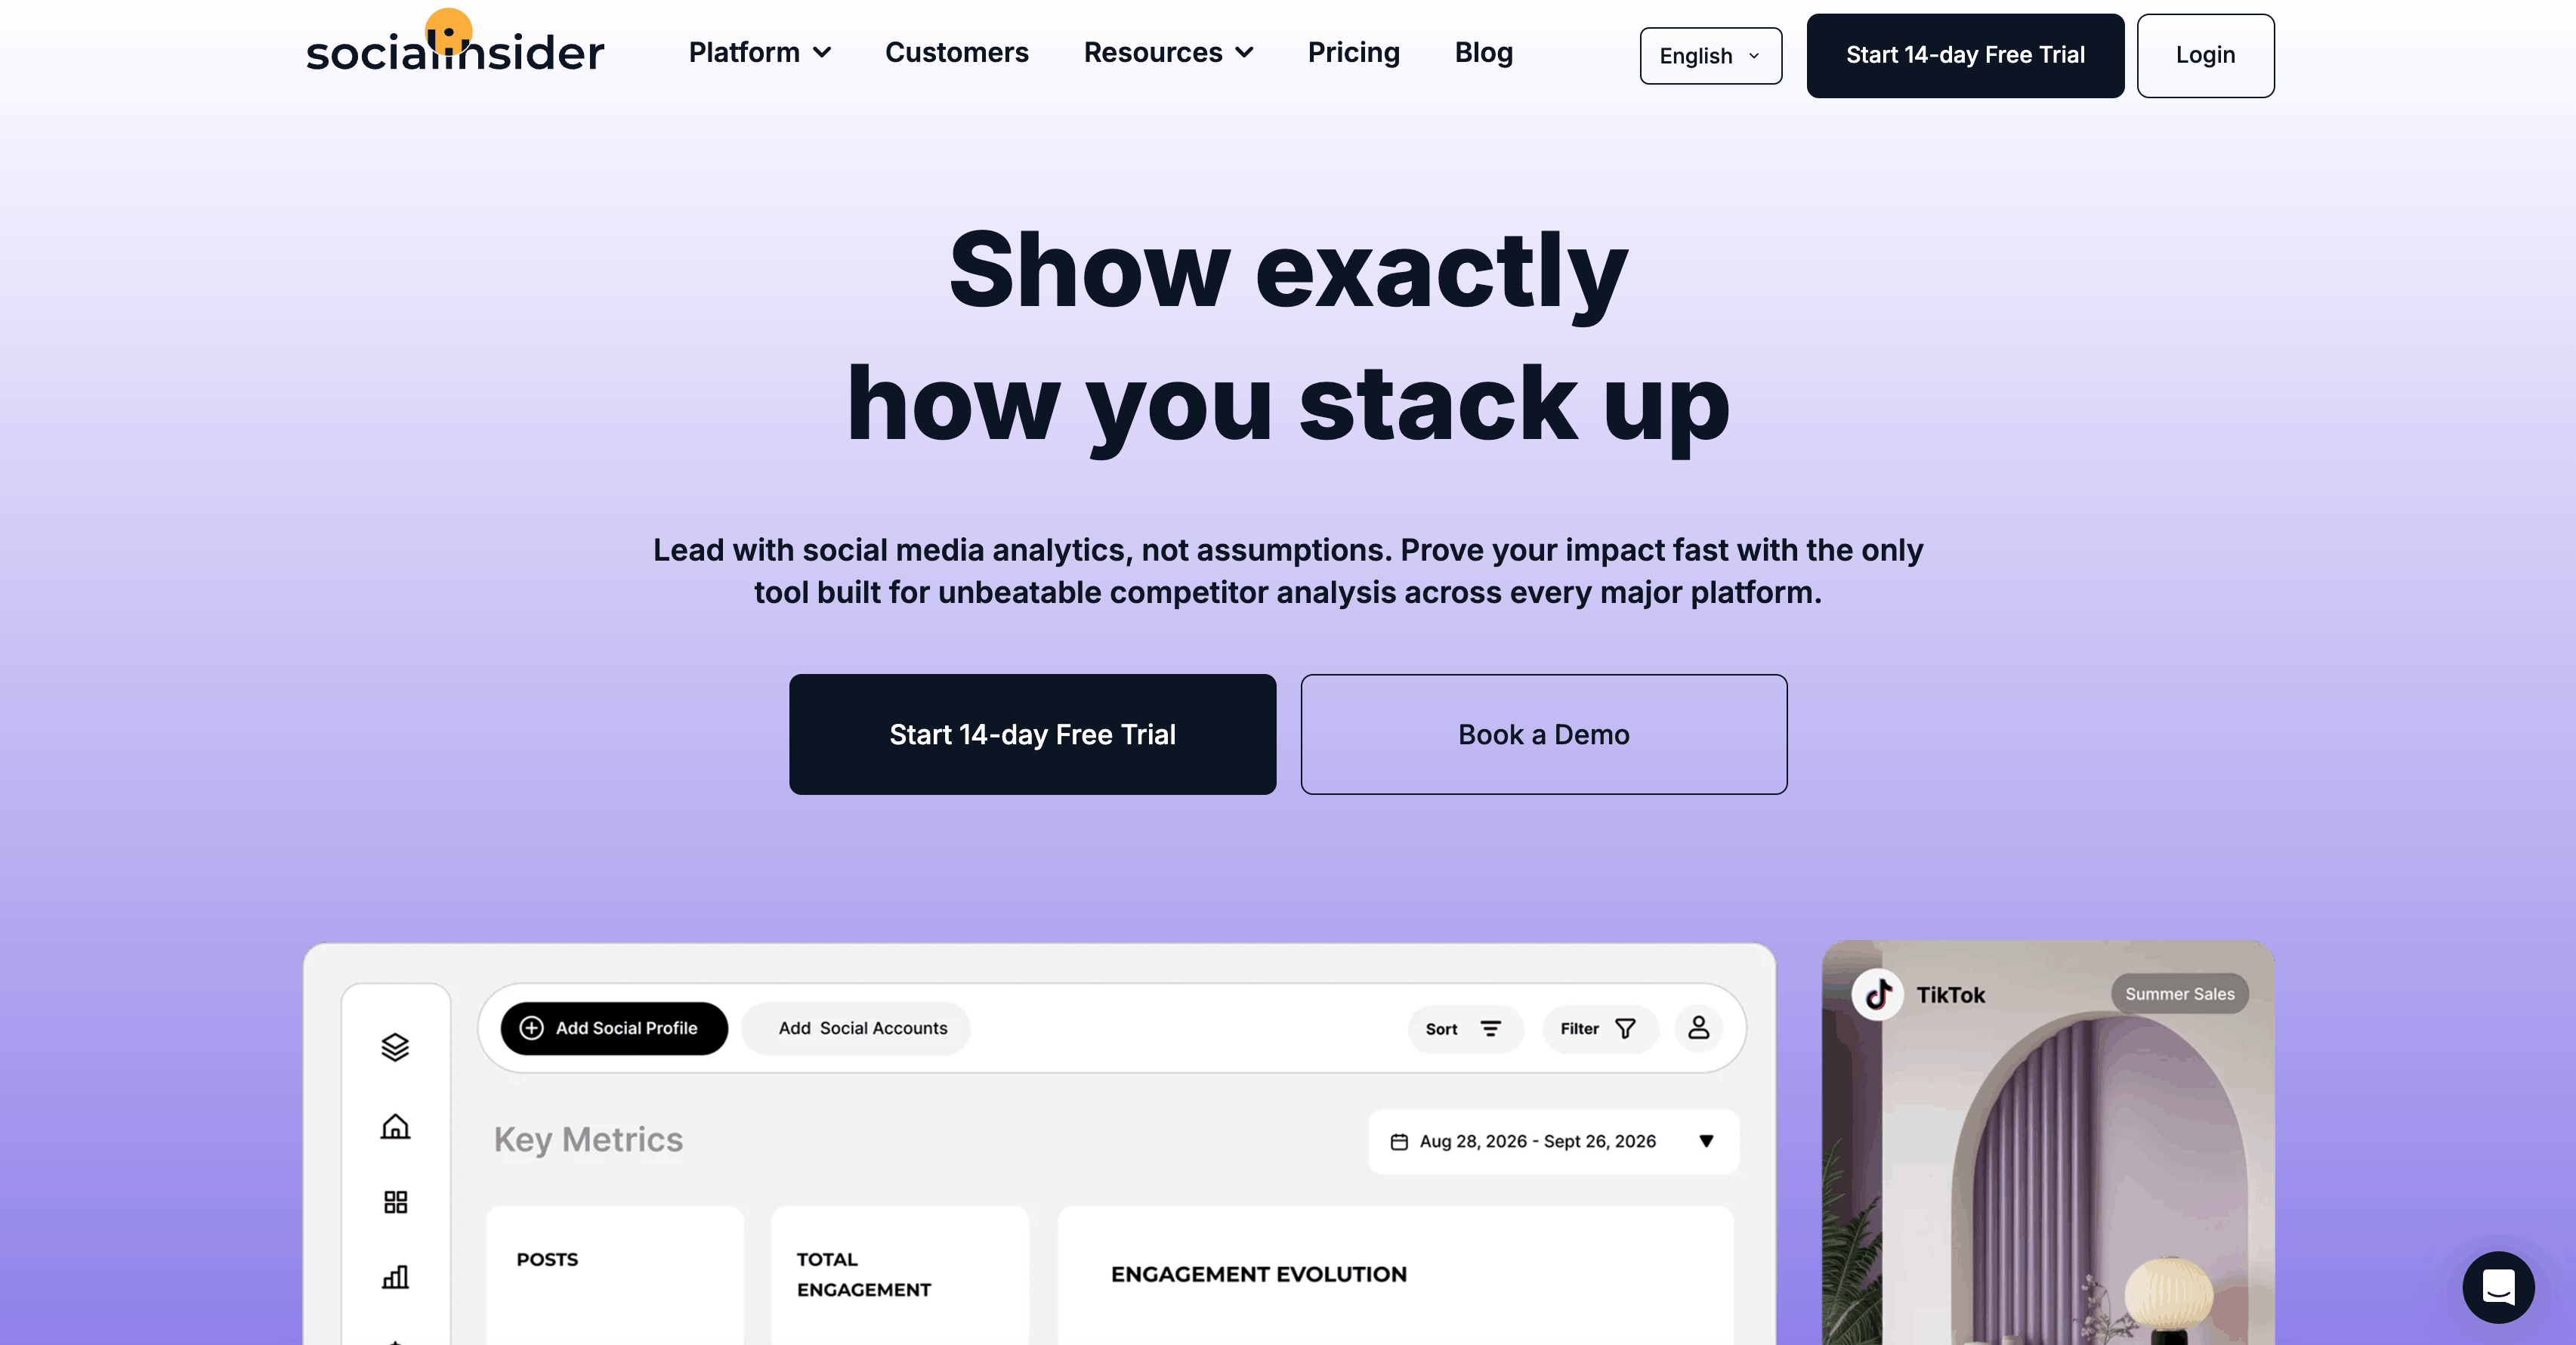
**Platforms:** Facebook, Instagram, X/Twitter, TikTok, LinkedIn, YouTube (6 total)
[Socialinsider](https://www.socialinsider.io) is a pure analytics API - no posting, no scheduling. If your use case is tracking competitors, monitoring influencers, or building analytics dashboards, Socialinsider provides some of the deepest social data available.
### Key Features
- **Post-level engagement metrics** - Likes, comments, shares, saves, views, and engagement rate for every post on a tracked account.
- **Profile performance data** - Follower growth, reach, impressions, and account-level trends.
- **Historical depth** - Up to 12 months of historical data per profile for trend analysis and benchmarking.
- **Video analytics** - Watch time, average view duration, and drop-off curves for video posts (where supported by the platform).
- **Private metrics** - For owned accounts, returns private metrics (reach, impressions, saves) that aren't visible via public data.
- **6-hour refresh** - Near real-time with 6-hour refresh intervals on tracked profiles.
- **No API rate limits** - Pricing is per-handle tracked, not per API call, so you can query as often as you like.
- **99.99% uptime** - Published SLA.
- **3-month POC option** - Proof-of-concept period with zero long-term commitment.
### Pricing
- **Starting plans** - $83/mo (annual) for 10 social profiles (no API).
- **Professional** - $166/mo, more profiles, no API.
- **Advanced** - $333/mo. API access included. Unlimited API calls. Pay per tracked handle.
- **Enterprise** - Custom. Volume discounts for tracking thousands of profiles.
### Pros
- Deepest historical analytics data on this list (12 months).
- Per-handle pricing is predictable if you know your account count.
- No API rate limits - unusual and useful.
- Private metrics for owned accounts.
### Cons
- Analytics only. No posting, scheduling, or content creation.
- API access only on Advanced ($333/mo) and above.
- Handles-only model means you can't query by keyword or hashtag.
- 6 platforms (no Pinterest, Threads, Bluesky, Reddit).
### Best For
Agencies and analytics platforms that need deep historical social data for competitor analysis, influencer monitoring, or custom dashboards. Also great for BI teams feeding social data into existing reporting stacks.
---
## 9. Data365 - Best for Data Collection
**Platforms:** Instagram, X/Twitter, Reddit, TikTok, Facebook, Threads (6 total)
[Data365](https://data365.co) is a data retrieval API focused on collecting and normalizing social media data at scale. It covers profiles, posts, comments, and engagement metrics across six platforms with a consistent schema - no matter which platform the data comes from, the response format is the same.
### Key Features
- **Real-time collection** - Data is gathered live at request time, not from a pre-built cache. Requests use a two-step flow: POST to initiate collection, GET to retrieve once ready.
- **Comprehensive datasets** - Profiles (usernames, follower counts, verification status, avatars), posts (caption, media, timestamps), comments (text, author, engagement), and account-level metrics.
- **Consistent schema across platforms** - Same normalized shape for a TikTok post and an Instagram post. Great for analytics pipelines that can't afford to write 6 parsers.
- **99.9% uptime** - Published infrastructure reliability.
- **Access-token auth** - Simple REST authentication.
- **Postman workspace** - Full Postman collection published, which accelerates first-day integration.
- **Custom endpoints** - They will build platform-specific endpoints for enterprise customers with unique needs.
- **8+ years of specialized expertise** - Long track record of adapting quickly to platform changes.
### Pricing
- **Pay-as-you-go** - Volume-based, transparent tiers. Not self-serve; contact sales for exact pricing.
- **Free trial** - Available on request.
- **Scales to millions of records** per customer.
### Pros
- Excellent schema normalization across platforms.
- Real-time (not cached) data gathering.
- Responsive personal customer support - they'll build custom endpoints.
- 8 years of platform-change expertise means less breakage.
### Cons
- Not self-serve - requires a sales conversation to get pricing.
- No posting capabilities - read-only.
- 6 platforms (no LinkedIn, Pinterest, YouTube).
- Async (POST then GET) flow requires more client code than a standard REST API.
### Best For
Data engineers, researchers, and ML teams who need structured, normalized social media data at scale for analysis, training datasets, market research, or competitor monitoring pipelines.
---
## 10. SociaVault - Best Free Option for Data Extraction
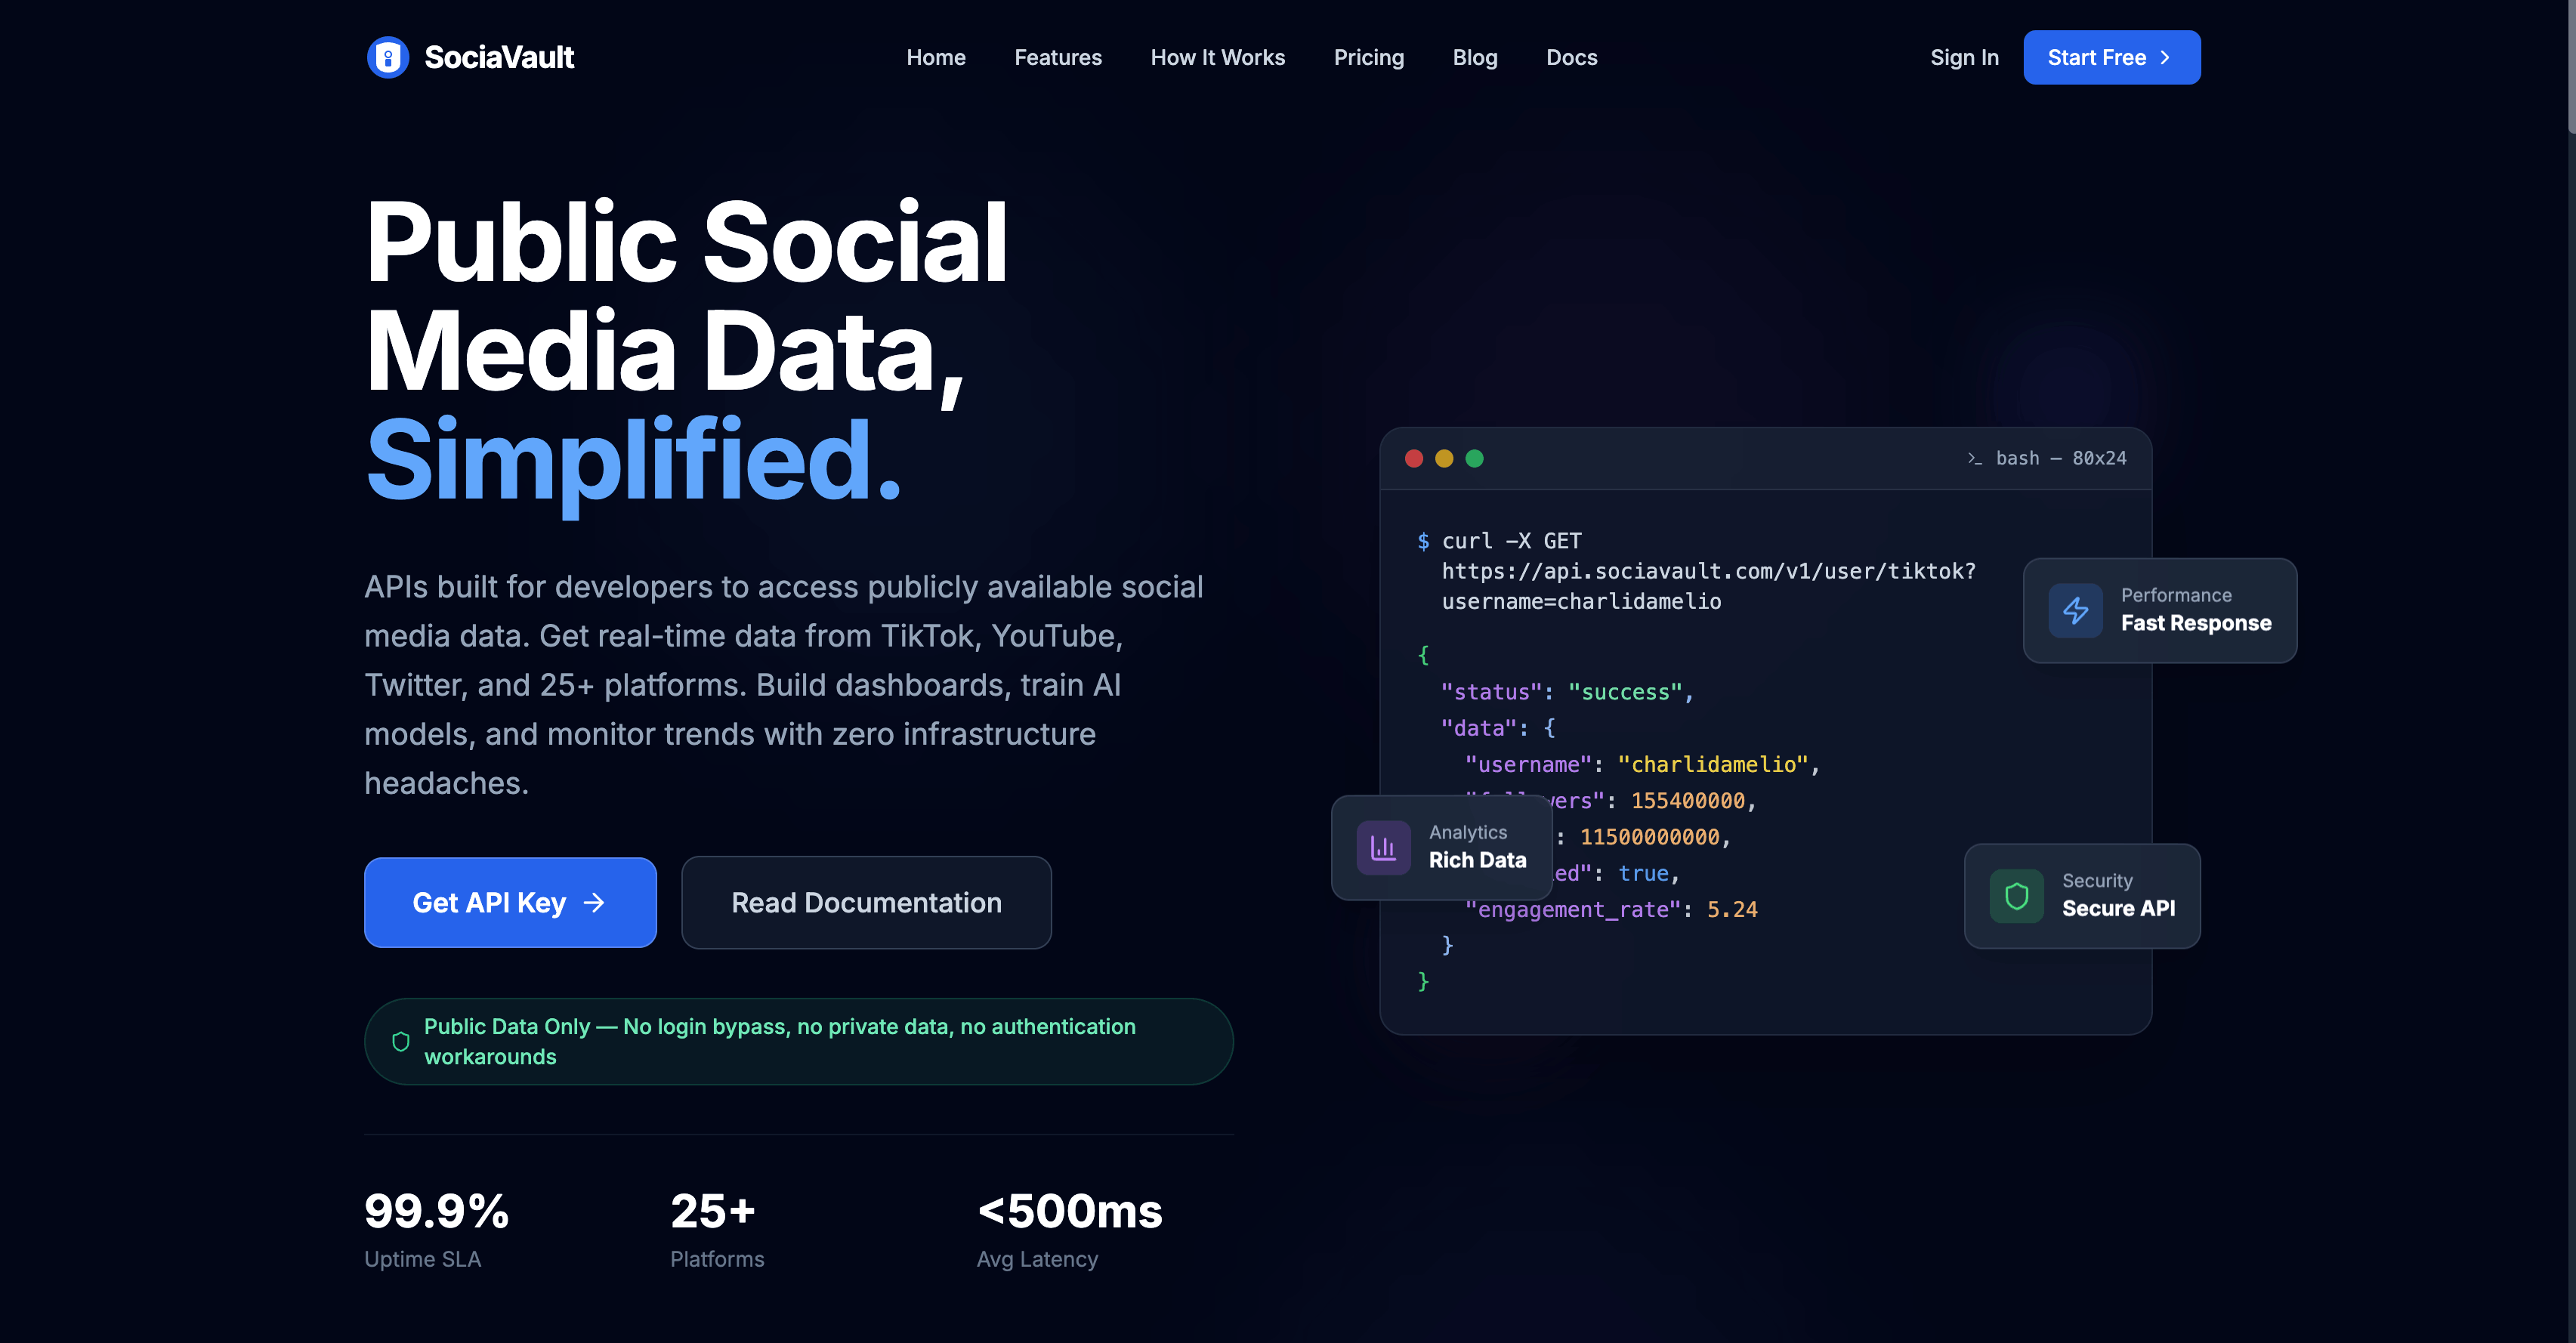
**Platforms:** TikTok, Instagram, YouTube, X/Twitter, LinkedIn, Facebook, Reddit, Threads, Pinterest, Snapchat, Google, Bluesky, Truth Social, and 12+ more (25+ total)
[SociaVault](https://sociavault.com) claims the widest platform coverage of any API on this list - 25+ social networks through a single API key. It is a data extraction API (no posting), focused on pulling profiles, posts, and engagement metrics from public accounts in real time.
### Key Features
- **25+ platforms** - TikTok, YouTube, Twitter/X, Reddit, Pinterest, Google, Snapchat, Bluesky, Truth Social, plus 15+ more explicitly listed.
- **Under 500ms average latency** - Fast responses suitable for real-time dashboards.
- **99.9% uptime SLA** - Auto-scaling infrastructure.
- **No rate limits on concurrent requests** - Parallelize freely.
- **Simple auth** - Single header (`X-API-Key`). No OAuth complexity for data reads.
- **Credit system** - 1 request = 1 credit, transparent endpoint pricing in docs.
- **Free tier with 50 credits** - No credit card required. Credits never expire.
### Pricing
| Plan | Price | Credits | Per-Credit |
|---|---|---|---|
| Free Trial | $0 | 50 | - |
| Starter Pack | $29 | 6,000 | $0.0048 |
| Growth Pack | $79 | 20,000 | $0.0040 |
| Pro Pack | $199 | 75,000 | $0.0027 |
| Enterprise | $399 | 200,000 | $0.0020 |
No subscription required. All packs are one-time purchases that never expire.
### Pros
- Widest platform coverage of any API on this list (25+).
- Credits never expire - rare in the industry.
- No subscription, no minimum commitment.
- Free tier (50 credits) is enough to test realistic workflows.
- Sub-500ms latency is genuinely fast.
### Cons
- Read-only. No posting, no scheduling, no content creation.
- Free tier (50 credits) is not enough for production.
- Some platforms only have partial endpoint coverage - check their docs.
- Smaller company than Ayrshare or Hootsuite; ecosystem is thinner.
### Best For
Developers who need a free starting point for social media data extraction, competitor monitoring, sentiment analysis, or feeding social data into analytics tools. Also the cheapest way to get data from long-tail platforms (Truth Social, Snapchat, Bluesky) through a single API.
---
## Capability Matrix
Quick at-a-glance view of what each API can actually do:
| API | Post | Schedule | Read Analytics | AI Content | Workspace Isolation | AI Agent Skill | Webhooks |
|---|---|---|---|---|---|---|---|
| Genviral | Yes | Yes | 3 platforms | Yes | Yes | Yes (OpenClaw, 47 cmds) | Limited |
| Ayrshare | Yes | Yes | Yes | Basic | Partial | - | Yes |
| Outstand | Yes | Yes | Yes | - | Partial | Yes (MCP) | Yes |
| Upload-Post | Yes | Yes | Yes | - | Whitelabel | - | Yes |
| PostForMe | Yes | Yes | Yes | - | Projects | - | Yes |
| Buffer | Yes | Yes | Yes | - | Accounts | - | Limited |
| Hootsuite | Yes | Yes | Yes | - | Enterprise | - | Yes |
| Socialinsider | - | - | Yes | - | Handles | - | Limited |
| Data365 | - | - | Yes | - | - | - | - |
| SociaVault | - | - | Yes | - | - | - | - |
---
## What About Native Platform APIs?
You can always integrate directly with each platform's own API. Here is a quick reality check on what that actually involves in 2026:
| Platform | Difficulty | Key Pain Points |
|---|---|---|
| **Facebook Graph API** | Hard | Rigorous app review (video screencast demo required), often rejected multiple times, can only post to Pages (not personal profiles), Business Verification required. |
| **Instagram Graph API** | Hard | Inherits Facebook's approval process, multi-step async uploads, 50 posts/24hr rolling limit, JPEG only for images (no PNG), no Stories or Reels for most scopes. |
| **TikTok API** | Hard | Async uploads (no immediate video ID), webhook required for completion, domain verification mandatory, docs have known errors, approval takes weeks. |
| **LinkedIn API** | Hard | Docs mix v1/v2 inconsistently, confusing scope approval flow, tokens expire in 60 days with no refresh on some scopes, LinkedIn Marketing API is gated behind partner application. |
| **YouTube Data API** | Medium | Manageable approval, solid docs, but the 10,000-unit daily quota can be restrictive (uploads cost 1,600 units each). |
| **Pinterest API** | Easy | Well-organized docs, quick approval, simple endpoints - the easiest native API on this list. |
| **X/Twitter API** | Medium-Hard | Paid tiers start at $200/mo and scale to $42,000+/mo, incomplete v2 API (still need v1.1 for some media operations), Elon-era changes make long-term planning hard. |
For most use cases, a unified API saves 2-6 months of development time up front and eliminates ongoing maintenance when platforms change their endpoints, authentication flows, or rate limits.
---
## Security and Authentication Considerations
Every social media API you integrate with is a potential blast radius. A leaked API key or compromised token can let an attacker post on behalf of your users, delete content, or exfiltrate their data. Before picking an API:
- **Rotate keys regularly** - Most APIs let you issue multiple keys and revoke individually. Use separate keys per environment (dev, staging, prod) and per service.
- **Scope keys narrowly** - If an API supports scoped keys (read-only, post-only, workspace-only), always use them. Genviral supports workspace-scope keys so a leaked key can't touch another tenant.
- **Rotate OAuth refresh tokens** - TikTok and LinkedIn tokens expire in 60 days. Build refresh flows into your scheduler, not as an afterthought.
- **Audit logs** - APIs with audit logs (Hootsuite Enterprise, Genviral workspace logs) let you trace "who posted what" for compliance.
- **Webhook signature verification** - Always verify webhook HMAC signatures. A webhook endpoint that accepts unsigned payloads is a denial-of-service vector.
- **Rate limits as safety rails** - Even if an API doesn't rate-limit you strictly, your code should. Upstream platform limits can cascade into account suspensions if hit.
---
## How to Choose
**Building a SaaS product?** Start with **PostForMe** (Quickstart mode) or **Outstand** (usage-based) for fast MVP shipping. You skip platform approval and pay only for what you use. Migrate to **Genviral** or **Ayrshare** when you need content creation or broader platform coverage.
**Running an agency?** [Genviral](https://www.genviral.io/agents) with workspace-scoped API keys lets your team create, schedule, and track content for multiple clients from one integration. You can schedule to [TikTok](https://www.genviral.io/tiktok-scheduler), [Instagram](https://www.genviral.io/instagram-scheduler), [YouTube](https://www.genviral.io/youtube-scheduler), [Facebook](https://www.genviral.io/facebook-scheduler), [Pinterest](https://www.genviral.io/pinterest-scheduler), and [LinkedIn](https://www.genviral.io/linkedin-scheduler) from a single dashboard or API call. Upload-Post is a budget alternative if you only need posting.
**Building analytics dashboards?** **Socialinsider** for deep historical data (12 months) and private metrics on owned accounts, or **Data365** for real-time streaming and data normalization across profiles, posts, and comments. **SociaVault** if you are on a budget or need long-tail platforms (Truth Social, Snapchat, Bluesky).
**Automating content with AI agents (Claude Code, Cursor, Codex)?** **Genviral** is the only API on this list with native AI content generation (images, videos, slideshows), an [OpenClaw skill](https://www.genviral.io/openclaw) with 47 commands, and TikTok trend-brief endpoints. Your agent can research trends, generate content, post it, and measure results through one API. **Outstand** is a solid alternative for MCP-native posting without AI generation.
**Need maximum platform coverage?** **Ayrshare** (13+ platforms including Telegram, Reddit, Google Business, Snapchat), **Upload-Post** (11 platforms including Bluesky, Reddit, Google Business), or **SociaVault** (25+ platforms, read-only).
**Enterprise with strict compliance?** **Hootsuite Enterprise** is the only option here with SSO, audit logs, employee advocacy, and SOC 2 at scale. Budget $15k+/year.
---
## FAQ
### What is a social media API?
A social media API is a programming interface that lets applications interact with social media platforms programmatically - posting content, fetching analytics, managing accounts, and automating workflows without manual interaction. Instead of logging into each platform's website, your code talks directly to their servers (or to a unified aggregator API that wraps them all).
### Do I need a unified API or can I use platform APIs directly?
You *can* use platform APIs directly, but each has its own OAuth flow, rate limits, content format requirements, and approval process. Integrating with six platforms means maintaining six separate integrations - plus keeping up with breakage every time one of them deprecates an endpoint or changes authentication. A unified API abstracts this into a single integration. For most products, the time and maintenance savings easily outweigh the API cost. If you only ever plan to post to one platform (say, Pinterest), going direct is fine.
### Which social media API is best for AI agents?
Genviral is the only API on this list built specifically for AI agent workflows. It includes an [OpenClaw social media skill](https://www.genviral.io/blog/best-openclaw-skills-social-media) with 47 commands, a consistent `{ ok, code, message, data }` response envelope for easy parsing, `external_id` idempotency on `POST /posts` for safe retries, and AI content generation endpoints for images, videos, and slideshows. Claude Code, Cursor, and Codex can research trends, create content, post it, and analyze results through a single integration. Outstand is a solid alternative if you only need posting (via MCP, 25 tools).
### How much does a social media API cost?
Pricing varies widely in 2026. PostForMe starts at $10/mo for 1,000 posts. Upload-Post is $16/mo for unlimited posts on 5 profiles. Buffer starts at $5/mo per channel. Outstand is usage-based at $5/mo + $0.01/post. Genviral starts at $29/mo with 200 credits. Ayrshare starts at $24.99/mo. Enterprise tools like Hootsuite start at $199/seat/mo and scale to $15k+/year for custom plans. Analytics-only APIs (Socialinsider, Data365) use per-handle or custom pricing. Most offer free tiers or trials.
### Can I post to TikTok via API?
Yes, but TikTok's native API has a notoriously difficult approval process and requires async uploads with webhooks, domain verification, and a partner review that can take weeks. Unified APIs like Genviral, Ayrshare, Upload-Post, and PostForMe handle all of this for you - including [TikTok slideshow/carousel publishing](https://www.genviral.io/tiktok-scheduler) (up to 35 images) which most APIs skip because of its complexity.
### What is the best free social media API?
For posting, Upload-Post's free tier (10 uploads/month, 2 profiles) and Buffer's free tier (3 channels, 10 scheduled posts each) are the most generous. For data extraction, SociaVault offers 50 free credits with no expiry. For full-featured testing, most unified APIs (Ayrshare, PostForMe, Outstand, Genviral) offer trial credits or free tiers so you can validate the integration before paying.
### Which API handles Instagram Reels and Stories?
Reels and Stories are notoriously limited in the Instagram Graph API. Genviral, Ayrshare, and Upload-Post support Reels publishing. Stories via API are extremely rare - Instagram gates Stories behind Instagram Login scopes that most aggregator APIs don't have. If Stories posting is mission-critical, plan to use the Instagram mobile app or a hosted-account automation layer.
### Can I delete posts via API?
Ayrshare supports deleting posts across all connected networks simultaneously. Genviral, Upload-Post, and PostForMe support deletion on a subset of platforms (rules vary - YouTube and Facebook are usually supported; TikTok and Instagram deletion is often limited to draft/scheduled content).
### Which API has the best analytics?
For deep historical data and private metrics: **Socialinsider** (12 months history, 6-hour refresh, unlimited API calls). For normalized cross-platform data: **Data365**. For 25+ platforms including long-tail: **SociaVault**. For posting + basic analytics combined: **Genviral** and **Ayrshare**.
### How do I handle OAuth token expiration?
All major platform tokens expire eventually. LinkedIn and TikTok tokens expire in 60 days. Facebook/Instagram tokens can be long-lived (60+ days) but require periodic refresh. The best unified APIs (Genviral, Ayrshare, PostForMe) handle token refresh automatically and expose the current connection status via API or webhook. If you go direct to platforms, build refresh flows into your scheduler from day one.
---
## Key Takeaways
- **Unified social media APIs save 2-6 months of engineering time up front** and eliminate ongoing platform-breakage maintenance. For any product posting to 3+ platforms, they are almost always worth the cost.
- **Genviral is the only API that covers the full pipeline** - AI image/video/slideshow generation, cross-platform posting, analytics on TikTok/Instagram/YouTube, TikTok trend briefs, and 5-200 item video Bulk Creation campaigns - in one integration with a 47-command OpenClaw skill.
- **Ayrshare wins on platform breadth** (13+ networks) but is posting-only and requires you to bring your own content.
- **Outstand has the most developer-friendly pricing** ($5/mo + $0.01/post) and published performance metrics, making it ideal for apps with variable posting volumes.
- **Upload-Post is the cheapest paid option** ($16/mo for 11 platforms) and includes built-in FFmpeg video processing.
- **Analytics-only APIs (Socialinsider, Data365, SociaVault)** handle a different job: they read data but don't post. Pair them with a posting API if you need both.
- **Hootsuite is overkill unless you are a large enterprise** with compliance, SSO, and audit requirements. Budget $15k+/year.
- **For AI agent workflows**, Genviral (OpenClaw skill, 47 commands) and Outstand (MCP, 25 tools) are the two APIs built for autonomous agents in 2026.
---
## Related Guides
- [How to Use OpenClaw to Automate Your Social Media](https://www.genviral.io/blog/how-to-use-openclaw)
- [15 Best OpenClaw Skills for Social Media Marketing](https://www.genviral.io/blog/best-openclaw-skills-social-media)
- [How to Schedule TikTok Posts](https://www.genviral.io/tiktok-scheduler)
- [How to Schedule Instagram Posts](https://www.genviral.io/instagram-scheduler)
- [How to Schedule Pinterest Posts](https://www.genviral.io/pinterest-scheduler)
- [How to Schedule YouTube Posts](https://www.genviral.io/youtube-scheduler)
- [How to Schedule Facebook Posts](https://www.genviral.io/facebook-scheduler)
- [How to Schedule LinkedIn Posts](https://www.genviral.io/linkedin-scheduler)
- [AI Agents for Social Media](https://www.genviral.io/agents)
---
*Genviral is an AI-powered social media platform with a REST API and OpenClaw skill for autonomous content creation, scheduling, and analytics across TikTok, Instagram, YouTube, Facebook, Pinterest, and LinkedIn. [Get started →](https://www.genviral.io)*
---
Canonical HTML: https://www.genviral.io/blog/best-social-media-apis
# 6 Best Social Media CLI Tools for Posting & Automation
- A social media CLI lets you post, schedule, and pull analytics straight from the terminal - scriptable into cron jobs, CI/CD pipelines, and AI-agent workflows without ever opening a dashboard.
- We only included tools that are genuinely a CLI: a command you `npm install` and run in your shell. Plenty of products advertise a "CLI" that turns out to be a REST API, an SDK, or an MCP server with no terminal binary - those were excluded.
- Having an API underneath is fine and expected. What disqualifies a tool is the reverse: being an API-first product that bolts on a thin CLI as an afterthought.
- We tested 6 across five criteria: platform coverage, posting and scheduling, content creation, developer experience, and how cleanly each CLI scripts into automation and AI agents.
- [Genviral](https://www.genviral.io/) ships the most complete CLI - AI image/video/slideshow generation, cross-platform posting and scheduling, analytics, and TikTok trend briefs across 6 platforms - from one `genviral` command, installable with `npm install -g genviral`. We link both the product *and* its CLI for every entry.
If you live in the terminal, the last place you want to be is a social media scheduling dashboard. Clicking through a calendar UI to drop in a caption, attach a video, and pick a publish time does not script, does not version-control, and does not slot into a cron job or an AI agent's tool loop. Developers, indie hackers, and automation builders increasingly want the same thing they want from everything else: a command they can pipe, schedule, and commit.
A real category now exists to serve that: social media tools you drive entirely from a **command-line interface (CLI)**. You install a binary, authenticate once, then post, schedule, upload media, and pull analytics with a single command - often with JSON output and a bundled AI-agent skill so Claude Code, Cursor, or Codex can run it autonomously.
The hard part is that the word "CLI" gets thrown around loosely. A surprising number of products marketed as having a "social media CLI" actually ship only a REST API, a language SDK, or an MCP server - none of which is a command you can run in your terminal. So we verified every tool below against the npm registry (a real `bin` entry) and, where possible, a public GitHub repo. We also drew a line the other way: tools where the API is clearly the product and the CLI is a thin afterthought didn't make the cut, because that defeats the point of a CLI guide. The 6 below are genuine command-line tools you can install and run today.
---
## What Is a Social Media CLI?
A **social media CLI** is a command-line program that lets your terminal - or a script, cron job, or AI agent - manage social media without a dashboard. With one installed binary you can:
- Publish posts (text, images, videos, carousels) without a browser.
- Schedule content for future publish times across platforms and timezones.
- Upload and manage media from local files or URLs.
- Pull analytics and engagement metrics into stdout, ready to pipe into `jq`.
- Drive everything from CI/CD, a Makefile, a shell script, or an AI agent's tool loop.
Each tool in this guide is the official command-line interface to a social media product. You connect your accounts once in the product, generate an API key, and from then on you run everything from the terminal - which is what lets these CLIs reach the mainstream networks (TikTok, Instagram, YouTube, Facebook) that gate or paywall direct API access. The command is the point; the API underneath is just plumbing.
That's different from open-source single-network terminal clients (the various Mastodon or Bluesky CLIs). Those are great if you only post to one open-API network, but they don't cover the mainstream platforms, don't schedule natively, and don't generate content. This guide is about driving your *whole* social presence from one command line.
---
## How We Evaluated
We assessed each CLI across five criteria:
- **Is it actually a CLI?** A verified, installable command-line binary (real npm `bin` entry), not an API, SDK, or MCP server wearing the label. This was a hard gate.
- **Platform coverage** - How many mainstream networks can it reach? TikTok, Instagram, YouTube, Facebook, Pinterest, LinkedIn, X, and beyond?
- **Posting and scheduling** - Can it post immediately, upload video and images, schedule for later, and customize per platform?
- **Content creation** - Does it only distribute content you already have, or can it generate images and video too?
- **Automation and AI-agent fit** - How cleanly does it drop into cron, CI/CD, and agent tool loops (Claude Code, Cursor, Codex)? JSON output, idempotency, a skill file, or an MCP server?
We gave credit for independently verifiable signal - a real npm `bin` entry, a public GitHub repo with stars and commits, and organic discussion - and weighted that over marketing claims, because this category is full of vendor SEO. Where a CLI is genuinely new or low-volume, we say so in plain terms.
---
## Quick Comparison
| Tool | Platforms | CLI Install | Schedules | Analytics | AI Content | Starting Price |
|---|---|---|---|---|---|---|
| **Genviral** | 6 | `npm i -g genviral` | Yes | 3 platforms | Image + video + slideshow | $29/mo |
| **Buffer** | 11 | `npm i -g @bufferapp/cli` | Yes | Experimental | No | Free / $5 per channel |
| **Simplified** | 10 | `npm i -g simplified-cli` | Yes | Yes | Image | Free / ~$19/mo |
| **Zernio** | 13+ | `npm i -g @zernio/cli` | Yes | Yes | No | 2 free accounts / usage-based |
| **Post Bridge** | 9 | `npm i -g postbridge-cli` | Yes | Yes | No | From ~$5/mo + agent add-on |
| **Wonda** | 5 | `npm i -g @degausai/wonda` | Yes | Limited | Image + video | Usage-based credits |
---
## 1. Genviral - Best All-in-One Social Media CLI

**Platforms:** TikTok, Instagram, YouTube, Facebook, Pinterest, LinkedIn (posting to all 6; analytics on TikTok, Instagram, and YouTube)
**CLI:** [`genviral` on npm](https://www.npmjs.com/package/genviral)
[Genviral](https://www.genviral.io/) ships the most complete CLI on this list - the only one that runs the *entire* social media loop from the terminal. Where the other tools here distribute content you already made, the `genviral` command can research a trend, generate the image or video, post or schedule it across six mainstream platforms, and pull the analytics back, all from one authenticated binary. Install it with `npm install -g genviral`, export your API key, and you're posting in two commands:
```bash
npm install -g genviral
export GENVIRAL_API_KEY="public_id.secret"
genviral accounts
genviral create-post \
--caption "Launch day" \
--media-type video \
--media-url "https://cdn.example.com/launch.mp4" \
--accounts "account_uuid"
```
It is built for exactly the people who want a social media CLI in the first place: developers, indie hackers, and AI agents that need social posting to be scriptable, not click-through. Every command returns a predictable JSON envelope, so it pipes straight into `jq`, cron, CI/CD, or an agent's tool loop.
### Key Features
- **Cross-platform posting and scheduling** - One `genviral create-post` reaches TikTok, Instagram, YouTube, Facebook, Pinterest, and LinkedIn. Supports video, photo carousels, and slideshows, with per-platform settings (YouTube title/privacy, Instagram Reel cover and share-to-feed, TikTok privacy/comment/duet/stitch flags) via flags or `--settings-json`.
- **AI content generation** - The CLI doesn't just post, it *creates*. `genviral studio-generate-image` and `genviral studio-generate-video` produce media with the same models you'd use in the app (Nano Banana, SeeDream 5, GPT Image 1.5 for images; Sora 2, Veo 3.1, Kling 2.6 Pro for video). Image generation is synchronous; video is async with `genviral studio-video-status --poll`.
- **TikTok trend briefs** - `genviral trend-brief` returns top hashtags, sounds, creators, posting windows, and hook angles for any keyword - a research command none of the others have.
- **Slideshows, packs, templates** - Full CRUD from the terminal: `generate`, `render`, `review`, `regenerate-slide`, `duplicate`, plus reusable image packs and templates to keep branding consistent.
- **Analytics** - `genviral analytics-summary` and `analytics-posts` track any TikTok, Instagram, or YouTube handle (yours or a competitor's) with follower counts, engagement, and post-level metrics.
- **Full pipeline in one call** - `genviral full-pipeline` chains generation through to a draft post, so an agent can go from idea to scheduled content in a single command.
- **Built for scripting and agents** - Consistent `{ ok, code, message, data }` envelope, `--json` for compact output, `--full` for the raw response, and `--external-id` idempotency on `create-post` so retries never double-post. Works alongside the official [OpenClaw skill](https://www.genviral.io/openclaw) for Claude Code, Cursor, and Codex.
### Pricing
| Plan | Price (Monthly) | Credits | Social Accounts | CLI / API Access |
|---|---|---|---|---|
| Creator | $29/mo ($290/yr) | 200/mo | 10 | Yes |
| Professional | $49/mo ($490/yr) | 500/mo | 15 | Yes |
| Business | $99/mo ($990/yr) | 1,200/mo | 30 | Yes + workspaces |
- CLI and API access are included on every plan - there's no separate developer tier to buy.
- Credits cover AI generation and automation (images 1-3 credits, video 5-72 credits depending on model). Posting and scheduling themselves don't burn generation credits.
- 30-day money-back guarantee across all plans.
### Pros
- The only CLI here that **generates** image, video, *and* slideshow content and posts it - not just distributes media you already have.
- Reaches the mainstream networks (TikTok, Instagram, YouTube) with sanctioned OAuth - no per-platform developer apps to register.
- Native scheduling, analytics, and TikTok trend briefs in one binary.
- Agent-native: clean JSON envelope, idempotency keys, and a companion OpenClaw skill for Claude Code / Cursor / Codex.
- One install, one API key, six platforms.
### Cons
- 6 platforms - no X/Twitter, Bluesky, Mastodon, or Reddit (Zernio covers more networks).
- It's a hosted CLI, so it requires a Genviral account and API key.
- Credit-based pricing for generation is a different mental model than flat per-channel pricing.
- Analytics cover TikTok, Instagram, and YouTube today, not all six networks.
### Best For
Developers, indie hackers, and AI agents that want to **create and distribute** content from the terminal - the full research → generate → post → measure loop in one scriptable CLI, rather than a posting-only client.
---
## 2. Buffer - Best Established Scheduler With a CLI

**Platforms:** Facebook, Instagram, X/Twitter, LinkedIn, TikTok, Pinterest, YouTube, Google Business Profile, Threads, Bluesky, Mastodon (11 total)
**CLI:** [`@bufferapp/cli` on npm](https://www.npmjs.com/package/@bufferapp/cli)
[Buffer](https://buffer.com) is the most established name here, and in 2026 it shipped a genuine first-party CLI under its own `@bufferapp` npm scope. It covers the full posting workflow from the terminal - create, schedule, queue, list channels and posts, manage content ideas - and outputs JSON with a handy dry-run mode that prints the request payload without sending it. It even ships Claude Code and Codex skill files. The CLI itself is brand new and still low-volume, and its analytics are explicitly experimental, but the scheduling engine behind it is the most battle-tested on this list.
### Key Features
- Create, schedule, and queue posts; list and get channels and posts.
- Create and manage content "ideas" (drafts) from the terminal.
- Experimental analytics metrics and quarterly reports.
- Dry-run validation that prints the request payload without calling the API.
- JSON output with field selection, plus `buffer init` / `buffer doctor` and bundled Claude Code + Codex skills.
### Pricing
Free (3 channels, 10 queued posts per channel). Essentials around $5/channel/mo (yearly); Team around $10/channel/mo. The CLI uses your existing Buffer plan via a dashboard-generated API key.
### Pros
- A genuine, official, first-party CLI from a long-established, trusted, profitable product.
- Broad platform coverage including Bluesky, Threads, Mastodon, and Google Business Profile.
- Agent-ready: JSON output, dry-run preview, and shipped Claude Code/Codex skills.
- Generous free tier to test the CLI before paying.
### Cons
- The CLI is very new (v1.0.0, mid-2026) with low npm download volume.
- Analytics in the CLI are experimental and lighter than the web app.
- Per-channel pricing scales up quickly for many connected accounts.
- No content generation - you bring your own media.
### Best For
Teams and creators who already trust Buffer and want to drive its proven scheduling engine from the terminal or an agent - and are fine working within Buffer's per-channel model.
---
## 3. Simplified - Best Open-Source CLI With AI Image Generation
**Platforms:** Instagram, TikTok, LinkedIn, YouTube, Facebook, Pinterest, Threads, Bluesky, Google Business Profile (10 total)
**CLI:** [`simplified-cli` on npm](https://www.npmjs.com/package/simplified-cli)
[Simplified](https://simplified.com) ships `simplified-cli`, the most actively maintained and highest-download dedicated scheduler CLI in this set. It's genuinely open source (MIT, auditable on GitHub), JSON-native, and ships an installable Claude Code plugin. Beyond publishing and analytics across 10 platforms, it also generates and edits images from the command line (background removal, upscaling, format conversion) - making it the closest tool here to Genviral's create-and-post model, though it stops at images and covers fewer platforms.
### Key Features
- Schedule and publish posts across 10 platforms.
- Analytics: engagement, followers, reach.
- AI image generation (20+ models) plus image processing (background removal, upscale, convert).
- Asset management, brand kits, and project organization.
- JSON-native stdout for command chaining, plus a Claude Code plugin.
### Pricing
Free Forever (10 posts in queue). Paid plans run from roughly $19/mo (Pro, annual) up to ~$79–$149/mo (Business/Enterprise), which add seats and more connected accounts. The CLI uses your Simplified account.
### Pros
- A genuine open-source (MIT) global CLI with a real `bin` entry, auditable on GitHub.
- The most actively maintained CLI here, with the highest weekly download volume.
- Generates and edits images from the terminal, not just posts.
- JSON-native output and a Claude Code plugin for autonomous workflows.
### Cons
- Requires Node.js 22+.
- The free tier is effectively a trial (10 posts in queue).
- Fewer platforms than Zernio, and no DM/inbox automation in the CLI.
- Image-only AI generation - no video or slideshows.
### Best For
Developers who want an open-source, inspectable scheduler CLI that also generates and edits images - and who post to the mainstream networks without needing X or Reddit.
---
## 4. Zernio - Best Platform Breadth Plus Inbox Automation
**Platforms:** Instagram, TikTok, X/Twitter, LinkedIn, Facebook, Threads, YouTube, Bluesky, Pinterest, Reddit, Snapchat, Telegram, Google Business Profile (13+ total)
**CLI:** [`@zernio/cli` on npm](https://www.npmjs.com/package/@zernio/cli)
[Zernio](https://zernio.com) - the rebrand of Late / getlate.dev - ships `@zernio/cli`, a real global binary that installs both `zernio` and `late` commands. It has the widest practical platform coverage on this list (around 13–14 networks, including Snapchat, Telegram, and Reddit) and does far more than post: the CLI manages your inbox and DMs, sends broadcasts, runs drip sequences, and triggers automations from comments, all JSON-first with an MCP server. The honest caveat: it recently rebranded and the CLI is still early (v0.3.x) with thin organic validation.
### Key Features
- Create and schedule posts across many accounts; upload media.
- Analytics and performance metrics.
- Inbox: DM and comment management.
- Broadcasts / bulk messaging and automated drip sequences.
- Comment-triggered automation (Instagram/Facebook), contact management, and an MCP server; browser or API-key auth.
### Pricing
First 2 connected accounts free (20 posts/month total). Paid is usage-based per connected account: roughly $6/account for 1–10, scaling down to ~$1/account at higher volumes, with unlimited posts, analytics, inbox, and API per paid account.
### Pros
- A genuine global CLI binary that does posting, inbox, and automation.
- The widest platform coverage here, including Snapchat, Telegram, and Reddit.
- Goes beyond scheduling: inbox/DM, broadcasts, sequences, and automations.
- JSON-first, with an MCP server and flexible auth.
### Cons
- Recently rebranded (Late → Zernio); naming and URLs are still in flux.
- Early CLI version and low download volume - less battle-tested.
- Pay-per-connected-account pricing can climb as you add accounts.
- Heavy reliance on vendor SEO with little independent discussion.
### Best For
Teams that need the broadest network coverage plus inbox and automation from one CLI, and are comfortable adopting a newer, fast-moving tool.
---
## 5. Post Bridge - Best Creator SaaS With an Agent CLI
**Platforms:** Instagram, TikTok, YouTube, X/Twitter, LinkedIn, Facebook, Pinterest, Threads, Bluesky (9 total)
**CLI:** [`postbridge-cli` on npm](https://www.npmjs.com/package/postbridge-cli)
[Post Bridge](https://www.post-bridge.com/) is an established creator-focused scheduling product - with genuine third-party reviews and a founder-disclosed MRR - whose `postbridge-cli` is a verified, zero-dependency CLI that also installs as a Claude Code / Cursor / Windsurf skill and offers an MCP server. It posts, schedules, and tracks analytics across 9 platforms with per-platform customization (TikTok draft mode, custom YouTube titles) at affordable creator pricing. The CLI specifically is brand new and low-volume, but it's an MIT-licensed wrapper you can inspect.
### Key Features
- Setup/auth with an API key; list connected accounts and verify status.
- Post immediately, schedule to specific times, or drop into auto-queue slots.
- Media upload (image/video) with automatic format conversion.
- Analytics (views, likes, comments, shares) and per-platform results.
- Per-platform customization (custom captions, TikTok draft, YouTube titles); installable as a Claude Code/Cursor/Windsurf skill with an MCP server.
### Pricing
Paid plans (billed yearly) run roughly Starter ~$5–7.50/mo, Creator ~$11–15/mo, Pro ~$16–22.50/mo, Growth ~$49/mo, with agent/API access as a ~$5/mo add-on. There's a free trial / limited free tier. The CLI uses your account API key.
### Pros
- Backed by a genuinely established product with organic third-party reviews.
- A verified CLI that doubles as an agent skill plus an MCP server.
- Per-platform options (TikTok draft, YouTube titles) and zero-install usage via `npx`.
- Affordable creator-focused pricing; the MIT CLI is inspectable.
### Cons
- The CLI is brand new with low downloads and a small repo.
- Requires a paid agent add-on on top of the base plan to use the CLI.
- Fewer platforms (9) than Zernio.
- Much of the discoverable content is self-published or affiliate-style.
### Best For
Solo creators and small teams who want affordable, creator-friendly scheduling that they can also automate from the terminal or an AI agent.
---
## 6. Wonda - Best CLI When AI Media Generation Matters Most
**Platforms:** Instagram, TikTok, X/Twitter, LinkedIn, Reddit (5 total)
**CLI:** [`@degausai/wonda` on npm](https://github.com/degausai/wonda)
[Wonda](https://www.wonda.sh) (`@degausai/wonda`, bin: `wonda`) is the highest-version, highest-adoption CLI in this set, with a public, starred GitHub repo - and it's distributed primarily *as* a CLI. It's less a pure scheduler and more an end-to-end AI content tool: it generates and edits media (images, video, captions, lip-sync, TTS) and then publishes or schedules to a smaller set of platforms, with clean JSON output built for Claude Code and Codex. If your bottleneck is *making* the content, Wonda leans hard into that - at the cost of the narrowest posting platform list here.
### Key Features
- AI generation: images, video, text, music, TTS/STT, multi-speaker dialogue.
- Video editing: captions, overlays, audio mixing, merge, trim, speed, background removal, lip-sync, upscaling.
- Publishing and scheduling/queueing across platforms from the terminal.
- Social automation (LinkedIn/X/Reddit) plus trend research and content analysis.
- JSON output to stdout with `--quiet`, `--fields`, and `--jq`; credit balance and cost estimation.
### Pricing
Account required at wonda.sh; media editing is free, with AI generations billed at model cost via credit top-ups. No simple flat scheduling tier is published on the CLI surfaces.
### Pros
- The highest adoption and maturity here, with a public, actively-pushed GitHub repo (~126 stars).
- Distributed primarily as a CLI, with a very broad capability set: AI media generation and editing plus multi-platform publishing.
- Agent-friendly: clean JSON to stdout, `--jq`/`--fields`/`--quiet`, built for Claude Code/Codex.
- Frequent releases and free media editing.
### Cons
- The narrowest scheduling platform list (5) - no YouTube, Facebook, Pinterest, or Bluesky.
- Positioned as an AI content-generation tool first; scheduling is secondary.
- Credit/usage-based AI costs can be unpredictable, with no clear flat pricing.
- Heavy vendor SEO footprint with little independent discussion.
### Best For
Creators and agents whose main job is generating short-form media at the command line, and who only need to publish to a handful of networks.
---
## Capability Matrix
A quick at-a-glance view of what each CLI can actually do:
| Tool | Post | Schedule | Analytics | AI Content | Platforms | Agent/MCP |
|---|---|---|---|---|---|---|
| Genviral | Yes | Yes | 3 platforms | Image + video + slideshow | 6 | Yes (OpenClaw skill) |
| Buffer | Yes | Yes | Experimental | - | 11 | Yes (skills) |
| Simplified | Yes | Yes | Yes | Image | 10 | Yes (Claude plugin) |
| Zernio | Yes | Yes | Yes | - | 13+ | Yes (MCP) |
| Post Bridge | Yes | Yes | Yes | - | 9 | Yes (skill + MCP) |
| Wonda | Yes | Yes | Limited | Image + video | 5 | Yes (built for agents) |
---
## What We Excluded: API-Only Tools With No CLI
Every tool above is a real CLI - we confirmed an installable `bin` entry on npm (and, where available, a public GitHub repo) for each one. These popular products are often *called* CLIs but aren't, so we left them out:
- **Upload-Post** ships a Python *SDK* with no console entry point - there's no terminal binary to install.
- **Ayrshare, Post for Me, and Outstand** ship a REST API plus language SDKs (and in some cases an MCP server), but no command-line tool.
- We also left out genuinely **API-first products that bolt on a thin CLI** as a secondary surface. When the API is the product and the CLI is an afterthought, it's not really a CLI tool - which is the whole point of this guide.
If you want a command you can run in a terminal, check for a real `bin`: the package should expose an executable name (like `genviral`, `buffer`, or `zernio`) that works after `npm install -g`. An MCP server or an SDK import is not the same thing.
---
## How to Choose
**Want to create *and* post content from the terminal?** [Genviral](https://www.genviral.io/) is the only CLI here that generates images, video, *and* slideshows and posts or schedules them across TikTok, Instagram, YouTube, Facebook, Pinterest, and LinkedIn - with analytics and TikTok trend briefs - from one `genviral` command. Best for the full content loop. Simplified is the runner-up if you only need AI *images* and a smaller platform set; Wonda if media generation is your whole focus and you post to just a few networks.
**Already trust an established brand?** [Buffer](https://buffer.com) is the most proven product on the list, now with a real first-party CLI and a generous free tier - a safe pick if you value a long track record over cutting-edge features.
**Need the widest network coverage?** [Zernio](https://zernio.com) reaches the most platforms (13+), including Reddit, Snapchat, and Telegram, and adds inbox and comment automation on top of scheduling.
**Creator on a budget who also wants automation?** [Post Bridge](https://www.post-bridge.com/) offers affordable creator pricing with a verified agent-mode CLI and MCP server.
**Building AI agents?** Every tool here ships some agent surface, but Genviral (OpenClaw skill + content generation), Post Bridge (skill + MCP), and Wonda (built for Claude Code/Codex) are the most agent-native.
---
## FAQ
### What is a social media CLI?
A social media CLI is a command-line program that lets your terminal - or a script, cron job, or AI agent - post, schedule, upload media, and pull analytics without a browser dashboard. The tools in this guide are real, installable CLIs (npm packages you run after `npm install -g`) tied to a social media product.
### Which social media CLI is best for AI agents?
Genviral is purpose-built for agent workflows: a consistent `{ ok, code, message, data }` JSON envelope, `--external-id` idempotency so retries never double-post, content-generation commands, and a companion [OpenClaw skill](https://www.genviral.io/blog/best-openclaw-skills-social-media) for Claude Code, Cursor, and Codex. Post Bridge and Wonda are also strongly agent-native, shipping skill files and (for Post Bridge) an MCP server.
### Can I post to TikTok or Instagram from the command line?
Yes - through a CLI that holds sanctioned OAuth for you. [Genviral](https://www.genviral.io/tiktok-scheduler), Buffer, Simplified, Zernio, and Post Bridge all post to TikTok and Instagram via the platforms' official upload flows. Open-source single-network CLIs generally can't, because TikTok and Instagram don't offer the open posting APIs that Mastodon and Bluesky do. Avoid cookie-scraping uploaders - they break often and risk account suspension.
### Are these social media CLIs free?
Most have a free tier but are paid for real use. Buffer's free tier covers 3 channels; Simplified, Zernio, and Post Bridge all offer limited free tiers or trials, then move to paid plans. Genviral starts at $29/mo with CLI and API access included on every plan. Simplified's CLI is open source (MIT) even though the product behind it is a paid SaaS.
### How do I know a "social media CLI" is actually a CLI and not just an API?
Check for a real command-line binary. On npm, the package's `bin` field should expose an executable (like `genviral` or `buffer`) that runs after `npm install -g`. If the product only offers a REST API, a language SDK you `import`, or an MCP server, it's not a CLI - even if its marketing says "CLI." Every tool in this guide passed that check; Upload-Post, Ayrshare, and Outstand did not.
### Do these CLIs generate content or only post it?
Most only distribute content you already have. The exceptions are Genviral (AI images, video, *and* slideshows, plus TikTok trend briefs), Simplified (AI images and image editing), and Wonda (AI images and video). If "create and post in one command" matters, those three lead.
### How do I install a social media CLI?
They're npm packages, so installation is consistent: `npm install -g genviral`, `npm install -g @bufferapp/cli`, `npm install -g simplified-cli`, `npm install -g @zernio/cli`, `npm install -g postbridge-cli`, or `npm install -g @degausai/wonda`. Then authenticate with an API key generated from the product's dashboard.
---
## Key Takeaways
- **A "social media CLI" should be a command you can actually run.** Verify a real npm `bin` entry - many products marketed as CLIs ship only an API, SDK, or MCP server (Upload-Post, Ayrshare, and others).
- **Genviral ships the most complete CLI** - AI image/video/slideshow generation, cross-platform posting and scheduling, analytics, and TikTok trend briefs across 6 networks from one `genviral` command, installable with `npm install -g genviral`.
- **Buffer is the safe, established pick** - a proven product with a brand-new but genuinely first-party CLI and a generous free tier.
- **Simplified is the best open-source option** (MIT, most actively maintained) and the closest challenger on AI image generation.
- **Zernio covers the most networks** (13+) and adds inbox and comment automation on top of scheduling.
- **Post Bridge is the creator-friendly, affordable pick** with a verified agent CLI; **Wonda leads on AI media generation** but posts to the fewest platforms.
- **An API underneath is fine - an API *instead* of a CLI is not.** We kept this list to genuine command-line tools, which is what makes them worth using from a terminal in the first place.
---
## Related Guides
- [10 Best Social Media APIs for Posting & Automation](https://www.genviral.io/blog/best-social-media-apis)
- [How to Use OpenClaw to Automate Your Social Media](https://www.genviral.io/blog/how-to-use-openclaw)
- [15 Best OpenClaw Skills for Social Media Marketing](https://www.genviral.io/blog/best-openclaw-skills-social-media)
- [How to Schedule TikTok Posts](https://www.genviral.io/tiktok-scheduler)
- [How to Schedule Instagram Posts](https://www.genviral.io/instagram-scheduler)
- [AI Agents for Social Media](https://www.genviral.io/hermes-agent)
---
*Genviral is an AI-powered social media platform with a CLI (`genviral`), REST API, and OpenClaw skill for autonomous content creation, scheduling, and analytics across TikTok, Instagram, YouTube, Facebook, Pinterest, and LinkedIn. [Get started →](https://www.genviral.io)*
---
Canonical HTML: https://www.genviral.io/blog/best-social-media-cli
# Best Social Media Data APIs in 2026 (Compared for Developers)
Looking for a social media data API for profiles, posts, comments, and video metadata? This guide compares coverage, pricing models, and where each option fits your product.
Building a creator tool or a brand monitoring dashboard usually starts with a simple question: how do we get the data? Then come separate platform integrations, pagination rules, missing fields, and scrapers that need maintenance.
A managed social media data API can take part of that work off your team. You send HTTP requests and receive structured data for your application, research pipeline, or AI agent.
Our first pick is **ScrapeAtlas** for developers who want broad public-data coverage through one integration. The alternatives below cover enterprise collection, custom scraping, creator-authorized metrics, and warehouse research.
**Disclosure:** ScrapeAtlas is our product. This is an editorial comparison based on public documentation, checked on September 30, 2026. We did not run comparative speed, uptime, or accuracy benchmarks.
## Social Media Data APIs at a Glance
| Option | Type | Best fit | Pricing model |
| ------------------------------- | ------------------------------------- | ------------------------------------------- | ----------------------------------------- |
| **1. ScrapeAtlas** | Public social and media data API | Apps and agents spanning multiple platforms | 100 free credits; one-time packs from $19 |
| **2. Bright Data** | Managed social scrapers | Enterprise data collection | Successful records; volume plans |
| **3. Apify** | Scraper and automation marketplace | Custom collection jobs | Actor-specific charges and platform usage |
| **4. Oxylabs** | Managed web scraping API | Broad scraping infrastructure | Usage plans; target-dependent pricing |
| **5. ScrapingBee** | Scraping API with dedicated endpoints | General web scraping alongside social data | Monthly API credits |
| **6. RapidAPI** | API marketplace | Trying a narrow endpoint | Varies by provider and listing |
| **7. Phyllo** | Creator data infrastructure | Creator-authorized insights and discovery | Product-specific plans |
| **8. Official platform APIs** | Platform-owned integrations | Account access and authorized actions | Platform-specific quotas and charges |
| **9. BigQuery public datasets** | Warehouse data access | Batch and historical research | Query usage; free-tier limits apply |
These options serve different jobs. BigQuery is included as a research alternative, and marketplaces require you to choose an individual provider. Pricing sources are linked in each section.
## How to Compare Social Media Data APIs
Start with the requests your product actually needs. A vendor supporting Instagram does not tell you whether it exposes profile details, Reels, comments, search, or all four.
- **Endpoint depth:** Check the exact fields and pagination for each platform you need.
- **Freshness:** Ask whether results are fetched live, cached, or delivered from a stored dataset.
- **Cost:** Identify the billable unit: a request, a returned record, a page, or compute time.
- **Failure handling:** Check how the provider represents partial responses, empty results, retries, and errors.
- **Developer experience:** Look for clear authentication, response examples, documented limits, and a usable support path.
One API key also does not guarantee one identical schema across platforms. Inspect real responses before designing your database or promising a field to your users.
## 1. ScrapeAtlas: Our Top Pick for Public Social Data and AI Workflows
[ScrapeAtlas](https://scrapeatlas.com/) combines public social, video, community, advertising, and commerce data under one API. Its homepage lists **39 platforms and 289 endpoints** at the time of this review.
That breadth is useful when a workflow crosses platforms. A creator research product might need an Instagram profile, a YouTube transcript, and a Reddit discussion without maintaining three separate vendor integrations.
### What You Can Retrieve
The [API documentation](https://scrapeatlas.com/docs/) includes Instagram profiles and posts, TikTok videos and comments, YouTube metadata and transcripts, and Reddit conversations.
It also covers sources beyond the major social feeds, including Meta Ads Library, Pinterest, Threads, LinkedIn, and marketplaces such as Depop and Etsy. Available fields and collection depth depend on the endpoint.
### Developer and Agent Access
Requests use an `x-api-key` header and return JSON. You can call the API from your application, use the `@scrapeatlas/cli` terminal client, or connect an AI workflow through MCP. See the [integration guides](https://scrapeatlas.com/docs/).
For an agent, the practical benefit is access to source material it can inspect before answering: recent posts, comments, or a transcript relevant to the user's question.
### Pricing
The [public pricing section](https://scrapeatlas.com/#pricing) lists these one-time packs in US dollars:
| Pack | Price | Credits |
| ------- | ----- | ------- |
| Free | $0 | 100 |
| Starter | $19 | 10,000 |
| Growth | $89 | 50,000 |
No credit card is required for the free allowance. Credits do not expire, and the listed packs have no monthly subscription.
According to the site's credit policy, a successful retrieval costs one credit, including partial results and valid empty collections. Additional pages are separate requests.
Failed requests cost zero credits. Internal retries cost nothing extra.
**Best for:** Developers building public-data features across several platforms, especially when the same integration needs to support application code and AI agents.
**Check first:** Whether the endpoints expose your required fields. Public-data retrieval does not replace creator-authorized access to private account analytics.
[Try ScrapeAtlas with 100 free credits](https://scrapeatlas.com/).
## 2. Bright Data: Best Fit for Enterprise Social Data Collection
[Bright Data's Social Media Scraper API](https://brightdata.com/products/web-scraper/social-media-scrape) offers collectors for networks including Instagram, Facebook, TikTok, LinkedIn, X, and YouTube.
It fits teams that already buy web data at scale and want social collection alongside their other scraping and dataset workflows.
**Pricing:** Bright Data prices its scraper API around successfully delivered records, with volume plans available. Check its [current scraper pricing](https://brightdata.com/pricing/web-scraper) for your collection method and volume.
**Trade-off:** Compare the cost per usable result. A price per thousand records cannot be compared directly with a price per thousand requests when one request can return multiple records.
## 3. Apify: Best Fit for Custom Scrapers and Scheduled Jobs
[Apify](https://apify.com/store) offers a marketplace of Actors: programs that collect data or automate tasks. Social scrapers sit alongside scheduling, storage, and tools for running your own collection logic.
This makes Apify worth checking when a managed API lacks a particular search, filter, or workflow. You can choose an existing Actor or build one around the job you need.
**Pricing:** Costs depend on the Actor's charging model and your platform usage. Review both [Apify's plans](https://apify.com/pricing) and the individual Actor's pricing before estimating a production workload.
**Trade-off:** Inputs, outputs, maintenance, and support differ between Actors. Treat each one as a separate integration to evaluate.
## 4. Oxylabs: Best Fit for Teams with Broader Web Scraping Needs
[Oxylabs Web Scraper API](https://oxylabs.io/products/scraper-api/web) provides managed collection infrastructure for public websites, with ready-to-use scraping sources and parsing options.
It is a candidate when social or video data is one part of a larger scraping operation, alongside ecommerce, search, or other web sources.
**Pricing:** Consult the [Web Scraper API pricing](https://oxylabs.io/products/scraper-api/web/pricing) for current plans and trial terms. Confirm the target and parsing features included in your intended setup.
**Trade-off:** Verify the exact source you need. A provider's ability to fetch a website does not, by itself, establish support for structured profiles, comments, or discovery results.
## 5. ScrapingBee: Best Fit for Mixed Web and Social Scraping
[ScrapingBee](https://www.scrapingbee.com/) handles proxies and JavaScript rendering. Its [dedicated scraper tools](https://www.scrapingbee.com/documentation/cli/) include YouTube search and video metadata.
That combination can suit a product collecting both structured social data and ordinary web pages.
**Pricing:** Plans use API credits. Check [ScrapingBee's pricing](https://www.scrapingbee.com/pricing/) and the credit cost of your chosen endpoint and request options.
**Trade-off:** A dedicated endpoint and a general page request are different integrations. Confirm whether you receive structured fields or need to parse HTML yourself.
## 6. RapidAPI: Best Fit for Testing a Specific Endpoint
[RapidAPI](https://rapidapi.com/) is an API marketplace. You can discover and subscribe to individual services for platforms such as Instagram, TikTok, or YouTube.
It is useful when you want to compare a few providers for a narrow requirement before choosing one for your application.
**Pricing:** Free allowances, subscriptions, overages, and limits belong to the individual listing. Read that provider's plan details before sending a large batch.
**Trade-off:** Marketplace availability does not establish a provider's reliability. Check response completeness, maintenance history, documentation, and support yourself.
## 7. Phyllo: Best Fit for Creator-Authorized Data
[Phyllo](https://www.getphyllo.com/) offers creator data products that include connected-account access and public discovery. Its Connect SDK supports workflows where creators authorize access to their accounts.
This matters when your product needs insights that are unavailable from a public profile, such as supported audience or account performance metrics.
**Pricing:** [Phyllo's pricing page](https://www.getphyllo.com/pricing) asks you to request a quote. Confirm the product, platforms, and data access included in that quote.
**Trade-off:** Public discovery and creator-authorized access have different onboarding and coverage requirements. Confirm which fields require a connected account.
## 8. Official Platform APIs: Best Fit for Authorized Account Features
Official APIs are the starting point when your product needs to act on a user's account or access data through that platform's authorization flow.
Examples include the [YouTube Data API](https://developers.google.com/youtube/v3), [TikTok developer products](https://developers.tiktok.com/products/), and [Meta's Instagram platform](https://developers.facebook.com/docs/instagram-platform/).
**Pricing and limits:** Each platform defines its own permissions, quotas, review requirements, and commercial terms. Check the particular API rather than assuming a shared free tier.
**Trade-off:** An authorized account integration may not support broad discovery of unrelated public accounts. Many products need both account connections and a public-data provider.
If your main goal is publishing and scheduling, our [social media CLI comparison](https://www.genviral.io/blog/best-social-media-cli) covers a different set of tools built for those workflows.
## 9. BigQuery Public Datasets: An Alternative for Batch Research
[BigQuery public datasets](https://cloud.google.com/bigquery/public-data) let you query hosted datasets with SQL. Google's program includes a Stack Overflow dataset, which can support community research and historical analysis.
This option belongs in a research stack when you already know the dataset contains the records you need. It does not provide live Instagram profiles or TikTok comments on demand.
**Pricing:** Public dataset storage is hosted by the program; query usage is subject to BigQuery's pricing and free-tier limits.
**Trade-off:** Check the dataset's scope, update schedule, and license before planning your analysis. Freshness depends on the dataset, not just the ability to call BigQuery's API.
## How to Choose the Right API for Your Product
Build a short acceptance checklist before signing up. For example: retrieve a profile, collect two pages of posts, fetch comments, and handle a missing or unavailable record.
Run the same workload against two or three candidates. Record the fields returned, missing values, response times, pagination behavior, and total charge. Include the requests your product finds difficult, not just popular public profiles.
Calculate cost at the workflow level. If researching one creator requires a profile lookup, three post pages, and two comment pages, your unit is that complete sequence rather than a single advertised request.
Choose **ScrapeAtlas** when broad public-data coverage and access from both code and agents match your needs. Start with a specific feature, use the free credits to validate it, and expand once the responses meet your requirements.
Choose a specialist when your requirements point elsewhere: Apify for custom Actors, Phyllo for creator-authorized insights, enterprise scraping providers for broader collection operations, or official APIs for account actions.
## Frequently Asked Questions
### What Is the Best Social Media Data API for Developers?
ScrapeAtlas is our first recommendation for public-data workflows spanning multiple platforms. The right choice depends on your required endpoints, authorization needs, and cost per completed workflow.
### Can I Try a Social Media Data API for Free?
ScrapeAtlas offers 100 starter credits. Other providers offer trials or free allowances with different limits. Compare what the allowance lets you retrieve, since credits, records, and compute budgets are different units.
### Can One API Cover Every Social Platform?
Several services cover multiple platforms, but coverage is specific to endpoints and fields. Check the operations you need on each network before assuming one provider covers your entire product.
### Can I Use These APIs with an AI Agent?
An agent with HTTP tooling can use an API through your integration. ScrapeAtlas also provides MCP access and a CLI. Design the workflow to preserve source URLs and distinguish missing data from a verified result.
## Start with the Data Your Product Needs
The strongest API choice is the one that reliably supplies the fields your users depend on at a cost you understand. Platform counts help you shortlist; your own workload tells you whether the integration fits.
[Start with ScrapeAtlas](https://scrapeatlas.com/) and test the endpoints behind your next feature. Keep this comparison handy if you also need custom collection, creator-authorized data, or a warehouse source.
---
Canonical HTML: https://www.genviral.io/blog/best-social-media-data-apis
# 12 Best TikTok Schedulers in 2026 (Tested & Compared)
- TikTok schedulers in 2026 split into three categories: **TikTok-first platforms** that handle creation, slideshows, multi-account posting, and analytics in one workflow (Genviral); **generalist all-in-one suites** that treat TikTok as one channel among many (Buffer, Hootsuite, Later, Sprout, Metricool, Publer, Vista Social, SocialBee); and **everything-else options** including AI-only generators (Predis.ai), open-source self-host (Postiz), and TikTok's free [native scheduler](https://www.tiktok.com/creator-center).
- We tested 12 schedulers across six criteria: TikTok-native posting depth, slideshow / carousel support, scheduling and queue logic, AI content generation, analytics, and pricing.
- [Genviral](https://www.genviral.io/) is the only tool on this list built TikTok-first - photo carousels up to 35 images, branded-content and commercial-content disclosures, comment / duet / stitch toggles, custom cover frames, draft + direct-post modes, and a [TikTok Scheduler](https://www.genviral.io/tiktok-scheduler) that publishes to as many TikTok accounts as you want from one queue.
- Pricing spans free (Postiz self-host, TikTok native), freemium ($0-29/mo for Buffer, Publer, Metricool, Vista Social), mid-tier ($29-49/mo for Genviral, SocialBee, Predis.ai, Later), and enterprise ($99-249+/seat for Hootsuite and Sprout Social).
- If your job is actually growing on TikTok - not posting one update a week to seven networks - a TikTok-first tool wins on every metric that matters: time to publish, slideshow support, multi-account workflows, and TikTok-native analytics.
The TikTok scheduler category looks crowded until you start using the tools. Most "TikTok schedulers" are actually generalist social media suites that bolted on TikTok support somewhere between Buffer's 2007 launch and the present day. They post to TikTok, but they treat it the same way they treat LinkedIn or Pinterest: a single video, a single caption, a single time. That worked when TikTok was new. It does not work in 2026, when serious creators run multiple accounts, post 3-10 times a day, mix slideshows and videos, and need analytics that go beyond "how many likes did this post get."
We tested 12 of the most popular TikTok schedulers on the market, ranging from TikTok-first platforms to enterprise suites to TikTok's own free in-app scheduler. Whether you are a solo creator posting daily, an agency managing dozens of accounts, an ecommerce brand running TikTok Shop, or a SaaS founder doing TikTok-led growth, there is a tool on this list that fits.
---
## What Is a TikTok Scheduler?
A **TikTok scheduler** is a tool that publishes content to TikTok at a future time, instead of you posting manually from the app. Modern schedulers go far beyond a calendar - the good ones handle bulk uploads, multi-account workflows, photo carousels, captions and hashtags, branded-content disclosures, comment and stitch toggles, analytics, and team collaboration.
In 2026, TikTok schedulers fall into three categories:
1. **TikTok-first platforms** - built around TikTok's actual content formats (videos, photo carousels, sounds, captions, branded content) and creator workflows (multi-account, daily volume, slideshows). [Genviral](https://www.genviral.io/) is the canonical example.
2. **Generalist all-in-one suites** - schedulers that support 6-15 networks and treat TikTok as one of them. Buffer, Hootsuite, Later, Sprout Social, Metricool, Publer, Vista Social, SocialBee. Strong on breadth, weaker on TikTok-specific depth.
3. **Everything else** - AI-only content generators (Predis.ai), open-source self-host options (Postiz), and TikTok's free built-in [Creator Center scheduler](https://www.tiktok.com/creator-center).
The "right" scheduler depends entirely on what you're trying to do. A solo creator posting one video a week might be perfectly happy on TikTok's native scheduler. An agency posting 100+ TikToks a week across 30 client accounts needs a TikTok-first tool. Most people are somewhere in between.
---
## How We Evaluated
We assessed each scheduler across six criteria:
- **TikTok-native posting depth** - photo carousels (up to 35 images), branded-content disclosure, commercial-content toggle, comment / duet / stitch controls, custom cover frame, privacy levels, draft vs direct-post modes, sound selection.
- **Slideshow / carousel support** - can you build TikTok photo posts inside the tool? Templates? AI image generation? Drag-and-drop reordering?
- **Scheduling & queue logic** - bulk scheduling, multi-account posting, retry on failure, daily-limit awareness, time-of-day windows, drag-and-drop calendar.
- **AI content generation** - does the scheduler also generate the content (videos, slideshows, captions, hooks, hashtags), or is it only a publisher?
- **Analytics** - per-post metrics, per-account growth, history depth, refresh cadence, comparable cross-account views.
- **Pricing transparency** - per-account, per-seat, or per-workspace? Free tier? Credits or unlimited posts? Roll-over?
We also gave credit for unique TikTok-relevant capabilities: trend research, hook libraries, AI lip-sync translation, workspace isolation for agencies, and a [public Partner API](https://www.genviral.io/agents) for programmatic posting.
---
## Quick Comparison
| Tool | Best For | TikTok Slideshows | AI Generation | Multi-Account | Starting Price |
|---|---|---|---|---|---|
| **Genviral** | TikTok-first creators & agencies | Yes (up to 35 images) | Yes (video + image + slideshow) | Unlimited | $29/mo |
| **Buffer** | Solo creators | Limited | Basic captions | Free for 3 channels | Free / $6 per channel |
| **Hootsuite** | Enterprise teams | Limited | Basic | Yes (paid tier) | ~$99/mo |
| **Later** | Visual brands | Yes | Basic | Yes | ~$25/mo |
| **Sprout Social** | Enterprise reporting | Limited | Basic | Yes | ~$249/seat |
| **Metricool** | Small agencies | Yes | No | Yes | Free / $22/mo |
| **Publer** | Freelancers | Yes | Basic | Yes | Free / $12/mo |
| **Vista Social** | White-label agencies | Yes | Limited | Yes | Free / $39/mo |
| **SocialBee** | Evergreen recyclers | Limited | Basic captions | Yes | $29/mo |
| **Predis.ai** | AI-only content | Yes | Yes (template-driven) | Yes | Free / $32/mo |
| **Postiz** | Self-host / technical teams | Yes | Basic | Yes | Free (self-host) / $29/mo |
| **TikTok Native** | Single creator, free | Yes (in-app) | No | No | Free |
---
## 1. Genviral - Best for TikTok-First Creators and Agencies

**Platform:** Web (full creator pipeline)
[Genviral](https://www.genviral.io/) is the only tool on this list built TikTok-first. Most schedulers add TikTok as an afterthought; Genviral started by solving the TikTok-specific problems other tools ignore - photo carousels, branded-content disclosure, comment and stitch toggles, custom cover frames, multi-account batching, draft mode for higher rate limits, and a [TikTok Scheduler](https://www.genviral.io/tiktok-scheduler) that publishes to as many connected TikTok accounts as you want from one queue. Everything else - the cross-platform posting, the AI content generation, the analytics - is built around that TikTok-first core.
The defining quality is depth. Other schedulers let you write a caption and pick a time. Genviral lets you build a 35-image TikTok photo carousel from AI-generated images, set a custom cover frame by millisecond timestamp, disable duets and stitches, declare branded content with the proper consent flag, queue it across 12 connected TikTok accounts, and get back analytics on every post - all from one workspace.
### Key TikTok Features
- **Photo carousels up to 35 images** - build TikTok slideshows directly in the editor with title, description, and per-image ordering. Generate the source images with AI Studio (Nano Banana 2, GPT Image 1.5, SeeDream 5, Imagen 4) or upload your own. See [How to Create TikTok Slideshow Images with AI](https://www.genviral.io/blog/create-tiktok-slideshow-images-with-ai) for the full workflow.
- **Direct video posting via official TikTok API** - upload single MP4, MOV, or WebM videos with title, captions, and hashtags. Genviral uses the official TikTok Content Posting API, not browser automation.
- **Privacy controls** - choose public, friends-only, followers-only, or private (saved as draft inside TikTok). Toggle per post.
- **Engagement toggles** - disable comments, disable duet, disable stitch. Set defaults per account, override per post.
- **Branded content & commercial disclosures** - mark posts as branded content, commercial content, or "your brand," with the proper consent tracking TikTok requires for monetized content.
- **Auto-music & custom cover frame** - let TikTok auto-add trending music, or pick a specific frame as the video thumbnail by millisecond timestamp.
- **Direct-post or draft mode** - publish immediately, or upload as a TikTok draft for higher rate limits and manual review inside the app.
- **Multi-account scheduling** - connect unlimited TikTok accounts, post the same content (or platform-specific variants) to all of them in one action. Per-account daily limits enforced automatically.
- **Smart retry & rate limiting** - failed posts retry up to 3 times within 24 hours for transient errors; spam-detection lockouts are respected; retries skip when TikTok rejects the post outright.
- **Publishing calendar** - drag-and-drop calendar showing every scheduled, pending, posted, and failed post across all your TikTok accounts. Click any post to edit caption, time, or recipients.
- **TikTok analytics dashboard** - followers, video views, likes, comments, shares, plays, and engagement rate per post, with 90-day history. Refresh on demand.
- **AI video generation** - generate TikTok-ready short-form video in [AI Studio](https://www.genviral.io/studio) using Kling 2.6 Pro, Sora 2, Veo 3.1, or WAN 2.6. Brainrot Video Generator builds split-screen gameplay videos with AI voiceover and word-synced captions in 17 caption styles.
- **AI lip-sync translation** - translate any video into 180+ languages with voice cloning and lip-sync, then post the localized version to TikTok accounts in different markets.
- **Consistent AI characters** - train a character model on your photos once, then generate unlimited images of you (or a virtual creator) in any scene, in any outfit, in any setting - all post-ready for TikTok carousels.
- **Workspace collaboration** - owner / admin / viewer roles, workspace-scoped TikTok accounts, shared queue. Built for agencies managing client accounts cleanly.
- **Cross-platform repurposing** - post the same TikTok video or slideshow to Instagram Reels, YouTube Shorts, Facebook, Pinterest, and LinkedIn in one click, with platform-specific caption variants.
- **Public Partner API** - programmatic posting, account queries, file uploads, AI generation. See [How to Automate TikTok Posting with OpenClaw and Genviral](https://www.genviral.io/blog/openclaw-tiktok) for an agent-driven setup.
### Pricing
- **Creator:** $29/mo - unlimited scheduled posts, unlimited TikTok accounts
- **Professional:** $49/mo - unlimited posts, unlimited TikTok accounts, workspace features
- **Business:** $99/mo - unlimited posts, unlimited TikTok accounts, Partner API, multi-workspace
- **Included on all plans:** TikTok scheduling, slideshows, analytics, and AI Studio credits
- **No per-channel surcharge:** no "TikTok add-on" and no enterprise upgrade required for multi-account access
- **Guarantee:** 30-day money-back guarantee
| Plan | Price | Posts | TikTok Accounts |
|---|---|---|---|
| Creator | $29/mo | Unlimited scheduled posts | Unlimited |
| Professional | $49/mo | Unlimited | Unlimited + workspace |
| Business | $99/mo | Unlimited + Partner API | Unlimited + multi-workspace |
All plans include TikTok scheduling, slideshows, analytics, and the AI Studio with a shared monthly credit pool. No per-channel surcharge, no "TikTok add-on," no enterprise upgrade gating the multi-account features. 30-day money-back guarantee.
### Pros
- Deepest TikTok feature support of any scheduler on this list (photo carousels, branded-content, cover frames, engagement toggles, draft mode).
- Unlimited connected TikTok accounts on every paid plan - no per-channel pricing.
- AI content generation (video, image, slideshow, captions, hooks) included in the same subscription.
- Built-in TikTok analytics with 90-day history.
- Public Partner API for programmatic posting and AI agent workflows.
- Workspace model designed for agencies managing client TikTok accounts.
### Cons
- Newer brand than incumbents like Buffer or Hootsuite, so fewer "ten years on the market" reviews.
- The breadth of AI Studio tools means there is more to learn than a pure scheduler.
- Web-only - no native mobile app today (mobile web works fine, but iOS / Android apps are on the roadmap).
### Best For
Solo creators, agencies, and brand teams whose primary channel is TikTok. If you post slideshows, run multiple TikTok accounts, want AI to handle the content production side, or need to manage TikTok at agency scale, Genviral is the obvious pick. If you mostly post one update a week to seven networks and TikTok happens to be one of them, a generalist suite further down this list is fine.
---
## 2. Buffer - Best for Solo Creators on a Budget

**Platform:** Web, iOS, Android
[Buffer](https://buffer.com) is the OG scheduler. It pioneered the simple queue-based posting model in 2010 and has been refining the same idea ever since. The free plan covers three channels, the UI is famously clean, and TikTok publishing works reliably for single videos. For a solo creator who posts a few times a week and wants zero friction, Buffer is hard to beat on price or simplicity.
### Key Features
- Forever-free plan covering 3 channels.
- Clean, fast queue-based scheduling UI.
- Basic AI assistant for caption ideas.
- Multi-platform posting across all the majors.
- Browser extension for one-click sharing.
### Pricing
- **Free:** up to 3 channels
- **Essentials:** from ~$6/channel/month
- **Team and Agency:** higher tiers add collaboration features
### Pros & Cons
**Pros:** Cleanest UI in the category, generous free tier, reliable publishing, fast onboarding.
**Cons:** Treats TikTok as one platform among many - no slideshow builder, no TikTok-specific sound discovery, no branded-content toggles in the UI. The per-channel pricing adds up fast once you connect multiple TikTok accounts.
### Best For
Solo creators posting one or two TikToks a week alongside other networks, on a tight budget. Not a fit for agencies or anyone managing multiple TikTok accounts, since per-channel pricing breaks down quickly.
---
## 3. Hootsuite - Best for Enterprise Teams

**Platform:** Web, iOS, Android
[Hootsuite](https://hootsuite.com) is the enterprise incumbent. It's been around since 2008 and is built for the kinds of teams that have approval workflows, legal review, and a unified social inbox spanning 30+ accounts. TikTok publishing works, and the analytics and listening tools are deep, but you're paying enterprise prices for a generalist suite.
### Key Features
- Unified social inbox across 35+ networks.
- Approval workflows and team permissions.
- Deep analytics and social listening at higher tiers.
- TikTok publishing supported on Professional and above.
- Bulk scheduling via CSV upload.
### Pricing
- **Professional:** from ~$99/mo
- **Team:** from ~$249/mo
- **Enterprise:** custom pricing
### Pros & Cons
**Pros:** Mature platform with deep enterprise features. Strong inbox, listening, and team workflows. Reliable at scale.
**Cons:** Pricing scales aggressively. The platform is generalist by design - TikTok creators rarely use the listening, inbox, or compliance layers they're paying for. No TikTok slideshow builder.
### Best For
Mid-market and enterprise brands with multi-channel social teams that need compliance, approvals, and listening. Overkill for TikTok-first creators or small agencies.
---
## 4. Later - Best for Visual Brands

**Platform:** Web, iOS, Android
[Later](https://later.com) started as an Instagram-first scheduler in 2014 and has expanded into TikTok with strong visual planning. The visual content calendar, media library, and Linkin.bio tool make it especially popular with influencers and DTC brands. TikTok publishing supports videos and photo carousels, with a clean drag-and-drop calendar.
### Key Features
- Visual content calendar with drag-and-drop.
- Media library for organizing assets.
- TikTok photo carousel support.
- Linkin.bio link-in-bio tool.
- Influencer marketplace at higher tiers.
### Pricing
- **Free trial:** yes
- **Starter:** from ~$25/mo
- **Growth:** from ~$45/mo
### Pros & Cons
**Pros:** Best-in-class visual planning UI. Strong media library. TikTok carousel support is genuinely good. Good Instagram + TikTok pairing.
**Cons:** TikTok features mirror what Later built for Instagram - light on TikTok-native trends, sound discovery, and short-form analytics. Higher tiers required for unlimited posts.
### Best For
DTC brands and influencers who plan Instagram and TikTok side by side and care about visual presentation of the calendar. See [How to Make TikTok Slideshows on Your PC](https://www.genviral.io/blog/how-to-make-a-slideshow-on-tiktok-pc) for a comparison of slideshow workflows including Later.
---
## 5. Sprout Social - Best for Enterprise Reporting
**Platform:** Web, iOS, Android
[Sprout Social](https://sproutsocial.com) is the premium enterprise platform aimed at mid-market and large companies. The reporting, CRM integrations, and listening features are widely considered best-in-class. TikTok publishing is supported on Standard and above, but the platform is built for the social-team-with-analyst use case, not for TikTok-first creators.
### Key Features
- Polished, executive-ready reporting templates.
- Salesforce, HubSpot, Microsoft Dynamics CRM integrations.
- Strong unified inbox and customer-care workflows.
- Listening and competitive analysis at higher tiers.
- TikTok publishing on Standard and above.
### Pricing
- **Standard:** from ~$249/seat/month
- **Professional:** from ~$399/seat
- **Advanced:** from ~$499/seat
### Pros & Cons
**Pros:** Best-in-class reporting. Very polished UI. Strong customer support. Reliable at enterprise scale.
**Cons:** Per-seat pricing is hard to justify for any creator-led team. No TikTok slideshow builder. No AI content generation. Generalist by design.
### Best For
Enterprise marketing teams that need to report TikTok performance alongside Instagram, LinkedIn, X, and Facebook in unified executive reports. Not a fit for creators or small agencies.
---
## 6. Metricool - Best Affordable Analytics + Scheduling Combo

**Platform:** Web, iOS, Android
[Metricool](https://metricool.com) has quietly become a favorite of solopreneurs and small agencies for combining scheduling, analytics, and competitor tracking at a competitive price. TikTok analytics on Metricool are unusually deep for the price tier, with hashtag and competitor tracking included.
### Key Features
- TikTok analytics with hashtag and competitor tracking.
- Scheduling across 8+ networks including TikTok.
- TikTok carousel posting supported.
- Competitor benchmarking.
- Free plan with limited features.
### Pricing
- **Free:** limited features
- **Starter:** from ~$22/mo
- **Advanced:** from ~$45/mo
- **Agency:** from ~$139/mo
### Pros & Cons
**Pros:** Strong TikTok analytics for the price. Competitor tracking included at low tiers. Generous free plan for testing.
**Cons:** No content generation - you still need a separate stack for video creation, trending sounds, and slideshow production.
### Best For
Small agencies and solopreneurs who want a single tool for scheduling and analytics, and don't need AI content generation built in.
---
## 7. Publer - Best for Freelancers Managing Many Client Accounts
**Platform:** Web, iOS, Android
[Publer](https://publer.com) is a fast-growing scheduler with a generous free plan and an unusually broad list of supported networks (including Mastodon, Bluesky, and Threads). The workspace model and AI caption assistant make it friendly for freelancers juggling multiple small clients.
### Key Features
- Generous free tier for testing.
- Workspaces for managing client accounts.
- AI caption generation built in.
- Supports 11+ networks including TikTok.
- TikTok carousel posting supported.
### Pricing
- **Free:** generous free tier
- **Professional:** from ~$12/mo
- **Business:** from ~$21/mo
### Pros & Cons
**Pros:** Cheapest paid tier in the category. Workspace model good for freelancers. AI captions help with idea generation.
**Cons:** Breadth-over-depth - TikTok works but doesn't get the platform-specific automations a TikTok-focused creator would want. Limited TikTok analytics.
### Best For
Freelance social media managers running 5-15 small client accounts on a tight budget. Not a fit for agencies needing deep TikTok analytics or large-scale automation.
---
## 8. Vista Social - Best for White-Label Agencies
**Platform:** Web
[Vista Social](https://vistasocial.com) is one of the newer challengers in the space and has gained traction with agencies thanks to flexible pricing, white-label client reports, and a surprisingly deep feature set. Solid TikTok support including first-comment scheduling and carousel posts.
### Key Features
- White-label reporting for client deliverables.
- TikTok carousel + video posting.
- First-comment scheduling.
- Approval workflows for client review.
- Free tier and affordable paid plans.
### Pricing
- **Free:** available
- **Pro:** from ~$39/mo
- **Pro+:** from ~$79/mo
- **Agency:** higher tiers above Pro+
### Pros & Cons
**Pros:** Strong white-label features at sub-enterprise pricing. Solid TikTok support. Good agency workflow tools.
**Cons:** Feature-rich but generalist - no TikTok-native content generation, so video and slideshow production happen elsewhere.
### Best For
Boutique agencies that want white-label client reporting without paying Sprout or Hootsuite enterprise prices.
---
## 9. SocialBee - Best for Evergreen Content Recyclers

**Platform:** Web
[SocialBee](https://socialbee.com) is best known for its category-based content recycling, which suits coaches, consultants, and evergreen-content brands. The platform has added solid AI assistance for captions and post variations. TikTok publishing is supported but not a focus.
### Key Features
- Category-based content recycling and re-queueing.
- AI caption and post variation generation.
- TikTok publishing supported.
- Concierge service available for done-for-you scheduling.
- 14-day free trial.
### Pricing
- **Free trial:** 14 days
- **Bootstrap:** from ~$29/mo
- **Accelerate:** from ~$49/mo
### Pros & Cons
**Pros:** Best-in-class content recycling for evergreen content. AI caption variations save time. Concierge add-on is unique.
**Cons:** The recycle-and-evergreen model is a poor fit for TikTok, where trends turn over weekly and reposts rarely perform.
### Best For
Coaches, consultants, and personal brands who post evergreen content across LinkedIn, Twitter, and Facebook, with TikTok as a secondary channel.
---
## 10. Predis.ai - Best for AI-Generated TikTok Content
**Platform:** Web
[Predis.ai](https://predis.ai) leans heavily into AI generation - captions, carousels, and short videos from a prompt. It's popular with small businesses that want content and scheduling in one tool. TikTok carousel and video publishing are supported alongside the AI generator.
### Key Features
- AI-generated short videos from a prompt.
- AI carousel and image generation.
- Scheduling to TikTok and other networks.
- Brand voice tuning.
- Free tier for testing.
### Pricing
- **Free:** available
- **Lite:** from ~$32/mo
- **Premium:** from ~$59/mo
### Pros & Cons
**Pros:** Lowest-friction AI content generation in the category. One tool for content + scheduling. Decent free tier.
**Cons:** AI output is template-driven and tends to look generic on TikTok, where native-feeling, trend-aware content outperforms polished AI assets. Limited control over output style.
### Best For
Small businesses or local services with no in-house content team who need a steady stream of "good enough" TikTok content. Not a fit for creators who care about a distinctive visual style or trending content.
---
## 11. Postiz - Best for Self-Hosting and Technical Teams
**Platform:** Web (self-host or hosted SaaS)
[Postiz](https://postiz.com) is an open-source scheduler with both a self-host option (free) and a hosted SaaS tier. It appeals to technical founders, privacy-conscious teams, and developers who want to extend or audit the codebase. The active GitHub community and fast-moving roadmap have made it a credible alternative to commercial SaaS.
### Key Features
- Open-source (AGPL) self-host option.
- Hosted SaaS tier with managed infrastructure.
- Multi-platform scheduling including TikTok.
- AI caption generation.
- Public-launch-friendly community and changelog.
### Pricing
- **Self-hosted:** free
- **SaaS Standard:** from ~$29/mo
- **SaaS Team:** from ~$39/mo
### Pros & Cons
**Pros:** Only credible open-source option in the category. Strong privacy posture. Active community. Affordable hosted tier.
**Cons:** Self-hosting overhead is real - infrastructure, updates, OAuth refresh handling, deliverability monitoring all become your problem. TikTok integration is publishing-focused rather than optimized for short-form virality workflows.
### Best For
Technical founders, agencies with infrastructure expertise, and privacy-conscious teams that want to own their scheduling stack end-to-end.
---
## 12. TikTok Native Scheduler - Best Free Baseline
{/*  */}
**Platform:** Web (TikTok Creator Center)
[TikTok's built-in scheduler](https://www.tiktok.com/creator-center) inside Creator Center lets you queue videos up to 10 days out, at no cost. It's the most "native" option possible and handles sounds, effects, and captions exactly as TikTok intends. For a solo creator posting from one account who doesn't need anything beyond basic scheduling, it's the obvious starting point.
### Key Features
- Free.
- Schedule up to 10 days in advance.
- Native handling of TikTok sounds, effects, captions.
- Direct access to TikTok's built-in tools.
- Browser-based, no install.
### Pricing
- **Free:** yes
### Pros & Cons
**Pros:** Free. Native to TikTok. Sounds, effects, and captions behave exactly as expected because they're inside TikTok itself.
**Cons:** No multi-account management. No team workflows. No cross-platform posting. No analytics beyond what's in the app. No bulk scheduling. 10-day scheduling cap. Browser-only (web) - no mobile scheduler in the TikTok app.
### Best For
Solo creators with one TikTok account, no budget, no need for cross-platform posting, no need for analytics beyond what TikTok already shows. Excellent free baseline before upgrading.
---
## How to Choose
The right scheduler depends on what you're actually trying to do. Here's a quick decision tree:
**Solo creator, one account, no budget:** Start with [TikTok's native scheduler](https://www.tiktok.com/creator-center). It's free and good enough for one account. Upgrade when you need multi-account, slideshows, or analytics.
**Solo creator, multiple platforms, light volume:** [Buffer](https://buffer.com) free plan or [Publer](https://publer.com) free tier. Both are clean and reliable.
**TikTok-first creator or agency, daily volume, slideshows, multiple accounts:** [Genviral](https://www.genviral.io/). The combination of TikTok-native posting depth (carousels, branded content, custom covers, draft mode), unlimited connected accounts on every plan, AI content generation (video, image, slideshow), and built-in TikTok analytics is unmatched on this list.
**Agency managing 30+ client accounts with compliance needs:** [Hootsuite](https://hootsuite.com) or [Sprout Social](https://sproutsocial.com). Expensive, but the inbox, listening, approval, and reporting layers justify the cost at that scale.
**Visual-first DTC brand pairing Instagram + TikTok:** [Later](https://later.com). The visual calendar and media library are still best-in-class.
**Affordable analytics + scheduling combo:** [Metricool](https://metricool.com). Strong TikTok analytics at sub-$30/mo pricing.
**Evergreen-content recycler:** [SocialBee](https://socialbee.com). Best content-recycling model in the category, though weaker fit for TikTok specifically.
**Self-host, open-source, technical team:** [Postiz](https://postiz.com). The only credible open-source option.
**AI does everything, you just press post:** [Predis.ai](https://predis.ai) for fully AI-generated content. [Genviral](https://www.genviral.io/) if you want AI generation plus deeper TikTok posting controls.
---
## FAQ
### Can I schedule TikTok slideshows (photo carousels) with these tools?
Yes, but only some of them. [Genviral](https://www.genviral.io/), [Later](https://later.com), [Metricool](https://metricool.com), [Publer](https://publer.com), [Vista Social](https://vistasocial.com), [Predis.ai](https://predis.ai), and [Postiz](https://postiz.com) all support TikTok photo carousel posting. [Buffer](https://buffer.com), [Hootsuite](https://hootsuite.com), [Sprout Social](https://sproutsocial.com), and [SocialBee](https://socialbee.com) currently treat TikTok primarily as a video platform with limited or no slideshow support. For more on building TikTok slideshows, see [Create TikTok Slideshow Images with AI](https://www.genviral.io/blog/create-tiktok-slideshow-images-with-ai) and [How to Make TikTok Slideshows on PC](https://www.genviral.io/blog/how-to-make-a-slideshow-on-tiktok-pc).
### Do these schedulers use the official TikTok API?
Genviral, Buffer, Hootsuite, Later, Sprout Social, Metricool, Publer, Vista Social, SocialBee, Predis.ai, Postiz, and TikTok's native scheduler all publish via TikTok's official Content Posting API (or, for the native scheduler, directly inside TikTok itself). Anything that claims to "post to TikTok" without an OAuth flow into your real TikTok account should be treated with extreme skepticism.
### How many TikTok accounts can I connect?
It varies by tool and plan. [Genviral](https://www.genviral.io/) supports unlimited connected TikTok accounts on every paid plan with no per-channel surcharge. [Buffer](https://buffer.com) charges per channel, so 10 TikTok accounts = 10x the price. [Hootsuite](https://hootsuite.com) and [Sprout Social](https://sproutsocial.com) gate multi-account features behind higher tiers. Always check per-account pricing before committing.
### Can I post to TikTok and Instagram Reels in one click?
Yes - most of the schedulers on this list support cross-platform posting. [Genviral](https://www.genviral.io/) handles TikTok + Instagram Reels + YouTube Shorts + Facebook + Pinterest + LinkedIn from a single composer with platform-specific caption variants. Generalist suites like [Buffer](https://buffer.com), [Later](https://later.com), and [Hootsuite](https://hootsuite.com) all support multi-network posting too.
### Will scheduled posts hurt my TikTok reach?
No. TikTok's algorithm does not penalize content posted via the official Content Posting API. The myth that "scheduled posts get suppressed" comes from the early days of social media schedulers, when some platforms genuinely did down-rank API-posted content. TikTok's current API is treated identically to native posts.
### Can I use these schedulers to grow on TikTok from scratch?
Scheduling alone won't grow you - the content has to be good. But removing the friction of "I have to remember to post at 7pm" lets you focus on the things that actually drive growth: hooks, trends, and consistency. See [TikTok Growth Strategies for SaaS Products](https://www.genviral.io/blog/tiktok-growth-strategies-for-saas) for the playbook, and [How to Make Money with TikTok](https://www.genviral.io/blog/how-to-make-money-with-tiktok) for monetization paths once you have an audience.
### Is there a TikTok scheduler with a public API for AI agents?
Yes - [Genviral](https://www.genviral.io/) exposes a public Partner API for programmatic posting, account queries, file uploads, and AI generation. If you want to see what that looks like in practice with modern agent tooling, see [How to Automate TikTok Posting with Hermes Agent](https://www.genviral.io/blog/hermes-agent-tiktok).
---
## Key Takeaways
- The TikTok scheduler category is dominated by generalist suites that treat TikTok as one of many channels. Most don't support TikTok photo carousels, branded-content disclosure, or custom cover frames.
- TikTok-first tools win on every TikTok-specific metric: photo carousels, multi-account scheduling, branded-content compliance, draft mode, analytics depth.
- Per-channel pricing (Buffer, Hootsuite, Sprout) gets expensive fast once you connect more than a few TikTok accounts. Per-workspace pricing (Genviral) scales without penalty.
- AI content generation matters in 2026. Tools that only schedule (Buffer, Hootsuite, Sprout, Metricool, Postiz) require you to bring a separate content stack. Tools that integrate generation (Genviral, Predis.ai) collapse the workflow.
- TikTok's native scheduler is a great free baseline for solo creators with one account. Beyond that, you need a real tool.
- For TikTok-first creators and agencies in 2026, [Genviral](https://www.genviral.io/) is the only platform on this list built around how people actually use TikTok in 2026.
---
## Related Guides
- [TikTok Scheduler](https://www.genviral.io/tiktok-scheduler) - Genviral's dedicated TikTok scheduling product page.
- [How to Automate TikTok Posting with Hermes Agent](https://www.genviral.io/blog/hermes-agent-tiktok) - TikTok-specific Hermes workflow for drafts, slideshows, and recurring posting.
- [How to Automate TikTok Posting with OpenClaw and Genviral](https://www.genviral.io/blog/openclaw-tiktok) - end-to-end agent-driven TikTok posting.
- [TikTok Growth Strategies for SaaS Products](https://www.genviral.io/blog/tiktok-growth-strategies-for-saas) - the playbook for scaling from $0 to $20K+ MRR with TikTok.
- [How to Warm Up a TikTok Account](https://www.genviral.io/blog/warm-up-tiktok-account) - 5-day warm-up guide for brand-new TikTok accounts before manual posting and automation.
- [Create TikTok Slideshow Images with AI](https://www.genviral.io/blog/create-tiktok-slideshow-images-with-ai) - generate 4K AI images for TikTok carousels.
- [How to Make TikTok Slideshows on Your PC](https://www.genviral.io/blog/how-to-make-a-slideshow-on-tiktok-pc) - desktop slideshow workflow.
- [How to Target US Users on TikTok](https://www.genviral.io/blog/target-us-users-on-tiktok) - device, region, and account setup for US audiences.
- [How to Make Money with TikTok](https://www.genviral.io/blog/how-to-make-money-with-tiktok) - 9 monetization paths in 2026.
- [How to Delete Your TikTok Account](https://www.genviral.io/blog/how-to-delete-tiktok-account) - the 30-day grace period and what to do before you delete.
- [10 Best Social Media APIs for Posting, Analytics & Automation in 2026](https://www.genviral.io/blog/best-social-media-apis) - if you're building on top of social APIs.
---
Canonical HTML: https://www.genviral.io/blog/best-tiktok-scheduler
# Claude Facebook Automation: How to Schedule Posts with Claude Cowork
- Claude can select a finished video, write the Facebook caption, and schedule the post through Genviral without you moving the file between tools.
- Start with one post scheduled ahead for review. Check the account, video, caption length, hashtags, date, and displayed time before you build the recurring task.
- Clear folder names and ordered filenames matter because Claude relied on file metadata to find the right videos in this workflow.
- Claude Cowork can reuse an ordered media inventory, post on a recurring schedule, and send the same video to Facebook and Instagram when you define both destinations.
- A Cowork notification is not always proof that Facebook published the post. Keep the Genviral calendar in the review loop and expect connected accounts to need reauthentication occasionally.
Claude Facebook automation is useful when the content already exists and the repetitive part is choosing a file, writing the caption, selecting the account, and scheduling the post.
The first workflow in this guide uses a finished Terrific Tools demo video. Claude finds it in a named Genviral folder and schedules it for the OnlineDopamine Facebook account one week ahead.
The second workflow moves the tested process into Claude Cowork. That version cycles through 31 Pantry AI videos and schedules two posts per day for Facebook, with Instagram as an optional second destination.
Claude handles the instructions and decisions. [Genviral's MCP server](https://www.genviral.io/mcp) handles the media library, connected accounts, scheduling, and Facebook publishing through the permissions you approve.
## What this Claude Facebook automation does
You give Claude three exact identifiers: the Genviral workspace, the media folder, and the destination Facebook account. You then specify the video, caption objective, publish date, and time zone.
In the Terrific Tools example, the selected video shows the desktop app converting medical images into PNG or JPEG files. Claude uses that context to write the post instead of guessing what the product does.
The post is scheduled one week ahead at 5 PM in New York. It then appears in the Genviral calendar, where the media, copy, and scheduling details can still be edited before publication.
That review step caught a real problem in the walkthrough: the Facebook copy was too long and needed to be shortened. Scheduling first gave us time to fix it.
## How this differs from the Instagram workflow
The [Claude Instagram automation guide](https://www.genviral.io/blog/claude-instagram-automation) starts with a recipe and asks Claude to generate an image that follows a visual reference.
Because this Facebook workflow begins with finished videos, the work shifts to finding the correct file, writing platform-appropriate copy, choosing the account, and reading the converted time correctly.
Facebook also adds a useful cross-posting case. The Pantry AI Cowork task schedules the same videos for Facebook and Instagram, while keeping the destination accounts explicit.
## What you need
Prepare these six things before asking Claude to post:
1. A Claude account that can add a custom connector
2. A paid Claude plan for Cowork projects and scheduled tasks
3. A [Genviral account](https://www.genviral.io/auth)
4. A Facebook account connected in Genviral
5. A named media folder containing finished videos
6. Several real Facebook captions and hashtag sets
Post manually for the first week if the page does not have an established format yet. You need real examples before Claude can reproduce your caption style without falling back to generic AI copy.
## Step 1: Add Genviral as a Claude connector
Open Claude, go to **Customize**, and choose **Connectors**. Add a custom connector with this remote MCP endpoint:
```text
https://mcp.genviral.io/mcp
```
Name it `Genviral`, continue through the setup, and approve the OAuth connection.
Anthropic's [connector documentation](https://support.claude.com/en/articles/11176164-use-connectors-to-extend-claude-s-capabilities) explains how custom remote MCP connectors work in Claude and Cowork.
Only connect servers you trust and review what each permission allows. This connector can expose tools that read media or schedule real posts on your behalf.
## Step 2: Enable the permissions you need
Open the Genviral connector settings under **Manage Connectors** and review the available tools.
For this workflow, Claude needs permission to view folders and media, inspect connected accounts, and create scheduled posts. Enable Upload Media if files may arrive from your device or another connected source.
Upload Media is disabled by default. That does not matter when every video is already in Genviral, but it will block a workflow that needs to move a file from Drive, Dropbox, or your computer.
You do not need to approve every generation tool when the job only schedules finished videos. Give Claude the access required for this task and understand the actions before enabling them.
## Step 3: Connect and confirm the Facebook account
Open [Social Posts](https://www.genviral.io/social?tab=queue), choose **Manage Accounts**, and connect Facebook. Complete the authorization flow for the account you want Claude to use.
If you have multiple workspaces, switch to the correct workspace before connecting the account. Then ask Claude to list the Facebook destinations it can see there.
Confirm the workspace and destination name before creating the test. This prevents a useful post for one project from appearing on an unrelated Facebook presence.
## Step 4: Put finished videos in a named folder
Upload the finished videos into one folder instead of asking Claude to search the entire media library. The first video uses a folder named `terrific.tools` and a file described as the medical image video.
For a recurring workflow, use ordered filenames that expose the sequence:
```text
Pantry AI Vids/
├── FB-01-kimbap.mp4
├── FB-02-pesto-pasta.mp4
├── FB-03-roast-chicken.mp4
└── FB-04-tomato-pasta.mp4
```
In the Cowork walkthrough, Claude found the workspace and folder but initially missed the videos. A screenshot showing the filenames and a direct instruction to search for the prefix fixed the discovery problem.
Claude relied on filenames and metadata in this setup. Name the file after what it contains instead of using camera exports such as `IMG_4827.mp4`.
## Step 5: Schedule one Facebook test post
Your first prompt should describe one scheduled post, not an unattended recurring task. Include the workspace, folder, filename, destination, content objective, date, and IANA time zone.
You can adapt this prompt:
```text
Use the Genviral connector in my personal workspace.
Schedule a Facebook post for the OnlineDopamine account using the medical
image video in the terrific.tools folder.
The video shows the Terrific Tools desktop app converting medical images
into regular PNG and JPEG files. Write a concise Facebook caption that
explains that use case without overstating it.
Do not publish immediately. Schedule it for one week from today at 5:00 PM
America/New_York, then show me the selected account, video, caption, and time.
```
The content objective gives Claude enough context to write useful copy. The explicit instruction not to publish gives you time to correct whatever it gets wrong.
## Step 6: Review the Facebook-specific failure points
Open the scheduled post in Genviral and inspect the result rather than treating task completion as approval.
Check:
- the Facebook destination
- the selected video and preview
- the caption and hashtags
- the post length
- the scheduled date
- the source and displayed time zones
The walkthrough exposed a caption-length problem. Shorten the copy before the post goes live whenever a generated caption is too long.
It also exposed a time-zone display detail. A post requested for 5 PM New York appeared at 5 AM in Bali because the calendar displayed the viewer's local time.
Use `America/New_York` in the instruction and confirm the converted calendar time. A correct conversion can look wrong when you forget which time zone the interface is showing.
If you need help locating queued Facebook content later, see [where to find scheduled Facebook posts](https://www.genviral.io/blog/where-to-find-scheduled-posts-on-facebook).
## Step 7: Move the tested workflow into Claude Cowork
Once Claude can schedule one correct post, move those instructions into a Cowork project. Keep the workspace, folder, destination accounts, caption examples, and inventory rules together.
The Pantry AI example schedules two posts per day, one in the morning and one in the evening in New York time. It sends the videos to Facebook and Instagram together.
That cadence is the workflow shown in the video, not a universal Facebook recommendation. Start with the frequency you have already tested manually and can review reliably.
## Step 8: Teach Cowork your real caption pattern
Paste several captions and hashtag sets you have already published. Explain what should remain fixed and what Cowork may vary for each video.
The Pantry AI examples use lowercase copy and a recognizable caption structure. Giving Claude those examples works better than asking for something `friendly`, `human`, or `engaging`.
Your instructions should cover:
- caption length and capitalization
- opening and call-to-action style
- hashtags to use or avoid
- whether Facebook and Instagram need different copy
- claims Claude must not invent
Real examples replace vague taste instructions with a pattern Claude can follow.
## Step 9: Define the media loop and cross-posting rules
Tell Cowork what to do after it reaches the final file. In the Pantry AI workflow, video 31 is followed by video 1 so the account does not stop posting when no new video has been added.
Tell the task to rescan the folder before each run, include newly added filenames in the sequence, and restart only after the current inventory is exhausted.
The loop worked for this Pantry AI Facebook and Instagram setup. Treat that as one tested result, not proof that every page can recycle the same videos indefinitely without performance loss.
Cross-posting also needs explicit destinations. Tell Cowork whether each file should go to Facebook only or to both Facebook and Instagram, then confirm both connected accounts before scheduling.
## Step 10: Create the recurring scheduled task
Cowork scheduled tasks can run on a recurring cadence and use the connectors already configured for the project.
Anthropic documents the current setup in its [scheduled tasks guide](https://support.claude.com/en/articles/13854387-schedule-recurring-tasks-in-claude-cowork).
Schedule each post half a day or a day ahead during the first runs. The review window lets you inspect the selected file, copy, and destinations before the publish time.
Require a notification after every run. Include the filename, destination accounts, scheduled time, status returned by Genviral, and the next file in the sequence.
## Step 11: Separate notifications from verified delivery
The Cowork walkthrough shows a useful limitation. The scheduled task kept raising a warning because it could not confirm the final Facebook publication from the data returned to it.
The posts were still appearing in the example, but the task could not independently verify that result. So your status language needs to separate three things:
1. Genviral accepted or scheduled the post
2. Facebook published the post
3. Claude independently verified the published result
Do not call step one a verified publication. Use the notification as a prompt to check the Genviral calendar or Facebook when final verification is unavailable.
This distinction also makes failures easier to diagnose because you know whether the problem happened during scheduling, Facebook delivery, or result verification.
## When Facebook needs to be reconnected
Connected Facebook accounts may require reauthentication. In the walkthrough, the recurring task's warning provided a reason to inspect the account and confirm whether it still had access.
Your failure notification should identify the destination, preserve the media filename, and stop short of claiming success. Reconnect the account, then retry only the failed post instead of restarting the entire inventory.
The [Hermes Agent Facebook guide](https://www.genviral.io/blog/hermes-agent-facebook) covers the same reauthentication and failure-reporting problem from a durable agent-log perspective.
## Can Claude post directly to Facebook?
Claude needs a connected tool that can perform the publishing action. In this workflow, Genviral provides that tool through MCP and manages the Facebook authorization.
Claude does not need your Facebook password. You connect the account in Genviral and approve the MCP permissions Claude may use.
## Can Claude post the same video to Facebook and Instagram?
Yes. The Cowork example schedules the Pantry AI videos for both connected destinations. Name both accounts explicitly and review the platform-specific copy before publishing.
If the Instagram post needs a generated image or tighter visual references, use the separate [Claude Instagram workflow](https://www.genviral.io/blog/claude-instagram-automation).
## Can Claude understand the videos in my folder?
In this workflow, Claude relied on folder names, filenames, metadata, and a screenshot of the inventory. Do not assume it has watched every video just because it can list the files.
Use descriptive filenames and include a one-sentence content description when the caption depends on details that are not visible in the metadata.
## Can the Cowork task run while my computer is off?
Connector-based tasks and files saved to your Claude account can run while your computer is asleep.
If the task uses local files or desktop apps, keep the Claude Desktop app open and the computer available. Store recurring media where the scheduled task can reach it reliably.
## Getting started
Use this order for the first Facebook workflow:
1. Add the [Genviral MCP connector](https://www.genviral.io/mcp) to Claude
2. Approve the folder, media, account, and scheduling permissions you need
3. Connect and confirm the Facebook destination
4. Upload finished videos into a named folder
5. Rename the files in a clear order
6. Schedule one test post in an explicit time zone
7. Review the video, caption length, account, and converted time
8. Move the working instructions into a Cowork project
9. Add real caption examples and end-of-folder rules
10. Schedule the recurring task ahead of publish time
11. Require notifications without confusing scheduling with verified delivery
If you only need a calendar and manual approval flow, [Genviral's Facebook Scheduler](https://www.genviral.io/facebook-scheduler) is the simpler starting point.
Add Claude when you need media selection, caption reasoning, cross-posting rules, and recurring instructions.
## Related guides
- [Claude YouTube Automation: Schedule Shorts with Claude Cowork](https://www.genviral.io/blog/claude-youtube-automation)
- [How to Connect Claude to Instagram and Automate Posting](https://www.genviral.io/blog/claude-instagram-automation)
- [How to Automate Facebook Posting with Hermes Agent](https://www.genviral.io/blog/hermes-agent-facebook)
- [How to Automate Facebook Posting with OpenClaw](https://www.genviral.io/blog/openclaw-facebook)
- [Where to Find Scheduled Posts on Facebook](https://www.genviral.io/blog/where-to-find-scheduled-posts-on-facebook)
- [How to Find Drafts on Facebook](https://www.genviral.io/blog/how-to-find-drafts-on-facebook)
- [Best Social Media APIs for Posting and Automation](https://www.genviral.io/blog/best-social-media-apis)
---
Canonical HTML: https://www.genviral.io/blog/claude-facebook-automation
# How to Connect Claude to Instagram and Automate Posting
- Claude can plan an Instagram post, create or select media through Genviral, write the caption, and schedule the finished post without you moving content between separate tools.
- The connection uses Genviral's remote MCP server, which gives Claude permissioned tools for media, connected accounts, scheduling, and publishing.
- Start with a scheduled post instead of an immediate post. You get time to inspect the image, caption, account, and publish time before anything goes live.
- Give Claude a small folder of approved reference assets. A named folder is more reliable than asking it to guess which images in a large media library match your style.
- Claude Cowork can turn the same tested workflow into a recurring task, but you should keep confirmations enabled and review the first runs closely.
This Claude Instagram automation setup lets you prepare and schedule a post without building a custom integration or handing the model your Instagram password.
Claude handles the instructions and decisions. [Genviral's MCP server](https://www.genviral.io/mcp) handles the connected account, media generation, uploads, and final Instagram publishing.
That distinction matters. Claude is the control layer, while Genviral performs the social media actions Claude asks for through the permissions you approve.
The Instagram posting automation starts as a hands-on Claude workflow. It then moves into Claude Cowork when you're ready to run the same process repeatedly.
## What this Instagram setup does
You give Claude a content source, an Instagram account, a visual reference, and a publishing time. Claude can then turn those inputs into a scheduled post you can review in Genviral.
The example in the video uses a recipe website and an existing Pantry AI post. Claude reads the recipe, checks the reference, creates a new image, writes the caption, and schedules the post for the next morning.
You can use the same setup with:
- articles or product pages
- images and videos in your media library
- files from another connected service
- AI-generated images
- an existing Instagram post you want to use as a style reference
If you already have finished Reels, you can skip generation and let Claude select and schedule them. The workflow does not need to create every asset from scratch to be useful.
## What you need
Before you start, prepare these four things:
1. A Claude account that can add a custom connector
2. A [Genviral account](https://www.genviral.io/auth)
3. The Instagram account you want to publish to
4. One to three posts or media assets that represent the style you want
You do not need to create a separate Instagram API integration. Genviral owns that connection, and Claude reaches it through the MCP connector.
If the Instagram account is new, spend a few days using it manually before turning on recurring automation. Our [Instagram account warm-up guide](https://www.genviral.io/blog/warm-up-instagram-account) explains the safer starting cadence.
## Step 1: Add Genviral as a Claude connector
Open Claude, go to **Customize**, and choose **Connectors**. Add a custom connector and use this remote MCP endpoint:
```text
https://mcp.genviral.io/mcp
```
Give the connector a recognizable name such as `Genviral`, continue through the setup, and approve the OAuth connection.
Anthropic's [connector documentation](https://support.claude.com/en/articles/11176164-use-connectors-to-extend-claude-s-capabilities) explains how custom remote MCP connectors work across Claude and Cowork.
Only connect MCP servers you trust. A connector can expose tools that read data or take actions, so check the service and review the requested permissions before approving it.
## Step 2: Review the connector permissions
Adding the connector is not the same as giving Claude access to every tool. Open the Genviral connector settings and review the available permissions.
Enable the actions your workflow needs. For the example in this guide, that includes reading the media library, uploading media, generating an image, viewing connected accounts, and creating a scheduled post.
The upload permission is easy to miss. If it stays disabled, Claude may find a file in another service but fail when it tries to move that file into the publishing workflow.
Do not approve permissions blindly. If you only want Claude to schedule existing media, it does not need every generation tool. Give the workflow enough access to finish the job and understand what each permission allows.
## Step 3: Connect your Instagram account
Open [Social Posts](https://www.genviral.io/social?tab=queue) in Genviral, choose **Manage Accounts**, and connect Instagram. Complete Meta's authorization flow for the account you want to use.
If you have multiple workspaces, switch to the correct workspace before connecting the account. Claude needs the workspace name later so it does not schedule a post for the wrong brand.
After the connection finishes, ask Claude to list the Instagram accounts available in that workspace. Confirming the account name keeps a good post from becoming the wrong post on the wrong profile.
## Step 4: Give Claude a narrow visual reference
You may already have hundreds of unrelated images in your media library. Claude cannot know which ones define the style you want unless you make that choice explicit.
Create a folder for the campaign or account, then place one to three approved references inside it. Give the folder a clear name and use descriptive filenames.
For example:
```text
Pantry AI Instagram References/
├── 01-kimbap-overhead-photo.webp
├── 02-pesto-pasta-overhead-photo.webp
└── 03-tomato-pasta-overhead-photo.webp
```
The first attempt in the video used a large mixed library. Claude selected a reasonable image, but it was not the intended style because the reference was too vague.
A smaller, better-organized reference set fixed the result faster than another paragraph of prompting would have.
## Step 5: Ask for a scheduled test post
Your first request should create one scheduled post, not a recurring automation. Include the workspace, Instagram account, content source, reference folder, generation model, aspect ratio, and time zone.
You can adapt this prompt:
```text
Use the Genviral connector in the Pantry AI workspace.
Create one Instagram post for the Pantry AI account using a recipe from
the linked recipe page. Match the approved images in the folder named
"Pantry AI Instagram References".
Use the same image model, aspect ratio, and visual style as those references.
Write a concise caption in the style of our recent posts.
Do not publish immediately. Schedule the post for tomorrow at 9:00 AM
America/New_York, then show me the image, caption, account, and scheduled time.
```
The time zone should be explicit. `9 AM tomorrow` can mean different things when your account, workspace, and current location are in different regions.
Scheduling the test gives you a review window. You can edit the post or cancel it in Genviral if the image, caption, account, or timing is wrong.
## Step 6: Review what Claude actually made
Do not approve the first output just because the workflow completed. Open the scheduled post and inspect the parts that affect the final result.
Check:
- the selected Instagram account
- the image or video
- the caption and hashtags
- the aspect ratio
- the scheduled date, time, and time zone
- any destination-specific settings
If the style is wrong, point Claude to the exact reference folder and filenames. If the caption is wrong, give it three to ten real captions instead of describing your voice with adjectives.
Examples teach the pattern better than `make it engaging` ever will.
If you are publishing video, use the format guidance in our [Instagram Reels guide](https://www.genviral.io/blog/how-to-make-a-reel-on-instagram) before you automate the schedule.
## Step 7: Move the tested workflow into Claude Cowork
Once the single-post version works, Claude Cowork can manage the longer workflow as a project. This is where you keep the account rules, reference files, caption examples, and recurring instructions together.
Create a Cowork project for the Instagram account and begin with the same three identifiers every time:
- the Genviral workspace
- the media-library folder
- the destination Instagram account
In the video, Claude found the workspace and folder but initially struggled to identify the right videos. Clear filenames and a screenshot of the folder made the inventory easier to understand.
Name media in the order it should be used:
```text
Pantry AI Vids/
├── 01-kimbap.mp4
├── 02-pesto-pasta.mp4
├── 03-roast-chicken.mp4
└── 04-tomato-pasta.mp4
```
Tell Cowork what should happen when it reaches the final file. It can stop, ask for more media, or return to file one. Do not let that decision remain implicit.
## Step 8: Teach Cowork the caption pattern
Paste several captions and hashtag sets you have already used successfully. Explain which parts should stay consistent and which parts Claude can vary.
Your instructions should cover:
- caption length
- opening style
- call to action
- number and type of hashtags
- words or claims to avoid
- whether the post needs a title image
One or two weeks of manual posts usually gives you enough examples to define the pattern. You are not training a model. You are giving Cowork a concrete operating reference.
For the broader cadence, use our guide on [how often to post on Instagram](https://www.genviral.io/blog/how-often-should-you-post-on-instagram) instead of choosing a frequency only because the automation can handle it.
## Step 9: Schedule the recurring task
Cowork scheduled tasks can run on a recurring cadence and use the connectors you have already configured.
Anthropic documents the current setup in its [scheduled tasks guide](https://support.claude.com/en/articles/13854387-schedule-recurring-tasks-in-claude-cowork).
Start with a conservative schedule. One reviewed post per day is easier to diagnose than three posts per day across several platforms.
Ask Cowork to send a confirmation after every run. The confirmation should include the account, media filename, caption summary, publish status, post URL when available, and the next file in the sequence.
Also require a failure confirmation. Silence is not proof that the automation worked.
Anthropic recommends extra care with scheduled tasks that take consequential actions. Review early runs closely, pause unused tasks, and avoid granting access the workflow does not need.
## Common mistakes to avoid
### Letting Claude search the entire media library
A large mixed library produces inconsistent references. Use a dedicated folder with a few approved assets and filenames that say what each asset contains.
### Publishing the first attempt immediately
Schedule the first post far enough ahead to review it. Once the workflow has passed several checks, you can decide how much approval you still want.
### Leaving the time zone unstated
Always include an IANA time zone such as `America/New_York`. Do not rely on the device time, account time, or your current location being the same.
### Describing your caption voice without examples
Words like `friendly`, `helpful`, and `engaging` leave too much room for interpretation. Paste real captions and tell Claude what it may change.
### Running without confirmations
Successful and failed runs both need a visible result. Otherwise an expired account connection can quietly break several days of scheduled content.
### Automating before the manual workflow works
Automation repeats your process. If the content source, visual style, or caption pattern is still uncertain, Claude will repeat that uncertainty faster.
## Can Claude post directly to Instagram?
Claude needs a connected tool that can perform the publishing action. In this setup, Genviral provides that tool through MCP and manages the Instagram connection.
Claude does not need your Instagram password. You authorize the Instagram account in Genviral and approve the MCP permissions Claude may use.
## Can Claude create Instagram images?
Claude can ask Genviral to generate an image with a supported image model, then use that asset in a scheduled post. It can also select an existing image or upload one from another connected source.
For a more image-focused workflow, see [how to create infographics with AI](https://www.genviral.io/blog/how-to-create-infographics-with-ai).
## Can Claude Cowork run the automation when my computer is off?
Connector-based tasks and files saved to your Claude account can run while your computer is asleep.
If the task uses local files or desktop apps, keep the Claude Desktop app open and the computer available. Test that access before you leave the task unattended.
## Getting started
The safest order is simple:
1. Add the [Genviral MCP connector](https://www.genviral.io/mcp) to Claude
2. Approve only the permissions the workflow needs
3. Connect and confirm the Instagram account
4. Create a small folder of approved visual references
5. Schedule one test post with an explicit time zone
6. Review the media, caption, account, and publish time
7. Move the tested instructions into a Cowork project
8. Add caption examples and ordered media filenames
9. Schedule a conservative recurring task
10. Require confirmations for successful and failed runs
If you only need a normal calendar and approval workflow, [Genviral's Instagram Scheduler](https://www.genviral.io/instagram-scheduler) is the simpler starting point.
Add Claude when you want the system to reason over content sources, references, and recurring instructions.
## Related guides
- [Claude YouTube Automation: Schedule Shorts with Claude Cowork](https://www.genviral.io/blog/claude-youtube-automation)
- [Claude Facebook Automation with Claude Cowork](https://www.genviral.io/blog/claude-facebook-automation)
- [How to Automate Instagram Posting with Hermes Agent](https://www.genviral.io/blog/hermes-agent-instagram)
- [How to Automate Instagram Posting with OpenClaw](https://www.genviral.io/blog/openclaw-instagram)
- [How to Use OpenClaw to Automate Your Social Media](https://www.genviral.io/blog/how-to-use-openclaw)
- [How to Warm Up an Instagram Account](https://www.genviral.io/blog/warm-up-instagram-account)
- [How Often Should You Post on Instagram?](https://www.genviral.io/blog/how-often-should-you-post-on-instagram)
- [How to Make a Reel on Instagram](https://www.genviral.io/blog/how-to-make-a-reel-on-instagram)
- [How to Create Infographics with AI](https://www.genviral.io/blog/how-to-create-infographics-with-ai)
- [Best Social Media APIs for Posting and Automation](https://www.genviral.io/blog/best-social-media-apis)
---
Canonical HTML: https://www.genviral.io/blog/claude-instagram-automation
# Claude YouTube Automation: Schedule Shorts with Claude Cowork
- Claude Cowork can select an existing video, write a YouTube title and description, and ask Genviral to schedule it as a Short.
- Use named folders and numbered filenames. In the recorded setup, Claude initially missed the videos until it received exact filenames and search patterns.
- Give Cowork about 10 real YouTube examples before automating the metadata. Titles and descriptions need a pattern taken from the channel you are posting to.
- Alternate YouTube content folders with an explicit sequence, rescan rule, and end-of-inventory rule so the same Short is not selected by mistake.
- The scheduled YouTube task shown in the walkthrough was not working reliably at recording time. Test each stage and do not treat a Cowork notification as proof of publication.
Claude YouTube automation is useful when your Shorts already exist and the repetitive work is choosing the next video, writing the metadata, and keeping the publishing queue moving.
This YouTube Shorts automation is about distributing finished videos. It does not create a faceless channel, write scripts, or generate every Short from scratch.
The workflow in this guide uses two YouTube content folders for Pantry AI. Claude Cowork alternates between recipe Shorts and product-demo Shorts, then prepares each video for the Pantry AI YouTube channel.
Claude handles the instructions and file-selection logic. [Genviral's MCP server](https://www.genviral.io/mcp) gives Claude permissioned access to the media library, connected YouTube account, and scheduling tools.
This is not a claim that the recorded setup was fully autonomous. The scheduled YouTube task was still failing during the walkthrough, which makes the testing and confirmation steps below part of the setup.
## What this Claude YouTube automation does
You give Cowork the Genviral workspace, two media folders, exact filename patterns, destination channel, metadata examples, and posting sequence.
For the Pantry AI workflow, one post comes from the recipe folder and the next comes from the product-demo folder. The files are numbered, so Cowork can move through both YouTube queues in order.
The same media is reused from Genviral instead of uploaded again for every post. That keeps the library clean and avoids creating a new duplicate each time the task runs.
Cowork then writes a YouTube-specific title, description, and hashtags for the selected Short. The post can be scheduled ahead so you have time to review it in the [Genviral queue](https://www.genviral.io/social?tab=queue).
## Why YouTube needs its own content rules
YouTube viewers see the title before they decide whether to watch. That makes the title part of the content system, not a caption added after the video is finished.
A YouTube Short needs a clear title that describes the video before the description adds context. The hashtags, call to action, and wording should follow examples from the same channel.
This setup starts with finished YouTube videos, so its harder problems are inventory and metadata. Cowork needs to know which Short comes next and how that channel writes about it.
Keep those YouTube rules in their own Cowork project. A separate project stops unrelated content instructions from changing the title format, folder sequence, or destination channel.
## What you need
Prepare these six things before you build the task:
1. A Claude account with custom connector access
2. A paid Claude plan for Cowork projects and scheduled tasks
3. A [Genviral account](https://www.genviral.io/auth)
4. A YouTube channel connected in Genviral
5. One or more named folders containing finished vertical videos
6. About 10 real YouTube titles, descriptions, and hashtag sets
Post manually for one or two weeks if you do not know what your YouTube metadata should look like yet. Automation cannot recover a format you have not decided.
## Step 1: Add Genviral as a Claude connector
Open Claude, go to **Customize**, and choose **Connectors**. Add a custom connector with this remote MCP endpoint:
```text
https://mcp.genviral.io/mcp
```
Name it `Genviral`, continue through the setup, and approve the OAuth connection.
Anthropic's [connector documentation](https://support.claude.com/en/articles/11176164-use-connectors-to-extend-claude-s-capabilities) explains how custom remote MCP connectors work.
Only connect servers you trust. A connector that can create posts can take real actions on your social accounts through the permissions you approve.
## Step 2: Approve the permissions this task needs
Open **Manage Connectors**, select Genviral, and review the tools available to Claude.
This workflow needs access to the relevant workspaces, folders, media files, connected accounts, and post-scheduling action. Enable upload access only when Cowork must bring in a file that is not already in Genviral.
The video enables every available tool because the wider project also creates content. You do not need to copy that permission set for a task that only schedules finished Shorts.
Give the project the smallest useful set of permissions, then expand it when a specific step requires more access.
## Step 3: Connect and confirm the YouTube channel
Open [Social Posts](https://www.genviral.io/social?tab=queue), choose **Manage Accounts**, and connect the YouTube channel you want to use.
If you have more than one Genviral workspace, switch to the correct workspace first. The walkthrough targets the Pantry AI workspace and its Pantry AI YouTube channel.
Ask Claude to list the YouTube destinations it can see. Confirm the workspace and channel name before you let it create the first post.
Do this before you debug folders or metadata. If Claude cannot see the destination, the rest of the task cannot work.
## Step 4: Create a dedicated Cowork project
Create one Cowork project for the YouTube workflow. Keep the connector instructions, destination channel, folder names, filename patterns, metadata examples, and scheduling rules inside it.
If you already scheduled one correct YouTube Short in Claude, ask it to summarize that setup as a handoff. Paste the handoff into the Cowork project before describing the recurring sequence.
The handoff preserves the workspace, channel, folder, and connector details that you have already debugged. Cowork can use those facts without searching for the same setup again.
Reuse the setup facts, but rewrite the output rules for YouTube.
## Step 5: Organize the YouTube content folders
Put finished YouTube videos into folders with names that explain the content inside them. The example below separates recipe Shorts from product-demo Shorts.
Number the files so Cowork can follow a stable order:
```text
Pantry AI YouTube Recipes/
├── YT-R-01-hair-growth-recipe.mp4
├── YT-R-02-kimbap-recipe.mp4
└── YT-R-03-pesto-pasta.mp4
Pantry AI YouTube Product Demos/
├── YT-D-01-scan-ingredients.mp4
├── YT-D-02-build-a-meal.mp4
└── YT-D-03-save-a-recipe.mp4
```
The recorded library had about 35 numbered files. Cowork initially found the folders but missed the videos because the instruction did not include enough detail about their names.
Give it one or two exact filenames and the prefixes it should search for. Clear filenames are part of the automation contract.
## Step 6: Confirm the inventory before posting
Ask Cowork to return the files it found before it creates a post. The response should include the folder, filename, sequence number, and media reference it plans to reuse.
Do not accept a general message saying the folder was found. In the walkthrough, the folder existed while the first file search still returned the wrong result.
Use a prompt like this:
```text
Use the Genviral connector in the Pantry AI workspace.
Find the folders named Pantry AI YouTube Recipes and Pantry AI YouTube Product
Demos. Search for files beginning with YT-R- and YT-D-. Show me five filenames
from each folder in sequence. Do not create or schedule a post yet.
```
The preview gives you a cheap place to correct a folder name or search pattern before it affects the channel.
## Step 7: Reuse existing media without creating duplicates
Tell Cowork to use the existing Genviral media reference for each Short. It should not upload another copy when the selected video is already in the library.
This is safer than giving the task a raw storage URL and assuming it will remain valid forever. Let the connector return and use the media reference supported by the posting tool.
After the first run, open the media library and confirm that one scheduled post did not create another copy of the original video.
## Step 8: Teach Cowork your YouTube metadata
Paste about 10 titles, descriptions, and hashtag sets from Shorts you posted manually. Pick examples you would publish again, not every post you have ever made.
Tell Cowork which parts are fixed and which parts may change. Your instructions should cover:
- title length and capitalization
- whether the title names the recipe, result, or problem
- description structure and call to action
- hashtags to include or avoid
- claims the task must not invent
- whether reused videos need a new YouTube angle
The walkthrough calls out robotic AI writing as a problem. Real examples give Cowork a pattern it can reproduce instead of asking it to guess what `human` or `engaging` means.
## Step 9: Define the alternating sequence
Write the folder rule as an explicit sequence. For example, select the next unused `YT-R-` file, then the next unused `YT-D-` file, and repeat.
Tell Cowork to rescan both folders before each run so newly added videos enter the inventory. It should preserve the current position rather than starting again when a new file appears.
Also define what happens when one folder ends before the other. The task can continue with the remaining folder, pause for review, or restart only after both pools are exhausted.
Do not leave that decision implicit. An unclear end-of-inventory rule is how the same Short gets selected again by mistake.
## Step 10: Schedule one reviewed Short
Before creating a recurring task, schedule one Short far enough ahead to inspect it. Include the workspace, folder, filename, YouTube channel, title rules, publish time, and IANA time zone.
You can adapt this prompt:
```text
Use the Genviral connector and the Pantry AI workspace.
Select YT-R-01 from the Pantry AI YouTube Recipes folder and schedule it for
the Pantry AI YouTube channel tomorrow at 10:00 AM America/New_York.
Write a YouTube-specific title and description using the examples in this
project. Reuse the existing media reference. Do not upload a duplicate.
Before finishing, show me the channel, filename, title, description, hashtags,
scheduled time, and status returned by Genviral.
```
Open the post in Genviral and review the selected video, title, description, hashtags, channel, date, and displayed time.
If you only need this reviewable calendar workflow, the [YouTube Scheduler](https://www.genviral.io/youtube-scheduler) is the simpler starting point. Add Cowork when you need the file-selection and metadata decisions too.
## Step 11: Create the recurring Cowork task
Once the reviewed Short is correct, create the recurring task in Cowork. Anthropic explains the current controls in its [scheduled tasks guide](https://support.claude.com/en/articles/13854387-schedule-recurring-tasks-in-claude-cowork).
The walkthrough uses two posts per day, one in the morning and one in the evening. That is the Pantry AI cadence shown in the video, not a universal recommendation for YouTube Shorts.
Start with a cadence you have already handled manually. Schedule each Short ahead of its publish time during the first week so a bad title or wrong file can still be corrected.
Ask for a confirmation after every run. It should include the selected filename, YouTube folder, channel, scheduled time, title, status returned by Genviral, and the next file in the sequence.
## What was not working in the recorded setup
The scheduled YouTube task did not appear to work reliably at the time of recording. The walkthrough shows the intended recurring setup, but it does not show a completed unattended YouTube run followed by verified publication.
The workflow is still useful, but you need to validate each stage instead of calling the whole system successful when Cowork finishes a task.
Track these states separately:
1. Cowork ran the scheduled task
2. Genviral accepted or scheduled the Short
3. YouTube published the Short
4. Claude independently confirmed the published result
A Cowork confirmation proves the first state only unless it includes evidence from the later stages. Check the Genviral calendar and the YouTube channel while you validate the recurring setup.
If a run fails, preserve the filename and sequence position. Retry the failed Short instead of advancing the inventory or starting the whole sequence again.
## Reusing Shorts responsibly
The Pantry AI workflow reuses videos that Fekri and Viktor own and have approved for the YouTube channel. It cycles through that library rather than creating a new asset for every upload.
That does not mean every channel should repost the same inventory forever. Watch for audience fatigue, update weak metadata, and add new videos before the account becomes a loop people can predict.
YouTube also reviews repetitive and reused content when it evaluates monetization. Read YouTube's [channel monetization policies](https://support.google.com/youtube/answer/12504220) before scaling a recycled-content workflow.
Keep the rights to every video, avoid low-value mass duplication, and make sure the channel gives viewers a reason to watch the content on YouTube.
## Can Claude post directly to YouTube?
Claude needs a connected tool that can perform the publishing action. In this workflow, Genviral provides the tool through MCP and manages the YouTube account connection.
You do not give Claude your YouTube password. You authorize the channel in Genviral and approve the connector permissions Claude may use.
## Can Claude understand every video in the folder?
In this workflow, Cowork relied on folder names, filenames, metadata, and the instructions in the project. Do not assume it watched every video because it can list the files.
Use descriptive filenames and add a one-sentence note when the correct title depends on a detail the filename does not contain.
## Can Cowork run while my computer is off?
Connector-based tasks and files saved to your Claude account can run while your computer is asleep.
If the task needs local files or desktop apps, the Claude Desktop connection and computer need to remain available. Test the exact task before leaving it unattended.
## Can I generate the Shorts instead?
Yes. Claude can ask a connected service such as Genviral to generate an image or video with an external model, then schedule the result.
The recorded workflow uses finished Pantry AI videos because the goal is distribution. Start there if you already have a useful inventory, then add generation as a separate process.
## Getting started
Use this order for your first Claude YouTube automation:
1. Add the [Genviral MCP connector](https://www.genviral.io/mcp) to Claude
2. Approve the workspace, media, account, and scheduling permissions you need
3. Connect and confirm the YouTube channel
4. Create a dedicated Cowork project
5. Add named folders and ordered filenames
6. Ask Cowork to preview the inventory without posting
7. Tell it to reuse existing media references
8. Paste about 10 real YouTube metadata examples
9. Define the alternating and end-of-inventory rules
10. Schedule one Short ahead for review
11. Verify the post in Genviral and on YouTube
12. Create the recurring task and keep confirmations enabled
The [OpenClaw YouTube guide](https://www.genviral.io/blog/openclaw-youtube) is a better fit when you want an API-key-based agent with its own posting and analytics loop.
The [Hermes Agent YouTube guide](https://www.genviral.io/blog/hermes-agent-youtube) covers the same folder, logging, and confirmation problems for an agent that runs in a messaging channel.
## Related guides
- [How to Connect Claude to Instagram and Automate Posting](https://www.genviral.io/blog/claude-instagram-automation)
- [Claude Facebook Automation with Claude Cowork](https://www.genviral.io/blog/claude-facebook-automation)
- [How to Automate YouTube Posting with OpenClaw](https://www.genviral.io/blog/openclaw-youtube)
- [How to Automate YouTube Shorts Posting with Hermes Agent](https://www.genviral.io/blog/hermes-agent-youtube)
- [YouTube Scheduler](https://www.genviral.io/youtube-scheduler)
- [Best Social Media APIs for Posting and Automation](https://www.genviral.io/blog/best-social-media-apis)
---
Canonical HTML: https://www.genviral.io/blog/claude-youtube-automation
# How to Create TikTok Slideshow Images with AI (2026 Guide)
## Introduction
Creating unique images for your TikTok slideshows is crucial for standing out and ranking higher in the algorithm. While you can upload your own images or use community packs, generating AI images gives you unlimited unique content that helps you avoid copyright issues and create a distinctive aesthetic.
**Want to see this in action?** Watch the complete tutorial below:
## Why Use AI for TikTok Slideshow Images?
### Algorithm Benefits
- **Uniqueness matters**: TikTok's algorithm likely runs checks against image uniqueness
- **Stand out easier**: Unique images help you differentiate from competitors
- **Better ranking potential**: More unique content = higher chance of getting views
### Cost & Quality Advantages
- **4K resolution**: Generate high-quality images up to 4K without price changes
- **Multiple aspect ratios**: Perfect for different content formats
- **Cheaper than alternatives**: More cost-effective than other AI models
- **Less strict copyright checks**: Fewer restrictions compared to other platforms
## Getting Started with Genviral's AI Studio
### Step 1: Access the AI Studio
1. Navigate to the AI Studio section in Genviral
2. Select **Seedream 4** (by ByteDance) as your AI model
3. Choose your desired aspect ratio (9:16 for TikTok)
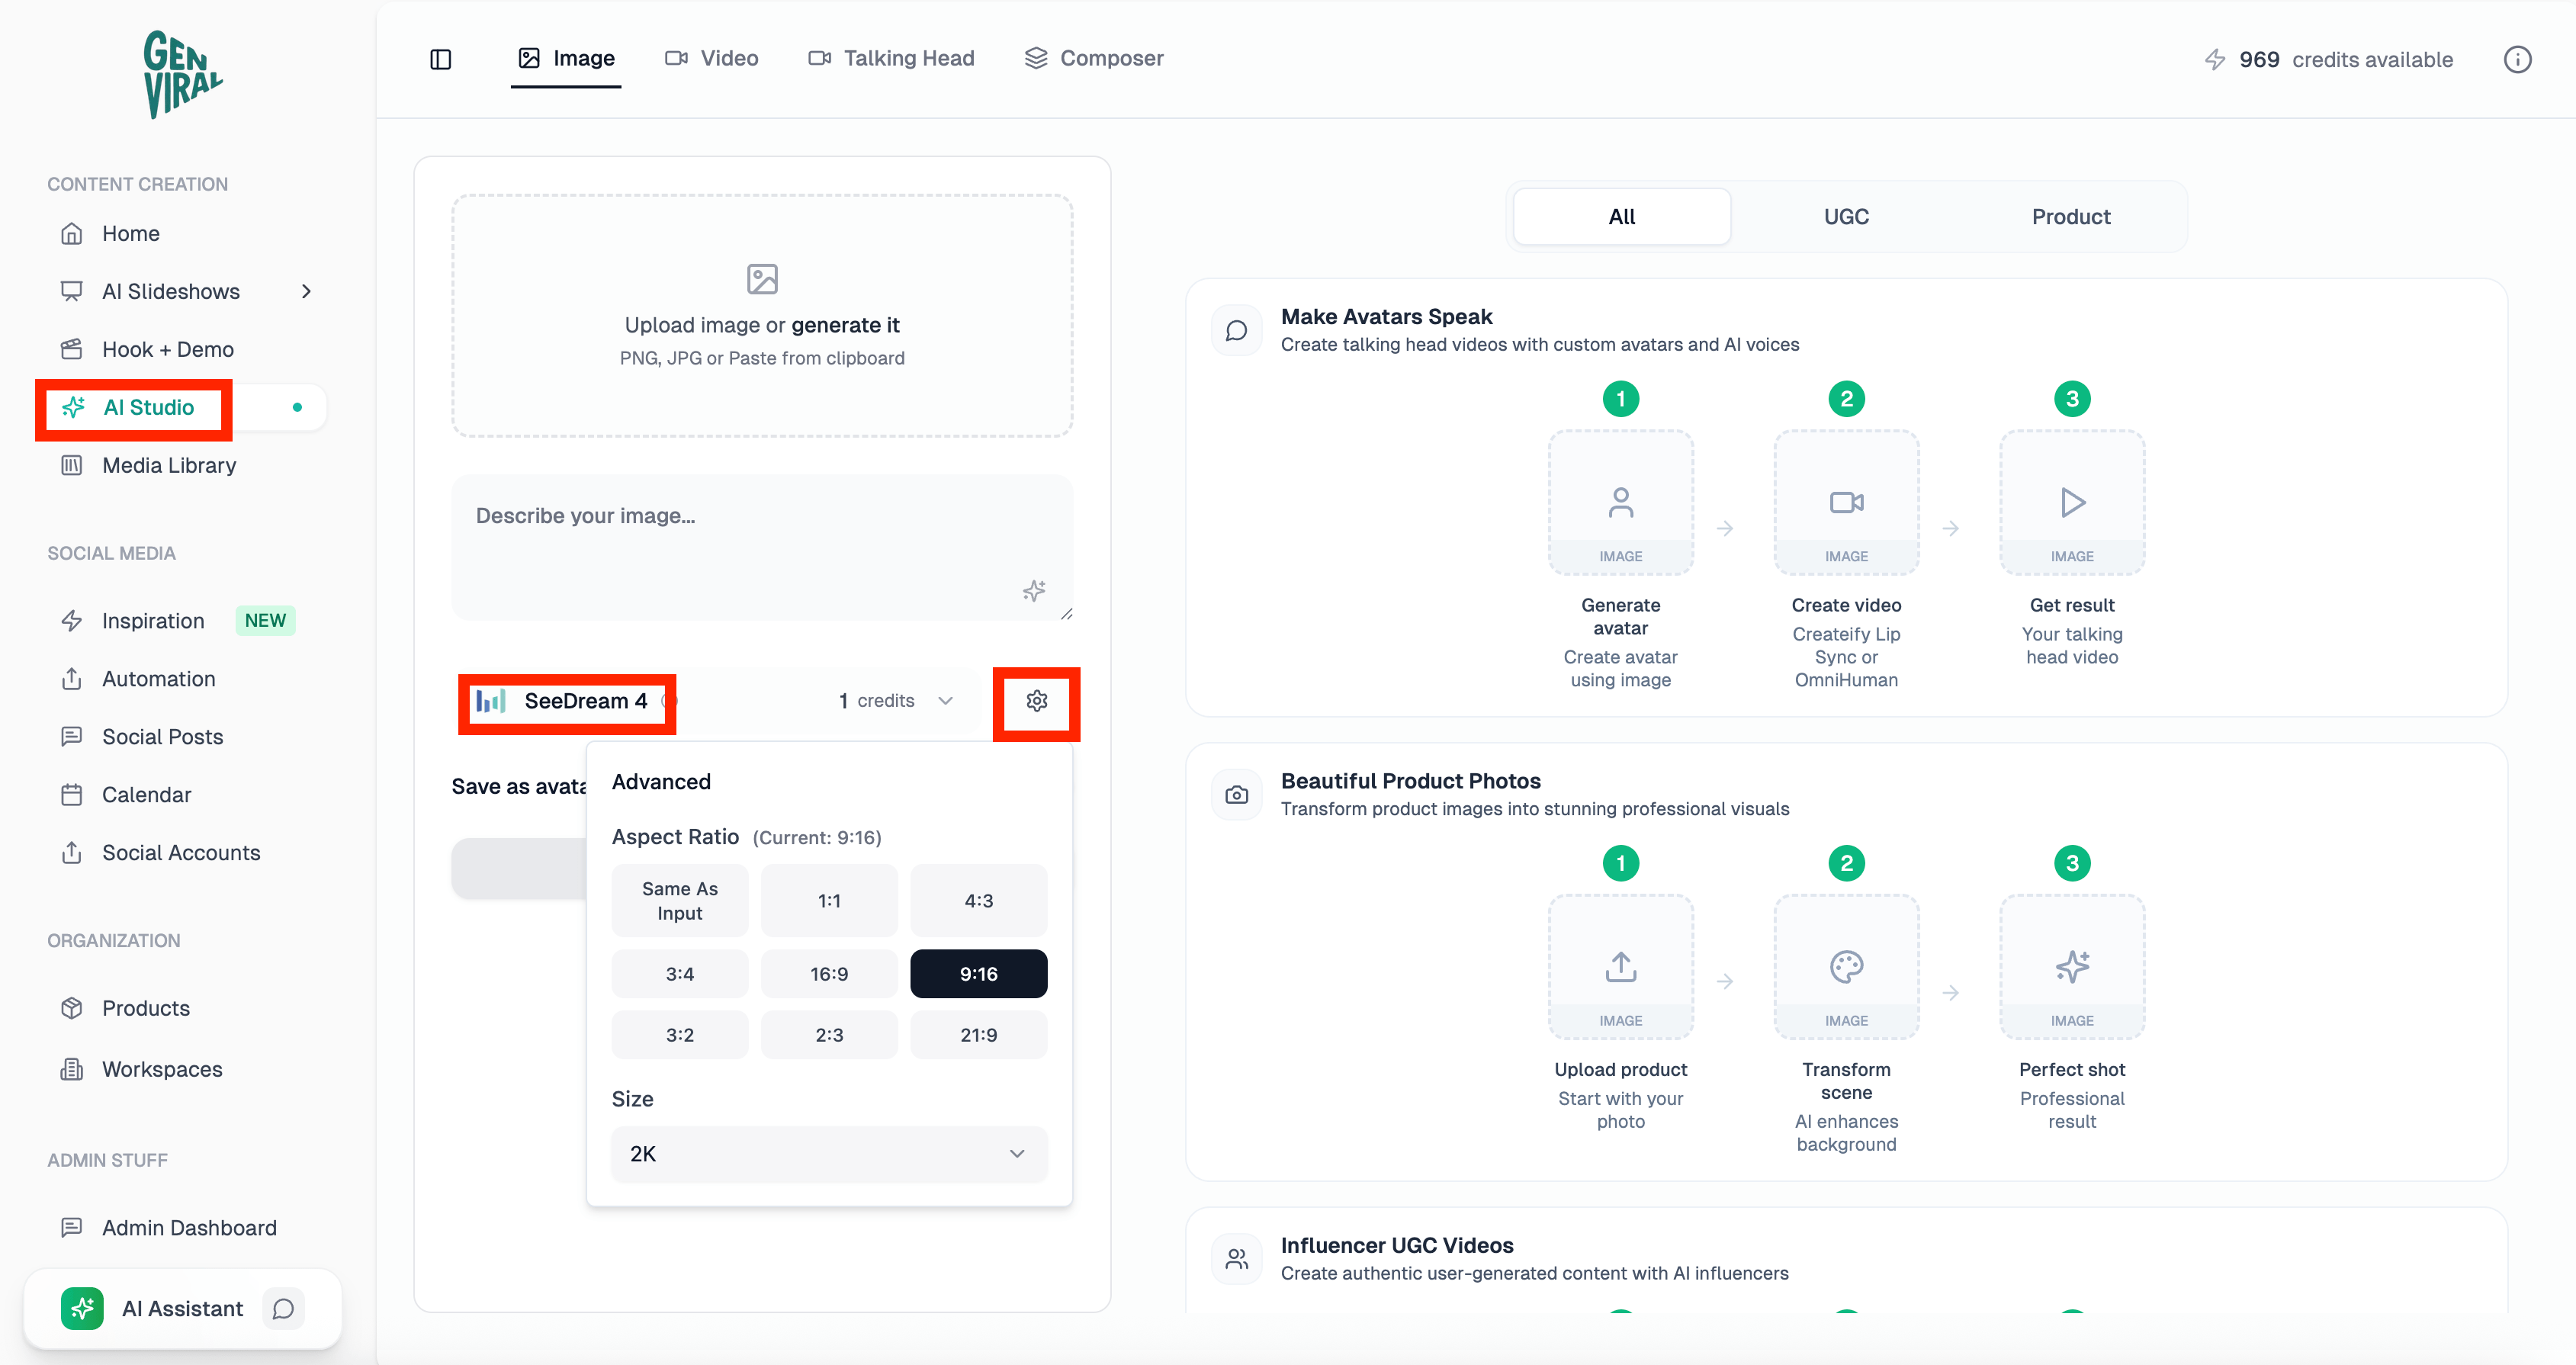
### Step 2: Generate Your First Image
1. Enter a descriptive prompt for your image
2. Select your preferred resolution (1K, 2K. or 4K)
3. Click generate and wait for results
**Pro tip**: Start with specific, detailed prompts. For example, instead of "Spanish city," use "Barcelona Sagrada Familia with dramatic lighting and realistic architecture."
## Advanced Techniques
### Creating Image Variations
Once you have a base image you like:
1. **Upload your reference image**
2. **Ask for variations**: "Create a dark moody variation of this image"
3. **Specify style**: "Make it 60s Mad Men aesthetic"
4. **Generate multiple options** to choose from
### Combining Multiple References
Seedream 4 allows you to:
- Upload multiple reference images
- Combine different visual elements
- Create cohesive series with similar aesthetics
### Batch Generation Tips
- Generate 2-3 images at a time for best results
- Too many simultaneous generations can cause quality issues
- Test different prompts to find what works best
## Best Practices for TikTok Slideshow Images
### Image Quality Guidelines
- **High contrast**: Choose images that work well with text overlays
- **Realistic physics**: Seedream 4 excels at realistic-looking images
- **Avoid small text**: The model struggles with narrow elements and small text
- **Test different styles**: Dark moody aesthetics work well for personal development content
-- **Find pictures to replicate**: Use models like Google's Nano Banana (with identical aspect ratio) to make particular changes to existing images
### Content Strategy
- **Consistent aesthetic**: Use similar styles across your slideshow series
- **Bold opening images**: Your first slide is most important - make it striking
- **Text-friendly backgrounds**: Ensure good contrast for readability
## Post-Generation Workflow
### Using Images in Genviral
1. **Access your image library** in the slideshow editor
2. **Replace existing images** with your AI-generated ones
3. **Apply additional effects** if needed (darken, adjust contrast, etc.)
4. **Test readability** with your text overlays
## Common Challenges & Solutions
### When Images Don't Turn Out Well
- **Regenerate with different prompts**: Sometimes it's just the prompt
- **Try different reference images**: Mix and match until you find what works
- **Adjust your expectations**: AI isn't perfect, but it's getting better
### Quality Control
- **Review before using**: Always check images before adding to slideshows
- **Have backups ready**: Generate multiple options for each concept
- **Test on mobile**: Ensure images look good on phone screens
## Pro Tips for Better Results
### Prompt Engineering
- **Be specific**: "Dark moody office scene with vintage 60s aesthetic"
- **Include style references**: "Realistic looking like the attached image"
- **Mention lighting**: "Dramatic lighting" or "soft natural light"
### Workflow Optimization
- **Generate in batches**: Create multiple images for a content series
- **Save your best prompts**: Keep a library of successful prompt templates
- **Experiment regularly**: AI models improve, so test new techniques
## Integration with Your Content Strategy
### Building Your Visual Brand
- **Consistent color palettes**: Use similar tones across your content
- **Recognizable style**: Develop a signature aesthetic
- **Quality over quantity**: Better to have fewer, higher-quality images
### Content Planning
- **Batch creation**: Generate images for multiple posts at once (works for [AI infographics](https://www.genviral.io/blog/how-to-create-infographics-with-ai) on Pinterest too)
- **Seasonal themes**: Create themed image sets for different topics
- **A/B testing**: Try different image styles to see what performs best
## Conclusion
AI-generated images for TikTok slideshows offer a powerful way to create unique, high-quality content that stands out in the algorithm. With Genviral's AI Studio and Seedream 4, you can generate professional-looking images at scale without breaking the bank.
The key is to experiment, iterate, and find the prompts and styles that work best for your niche. Start with the basics, then gradually incorporate more advanced techniques as you become comfortable with the platform.
If you want to turn those slideshow assets into a recurring posting workflow, [How to Automate TikTok Posting with Hermes Agent](https://www.genviral.io/blog/hermes-agent-tiktok) walks through the next step. If you're scrapping an underperforming account to start over with these new visuals, see [how to delete your TikTok account](https://www.genviral.io/blog/how-to-delete-tiktok-account) first.
Ready to create your first AI-powered slideshow? Head to Genviral's AI Studio and start generating unique images that will help your content stand out on TikTok.
---
Canonical HTML: https://www.genviral.io/blog/create-tiktok-slideshow-images-with-ai
# How to Automate Facebook Posting with Hermes Agent
- Hermes Agent works well for Facebook social media automation because it can ask clarifying questions up front, follow a repeatable posting workflow, and then keep the recurring job running with confirmations back to your channel.
- The Facebook example in this walkthrough uses Genviral as the publishing layer, so Hermes can work with connected accounts, media folders, post creation, and analytics through one API surface instead of wiring Facebook directly.
- The concrete automation in the transcript is a folder-based reposting workflow: Hermes watches a media folder, picks the next unused video, publishes once per day at a fixed time, and reports the result back to a monitoring channel.
- The most important operational detail is the logging system. Hermes needs a durable way to remember which videos have already been used so it does not recycle the same asset too early.
- Failed-post confirmations matter just as much as success confirmations. In the transcript, Facebook stopped working until the connected account was reauthenticated, and the automation only stayed debuggable because that failure was surfaced back into chat.
Facebook is a strong fit for Hermes Agent when your workflow is already clear and repetitive. If you already know what content should be posted, where it lives, how often it should go out, and how you want confirmations handled, Hermes is very good at turning that into a daily operating system.
This guide turns the walkthrough from the video above into a written setup. If you want the broader overview first, start with [Hermes Agent Social Media: How to Automate Posting](https://www.genviral.io/blog/hermes-agent-social-media).
For the same platform in other agents, compare the [Claude Facebook automation workflow](https://www.genviral.io/blog/claude-facebook-automation) and [Facebook posting with OpenClaw](https://www.genviral.io/blog/openclaw-facebook).
## What This Facebook Automation Actually Does
The example in the transcript is not "Hermes writes random Facebook posts forever." It is a much more practical workflow:
1. finished videos are added to a dedicated media folder
2. Hermes confirms it can see that folder
3. Hermes picks the next unused video
4. it applies the posting rules you defined
5. it publishes one Facebook post per day at the chosen time
6. it sends a confirmation back into the main channel
7. it updates its log so that asset is not reused immediately
That is a useful model because it keeps the automation narrow. A human or editor still owns the content production side. Hermes owns the repetitive selection, scheduling, publishing, and reporting side.
If you want to see the kind of destination page this workflow is meant to support, here is the [Genviral Facebook page](https://www.facebook.com/genviralapp/).
## Why Hermes Agent Makes Sense for Facebook
Facebook automations usually break in the same few places:
- the connected account is no longer authenticated
- the content source is vague or changes too often
- the same media gets reused because nothing is tracking past posts
- the automation fails silently and nobody notices
Hermes is useful because it can:
- verify prerequisites before the automation is turned on
- ask you for missing cadence, caption, and posting rules
- keep a per-automation log of what already ran
- report both successes and failures back into a channel your team already watches
That is much better than treating Facebook like a blind scheduler with no memory.
## What You Need
Before you ask Hermes to automate Facebook posting, make sure you have:
1. Hermes Agent already installed and running in your preferred interface
2. an active Genviral workspace and access to [API Keys](https://www.genviral.io/api-keys)
3. your Facebook account connected in [Social Posts](https://www.genviral.io/social?tab=queue)
4. a clear content source such as a media-library folder
5. a monitoring channel where Hermes can post confirmations
In the transcript, Hermes is running in Discord, but the same operating model can work in Telegram, WhatsApp, Teams, or another chat surface. What matters is that Hermes has one stable place to ask questions, receive instructions, and post status updates.
## Step 1: Choose the Home Surface for Hermes
The first decision is not Facebook-specific. It is where the automation should live.
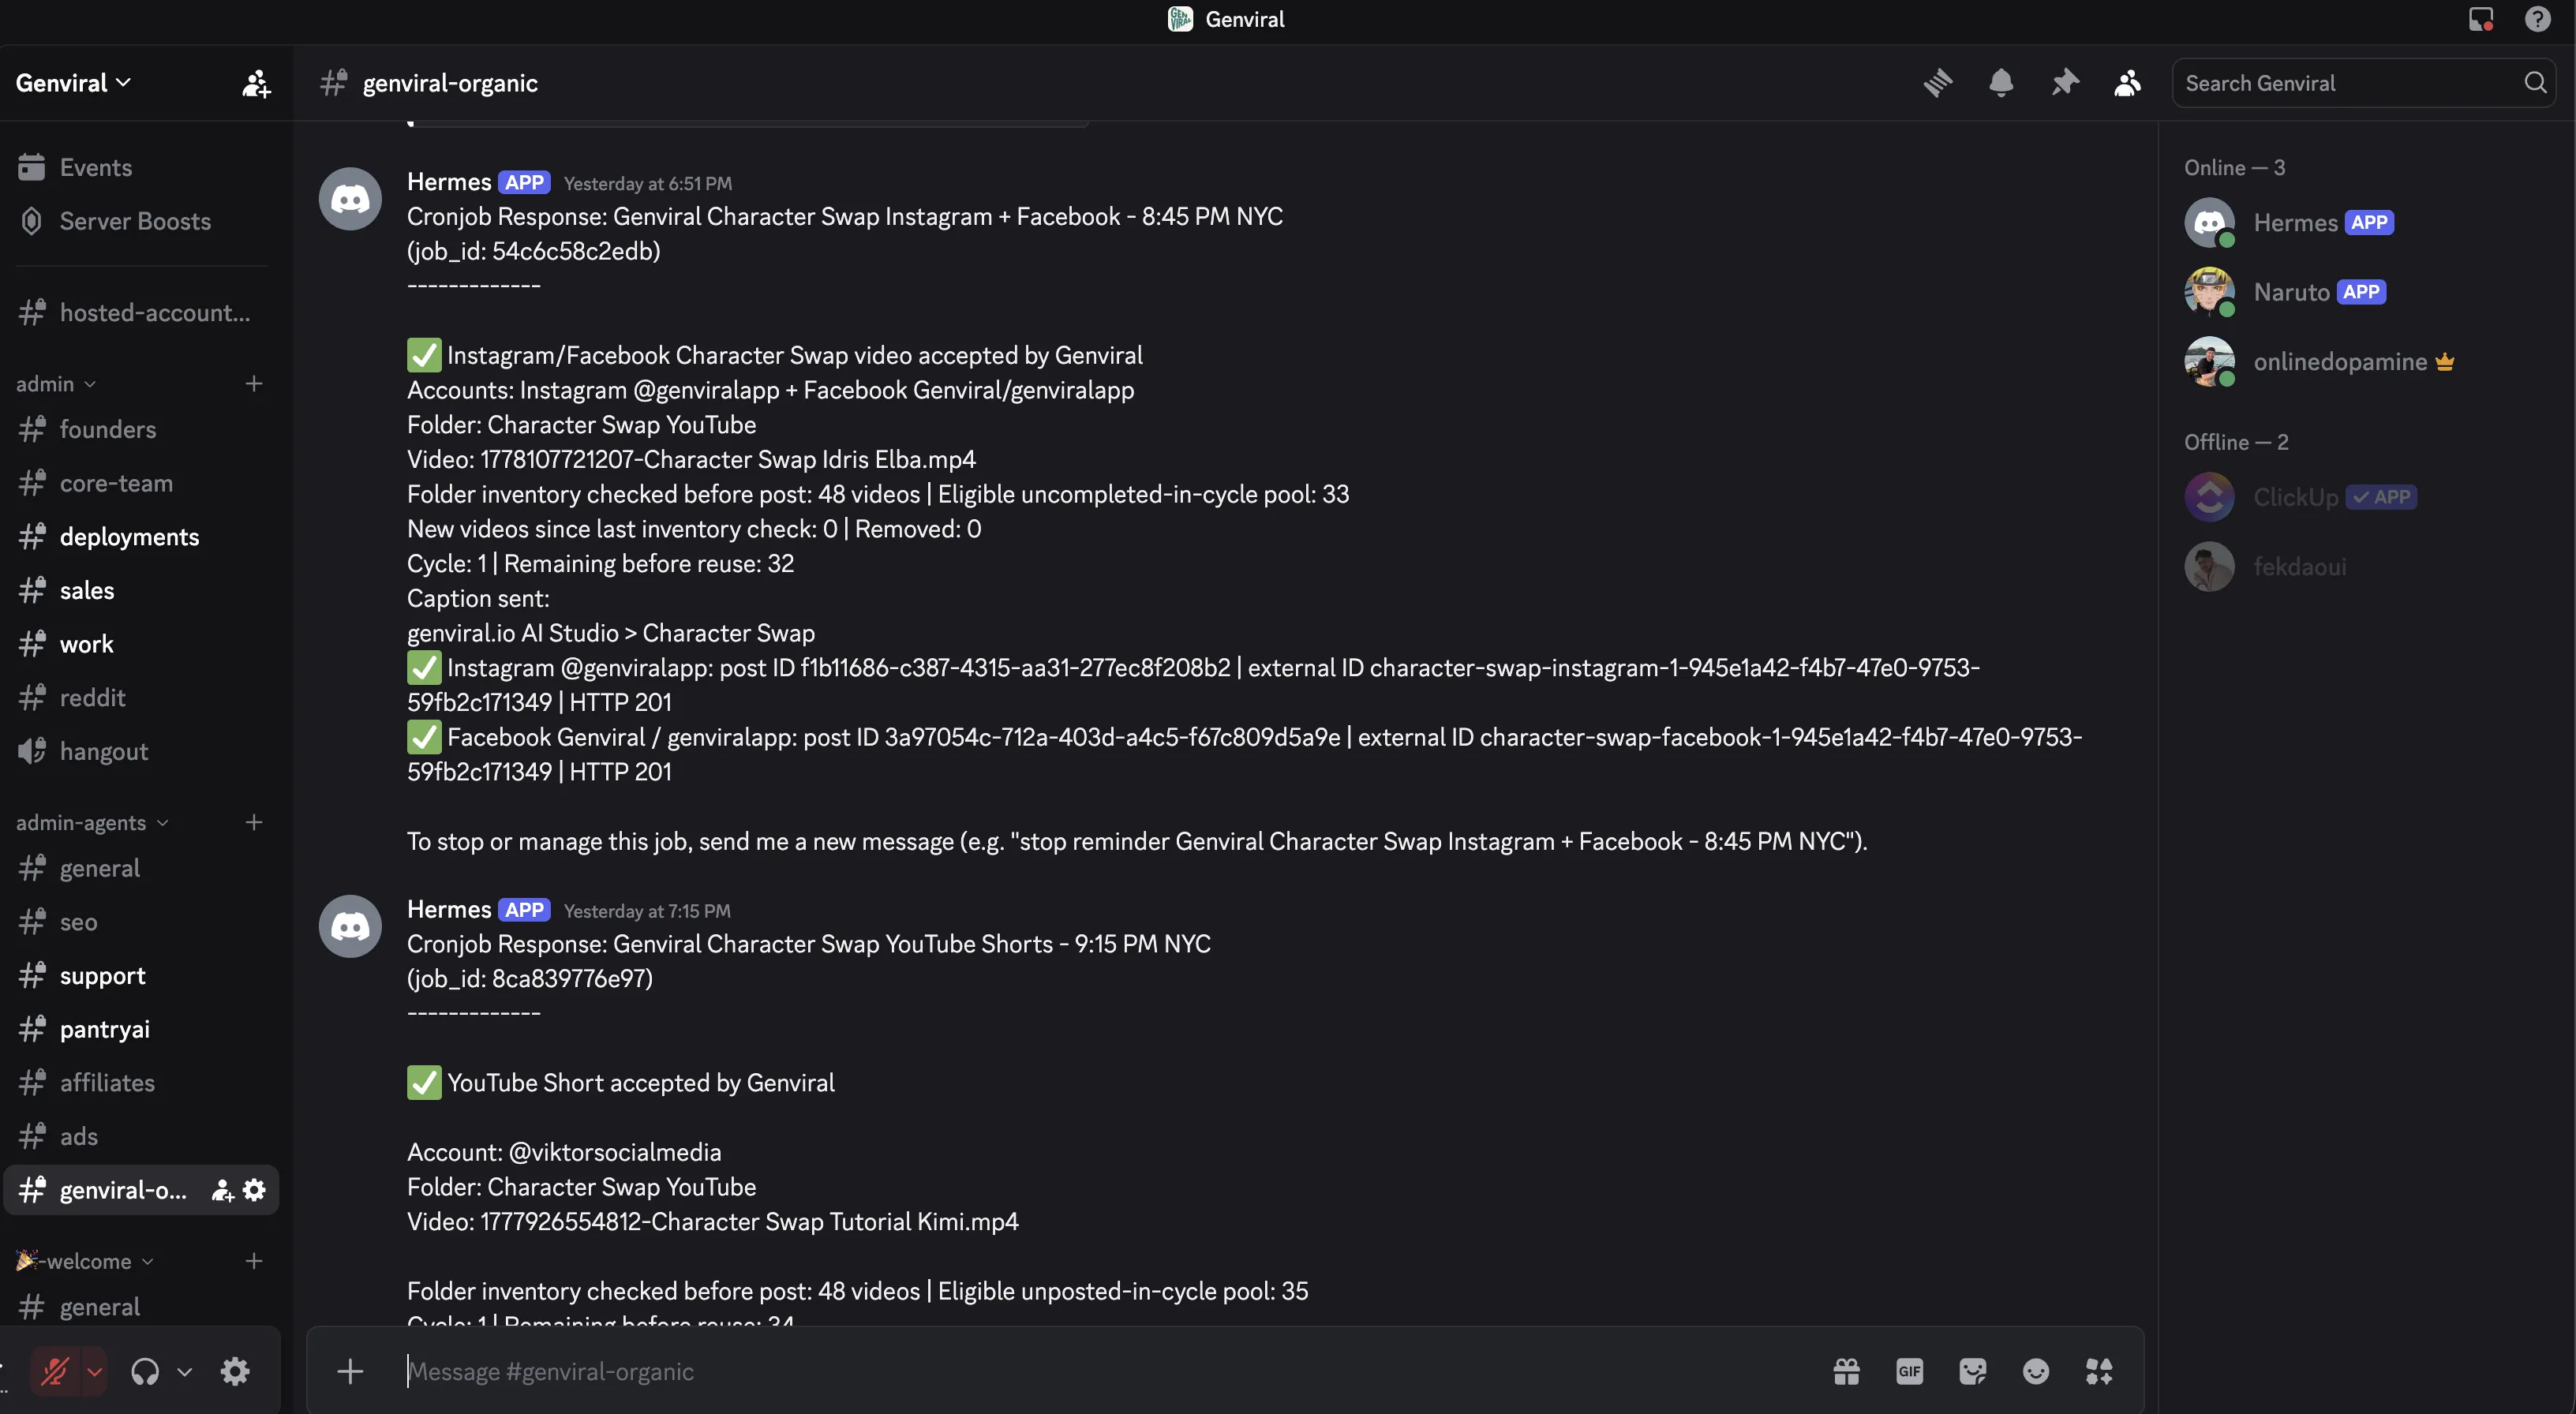
The example in the video runs in Discord, and that is a practical default because it gives you:
- a clear home channel for confirmations
- separate threads for different automations
- a simple place to collaborate with teammates
If you are already running Hermes elsewhere, that is fine too. The real requirement is operational clarity. One automation should have one home context.
## Step 2: Feed Hermes the API Docs and API Key
Once Hermes is running, it needs the execution layer it will use.
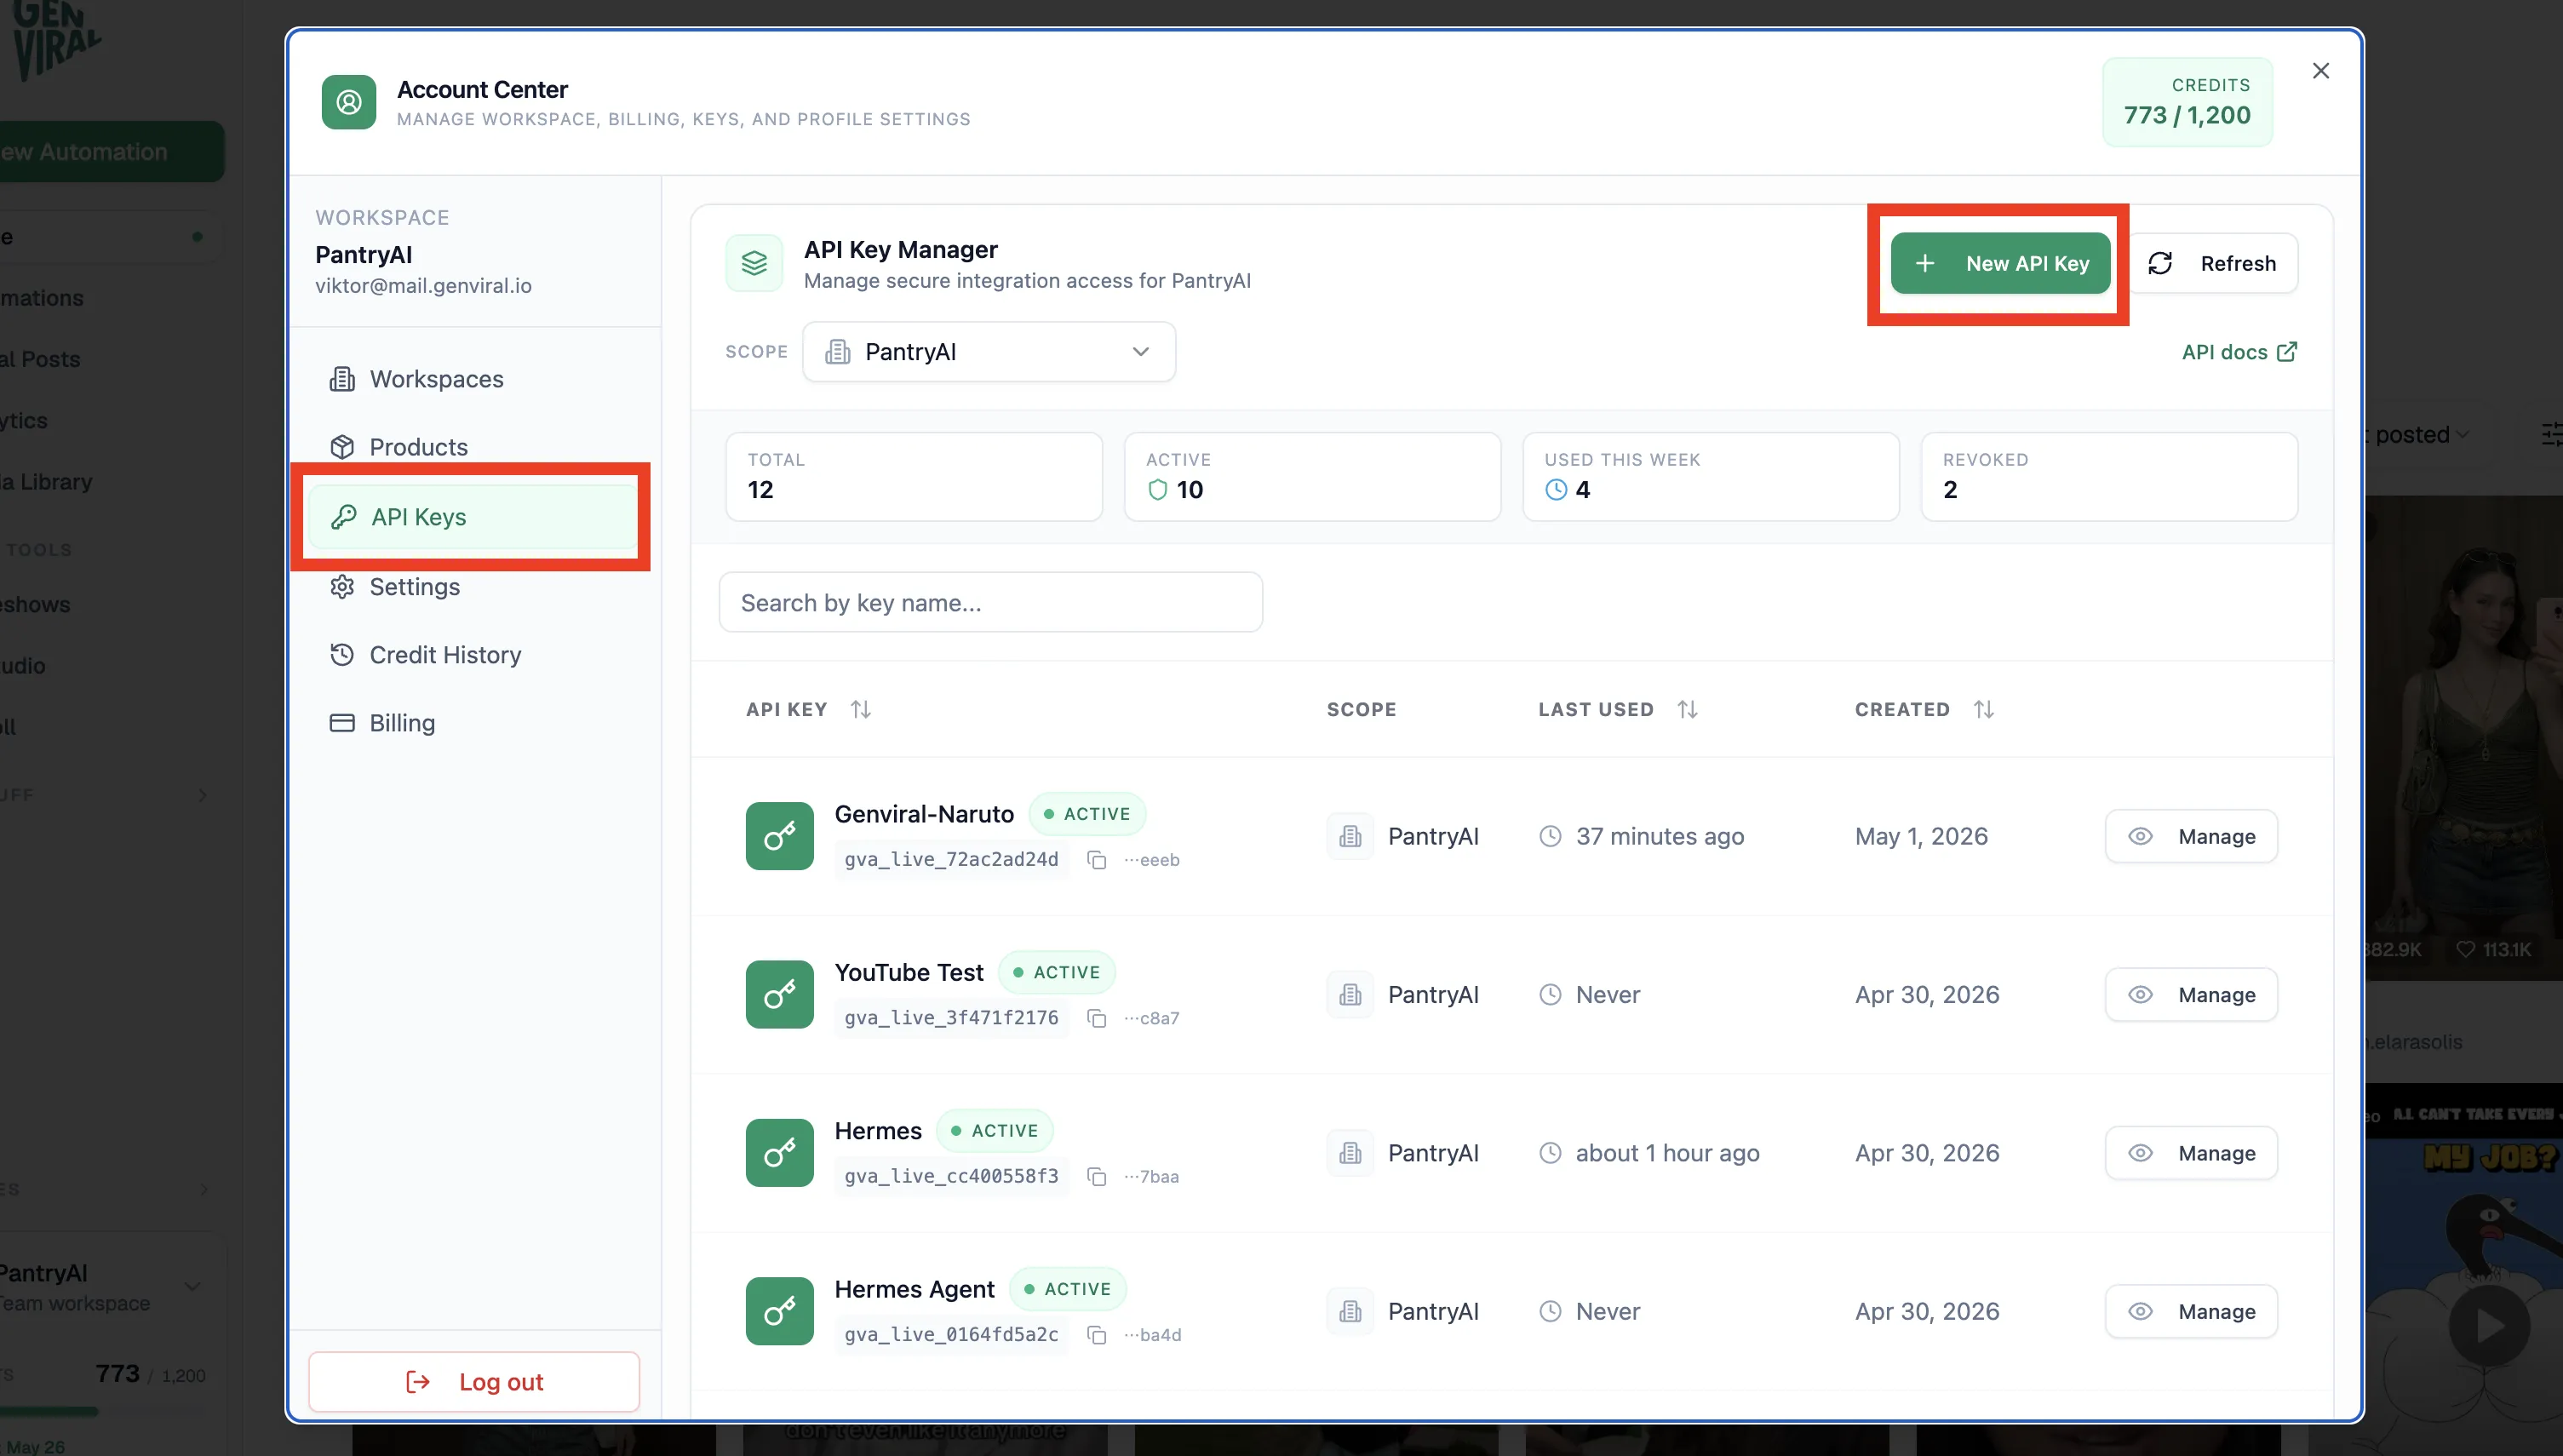
In this setup, that means giving Hermes:
- the Genviral API docs
- an API key from [API Keys](https://www.genviral.io/api-keys)
That is what lets Hermes do real work instead of only describing the workflow abstractly. It can authenticate, inspect connected accounts, create posts, and use the rest of the content pipeline through one backend surface.
## Step 3: Connect the Facebook Account Before Anything Else
Before Hermes can publish, the Facebook account needs to be connected manually.
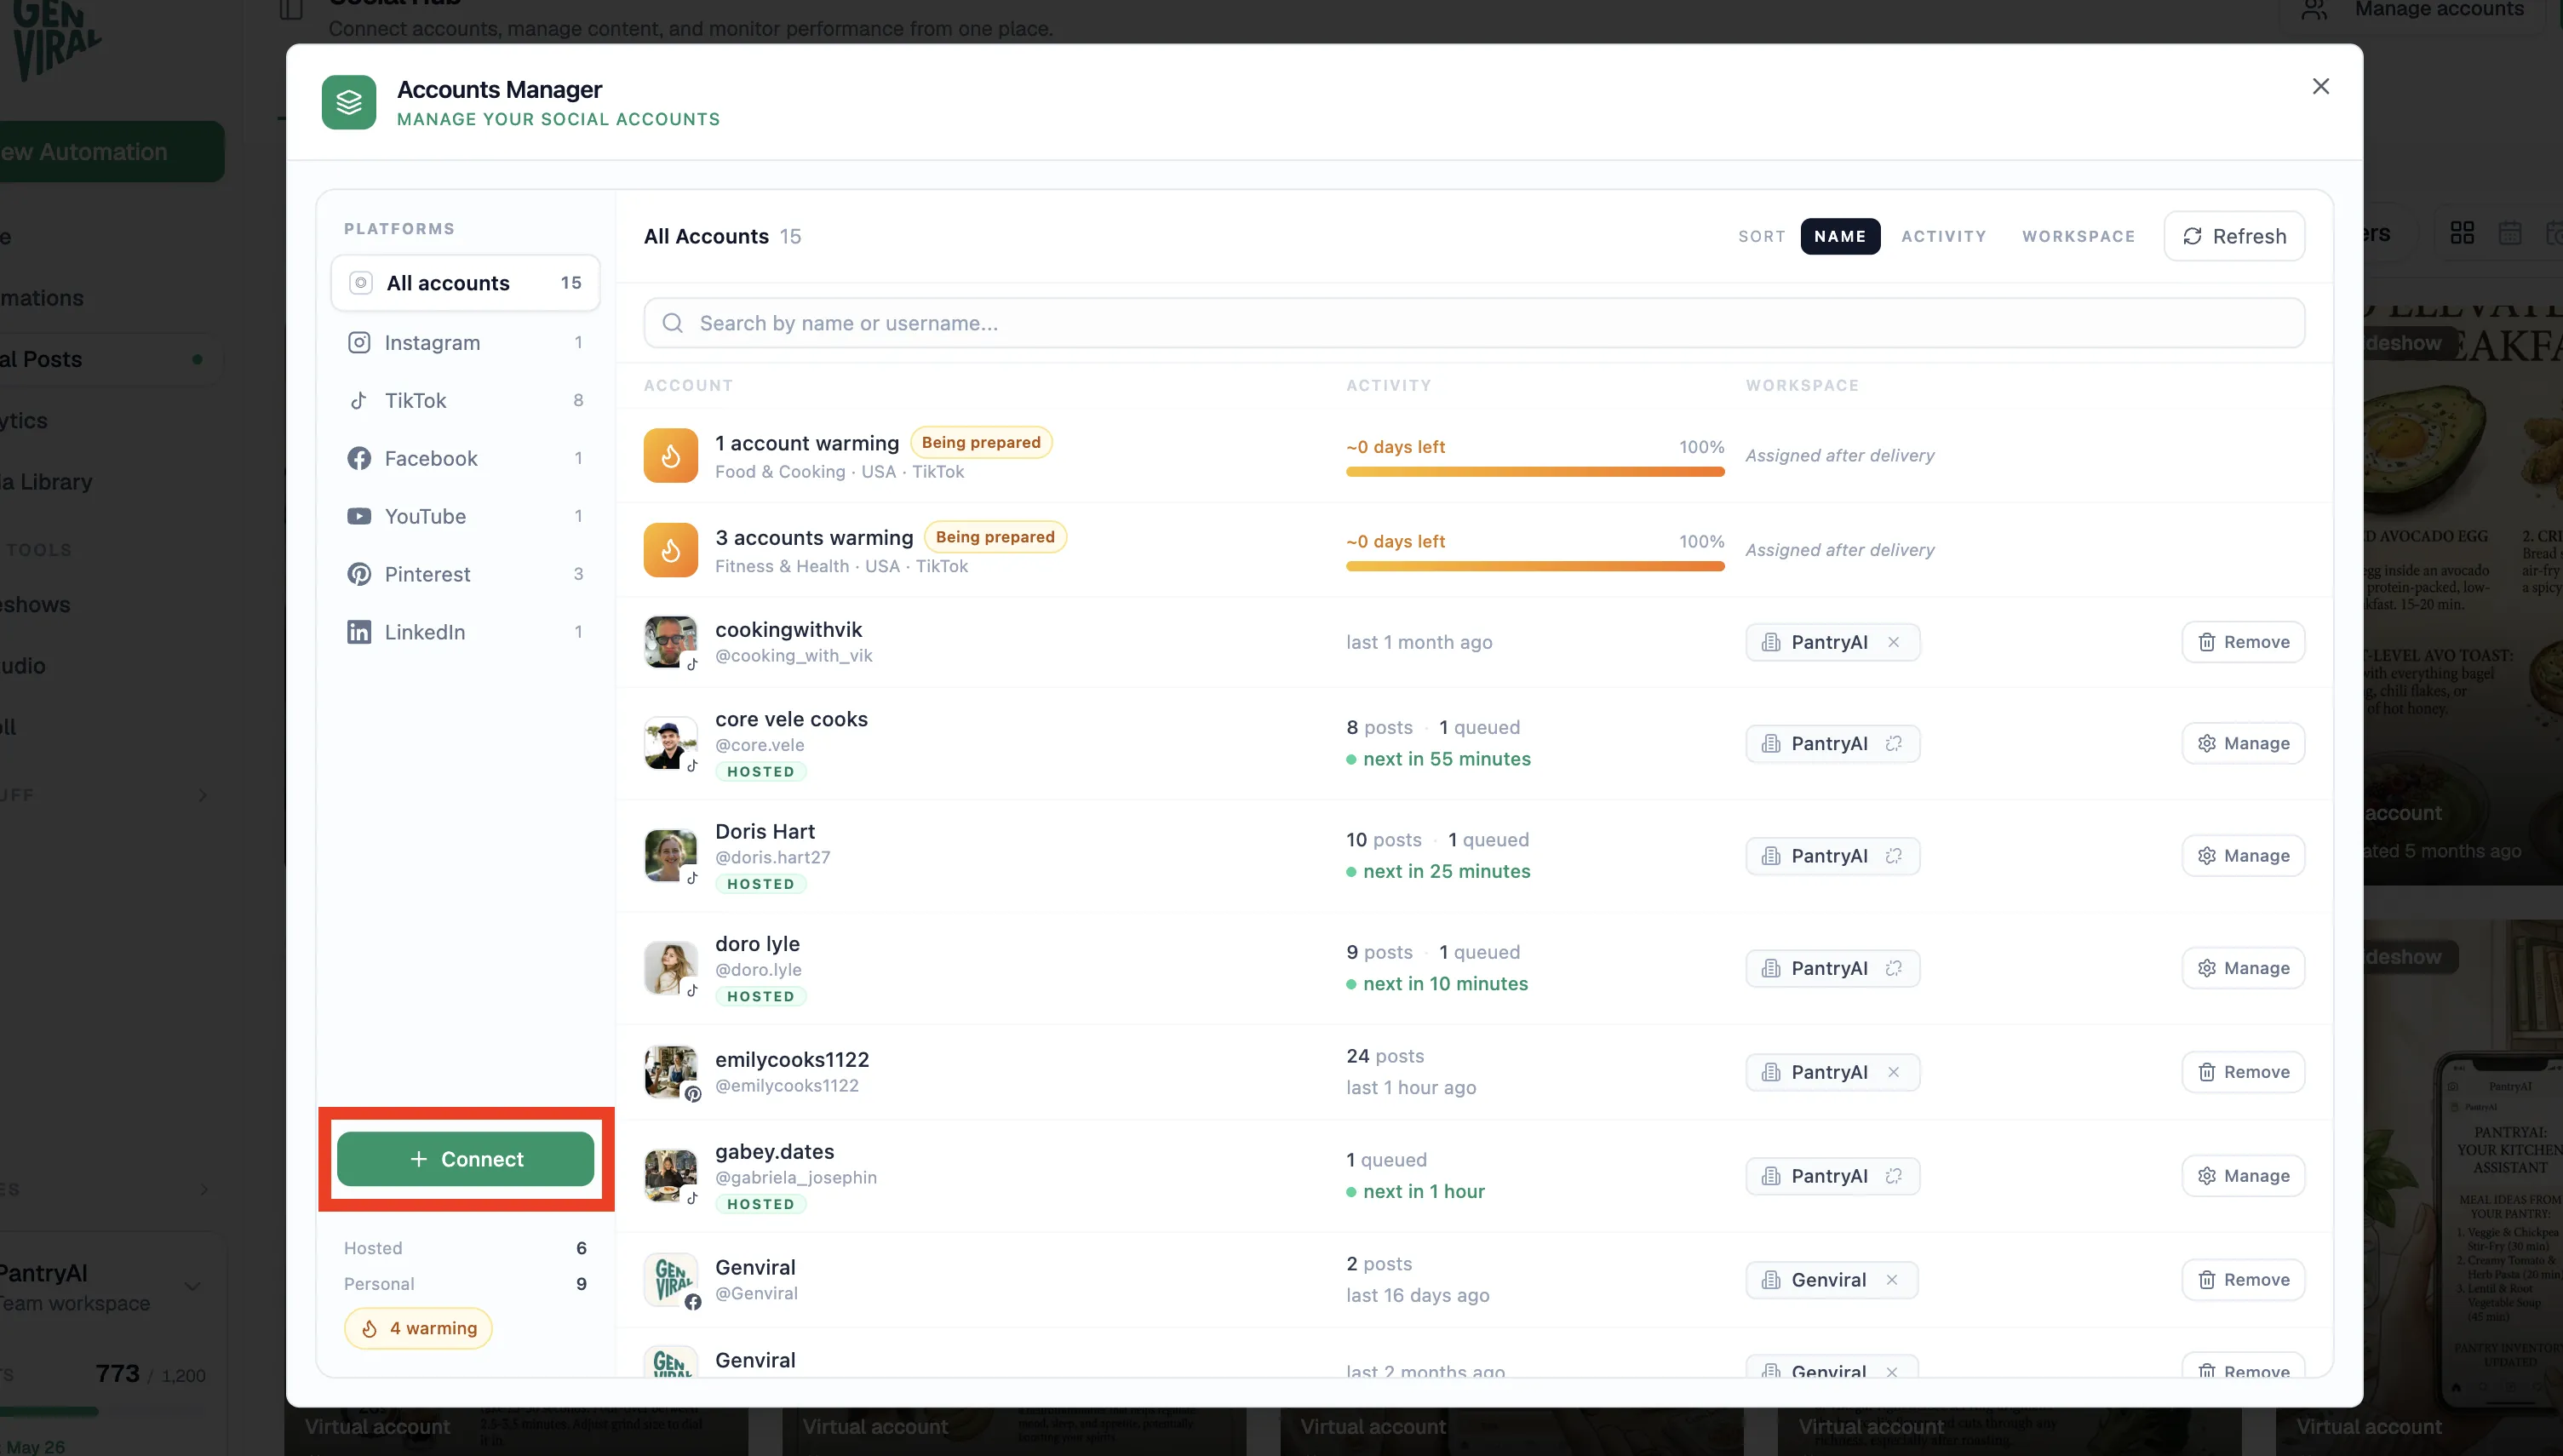
The flow is:
1. open [Social Posts](https://www.genviral.io/social?tab=queue)
2. go to Manage Accounts
3. choose Facebook
4. complete the connection flow
5. ask Hermes to confirm it can see the account
That last step matters. Do not move on to cadence, captions, or folder rules until Hermes confirms the account is visible and usable.
If you want to review or manually manage what is queued later, [Where to Find Scheduled Posts on Facebook](https://www.genviral.io/blog/where-to-find-scheduled-posts-on-facebook) is the best companion guide.
## Step 4: Point Hermes at a Real Content Source
The transcript uses a folder of pre-made videos, which is one of the best ways to start.
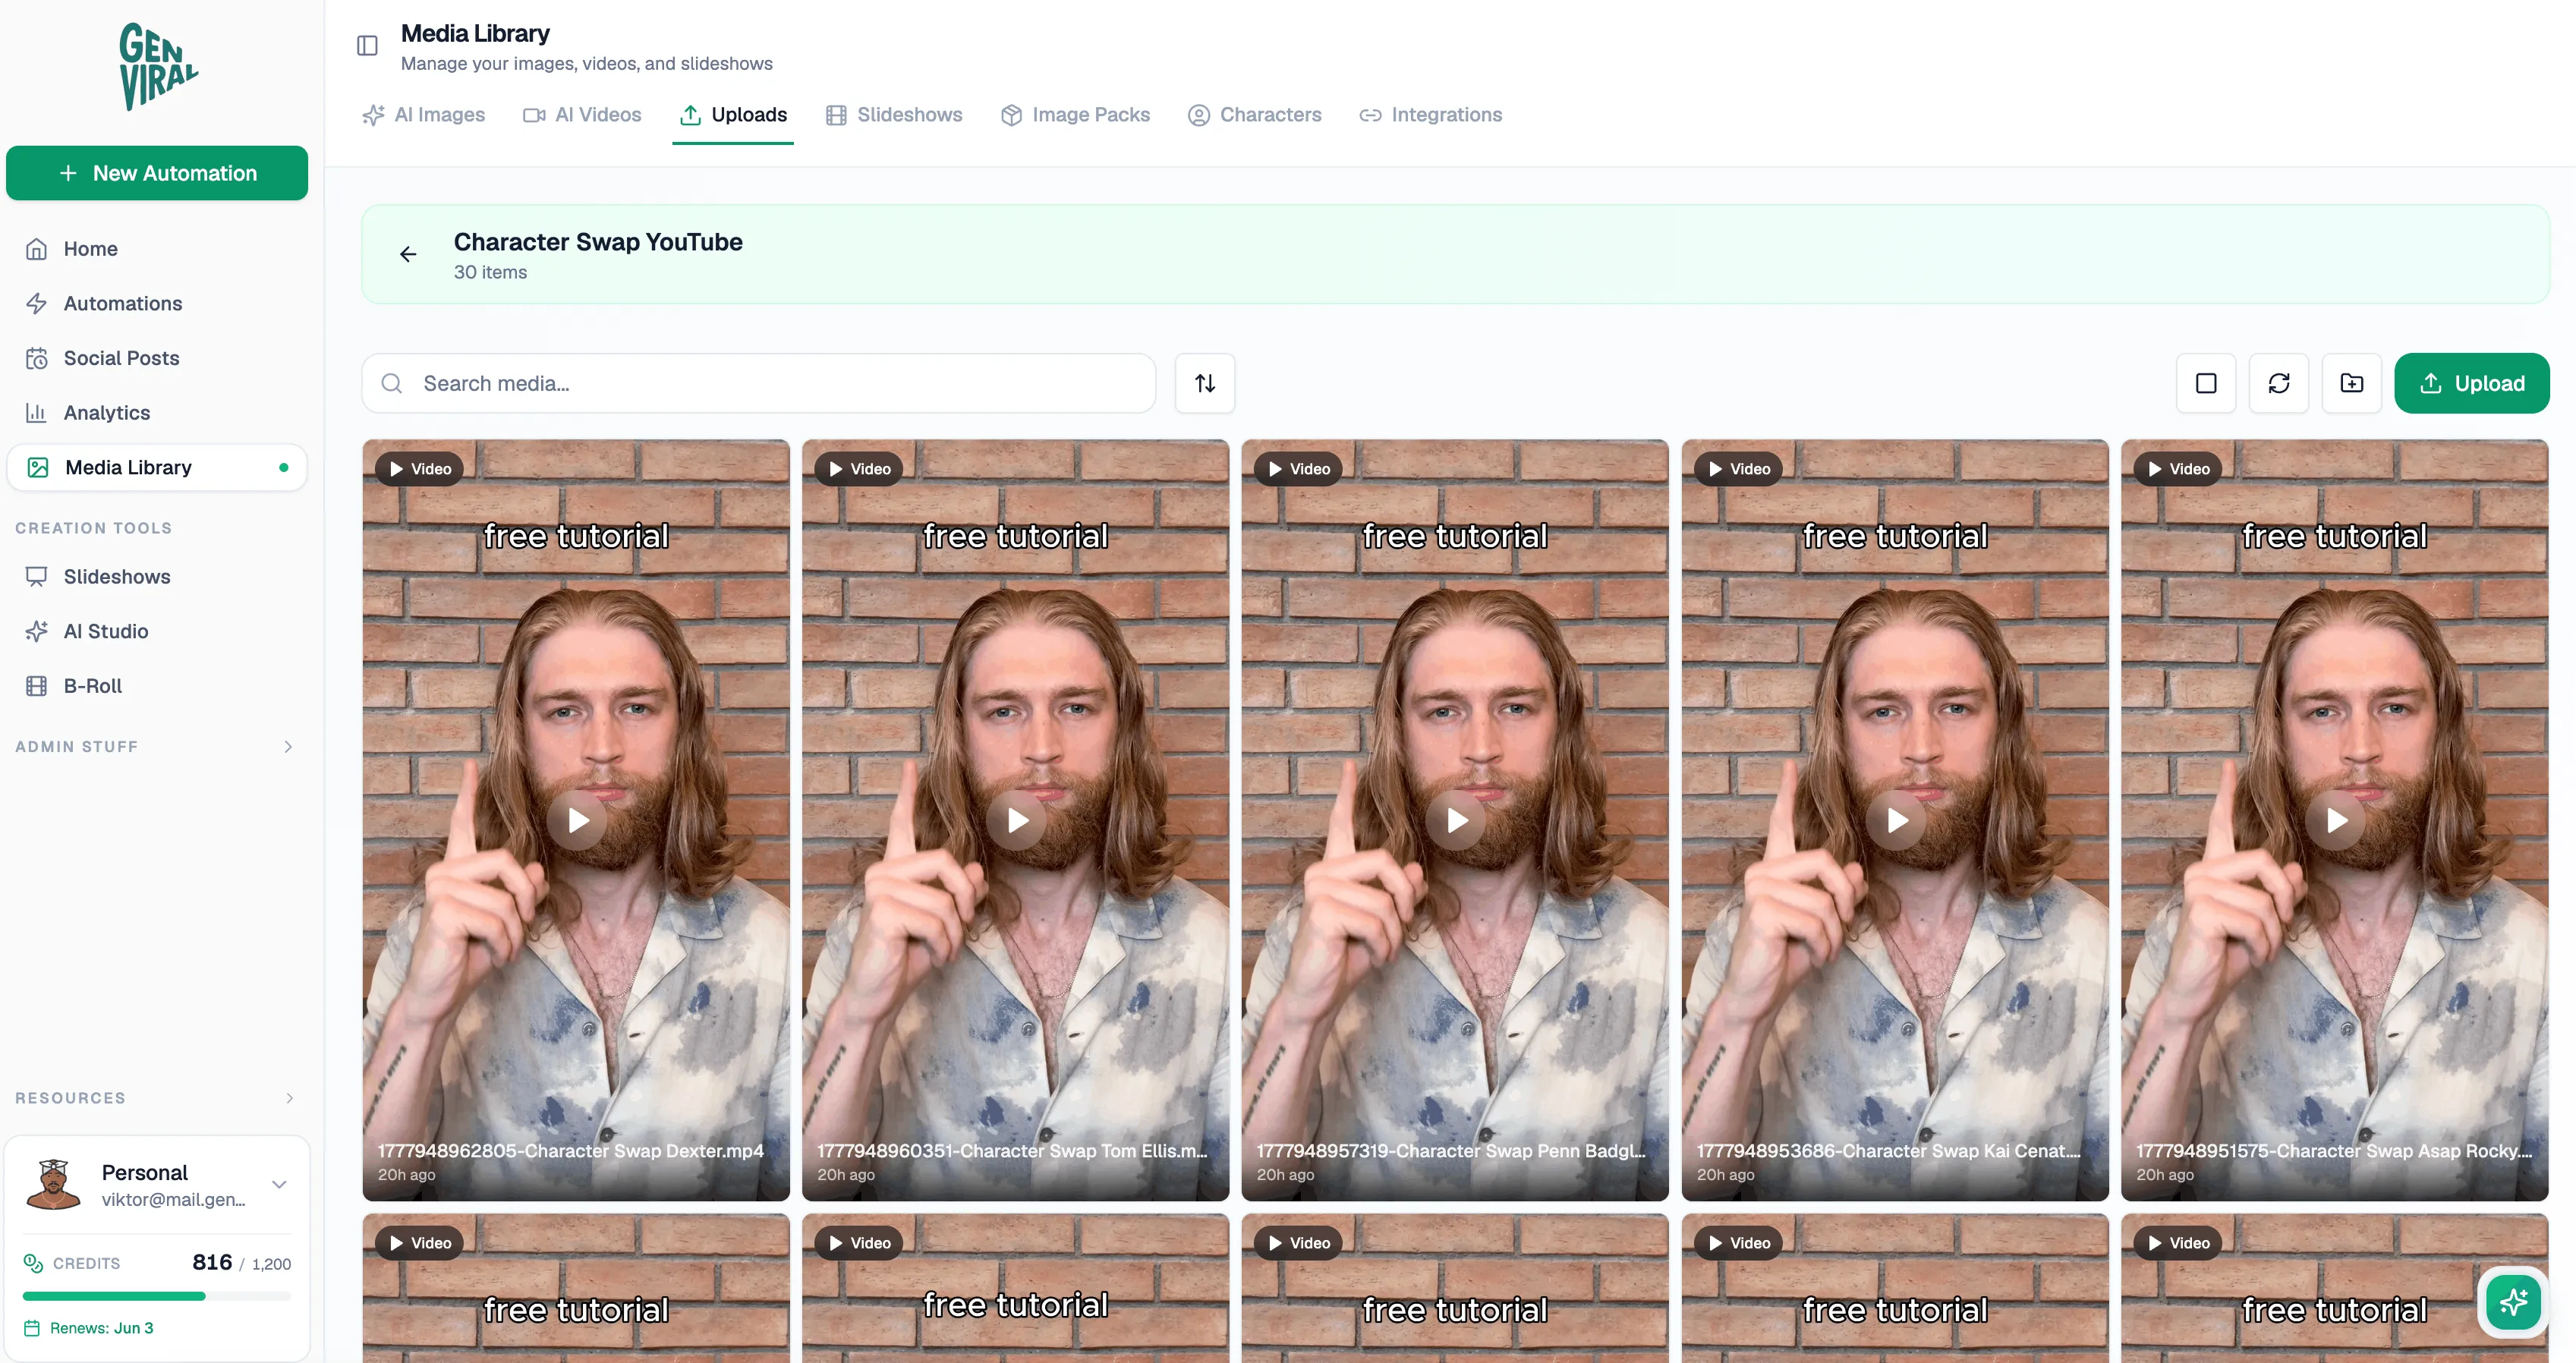
In that workflow:
- a human prepares the videos first
- new assets are uploaded into a dedicated folder
- Hermes confirms it can see that folder
- Hermes chooses from that inventory on each run
That is a better starting point than asking Hermes to invent the whole content system from scratch. If the assets already exist, the automation becomes much more stable.
This also makes cross-posting much easier. If the same videos are working across platforms, you can reuse that inventory for [Instagram](https://www.genviral.io/blog/hermes-agent-instagram) or [YouTube Shorts](https://www.genviral.io/blog/hermes-agent-youtube) without rebuilding the workflow from zero.
## Step 5: Let Hermes Ask Clarifying Questions
One of the best recommendations in the transcript is to let Hermes guide the setup instead of dumping everything into a single prompt.
Ask Hermes to walk through the automation step by step and clarify things like:
- what time the Facebook post should go out
- whether the content should be video-only or mixed media
- what caption format should be used
- whether hashtags should be included
- where confirmations should be posted
- what to do when an account fails or a post cannot be published
This matters because missing one rule early creates a messy recurring automation later.
## Step 6: Define the Cadence and Confirmation Rules Clearly
The concrete example in the transcript posts once per day at **8:45 p.m. New York City time** and sends a confirmation back into a dedicated channel.
That is a strong pattern for Facebook because it gives you:
- predictable cadence
- a stable audit trail
- one place to inspect what ran
- one place to catch failures quickly
You should be explicit with Hermes about:
- the posting time
- the destination Facebook account
- the caption pattern
- whether hashtags are allowed
- whether the confirmation should include a post ID or run ID
If you want a more cautious starting point, you can also make Hermes create the first post for review before you fully automate it. If you prefer a draft-heavy workflow, [How to Find Drafts on Facebook](https://www.genviral.io/blog/how-to-find-drafts-on-facebook) is useful for the manual-review side.
## Step 7: Keep a Log So Hermes Does Not Repost Too Early
This is the single most important detail in the whole setup.
If you are posting from a finite folder of assets, Hermes needs a log that tells it:
- what has already been posted
- when it was posted
- what should be skipped next time
- when the content pool has actually been exhausted
In the example from the video, the log prevents Hermes from posting the same character-swap video again on the next run. That matters even more when you are running many automations at once. Each automation needs its own distinct memory of what it has already used.
## Step 8: Have Hermes Monitor the Folder for New Media
The transcript also calls out another smart rule: keep monitoring the folder for newly added videos.
That way the workflow does not behave like a static list. Instead:
- Hermes knows the current folder inventory
- new uploads expand the available queue
- reposting becomes less likely because the pool keeps refreshing
This is especially helpful when your editor or content team is adding assets almost every day. Hermes does not need a whole new setup each time. It just needs permission to keep its understanding of the folder current.
## Step 9: Plan for Reauthentication and Failure Reporting
One of the practical lessons in the transcript is that the Facebook automation stopped working because the account had not been used for a while and needed to be reconnected.
That is exactly why failed-post confirmations matter.
Hermes should tell you when:
- the Facebook account is no longer authenticated
- a required scope is missing
- the post failed to publish
- the folder could not be read
- the automation skipped a run for a real reason
That makes the system debuggable. Without this, an automation can quietly stop posting and nobody notices until days later.
## The Biggest Facebook Lesson From This Workflow
The best recommendation in the video is still the same one that shows up across the other Hermes guides:
Run the workflow manually first.
Before you automate Facebook posting, learn:
- what type of Facebook content you actually want to publish
- what captions feel right for the page
- what cadence the page can sustain
- whether videos, graphics, or cross-posts work best
- how the connected account behaves in the product
Once that is clear, Hermes becomes a multiplier. Before that, it mostly automates uncertainty.
## Getting Started
If you want to replicate the Facebook workflow from the video:
1. set up Hermes in the interface where you want to manage the automation
2. connect your Facebook account in [Social Posts](https://www.genviral.io/social?tab=queue)
3. create an API key in [API Keys](https://www.genviral.io/api-keys)
4. feed Hermes the API docs and credentials
5. show Hermes the exact folder it should use
6. tell Hermes to ask clarifying questions before building the recurring job
7. define the posting time, caption rules, and confirmation channel
8. require a per-automation log of posted assets
9. make Hermes report both successful and failed runs
10. validate the first post before leaving the automation alone
If Facebook is only one part of your content distribution stack, the same overall model also extends naturally to [TikTok](https://www.genviral.io/blog/hermes-agent-tiktok), [Instagram](https://www.genviral.io/blog/hermes-agent-instagram), and [YouTube Shorts](https://www.genviral.io/blog/hermes-agent-youtube).
---
## Related Guides
- [Claude Facebook Automation with Claude Cowork](https://www.genviral.io/blog/claude-facebook-automation)
- [Hermes Agent Social Media Automation](https://www.genviral.io/hermes-agent)
- [Hermes Agent Social Media: How to Automate Posting](https://www.genviral.io/blog/hermes-agent-social-media)
- [How to Automate Facebook Posting with OpenClaw and Genviral](https://www.genviral.io/blog/openclaw-facebook)
- [How to Automate Instagram Posting with Hermes Agent](https://www.genviral.io/blog/hermes-agent-instagram)
- [How to Automate YouTube Shorts Posting with Hermes Agent](https://www.genviral.io/blog/hermes-agent-youtube)
- [How to Automate TikTok Posting with Hermes Agent](https://www.genviral.io/blog/hermes-agent-tiktok)
- [Where to Find Scheduled Posts on Facebook](https://www.genviral.io/blog/where-to-find-scheduled-posts-on-facebook)
- [How to Find Drafts on Facebook](https://www.genviral.io/blog/how-to-find-drafts-on-facebook)
---
Canonical HTML: https://www.genviral.io/blog/hermes-agent-facebook
# How to Automate Instagram Posting with Hermes Agent
- Hermes Agent works well for Instagram social media automation because it can manage the setup conversation, confirm prerequisites, and then run a recurring posting workflow with minimal supervision.
- The Instagram example in this walkthrough uses [Genviral's API docs](https://docs.genviral.io/api-reference/introduction) as the publishing layer, so Hermes can authenticate, access connected accounts, pull media from folders, and publish through one API surface.
- Before you do anything else, you need an active [Genviral subscription](https://www.genviral.io/auth), because you need both the connected social-account layer and the API key that Hermes will use.
- Hermes can automate several different Instagram workflows: reels from existing videos, carousels from generated images, slideshow-style educational posts, or cross-posted assets from other channels. The transcript uses pre-edited videos as a simple example, not as the only supported path.
- One of the most important parts of the setup is the internal log system so Hermes knows which videos have already been used.
- Always have Hermes send post confirmations, including failed-post confirmations, back into your main channel so you can intervene quickly when an account needs reauthentication or a job misfires.
Instagram is one of the cleaner places to use Hermes Agent for social media automation because the workflow can be very structured. Hermes can work with pre-made media, generated assets, carousels, reels, or cross-posted content. What matters is that you give it clear rules, the right account access, a stable content source, and a schedule it can follow.
The setup in this guide uses a video workflow because that is what the transcript focuses on, but the same principles apply more broadly to Instagram automation. Hermes acts as the orchestration layer, while Genviral handles the account connection and publishing.
If you already use Claude, the companion [Claude Instagram automation guide](https://www.genviral.io/blog/claude-instagram-automation) shows the connector setup and the path from one reviewed post to a recurring Claude Cowork task.
## What This Instagram Automation Actually Does
The transcript's concrete example is a very specific automation:
1. pre-edited videos are stored in a media-library folder
2. Hermes checks the connected Instagram account
3. it picks the next unused video
4. it applies a fixed title/caption pattern with a few relevant hashtags
5. it publishes the post once per day
6. it sends a confirmation back into the channel
That is important because it shows the real value of Hermes for social media: you do not need to automate every part of the content pipeline. Sometimes the best automation is to let a human prepare the media, then let Hermes handle the repetitive publishing logic. But you can also use the same setup model for more dynamic Instagram workflows.
## Other Instagram Automations You Can Run with Hermes
Do not read this guide as "Hermes only works for pre-made videos." Hermes can also be used to automate:
- reels from existing video folders
- carousel posts from generated or existing images
- AI-generated image posts through Studio AI
- slideshow-style educational posts
- cross-posting from a shared content pool to Instagram, Facebook, YouTube, or TikTok
- analytics-informed iteration where Hermes improves the workflow based on the data it gets back
So the example here is intentionally simple, but the setup principles are broader than the example itself.
## Why Hermes Agent Makes Sense for Instagram
Instagram automations usually fail in one of three places:
- the account is not actually connected or later loses authentication
- the content source is vague or inconsistent
- the system reposts old content because it has no memory of what already ran
Hermes is useful here because it can:
- verify that the account exists and is in a usable state
- follow explicit instructions about captions, hashtags, and cadence
- keep an internal log system for used assets
- send back confirmations so you can monitor the workflow
That is a much better fit than treating Instagram as a blind "publish at 8pm" scheduler.
## What You Need
Before you ask Hermes to automate Instagram posting, make sure you have:
1. Hermes Agent already installed and running in your preferred interface
2. an Instagram publishing layer Hermes can use
3. an active [Genviral subscription](https://www.genviral.io/auth)
4. an API key for that layer from [Genviral API Keys](https://www.genviral.io/api-keys)
5. your Instagram account connected in [Social Posts](https://www.genviral.io/social?tab=queue)
In this walkthrough, Genviral is the natural backend because it gives Hermes one way to authenticate, query accounts, pull media from folders, and publish across multiple social platforms if needed.
## Step 1: Choose Where Hermes Will Run
The first decision is not Instagram-specific. It is where the automation should live.
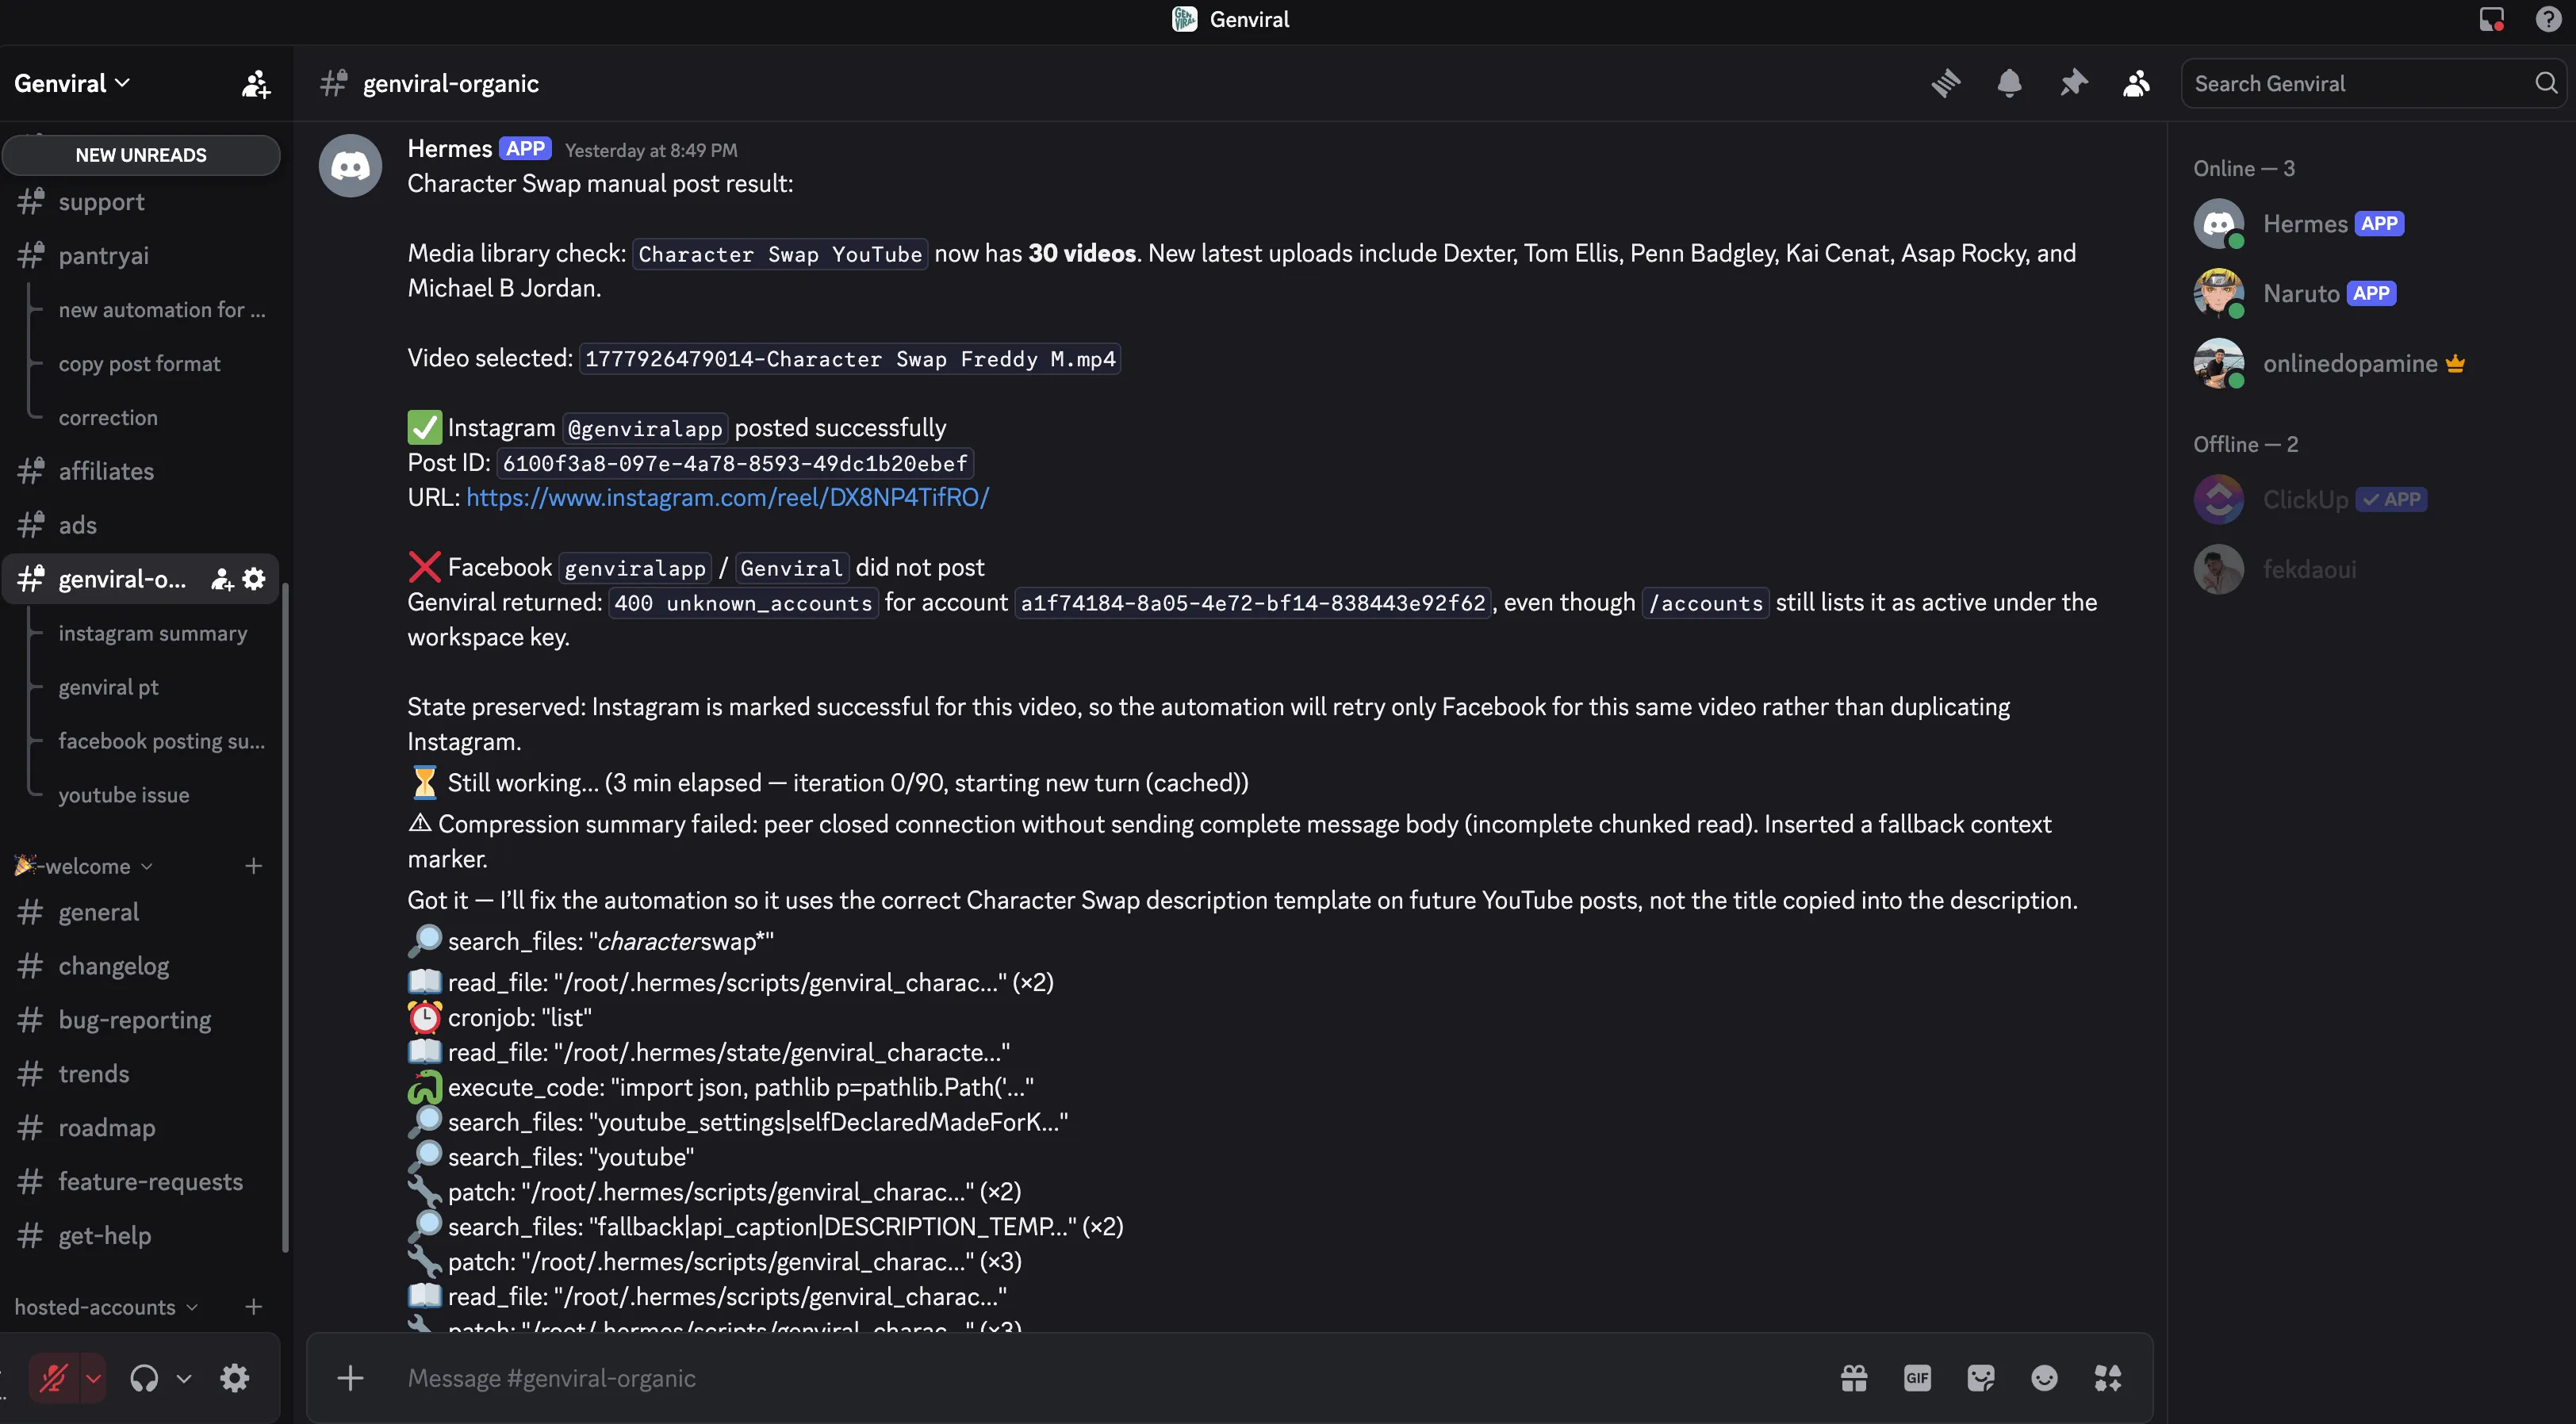
I recommend choosing the place where you already monitor other automations. Discord works well for this, but Telegram, Microsoft Teams, WhatsApp, and similar interfaces can work too. The important part is that Hermes already has a functioning home before you start the Instagram setup.
This video assumes Hermes is already installed and running. It does not cover Hermes setup itself.
## Step 2: Feed Hermes the API Docs and API Key
Once Hermes is up, the next requirement is the API surface it will use.
In this workflow, that means giving Hermes:
- the [Genviral API reference](https://docs.genviral.io/api-reference/introduction)
- an API key from [Genviral API Keys](https://www.genviral.io/api-keys) so it can authenticate
That key is what allows Hermes to act on your behalf instead of just planning the workflow abstractly.
## Step 3: Connect the Instagram Account First
Before Hermes can post anything, the Instagram account needs to be connected manually.
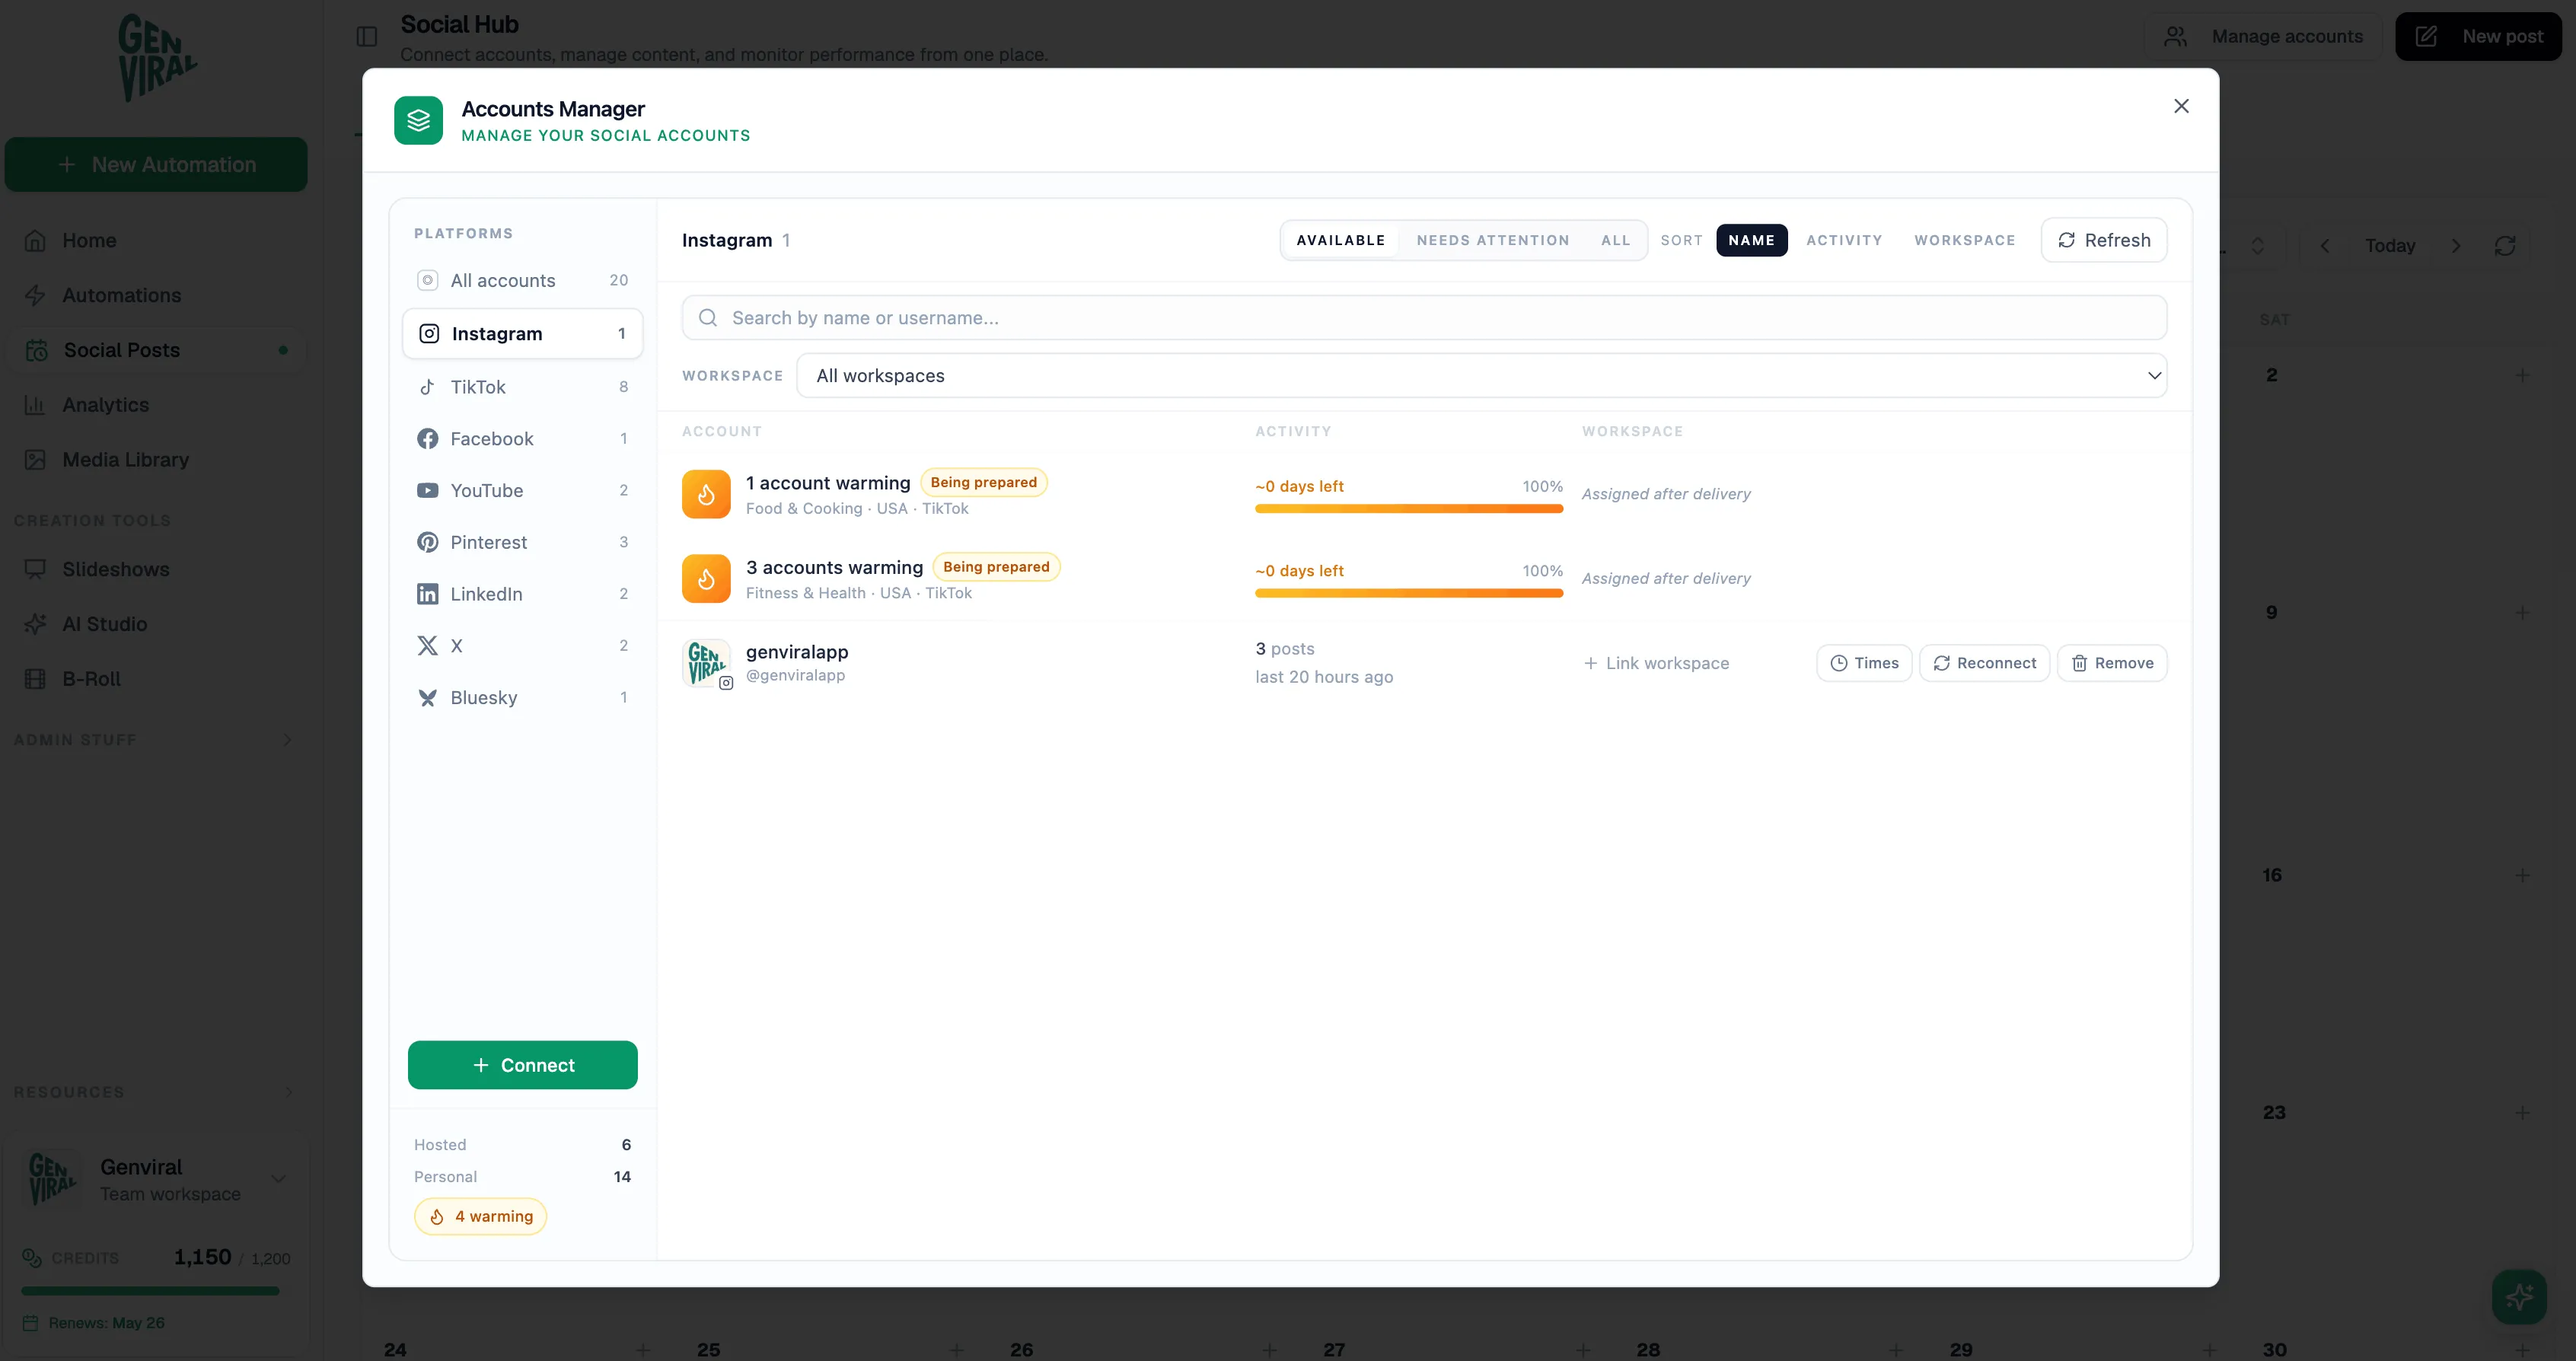
The basic flow is:
1. go to [Social Posts](https://www.genviral.io/social?tab=queue)
2. open Manage Accounts
3. choose Instagram
4. complete the authentication flow
Only after that should Hermes be asked to confirm the account status. Test this in chat first: ask Hermes whether it can see the account and whether the account is in a usable state before you move on.
That early confirmation saves a lot of debugging later.
## Step 4: Decide What Kind of Instagram Automation You Actually Want
This process works across major social platforms, but the exact setup depends on the automation.
For Instagram, Hermes can be used to:
- post carousel images
- post reels or regular videos
- generate images through Studio AI
- pick existing images or videos from folders
- cross-post assets that were already created for YouTube or Facebook
In the transcript's example workflow, the content is not generated from scratch every day. Instead, Hermes pulls from a folder of ready-made videos and publishes them on schedule.
That is often a good place to start because it reduces moving parts. But if your best Instagram workflow is more image-driven or carousel-driven, you can also have Hermes generate the content instead of only selecting it.
## Step 5: Use a Folder-Based Media Workflow
This is one practical content-source pattern, not the only one.

You should store your finished videos in a dedicated media-library folder. In this kind of setup, the videos can be edited in CapCut or another editor first, then dropped into the folder so Hermes can pick from them later.
In that setup, Hermes is responsible for:
- finding the next asset
- deciding whether it has already been used
- applying the right metadata
- posting it to Instagram
But Hermes is **not** responsible for editing the source videos.
That separation makes the automation much more stable. If you are starting with reels or short videos, I recommend beginning here before adding more moving pieces.
## Step 6: Give Hermes Clear Posting Rules
Once your chosen content source is in place, Hermes still needs explicit instructions.
Those instructions should include:
- always use a specific title format
- always use a specific caption structure
- include two to three relevant hashtags
- keep an internal log so the same video is not reposted immediately
This is one of the most important practical details in the whole setup. The lock system matters because any finite content source can run dry. If you do not explicitly tell Hermes how to track used assets, repeated posting becomes very likely.
A good setup looks like this:
- Hermes remembers which videos have already been posted
- new videos are added to the folder over time
- only when the folder is exhausted does reposting become acceptable
That is exactly how an Instagram automation should think about inventory.
## Step 7: Cross-Posting Is a Natural Next Step
The same source can also be used for more than one platform. For example, you can prepare the videos once, then route them to Instagram, YouTube, and Facebook. The same principle also applies to image sets and carousels if those formats fit multiple channels.
This is where Genviral fits very naturally into the story. Hermes does not need separate publishing logic for each platform. It can use one backend, one API surface, and one asset source while still sending the content to different social accounts.
If your media works across multiple platforms, this is one of the easiest ways to get more mileage out of the same content.
## Step 8: Send Confirmations for Every Post
This is probably the most important operational recommendation in the entire walkthrough.
When Hermes finishes a post, it should send a confirmation back into your main channel. And if a post fails, it should still send the failure confirmation.
That is how you catch issues like account reauthentication problems early. Without the confirmation loop, the automation can look healthy until you notice missing posts manually.
For Instagram, that same principle applies. Confirmations give you:
- proof that the post ran
- a chance to inspect the output
- a fast signal when account auth breaks
- a way to intervene before multiple scheduled runs are lost
And if you later add analytics into the workflow, those confirmations become even more useful because they give you both operational visibility and content feedback.
## The Biggest Lesson From This Workflow
The most useful recommendation here is the same one that shows up in the other Hermes guides:
Use the platform manually first.
Before automating Instagram, spend time posting manually so you understand:
- what good Instagram content looks like for your niche
- how your captions should read
- what hashtags are worth using
- what content format actually fits the account
- whether your strongest format is reels, carousels, static images, or something else
Once you understand the workflow end to end, Hermes becomes a multiplier. Before that, it mostly automates uncertainty.
## Getting Started
If you want to replicate the Instagram workflow from the video:
1. set up Hermes in the interface where you want to manage the automation
2. make sure you have an active [Genviral subscription](https://www.genviral.io/auth)
3. connect your Instagram account in [Social Posts](https://www.genviral.io/social?tab=queue)
4. generate an API key in [Genviral API Keys](https://www.genviral.io/api-keys)
5. feed Hermes the API docs and credentials
6. decide whether the automation will use folders, Studio AI, slideshows, or another asset source
7. define your caption/title/hashtag rules
8. tell Hermes to track which videos have already been posted
9. send one sample or test post first
10. only then enable the recurring daily automation
If you need the execution layer for that workflow, you can start with [Genviral](https://www.genviral.io/auth), then let Hermes operate on top of it.
---
## Related Guides
- [How to Connect Claude to Instagram and Automate Posting](https://www.genviral.io/blog/claude-instagram-automation)
- [Hermes Agent Social Media Automation](https://www.genviral.io/hermes-agent)
- [How to Automate Facebook Posting with Hermes Agent](https://www.genviral.io/blog/hermes-agent-facebook)
- [How to Automate Instagram Posting with OpenClaw and Genviral](https://www.genviral.io/blog/openclaw-instagram)
- [Hermes Agent Social Media: How to Automate Posting](https://www.genviral.io/blog/hermes-agent-social-media)
- [How to Automate TikTok Posting with Hermes Agent](https://www.genviral.io/blog/hermes-agent-tiktok)
- [How to Use OpenClaw to Automate Your Social Media](https://www.genviral.io/blog/how-to-use-openclaw)
- [Best Social Media APIs](https://www.genviral.io/blog/best-social-media-apis)
---
Canonical HTML: https://www.genviral.io/blog/hermes-agent-instagram
# How to Automate Pinterest Posting with Hermes Agent
- Hermes Agent works especially well for Pinterest social media automation when you give it a structured workflow: connected accounts, hardcoded boards, a stable visual style, and a clear posting cadence.
- The Pinterest setup in this walkthrough uses Genviral as the publishing and generation layer, so Hermes can access connected accounts, image folders, Studio AI settings, posts, and analytics through one API surface.
- One of the most practical setup improvements is splitting the API docs by endpoint into separate MD files, so the automation only loads the folders, studio, posting, or analytics docs it actually needs.
- Pinterest style drift is usually an operations problem, not a prompt problem. In the transcript, the output broke because the automation was not using the right reference image URL variable, so Hermes stopped feeding the right style images into the generation flow.
- Pinterest should not be treated as a fully hands-off platform. The strongest recommendation in the video is to keep some manual posting, repinning, and board management in the mix so the account keeps sending real human signals.
Pinterest is one of the cleaner places to use Hermes Agent because the workflow can be made very explicit. You usually know what kind of pin you want, what boards it should map to, what visual style it should follow, and what page it should link to. Once those pieces are defined, Hermes is very good at handling the repetitive part.
This guide turns the walkthrough from the video above into a written setup. If you want the broader Hermes overview first, start with [Hermes Agent Social Media: How to Automate Posting](https://www.genviral.io/blog/hermes-agent-social-media). If you want the OpenClaw version of the same Pinterest workflow, the closest companion is [How to Automate Pinterest Posting with OpenClaw and Genviral](https://www.genviral.io/blog/openclaw-pinterest).
## What This Pinterest Automation Actually Does
The transcript is not showing a vague "AI posts to Pinterest somehow" workflow. It is a concrete system:
1. Hermes is running inside a chat surface such as Discord
2. it gets access to API docs, an API key, and connected Pinterest accounts
3. it confirms which accounts and boards it can see
4. it uses the right endpoint combination for that automation
5. it generates or selects the right image style
6. it drafts titles, descriptions, tags, and destination links
7. it posts the pin on schedule
8. it sends a confirmation back into the home channel
That structure matters because Pinterest automation gets messy quickly when the boards, visual rules, and links are not defined up front.
## Why Hermes Agent Makes Sense for Pinterest
Pinterest automations usually break in a few predictable places:
- the account is connected, but the agent never confirms it can actually see it
- the boards are left ambiguous, so the content routing gets sloppy
- the visual style drifts because the wrong references are being used
- the recurring automation runs, but nobody checks whether the output still looks right
Hermes is useful here because it can:
- ask clarifying questions before the automation goes live
- keep the board logic and style rules in one evolving task file
- recursively refine the workflow when you correct it
- send confirmations back after each run so you can monitor quality and execution
That is a much better fit than trying to treat Pinterest like a generic scheduler.
## What You Need
Before you ask Hermes to automate Pinterest posting, make sure you have:
1. Hermes Agent already installed and running in your preferred interface
2. an active Genviral workspace and access to [API Keys](https://www.genviral.io/api-keys)
3. your Pinterest accounts connected in [Social Posts](https://www.genviral.io/social?tab=queue)
4. endpoint-specific API docs or notes Hermes can reference
5. a clear picture of the boards, style, links, and cadence you want
The transcript uses Discord because the automation is being run as part of a company workflow, but Telegram, WhatsApp, and similar interfaces can work too. The core point is that Hermes needs one stable place to ask questions, receive corrections, and report results.
## Step 1: Run Hermes in a Stable Chat Surface
The first decision is where this automation should live.
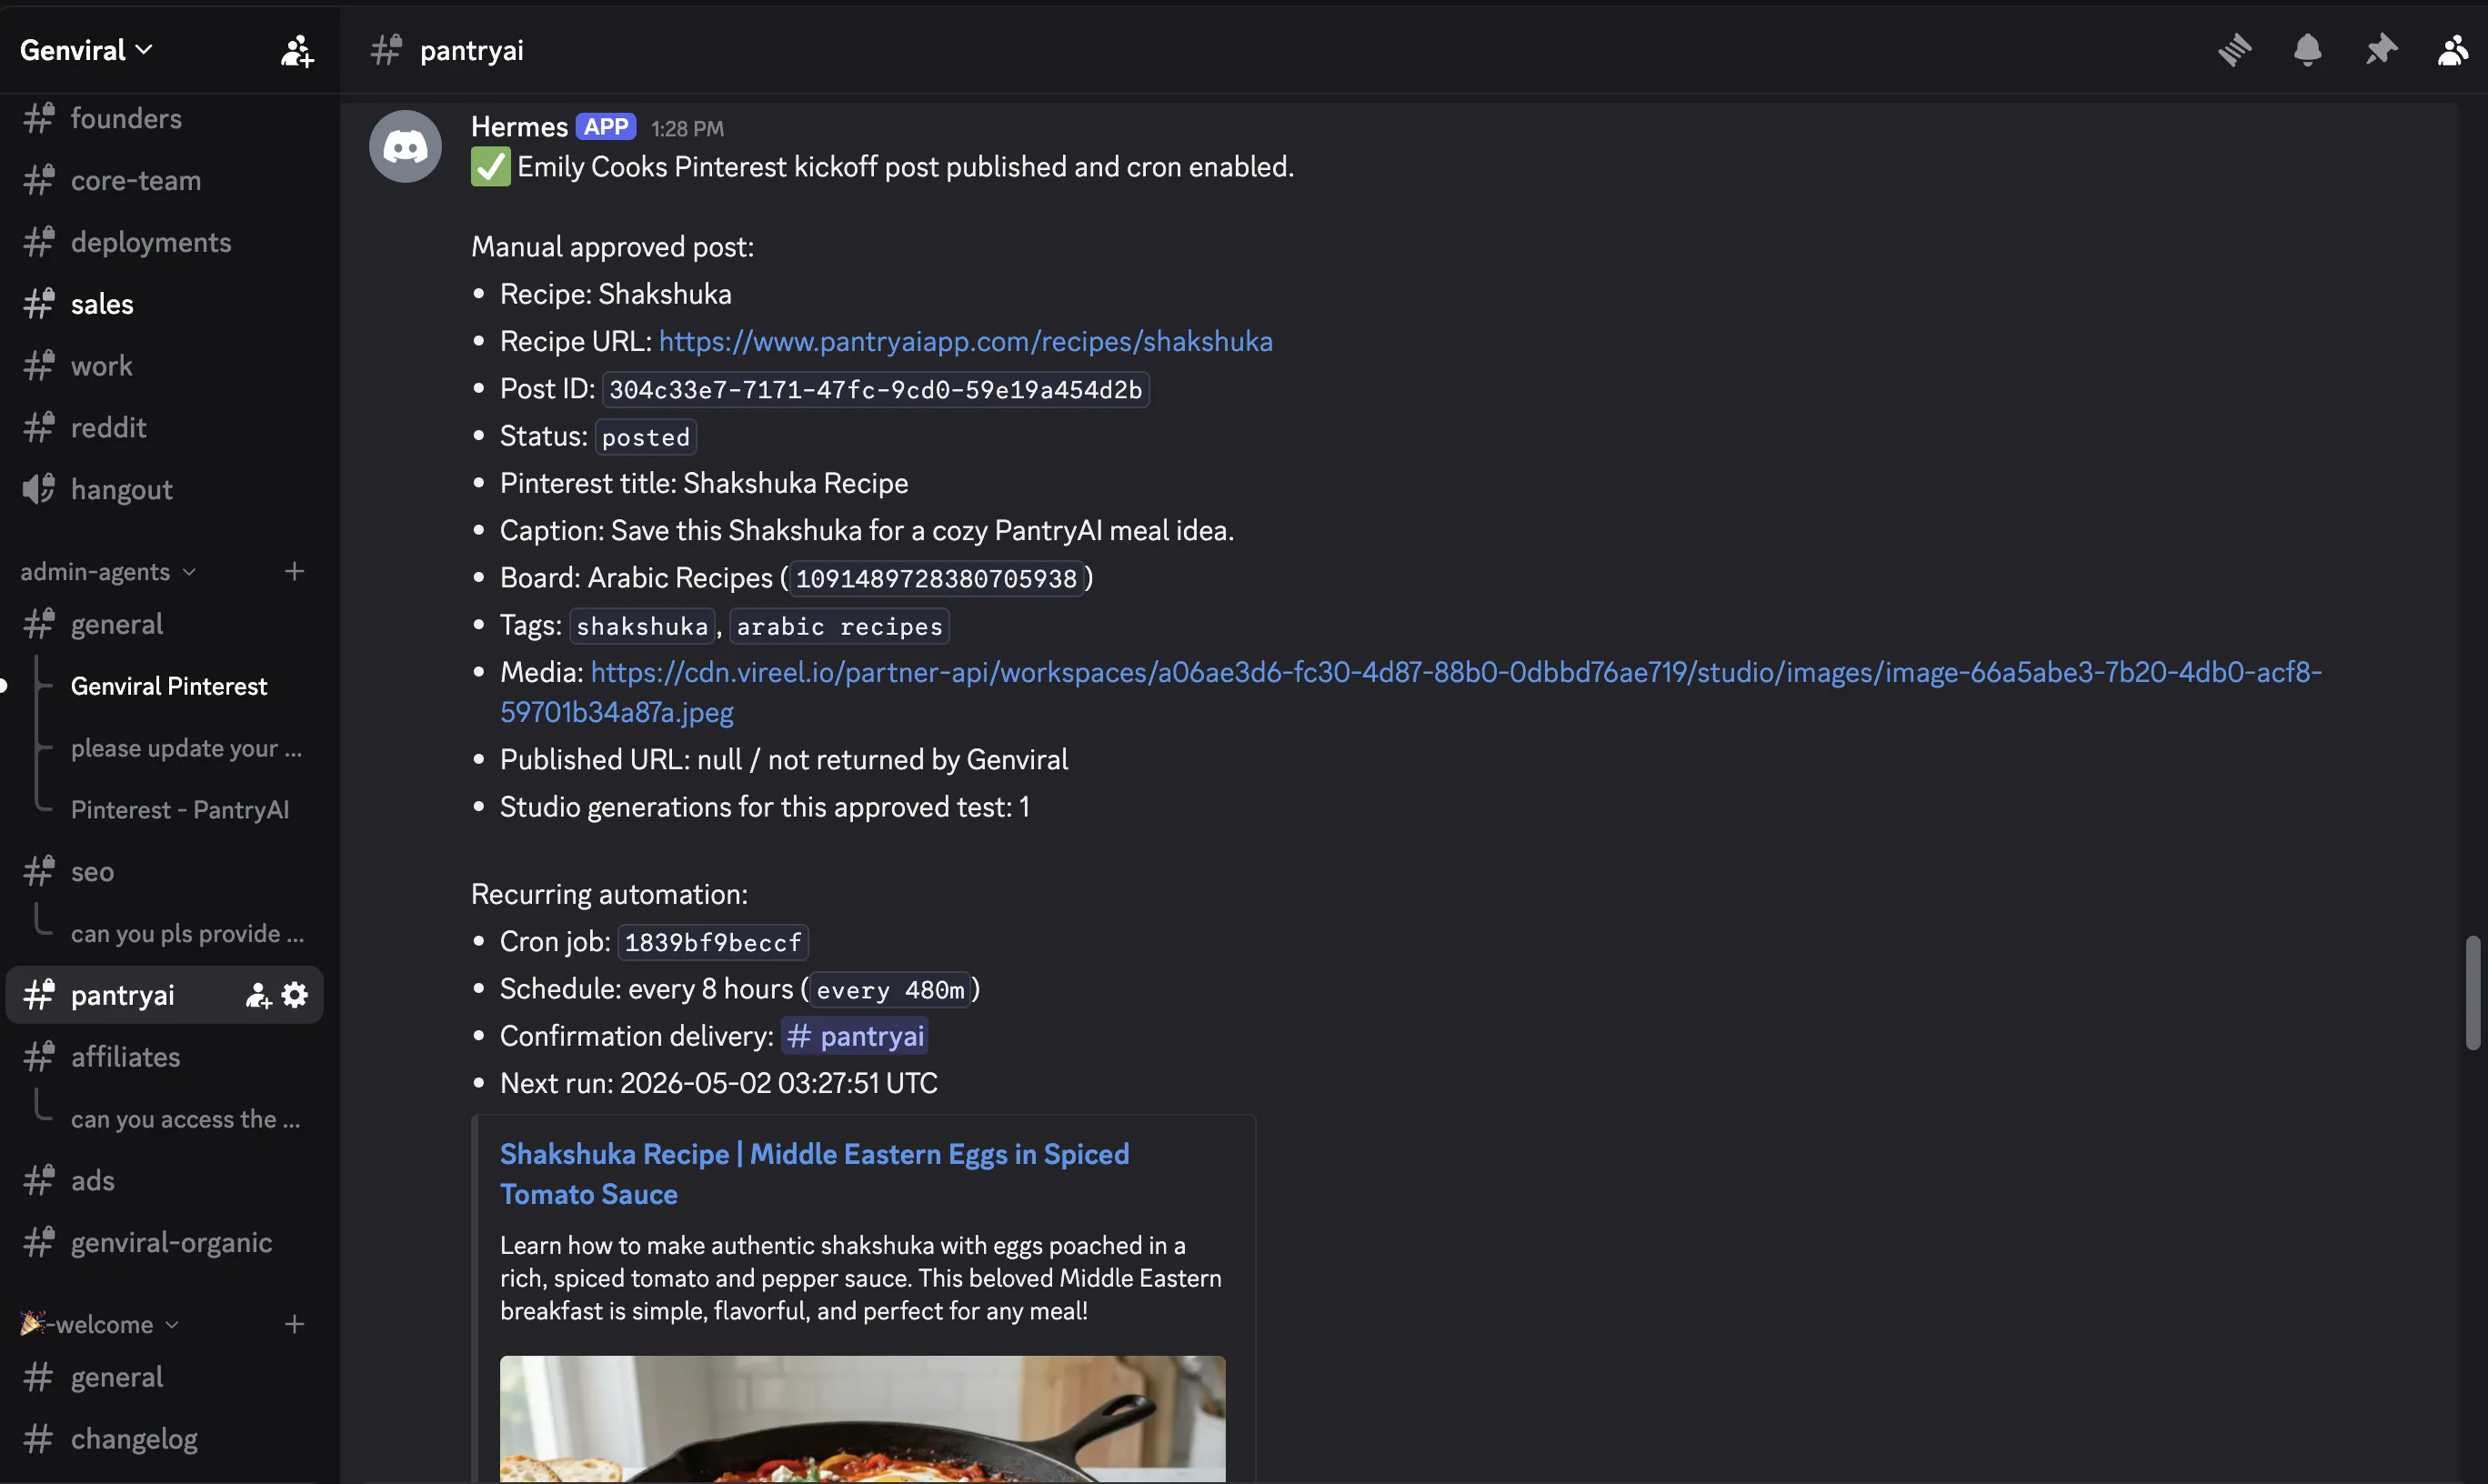
In the video, Discord is the home base. That is a good default because it gives you:
- one main channel for confirmations
- separate threads for different automations
- an easy place for teammates to collaborate
If you already run Hermes elsewhere, that is fine. What matters is keeping each automation in a stable context instead of scattering instructions across unrelated chats.
## Step 2: Split the API Docs by Endpoint
This is one of the most practical parts of the whole tutorial.
Instead of feeding Hermes one giant document every time, break the API reference into smaller endpoint-specific MD files. For example:
- folders
- studio
- posting
- slideshows
- analytics
Then, when you create a Pinterest automation, tell Hermes which endpoint docs to use for that specific task.
That matters because a Pinterest automation usually does not need the full platform surface on every run. If Hermes only needs folders, Studio AI, and posting, let it use only those. It saves tokens and keeps the automation more focused.
## Step 3: Feed Hermes the API Key
Once the docs are organized, Hermes still needs authentication.

Create an API key in [API Keys](https://www.genviral.io/api-keys), then provide it to Hermes securely inside the thread where you are setting up the automation.
That is what lets the agent move from planning to execution. Without the key, Hermes can reason about the workflow, but it cannot actually inspect accounts, read media sources, or publish pins.
## Step 4: Connect the Pinterest Accounts First
Before Hermes can post anything, the Pinterest accounts have to be connected manually.

The basic flow is:
1. open [Social Posts](https://www.genviral.io/social?tab=queue)
2. go to Manage Accounts
3. connect the Pinterest accounts you want to automate
4. ask Hermes which accounts it can see
That confirmation step matters a lot. The transcript explicitly recommends checking whether Hermes can see the connected accounts before you move on. That early verification saves a lot of wasted debugging later.
## Step 5: Hardcode the Boards and Review the Output Rules
Pinterest is more board-sensitive than most of the other Hermes workflows.
That means Hermes needs to know:
- which boards exist
- which topics should map to which boards
- what title structure should be used
- what description style should be used
- what links belong with which content type
In the transcript, Viktor recommends hardcoding the board list once and then having Hermes work from that stable set. That is a good call. It makes the recurring automation much more deterministic.
## Step 6: Set the Studio Model and Style Constraints Clearly
This is the part that controls how the pins actually look.
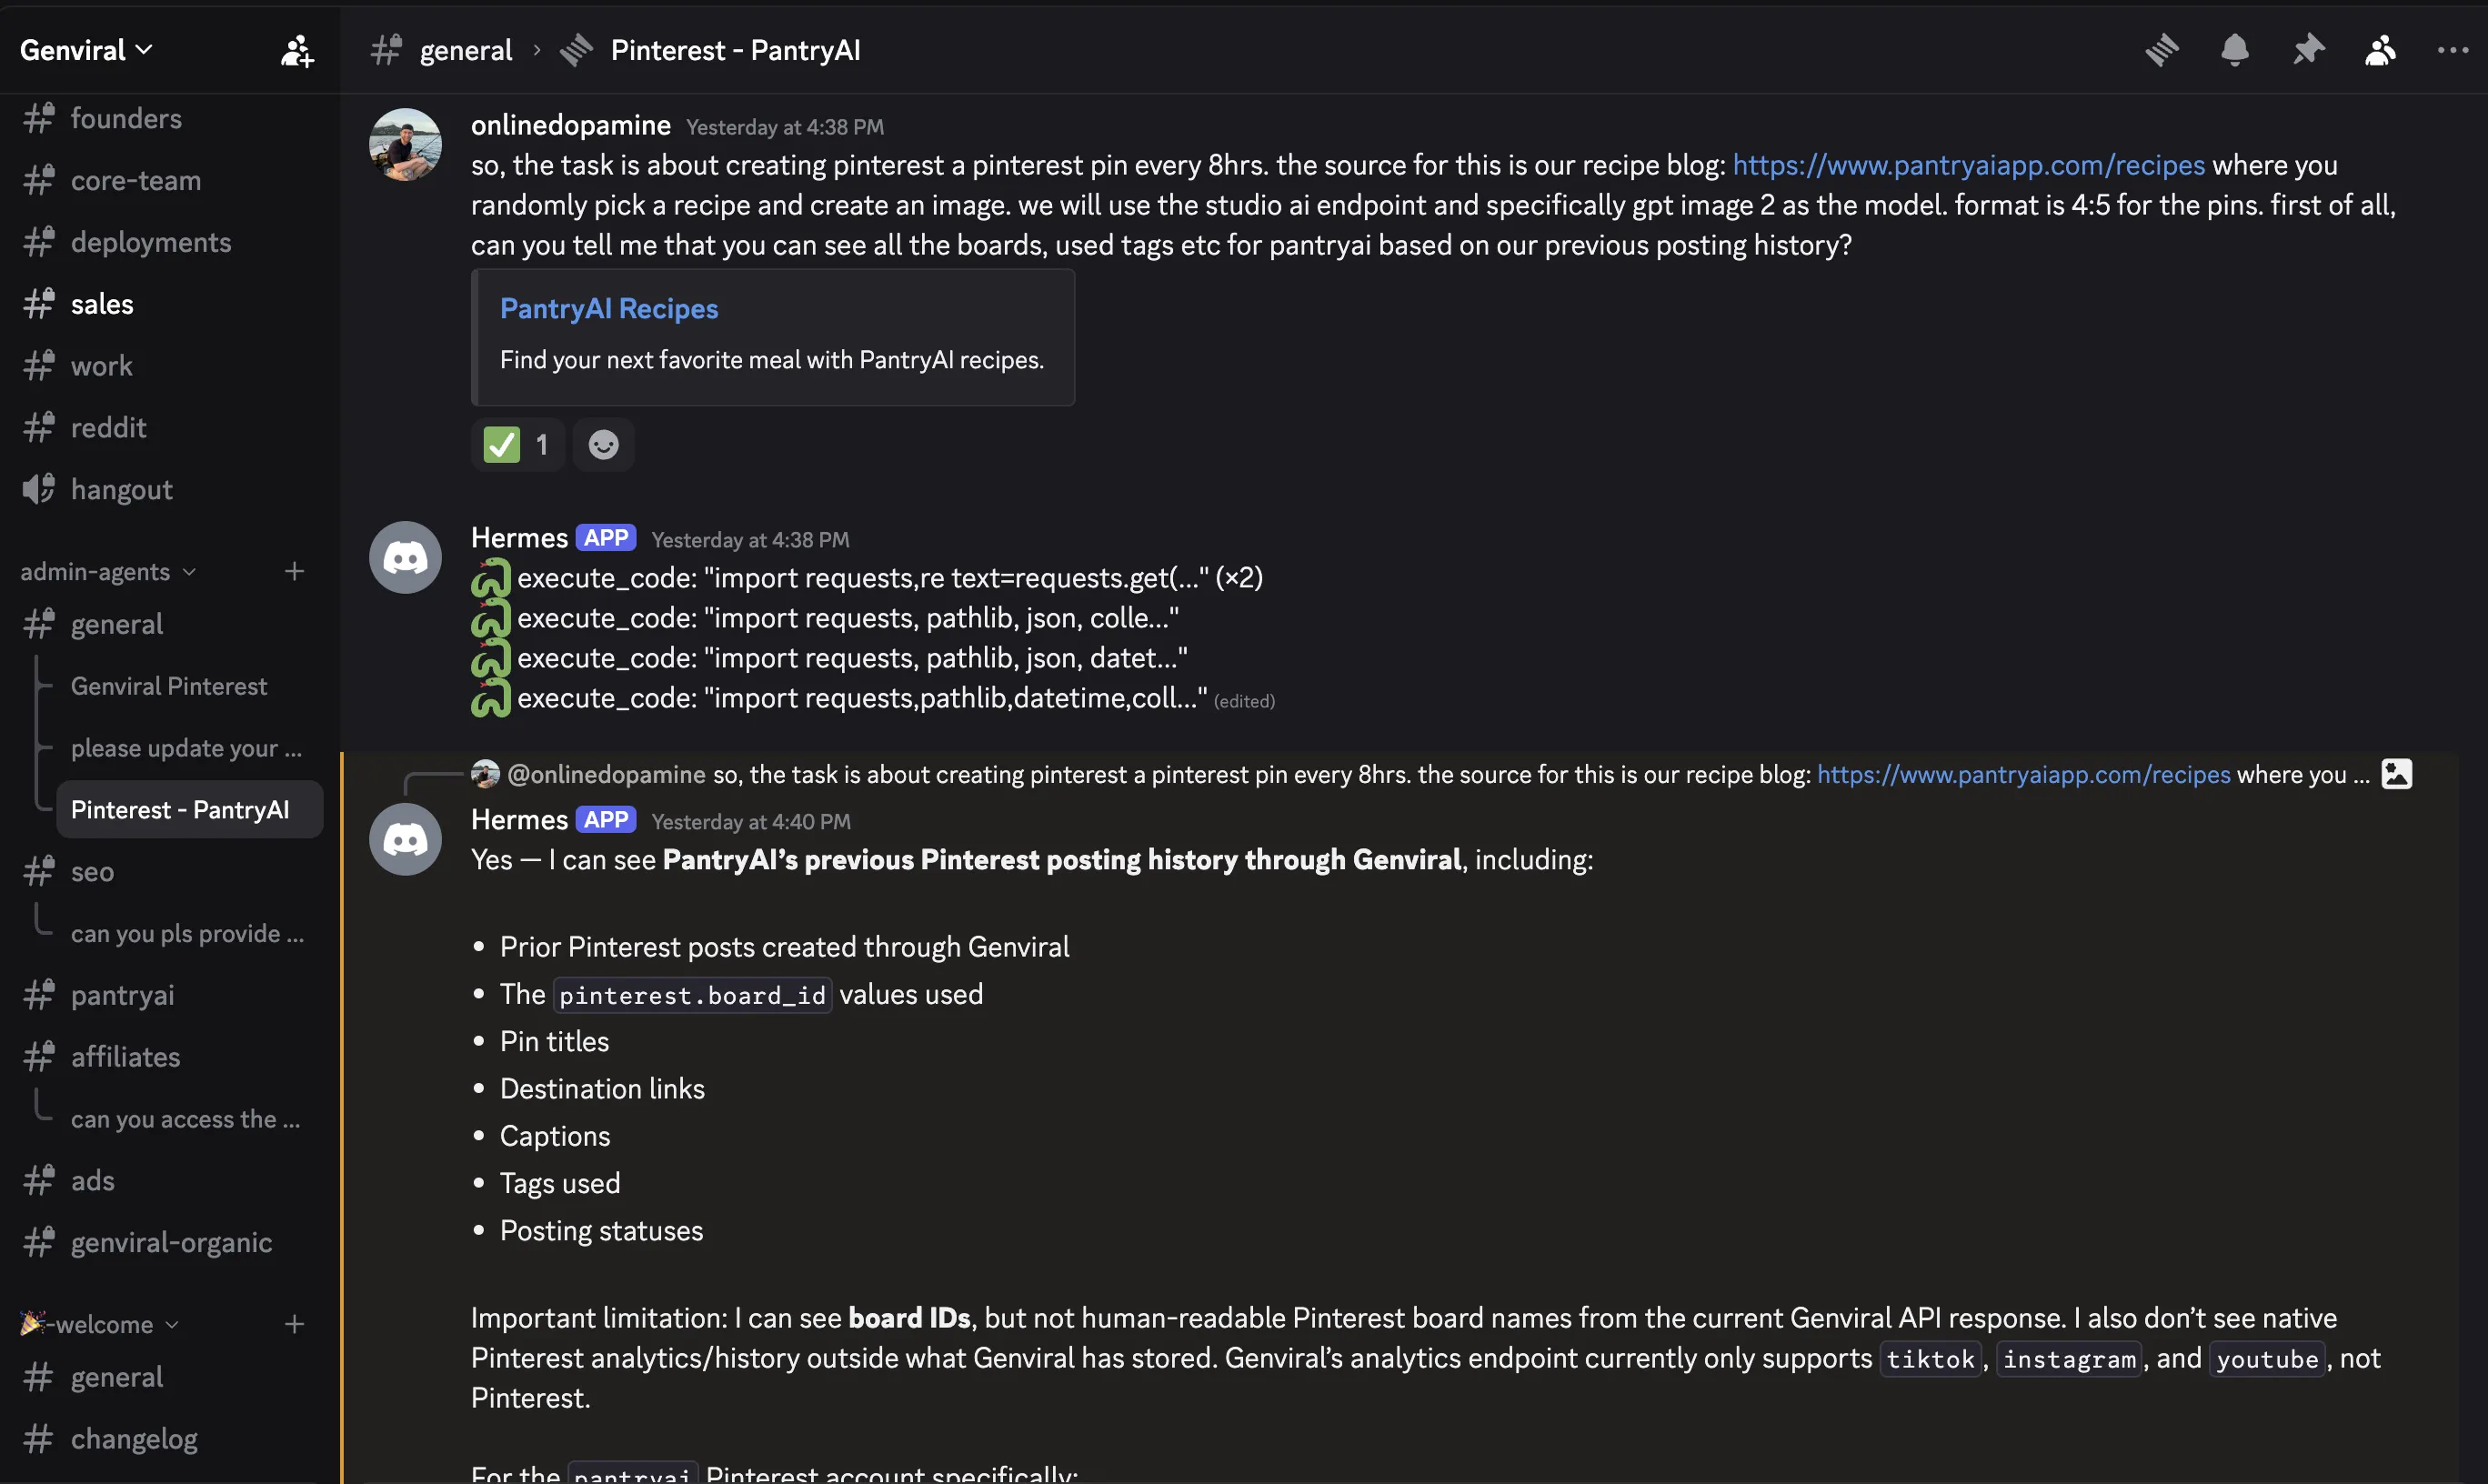
In the example workflow, the automation uses:
- GPT Image 2
- medium quality
- 4:5 aspect ratio
- additional formatting and footer rules
It also includes extra instructions such as documenting the task and keeping the pin output aligned with the brand.
This is where Hermes becomes more than a one-off prompt. Once the rules are clear, it can turn them into a reusable task file that keeps improving over time.
## Step 7: Debug Style Drift with the Reference Image Input
One of the most useful lessons in the video is that bad output does not always mean the model is bad.
In one of the Pinterest automations shown, the visual style drifted badly. After the back-and-forth, the real issue turned out to be operational: Hermes was not using the right `reference image URL` variable. That meant the generation flow was no longer receiving the reference images it needed for visual consistency.
This is a very practical Pinterest lesson:
- if the style breaks, inspect the actual image source
- confirm the right reference files are being used
- do not assume the prompt is the only issue
For Pinterest, consistency is often more important than novelty. If the automation loses the right visual anchors, the account starts looking scattered.
## Step 8: Always Review Sample Pins in Chat First
Before you automate anything, make Hermes create examples in chat first.
That lets you review:
- whether the image style is correct
- whether the title is engaging
- whether the description reads naturally
- whether the right link is attached
- whether the board logic makes sense
The transcript shows exactly this kind of back-and-forth. Hermes generated examples, got corrected, updated its understanding, and only then became ready for the recurring automation.
That is the right order. Pinterest is too visual to skip this validation pass.
## Step 9: Post Confirmations Back Into a Home Channel
Once the automation is live, have Hermes post confirmations into a stable channel.
That gives you a quick way to verify:
- a pin was created
- the run happened on schedule
- the workflow is still healthy
- nothing silently broke
This is especially useful when you are running multiple Pinterest accounts or mixing Pinterest with other automated channels.
## Step 10: Keep Some Manual Pinterest Activity in the Mix
This is the most Pinterest-specific recommendation in the whole walkthrough.
The video explicitly recommends not fully automating everything. Instead, keep some manual work in the system:
- schedule some pins manually
- repin manually from time to time
- create boards manually
- feed new boards back into the automation
The reasoning is simple: Pinterest appears to respond better when the account still behaves like a genuine user account, not a purely robotic publishing surface.
The mix described in the transcript is roughly **80% automated and 20% manual**. That is a much more believable Pinterest operating model than a completely hands-off setup.
If you want the broader cadence advice behind that approach, [Pinterest Posting Strategy](https://www.genviral.io/blog/pinterest-posting-strategy) is the best companion read.
## The Biggest Pinterest Lesson From This Workflow
The biggest takeaway is not "Hermes can automate Pinterest."
It is that Hermes works best when you already understand the Pinterest workflow manually.
Before you automate, learn:
- what boards you actually want to grow
- what visual format fits the account
- what links belong with which topics
- what a good pin title and description look like
- how much manual intervention the account still needs
Once you understand those things, Hermes becomes a multiplier. Before that, it mostly automates confusion.
## Getting Started
If you want to replicate the Pinterest workflow from the video:
1. set up Hermes in the interface where you want to manage the automation
2. connect your Pinterest accounts in [Social Posts](https://www.genviral.io/social?tab=queue)
3. create an API key in [API Keys](https://www.genviral.io/api-keys)
4. split the API docs into endpoint-specific files
5. tell Hermes which endpoint docs this automation should use
6. make Hermes confirm which accounts and boards it can see
7. define the boards, links, titles, descriptions, and visual style rules
8. configure the Studio AI settings such as model, quality, and aspect ratio
9. review sample pins in chat until the style is correct
10. only then enable the recurring automation
11. keep some manual board and pin activity in the account afterward
If you want to keep reading around the Pinterest side of this system, the closest follow-ups are [Best Pinterest Scheduler](https://www.genviral.io/blog/best-pinterest-scheduler), [Pinterest Posting Strategy](https://www.genviral.io/blog/pinterest-posting-strategy), and [How to Make a Pin on Pinterest](https://www.genviral.io/blog/how-to-make-a-pin-on-pinterest).
---
## Related Guides
- [Hermes Agent Social Media Automation](https://www.genviral.io/hermes-agent)
- [Hermes Agent Social Media: How to Automate Posting](https://www.genviral.io/blog/hermes-agent-social-media)
- [How to Automate Pinterest Posting with OpenClaw and Genviral](https://www.genviral.io/blog/openclaw-pinterest)
- [Best Pinterest Scheduler](https://www.genviral.io/blog/best-pinterest-scheduler)
- [Pinterest Posting Strategy](https://www.genviral.io/blog/pinterest-posting-strategy)
- [Pinterest Tips and Tricks](https://www.genviral.io/blog/pinterest-tips-and-tricks)
- [How to Make a Pin on Pinterest](https://www.genviral.io/blog/how-to-make-a-pin-on-pinterest)
- [How to Make a Board on Pinterest Private](https://www.genviral.io/blog/how-to-make-a-board-on-pinterest-private)
- [How to Make Money with Pinterest](https://www.genviral.io/blog/how-to-make-money-with-pinterest)
---
Canonical HTML: https://www.genviral.io/blog/hermes-agent-pinterest
# Hermes Agent Social Media: How to Automate Posting
- Hermes Agent is quickly becoming a strong alternative to OpenClaw for social media workflows, especially if you care about better memory, more autonomous behavior, and cleaner thread-based execution.
- Hermes is not the social media API itself. Its job is orchestration: memory, reasoning, sessions, skills, and scheduled execution. You still pair it with a posting layer.
- The example in the video uses Hermes to create and post Pinterest infographics automatically, but the same pattern also works for LinkedIn, YouTube, TikTok, Facebook, Instagram, and more.
- In this walkthrough, [Genviral](https://www.genviral.io/auth) fits naturally as that posting layer because Hermes can use it for connected accounts, media generation, and final publishing without you wiring each platform API separately.
- Before you let Hermes run on a cron schedule, have it generate one sample post in chat so you can verify the image style, caption, tags, and destination settings.
- Best practice is still the same as with OpenClaw: post manually first, learn the platform quirks, then automate the exact format that already works.
Hermes Agent is the new tool a lot of people in the agent space are paying attention to. If you've been using OpenClaw for social media automation, Hermes will feel familiar in some ways, but the workflow is a little cleaner and, at least in early use, more reliable when the automation gets more complex. If you want the primary source, start with the [official Hermes Agent website](https://hermes-agent.org/) and the [official Hermes docs](https://hermes-agent.nousresearch.com/docs/).
In the video above, Viktor walks through a real setup where Hermes Agent creates and posts Pinterest infographics automatically. This post turns that walkthrough into a written guide you can follow step by step, with [Genviral](https://docs.genviral.io/api-reference/introduction) acting as the API layer in the example rather than the main subject of the article.
## Why Hermes Agent for Social Media
The biggest pitch behind Hermes Agent is that it behaves less like a collection of loosely coordinated helpers and more like one strong agent that can direct the work, keep context, and improve the workflow over time.
That is also how Hermes describes itself in the official docs. As of **Hermes Agent v0.9.0, released April 13, 2026**, the project positions itself as a self-improving agent with persistent memory, built-in skills, a messaging gateway, and native scheduled tasks, not just a chat wrapper or IDE copilot.
Compared with OpenClaw, the advantages highlighted in the video are:
- **Better memory out of the box** so the agent loses less context as your setup grows
- **More autonomous behavior** with clearer reasoning and cleaner status updates
- **A stronger self-improving angle** where the automation can recursively refine itself over time
- **Better thread organization in Discord** so each automation has its own running context and history
That doesn't mean OpenClaw is dead. It is still actively maintained and still useful. But if you're trying to build a durable social media automation layer in 2026, Hermes Agent is worth serious attention.
## How Hermes Agent Fits Into a Social Media Workflow
Hermes itself is the agent layer. It handles the reasoning, the step-by-step setup, the memory, the follow-up questions, the automation logic, and the ongoing thread context. What it still needs is a way to actually talk to social platforms and, depending on your workflow, a way to generate media assets too.
In the example from the video, that infrastructure layer is Genviral. Hermes uses it to:
- access connected social accounts
- generate media assets
- create and publish posts
- confirm what happened after each run
That distinction matters. The article is really about how to make **Hermes Agent** useful for social media work. Genviral is not the star of the article. It is just a natural fit for the execution layer because Hermes needs one place to create content, access accounts, and publish across platforms.
## What the Official Hermes Docs Add
The video is helpful, but the official docs add a few details that matter a lot if you want this to run reliably:
- **Persistent memory:** Hermes keeps a bounded `MEMORY.md` and `USER.md`, plus searchable past sessions. For social media, that is useful for things like board lists, style rules, posting preferences, and account-specific quirks.
- **Discord session model:** in DMs Hermes replies to every message, but in server channels it defaults to `@mention` mode. It also supports free-response channels and auto-created threads, which makes Discord a strong home base for social automations.
- **Built-in cron:** Hermes has native scheduled tasks with natural-language schedules or cron expressions, and it can deliver output back to a Discord home channel.
- **Skills system:** Hermes can load and reuse skills on demand, which is useful when your posting workflow gets more structured over time.
- **OpenClaw migration path:** if you're moving from OpenClaw, Hermes now has an official `hermes claw migrate` path for bringing over memory, skills, config, and parts of your existing setup.
Those points make Hermes more than "another agent." They make it a better control layer for recurring social media work.
## What This Workflow Actually Does
The specific workflow from the video is:
1. Hermes Agent pulls content ideas from a recipe blog
2. It generates infographic-style Pinterest images with AI
3. It writes the caption, tags, and destination link
4. It publishes the pin through Genviral
5. It posts a confirmation back into the Discord home channel
In the example setup, the cadence is every eight hours and the account is a cooking brand. But the same structure generalizes easily to:
- LinkedIn thought-leadership posts
- YouTube cross-posting workflows
- TikTok slideshows
- Facebook filler content for brand-page trust
- Instagram image or video distribution
## What You Need
Before you ask Hermes to automate anything, make sure you have these four things ready:
1. **Hermes Agent installed and running** in your environment of choice
2. **A posting/API layer** Hermes can use to interact with social platforms
3. **The API documentation and key** for that posting layer
4. **Your social accounts connected** inside that system
In the workflow shown here, the posting layer is [Genviral](https://docs.genviral.io/api-reference/introduction), so that means using the Genviral docs, generating a Genviral API key, and connecting the relevant accounts there.
The video does **not** walk through how to install Hermes Agent itself. It assumes you already have Hermes running and are ready to connect it to a social media API. According to the official docs, the normal starting path is:
```bash
hermes setup
hermes gateway
```
And if you're moving over from OpenClaw, Hermes now documents:
```bash
hermes claw migrate
```
That matters because a lot of the audience for this topic is already coming from OpenClaw-related workflows.
## Step 1: Set Up Hermes in the Right Interface
The official Hermes docs make it clear that the agent works especially well through its messaging gateway. Discord is a strong fit for social media because Hermes already supports:
- DMs
- server channels
- threads
- file attachments
- slash commands
- proactive delivery back to a home channel
In Discord specifically, Hermes defaults to `@mention` mode in shared channels, and its `auto_thread` behavior is designed to keep each conversation isolated. That lines up well with the workflow in the video, where each automation gets its own thread while the main channel acts as the oversight layer.
If you want a cleaner operating model, set up Hermes in Discord first and make that your social-media command center.
## Step 2: Give Hermes Access to a Real Posting Layer
Hermes can plan and reason on its own, but it still needs a real interface into the platforms you want to automate. In the video, that interface is Genviral.
Inside Genviral:
1. Go to **API Keys**
2. Click **Create new API key**

3. Name it something descriptive
4. Copy the key and store it securely
You'll feed Hermes both the docs link and the API key so it knows how to authenticate and which endpoints it can use.
This is where Genviral fits naturally into the Hermes story. Hermes is handling the agent behavior. Genviral is handling the execution surface Hermes needs in order to actually publish.
## Step 3: Connect the Social Accounts Hermes Will Use
Before Hermes can post, the posting layer needs to know which accounts are available.
1. Go to [**Social Posts**](https://www.genviral.io/social?tab=queue)
2. Click **Manage Accounts**

3. Connect the platform account you want to automate
4. Create one manual post first to confirm the connection works
That last step matters. In the Pinterest example, Viktor already had the account connected and posting history in place, which made it easier for Hermes to understand the account context.
## Step 4: Create a Home Channel for Hermes
The setup in the video runs inside Discord. Hermes has a dedicated home channel, and every new automation run creates its own thread while still sending a confirmation back to the main channel.

This is one of the nicest parts of the Hermes workflow:
- the main channel becomes your monitoring surface
- each automation keeps its own thread-level context
- edits to an existing automation can happen inside the relevant thread
This lines up with the official cron docs too. Hermes can deliver scheduled task output back to a configured Discord home channel, which is exactly what you want for social automations that need human oversight without constant manual checking.
If you use Telegram or WhatsApp instead of Discord, the same principle still applies: give the automation a stable home and keep the context grouped.
## Step 5: Ask Hermes to Set It Up Step by Step
Do not dump everything into one prompt. Ask Hermes to guide the setup.
Use something like:
> "I want to set up a Pinterest posting automation. I want to use Genviral as the posting API layer. Please ask me clarifying questions step by step before you create the automation."
That matters because Hermes needs specifics such as:
- which account to post to
- what content source to use
- what posting cadence to follow
- what model to use for image generation
- what image style to match
- whether to publish directly or stage review steps first
The video explicitly recommends letting the agent ask clarifying questions. That is the fastest way to catch missing pieces before the automation starts running.
It also matches how Hermes cron is documented: scheduled prompts should be self-contained. The more specific you are at setup time, the better the recurring automation will behave later.
## Step 6: Specify the Content Workflow Clearly
In the Pinterest example, the instructions were specific:
- **Platform:** Pinterest
- **Cadence:** every eight hours
- **Content source:** random recipe selection from the blog
- **Image model:** GPT Image 2
- **Quality:** medium
- **Resolution:** 2K
- **Output:** infographic image, caption, tags, and destination link

This is the difference between a vague agent prompt and a useful automation. Hermes performs much better when you define the format tightly.
If you want Hermes to automate another platform, swap in the equivalent platform-specific instructions. For example, on LinkedIn you would define tone and text format, while on YouTube you'd focus more on title, description, and asset source.
## Step 7: Upload Reference Images and Give Hermes the Missing Context
One of the most important parts of the setup is reference material.
In the video, Viktor uploads reference images to the **Media Library** so Hermes can match a consistent Pinterest style when generating new infographics. If you skip this, your output will usually look less intentional and less brand-consistent.
For Pinterest specifically, there is one practical lesson from the walkthrough: Hermes can only work with the account and board context it has. In that setup, the board list was pasted into chat manually so Hermes could map recipes to boards correctly.
So if Hermes is missing context, give it:
- reference images
- folder names
- allowed boards or destinations
- formatting constraints
- example posts that represent the style you want
This is also where Hermes memory becomes useful over time. If you keep using the same account, same visual language, and same posting rules, Hermes has a better chance of staying consistent than a purely stateless setup.
## Step 8: Generate One Sample Post Before the Cron Job
This is the step almost everyone wants to skip, and it's the one you should never skip.
Before turning on the recurring automation, have Hermes generate one sample post directly in chat. Review:
- the image quality
- whether the prompt style is right
- whether the caption reads naturally
- whether the tags are relevant
- whether the link destination is correct
In the video, this test pass is where Hermes proved it understood the workflow correctly before the recurring schedule was enabled.
## Step 9: Turn On the Automation and Monitor Confirmations
Once the sample looks right, tell Hermes to set up the recurring job and post confirmations back into the main channel.
That gives you two layers of visibility:
- the automation thread for deeper context and edits
- the home channel for quick proof that runs are happening
This is a clean operating model for teams because you don't need to log into every platform just to check whether the automation fired.
And unlike a lot of "agent scheduler" setups, Hermes actually has first-class cron in the product. The official docs support natural-language intervals like `every 2h` as well as cron expressions, so this isn't a hack layered on top.
## Why Hermes Still Needs an API Layer
You could wire Hermes directly into each platform's APIs yourself, but in practice that is slow and annoying:
- Meta approvals can take a long time
- TikTok access can take even longer
- each platform has different auth and publishing quirks
- each platform exposes different post settings and content constraints
What Hermes needs is one clean API surface it can use reliably. In the video, that surface is Genviral. That means Hermes can focus on the automation logic instead of spending weeks dealing with the platform connectors directly.
Full disclosure: I'm one of the founders of Genviral, so I'm biased. But social posting automation is exactly what we built it for, and this Hermes workflow is a good example of why.
## Best Practices From the Video
A few practical takeaways matter more than anything else:
- **Start manually first.** Post by hand for a few days so you understand what good output actually looks like on the platform.
- **Automate proven formats, not experiments.** Hermes is best at scaling a workflow that already works.
- **Use reference images.** This is the easiest way to improve consistency.
- **Let Hermes ask clarifying questions.** Missing one setting early creates bad automations later.
- **Use Discord threads or another structured gateway surface.** Hermes works best when each automation has its own isolated session.
- **Write self-contained recurring prompts.** Hermes cron runs in a fresh session, so spell out the task clearly.
- **Review weekly.** Even strong automations drift if you never check them.
The final recommendation in the video is still the right one: do the workflow manually first for three or four days, learn the quirks, then hand the stable version to Hermes.
## Getting Started
If you want to replicate the exact workflow from the video:
1. Install Hermes and run `hermes setup`
2. Connect Hermes to Discord or your preferred chat surface with `hermes gateway`
3. If you're coming from OpenClaw, consider starting with `hermes claw migrate`
4. Choose the posting/API layer Hermes will use
5. If you're following the video exactly, sign up for [Genviral](https://www.genviral.io/auth)
6. Connect your Pinterest or other social accounts under **Social Posts**
7. Generate an API key at [genviral.io/api-keys](https://www.genviral.io/api-keys)
8. Feed Hermes the [API docs](https://docs.genviral.io/api-reference/introduction) and the key
9. Upload reference images in the Media Library
10. Ask Hermes to walk you through the automation step by step
11. Validate one sample post
12. Only then enable the recurring job
The Genviral API is available on all paid plans, and if you need help setting this up, you can reach out through the site or book a call through the landing page.
- [API Documentation](https://docs.genviral.io/api-reference/introduction)
- [Postman Collection](https://www.genviral.io/postman-collection.json)
- [API Keys](https://www.genviral.io/api-keys)
- [Genviral dashboard](https://www.genviral.io/auth)
---
## Related Guides
- [Hermes Agent Social Media Automation](https://www.genviral.io/hermes-agent)
- [How to Automate Facebook Posting with Hermes Agent](https://www.genviral.io/blog/hermes-agent-facebook)
- [How to Automate Pinterest Posting with Hermes Agent](https://www.genviral.io/blog/hermes-agent-pinterest)
- [How to Automate YouTube Shorts Posting with Hermes Agent](https://www.genviral.io/blog/hermes-agent-youtube)
- [How to Automate TikTok Posting with Hermes Agent](https://www.genviral.io/blog/hermes-agent-tiktok)
- [How to Use OpenClaw to Automate Your Social Media (Full Guide)](https://www.genviral.io/blog/how-to-use-openclaw)
- [How to Automate Pinterest Posting with OpenClaw and Genviral](https://www.genviral.io/blog/openclaw-pinterest)
- [15 Best OpenClaw Skills for Social Media Marketing](https://www.genviral.io/blog/best-openclaw-skills-social-media)
- [Best Social Media APIs](https://www.genviral.io/blog/best-social-media-apis)
- [Best Pinterest Scheduler](https://www.genviral.io/blog/best-pinterest-scheduler)
- [Pinterest Posting Strategy](https://www.genviral.io/blog/pinterest-posting-strategy)
---
Canonical HTML: https://www.genviral.io/blog/hermes-agent-social-media
# How to Automate TikTok Posting with Hermes Agent
- Hermes Agent works especially well for TikTok social media automation because it can manage the setup conversation, confirm prerequisites, and then run the workflow on a recurring basis without constant human input.
- The TikTok flow in this walkthrough uses [Genviral's API docs](https://docs.genviral.io/api-reference/introduction) as the execution layer, which lets Hermes create slideshows, generate AI images, and publish through one surface instead of wiring TikTok directly.
- Before you automate anything, connect your TikTok account, decide whether you want drafts or fully automatic posting, and make Hermes confirm it can see the right folders, accounts, and assets.
- For slideshow workflows, the most important ingredient is not the model. It is having a strong baseline visual format that Hermes can reliably repeat.
- Always have Hermes generate one sample TikTok post in chat first, then turn on the recurring automation only after you like the output.
TikTok is one of the best places to use Hermes Agent for social media automation because the workflow is repetitive, the format can be templated, and the upside of consistent posting is high. Once you have a format that already works, Hermes is very good at repeating it without you having to babysit every post.
In the video above, Viktor walks through a real TikTok setup where Hermes publishes cookbook-style recipe slideshows automatically. This guide turns that workflow into a written article, with Hermes as the control layer and Genviral as the publishing backend that actually talks to TikTok.
## Why Hermes Agent Makes Sense for TikTok
TikTok automation is not just "make a post and publish it." You usually need to decide:
- whether the content should be a slideshow or a video
- whether to post directly or upload as a draft
- where the content should come from
- what model should generate the images
- what style the output should follow
- whether the result is good enough to actually ship
That is exactly the kind of step-by-step configuration flow Hermes handles well. Instead of hardcoding every branch yourself, you can let the agent ask the missing questions, confirm the account access, and then formalize the workflow once the decisions are clear.
## What This TikTok Workflow Looks Like
The specific example from the transcript is a cookbook-style TikTok account with a three-page slideshow:
1. a title slide for the recipe
2. an ingredients slide
3. an instructions slide
Hermes creates unique content in that structure and then posts it automatically. The content itself looks polished because the format is already well-defined before the automation starts.
That is an important lesson for TikTok in general: Hermes is best when it is scaling a format that already works, not inventing one from scratch every time.
Here is the kind of TikTok slideshow this workflow is built to produce:
## What You Need
Before you ask Hermes to automate TikTok posting, make sure you have:
1. Hermes Agent already installed and running in your preferred interface
2. a TikTok publishing layer Hermes can use
3. an API key for that layer from [Genviral API Keys](https://www.genviral.io/api-keys)
4. your TikTok account connected in [Social Posts](https://www.genviral.io/social?tab=queue)
In this walkthrough, Genviral is the practical backend because Hermes can use it for account access, AI image generation, slideshow creation, and final delivery without you having to wait weeks for direct TikTok API approval.
## Step 1: Feed Hermes the Right API Surface
The first thing Hermes needs is the API reference and the authentication layer. In this workflow, that means giving Hermes the [Genviral API reference](https://docs.genviral.io/api-reference/introduction) plus an API key so it can authenticate and understand what endpoints are available.
This is where Genviral fits naturally into the article. Hermes is doing the reasoning and orchestration, but it still needs a reliable social publishing layer underneath it.
## Step 2: Connect Your TikTok Account First
Before Hermes can publish anything, it needs to be sure the account is already connected.
The basic flow is:
1. open the Social Posts area
2. connect TikTok
3. finish the account authentication
4. confirm Hermes can actually see the account
The transcript makes a big point of this confirmation step, and it is the right instinct. Before you talk about cadence, captions, or images, make Hermes verify that the account access is actually there.
## Step 3: Decide Whether You Want Drafts or Automatic Posting
This is one of the most important TikTok-specific decisions in the whole setup.
Hermes should ask you whether the post should:
- publish automatically, or
- upload as a draft for manual review
Viktor's recommendation in the video is sensible: for TikTok slideshows, **draft mode is often the better starting point**. The reason is music. If you post automatically through the API, TikTok will choose a song for you. If you care about having more control over the final slideshow, uploading as draft gives you a chance to review it and choose the sound yourself.
So if your automation is slideshow-heavy, drafts are often the safer default.
## Step 4: Choose the Right TikTok Content Pipeline
Hermes can only automate well if you tell it which content path it should use.
In the transcript, there are three practical options:
### AI-generated slideshows
This is the showcased workflow. Hermes uses Genviral's Studio AI endpoint to generate the images, then turns them into a slideshow.
### Slideshows from your own packs or folders
If you already have images prepared, Hermes can use those instead of generating everything from scratch. This is useful when you want tighter brand control.
### Video posting
If your TikTok workflow is video-based instead of slideshow-based, the same high-level setup still applies, but the asset pipeline changes.
The key point is that Hermes should know which of those pipelines you want before it tries to automate anything.
## Step 5: Give Hermes a Baseline Format It Can Repeat
This might be the most useful lesson in the entire video.
The reason the recipe slideshows work is not just because AI made pretty images. It is because the underlying format is stable.
Viktor shows a dedicated folder with baseline images and a fixed slideshow structure. That reduces the number of things that can go wrong. For example:
- the app CTA badge is already present
- the three-slide structure is already defined
- Hermes is told which image serves which role
That is exactly how you should think about TikTok automation. Give the agent a format with as few failure points as possible, then let it vary the topic inside that frame.
## Step 6: Specify the Model, Settings, and Source
Once the structure is clear, Hermes still needs the operating instructions.
In the example workflow, that includes:
- GPT Image 2 as the image model
- medium quality
- 2K resolution
- a recipe source pulled from a website or blog
Those settings are not universally correct for every TikTok automation, but the principle is: **be explicit**.
Tell Hermes:
- where the content ideas should come from
- which model to use
- what aspect ratio or quality settings to prefer
- what kind of captions and hashtags to create
TikTok automations get messy when these details are vague.
## Step 7: Generate a Sample Post Before You Automate
Before you let Hermes schedule anything, tell it to create a post in chat first without publishing it.
This is where you check:
- whether the slideshow actually looks good
- whether the caption feels right
- whether the content is accurate
- whether the format matches the account
In the transcript, that sample-review step is what happens right before the automation is activated. That is the right order. Don't schedule first and hope for the best later.
## Step 8: Turn It Into a Recurring TikTok Automation
Once the sample looks good, tell Hermes to convert it into a recurring automation and post confirmations back to the channel you use for oversight.
At that point the loop becomes:
1. pick or generate the content
2. create the TikTok asset
3. write the metadata
4. publish or upload as draft
5. confirm the result back in chat
That is the moment where Hermes stops being "an agent you test with" and becomes an actual social media operator for that workflow.
## The Biggest TikTok Lesson From the Video
The most important recommendation in the entire walkthrough is not about Hermes or Genviral. It is about process.
Do the workflow manually first.
If you do not already understand:
- what a good TikTok slideshow looks like
- how your captions should read
- what asset structure works
- where music choice matters
then the automation will be harder to debug and easier to mess up.
Hermes is best used to automate something you already understand end to end.
## Getting Started
If you want to replicate the TikTok workflow from the video:
1. set up Hermes Agent in Discord or your preferred interface
2. connect your TikTok account in Social Posts
3. create your API key
4. feed Hermes the API docs and credentials
5. decide whether you want drafts or automatic posting
6. define the slideshow or video pipeline
7. give Hermes a stable baseline format
8. review one sample post
9. only then turn on the recurring automation
If you need the full platform side of that workflow, you can start from [Genviral](https://www.genviral.io/auth), then use the TikTok setup as the execution layer under Hermes.
---
## Related Guides
- [Hermes Agent Social Media Automation](https://www.genviral.io/hermes-agent)
- [Hermes Agent Social Media: How to Automate Posting](https://www.genviral.io/blog/hermes-agent-social-media)
- [How to Warm Up a TikTok Account](https://www.genviral.io/blog/warm-up-tiktok-account)
- [How to Use OpenClaw to Automate Your Social Media (Full Guide)](https://www.genviral.io/blog/how-to-use-openclaw)
- [How to Automate TikTok Posting with OpenClaw and Genviral](https://www.genviral.io/blog/openclaw-tiktok)
- [Best TikTok Scheduler](https://www.genviral.io/blog/best-tiktok-scheduler)
- [Create TikTok Slideshow Images with AI](https://www.genviral.io/blog/create-tiktok-slideshow-images-with-ai)
- [Where to Find TikTok Drafts](https://www.genviral.io/blog/where-to-find-tiktok-drafts)
- [How to Delete Your TikTok Account](https://www.genviral.io/blog/how-to-delete-tiktok-account)
---
Canonical HTML: https://www.genviral.io/blog/hermes-agent-tiktok
# How to Automate YouTube Shorts Posting with Hermes Agent
- Hermes Agent works well for YouTube Shorts social media automation because it can confirm account access, follow a structured posting workflow, and keep recurring uploads organized without constant supervision.
- Before you do anything else, you need an active Genviral subscription, your API key, your connected social account, and the Genviral API docs that Hermes will use.
- You can run this workflow with pre-made shorts, shared content folders, Google Drive or Dropbox assets, Studio AI-generated media, or a broader cross-posting pipeline. The transcript uses pre-edited CapCut videos as the simplest example, not the only supported path.
- One of the most important parts of the setup is the internal logging system so Hermes knows which videos have already been posted and does not recycle the same assets too early.
- Always have Hermes send posting confirmations back into your main channel so you can catch failed uploads, missing titles, weak descriptions, or account issues quickly.
YouTube Shorts is one of the most practical places to use Hermes Agent for social media automation because the workflow is usually predictable: choose a video, apply the right metadata, publish on schedule, and keep the queue moving.
If you already have short-form content being created for TikTok, Instagram, Facebook, or another channel, Hermes can become the operator that takes those assets and distributes them to YouTube Shorts consistently. In this setup, Hermes is the orchestration layer, while Genviral is the backend that handles account connection and publishing.
## What This YouTube Automation Actually Does
The concrete example in the transcript is a YouTube Shorts workflow where:
1. ready-made short videos are stored in a shared media folder
2. Hermes checks the connected YouTube account
3. it chooses the next available unused video
4. it applies the title and description rules
5. it publishes the short on schedule
6. it sends a confirmation back into the main channel
If you want to see the kind of account this workflow is meant to support, you can look at the example [YouTube channel](https://www.youtube.com/@viktorsocialmedia).
That example is useful because it shows the real value of Hermes: you do not have to make the agent generate every asset from scratch. You can also let your existing content workflow produce the videos, then let Hermes handle the repetitive distribution layer.
## Other YouTube Automations You Can Run with Hermes
Do not read this guide as "Hermes only works for pre-edited CapCut videos." Hermes can also be used to automate:
- YouTube Shorts from existing video folders
- cross-posting the same short-form video across several platforms
- media pulled from Google Drive, Dropbox, or another external source
- AI-generated media using Studio AI
- analytics-informed iteration where Hermes improves future posting decisions
So the example here is intentionally simple, but the setup principles are broader than the example itself.
## Why Hermes Agent Makes Sense for YouTube Shorts
YouTube automations usually fail in one of four places:
- the account is not actually connected
- the title and description quality are inconsistent
- the same video gets reposted by mistake
- the workflow appears healthy until someone notices missing uploads
Hermes is useful because it can:
- verify that the account exists and is ready to use
- follow explicit rules for titles and descriptions
- maintain an internal log of posted assets
- send confirmations back to the team after every run
That is a much better fit than treating YouTube as a blind scheduler with no visibility.
## What You Need
Before you ask Hermes to automate YouTube Shorts posting, make sure you have:
1. Hermes Agent already installed and running in your preferred interface
2. an active [Genviral subscription](https://www.genviral.io/auth)
3. an API key from [API Keys](https://www.genviral.io/api-keys)
4. your YouTube account connected in [Social Posts](https://www.genviral.io/social?tab=queue)
5. the [Genviral API docs](https://docs.genviral.io/api-reference/introduction) so Hermes knows what endpoints it can use
In this workflow, Genviral is the natural backend because it gives Hermes one way to authenticate, access connected accounts, read folders and files when relevant, generate content when needed, publish the short, and later use analytics for recursive improvement.
## Step 1: Choose Where Hermes Will Run
The first decision is where the automation should live.

Discord works well if you already monitor multiple automations there, but Telegram, Microsoft Teams, WhatsApp, and similar interfaces can also work. The important part is that Hermes already has a functioning home before you start the YouTube setup.
This guide assumes Hermes itself is already installed and working.
## Step 2: Feed Hermes the API Docs and API Key
Once Hermes is running, you need to give it the API surface it will use.

In practice, that means:
- your API key so Hermes can authenticate
- the API docs so Hermes understands the available endpoints
For this type of YouTube automation, the most relevant endpoints are usually:
- **Accounts**
- **Files**
- **Folders**
- **Studio AI** if you want generated content
- **Posts**
- **Analytics** if you want Hermes to improve decisions over time
You do not need every endpoint for every workflow. If you are bringing your own shorts from another source, some endpoints may be irrelevant.
## Step 3: Connect the YouTube Account First
Before Hermes can publish anything, your YouTube account needs to be connected manually.

The basic flow is:
1. open Social Posts
2. go to Manage Accounts
3. connect your YouTube account
4. make Hermes confirm it can see the account
That final confirmation is important. Before you start configuring cadence, metadata, or content sources, ask Hermes directly whether it can see the account you just connected.
That early verification saves a lot of debugging later.
## Step 4: Decide What Content Source You Want to Use
This is where the workflow branches.
For YouTube Shorts, you can let Hermes work with:
- videos stored in Genviral folders
- videos stored in another system like Google Drive or Dropbox
- content generated through Studio AI
- shared assets that are already being posted to Instagram, Facebook, TikTok, or other platforms
The transcript uses a shared media folder because the same videos are also being published elsewhere. That is a strong place to start because it keeps the workflow simple and lets you reuse the same assets across multiple social channels.
## Step 5: Use a Shared Media Folder if You Already Have One
If your videos are already being created elsewhere, I recommend starting with a shared folder-based workflow.

That means:
- prepare the videos externally
- upload them into a dedicated YouTube folder
- let Hermes pick from that pool
This is especially useful when:
- your videos are edited by a human
- the same shorts are being cross-posted elsewhere
- you want a stable asset inventory before adding generation on top
Hermes does not need to edit the videos. It just needs to know where they are, how to choose them, and how to post them correctly.
## Step 6: Define the Metadata Rules Clearly
One of the practical problems called out in the transcript is that titles and captions were not always strong enough until the rules were refined.
So when you set up Hermes, be explicit about:
- the title format
- the description structure
- any hashtags you want included
- any copyright or source restrictions you need respected
- whether you need a title image or thumbnail logic
This matters because Shorts publishing is not only about uploading the file. The surrounding metadata has a real impact on whether the workflow is actually useful.
## Step 7: Keep an Internal Log of Posted Videos
This is one of the most important parts of the whole setup.
Hermes should keep an internal log of:
- what videos are available
- what videos have already been published
- what the most recent posts were
That way Hermes does not immediately recycle the same asset again and again.
If you keep adding new videos into the folder over time, the system can run continuously without running out of content. If the folder is eventually exhausted, then you can decide whether reposting is acceptable.
This is exactly how you should think about YouTube Shorts inventory.
## Step 8: Send Confirmations After Every Upload
When Hermes finishes a post, it should send a confirmation back into your main channel.
That confirmation should tell you:
- which video was posted
- whether the upload succeeded
- what the final title and description looked like
- whether anything failed
This is critical because YouTube automations can fail quietly if you do not build an explicit confirmation loop. If a title is weak, a description is missing, or the account has an issue, you want to know right away instead of discovering the problem after several missed or poor-quality uploads.
## Step 9: Start with One or Two Shorts Per Day
The transcript recommends starting with a moderate cadence first, and that is the right call.
For most YouTube Shorts automations, begin with:
- one short per day, or
- two shorts per day
Then watch the results. If the workflow is stable and the content performs well, you can scale up. But start with a cadence you can monitor comfortably.
## The Biggest Lesson From This Workflow
Use YouTube manually first.
Before automating Shorts, spend time posting manually so you understand:
- what a good Short looks like in your niche
- how your titles should read
- what description style works
- what content formats perform best
- what copyright issues you need to avoid
Once you understand that workflow end to end, Hermes becomes a multiplier. Before that, it mostly automates uncertainty.
## Getting Started
If you want to replicate the YouTube Shorts workflow from the video:
1. set up Hermes in the interface where you want to manage the automation
2. make sure you have an active Genviral subscription
3. connect your YouTube account in Social Posts
4. create your API key
5. feed Hermes the API docs and credentials
6. decide whether the automation will use folders, external storage, Studio AI, or another asset source
7. define your title and description rules
8. tell Hermes to keep an internal log of posted videos
9. send one test post first if you want to validate the metadata
10. only then enable the recurring YouTube Shorts automation
If you need the execution layer for that workflow, start with Genviral, then let Hermes operate on top of it.
---
## Related Guides
- [Claude YouTube Automation: Schedule Shorts with Claude Cowork](https://www.genviral.io/blog/claude-youtube-automation)
- [How to Automate YouTube Posting with OpenClaw and Genviral](https://www.genviral.io/blog/openclaw-youtube)
- [Hermes Agent Social Media: How to Automate Posting](https://www.genviral.io/blog/hermes-agent-social-media)
- [How to Automate TikTok Posting with Hermes Agent](https://www.genviral.io/blog/hermes-agent-tiktok)
- [How to Automate Instagram Posting with Hermes Agent](https://www.genviral.io/blog/hermes-agent-instagram)
- [How to Use OpenClaw to Automate Your Social Media](https://www.genviral.io/blog/how-to-use-openclaw)
- [Best Social Media APIs](https://www.genviral.io/blog/best-social-media-apis)
---
Canonical HTML: https://www.genviral.io/blog/hermes-agent-youtube
# How to Hide Your Following List on Instagram (2026 Guide)
- There is no dedicated "hide following list" setting on Instagram - the only way to restrict who sees it is to make your account private.
- With a private account, only approved followers can see your posts, followers list, and following list - anyone not following you sees only your bio and profile picture.
- Making your account private reduces organic discovery since your posts won't appear in Explore or hashtag results for non-followers - weigh the privacy benefit against the reach trade-off.
## The Short Answer
**You cannot completely hide your following list on Instagram.** There's no dedicated "hide following list" button or setting.
However, you can control who sees it by **making your account private**. According to [Instagram's official Help Center](https://help.instagram.com/116024195217477), once your account is private, only approved followers can see your posts, followers list, and following list.
## How to Make Your Account Private
**On mobile:**
1. Open Instagram and tap your profile icon
2. Tap the three lines (top right)
3. Go to **Settings and activity**
4. Tap **Account Privacy**
5. Toggle **Private Account** ON
**Important:** Making your account private means:
- ✅ Non-followers can't see your following list
- ✅ People must request to follow you
- ❌ Your approved followers can still see your following list
- ❌ Your reach will decrease (no public discoverability)
If you're concerned about maintaining reach with a private account, focus on consistent, high-quality content. 3-5 quality posts per week can help maintain engagement even with limited discoverability. You can also repost stories when tagged to share user-generated content and build community with your approved followers.
## What "Private Account" Actually Means
This is where confusion happens. **Private ≠ invisible.**
| Account Type | Who Sees Following List |
|-------------|------------------------|
| **Public** | Everyone |
| **Private** | Approved followers only |
| **Blocked users** | No one (they can't see your profile at all) |
Even with a private account, anyone you've approved as a follower can still view your entire following list. There's no way around this.
## Managing Specific People
If you want to hide your following list from specific followers, you have three options:
### 1. Remove Followers (Quiet Option)
Best for: Getting someone off your follower list without drama.
1. Go to your profile → **Followers**
2. Find the person
3. Tap the three dots next to their name
4. Select **Remove**
They won't be notified, but they'll no longer see your following list (assuming your account is private).
### 2. Restrict (Limits Interaction)
Best for: Limiting someone without unfollowing them.
1. Go to their profile
2. Tap the three dots
3. Select **Restrict**
**What this does:**
- Their comments on your posts are only visible to them
- They can't see when you're online
- Their DMs go to message requests
**What it doesn't do:**
- It doesn't hide your following list if they're already a follower
### 3. Block (Nuclear Option)
Best for: Complete invisibility from someone.
1. Go to their profile
2. Tap the three dots
3. Select **Block**
Once blocked, they can't:
- See your profile
- See your following/followers lists
- Search for you
- Message you
They won't be notified, but they'll notice if they try to find your profile.
## Can Business Accounts Go Private?
**No.** Instagram Business and Creator accounts cannot be set to private.
If you need privacy controls, you must switch back to a Personal account:
1. Go to **Settings** → **Account type and tools**
2. Select **Switch to Personal Account**
3. Then make it private following the steps above
Keep in mind you'll lose access to business features like Instagram Insights and ads.
## Other Privacy Settings Worth Enabling
While you can't fully hide your following list, these settings add more privacy:
**Profile visibility:**
- Instagram does not have a TikTok-style profile-view history toggle, but you can still reduce what people see. Start with [how to turn off profile views on Instagram](https://www.genviral.io/blog/how-to-turn-off-profile-views-on-instagram) for the exact settings that matter.
**Activity Status:**
- Settings → Messages and Story Replies → Activity Status → Toggle OFF
- Hides when you're online (you won't see others' status either)
**Limit Comments:**
- Settings → Privacy → Comments
- Choose who can comment on your posts
**Control Tags/Mentions:**
- Settings → Privacy → Tags and mentions
- Set to "People you follow" or "No one"
**Hide Stories from Specific People:**
- When posting a Story, tap the privacy settings
- Select "Hide story from" and choose people
For more tips on managing your Instagram strategy, check out our posting frequency guide below. To turn your presence into income, see [how to make money with Instagram](https://www.genviral.io/blog/how-to-make-money-with-instagram). You can also learn about reposting stories to share content with your approved followers.
## Common Questions
**Can I hide my following list without going private?**
No. The only way to restrict who sees your following list is by making your account private. There's no workaround.
**Will people know if I remove them as a follower?**
No. Instagram doesn't notify users when you remove them from your followers list. They'll only notice if they manually check your profile and see they're no longer following you.
**What about third-party apps that claim to hide it?**
Don't use them. These apps violate Instagram's terms of service and can get your account banned. They also pose security risks by accessing your login credentials.
**Does restricting someone hide my following list from them?**
No. Restrict only limits how they can interact with you (comments, messages, activity status). If they're an approved follower, they can still see your following list.
**Can blocked users see my following list?**
No. Blocking someone removes all their access to your profile, including your following and followers lists.
**Should I delete my account if I can't hide my following list?**
Not necessarily. If privacy is your main concern, making your account private is usually sufficient. However, if you're dealing with harassment or other serious issues, you may want to consider [temporarily deactivating or permanently deleting your Instagram account](https://www.genviral.io/blog/how-to-delete-instagram-account) as a last resort.
## The Bottom Line
Instagram doesn't let you selectively hide your following list. Your only real option is:
1. **Make your account private** (hides from non-followers)
2. **Remove or block specific followers** (hides from those individuals)
If your goal is to maintain a public account while hiding your following list, that's not possible. Instagram's entire model is built on connection transparency - they want following lists to be visible.
For most users, making your account private and carefully managing who you approve as followers is the best solution. It won't give you complete invisibility, but it drastically limits who can see your connections.
Once you've set up your privacy preferences, focus on creating quality content that keeps your approved followers engaged. Maintaining consistent, valuable content is key to growing your private account.
---
## More Instagram Guides
- [Switch to Personal Account on Instagram](https://www.genviral.io/blog/switch-to-personal-account-instagram) - understand the differences between account types
- [How Often Should You Post on Instagram](https://www.genviral.io/blog/how-often-should-you-post-on-instagram) - find the right posting frequency
- [How to Make a Reel on Instagram](https://www.genviral.io/blog/how-to-make-a-reel-on-instagram) - create Reels that get views
- [How to Repost a Story on Instagram](https://www.genviral.io/blog/how-to-repost-story-on-instagram) - share stories to your feed
- [How to Clear Instagram Cache](https://www.genviral.io/blog/how-to-clear-instagram-cache) - free up gigabytes of phone storage safely
*Managing your Instagram presence involves more than privacy settings. Want to maintain consistent posting? [Genviral's Instagram Scheduler](https://www.genviral.io/instagram-scheduler) helps you schedule content to stay active without the daily grind.*
---
Canonical HTML: https://www.genviral.io/blog/hide-instagram-following-list
# How Many Photos Can You Post on Instagram? (2026 Update)
- Instagram now supports up to 20 photos or videos per carousel post (up from 10 since August 2024), but third-party scheduling tools are still limited to 10 due to Instagram's API restrictions.
- Data shows most users only view the first 3-5 slides - front-load your best content and only use as many slides as the story actually needs.
- Carousels get 1.4x more reach and 3.1x more engagement than single photos, but all images in a carousel must share the same aspect ratio or Instagram will crop them.
## The Quick Answer
**Instagram allows up to 20 photos or videos in a single carousel post** as of August 2024. Previously, the limit was 10 photos per post.
There's no limit on total posts you can have on your account - only how many photos go into one carousel.
## Why Some Accounts Still Have a 10-Photo Limit
Not everyone has access to the 20-photo limit yet. Instagram's rollout is still in progress.
**If you're stuck at 10 photos:**
1. **Update your Instagram app** - Most common fix
- iOS: App Store → Instagram → Update
- Android: Play Store → Instagram → Update
2. **Clear cache and reinstall**
- iOS: Delete app and reinstall
- Android: Settings → Apps → Instagram → Storage → Clear Cache
3. **Try Instagram web** - Some users report the web version has the feature before mobile
4. **Wait for rollout** - Instagram is still gradually enabling this for all accounts
**Third-party scheduling tools** are limited to 10 photos due to Instagram's API restrictions, even if your account supports 20 in the native app.
## How to Post Multiple Photos on Instagram
1. Open Instagram and tap the **+** icon
2. Tap **"Select Multiple"** (stacked images icon)
3. Choose up to 20 photos/videos from your library
4. Tap **"Next"** and rearrange if needed
5. Add filters, caption, and location
6. Tap **"Share"**
You can mix photos and videos in the same carousel.
## Should You Actually Use All 20 Photos?
Just because you can doesn't mean you should.
**Data shows:**
- Most users only view the first 3-5 slides
- Carousels with 5-10 photos often get better engagement than 20
- Longer carousels see drop-off in completion rate
**Optimal carousel lengths:**
- **Event highlights:** 8-12 photos
- **Product showcases:** 5-10 photos
- **Tutorials:** 10-15 slides
- **Photo dumps:** 12-20 photos
Put your best content first - most people won't swipe all the way through.
## Technical Specs
**Photo requirements:**
- **Formats:** JPG, PNG
- **Recommended size:** 1080 x 1080px (square)
- **Max file size:** 30MB per photo
- **Aspect ratios:** All photos must use the same ratio (square, portrait, or landscape)
**Video requirements:**
- **Formats:** MP4, MOV
- **Length:** Up to 60 seconds per video
- **Max file size:** 4GB per video
## When to Use Carousels vs Single Posts
**Use carousels for:**
- Event recaps
- Step-by-step tutorials
- Product showcases (multiple angles)
- Before/after sequences
- Monthly photo dumps
**Use single posts for:**
- Strong standalone images
- Quick announcements
- Memes or trending content
- When one photo says it all
According to our research on [Instagram posting frequency](https://www.genviral.io/blog/how-often-should-you-post-on-instagram), **mixing single posts, carousels, and Reels** (3-5 total posts per week) works best.
Carousels get 1.4x more reach and 3.1x more engagement than single photos, but only if the content justifies multiple slides.
## Common Issues
**"My photos are getting cropped weird"**
Instagram forces all photos in a carousel to use the same aspect ratio. Pre-crop your photos to the same dimensions before uploading.
**"I can only post 10 photos, not 20"**
Update your app first. If that doesn't work, the feature hasn't rolled out to your account yet. Try the web version or wait for the update.
**"My scheduler only lets me post 10"**
Instagram's API restricts third-party tools to 10 photos. Post manually in the Instagram app for 20-photo carousels.
**"Who can see my carousel posts?"**
If you're concerned about privacy, your account's visibility settings determine who can see your posts. For profile-visit visibility, start with [how to turn off profile views on Instagram](https://www.genviral.io/blog/how-to-turn-off-profile-views-on-instagram). For connection visibility, see our guide on [hiding your Instagram following list](https://www.genviral.io/blog/hide-instagram-following-list).
**"I want to delete my account instead"**
If you're considering leaving Instagram entirely, whether due to privacy concerns, time management, or other reasons, see our complete guide on [how to delete or deactivate your Instagram account](https://www.genviral.io/blog/how-to-delete-instagram-account) for step-by-step instructions.
## The Bottom Line
Instagram's 20-photo limit gives you more flexibility, but **quality beats quantity**. Most viewers won't swipe through all 20 slides, so front-load your best content and only use as many photos as needed to tell your story.
---
## More Instagram Guides
- [How to Make a Reel on Instagram](https://www.genviral.io/blog/how-to-make-a-reel-on-instagram) - create Reels alongside your carousels
- [How to Repost a Story on Instagram](https://www.genviral.io/blog/how-to-repost-story-on-instagram) - share stories to your feed
- [Switch to Personal Account on Instagram](https://www.genviral.io/blog/switch-to-personal-account-instagram) - account type comparison
- [How Often Should You Post on Instagram](https://www.genviral.io/blog/how-often-should-you-post-on-instagram) - find your ideal posting cadence
- [How to Clear Instagram Cache](https://www.genviral.io/blog/how-to-clear-instagram-cache) - reclaim phone storage from the IG app
*Want to maintain consistent Instagram posting? [Genviral's Instagram Scheduler](https://www.genviral.io/instagram-scheduler) helps you schedule carousel posts to keep your account active without the daily grind. To turn your content into income, see [how to make money with Instagram](https://www.genviral.io/blog/how-to-make-money-with-instagram).*
---
Canonical HTML: https://www.genviral.io/blog/how-many-photos-can-you-post-on-instagram
# How Often Should You Post on Instagram in 2026?
- Analysis of 2+ million posts shows 3-5 feed posts per week is the optimal frequency - moving from 1-2 to 3-5 posts can more than double follower growth, but going beyond 5 shows rapidly diminishing returns.
- Instagram Stories should be posted daily (minimum 1-2, ideally 4+ for established accounts) - they reduce unfollows and keep existing followers engaged, which most creators ignore.
- Reels are the discovery engine: post 2-4 per week. 60%+ of Reel views come from non-followers, making them the single most effective format for reaching new audiences.
- The biggest mistake is inconsistency - a "no-post penalty" actively causes follower stagnation. Posting 3x per week reliably beats sporadic 10x/week posting every time.
## TL;DR
Instagram posting frequency in 2026:
- **Feed posts (Reels/Photos/Carousels):** 3-5 times per week is the sweet spot
- **Instagram Stories:** Daily (minimum 1-2 per day, ideally 4+ for established accounts)
- **Instagram Reels:** 2-4 per week for maximum reach
- **Key insight:** Consistency beats volume - posting 3x/week reliably outperforms sporadic 10x/week posting
## Why Posting Frequency Actually Matters on Instagram
Unlike platforms where content disappears in hours, Instagram's algorithm rewards accounts that show up consistently. But here's the catch: **more doesn't always mean better**.
Buffer's 2026 analysis of over 2 million posts from 100,000+ Instagram accounts reveals something surprising: the biggest performance jump happens when you move from 1-2 posts to 3-5 posts per week. After that? Diminishing returns kick in hard.
## The Sweet Spot: 3-5 Feed Posts Per Week
### What the Data Shows
Multiple studies analyzing millions of posts converge on the same conclusion:
**Buffer's findings (2.1M posts analyzed):**
- Posting 3-5 times weekly can **more than double follower growth** vs 1-2 times/week
- Reach per post increases by ~12% at this frequency
- The algorithm rewards consistency without penalizing volume
**Later's analysis (19M posts):**
- Nano accounts (0-10K): Average 2 posts/week
- Micro accounts (10-100K): Average 3 posts/week
- Mid accounts (100K-500K): Average 5 posts/week
**Dash Social's research (1.2M posts):**
- 2-3 posts per week drives highest engagement without burnout risk
- Going beyond 5 posts/week shows minimal additional benefit
### Why 3-5 Posts Works
This frequency hits the perfect balance:
- Frequent enough to signal activity to the algorithm
- Creates consistent opportunities for Explore page placement
- Avoids quality drop that comes with chasing daily posting
- Sustainable long-term without creator burnout
## What Happens When You Post More?
Instagram CEO Adam Mosseri has been clear: **"The more you post, the more people you'll reach."** But there's a critical caveat.
### The Diminishing Returns Reality
Here's what Buffer's data shows using a 5K follower account example:
- **0 posts/week:** Account stagnation (baseline 0% growth)
- **1-2 posts/week:** +6 followers/week
- **3-5 posts/week:** +13 followers/week ⭐ **Best ROI**
- **6-9 posts/week:** +22 followers/week
- **10+ posts/week:** +33 followers/week
Notice the pattern? Moving from 1-2 to 3-5 posts **doubles your growth**. But going from 5 to 10 posts only adds 50% more followers while requiring 2x the work.
### The Burnout Problem
Creating 10+ posts weekly might mean:
- Dropping content quality to hit volume targets
- Burning out after 2-3 weeks and quitting entirely
- Sacrificing strategy for speed
**Both scenarios hurt growth more than posting 3x/week consistently.**
## Instagram Stories: The Daily Engagement Tool
Stories operate differently than feed posts. They're not about reaching new audiences - they're about **keeping the audience you have**. You can also repost stories when tagged to maintain consistent daily content.
### Recommended Story Frequency
**Minimum:** 1-2 Stories per day
**Optimal:** 4+ Stories per day for established accounts
**Data point:** Accounts with 100K-500K followers average 15 Stories per week
### Why Stories Matter for Retention
Adam Mosseri confirmed: **creators who post Stories frequently experience fewer unfollows**. If you're gaining 2,000 followers monthly but losing 2,000, your net growth is zero. Stories help you keep the followers you work hard to get.
### Story Strategy Tips
Each frame in a Story sequence counts separately, so:
- Create connected story arcs across 3-5 frames
- Share behind-the-scenes content
- Use interactive features (polls, questions, sliders)
- Save important Stories to Highlights
Stories require less production value than feed posts, making daily posting more realistic.
## Instagram Reels: 2-4 Per Week for Algorithm Love
In 2026, Instagram is heavily prioritizing video content. Over half the time spent on Instagram is now watching video.
### Optimal Reel Frequency
**Sweet spot:** 2-4 Reels per week
**Why this works:** Reels get 2x more engagement than static posts while being sustainable to produce
### The Algorithm Signals That Matter
According to Mosseri, Instagram's ranking factors are:
1. **Watch time** (most important)
2. **Likes per reach**
3. **Sends per reach** (shares/DMs)
For Reels specifically:
- First 3 seconds are critical for hook
- Shares are more valuable than saves
- Completion rate matters more than total views
You can also convert photo content into Instagram carousel posts (up to 20 photos) to maximize your content investment. Carousels work great alongside Reels for a diverse content mix.
## The No-Post Penalty
Here's something most creators don't realize: **not posting actively hurts your account**.
Buffer's research identified a "no-post penalty" - weeks with zero posts show follower growth ~0.08 standard deviations below baseline. Translation: account stagnation or actual follower loss.
Even posting just 1-2 times per week is significantly better than inconsistent gaps.
## What Adam Mosseri Actually Said
Instagram's CEO has addressed posting frequency multiple times in 2026. Here's what actually matters:
### His Core Message
**"Prioritize quality over quantity, but in general, the more you post, the more people you'll reach."**
Key nuances:
- Posting more shouldn't come at the cost of creativity or wellbeing
- When creators burn out, content quality suffers
- Create a sustainable schedule you can maintain
### His Specific Recommendations
- **Feed posts:** Around 10 per month (roughly 2-3 times/week)
- **Stories:** Several per day (minimum 1-2)
- **Focus:** Consistency without burnout
## Common Posting Mistakes That Kill Growth
### ❌ The Volume Trap
Trying to post daily when you can only create 3 quality posts per week. Result: lower quality content that underperforms.
**Fix:** Better to post 3 exceptional posts than 7 mediocre ones.
### ❌ The Sporadic Poster
Going hard for a week (10 posts), then nothing for two weeks.
**Fix:** Instagram rewards predictable consistency. 3 posts every week beats 21 posts once a month.
### ❌ Ignoring Stories Completely
Only focusing on feed posts while neglecting Stories.
**Fix:** Stories reduce unfollows and keep you top-of-mind. Add 1-2 daily Stories minimum.
### ❌ Comparing to Accounts with Teams
Seeing a brand post 2x daily and thinking you should too - when they have a 5-person social team.
**Fix:** Match frequency to YOUR resources, not someone else's.
## Building a Sustainable Instagram Strategy
### For New Accounts (0-6 Months)
**Start conservative:**
- 3 feed posts per week
- 1-2 Stories daily
- 2 Reels per week
**Focus on:**
- Establishing consistency
- Understanding your audience
- Finding content that resonates
### For Established Accounts (6+ Months)
**Scale strategically:**
- 4-5 feed posts per week
- 3-5 Stories daily (or 15+ per week)
- 3-4 Reels per week
**Focus on:**
- Doubling down on what works
- Testing new formats
- Analyzing Instagram Insights data
## The Sunday Batch Creation Method
Want to post consistently without daily content creation stress? Batch your work.
### The System
**Sunday (2-3 hours):**
1. **Review analytics** (15 min)
- What performed well last week?
- Which Reels got saves/shares?
- Any patterns in top content?
2. **Create 10-15 pieces of content** (90-120 min)
- 3-5 feed posts
- 7-14 Story frames
- 2-3 Reels
3. **Schedule everything** (30 min)
- Spread across the week
- Post at optimal times
- Mix content types
This approach maintains perfect consistency while freeing up your weekdays.
For more Instagram content creation strategies, see our Reels guide below to add video content to your posting mix. To turn your presence into income, see [how to make money with Instagram](https://www.genviral.io/blog/how-to-make-money-with-instagram).
## What About Scheduling Tools?
Here's the good news: **Instagram's algorithm treats scheduled posts exactly the same as manual posts** - there's no penalty.
What matters:
- **Timing:** Post when your audience is most active
- **Consistency:** Never miss your posting schedule
- **Quality:** Don't sacrifice content quality for convenience
Scheduling tools like [Genviral](https://genviral.io) help maintain consistency even when life gets busy. You create quality content once, schedule it strategically, and the algorithm rewards your reliability.
## Measuring What Actually Matters
### Track These Metrics
**Engagement signals:**
- Saves (strongest quality indicator)
- Shares/Sends (increasingly important in 2026)
- Comments
- Likes per reach
**Growth metrics:**
- Follower growth rate
- Reach (especially from non-followers)
- Profile visits
- Website clicks
### What Success Looks Like
**Months 1-3:** Focus on consistency, not results
**Months 4-6:** Identify patterns in what works
**Months 7-12:** Accelerate growth by scaling successful content
**Year 2+:** Compounding returns as older content continues performing
Remember: Instagram is a **long-term game**. Some Reels peak 6-12 months after posting.
## Industry-Specific Considerations
Optimal frequency varies by niche:
**E-commerce/Products:** 4-5 posts/week (more product showcases)
**Personal brands:** 3-4 posts/week (quality over quantity)
**Education/B2B:** 2-3 posts/week (deeper, valuable content)
**Entertainment:** 5-7 posts/week (high volume, trending content)
Find what works for YOUR audience and resources. If you've tried optimizing your frequency and still aren't seeing results, or if Instagram is negatively impacting your mental health, you may want to consider [temporarily deactivating or permanently deleting your account](https://www.genviral.io/blog/how-to-delete-instagram-account) as an alternative.
## The 2026 Algorithm Reality
Instagram's algorithm in 2026 prioritizes:
✅ **Regular engagement** (consistent posting signals active creator)
✅ **Varied content formats** (Reels, carousels, static posts)
✅ **Authentic storytelling** (algorithm favors genuine over polished)
✅ **Watch time** (especially for video content)
❌ **Generic content** (algorithm can detect low-effort posts)
❌ **Watermarked content** (TikTok logos get deprioritized)
❌ **Inconsistent posting** (gaps hurt more than slower frequency)
## Your Action Plan
**Week 1:** Audit current posting
- How often are you posting now?
- What's sustainable long-term?
- Which content types perform best?
**Week 2:** Set realistic targets
- 3 feed posts per week minimum
- Daily Stories (start with 1-2)
- 2 Reels per week
**Week 3:** Implement batch creation
- Pick your content creation day
- Create 1 week of content
- Schedule everything
**Week 4:** Analyze and adjust
- Review which posts performed best
- Identify patterns
- Refine strategy for next month
If profile visits are part of that review, remember that Instagram shows them as an aggregate performance signal, not a named list of profile viewers. For the privacy side, see [how to turn off profile views on Instagram](https://www.genviral.io/blog/how-to-turn-off-profile-views-on-instagram).
## The Bottom Line
The data is clear: **3-5 quality posts per week beats daily mediocre content every time**.
Instagram success in 2026 isn't about posting more than everyone else. It's about:
- Showing up consistently
- Creating content people actually want to engage with
- Building sustainable systems that prevent burnout
- Playing the long game (months and years, not days)
Start where you are. If you're currently posting 1x/week, aim for 2x. Already at 3x/week? Perfect - focus on improving quality, not adding quantity.
The creators winning on Instagram aren't necessarily posting the most - they're posting consistently, strategically, and sustainably.
---
## More Instagram Guides
- [How to Make a Reel on Instagram](https://www.genviral.io/blog/how-to-make-a-reel-on-instagram) - create Reels that get views
- [How to Repost a Story on Instagram](https://www.genviral.io/blog/how-to-repost-story-on-instagram) - share others' stories to your feed
- [How Many Photos Can You Post on Instagram](https://www.genviral.io/blog/how-many-photos-can-you-post-on-instagram) - posting limits explained
- [Switch to Personal Account on Instagram](https://www.genviral.io/blog/switch-to-personal-account-instagram) - personal vs business account differences
- [Hide Your Instagram Following List](https://www.genviral.io/blog/hide-instagram-following-list) - privacy controls for your account
- [How to Clear Instagram Cache](https://www.genviral.io/blog/how-to-clear-instagram-cache) - reclaim phone storage from the IG app
*Want to maintain consistent Instagram posting without the daily grind? [Genviral's Instagram Scheduler](https://www.genviral.io/instagram-scheduler) helps you schedule Reels and posts to keep your account active while you focus on creating great content.*
---
Canonical HTML: https://www.genviral.io/blog/how-often-should-you-post-on-instagram
# How to Add Admin to Facebook Page (Desktop & Mobile 2026)
- Add an admin via Settings - Page roles - enter their name or email - select Admin - click Add. The person must accept the invitation before gaining full admin access.
- Facebook has 5 role levels: Admin (full access), Editor (content and moderation), Moderator (comments and messages), Advertiser (ads only), and Analyst (insights only) - assign the minimum role needed.
- Every business Page should have at least two admins - if the sole admin loses account access, no one can manage the Page and recovery through Facebook support is slow and unreliable.
Adding an admin to your Facebook Page takes under a minute - but the person has to accept the invitation before their access kicks in. Here's the full process for both the classic Page Settings and Meta Business Suite.
## Why You Need Multiple Admins on Your Facebook Page
Having multiple administrators on your Facebook Page isn't just convenient - it's essential for business continuity and effective social media management.
**Key benefits of multiple admins:**
- **Business continuity** - Your page remains accessible if you're unavailable, on vacation, or lose account access
- **Shared workload** - Distribute content creation, community management, and customer service tasks
- **24/7 coverage** - Different team members can cover various time zones or shifts
- **Specialized skills** - Different admins can focus on content, advertising, analytics, or customer support
- **Security backup** - If one admin loses access, others can restore it
According to Facebook's best practices, every business page should have at least two administrators to prevent being locked out of your own page.
## Understanding Facebook Page Roles
Before adding an admin, you should understand the different page roles Facebook offers. Each role has specific permissions designed for different responsibilities.
### The 6 Facebook Page Roles:
**1. Admin** (Full Control)
- Manage all aspects of the Page
- Assign and remove other Page roles
- Edit Page settings and information
- Create, edit, and delete posts
- Respond to and delete comments/messages
- Create and manage ads
- View Page insights
- Delete the Page
**2. Editor**
- Edit Page information
- Create and delete posts
- Respond to and delete comments/messages
- Create ads
- View Page insights
- **Cannot:** Manage Page roles or settings
**3. Moderator**
- Respond to and delete comments/messages
- Create ads
- View Page insights
- **Cannot:** Create posts, edit Page information, or manage roles
**4. Advertiser**
- Create ads
- View Page insights
- **Cannot:** Create content, respond to messages, or edit Page settings
**5. Analyst**
- View Page insights only
- **Cannot:** Create content, manage ads, or interact with the community
**6. Jobs Manager** (if Jobs feature is enabled)
- Create and manage job posts
- View Page insights
- **Cannot:** Create regular posts or manage Page settings
For most businesses, you'll primarily use **Admin**, **Editor**, and **Moderator** roles.
## How to Add Admin to Facebook Page (Desktop)
Adding an admin through your desktop browser is the most common method. Here's the step-by-step process:
### Method 1: Via Page Settings (Traditional)
**Step 1:** Log into Facebook and navigate to your Page
- Click **Pages** in the left sidebar of your News Feed
- Select the Page you want to manage
**Step 2:** Access Page Settings
- Click **Settings** in the left sidebar of your Page
- You may need to scroll down to see this option
**Step 3:** Go to Page Roles
- In the left menu, click **Page Roles**
- You'll see existing Page roles listed
**Step 4:** Assign New Page Role
- Scroll to the **"Assign a New Page Role"** section
- Enter the person's name or email address in the search box
- If they're your Facebook friend, their name will appear in the dropdown
**Step 5:** Select Admin Role
- Click the dropdown menu (defaults to **Editor**)
- Select **Admin** from the list
**Step 6:** Add and Confirm
- Click **Add**
- Enter your Facebook password to confirm
- The person will receive a notification
**Step 7:** New Admin Accepts Invitation
- The invited person must accept the invitation
- Their name will appear under **"Existing Page Roles"** once accepted
- Until accepted, they'll show as **"Pending"**
### Method 2: Via Meta Business Suite
Meta Business Suite offers more advanced access control, especially if you manage multiple pages or work with agencies.
**Step 1:** Access Meta Business Suite
- Go to [business.facebook.com](https://business.facebook.com)
- Log in with your Facebook credentials
**Step 2:** Navigate to Settings
- Click **Settings** in the bottom-left corner
- This opens Business Settings
**Step 3:** Add People
- Click **People** in the left sidebar under "Users"
- Click **Add People** button
**Step 4:** Enter Email and Assign Role
- Enter the person's email address
- Select **Admin access** toggle
- Choose access level: **Full Control**, **Partial Access**, or **Task Access**
**Step 5:** Assign Assets
- Select which Facebook Pages they can access
- Choose permission levels for each asset
- Click **Invite**
**Step 6:** Person Accepts Invitation
- They'll receive an email invitation
- Must accept through email or Meta Business Suite
- Access is granted once they accept
## How to Add Admin to Facebook Page (Mobile)
The mobile app process is slightly different but equally straightforward.
### For iOS and Android:
**Step 1:** Open Facebook App
- Log into your account
- Switch to your Page (tap profile picture, select your Page)
**Step 2:** Access Settings
- Tap the **three horizontal lines** (menu icon)
- **iOS:** Bottom-right corner
- **Android:** Top-right corner
- Tap **Settings**
**Step 3:** Navigate to Page Access
- Scroll down to **"Page Setup"** section
- Tap **Page Access**
**Step 4:** Add New Admin
- Tap **Add New** at the top
- Search for the person by name or email
- Select them from the list
**Step 5:** Assign Admin Role
- Tap **Give Access**
- Select **Admin** from the role options
- Tap **Confirm**
**Step 6:** Confirm with Password
- Enter your Facebook password
- Tap **Continue**
**Step 7:** Wait for Acceptance
- The person receives a notification
- They must accept to gain admin access
## What Happens After Adding an Admin
Once you add someone as an admin, here's what they can do and what to expect:
**Immediate effects:**
- Admin receives notification via Facebook and email
- Shows as "Pending" under Existing Page Roles until accepted
- No access granted until invitation is accepted
**After acceptance:**
- Full admin access is activated immediately
- Can manage all Page aspects as described above
- Their actions appear in Page Management History
- Can add or remove other admins (including you)
**Important considerations:**
- Only current admins can assign new admins
- You must be Facebook friends or know their email
- Person must have a Facebook account
- Some features require two-factor authentication
- Admin can be from any country (no geographic restrictions)
- Note: Changing your personal profile name is separate from Page management
- For updating your account email, see [how to change email on Facebook](https://www.genviral.io/blog/how-to-change-email-on-facebook)
## How to Remove Admin from Facebook Page
It's equally important to know how to remove admin access when team members leave or roles change.
### Desktop Method:
1. Go to **Settings > Page Roles**
2. Find the person under **"Existing Page Roles"**
3. Click **Edit** next to their name
4. Click **Remove** at the bottom
5. Confirm with your password
### Mobile Method:
1. Go to **Settings > Page Access**
2. Find the person in the list
3. Tap their name
4. Tap **Remove**
5. Confirm the removal
**Security tip:** Remove admin access immediately when someone leaves your organization or no longer needs access to prevent unauthorized changes. For personal account privacy, learn [how to view blocked Facebook friends](https://www.genviral.io/blog/how-to-view-blocked-facebook-friends).
## Full Control vs. Partial Access vs. Task Access
If you're using Meta Business Suite, you'll see three access levels. Here's what they mean:
**Full Control:**
- Complete access to the Page
- Can manage settings, roles, and delete the Page
- View all Page data and insights
- Manage all connected assets
**Partial Access:**
- Limited to specific tasks
- Can manage content, ads, or community
- Cannot change Page settings or roles
- Cannot delete the Page
**Task Access:**
- Access via external tools only (like Meta Business Suite)
- No direct Facebook access to the Page
- Can perform specific assigned tasks
- Most restricted access level
## Common Issues and Solutions
### "I Can't See Page Roles Option"
**Possible reasons:**
- You're not currently an admin
- Page is managed through Meta Business Suite only
- You're viewing from mobile (try desktop)
**Solution:** Ask an existing admin to add you, or access via Meta Business Suite.
### "Person Hasn't Received Invitation"
**Possible reasons:**
- Wrong email address entered
- Invitation went to spam folder
- They don't check Facebook notifications regularly
**Solution:** Verify email address, ask them to check spam, or resend invitation.
### "Can't Add Non-Facebook Friend as Admin"
**Workaround:** Use their email address instead of searching by name. They don't need to be your Facebook friend if you know their email.
### "Missing Permissions on Business Suite"
**Solution:** Only users with Full Control can add people. Request access upgrade from Business Admin.
### "Two-Factor Authentication Required"
**What it means:** Facebook requires 2FA for security on Pages with significant reach or business assets.
**Solution:** Enable two-factor authentication in your Facebook account settings before accepting admin role.
## Best Practices for Managing Facebook Page Admins
**1. Minimum Two Admins**
Always have at least two trusted admins to prevent lockouts. Choose someone reliable who won't leave the organization.
**2. Use Appropriate Roles**
Don't give everyone admin access. Use Editor for content creators, Moderator for community managers, Advertiser for marketing staff.
**3. Regular Access Audits**
Review Page Roles quarterly. Remove inactive users or those who've changed positions.
**4. Document Admin Changes**
Keep a record of who has access and why. Track when admins are added or removed.
**5. Enable Two-Factor Authentication**
Require all admins to use 2FA. This significantly improves Page security.
**6. Use Meta Business Suite for Teams**
If managing multiple Pages or working with agencies, use Meta Business Suite for centralized control.
**7. Avoid Shared Login Credentials**
Never share Facebook passwords. Assign individual roles instead.
**8. Review Page Management History**
Check what actions admins have taken. Access via Settings > Page Transparency.
**9. Start with Limited Roles**
Give new team members Editor or Moderator roles first. Upgrade to Admin only after proving trustworthy.
**10. Establish Clear Responsibilities**
Define what each admin is responsible for (content, customer service, ads, etc.).
## Common Questions
**How many admins can I add to a Facebook Page?**
Facebook allows unlimited admins on a Page. However, best practice is to keep the number manageable (5-10 for most businesses) to maintain security and accountability.
**Can I add someone as admin without being Facebook friends?**
Yes. You can add anyone using their email address associated with their Facebook account. You don't need to be Facebook friends with them.
**What's the difference between adding via Page Settings vs. Meta Business Suite?**
Page Settings is simpler for single pages. Meta Business Suite offers advanced options like Full/Partial/Task access and is better for managing multiple pages or working with agencies. Both methods achieve the same admin access.
**Can an admin delete my Facebook Page?**
Yes. Any admin has the power to delete the Page. This is why you should only grant admin access to completely trusted individuals and regularly review who has access.
**How long does it take for admin access to activate?**
Admin access activates immediately after the person accepts the invitation. However, they must accept first - invitations don't automatically grant access.
**Can I add an admin if they don't have a Facebook account?**
No. Every admin must have their own Facebook account. You cannot grant admin access to someone without a Facebook profile.
**What happens if I remove myself as admin by accident?**
If other admins exist, they can re-add you. If you were the only admin, you'll need to contact Facebook Support to regain access. This is why having multiple admins is critical.
**Can I make someone admin of a Facebook Page I don't own?**
No. Only current admins can add new admins. If you're not an admin, you must ask an existing admin to either add the person or upgrade your role first.
**Do admins need to like the Page first?**
In most cases, no. However, some older Pages may require the person to like the Page before accepting admin access. This varies by Page setup.
**Can I schedule posts as an admin?**
Yes. Admins and Editors can schedule posts using Facebook's native scheduling feature or third-party tools like Meta Business Suite, Hootsuite, or Buffer.
## When to Use Each Facebook Page Role
Not everyone needs full admin access. Here's when to use each role:
**Use Admin when:**
- Person needs complete control (owner, CMO, social media director)
- Trusted long-term team member
- Need someone who can manage team access
- Backup admin for business continuity
**Use Editor when:**
- Content creators who need to publish
- Social media managers who handle daily posting
- Customer service reps who respond to messages
- Team members who manage ads but don't need settings access
**Use Moderator when:**
- Community managers who handle comments only
- Customer support who respond but don't create content
- Interns or junior staff who monitor engagement
**Use Advertiser when:**
- Marketing specialists who only run ads
- Agency partners managing paid campaigns
- Analytics staff who track ad performance
**Use Analyst when:**
- Data analysts who need insights only
- Executives who want to review performance
- Consultants who evaluate Page metrics
**Use Jobs Manager when:**
- HR staff who post job openings
- Recruiters managing hiring campaigns
- Talent acquisition teams
## The Bottom Line
Adding an admin to your Facebook Page is a straightforward process that takes less than 2 minutes. Whether you use the traditional Page Settings method or Meta Business Suite, the key is choosing the right people and assigning appropriate access levels.
**Remember the essentials:**
- Always have at least two admins for backup
- Use the minimum role necessary for each person's responsibilities
- Review and audit access regularly
- Enable two-factor authentication for all admins
- Remove access immediately when someone leaves
With proper admin management, your Facebook Page will remain secure, efficiently managed, and accessible even as your team changes over time. For monetizing your Page, see [how to make money with Facebook](https://www.genviral.io/blog/how-to-make-money-with-facebook). For more Facebook account management tips, see our guides on [where to find scheduled posts on Facebook](https://www.genviral.io/blog/where-to-find-scheduled-posts-on-facebook), [how to find drafts on Facebook](https://www.genviral.io/blog/how-to-find-drafts-on-facebook), [how to lock Facebook account](https://www.genviral.io/blog/how-to-lock-facebook-account), [how to change name on Facebook](https://www.genviral.io/blog/how-to-change-name-on-facebook), [how to see who shared my post on Facebook](https://www.genviral.io/blog/how-to-see-who-shared-my-post-on-facebook), and [how to comment anonymously on Facebook](https://www.genviral.io/blog/how-to-comment-anonymously-on-facebook).
---
*Looking to streamline your Facebook content management? [Genviral's Facebook Scheduler](https://www.genviral.io/facebook-scheduler) helps you schedule and publish Facebook posts seamlessly, making it easier for your entire admin team to collaborate on content strategy - whether you have 2 admins or 20.*
---
Canonical HTML: https://www.genviral.io/blog/how-to-add-admin-to-facebook-page
# How to Add Link to TikTok Bio (2026 Guide)
- To add a clickable link to your TikTok bio, you need either a Business account (no follower minimum) or 1,000+ followers on a Personal or Creator account.
- Go to Profile - Edit Profile - Website - paste your URL - Save. The link appears as a clickable element directly on your profile.
- If you don't meet either requirement, you can still paste a URL as plain bio text - it won't be clickable, but users can copy it manually.
Adding a clickable link to your TikTok bio requires meeting one of two eligibility conditions. Here's the full process and what to do if you don't qualify yet.
## Requirements to Add a Link to TikTok Bio
Before you can add a clickable link, you must meet **one** of these requirements:
**Option 1: Have a Business Account**
- Switch to a Business account (free)
- Get clickable link access immediately
- No follower requirement
**Option 2: Have 1,000+ Followers**
- Keep your personal/creator account
- Reach 1,000 followers
- Link option unlocks automatically
If you don't meet either requirement, you can still add a link as plain text in your bio - but it won't be clickable. Users would need to copy and paste it manually.
## How to Add a Link to TikTok Bio
Once you meet the requirements, adding a link takes less than a minute.
**Step 1:** Open the TikTok app
**Step 2:** Go to your Profile (tap the icon in the bottom right)
- For finding drafts, see [where to find TikTok drafts](https://www.genviral.io/blog/where-to-find-tiktok-drafts)
**Step 3:** Tap "Edit Profile"
**Step 4:** Find the "Website" field
- Scroll down to the Links section
- Tap "Add your website" or the Website field
**Step 5:** Paste your URL
- Enter the full URL including https://
- Example: https://yourwebsite.com
**Step 6:** Tap "Save"
**Done!** Your link now appears below your bio and is clickable for all visitors.
## How to Switch to a TikTok Business Account
If you have fewer than 1,000 followers, switching to a Business account is the fastest way to get a clickable link.
**Step 1:** Open TikTok and go to your Profile
**Step 2:** Tap the three lines (☰) in the top right corner
**Step 3:** Tap "Settings and privacy"
**Step 4:** Tap "Account"
**Step 5:** Tap "Switch to Business Account"
**Step 6:** Choose a category that describes your account
- Options include: Fashion, Food, Education, Entertainment, etc.
**Step 7:** Tap "Next" to confirm
**Done!** Your account is now a Business account. Go to Edit Profile to add your link.
### Business Account Trade-offs
**Pros:**
- Clickable bio link (no follower requirement)
- Access to analytics and insights
- Professional tools and features
- Contact button options
**Cons:**
- Limited access to some trending sounds
- Can't use certain copyrighted music
- May affect content reach (algorithm treats business accounts differently)
**Tip:** If music and trending sounds are critical to your content strategy, consider growing to 1,000 followers on a personal account instead. For account management, see [how to change TikTok account region](https://www.genviral.io/blog/how-to-change-tiktok-account-region).
## Why Can't I Add a Link to My TikTok Bio?
**Common reasons:**
**1. Personal account with under 1,000 followers**
- Solution: Switch to a Business account OR grow your following
**2. Trying to add link from desktop**
- The bio link feature only works in the TikTok mobile app
- You cannot add clickable links from a computer
**3. App needs updating**
- Update TikTok to the latest version in your app store
**4. Feature not available in your region**
- TikTok rolls out features gradually by country
- Some regions may not have access yet
**5. Link added before meeting requirements**
- If you added a link before reaching 1,000 followers, it may not be clickable
- Try removing and re-adding the link
**6. Account glitch**
- Log out and log back in
- Clear app cache
- Reinstall the app if needed
## Alternative: Add Link as Plain Text
If you can't add a clickable link yet, you can still include a URL in your bio description.
**How to do it:**
**Step 1:** Go to Profile → Edit Profile
**Step 2:** In the "Bio" text field, type your URL
**Step 3:** Save changes
**Result:** The link appears in your bio but isn't clickable. Users must copy and paste it manually.
**Tips for plain text links:**
- Keep the URL short and simple
- Use a custom short link (like bit.ly/yourname)
- Make it easy to remember and type
- Example: yoursite.com/tiktok
## Link-in-Bio Tools (For Multiple Links)
TikTok only allows **one** clickable link. To share multiple destinations, use a link-in-bio tool.
**How it works:**
1. Create a landing page with multiple links
2. Add that single landing page URL to your TikTok bio
3. Visitors click one link and see all your destinations
**Popular link-in-bio tools:**
- Linktree
- Stan Store
- Beacons
- Later's Linkin.bio
- Shorby
- Carrd
**What to include on your landing page:**
- Website/online store
- Other social media profiles
- Latest content (YouTube, blog, podcast)
- Products or services
- Newsletter signup
- Affiliate links
- Contact information
## Adding Links to TikTok Stories
If you have **10,000+ followers**, you can add clickable links directly to your TikTok Stories.
**How to add links to Stories:**
1. Create a TikTok Story
2. Tap the link icon
3. Add your URL
4. Post your Story
**Note:** This feature is only available to accounts with 10,000 or more followers. For accounts under 10,000 followers, the bio link is the only option for clickable links.
## Connecting Social Media Accounts
You can link your Instagram and YouTube accounts to your TikTok profile without meeting follower requirements.
**How to connect:**
**Step 1:** Go to Profile → Edit Profile
**Step 2:** Scroll to "Social" section
**Step 3:** Tap "Add Instagram" or "Add YouTube"
**Step 4:** Log in to verify your account
**Step 5:** Save changes
**Result:** Instagram and YouTube icons appear on your profile. Users can tap them to visit your other accounts.
## Tips for Optimizing Your Bio Link
**Best practices:**
✓ **Use a short, clean URL** - Avoid long, messy links. Use a branded short link if possible.
✓ **Make it mobile-friendly** - TikTok users are on mobile. Ensure your linked page loads fast and looks good on phones.
✓ **Use a clear call-to-action** - Tell viewers what to do: "Link in bio for the full tutorial" or "Shop the look - link in bio"
✓ **Update regularly** - Change your link based on current campaigns, new products, or timely content.
✓ **Track your clicks** - Use UTM parameters or link shorteners with analytics to see how many people click.
✓ **Send to a landing page** - Don't just link to your homepage. Send traffic to a specific page that matches your content.
✓ **Mention it in videos** - Remind viewers: "Check the link in my bio" to drive traffic.
## What to Link To
**Ideas for your bio link:**
**For creators:**
- YouTube channel
- Patreon or membership
- Merchandise store
- Email newsletter signup
- Portfolio or website
- Podcast
**For businesses:**
- Online store
- Product page
- Sale or promotion
- Lead capture page
- Booking/appointment page
- Contact form
**For affiliate marketers:**
- Affiliate product page
- Amazon storefront
- Comparison/review page
**For everyone:**
- Link-in-bio page with multiple destinations
## Common Questions
**Can I add a link without 1,000 followers?**
Yes, if you switch to a Business account. Business accounts can add a clickable link regardless of follower count. Alternatively, you can add a non-clickable link as plain text in your bio description.
**Can I add multiple links to my TikTok bio?**
No. TikTok only allows one clickable link in the Website field. To share multiple links, use a link-in-bio tool that creates a landing page with all your links.
**Why is my link not clickable?**
Your account may not meet the requirements (Business account or 1,000+ followers). Also, make sure you added the link in the "Website" field, not just the bio text. Links in the bio text appear as plain text only.
**Can I add a link from my computer?**
No. The bio link feature only works in the TikTok mobile app. You must use your phone to add or edit your clickable link.
**Does switching to a Business account affect my reach?**
Possibly. Some creators report that Business accounts have less access to trending sounds and may see different algorithm treatment. Test and see what works best for your content.
**Can I change my link anytime?**
Yes. You can update your bio link as often as you want. Go to Edit Profile → Website → Change the URL → Save.
**How do I track clicks on my bio link?**
TikTok doesn't provide detailed bio link analytics. Use a link shortener (like Bitly) or add UTM parameters to track clicks in Google Analytics.
**What happens if I switch back to a personal account?**
If you switch from Business to Personal and have fewer than 1,000 followers, you'll lose access to the clickable link feature.
**Can I link to any website?**
Yes, as long as it doesn't violate TikTok's community guidelines. You can link to websites, stores, social profiles, or any valid URL.
**Why does my link show as text, not clickable?**
You may have added the link to the wrong field (Bio text instead of Website field), or your account doesn't meet the requirements. Check that you're using the dedicated Website field and meet either the Business account or 1,000 follower threshold.
## The Bottom Line
Adding a link to your TikTok bio:
**Requirements (need ONE):**
- Business account (any follower count)
- Personal account with 1,000+ followers
**Steps:**
1. Open TikTok app (mobile only)
2. Go to Profile → Edit Profile
3. Tap "Website" or "Add your website"
4. Paste your URL
5. Save
**Key points:**
- Only one clickable link allowed
- Must use mobile app (not desktop)
- Use link-in-bio tools for multiple links
- 10,000+ followers can add links to Stories
- Plain text links work as a workaround (not clickable)
**Pro tip:** Don't waste your one link on a basic homepage. Send traffic to a dedicated landing page, product page, or link-in-bio tool that gives visitors clear next steps.
For more TikTok tips, see [how to make money with TikTok](https://www.genviral.io/blog/how-to-make-money-with-tiktok), [how to get Spark Code on TikTok](https://www.genviral.io/blog/how-to-get-tiktok-spark-code), [where to find TikTok drafts](https://www.genviral.io/blog/where-to-find-tiktok-drafts), [how to repost on TikTok](https://www.genviral.io/blog/how-to-repost-on-tiktok), [how to see saved videos on TikTok](https://www.genviral.io/blog/how-to-see-saved-videos-on-tiktok), [how to turn off profile views on TikTok](https://www.genviral.io/blog/how-to-turn-off-profile-views-on-tiktok), [how to block someone on TikTok](https://www.genviral.io/blog/how-to-block-someone-on-tiktok), [why can't I follow people on TikTok](https://www.genviral.io/blog/why-cant-i-follow-people-on-tiktok), and [how to delete your TikTok account](https://www.genviral.io/blog/how-to-delete-tiktok-account).
---
*Want to maximize your TikTok bio link? [Genviral](https://genviral.io) helps you plan and schedule content across TikTok, Instagram, Pinterest, and more - so you can drive consistent traffic to your bio link and turn viewers into followers and customers.*
---
Canonical HTML: https://www.genviral.io/blog/how-to-add-link-to-tiktok-bio
# How to Block Someone on TikTok (2026 Guide)
- To block: go to their profile, tap the Share arrow (top-right), select Block, and confirm. The blocked user is not notified.
- When blocked, they can't view your profile, videos, or comments, can't find you in search, and can't send messages - and you won't be able to see their content either.
- To bulk block commenters, long-press a comment, tap the author's username, and block directly from there - no need to visit each profile individually.
Blocking on TikTok is fast and completely private - the person you block is never notified. Here's how to block from a profile, a comment, or in bulk.
## How to Block Someone on TikTok (Mobile)
**Step 1:** Open TikTok app
**Step 2:** Go to the user's profile
- Search their username
- Or tap their profile from a video/comment
- Note: If you're having trouble following people, see [why can't I follow people on TikTok](https://www.genviral.io/blog/why-cant-i-follow-people-on-tiktok)
**Step 3:** Tap the Share arrow
- Top-right corner (looks like arrow pointing right)
- Or three dots (depending on app version)
**Step 4:** Tap "Block"
**Step 5:** Confirm by tapping "Block" again
**Done.** The user is now blocked.
## How to Block Someone on Desktop
**Step 1:** Go to tiktok.com
- Log in to your account
**Step 2:** Find the user's profile
- Search their username
- Or click their profile from a video
**Step 3:** Click three dots
- Top-right corner of their profile
**Step 4:** Click "Block"
**Step 5:** Confirm by clicking "Block" again
**That's it.** They're blocked from desktop too.
## How to Block Multiple People at Once (Bulk Blocking)
Block up to 100 accounts at once from your comments.
**Step 1:** Open one of your videos
**Step 2:** Tap "Comments"
**Step 3:** Long-press a comment
- Or tap pencil icon (top-left)
**Step 4:** Tap "Manage multiple comments"
**Step 5:** Select comments from accounts you want to block
- Up to 100 at a time
**Step 6:** Tap "More" (bottom menu)
**Step 7:** Tap "Block accounts"
**Step 8:** Confirm "Block accounts"
**Result:** All selected accounts are blocked instantly, and their comments disappear.
**Note:** Bulk blocking only works for users who have commented on YOUR videos.
## What Happens When You Block Someone?
**They cannot:**
- ❌ View your profile
- ❌ See your videos
- ❌ Comment on your posts
- ❌ Send you messages
- ❌ Find your account in search
- ❌ Tag or mention you
- ❌ Duet or Stitch your videos
- ❌ See your likes or comments on other videos
**You cannot:**
- ❌ See their profile or videos
- ❌ Find them in search
- ❌ Message them
**What stays:**
- Their old comments on your videos are hidden (not deleted)
- They might still appear in group chats or multi-host lives (but can't contact you directly)
## Does TikTok Notify When You Block Someone?
**No.** TikTok does NOT send a notification when you block someone.
**However, they might figure it out if:**
- They try to visit your profile (it appears blank)
- They search for you (you won't appear)
- They try to message you (can't send messages)
- Your videos disappear from their feed
**Bottom line:** No direct notification, but they can suspect if they look.
## How to See Who You've Blocked
**Step 1:** Go to Profile
**Step 2:** Tap menu (three lines, top-right)
**Step 3:** Tap "Settings and privacy"
- Note: Region settings may affect privacy features (see [how to change TikTok account region](https://www.genviral.io/blog/how-to-change-tiktok-account-region))
**Step 4:** Tap "Privacy"
**Step 5:** Tap "Blocked accounts"
**Here you'll see:**
- List of all blocked users
- Option to unblock any of them
## How to Unblock Someone
**Method 1: From their profile**
**Step 1:** Go to their profile
- You can still access it via old links or DMs
**Step 2:** Tap Share arrow or three dots
**Step 3:** Tap "Unblock"
**Done.** They can now interact with you again.
**Method 2: From blocked list**
**Step 1:** Settings → Privacy → Blocked accounts
**Step 2:** Find the user
**Step 3:** Tap "Unblock" next to their name
**Result:** They're unblocked immediately.
**Note:** After unblocking, they don't automatically follow you again. They must follow you again manually.
## When to Block Someone on TikTok
**Block if someone is:**
- Harassing or bullying you
- Sending spam or scam messages
- Leaving hateful comments
- Stalking or making you uncomfortable
- Impersonating you or others
- Posting inappropriate content
- Being persistently negative
- Someone you simply don't want viewing your content (ex, coworker, etc.)
**Your safety and comfort come first.** Don't hesitate to block.
## Alternatives to Blocking
If blocking feels too extreme:
### 1. Mute
- Go to their profile → Three dots → "Mute"
- Their videos won't appear in your feed
- They can still view and interact with your content
- They won't know you muted them
### 2. Restrict Comments
- Settings → Privacy → Comments
- Choose "Friends" or "No one"
- Limits who can comment on your videos
### 3. Filter Comments
- Settings → Privacy → Filters
- Add keywords to auto-filter comments
- Helps reduce spam and negativity
### 4. Make Account Private
- Settings → Privacy → Private account (toggle on)
- Only approved followers see your content
- You control who follows you
- For managing your saved content, see [how to see saved videos on TikTok](https://www.genviral.io/blog/how-to-see-saved-videos-on-tiktok)
### 5. Report
- If someone violates TikTok's guidelines
- Tap three dots → "Report"
- TikTok reviews and may ban them
## Can You Block Someone Who Doesn't Follow You?
**Yes.** You can block anyone on TikTok.
- Don't need to follow them
- They don't need to follow you
- Works for strangers, spam accounts, anyone
**Just visit their profile and block.**
## What If You Can't Find Someone to Block?
**If they blocked you first:**
- You won't find them in search
- Their profile appears blank to you
**Workaround:**
1. Use a different account or ask a friend
2. Find their profile
3. Copy their profile URL
4. Paste URL in browser while logged into your account
5. Block them from there (if profile loads)
**Or:** If you have old messages, block from DM thread.
## Blocking Limits
**Individual blocks:**
- Can block up to 10,000 total accounts
**Bulk blocking:**
- Can block up to 100 accounts at once
- Only from your video comments
- Can repeat this multiple times
**If you hit the limit:**
- Unblock old accounts you no longer need blocked
- Then block new ones
## Troubleshooting
**Block button not working:**
- Update TikTok to latest version
- Check internet connection
- Restart app
- Try desktop instead of mobile (or vice versa)
- For managing your unpublished content, see [where to find TikTok drafts](https://www.genviral.io/blog/where-to-find-tiktok-drafts)
**Can't find Block option:**
- Look under Share arrow (not three dots)
- TikTok changed UI - update app
- On desktop, check three-dot menu
**Block didn't work:**
- Confirm you tapped "Block" twice (confirmation step)
- Refresh profile to check
- Visit Blocked list to verify
**Person you blocked still appears:**
- May take a moment to update
- Restart app
- Their old content may still be cached
## Common Questions
**Can someone see if I blocked them?**
No direct notification, but they'll notice if they try to view your profile or interact with you.
**Can I block someone without visiting their profile?**
Yes. Use bulk blocking from comments, or block from DMs if you have a message thread.
**What happens to my comments on their videos?**
Your comments remain visible to others, but you won't see their videos anymore.
**Can blocked users still see my comments on other people's videos?**
No. Blocked users can't see your activity anywhere on TikTok.
**Does blocking remove their followers from my account?**
No. If they followed you before blocking, you'll need to manually remove them from your followers list.
**Can I block someone temporarily?**
Yes. Block them, then unblock when ready. There's no "temporary block" feature, but you can unblock anytime.
**Will blocking stop them from downloading my videos?**
It prevents them from seeing your videos, but if they already downloaded them before blocking, those copies remain on their device.
**Can blocked users create a new account to view my content?**
Yes. Blocking only affects the specific account. If your profile is public, new accounts can see your content. Consider making your account private. For creating your own content, see [how to make a slideshow on TikTok PC](https://www.genviral.io/blog/how-to-make-a-slideshow-on-tiktok-pc).
**Does TikTok notify me when someone I blocked tries to view my profile?**
No. You won't receive any notifications about blocked users' attempts to access your profile.
**How long does blocking last?**
Forever, until you manually unblock them.
## The Bottom Line
Blocking on TikTok:
**Mobile:** Profile → Share arrow → Block → Confirm
**Desktop:** Profile → Three dots → Block → Confirm
**Bulk:** Comments → Manage multiple → Select → Block accounts
**Key points:**
- No notification sent to blocked person
- They can't view or interact with you
- Can block up to 10,000 accounts total
- Can bulk block 100 at once from comments
- Unblock anytime from Settings or their profile
Use blocking to protect your privacy, reduce negativity, and create a safer TikTok experience. If you also want to browse profiles without joining TikTok's mutual viewer list, see [how to turn off profile views on TikTok](https://www.genviral.io/blog/how-to-turn-off-profile-views-on-tiktok). For adding a link to your bio, see [how to add link to TikTok bio](https://www.genviral.io/blog/how-to-add-link-to-tiktok-bio). For sharing others' videos, see [how to repost on TikTok](https://www.genviral.io/blog/how-to-repost-on-tiktok). For creating AI-generated images for your content, see [how to create TikTok slideshow images with AI](https://www.genviral.io/blog/create-tiktok-slideshow-images-with-ai). For growth strategies, see [TikTok growth strategies for SaaS](https://www.genviral.io/blog/tiktok-growth-strategies-for-saas), and for targeting specific audiences, see [how to target US users on TikTok](https://www.genviral.io/blog/target-us-users-on-tiktok). Also consider learning [how to get a TikTok Spark Code](https://www.genviral.io/blog/how-to-get-tiktok-spark-code) and [how to make money with TikTok](https://www.genviral.io/blog/how-to-make-money-with-tiktok) to socialize and monetize your best content. If blocking isn't enough and you'd rather start over, see [how to delete your TikTok account](https://www.genviral.io/blog/how-to-delete-tiktok-account).
---
*Need help managing your social media presence across platforms? [Genviral](https://genviral.io) helps you schedule and manage content on TikTok, Instagram, Facebook, and more-keeping your accounts organized and your community engaged.*
---
Canonical HTML: https://www.genviral.io/blog/how-to-block-someone-on-tiktok
# How to Change Email on Facebook (2026 Quick Guide)
- The full path is: Settings and Privacy - Settings - Accounts Center - Personal Details - Contact Info - Add email - Verify via confirmation email - Set as Primary - Remove old email (optional).
- You must verify the new email before setting it as primary - and you can't remove your only email without first adding and verifying a replacement.
- Changing your email doesn't affect any account content, friends, groups, or Page admin access - only the login email address and notification destination change.
Changing your Facebook email takes about two minutes and runs entirely through the Accounts Center. Here's the complete process for both desktop and mobile.
## Desktop: How to Change Email on Facebook
**Step 1:** Go to facebook.com and log in
**Step 2:** Click your profile picture (top-right)
**Step 3:** Click "Settings & Privacy"
**Step 4:** Click "Settings"
- Note: For other account changes, see [how to change name on Facebook](https://www.genviral.io/blog/how-to-change-name-on-facebook)
**Step 5:** Click "Accounts Center"
- In the left menu or center of page
**Step 6:** Click "Personal Details"
**Step 7:** Click "Contact Info"
**Step 8:** Click "Add email address"
**Step 9:** Enter your new email
- Type carefully
- Must be an email you can access
**Step 10:** Click "Add"
**Step 11:** Check your email inbox
- Facebook sends verification email
- Open it and click confirmation link
**Step 12:** Set as primary email (recommended)
- Return to Contact Info
- Click the new email
- Select "Make Primary"
**Step 13:** Remove old email (optional)
- Click old email
- Click "Remove"
- Confirm deletion
**Done.** Your new email is now active.
## Mobile: How to Change Email on Facebook
### On iPhone/Android:
**Step 1:** Open Facebook app
**Step 2:** Tap menu icon (☰)
- **iOS:** Bottom-right corner
- **Android:** Top-right corner
**Step 3:** Scroll and tap "Settings & Privacy"
**Step 4:** Tap "Settings"
**Step 5:** Tap "Accounts Center"
**Step 6:** Tap "Personal Details"
- Under "Account Settings"
**Step 7:** Tap "Contact Info"
**Step 8:** Tap "Add email address"
**Step 9:** Enter new email and tap "Add"
**Step 10:** Verify via email
- Check inbox
- Tap confirmation link
**Step 11:** Set as primary
- Go back to Contact Info
- Tap new email
- Tap "Make Primary"
**Step 12:** Remove old email (optional)
- Tap old email
- Tap "Remove"
**Done.**
## What is "Primary Email"?
Your **primary email** is:
- The email used to **log in** to Facebook
- Where Facebook sends **important notifications**
- Used for **password resets**
- The main contact for **account recovery**
**You must have at least one primary email.** You can't remove it unless you add and set a new one first.
## How to Set an Email as Primary
After adding a new email:
**Step 1:** Go to Contact Info (Settings → Accounts Center → Personal Details → Contact Info)
**Step 2:** Click/tap on the new email
**Step 3:** Select "Make Primary"
**Step 4:** Confirm
**Your primary email is now changed.**
## How to Remove an Old Email
**Important:** You can only remove an email if:
- ✓ It's NOT your primary email
- ✓ You have another verified email on the account
**Steps:**
**Step 1:** Go to Contact Info
**Step 2:** Find the email you want to remove
**Step 3:** Click/tap "Remove" next to it
**Step 4:** Confirm removal
**Note:** You must have access to the email to remove it (Facebook may send a verification code).
## What if I Can't Access My Old Email?
This is a common problem. Here's what to do:
### If you can still log in to Facebook:
**Step 1:** Add a new email (follow steps above)
**Step 2:** Verify the new email
**Step 3:** Set new email as primary
**Step 4:** Try removing old email
- If Facebook asks for verification code from old email
- AND you can't access it
- The old email may stay on your account
**Workaround:** As long as your new email is primary, the old one won't be used for login or notifications. It can stay listed without causing issues.
### If you CAN'T log in to Facebook:
**Step 1:** Go to facebook.com/login
**Step 2:** Click "Forgot Password?"
**Step 3:** Select "No longer have access to these?"
**Step 4:** Choose recovery method:
- Phone number
- Full name + friend help
- Government ID upload
**Step 5:** Follow Facebook's identity verification process
This is more complex and may take several days.
## Can I Use the Same Email for Multiple Facebook Accounts?
**No.** Each Facebook account requires a unique email address.
**If you try to add an email already in use:**
- Facebook will show an error
- "This email is already associated with another account"
- You must use a different email
**Workaround:** Use email aliases if your provider supports them (e.g., Gmail's "+" feature).
## Common Issues and Solutions
**Problem: "Email is already in use"**
**Meaning:** This email is linked to another Facebook account.
**Solutions:**
- Remove it from the other account first
- Use a different email
- Use an email alias (Gmail: youremail+fb@gmail.com)
**Problem: "Didn't receive verification email"**
**Solutions:**
- Check spam/junk folder
- Wait 10-15 minutes (emails can be delayed)
- Check you typed the email correctly
- Try "Resend confirmation email" option
- Add noreply@facebook.com to contacts
**Problem: "Can't remove old email"**
**Reasons:**
- It's your primary email (change primary first)
- It's your only email (add another first)
- Need verification code from that email
**Solution:** Add new email → set as primary → then remove old one
**Problem: "Changes not saving"**
**Solutions:**
- Clear browser cache/cookies
- Update Facebook app
- Try desktop instead of mobile (or vice versa)
- Log out and log back in
- Try different browser
## Security Best Practices
**Recommended:**
✓ Use a secure email you access regularly
✓ Enable two-factor authentication
✓ Use a strong, unique password
✓ Add backup email/phone number
✓ Keep contact info updated
✓ For additional privacy protection, see [how to lock your Facebook account](https://www.genviral.io/blog/how-to-lock-facebook-account)
**Avoid:**
❌ Using temporary/disposable emails
❌ Sharing your Facebook password
❌ Using same password across accounts
❌ Using work email (if you might lose access)
❌ Ignoring security notifications
- For managing who can interact with you, see [how to view blocked Facebook friends](https://www.genviral.io/blog/how-to-view-blocked-facebook-friends)
- For finding draft posts, see [how to find drafts on Facebook](https://www.genviral.io/blog/how-to-find-drafts-on-facebook)
## Will Changing Email Affect My Account?
**What STAYS the same:**
✓ All your friends
✓ All your posts and photos
✓ Your profile information
✓ Your Page admin access (for managing Pages, see [how to add admin to Facebook Page](https://www.genviral.io/blog/how-to-add-admin-to-facebook-page))
✓ Your groups and memberships
✓ Your messages
**What CHANGES:**
- Login email address
- Where notifications are sent
- Password reset email
- Account recovery email
**Your account remains exactly the same.** Only the contact email changes.
## Common Questions
**How long does it take to change my email?**
Instant once you verify the new email. The verification email usually arrives within minutes.
**Will my friends be notified?**
No. Changing your email is completely private. No notifications are sent.
**Can I add multiple emails to my Facebook account?**
Yes. You can add multiple emails but only one can be primary (used for login).
**Do I need to change my password when changing email?**
No, but it's a good security practice to update your password periodically.
**Can I change my email if I forgot my password?**
Only if you can still log in. If you're locked out, use "Forgot Password" first.
**What happens to notifications sent to my old email?**
Once you remove the old email, notifications will only go to your new primary email.
**Can I change my Facebook email without access to the old one?**
Yes, as long as you can still log in. Add and verify a new email, then set it as primary.
**How do I know which email is my primary email?**
Go to Contact Info in settings. The primary email is marked as "Primary" or has a star/badge.
**Can I use a phone number instead of an email?**
Yes. Facebook allows you to use a phone number as your primary login method.
**Will this affect my Messenger?**
No. Messenger is linked to your Facebook account, not your email. Everything stays the same.
## The Bottom Line
Changing your email on Facebook is straightforward:
1. **Add** new email (Settings → Accounts Center → Personal Details → Contact Info)
2. **Verify** via confirmation email
3. **Set as primary** (recommended)
4. **Remove** old email (optional)
**Key reminders:**
- You must verify new email before setting it as primary
- You can't remove your only email
- Changes are instant after verification
- Your account and content remain unaffected
Keep your contact information updated for account security and easy recovery if you ever get locked out. For monetizing your presence, see [how to make money with Facebook](https://www.genviral.io/blog/how-to-make-money-with-facebook). For managing your Facebook content, see our guides on [where to find scheduled posts on Facebook](https://www.genviral.io/blog/where-to-find-scheduled-posts-on-facebook), [how to see who shared my post on Facebook](https://www.genviral.io/blog/how-to-see-who-shared-my-post-on-facebook), and [how to comment anonymously on Facebook](https://www.genviral.io/blog/how-to-comment-anonymously-on-facebook).
---
*Managing your Facebook presence along with other social platforms? [Genviral's Facebook Scheduler](https://www.genviral.io/facebook-scheduler) helps you schedule content, track engagement, and manage multiple accounts - all from one dashboard, saving you hours each week.*
---
Canonical HTML: https://www.genviral.io/blog/how-to-change-email-on-facebook
# How to Change Name on Facebook (Desktop & Mobile 2026)
- Change your name at Settings and Privacy - Settings - Account Center - Personal details - Name. You can only change it once every 60 days, so double-check spelling before confirming.
- Facebook requires your name to reflect your real identity - nicknames, titles, symbols, and random characters all violate name policy and can result in an account review or restriction.
- The change takes effect immediately but your profile URL (facebook.com/yourname) does not update automatically when you change your display name.
Changing your Facebook name takes effect immediately through the Accounts Center, but you're limited to once every 60 days - so make sure you get it right.
## Why You Might Need to Change Your Facebook Name
Life changes, and your Facebook name should reflect who you are today. Common reasons people change their Facebook name include:
**Legal name changes:**
- Marriage or divorce (updating to spouse's name or reverting to maiden name)
- Legal name change through courts
- Adoption
- Gender transition
**Personal preferences:**
- Started using a different version of your name (e.g., Michael to Mike)
- Want to use your middle name
- Correcting spelling errors from when you first created your account
- Updating to a name you're commonly known by
**Professional reasons:**
- Separating professional identity from personal
- Matching your name across business platforms
- Brand consistency for content creators
**Privacy concerns:**
- Making yourself less searchable
- Protecting against harassment or stalking
- Using a safer variation of your real name
- For additional privacy protection, see [how to view blocked Facebook friends](https://www.genviral.io/blog/how-to-view-blocked-facebook-friends)
Whatever your reason, Facebook's name change process is straightforward - but it comes with strict policies and limitations you need to understand first.
## Facebook's Name Policy: What You Need to Know
Before changing your name, you must understand Facebook's naming rules. Facebook requires users to use their "authentic name" - the name they go by in everyday life.
### What Facebook Allows:
✅ **Your real name** or the name you're commonly known by in daily life
✅ **Name variations** that are authentic (Mike instead of Michael)
✅ **Cultural name variations** (different scripts for the same name)
✅ **Legitimate nicknames** as alternate names (shown in parentheses)
✅ **Maiden names** as alternate names
✅ **Professional names** as alternate names (stage names, pen names)
✅ **Middle names** included in your full name
### What Facebook Prohibits:
❌ **Symbols** (!@#$%^&*)
❌ **Numbers** (except in legitimate names)
❌ **Unusual capitalization** (tYLeR, JOHN)
❌ **Repeated characters** (Juuuliaaaa)
❌ **Punctuation** used incorrectly
❌ **Titles** (Dr., Prof., Mr., Mrs.)
❌ **Phrases or random words** instead of names
❌ **Fake names** or impersonations
❌ **Offensive words**
❌ **Characters from multiple languages** mixed together (unless authentic)
### The 60-Day Rule (Critical Limitation)
**You can only change your name once every 60 days.**
This is Facebook's most important restriction. If you make a spelling error or change your mind, you'll have to wait the full 60 days to correct it. There are NO exceptions to this rule - even if you made a genuine mistake.
**Why this matters:** Double-check everything before hitting "Save Changes." One typo means waiting two months to fix it.
## How to Change Your Name on Facebook (Desktop)
The desktop method gives you the most control and clearest view of your changes.
### Step-by-Step Process:
**Step 1:** Log into Facebook
- Go to [facebook.com](https://facebook.com)
- Enter your login credentials
**Step 2:** Access Settings
- Click your **profile picture** in the top right corner
- Click **Settings & Privacy**
- Select **Settings**
**Step 3:** Navigate to Account Center
- In the left sidebar, click **Account Center**
- Under "Account Settings," click **Personal details**
- Note: To change your email address, see [how to change email on Facebook](https://www.genviral.io/blog/how-to-change-email-on-facebook)
**Step 4:** Select Your Profile
- Click **Profiles**
- Select your Facebook profile from the list
- If you have Instagram or other Meta accounts, they'll appear here too
**Step 5:** Edit Your Name
- Click **Name**
- You'll see fields for:
- **First name** (required)
- **Middle name** (optional)
- **Last name** (required)
- Enter your new name
**Step 6:** Review Change
- Click **Review Change**
- Facebook will show you a preview of how your new name will appear
- Carefully check for spelling errors
**Step 7:** Confirm with Password
- Enter your Facebook password in the popup
- This security step confirms you're the account owner
**Step 8:** Save Changes
- Click **Save Changes**
- Your name will update within minutes (sometimes instantly)
**Step 9:** Wait for Approval (If Required)
- Most name changes are approved immediately
- If Facebook flags your name as unusual, it may require review
- You'll receive a notification if additional verification is needed
## How to Change Your Name on Facebook (Mobile)
The mobile app process is nearly identical but with a slightly different navigation path.
### For iOS (iPhone/iPad):
**Step 1:** Open Facebook App
- Launch the Facebook app
- Make sure you're logged in
**Step 2:** Access Menu
- Tap the **three horizontal lines** (☰) in the bottom-right corner
**Step 3:** Open Settings
- Scroll down and tap **Settings & Privacy**
- Tap **Settings**
**Step 4:** Go to Account Center
- Tap **See more in Accounts Center** under "Account settings"
- Tap **Personal details**
**Step 5:** Select Your Profile
- Tap **Profiles**
- Select your Facebook profile
**Step 6:** Edit Name
- Tap **Name**
- Enter your new first name, middle name (optional), and last name
- Tap **Review Change**
**Step 7:** Confirm and Save
- Enter your password when prompted
- Tap **Save Changes**
### For Android:
**Step 1:** Open Facebook App
- Launch the Facebook app
**Step 2:** Access Menu
- Tap the **three horizontal lines** (☰) in the top-right corner
**Step 3:** Navigate to Settings
- Tap **Settings & Privacy**
- Tap **Settings**
**Step 4-7:** Follow Same Steps as iOS
- The remaining steps are identical to iPhone instructions
- Navigate to Account Center > Personal details > Profiles > Name
- Make changes, review, enter password, and save
## What Happens After You Change Your Name
Once you submit your name change, here's what to expect:
**Immediate effects:**
- Your new name appears on your profile (usually instantly)
- Your new name shows in friends' News Feeds
- Your new name appears in search results
**What stays the same:**
- Your Facebook username (URL) does NOT automatically change
- Your Page names are NOT affected (those must be changed separately)
- Your messages show your new name retroactively
- Your previous posts and comments update to show your new name
- Your 60-day waiting period begins
**Friend notifications:**
- Friends are NOT directly notified of your name change
- However, they'll see your new name when viewing your profile or seeing your posts
- There's no announcement or notification sent
**Search visibility:**
- People can find you by your new name immediately
- Your old name may still appear in Facebook's search cache for a short time
## Facebook Name Verification: If You're Asked for ID
Facebook may require you to verify your identity if:
- Your name seems unusual to their system
- You've changed your name multiple times
- Your name contains uncommon characters
- Facebook's AI flags your name as potentially fake
- Someone reports your profile
### Accepted Forms of Identification:
**Government-issued IDs (1 document required):**
- Passport
- Driver's license
- National ID card
- State ID card
- Birth certificate
- Green card
- Immigration documents
**Non-government IDs (2 documents required if no government ID):**
- School/college ID with photo
- Library card
- Work ID badge
- Professional license or certificate
- Yearbook photo
- Utility bill showing your name
- Bank statement
- Marriage certificate
- Name change certificate
- Military ID
- Medical records
- Social welfare card
**Requirements for ID submission:**
- Must clearly show your name
- At least one ID should show your photo or date of birth
- Name on ID must match the name you're requesting
- Document must be valid (not expired)
- Photo/scan must be clear and readable
- All four corners must be visible
- No glare or blurriness
- For finding draft posts, see [how to find drafts on Facebook](https://www.genviral.io/blog/how-to-find-drafts-on-facebook)
### How to Submit ID for Verification:
1. Facebook will prompt you with a verification request
2. Click the verification link in the notification
3. Select your document type
4. Take a clear photo or upload a scan
5. Submit for review
6. Wait 24-48 hours for Facebook to review
7. You'll receive notification once approved
**Pro tip:** Use your phone camera (not computer webcam) for better quality. Place ID on a dark surface for contrast, ensure good lighting, and avoid glare.
## How to Add a Nickname or Alternate Name
If you don't want to fully change your primary name, Facebook allows you to add alternate names that appear in parentheses.
### Types of Alternate Names You Can Add:
- **Nickname** - What friends call you (e.g., Mike, Liz, TJ)
- **Maiden name** - Your name before marriage
- **Birth name** - Your name at birth (if legally changed)
- **Professional name** - Stage name, pen name, business name
- **Name in another language** - Different script version
- **Former name** - A previous legal name
- **Alternate spelling** - Different spelling of your name
- **Name with title** - Academic or professional title
### How to Add an Alternate Name:
**Desktop:**
1. Go to your profile
2. Click **About**
3. Click **Details About You**
4. Under "Other Names," click **Add a nickname, a birth name...**
5. Select the **name type** from the dropdown
6. Enter your alternate name
7. Check **Show at top of profile** (optional)
8. Enter your password
9. Click **Save Changes**
**Mobile:**
1. Go to your profile
2. Tap **About**
3. Scroll to **Details About You**
4. Tap **Add a nickname, a birth name...**
5. Select name type and enter the alternate name
6. Choose visibility options
7. Save changes
**How alternate names appear:**
- Your primary name: **John Smith**
- With alternate name: **John Smith (Johnny)**
**Benefits of alternate names:**
- People can find you by multiple names in search
- You maintain your legal name as primary
- No 60-day waiting period for alternate names
- Can add up to 50 alternate names
- Each can have different visibility settings
## Common Issues and How to Fix Them
### Issue 1: "You Can't Change Your Name Right Now"
**Cause:** You changed your name within the last 60 days.
**Solution:** Wait until 60 days have passed since your last name change. Check your name change history in your Activity Log. There are no exceptions or workarounds.
### Issue 2: "This Name Isn't Allowed"
**Causes:**
- Contains symbols or numbers
- Uses titles (Dr., Mr., Mrs.)
- Has unusual capitalization
- Contains offensive words
- Doesn't follow Facebook's name policy
**Solution:** Revise your name to follow Facebook's guidelines. Remove any prohibited elements and try again.
### Issue 3: "Please Confirm Your Identity"
**Cause:** Facebook needs to verify you're using your real name.
**Solution:** Upload a clear government-issued ID or two non-government IDs showing your name. Make sure the name on your ID matches exactly what you're trying to change your name to.
### Issue 4: ID Was Rejected
**Common reasons IDs are rejected:**
- Photo is blurry or unclear
- Name on ID doesn't match requested name exactly
- ID is expired
- Wrong document type selected
- Portions of ID are cut off or obscured
- Glare makes text unreadable
**Solution:** Take a better quality photo using these tips:
- Use phone camera, not computer webcam
- Place ID on dark flat surface
- Ensure all four corners are visible
- Turn off flash to reduce glare
- Make sure text is sharp and readable
- Submit correct document type
### Issue 5: Name Change Still Pending Review
**Cause:** Facebook is manually reviewing your request.
**Solution:** Wait 24-48 hours. Check for notifications from Facebook. If no response after 3 days, try submitting different documentation.
### Issue 6: Can't Find Name Settings in App
**Cause:** App interface may vary based on updates.
**Solution:**
- Update Facebook app to latest version
- Use desktop site if mobile isn't working
- Try Settings & Privacy > Settings > Personal details
- Look for "Account Center" in settings
### Issue 7: Changed Name by Mistake
**Cause:** Typo or incorrect name entered.
**Solution:** Unfortunately, you must wait 60 days to change it again. There is no immediate fix. This is why reviewing before saving is critical.
## Name Change vs. Username Change
Many people confuse Facebook name with Facebook username. They're different:
**Facebook Name:**
- Your full name displayed on your profile
- What people see when you comment or post
- Appears in search results
- Subject to 60-day limit
**Facebook Username:**
- Part of your profile URL (facebook.com/username)
- Also called your @name
- Used for tagging and mentions
- Can be changed more frequently
- Must be unique across Facebook
**To change your username:**
1. Go to Settings > Username
2. Enter a new username
3. Check if it's available
4. Save changes
Changing your name does NOT automatically change your username. You must change them separately.
## Special Considerations
### For Businesses and Pages
**Personal profiles:** This guide covers personal profile name changes only.
**Business Pages:** Page name changes follow different rules:
- Go to Page Settings > Page Info
- Edit Page Name
- Subject to approval and different restrictions
- May require verification of business legitimacy
### For People with Unique Names
If you have a name from a non-Western culture or a name that includes:
- Characters from non-Latin alphabets
- Legitimate single names (mononyms)
- Names with apostrophes or hyphens
Facebook should accept these if they're authentic. If rejected, you may need to provide ID verification.
### For Trans and Non-Binary Individuals
You have the right to use your chosen name on Facebook, even if it doesn't match your legal documents yet. However:
- Facebook may require verification
- You can explain your situation when submitting ID
- Consider adding your legal name as an alternate name (hidden) temporarily
- Once you have updated legal documents, submit those
### For Recently Married or Divorced
**After marriage:**
- You can update to your spouse's name
- May need to provide marriage certificate
- Consider adding maiden name as alternate name
**After divorce:**
- You can revert to maiden name
- May need divorce decree or legal name change documentation
### For People Using Stage Names
Performers, writers, and creators can:
- Keep legal name as primary
- Add stage name as alternate/professional name
- Or change primary name to stage name (may require verification)
- Consider creating a separate Facebook Page for your professional persona
## Best Practices for Changing Your Facebook Name
**1. Choose Wisely**
You only get one change every 60 days. Make it count.
**2. Review Three Times**
Check spelling, capitalization, and spacing before saving. One typo means a 60-day wait.
**3. Have ID Ready**
If Facebook might flag your name as unusual, have your ID scanned and ready to submit.
**4. Consider Alternate Names First**
If you just want friends to find you by a nickname, add it as an alternate name instead of changing your primary name.
**5. Change Username Too**
If you want your URL to match your new name, remember to change your username separately.
**6. Update Other Platforms**
If changing for consistency, don't forget to update Instagram, LinkedIn, Twitter, etc.
**7. Check Name in Search**
After changing, search for yourself to see how your name appears to others.
**8. Be Patient with Verification**
If asked for ID, the process takes 24-48 hours. Don't repeatedly submit documents.
**9. Keep Legal Documentation Handy**
Marriage certificates, divorce decrees, or court name change orders may be needed.
**10. Don't Fight the 60-Day Rule**
There's no workaround. If you need to change again, you must wait the full 60 days.
## Common Questions
**How many times can I change my name on Facebook?**
Unlimited times over your lifetime, but only once every 60 days. Each change starts a new 60-day waiting period. There are no exceptions to this rule.
**Will my friends be notified when I change my name?**
No. Facebook does not send notifications to friends when you change your name. However, they'll see your new name when viewing your profile, posts, or comments.
**Can I use a nickname as my main Facebook name?**
Yes, if it's a name you're commonly known by in daily life. However, it's often better to add nicknames as alternate names and keep your legal name as your primary name.
**What happens to my old posts after I change my name?**
All your old posts, comments, and messages automatically update to show your new name. There's no way to keep your old name on previous content.
**Can I change my name if I don't have an ID?**
If Facebook requires verification, you'll need ID. However, most name changes don't require verification. If you truly don't have any accepted forms of ID, you may not be able to change your name on Facebook.
**Does changing my name change my Facebook URL?**
No. Your Facebook username (part of your URL) is separate and must be changed independently in Settings > Username.
**Can I change my name more frequently than every 60 days?**
No. The 60-day rule is absolute. Even Facebook support cannot override this limitation. Plan your name change carefully.
**What if my name change is rejected?**
Review Facebook's name policy, ensure your name follows all guidelines, and try again. If rejected again, you may need to submit ID verification or choose a different name that complies with policies.
**Can I hide my real name and use only a nickname?**
No. Facebook requires your primary name to be your authentic name. You can add nicknames as alternate names, but your real name must remain your primary name.
**What if my legal name has changed but my ID hasn't been updated yet?**
You can submit other legal documentation like a marriage certificate, divorce decree, or court order for name change. Include a note explaining your situation.
## The Bottom Line
Changing your name on Facebook is a straightforward process that takes less than 5 minutes. The most important things to remember are:
- **Review carefully** before saving (60-day rule means no quick corrections)
- **Follow Facebook's name policy** (authentic names only, no symbols/titles)
- **Be prepared to verify** with ID if Facebook requests it
- **Consider alternate names** instead of changing your primary name
- **Plan ahead** because you only get one change every 60 days
Whether you're updating after marriage, correcting a spelling error, or switching to a name you prefer, Facebook's name change process is designed to verify authentic identities while giving users flexibility to represent themselves accurately. For monetizing your presence, see [how to make money with Facebook](https://www.genviral.io/blog/how-to-make-money-with-facebook). For more Facebook account management tips, see our guides on [where to find scheduled posts on Facebook](https://www.genviral.io/blog/where-to-find-scheduled-posts-on-facebook), [how to lock Facebook account](https://www.genviral.io/blog/how-to-lock-facebook-account), [how to add admin to Facebook Page](https://www.genviral.io/blog/how-to-add-admin-to-facebook-page), [how to see who shared my post on Facebook](https://www.genviral.io/blog/how-to-see-who-shared-my-post-on-facebook), and [how to comment anonymously on Facebook](https://www.genviral.io/blog/how-to-comment-anonymously-on-facebook).
---
*Managing your Facebook presence across name changes and profile updates? [Genviral's Facebook Scheduler](https://www.genviral.io/facebook-scheduler) helps you maintain consistent social media content scheduling even as your personal brand evolves - ensuring your posts go live on time regardless of profile changes.*
---
Canonical HTML: https://www.genviral.io/blog/how-to-change-name-on-facebook
# How to Change TikTok Account Region
- TikTok does not provide an official way to manually change your account region - it's determined automatically by your SIM card, IP address, device language settings, and App Store region.
- The only reliable method to reach a different region's For You Page is to create a new account on a clean device with the correct regional setup from the start.
- Changing your phone's language or time zone has minimal effect - TikTok primarily uses the SIM card country code and IP address to lock an account to a specific region.
**The Truth:** TikTok does not provide an official way to manually change your account's region or country. Your region is automatically determined by your SIM card, IP address, and device settings - and TikTok intentionally makes it difficult to change.
## How TikTok Determines Your Region
According to [TikTok's official support documentation](https://support.tiktok.com/en/account-and-privacy/account-privacy-settings/location-services-on-tiktok), the platform uses multiple data points to determine your region:
**Primary factors:**
- **SIM card region** - The country code of your mobile carrier
- **IP address** - Your internet connection's geographic location
- **Device settings** - Your phone's language and region settings
- **App Store region** - Where you downloaded TikTok from (iOS/Android)
**Secondary factors:**
- Location Services (if enabled)
- Time zone and day settings
- Language preference
- Device type
TikTok combines these signals to lock your account to a specific region, which determines:
- Content you see in your For You feed
- Available features (TikTok Shop, Creator Fund, monetization)
- Trending content and sounds
- Ad targeting and commerce options
## Why TikTok Doesn't Allow Region Changes
TikTok restricts region changes for several reasons:
**1. Monetization and Creator Fund eligibility**
Different regions have different Creator Fund programs. TikTok prevents users from switching regions to access better monetization or programs like the TikTok Creator Rewards Program. To learn more about earnings, see our guide on [how to make money with TikTok](https://www.genviral.io/blog/how-to-make-money-with-tiktok).
**2. Regulatory compliance**
TikTok must comply with local laws in each country. Region-locking ensures proper data handling, age restrictions, and content moderation.
**3. Content licensing**
Music, sounds, and branded content have regional licensing. Your region determines which sounds you can use.
**4. E-commerce and TikTok Shop**
TikTok Shop is region-specific. Allowing free region switching would create fulfillment and payment issues.
**5. Preventing abuse**
Without restrictions, users could manipulate trending algorithms and spam different regional markets.
## The 90-Day Rule (When Region Changes ARE Possible)
While TikTok doesn't provide a manual "change region" button, your account region CAN update automatically under specific circumstances - but there's a waiting period.
According to user reports across TikTok throughout 2026, if you meet ALL these conditions:
- Physically relocate to a new country
- Use a local SIM card from that country
- Connect via local Wi-Fi/IP addresses consistently
- Update your device region settings
- Wait approximately **90 days** of consistent local usage
...TikTok may eventually update your account region automatically.
**Important:** This is not guaranteed and varies by user. Some report waiting 6+ months before their region updated.
## What Happens If You Try to Force a Region Change
Many users attempt workarounds to change their TikTok region. Here's what actually happens:
### Method 1: Using a VPN
**What users try:** Connect to a VPN in the desired country.
**What actually happens:**
- TikTok detects VPN usage and may restrict your account
- Content feed may show some regional content temporarily
- Your account region does NOT change
- Risk of account suspension for violating Terms of Service
- TikTok's algorithm still uses your SIM card region as primary signal
**2026 user reports:** Multiple TikTok users report this method shows regional content temporarily but doesn't change account settings or unlock region-specific features like monetization. For a legitimate method to target specific regions like the US, see our guide on [how to target US users on TikTok](https://www.genviral.io/blog/target-us-users-on-tiktok).
### Method 2: Changing Device Settings
**What users try:** Change phone language, region settings, and App Store country.
**What actually happens:**
- Interface language changes
- Some regional content appears
- Account region remains unchanged
- Features like TikTok Shop, Creator Fund still locked to original region
### Method 3: Creating a New Account
**What users try:** Delete old account, create new one with VPN or new SIM.
**What actually happens:**
- You lose all followers, videos, and engagement
- New account inherits region from current SIM/IP/device settings
- No guarantee you'll get desired region
- Violates TikTok TOS if using location spoofing
### Method 4: GPS Spoofing Apps
**What users try:** Use location spoofing apps to fake GPS location.
**What actually happens:**
- TikTok ignores GPS data for account region (uses SIM/IP instead)
- High risk of account ban
- Violates TikTok Terms of Service
- Only affects tagged locations on posts, not account region
## What You CAN Actually Change
While you can't manually change your account region, you CAN control some location-related settings:
### 1. Location Services (What You See Nearby)
**To disable Location Services:**
1. Open TikTok app
2. Tap **Profile** → **Three lines menu** (top right)
3. Go to **Settings and privacy** → **Privacy**
4. Tap **Location Services**
5. Select **Never** or **Don't Allow**
This prevents TikTok from accessing your precise GPS location, but does NOT change your account region.
### 2. Content Language Preferences
**To change content language:**
1. Go to **Settings and privacy**
2. Select **Content preferences**
3. Choose preferred languages
This affects the language of content you see, but not your account's registered region.
### 3. Post Location Tags
You can add location tags to individual posts:
1. Create a post
2. Tap **Add location**
3. Select any location globally
This tags where your video appears to be from, but doesn't change your account region.
## How to Actually Get a Different TikTok Region
If you genuinely need a TikTok account in a different region, here are the only legitimate methods:
### Option 1: Physical Relocation + Wait
**Steps:**
1. Physically move to the target country
2. Get a local SIM card and phone number
3. Use local Wi-Fi and mobile data exclusively
4. Update device region to match new country
5. Use TikTok normally for 90+ days
6. **If you have Creator Monetization enabled:** You may need to remove it first, then wait for your region to update before re-applying
**Timeline:** 90 days minimum, potentially 6+ months based on 2026 user reports
**Success rate:** Moderate - not guaranteed but most likely to work
### Option 2: Start Fresh With Proper Setup
**Steps:**
1. Be in the target country (or have a genuine connection there)
2. Get a SIM card from that country
3. Set up new device with that region
4. Download TikTok from that region's App Store
5. Create entirely new account
6. Never use VPN or location spoofing
**Downside:** You lose your existing account, followers, and content
### Option 3: Use TikTok Features That Don't Require Region Change
Instead of changing region, adapt your strategy:
**For content creators:**
- Create content that appeals to your target audience regardless of your region
- Use trending sounds and hashtags from your target market
- Post during peak hours for your target region
- Engage with creators from your target region
- Learn how to create professional slideshows with our guides on [how to make TikTok slideshows on PC](https://www.genviral.io/blog/how-to-make-a-slideshow-on-tiktok-pc) and [how to create TikTok slideshow images with AI](https://www.genviral.io/blog/create-tiktok-slideshow-images-with-ai)
**For viewers:**
- Follow creators from your desired region
- TikTok's algorithm will show you more content from that area
- Change content language preferences
- Interact with (like, comment, share) content from that region
## Why "Region Change Hacks" Don't Work in 2026
TikTok has significantly improved its region detection systems. Methods that supposedly worked in 2023-2024 no longer function:
**What TikTok now detects:**
- VPN usage (IP fingerprinting)
- GPS spoofing (cross-referencing with cell tower data)
- SIM card vs. IP address mismatches
- App Store region vs. network region conflicts
- Rapid location changes (flagged as suspicious)
Users reporting "successful" region changes in 2026 almost always fall into two categories:
1. They physically relocated and waited 90+ days
2. They're seeing algorithm-based content changes (not actual region change)
## Common Questions
**Can I change my TikTok region to access TikTok Shop in my country?**
No. TikTok Shop availability is determined by where you physically are and your account's registered region. If TikTok Shop isn't available in your country, you cannot access it by changing settings. The feature must be officially launched in your region.
**Will using a VPN change my TikTok region?**
No. VPNs may show you some regional content temporarily, but your account region is primarily determined by your SIM card and device settings, not your IP address alone. Using VPNs also violates TikTok's Terms of Service and can result in account restrictions. If you're experiencing issues with following people after using a VPN, see our guide on [why you can't follow people on TikTok](https://www.genviral.io/blog/why-cant-i-follow-people-on-tiktok).
**How long does it take for TikTok to update my region after moving countries?**
Based on 2026 user reports, expect 90 days to 6+ months of consistent use in your new country with a local SIM card. Some users report never having their region update automatically. There is no manual option to speed this up.
**Can I have TikTok accounts in multiple regions?**
Yes, technically you can create separate accounts in different regions, but each account must be genuinely tied to that region (local SIM, local usage). Managing multiple accounts with VPNs or spoofing will likely result in bans. For strategies on managing multiple TikTok accounts for growth, see our guide on [TikTok growth strategies for SaaS](https://www.genviral.io/blog/tiktok-growth-strategies-for-saas).
**Why does my friend's region show different than mine when we're in the same location?**
TikTok region is set based on where the account was created and initially used, not where you currently are. If your friend created their account in a different country with a different SIM card, their region remains locked to that location.
**Does deleting and reinstalling TikTok change my region?**
No. Your account region is tied to your account data on TikTok's servers, not the app installation. Reinstalling the app does not reset or change your region.
**Can TikTok support manually change my region?**
No. TikTok support does not manually change account regions. The platform's official position is that region is automatically determined and cannot be manually adjusted, even by support staff.
**What if I need to change region for Creator Fund eligibility?**
If you've genuinely relocated to an eligible country, you'll need to wait for your region to update automatically (90+ days minimum) while using a local SIM and local internet. You may need to remove existing monetization features first. There is no shortcut for this.
## The Bottom Line
TikTok intentionally does not provide a manual region change option. Your account region is automatically determined by your SIM card, IP address, and device settings - and changes only under very specific circumstances (genuine relocation + 90+ day wait period).
**If you're trying to change region:**
- **For content access:** Follow creators from that region, adjust language preferences, and let the algorithm adapt
- **For monetization:** You must genuinely be in an eligible country with local SIM and usage patterns
- **For TikTok Shop:** Wait for official launch in your actual region
**Avoid:**
- VPNs (detectable and violates TOS)
- GPS spoofing (doesn't affect region)
- "Region change hacks" (don't work in 2026)
The only reliable method is genuine physical relocation with local SIM card usage for 90+ days. Any other approach risks account suspension and won't achieve the desired results. For managing your content, see [where to find TikTok drafts](https://www.genviral.io/blog/where-to-find-tiktok-drafts). For viewing your saved videos, see [how to see saved videos on TikTok](https://www.genviral.io/blog/how-to-see-saved-videos-on-tiktok). For adding a link to your bio, see [how to add link to TikTok bio](https://www.genviral.io/blog/how-to-add-link-to-tiktok-bio). For sharing others' videos, see [how to repost on TikTok](https://www.genviral.io/blog/how-to-repost-on-tiktok). For managing unwanted interactions, see [how to block someone on TikTok](https://www.genviral.io/blog/how-to-block-someone-on-tiktok). If you're a creator looking to monetize, learn [how to get a TikTok Spark Code](https://www.genviral.io/blog/how-to-get-tiktok-spark-code) and how to make money with TikTok (guide linked above). If your only option is to start fresh in a new region, see [how to delete your TikTok account](https://www.genviral.io/blog/how-to-delete-tiktok-account) before creating the replacement.
---
*Want to manage your TikTok content strategy more effectively? While you can't change your region, [Genviral](https://genviral.io) helps you schedule and optimize TikTok posts to reach your target audience, regardless of your account's region.*
---
Canonical HTML: https://www.genviral.io/blog/how-to-change-tiktok-account-region
# How to Clear Facebook Cache (2026 Guide for Phone and PC)
- Facebook caches every video, photo, Reel, and Marketplace listing you scroll past. A daily user can easily hit **2–5 GB** of cache in a few weeks. Clearing it does **not** log you out of the app and does **not** delete your posts or messages.
- On phone, you need to clear it in two places: the **in-app browser cache** (Settings & Privacy → Settings → Browser) and your phone's **Apps → Facebook → Storage**.
- On PC, there's no in-app "clear cache" button. You clear it through your browser (Chrome, Edge, Firefox) - ideally site-specific so you don't get signed out of everything else.
If Facebook is silently eating your phone storage, it's not a bug - the app aggressively caches every video, Reel, and Marketplace photo you scroll past so they load instantly next time. On a daily-use phone, the Facebook app can easily climb past 3 GB inside a month. Here's the full clean-out, on phone and PC.
## Why Your Facebook Cache Gets So Big
Three things make Facebook's cache balloon faster than most apps:
- **Auto-play videos and Reels.** Every video that auto-plays in your feed is partially or fully cached so it doesn't re-buffer when you scroll back.
- **Marketplace and high-res photos.** Every listing you tap on stores its image gallery locally.
- **The in-app browser.** Every link you open *inside* Facebook (instead of your real browser) caches cookies, images, and scripts in a separate bucket.
Two things to know before you start:
- **Clearing cache will not log you out** as long as you stick to *Clear cache* and not *Clear data / Clear storage*.
- **You will not lose drafts, saved posts, or messages.** Those live on Facebook's servers, not in your phone's cache.
## How to Clear Facebook Cache on Phone (iPhone and Android)
There are two separate places Facebook hides cached data on mobile. To fully clean up, do both.
### Step 1: Clear the In-App Browser Cache (The Hidden One)
This is the chunk most guides miss. Every link you tap inside Facebook opens in Facebook's own built-in browser, which stores its own cookies, images, and scripts - completely separate from the rest of the app cache.
1. Open Facebook and tap the **menu icon** (three lines, top-left next to the Facebook logo - the process is the same on iPhone and Android).
2. Scroll down and tap **Settings & privacy** → **Settings**.
3. Scroll to the **Preferences** section and tap **Browser**.
4. Under **Your browsing data**, tap **Clear** next to **Cookies, cache and other site data**.
5. Confirm.
This wipes the in-app browser without touching your Facebook account, feed, or recommendations.
### Step 2: Clear App Cache From Your Phone Settings
The in-app tool doesn't catch the feed, video, and Marketplace cache. To get the rest, go through your phone's system settings.
**On Android:**
1. Open phone **Settings**.
2. Tap **Apps** (or **Apps & notifications**).
3. Find and tap **Facebook**.
4. Tap **Storage** (or **Storage & cache**).
5. Tap **Clear cache**.
6. ⚠️ **Do not tap "Clear storage" or "Clear data"** unless you're ready to log back in. "Clear cache" is the safe option.
**On iPhone:**
iOS doesn't expose a per-app cache button, so your only options are:
- The in-app **Browser → Clear** tool above (Step 1), or
- **Offload the app**: Settings → General → iPhone Storage → Facebook → **Offload App**. This removes the app but keeps your account data and login. Reinstalling pulls a fresh, empty cache.
> **Facebook Lite note:** If you use the Facebook Lite app on Android, it has a much smaller cache (usually under 100 MB) and the same Android Settings → Apps → Facebook Lite → Storage → Clear cache flow works exactly the same.
## How to Clear Facebook Cache on PC
Facebook on desktop doesn't store data the same way as the mobile app, and **there is no "Clear cache" button inside facebook.com or Meta Business Suite**. You clear it through your browser instead.
### Option 1: Clear Facebook's Cache for One Site Only (Recommended)
This wipes just Facebook's data without logging you out of every other site you use.
**Chrome and Edge:**
1. Go to **facebook.com** and sign in.
2. Click the **lock icon** (or "tune" icon) to the left of the URL.
3. Click **Site settings** (Chrome) or **Permissions for this site** (Edge).
4. Find **Cookies and site data** and click **Clear data**, or scroll to the bottom of Site Settings and click **Clear data**.
**Firefox:**
1. Open Settings → **Privacy & Security**.
2. Scroll to **Cookies and Site Data** → click **Manage Data**.
3. Search for `facebook`, select it (and `fbcdn.net` if it appears), and click **Remove Selected**.
### Option 2: Clear All Browser Cache (Faster but Wipes Everything)
Use the universal shortcut **`Ctrl + Shift + Delete`** on Windows (or **`Cmd + Shift + Delete`** on Mac) in any browser. Then:
- **Time range:** All time
- **Check:** Cached images and files (and Cookies, if you want a full clean)
- Click **Clear data**
This signs you out of every site, not just Facebook, so use Option 1 unless you actually want a full reset.
### Option 3: Reset the Facebook Messenger Windows App
If you also use the standalone **Messenger Windows app** (from the Microsoft Store) and want to wipe its cache, it has no in-app cache button. Reset it from Windows:
1. Open **Settings** → **Apps** → **Installed apps**.
2. Find **Messenger** in the list, click the **three-dot menu** → **Advanced options**.
3. Scroll to **Reset** and click it. Confirm.
⚠️ This wipes **all** local app data, including your sign-in. You'll need to log back in afterward.
## How Much Space Will I Actually Recover?
Real numbers from typical users:
| Usage pattern | Typical cache size |
| --- | --- |
| Light user, 1 week | 200–500 MB |
| Daily user, 1 month | 1–3 GB |
| Heavy user with Marketplace and Reels | 3–6 GB+ |
If your Facebook app is taking more than 5 GB and Step 1 + Step 2 don't clear most of it, the culprit is almost always the **in-app browser** - that bucket grows fastest because every external link you tap (news articles, shop pages, ads) gets cached there.
## Will Clearing Cache Log Me Out or Delete My Data?
This is the question that stops most people from doing it. Short answers:
| Action | Logs you out? | Deletes posts/messages? | Deletes scheduled posts? |
| --- | --- | --- | --- |
| In-app **Browser → Clear** (Step 1) | No | No | No |
| Phone Settings → **Clear cache** (Android) | No | No | No |
| Phone Settings → **Clear storage / data** (Android) | **Yes** | No (server-side) | No (server-side) |
| iPhone **Offload App** | No | No | No |
| Messenger Windows app **Reset** | **Yes** (Messenger only) | No | No |
Your posts, messages, scheduled posts, and saved drafts live on Facebook's servers and are tied to your account, not your device. Wiping the cache changes nothing about what shows up when you log back in. If you're worried about losing scheduled content, you can always double-check it in Meta Business Suite - see [where to find scheduled posts on Facebook](https://www.genviral.io/blog/where-to-find-scheduled-posts-on-facebook).
## How Often Should You Clear It?
If you're a regular Facebook user, once a month is plenty. If you're a Marketplace browser or you tap a lot of in-app articles, do **Step 1 only** (Browser → Clear) every two weeks - it's the fastest, lowest-risk option and recovers the biggest chunk on most phones.
If your phone is constantly running out of storage and Facebook is one of the top offenders, the real fix is usually closing Facebook Reels in the background and turning off auto-play video over cellular (**Settings & privacy → Settings → Videos and photos → Autoplay**) to slow the cache from refilling.
## Troubleshooting
**The "Browser" menu doesn't appear in Settings**
- Update Facebook to the latest version. The in-app browser controls were moved into Settings in a 2023 redesign and old versions of the app don't expose them.
- On some regions/devices the option is labeled **Media** or **Apps and websites** - look for a "Browsing data" or "Cookies, cache and other site data" row under either.
**Android shows 0 MB of cache even though Facebook is several GB**
- The cache may have been auto-cleared by Android's storage manager. The remaining size is the app binary plus stored data (e.g., downloaded videos in Watch). To free more, offload the app and reinstall it.
**My Facebook keeps re-filling cache instantly**
- That's normal. Every time you scroll the feed, new videos and photos get cached. The goal of clearing isn't permanent - it's a periodic reset.
**Clearing data signed me out and now my drafts are gone**
- Drafts in the Facebook app are stored locally by default. If you cleared *data* or *storage* (not *cache*), local drafts are gone. To prevent this in the future, schedule the post or save it as a scheduled draft inside Meta Business Suite - see [how to find drafts on Facebook](https://www.genviral.io/blog/how-to-find-drafts-on-facebook) for where they actually live.
**Marketplace listings keep loading slowly after clearing**
- That's expected for the first few sessions while the cache rebuilds. After a day of normal use, image loading speeds return to normal.
## The Bottom Line
To fully clear Facebook cache on phone, you need **both** steps: the in-app **Browser → Clear** for cookies and external sites, plus your phone's **Apps → Facebook → Storage → Clear cache** for the feed, Reels, and Marketplace bucket. The first one is the hidden trick that recovers the most space on heavy users and the one most guides skip.
On PC, there's no in-app option - clear Facebook's browser data through your browser settings (use the site-specific method to avoid signing out of everything else), or reset the Messenger Windows app if you use it.
**Key takeaways:**
- Clearing cache **does not** log you out, delete posts, or wipe scheduled content
- Cache lives in two separate places on mobile - both need cleaning
- Desktop Facebook cache is just browser cache - no in-app button exists
- Always pick "Clear cache" over "Clear storage" or "Clear data" to stay signed in
For more Facebook account tips, see [how to add an admin to a Facebook page](https://www.genviral.io/blog/how-to-add-admin-to-facebook-page), [how to change your name on Facebook](https://www.genviral.io/blog/how-to-change-name-on-facebook), [how to lock your Facebook account](https://www.genviral.io/blog/how-to-lock-facebook-account), [how to comment anonymously on Facebook](https://www.genviral.io/blog/how-to-comment-anonymously-on-facebook), [how to make money with Facebook](https://www.genviral.io/blog/how-to-make-money-with-facebook), and - if you also use the other Meta apps - [how to clear Instagram cache](https://www.genviral.io/blog/how-to-clear-instagram-cache) or [how to clear TikTok cache](https://www.genviral.io/blog/how-to-clear-tiktok-cache).
---
*Tired of Facebook eating your phone storage from drafting and posting on mobile? [Genviral's Facebook Scheduler](https://www.genviral.io/facebook-scheduler) lets you write, schedule, and publish Facebook content from your PC - so your phone stays clean and your posting stays consistent.*
---
Canonical HTML: https://www.genviral.io/blog/how-to-clear-facebook-cache
# How to Clear Instagram Cache (2026 Guide for Phone and PC)
- Instagram caches every Reel, Story, Explore image, and DM media you scroll past. A daily user can easily hit **2–6 GB** of cache in a few weeks. Clearing it does **not** log you out and does **not** delete your posts, drafts saved to the cloud, or DMs.
- Instagram has **no in-app "clear cache" button**. On Android you clear it from your phone's **Apps → Instagram → Storage → Clear cache**; on iPhone the only way is to **Offload App** from **iPhone Storage**, which keeps you logged in.
- On PC, there's no in-app "clear cache" button. You clear it through your browser (Chrome, Edge, Firefox) - ideally site-specific so you don't get signed out of every other site.
If Instagram is silently eating your phone storage, it's not a bug - the app aggressively caches every Reel, Story, Explore tile, and DM photo you scroll past so they load instantly next time. On a daily-use phone, the Instagram app can easily climb past 4 GB inside a month. Here's the full clean-out, on phone and PC.
## Why Your Instagram Cache Gets So Big
Three things make Instagram's cache balloon faster than most apps:
- **Reels and auto-play video.** Every Reel that auto-plays in the feed, Explore, or Reels tab is partially or fully cached so it doesn't re-buffer when you scroll back.
- **Stories and Explore grids.** Every Story you tap into and every Explore image you scroll past stores its full-res version locally for the day.
- **The in-app browser.** Every external link you tap *inside* Instagram (instead of your real browser) caches cookies, images, and scripts in a separate bucket.
Two things to know before you start:
- **Clearing cache will not log you out** as long as you stick to *Clear cache* and not *Clear data / Clear storage*.
- **You will not lose published posts, sent DMs, or scheduled content.** Those live on Instagram's servers, not in your phone's cache. Local-only Reel drafts and Story drafts can be lost if you clear *data*, so back up anything you care about first.
## How to Clear Instagram Cache on Phone (iPhone and Android)
Unlike TikTok, Instagram has **no "clear cache" button inside the app** - so you can't clear the feed, Reels, Stories, or DM media cache from within Instagram. You have to do it through your phone's system settings, and the steps are different on Android and iPhone.
**On Android:**
1. Open phone **Settings**.
2. Tap **Apps** (or **Apps & notifications**).
3. Find and tap **Instagram**.
4. Tap **Storage** (or **Storage & cache**).
5. Tap **Clear cache**.
6. ⚠️ **Do not tap "Clear storage" or "Clear data"** unless you're ready to log back in and lose unsaved Reel/Story drafts. "Clear cache" is the safe option.
**On iPhone:**
iOS doesn't give Instagram a per-app "clear cache" button, and tapping the Instagram app icon in iOS Settings won't show a "remove storage" or "clear cache" option either - that was changed. The only way to clear the cache is to **offload the app**:
1. Open **Settings** and search for **iPhone Storage** (or go to Settings → General → iPhone Storage).
2. Scroll down and tap **Instagram**.
3. Tap **Offload App**.
Offloading clears the gigabytes of cached "data" (often **4 GB+**) while keeping you logged in - only the app's documents and data remain, so you don't get signed out.
Don't tap **Delete App**, which logs you out and wipes everything. Reel and Story drafts saved only locally will be lost - publish them as "Close friends only" first if you want to keep them.
> **Instagram Lite note:** If you use Instagram Lite on Android, it has a much smaller cache (usually under 100 MB) and the same Android Settings → Apps → Instagram Lite → Storage → Clear cache flow works exactly the same.
## How to Clear Instagram Cache on PC
Instagram on desktop doesn't store data the same way as the mobile app, and **there is no "Clear cache" button inside instagram.com**. You clear it through your browser instead.
### Option 1: Clear Instagram's Cache for One Site Only (Recommended)
This wipes just Instagram's data without logging you out of every other site you use.
**Chrome and Edge:**
1. Go to **instagram.com** and sign in.
2. Click the **lock icon** (or "tune" icon) to the left of the URL.
3. Click **Site settings** (Chrome) or **Permissions for this site** (Edge).
4. Find **Cookies and site data** and click **Clear data**, or scroll to the bottom of Site Settings and click **Clear data**.
**Firefox:**
1. Open Settings → **Privacy & Security**.
2. Scroll to **Cookies and Site Data** → click **Manage Data**.
3. Search for `instagram`, select it (and `cdninstagram.com` if it appears), and click **Remove Selected**.
### Option 2: Clear All Browser Cache (Faster but Wipes Everything)
Use the universal shortcut **`Ctrl + Shift + Delete`** on Windows (or **`Cmd + Shift + Delete`** on Mac) in any browser. Then:
- **Time range:** All time
- **Check:** Cached images and files (and Cookies, if you want a full clean)
- Click **Clear data**
This signs you out of every site, not just Instagram, so use Option 1 unless you actually want a full reset.
## How to Load Less Data Into the App (So It Caches Less)
Clearing cache is a reset - but you can also slow how fast it refills. Instagram tucks the controls under **Your app and media**, and turning them down means less media gets downloaded and cached in the first place.
1. Open Instagram and tap your **profile picture** (bottom-right).
2. Tap the **three lines** (☰) in the top-right corner.
3. Scroll all the way down to **Your app and media**.
4. Tap **Media quality** and turn on **Use less mobile data** (and leave **Upload at highest quality** off if you want to save the most). This loads lower-resolution media on cellular, so less is cached.
5. Tap **Archiving and downloading** and toggle off the auto-save options. Instagram can automatically save your Stories and posts to your phone, which quietly adds up in local storage on top of the cache.
These don't clear anything on their own, but they meaningfully slow how quickly Instagram's cache and your phone's storage fill back up.
## How Much Space Will I Actually Recover?
Real numbers from typical users:
| Usage pattern | Typical cache size |
| --- | --- |
| Light user, 1 week | 200–500 MB |
| Daily user, 1 month | 1.5–3 GB |
| Heavy Reels and DM media user | 3–6 GB+ |
If your Instagram app is taking more than 5 GB, the biggest culprits are usually **DM media** - photos and videos sent to you in chats stay cached as long as the thread stays open - plus everything you've loaded through the **in-app browser** (every shop and ad link you tap). Offloading on iPhone, or **Clear cache** on Android, clears all of it at once.
## Will Clearing Cache Log Me Out or Delete My Drafts?
This is the question that stops most people from doing it. Short answers:
| Action | Logs you out? | Deletes posts/DMs? | Deletes Reel/Story drafts? |
| --- | --- | --- | --- |
| Phone Settings → **Clear cache** (Android) | No | No | No |
| Phone Settings → **Clear storage / data** (Android) | **Yes** | No (server-side) | **Yes** if local-only |
| iPhone **Offload App** | No | No | **Yes** if local-only |
Your posts, sent DMs, and scheduled content live on Instagram's servers and are tied to your account, not your device. Wiping the cache changes nothing about what shows up when you log back in. Reel and Story drafts are the one exception - by default they're stored locally, so if you clear *data* or offload the app, those drafts go with it.
## How Often Should You Clear It?
If you're a regular Instagram user, once a month is plenty. If your phone is constantly low on storage, offload (iPhone) or clear cache (Android) every couple of weeks - it's quick, doesn't log you out, and recovers the biggest chunk on most phones.
The longer-term fix is loading less data in the first place: turn on **Use less mobile data** under **Your app and media → Media quality**, turn off auto-play video over cellular, and trim long DM threads with heavy media. Reels and DM photos are what refill the cache fastest. Instagram also publishes a short official guide on using less data on Instagram that pairs well with a cache cleanout.
## Troubleshooting
**There's no "clear cache" option anywhere in the Instagram app**
- That's expected - Instagram doesn't expose one. On Android, clear it from phone **Settings → Apps → Instagram → Storage → Clear cache**. On iPhone, the only route is **iPhone Storage → Instagram → Offload App**.
**Android shows 0 MB of cache even though Instagram is several GB**
- The cache may have been auto-cleared by Android's storage manager. The remaining size is the app binary plus stored data (downloaded Reels, saved DMs). To free more, offload or reinstall the app.
**My Instagram keeps re-filling cache instantly**
- That's normal. Every time you scroll the feed, Reels, or Explore, new media gets cached. The goal of clearing isn't permanent - it's a periodic reset.
**Clearing data signed me out and now my Reel drafts are gone**
- Reel and Story drafts in the Instagram app are stored locally by default. If you cleared *data* or *storage* (not *cache*), local drafts are gone. To prevent this in the future, publish drafts to "Close friends only" or save the source clip to your camera roll before clearing data.
**Explore and Reels feel "rebooted" after clearing**
- Don't worry - your algorithm is server-side and tied to your account. The first few sessions just feel slower because cached thumbnails are rebuilding. After a day of normal use, image loading speeds return to normal.
## The Bottom Line
Instagram has no in-app "clear cache" button. On **Android**, clear it from your phone's **Apps → Instagram → Storage → Clear cache**. On **iPhone**, the only way is to **Offload App** from **iPhone Storage**, which clears the cached data while keeping you logged in. Then load less going forward with **Your app and media → Media quality → Use less mobile data**.
On PC, there's no in-app option either - clear Instagram's browser data through your browser settings (use the site-specific method to avoid signing out of everything else).
**Key takeaways:**
- Clearing cache **does not** log you out, delete posts, DMs, or scheduled content
- There's no clear-cache button in the Instagram app - use Android's Storage settings or iPhone's Offload App
- Desktop Instagram cache is just browser cache - no in-app button exists
- On Android, pick "Clear cache" over "Clear storage" or "Clear data" to keep your Reel and Story drafts
## More Instagram Guides
- [How often should you post on Instagram](https://www.genviral.io/blog/how-often-should-you-post-on-instagram) - the cadence that actually grows accounts
- [How many photos can you post on Instagram](https://www.genviral.io/blog/how-many-photos-can-you-post-on-instagram) - carousel and posting limits
- [How to make a Reel on Instagram](https://www.genviral.io/blog/how-to-make-a-reel-on-instagram) - create Reels that get views
- [How to repost a Story on Instagram](https://www.genviral.io/blog/how-to-repost-story-on-instagram) - share stories to your feed
- [How to turn off profile views on Instagram](https://www.genviral.io/blog/how-to-turn-off-profile-views-on-instagram) - fix profile-view and activity-status confusion
- [Switch to a personal account on Instagram](https://www.genviral.io/blog/switch-to-personal-account-instagram) - personal vs business differences
- [Hide your Instagram following list](https://www.genviral.io/blog/hide-instagram-following-list) - privacy controls
- [How to delete or deactivate your Instagram account](https://www.genviral.io/blog/how-to-delete-instagram-account) - if you're done with the app entirely
- [How to make money with Instagram](https://www.genviral.io/blog/how-to-make-money-with-instagram) - turn your account into income
- If you came here from the Facebook side: [how to clear Facebook cache](https://www.genviral.io/blog/how-to-clear-facebook-cache)
---
*Tired of Instagram eating your phone storage from drafting and posting on mobile? [Genviral's Instagram Scheduler](https://www.genviral.io/instagram-scheduler) lets you write, schedule, and publish Instagram content from your PC - so your phone stays clean and your posting stays consistent.*
---
Canonical HTML: https://www.genviral.io/blog/how-to-clear-instagram-cache
# How to Clear TikTok Cache (2026 Guide for Phone and PC)
- TikTok stores every video you watch as cached data - a new install can balloon to several gigabytes in just a few days. Clearing it does **not** affect your For You recommendations.
- On phone (iPhone and Android), the main fix is the in-app tool: **Profile → ☰ → Settings and privacy → Cache and cellular → Free up space → Clear**. You can also wipe your hidden **Watch History** (Search → type ".") for the biggest single chunk, and enable **Data Saver** to slow future bloat.
- On PC, there is no in-app "clear cache" button. The TikTok website barely caches anything, so clearing it just means clearing your browser's cache (Chrome, Edge, Firefox) - or, if you use the TikTok Windows app, resetting it from Windows Settings.
If TikTok is eating your phone's storage, it's not a bug - it's the app silently caching every video you scroll past so that the next time you see it, the playback feels instant. The trade-off: a fresh install can balloon past **3 GB in two days** of normal scrolling. Here's the full clean-out, on phone and PC.
## Why Your TikTok Cache Gets So Big
Every video you watch on the For You page gets cached so it loads instantly if you revisit it or scroll back. TikTok also caches profile pictures, sounds, drafts, and downloaded videos. Over a few weeks of normal use, this can easily climb past 5–10 GB.
Two things to know before you start:
- **Clearing your cache will not reset your algorithm.** Your watch history, likes, and recommendation data live on TikTok's servers, not in the cache.
- **You will not lose your drafts** as long as you only clear *Cache* and *Downloaded videos*, not the entire app data. (We'll flag this clearly below.)
## How to Clear TikTok Cache on Phone (iPhone and Android)
The same in-app tool works on both iPhone and Android. For a full clean-out, run Step 1 (the in-app cache flush) and Step 2 (Watch History). Step 3 is only needed in stubborn cases.
### Step 1: Use TikTok's "Free Up Space" Tool (iPhone and Android)
This is the main fix and works the same on both platforms. It typically clears the biggest single chunk of storage - usually **1–3 GB** in one tap.
1. Open TikTok and go to your **Profile**.
2. Tap the **three lines** (☰) in the top-right corner.
3. Tap **Settings and privacy**.
4. Scroll down to the **Cache and cellular** section.
5. Tap **Free up space**.
6. You'll see your current cache and downloaded-video storage. Tap **Clear**:
- **Cache** - safe to clear, no data loss, no log-out.
- **Downloaded videos** - removes videos you saved for offline viewing.
That's it. You do **not** need to dig into iOS or Android system settings for this — TikTok exposes the cache button itself.
**Bonus: turn on Data Saver to slow future bloat.**
On the same **Cache and cellular** screen, tap **Data Saver** and enable it. This lowers the video quality TikTok pre-caches, which cuts how fast the cache grows back.
### Step 2: Wipe Your Watch History (The Hidden One)
This is the trick most "clear cache" guides miss. It doesn't show up as "cache" in your phone settings, but for heavy users it's where the largest chunk of bloat actually lives.
1. Open TikTok and tap the **Search icon** (top right of the For You page).
2. In the search bar, type a single period: `.` (if a period doesn't work, type a hashtag `#` instead). Tap **Search**.
3. A **Watch History** option appears in the results. Tap it.
4. Tap **Select** in the top-right corner.
5. Tap **Select all**, then **Delete**, and confirm.
This clears every video you've watched. As noted above, it does **not** affect your recommendations.
### Step 3: Deeper Clean-Out (Only If Step 1 Didn't Free Enough Space)
If your phone still shows TikTok using way more storage than the in-app number suggests, you can go one level deeper through system settings.
**On Android:**
1. Open phone **Settings**.
2. Tap **Apps** (or **Apps & notifications**).
3. Find and tap **TikTok**.
4. Tap **Storage**.
5. Tap **Clear cache**.
6. ⚠️ **Do not tap "Clear data"** unless you're ready to log back in and lose drafts. "Clear cache" is the safe option.
**On iPhone:**
iOS doesn't expose a per-app "clear cache" button - the in-app **Free up space** tool from Step 1 is the actual cache button on iPhone, and for almost everyone that's enough. The only nuclear option iOS offers is:
- **Offload the app**: Settings → General → iPhone Storage → TikTok → **Offload App**. This removes the app binary and all local data but keeps your account. Reinstalling pulls a clean cache. ⚠️ Drafts saved only to the app cache will be lost — back them up first by posting them as "Only Me" before offloading.
Most iPhone users never need this. Step 1 already clears the same cache without signing you out.
## How to Clear TikTok Cache on PC
TikTok on desktop doesn't store data the same way as the mobile app, and **there is no "Clear cache" button inside tiktok.com or TikTok Studio**. You clear it through your browser instead.
### Option 1: Clear TikTok's Cache for One Site Only (Recommended)
This wipes just TikTok's data without logging you out of every other site you use.
**Chrome and Edge:**
1. Go to **tiktok.com** and sign in.
2. Click the **lock icon** (or "tune" icon) to the left of the URL.
3. Click **Site settings** (Chrome) or **Permissions for this site** (Edge).
4. Find **Cookies and site data** and click **Clear data**, or scroll to the bottom of Site Settings and click **Clear data**.
**Firefox:**
1. Open Settings → **Privacy & Security**.
2. Scroll to **Cookies and Site Data** → click **Manage Data**.
3. Search for `tiktok`, select it, and click **Remove Selected**.
### Option 2: Clear All Browser Cache (Faster but Wipes Everything)
Use the universal shortcut **`Ctrl + Shift + Delete`** on Windows (or **`Cmd + Shift + Delete`** on Mac) in any browser. Then:
- **Time range:** All time
- **Check:** Cached images and files (and Cookies, if you want a full clean)
- Click **Clear data**
This signs you out of every site, not just TikTok, so use Option 1 unless you actually want a full reset.
### Option 3: Reset the TikTok Windows App
If you use the standalone **TikTok Windows app** (from the Microsoft Store), it has no in-app cache option. Reset it from Windows:
1. Open **Settings** → **Apps** → **Installed apps**.
2. Find **TikTok** in the list, click the **three-dot menu** → **Advanced options**.
3. Scroll to **Reset** and click it. Confirm.
⚠️ This wipes **all** local app data, including your sign-in. You'll need to log back in afterward.
> **TikTok LIVE Studio note:** If you stream with the separate **TikTok LIVE Studio** broadcasting app (not the same as the regular TikTok app), its cache lives in `%LocalAppData%\TikTok LIVE Studio`. You can delete that folder manually while the app is closed.
## How Much Space Will I Actually Recover?
Real numbers from typical users:
| Usage pattern | Typical cache size |
| --- | --- |
| Fresh install, 2 days of scrolling | 1–3 GB |
| Daily user, 1 month | 3–8 GB |
| Heavy creator with saved drafts and downloads | 8–15 GB+ |
If your TikTok is hogging more than 10 GB and Step 1 doesn't clear most of it, the culprit is almost always **downloaded videos** and **drafts** you've forgotten about.
## Will Clearing Cache Log Me Out or Reset My Algorithm?
This is the question that stops most people from doing it. Short answers:
| Action | Logs you out? | Resets For You algorithm? | Deletes drafts? |
| --- | --- | --- | --- |
| Free up space → Clear Cache (Step 1) | No | No | No |
| Free up space → Clear Downloaded videos | No | No | No |
| Clear Watch History (Step 2) | No | No | No |
| Phone Settings → Clear cache (Android, Step 3) | No | No | No |
| Phone Settings → Clear **data** (Android) | **Yes** | No (server-side) | **Yes** if local-only |
| iPhone Offload App | No | No | **Yes** if local-only |
| Windows app **Reset** | **Yes** | No | **Yes** if local-only |
The algorithm is stored on TikTok's servers and tied to your account, not your device. Wiping the cache changes nothing about what you see on the For You page.
## How Often Should You Clear It?
If you're a regular TikTok user, once a month is plenty. **Step 1 (Free up space)** is the safest and fastest one - if you only do one thing every couple of weeks, do that.
If your phone is constantly running out of storage even after Step 1, add **Step 2 (Watch History)** to the routine. For heavy scrollers that bucket grows fastest, and it doesn't show up in the in-app cache number.
## Troubleshooting
**"Watch History" doesn't appear when I search "."**
- Update TikTok to the latest version. The Watch History feature rolled out gradually and older versions don't have it.
- Try typing `#` instead of `.`
- Make sure you're signed in - signed-out browsing has no history to clear.
**"Free up space" shows 0 MB even though TikTok is huge in my phone settings**
- The cache may have been cleared recently. The remaining storage is the app itself plus drafts and downloaded videos. On Android, go to Step 3 (phone Settings → Clear cache) for leftovers. On iPhone, the in-app number is the source of truth - if it's 0 MB, the cache really is empty and the rest is app + drafts.
**My TikTok keeps re-filling cache instantly**
- That's normal. Every time you scroll, new videos get cached. The goal of clearing isn't permanent - it's a periodic reset.
**Clearing data deleted my drafts**
- Drafts on TikTok are stored locally by default. If you cleared *data* (not *cache*), they're gone unless you'd uploaded them. To prevent this in the future, post drafts as "Only Me" to back them up to TikTok's servers before clearing data. See [where to find TikTok drafts](https://www.genviral.io/blog/where-to-find-tiktok-drafts) for a full breakdown.
## The Bottom Line
On phone, the in-app **Free up space** tool (Profile → ☰ → Settings and privacy → Cache and cellular → Free up space → Clear) is the actual fix on both iPhone and Android. For a deeper clean, wipe your **Watch History** via search, and on Android you can mop up the rest in phone Settings → Apps → TikTok → Storage.
On PC, there's no in-app option - clear TikTok's browser data through your browser settings (use the site-specific method to avoid signing out of everything else), or reset the Windows app if you use it.
**Key takeaways:**
- Clearing cache **does not** reset your For You algorithm
- The in-app **Free up space** button works on iPhone too - you don't need to dig into iOS settings
- Watch History is a separate cache bucket that the in-app number doesn't show
- Desktop TikTok cache is just browser cache - no in-app button exists
- Always pick "Clear cache" over "Clear data" to keep your drafts and stay signed in
For more TikTok account tips, see [where to find TikTok drafts](https://www.genviral.io/blog/where-to-find-tiktok-drafts), [how to repost on TikTok](https://www.genviral.io/blog/how-to-repost-on-tiktok), [how to see saved videos on TikTok](https://www.genviral.io/blog/how-to-see-saved-videos-on-tiktok), [how to turn off profile views on TikTok](https://www.genviral.io/blog/how-to-turn-off-profile-views-on-tiktok), [how to change TikTok account region](https://www.genviral.io/blog/how-to-change-tiktok-account-region), and [how to warm up a TikTok account](https://www.genviral.io/blog/warm-up-tiktok-account). Also using Instagram? See [how to clear Instagram cache](https://www.genviral.io/blog/how-to-clear-instagram-cache).
---
*Tired of TikTok eating your phone's storage from posting and editing on mobile? [Genviral's TikTok Scheduler](https://www.genviral.io/tiktok-scheduler) lets you create, schedule, and publish TikTok content from your PC - so your phone stays clean and your posting stays consistent.*
---
Canonical HTML: https://www.genviral.io/blog/how-to-clear-tiktok-cache
# How to Comment Anonymously on Facebook (2026 Guide)
- You can only comment anonymously on Facebook inside groups that allow it, and only on posts you yourself created anonymously - you cannot comment anonymously on other people's posts.
- Group admins can always see your real identity behind anonymous posts - only regular members see the anonymous label. Facebook can also identify you at any time.
- Anonymous posting must be enabled by the group admin - if you don't see the option, the feature has not been turned on for that group.
Facebook does support anonymous posting, but with strict limitations most people don't realize before they try. Here's what's actually possible - and what isn't.
**Prefer to watch?** Here's a quick video walkthrough of the same steps:
## The Truth About Anonymous Commenting on Facebook
Before we explain how to do it, you need to understand Facebook's critical limitations for anonymous commenting.
**What you CAN do:**
✅ Post anonymously in Facebook groups (if enabled by admin)
✅ Comment anonymously on YOUR OWN anonymous posts
✅ Reply anonymously to comments on YOUR anonymous posts
✅ React to posts anonymously on YOUR anonymous posts
**What you CANNOT do:**
❌ Comment anonymously on other members' posts
❌ Comment anonymously on regular (non-anonymous) posts
❌ Comment anonymously on Facebook Pages
❌ Comment anonymously on personal profiles
❌ Comment anonymously outside of Facebook groups
❌ Be truly anonymous (admins/moderators always see your identity)
**The key point:** Anonymous commenting on Facebook is extremely limited. You must first create an anonymous post, then you can only comment anonymously within that post's thread.
## How Anonymous Commenting Actually Works
Facebook's anonymous feature is designed for sensitive discussions in supportive communities, not general anonymous browsing.
### The Three-Layer System:
**Layer 1: Group Settings**
- Group admin must enable "Anonymous Posting" feature
- Only available in specific group types (support groups, parenting, health, etc.)
- Not available in public groups or business groups
- Private groups only
**Layer 2: Your Anonymous Post**
- You create a post using "Post Anonymously" toggle
- Post shows as "Anonymous Member" or "Group Member" to others
- Admin must approve post before it appears
- Your identity visible to admins/moderators and Facebook
**Layer 3: Comments on Your Post**
- Once your anonymous post is approved, you can comment on it
- Comments automatically appear anonymous (same identity as your post)
- You can reply to others' comments on your post anonymously
- Cannot comment anonymously anywhere else
### Who Can See Your Identity:
**Group members see:**
- "Anonymous Member" or "Group Member"
- Your chosen anonymous nickname (if you set one)
- No profile picture
- No name
**Group admins and moderators see:**
- Your real name
- Your profile picture
- Your full Facebook profile
- All your activity
**Facebook (the company) sees:**
- Everything about you
- Your IP address
- Device information
- Location data
- All activity on platform
## Why Facebook Limits Anonymous Commenting
Facebook's approach to anonymity reflects a balance between privacy and accountability.
**Reasons for the limitations:**
**1. Prevent abuse and harassment**
If anyone could comment anonymously on any post, trolling and harassment would skyrocket.
**2. Maintain community standards**
Admins need to enforce rules, which requires knowing who's posting.
**3. Reduce misinformation**
Anonymous commenting on public posts would make fact-checking impossible.
**4. Protect vulnerable users**
The feature is designed for people seeking help, not hiding bad behavior.
**5. Comply with regulations**
Laws in many countries require platforms to identify users who post illegal content.
**6. Real-name policy**
Facebook's core philosophy centers on authentic identity.
## How to Post Anonymously on Facebook Groups (Required First Step)
To comment anonymously, you MUST first create an anonymous post. Here's how:
### On Desktop:
**Step 1:** Open Facebook
- Go to [facebook.com](https://facebook.com)
- Log into your account
**Step 2:** Navigate to the Group
- Click **Groups** in the left sidebar
- Select the group where you want to post anonymously
- Ensure the group allows anonymous posting
**Step 3:** Start Creating a Post
- Click **Write something...** in the post box
- You'll see the posting interface
**Step 4:** Enable Anonymous Posting
- Look for **"Post anonymously"** toggle near the bottom
- If you don't see it, the group doesn't allow anonymous posts
- Click the toggle to turn it ON
**Step 5:** Choose Your Anonymous Identity (Optional)
- Some groups let you pick a nickname
- Example: "Anonymous Participant" or custom name
- This nickname will appear instead of "Group Member"
**Step 6:** Write Your Post
- Type your content
- Add any details you need
**Step 7:** Submit for Review
- Click **Post**
- A message appears: "Your post will be reviewed"
- Admins must approve before it's visible
- You'll receive notification when approved
### On Mobile (iPhone/Android):
**Step 1:** Open Facebook App
- Launch the Facebook app
**Step 2:** Go to Groups
- Tap **menu icon** (three lines)
- Select **Groups**
- Choose the group you want
**Step 3:** Start a Post
- Tap **Write something...** or **+ Create post**
**Step 4:** Enable Anonymous Toggle
- Look for **"Post anonymously"** slider/toggle
- Slide it to the **ON** position
- If missing, the group doesn't support it
**Step 5:** Write and Submit
- Type your post
- Tap **Post** to submit
- Wait for admin approval
**Important:** After posting anonymously, this post becomes the ONLY place you can comment anonymously.
## How to Comment Anonymously on Facebook Groups
Once your anonymous post is approved, commenting anonymously is automatic.
### On Desktop:
**Step 1:** Navigate to Your Anonymous Post
- Go to the Facebook group
- Find your anonymous post in the feed
- Or check your notifications for the approval
**Step 2:** Click in the Comment Box
- Click where it says **Write a comment...**
- The comment box expands
**Step 3:** Type Your Comment
- Write your anonymous comment
- No special toggle needed
- Your identity automatically matches your post
**Step 4:** Post the Comment
- Press **Enter** or click **Comment**
- Comment appears immediately as anonymous
- Shows same identity as your post ("Group Member" or your nickname)
**That's it!** Because you're commenting on your own anonymous post, Facebook automatically keeps you anonymous.
### On Mobile:
**Step 1:** Find Your Anonymous Post
- Open the Facebook app
- Go to the group
- Locate your anonymous post
**Step 2:** Tap Comment Section
- Tap **Comment** below your post
- Or tap **Write a comment...**
**Step 3:** Write Comment
- Type your anonymous comment
- Your anonymous identity is automatic
**Step 4:** Post
- Tap **Post** or the send icon
- Comment appears anonymously
### Reply to Comments Anonymously:
**Step 1:** Find a comment on your anonymous post
**Step 2:** Tap **Reply** below that comment
**Step 3:** Type your reply
**Step 4:** Post
Your reply automatically appears anonymous since you're replying on your own anonymous post.
## What You Cannot Do Anonymously
Understanding the limitations prevents frustration.
### Cannot Comment on Others' Posts
**Scenario:** Someone else posts in the group, and you want to comment anonymously.
**Reality:** You cannot. Your comment will show your real name and profile picture.
**Why:** Facebook only allows anonymous comments on your own anonymous posts.
### Cannot Comment on Regular (Non-Anonymous) Posts
**Scenario:** You made a regular post (not anonymous), and now you want to comment anonymously on it.
**Reality:** Impossible. Regular posts cannot have anonymous comments.
**Why:** Anonymous commenting is tied to anonymous posts only.
### Cannot Comment Anonymously on Facebook Pages
**Scenario:** You want to comment anonymously on a business Page post.
**Reality:** Not possible. Pages don't support anonymous comments.
**Why:** The feature only works in Facebook groups.
### Cannot Send Anonymous Direct Messages
**Scenario:** You want to message a group member anonymously.
**Reality:** All Messenger conversations show your real identity.
**Why:** Messaging is separate from group posting.
### Cannot Go Live Anonymously
**Scenario:** You want to livestream anonymously to the group.
**Reality:** Not supported. Live videos always show your identity.
**Why:** Anonymous posting is for text/image posts only.
### Cannot Share Content Anonymously
**Scenario:** You want to share someone's post anonymously.
**Reality:** Shares always display your real profile.
**Why:** Sharing is not part of the anonymous posting system.
## How to Check If a Group Allows Anonymous Posting
Not all groups support this feature. Here's how to check:
### Method 1: Try Creating a Post
**Step 1:** Go to the group
**Step 2:** Click **Write something...**
**Step 3:** Look for **"Post anonymously"** toggle
**If you see it:** Group allows anonymous posting
**If you don't:** Feature is disabled for this group
### Method 2: Check Group Rules/About
**Step 1:** Go to the group
**Step 2:** Click **About** in the left menu
**Step 3:** Look for mentions of "anonymous posting" in rules
Some groups explicitly state whether they allow it.
### Method 3: Ask Group Admins
**Step 1:** Send a message to group admins
**Step 2:** Ask: "Does this group allow anonymous posting?"
Admins can confirm and may enable it if disabled.
## How Group Admins Enable Anonymous Posting
If you're a group admin and want to allow anonymous posting:
**Step 1:** Go to your group
**Step 2:** Click **Settings** (gear icon)
**Step 3:** Select **Group settings**
**Step 4:** Find **"Anonymous posting"** option
**Step 5:** Toggle it **ON**
**Step 6:** Save changes
**Note:** Some group types may not have this option available.
## What Admins and Moderators Can See
Even when posting/commenting anonymously, your identity isn't completely hidden.
### Admins Can See:
✓ Your real name
✓ Your profile picture
✓ Your profile link (clickable)
✓ All your anonymous posts in the group
✓ All your anonymous comments
✓ Your posting history
✓ When you joined the group
### Admins Can Do:
✓ Approve or reject your anonymous posts
✓ Delete your anonymous posts/comments
✓ Remove you from the group
✓ Ban you if you violate rules
✓ Report your content to Facebook
### Facebook (The Company) Can See:
✓ Everything admins see
✓ Your IP address
✓ Device fingerprint
✓ Location data
✓ All activity across Facebook
✓ Connected accounts
**The bottom line:** You're not anonymous to authorities - only to regular group members.
## Why You Can't Comment Anonymously (Common Issues)
If the feature isn't working, here are the usual culprits.
### Issue 1: No "Post Anonymously" Toggle
**Causes:**
- Group admin hasn't enabled the feature
- You're in a public group (only private groups support it)
- You're in a business group (not supported)
- Your app is outdated
**Solutions:**
- Ask admin to enable anonymous posting
- Switch to a private support group
- Update your Facebook app
- Try desktop if mobile doesn't work
### Issue 2: Can't Comment on Someone Else's Post
**Cause:** Facebook doesn't allow this.
**Solution:** There is none. This is how the feature works. You can only comment anonymously on your own anonymous posts.
### Issue 3: Anonymous Post Pending Forever
**Causes:**
- Admins haven't reviewed it yet
- Post violates group rules
- Admins disabled anonymous posts after you submitted
**Solutions:**
- Wait 24-48 hours
- Message admin to ask about status
- Check if your post follows group guidelines
### Issue 4: Comments Not Appearing Anonymous
**Cause:** You're commenting on a regular post or someone else's anonymous post.
**Solution:** Only comment on YOUR anonymous posts.
### Issue 5: Group Members Can See Your Name
**Causes:**
- You didn't use the anonymous toggle when posting
- You're commenting outside your anonymous post
- There's a bug (rare)
**Solutions:**
- Delete the comment/post and redo it anonymously
- Report the issue to Facebook
## Privacy Considerations and Risks
Anonymous posting isn't completely private. Understand the risks.
### What Anonymous Posting Protects:
✓ Your identity from regular group members
✓ Your profile from being associated with sensitive topics
✓ Ability to ask embarrassing questions safely
### What It Doesn't Protect:
✗ Your identity from admins/moderators
✗ Your identity from Facebook
✗ Your data from being tracked
✗ Legal accountability if you post illegal content
✗ Complete anonymity from sophisticated tracking
### Additional Privacy Tips:
**1. Don't include identifying information**
- Avoid mentioning your city, workplace, or unique details
- Don't share photos that could identify you
**2. Change your writing style**
- If someone knows how you write, they might recognize you
- Vary sentence structure and vocabulary
**3. Be aware of timestamps**
- If you're the only person online at 3 AM, timing could identify you
- Consider posting during peak hours
**4. Use caution with follow-up questions**
- Multiple posts on the same topic might create a pattern
- Space out your anonymous posts
**5. Remember admins have context**
- They can see ALL your activity in the group
- They might recognize you from your posting patterns
## Alternatives to Anonymous Commenting
If anonymous commenting doesn't meet your needs, consider these options:
### 1. Create a Secondary Facebook Account
**How it works:**
- Create a new Facebook account with a pseudonym
- Use it exclusively for sensitive discussions
**Risks:**
- Violates Facebook's real-name policy
- Account may be banned if detected
- Facebook tracks devices and IPs
**Best practices:**
- Use a different email
- Don't connect to your main account
- Consider a VPN for extra privacy
### 2. Use Anonymous-Friendly Platforms
**Alternatives:**
- **Reddit** - Username-based, not real names
- **Discord** - Can use any username
- **Telegram** - Username-based messaging
- **Signal** - Encrypted messaging
### 3. Private Messages to Trusted Members
**How it works:**
- Send a direct message to someone you trust in the group
- Ask them to post your question anonymously
**Pros:**
- Truly anonymous to group members
- Trusted intermediary
**Cons:**
- Requires finding a willing helper
- Second-hand communication
### 4. Use Privacy Settings More Effectively
**On Facebook:**
- Limit who can see your posts
- Restrict profile visibility
- Control who can comment on your posts
- Create custom friend lists for different content
## Best Practices for Anonymous Posting
If you use the anonymous feature, follow these guidelines:
**1. Use it for its intended purpose**
- Sensitive health questions
- Parenting struggles
- Financial difficulties
- Relationship issues
- Mental health discussions
**2. Don't abuse the feature**
- No harassment or bullying
- No misinformation
- No illegal activity
- Respect group rules
**3. Be respectful**
- Anonymous doesn't mean rude
- Contribute constructively
- Help others who post anonymously
**4. Understand it's not truly anonymous**
- Admins can see everything
- Facebook tracks everything
- Legal authorities can access your data
**5. Verify group trustworthiness**
- Check admin reputation
- Read group rules carefully
- Ensure the group is actually private
- If you need to block someone, see [how to view blocked Facebook friends](https://www.genviral.io/blog/how-to-view-blocked-facebook-friends)
## Common Questions
**Can I see who else posted anonymously in a group?**
No. Just as your identity is hidden from other members, their identities are hidden from you. Only admins can see who posted anonymously.
**Will my Facebook friends in the group know it's me?**
Not unless you include identifying information. The anonymous feature hides your name and profile picture from all group members, including your friends.
**Can I delete an anonymous post or comment later?**
Yes. Go to your anonymous post, click the three dots (•••), and select "Delete." It works the same as regular posts, but only you can delete your own anonymous content.
**What happens if I leave the group after posting anonymously?**
Your anonymous posts and comments remain in the group even after you leave. They won't be automatically deleted.
**Can I edit an anonymous post after it's been approved?**
Yes. Click the three dots on your post and select "Edit." However, the edit may require admin approval again depending on group settings.
**Do anonymous posts appear in group search?**
Yes. Other members can find anonymous posts through group search, but they still won't see who posted them.
**Can I like or react to posts anonymously?**
Only on your own anonymous post thread. If you react to other posts in the group, your real identity will be visible.
**What if someone figures out it's me?**
If you included identifying details, there's no way to retroactively hide your identity. Be cautious about what information you share.
**Can I report an anonymous post?**
Yes. All group members can report posts that violate Facebook's Community Standards, even anonymous ones. Admins will investigate.
**Is anonymous posting available in all countries?**
Generally yes, but availability may vary based on local regulations and Facebook's policies in specific regions.
## The Bottom Line
Commenting anonymously on Facebook is possible but extremely limited. You can only do it on your own anonymous posts within Facebook groups that allow anonymous posting. Your identity remains hidden from regular group members but is always visible to admins, moderators, and Facebook itself.
**Key takeaways:**
- **Must post anonymously first** - Can't comment anonymously without creating an anonymous post
- **Only on your own posts** - Cannot comment anonymously on others' content
- **Groups only** - Feature doesn't work on Pages or personal profiles
- **Not truly anonymous** - Admins and Facebook always know who you are
- **Limited availability** - Only private groups with feature enabled
- **Approval required** - Posts must be approved by admins before appearing
**Remember:** Use anonymous posting responsibly for its intended purpose - seeking help and support in sensitive situations. It's not a tool for avoiding accountability or harassing others. For monetizing your presence, see [how to make money with Facebook](https://www.genviral.io/blog/how-to-make-money-with-facebook). For more Facebook account management tips, see our guides on [how to change email on Facebook](https://www.genviral.io/blog/how-to-change-email-on-facebook), [where to find scheduled posts on Facebook](https://www.genviral.io/blog/where-to-find-scheduled-posts-on-facebook), [how to find drafts on Facebook](https://www.genviral.io/blog/how-to-find-drafts-on-facebook), [how to lock Facebook account](https://www.genviral.io/blog/how-to-lock-facebook-account), [how to change name on Facebook](https://www.genviral.io/blog/how-to-change-name-on-facebook), [how to add admin to Facebook Page](https://www.genviral.io/blog/how-to-add-admin-to-facebook-page), and [how to see who shared my post on Facebook](https://www.genviral.io/blog/how-to-see-who-shared-my-post-on-facebook).
---
*Managing your Facebook group engagement and community discussions? [Genviral's Facebook Scheduler](https://www.genviral.io/facebook-scheduler) helps you schedule and manage social media content across platforms, making it easier to maintain active communities while respecting member privacy.*
---
Canonical HTML: https://www.genviral.io/blog/how-to-comment-anonymously-on-facebook
# How to Create Infographics with AI: Step-by-Step Guide
- Use Genviral's AI Studio to generate professional infographics from a text prompt - no design
skills needed - Attach reference images for style consistency across multiple infographics - Use
the AI assistant to generate structured prompts (like recipe templates) from existing content -
Nano Banana 2 is the recommended model: fast, affordable, and excellent text rendering - Negative
prompts help eliminate unwanted elements (extra fingers, tattoos, etc.) for people-heavy
infographics
Creating professional infographics used to require hours in Canva or Illustrator - or paying a designer $100-500+ per graphic. With AI, you can generate polished, shareable infographics in seconds. No templates to wrestle with, no design skills required.
In this guide, I'll walk you through exactly how to create infographics with AI using Genviral's AI Studio, including the tips and techniques I use to generate consistent, high-quality results every time.
**Watch the full tutorial:**
---
## Why Use AI for Infographics?
Traditional infographic creation has a few pain points:
- **Time-consuming** - laying out sections, choosing fonts, aligning elements manually
- **Expensive** - freelance designers charge $100-500+ per infographic
- **Inconsistent** - maintaining a cohesive visual style across dozens of infographics is hard
- **Skill-dependent** - you need to understand visual hierarchy, typography, and color theory
AI eliminates all of these. You describe what you want, attach a style reference, and get a professional result in seconds. The AI handles layout, typography, color palettes, and composition automatically.
---
## Getting Started
### Step 1: Open the AI Studio
Head to Genviral and sign up if you haven't already. Once you're in, navigate to the [AI Infographic Generator](https://www.genviral.io/features/ai-content-studio/ai-infographic-generator) - this is where all image generation happens.
One thing worth noting: Genviral isn't just an image generator. You can also publish your infographics directly to social media (Pinterest, Instagram, LinkedIn, etc.) from the same platform - which saves a ton of time if you're producing content at scale.
### Step 2: Choose Your AI Model
For infographics, I recommend **Nano Banana 2**. Here's why:
- **Best text rendering** - infographics rely heavily on readable text, and Nano Banana 2 handles it consistently
- **Fast generation** - results come back in seconds
- **Cost-effective** - cheaper than Nano Banana Pro while delivering the same (or better) text quality
- **Successor to Nano Banana Pro** - it's the newer, improved version
You can also use Nano Banana Pro if you prefer, but Nano Banana 2 is the better choice for most infographic use cases.
### Step 3: Set Your Aspect Ratio
Pick an aspect ratio that matches your target platform:
| Platform | Recommended Ratio |
| --------------- | ----------------- |
| Pinterest | 2:3 or 4:5 |
| Instagram Feed | 4:5 |
| Instagram Story | 9:16 |
| LinkedIn | 1:1 or 4:5 |
| Blog Embed | 16:9 or 4:5 |
For the tutorial example (recipe infographics for Pinterest), a **4:5 aspect ratio** works well.
### Step 4: Write Your Prompt
Describe the infographic you want. Be specific about:
- **Topic** - what the infographic is about (e.g., "Okazu beef rice bowl recipe")
- **Layout** - how sections should be organized (steps, ingredients, tips)
- **Style** - color palette, mood, branding elements
- **Text elements** - what text labels, headings, or callouts to include
**Pro tip:** You don't have to write prompts from scratch. Genviral has a built-in **AI assistant** that can generate structured prompts for you. For example, you can tell it "create a recipe prompt for Okazu" and it will generate a detailed, well-structured prompt template - complete with steps, ingredients, and styling instructions.
### Step 5: Attach Reference Images
This is the most important tip for creating **consistent** infographics. Always attach at least one reference image of the style you want to replicate.
The AI uses your reference image to understand:
- Color palette and mood
- Layout structure
- Typography style
- Overall visual aesthetic
If you already have an infographic you like, use Genviral's **context feature** - it pulls the prompt and reference image from a previous generation, so you can quickly create variations with the same style.
### Step 6: Generate
Set the quality to **2K** (going higher isn't necessary since social media compresses images anyway), and hit generate. You'll have a polished infographic in seconds.
---
## Advanced Tips for Better Results
### Use Negative Prompts
When your infographics include people (like a chef in a recipe card), negative prompts help eliminate common AI artifacts. Add a negative prompt at the bottom of your prompt with things like:
- "no tattoos on arms"
- "no extra fingers"
- "no six fingers"
- "no three arms"
- "no distorted faces"
The AI does an additional check to make sure these elements are excluded from the final image.
### Build a Style Library
Don't start from scratch every time. Build up a collection of baseline infographic images that represent the styles you want. When generating new content:
1. Attach 1-2 reference images from your library
2. Describe the new content (different topic, same style)
3. The AI will maintain visual consistency across all your infographics
This is how brands maintain a cohesive look across hundreds of social media posts.
### Use Templates
Genviral's AI Studio has a **template section** with pre-built infographic templates across multiple categories. These templates come with:
- Pre-selected AI models optimized for that style
- Example prompts you can customize
- Reference images for style guidance
Templates are a great starting point if you're not sure what style to go for - browse them, pick one that fits your niche, and customize from there.
### Leverage Web Browsing
The AI assistant can **browse the web** and analyze links for you. If you're creating an infographic about a specific topic, paste a URL and let the AI extract the relevant information - it'll pull out data points, steps, ingredients, or whatever is needed and structure it into your infographic prompt.
---
## Best Use Cases for AI Infographics
AI-generated infographics work especially well for:
- **Recipe cards** - step-by-step cooking instructions with ingredient lists
- **Fitness routines** - workout plans with exercise illustrations
- **Skincare guides** - product routines and application steps
- **Marketing visuals** - data visualizations, brand comparisons, feature highlights
- **Travel packing lists** - organized, visual packing guides
- **How-to guides** - any multi-step process benefits from visual structure
- **Meal prep guides** - weekly meal plans with prep instructions
---
## Where to Post Your Infographics
Infographics are one of the most saved and shared content formats. They perform best on:
- **Pinterest** - infographics are Pinterest's bread and butter. Recipe pins, fitness plans, and how-to guides get massive saves and repins
- **Instagram** - single-image posts or carousels work well for step-by-step infographics
- **LinkedIn** - professional infographics (data, industry insights, how-tos) get strong engagement
- **Blogs** - embedded infographics increase time-on-page and shareability
Since Genviral lets you publish directly to these platforms, you can go from idea to infographic to published post in minutes.
---
## Final Thoughts
Creating infographics with AI is one of the highest-leverage content creation workflows available right now. What used to take hours and hundreds of dollars now takes seconds and costs a fraction.
The key takeaways:
1. **Use Nano Banana 2** for the best text rendering at the lowest cost
2. **Always attach reference images** for style consistency
3. **Use negative prompts** when generating people
4. **Build a style library** to maintain brand consistency at scale
5. **Use the AI assistant** to generate structured prompts instead of writing them from scratch
Ready to create your first AI infographic? Open the [AI Studio](https://www.genviral.io/studio?tab=image) and start generating today.
---
## More Content Creation Guides
- [How to Create TikTok Slideshow Images with AI](https://www.genviral.io/blog/create-tiktok-slideshow-images-with-ai)
- [Pinterest Posting Strategy Guide](https://www.genviral.io/blog/pinterest-posting-strategy)
---
Canonical HTML: https://www.genviral.io/blog/how-to-create-infographics-with-ai
# How to Delete a Board on Pinterest (Desktop & Mobile)
- Delete a board by opening it, clicking the three dots next to the board name, selecting Edit board, scrolling to Delete, and confirming - this permanently deletes all pins on the board.
- Pinterest gives you a 7-day recovery window - deleted boards appear in the "Recently deleted" section on desktop or Android (not iOS) and can be fully restored within that window.
- Use Archive instead of Delete if you're unsure - archived boards are hidden from your public profile but all pins are preserved and can be unhidden at any time.
Deleting a Pinterest board removes it completely from your profile along with all pins on it. Before you delete, make sure you understand the difference between archiving (temporary) and deleting (permanent).
## Quick Facts
**⚠️ Critical Info:** According to [Pinterest's official Help Center](https://help.pinterest.com/en/article/archive-or-delete-a-board):
- Deleting a board deletes **all pins** on that board
- You have **7 days** to restore deleted boards (see our [recovery guide](https://www.genviral.io/blog/how-to-recover-deleted-pinterest-boards))
- After 7 days, deletion is **permanent**
- You **cannot** delete group boards you don't own (but you can leave them)
## How to Delete a Board (Desktop)
1. Log in to [pinterest.com](https://pinterest.com)
2. Click your **profile picture** (top right) to open your profile
3. Click the **board** you want to delete
4. Click **three dots (...)** next to the board name
5. Select **Edit board**
6. Click **Delete** (bottom left corner)
7. Click **Delete forever** to confirm
The board and all its pins are now deleted.
## How to Delete a Board (Mobile)
### iOS:
1. Open Pinterest app
2. Tap your **profile picture** (bottom right)
3. Tap **Boards** (or **Saved** for business accounts)
4. Tap the board you want to delete
5. Tap **three dots (...)** (top right)
6. Select **Edit board**
7. Scroll down and tap **Delete board**
8. Tap **Delete forever** to confirm
### Android:
Same steps as iOS, but final confirmation says **Delete** (not "Delete forever")
## Archive vs. Delete: Which Should You Use?
| Action | Archive | Delete |
|--------|---------|--------|
| **Visibility** | Hidden from public profile | Completely removed |
| **Pins preserved?** | Yes, all pins kept | No, all pins deleted |
| **Reversible?** | Yes, instantly anytime | 7 days only |
| **Board URL** | Still works | Becomes dead link |
| **Collaborators** | Keep access | Lose access |
| **Use when** | Temporarily hiding | Permanently removing |
**Recommendation:** Use **Archive** if you're unsure. You can always delete later, but you can't un-delete after 7 days.
## How to Archive a Board Instead
If you just want to hide a board temporarily:
**Desktop:**
1. Open the board → Three dots (...) → **Archive**
2. Confirm by clicking **Archive** again
**Mobile:**
1. Open board → Three dots (...) → **Archive board**
2. Tap **Archive** to confirm
**To find archived boards later:**
- Go to profile → Saved/Boards tab → Scroll to **"Archived boards"** section
**To unarchive:** Open archived board → Three dots (...) → Unarchive
## What Happens When You Delete a Board
**Immediately:**
- Board disappears from your profile
- All pins on the board are deleted
- Collaborators lose access (if group board)
- Board URL becomes inactive
**Within 7 days:**
- Board stored in "Recently deleted" section
- Can be restored (desktop/Android only)
- Not visible to anyone
**After 7 days:**
- Permanently deleted from Pinterest servers
- Cannot be recovered by anyone, including Pinterest Support
- All pins, comments, and engagement lost forever
**Important:** Other people's repins of your pins remain on their boards - they just lose the link back to your original board.
## Special Cases
### Group Boards
**If you're the owner:**
- You can delete the board (affects everyone)
- All collaborators lose access
- Consider removing collaborators individually instead
**If you're a collaborator:**
- You **cannot** delete the board
- You can only **leave** the board
- To leave: Open board → Three dots (...) → Leave board
### Secret Boards
Deleted the same way as public boards. Same 7-day recovery window applies.
### Board Sections
You cannot delete individual board sections separately. Sections are deleted when you delete the entire board. To remove pins from a section, move them to another section or board first.
## Before You Delete: Consider These Alternatives
**1. Make Board Secret**
- Hides board from public without deleting
- Board → Edit board → Toggle "Keep this board secret"
- You keep all pins and can make public again later
- See our full guide on [how to make a board on Pinterest private](https://www.genviral.io/blog/how-to-make-a-board-on-pinterest-private)
**2. Move Pins to Another Board**
- Save valuable pins before deleting board
- Click **Organize** → Select pins → Move
- Then delete empty board
**3. Merge with Another Board**
- Combine similar boards to reduce clutter
- Drag one board onto another → "Move Pins and delete board"
- Or manually move all pins, then delete
- See our full guide on [how to merge Pinterest boards](https://www.genviral.io/blog/how-to-merge-pinterest-boards) for every platform and the gotchas to watch for (followers don't transfer)
**4. Delete Individual Pins**
- Clean up board without deleting it
- See our guide on [how to delete Pinterest pins](https://www.genviral.io/blog/how-to-delete-a-pinterest-pin)
- For pins you've saved from others, see [how to unsave pins on Pinterest](https://www.genviral.io/blog/how-to-unsave-pins-on-pinterest)
- Removes clutter while keeping board structure
For creating new pins to replace deleted ones, see our guide on [how to make a pin on Pinterest](https://www.genviral.io/blog/how-to-make-a-pin-on-pinterest).
## Board Limits to Know
According to [Pinterest's official limits](https://help.pinterest.com/en/article/limits-for-pins-boards-and-follows):
- Maximum **2,000 boards** per account
- Includes secret boards and group boards you created
- Maximum **200,000 pins** across all boards
- No limit on board followers
If you hit the 2,000 board limit, you must delete boards to create new ones.
## Common Questions
**Can I recover a deleted board after 7 days?**
No. After 7 days, boards are permanently deleted. Pinterest Support cannot retrieve them. The 7-day window is firm. For detailed recovery steps within that window, see our recovery guide linked above.
**What happens to pins when I delete a board?**
All pins on that board are deleted from your account. However, if other users saved (repinned) your pins to their boards, their copies remain - they just lose the link back to your original pin.
**Can I delete multiple boards at once?**
No. Pinterest doesn't offer bulk board deletion. You must delete boards one by one. Consider archiving multiple boards instead if you want to hide them quickly.
**Will deleting a board affect my Pinterest SEO?**
Yes, potentially. If the board was well-optimized and driving traffic, deleting it removes that SEO value. Pinterest uses board titles and descriptions to understand your account. Deleting boards changes your account's keyword profile. For tips on optimizing your Pinterest strategy, see our [Pinterest tips and tricks guide](https://www.genviral.io/blog/pinterest-tips-and-tricks) and [Pinterest posting strategy](https://www.genviral.io/blog/pinterest-posting-strategy).
**Can I delete a board but keep the pins?**
Yes. Before deleting, go to the board → Click **Organize** → Select all pins → Click **Move** → Choose destination board. Then delete the empty board. This preserves your pins while removing the board structure.
**Why can't I delete a group board?**
If you didn't create the group board (you're just a collaborator), you can't delete it. Only the board owner can delete group boards. You can leave the board instead: Open board → Three dots (...) → Leave board.
**Does archiving a board count toward my 2,000 board limit?**
Yes. Archived boards still count toward your total board limit. They're just hidden from your public profile. To free up space for new boards, you must delete archived boards (not just archive them).
**Can business accounts delete boards differently?**
No, the deletion process is identical for personal and business accounts. Both have the same 7-day recovery window and use the same deletion steps.
## When to Delete vs. When to Keep
**Delete if:**
- Board is truly irrelevant to your current content
- Contains spam or guideline-violating content
- Duplicate of another board
- Hit the 2,000 board limit and need space
- Certain you'll never need the pins again
**Keep/Archive if:**
- Board has traffic or engagement
- Might need it later
- Contains valuable pins you haven't reviewed
- Not sure yet - archive first, decide later
- Board is seasonal (archive during off-season)
**Pro tip:** According to Pinterest best practices, you should **never** delete boards that are driving traffic. Instead, make them secret or archive them to preserve SEO value while hiding from your profile.
## Bottom Line
Deleting a Pinterest board is permanent after 7 days. If you're uncertain, **archive the board instead** - you can always delete it later, but you can't un-delete. Always move valuable pins to another board before deleting, and remember that deleting affects all collaborators on group boards.
To clean up individual pins instead of entire boards, check out the pin deletion guide linked above. If you're looking to expand your reach, learn how to [find group boards on Pinterest](https://www.genviral.io/blog/how-to-find-group-boards-on-pinterest). For creating interactive collages, see [how to make Pinterest collage](https://www.genviral.io/blog/how-to-make-pinterest-collage).
---
*Managing your Pinterest boards and pins efficiently? [Genviral](https://genviral.io) helps you schedule and organize your Pinterest content strategy to keep your profile active and optimized.*
---
Canonical HTML: https://www.genviral.io/blog/how-to-delete-a-board-on-pinterest
# How to Delete a Pinterest Pin (Single or Bulk)
- To delete a single pin: click the pin, click the three dots, select Edit Pin, click Delete, and confirm. Deleted pins cannot be recovered.
- To delete multiple pins at once, open the board, click Organize, select the pins you want to remove, and click the trash icon - bulk deletion saves significant time when cleaning up boards.
- Deleting a pin from your account doesn't remove copies that other users have already saved to their boards - those repins remain unaffected.
Whether you're cleaning up old pins, removing outdated content, or reorganizing your boards, deleting Pinterest pins is straightforward - but there are a few important things to know first.
## How to Delete a Single Pin
**⚠️ Important:** According to [Pinterest's official Help Center](https://help.pinterest.com/en/article/edit-or-delete-a-pin), once a pin is deleted, **it cannot be recovered**.
### Desktop:
1. Log in to [pinterest.com](https://pinterest.com)
2. Click your **profile picture** (top right)
3. Find the pin you want to delete
4. Click the pin to open it
5. Click the **three dots (...)** icon
6. Select **Edit Pin**
7. Click **Delete** (bottom left)
8. Click **Delete** again to confirm
### Mobile (iOS & Android):
1. Open the Pinterest app
2. Tap your **profile picture** (bottom right)
3. Find the pin you want to delete
4. Tap the pin to open it
5. Tap the **three dots (...)** icon (top right)
6. Tap the **edit option**
7. Tap **Delete this Pin** or the **trash icon** (bottom of screen)
8. Tap **Delete** to confirm
## How to Delete Pins in Bulk
**Pinterest only allows bulk deletion from individual boards** - you cannot bulk delete from your "All Pins" page.
**Limitations:**
- Desktop/web browser only (not available on mobile app)
- Up to 50 pins at a time
- Must be on the same board
- Can only delete pins you created on group boards
### Steps:
1. Go to your profile and open the board with pins to delete
2. Click **Organize** (below the board title)
- *Alternative: Click "Move pins" button next to the + icon*
3. Click each pin you want to delete
- A checkmark appears in the corner when selected
- Click again to deselect
- Use "Select all" to choose all visible pins
4. Click the **trash icon** at the bottom center
5. Click **Delete** to confirm
**Tip:** Delete 2-3 pins per day if cleaning up large boards. Deleting hundreds at once may trigger Pinterest's spam filters.
## What Happens When You Delete a Pin
### If You Created the Pin:
- **Deleted from Pinterest entirely** for everyone
- Removed from all your boards
- Other people's repins remain (but lose link to your account)
- Image removed from your profile permanently
- Original website content stays intact
### If You Saved Someone Else's Pin:
- **Only removed from your board**
- Pin still exists on Pinterest
- Original creator's pin unaffected
- Other savers still have it
**Note:** "Unsave" and "delete" mean the same thing for pins you've saved from others. For step-by-step instructions on unsaving pins, see our guide on [how to unsave pins on Pinterest](https://www.genviral.io/blog/how-to-unsave-pins-on-pinterest).
## Can You Edit a Pin Instead?
Before deleting, consider editing. You can change:
- Title
- Description
- Link
- Board location
- Comment settings
**What you cannot edit:**
- Image or video content (must create new pin)
- Audio content
To edit: Open pin → Three dots (...) → Edit Pin → Save changes
## Deleting Underperforming Pins
Many Pinterest marketers delete low-performing pins to improve overall account metrics. However, consider this before bulk deleting:
Before removing underperforming content, make sure you're following Pinterest best practices. For comprehensive optimization strategies, see our [Pinterest tips and tricks guide](https://www.genviral.io/blog/pinterest-tips-and-tricks).
**Think twice about deleting:**
- Pins from your own website (shows lower repin counts to others)
- Pins with existing engagement
- Pins with strong SEO value
**Good candidates for deletion:**
- Duplicate pins
- Broken or expired links
- Outdated seasonal content (old promotions, expired sales)
- Pins violating Pinterest guidelines
- Low-quality images that don't match your brand
## Common Questions
**Can I recover a deleted pin?**
No. Pinterest states that once a pin is deleted, it cannot be recovered. There's no "Recently Deleted" folder like Instagram or other platforms. Make sure before you delete. However, if you accidentally deleted an entire board, you have 7 days to recover it - see our guide on [how to recover deleted Pinterest boards](https://www.genviral.io/blog/how-to-recover-deleted-pinterest-boards). For instructions on deleting boards, see our guide on [how to delete a Pinterest board](https://www.genviral.io/blog/how-to-delete-a-board-on-pinterest).
**Will deleting a pin affect my Pinterest SEO?**
Possibly. If the pin was well-optimized and getting engagement, removing it can hurt your reach. Pinterest needs data to understand your interests and show content to the right audience. Consider editing instead of deleting.
**Can I bulk delete pins from multiple boards at once?**
No. You can only bulk delete pins from one board at a time using the "Organize" feature. To delete pins across multiple boards, you'll need to visit each board separately.
**What happens to comments on a deleted pin?**
All comments, likes, and engagement metrics are permanently deleted along with the pin.
**Can I delete other people's pins from my group board?**
Only if you're the board owner. To bulk remove other people's pins from your group board, you'd need to block the contributors (which removes all their pins), then unblock them afterward. Individual pins can be deleted one by one.
**How many pins can I delete at once?**
Pinterest allows up to 50 pins per bulk deletion. If you need to delete more, repeat the process in batches of 50.
**Is there a faster way to mass delete pins?**
Third-party tools like Redact.dev offer advanced bulk deletion with filters (by date, keyword, domain, board performance), but these typically require paid subscriptions. Pinterest's native tool is free but limited to 50 pins at a time per board.
**Will Pinterest suspend my account for deleting too many pins?**
Deleting hundreds or thousands of pins in a short period may trigger spam detection. Spread deletions over several days (2-3 pins per day for cleanup, or batches of 50 with breaks).
## Alternatives to Deleting Pins
**Archive the board instead:**
- Keeps pins but hides the board from your profile
- Can be unarchived anytime
- Go to board → Three dots (...) → Archive board
**Move pins to a secret board:**
- Pins stay saved but aren't public
- Create or use existing secret board ([how to make a board on Pinterest private](https://www.genviral.io/blog/how-to-make-a-board-on-pinterest-private))
- Select pins → Move → Choose secret board
**Hide pins from your home feed:**
- Only affects what you see, doesn't delete
- Three dots on pin → Hide Pin
## Should You Delete or Keep?
**Delete if:**
- Broken or dead links
- Duplicate content
- Outdated promotions/seasonal content
- Violates Pinterest policies
- Doesn't match your current brand
**Keep/Edit if:**
- Good engagement metrics
- Pins from your own website
- Strong Pinterest SEO value
- Evergreen content
- Just needs updated description or link
For creating new pins to replace deleted ones, see our complete guide on [how to make a pin on Pinterest](https://www.genviral.io/blog/how-to-make-a-pin-on-pinterest). For creating interactive collages, see [how to make Pinterest collage](https://www.genviral.io/blog/how-to-make-pinterest-collage). To learn how to profit from your pins, check out [how to make money with Pinterest](https://www.genviral.io/blog/how-to-make-money-with-pinterest). And for optimal posting frequency and strategy, check out our [Pinterest posting strategy guide](https://www.genviral.io/blog/pinterest-posting-strategy). To expand your reach, consider joining [group boards on Pinterest](https://www.genviral.io/blog/how-to-find-group-boards-on-pinterest). Cleaning up entire boards instead of individual pins? See [how to merge Pinterest boards](https://www.genviral.io/blog/how-to-merge-pinterest-boards).
---
*Want to optimize your Pinterest strategy? Need help scheduling pins consistently? [Genviral's Scheduler](https://www.genviral.io/pinterest-scheduler) helps you plan and schedule Pinterest content in advance.*
---
Canonical HTML: https://www.genviral.io/blog/how-to-delete-a-pinterest-pin
# How to Delete Instagram Account (Permanent & Temporary)
- You cannot delete your Instagram account from the app - you must use a web browser and go through Accounts Center - Account ownership and control - Deactivation or deletion.
- After requesting permanent deletion, Instagram gives you a 30-day grace period before all data is erased - log back in during that window to cancel the deletion.
- Temporary deactivation hides your profile without deleting anything and is reversible by simply logging back in - use it if you want a break without committing to permanent deletion.
## How to Permanently Delete Your Instagram Account
**You cannot delete your account from the Instagram app.** You must use a web browser.
### Steps to Delete (Desktop or Mobile Browser):
1. Go to [instagram.com/accounts/remove/request/permanent/](https://www.instagram.com/accounts/remove/request/permanent/) or:
- Log in → Menu (☰) → **Settings**
- **Accounts Center** → **Personal details**
- **Account ownership and control** → **Deactivation or deletion**
2. Select the account you want to delete
3. Choose **Delete account** → **Continue**
4. Pick a reason from the dropdown menu
5. Re-enter your password
6. Click **Permanently delete my account**
**Important:** According to [Instagram's Help Center](https://help.instagram.com/139886812848894), once deleted:
- Your profile, photos, videos, comments, likes, and followers are **permanently removed**
- Your username becomes available for others to claim
- You **cannot** sign up again with the same username
- Instagram **cannot** reactivate deleted accounts
## The 30-Day Grace Period
**Your account isn't deleted immediately.** Here's what happens:
- **Day 1-30:** Account is hidden (invisible to everyone)
- **Day 30:** Permanent deletion begins
- **Before Day 30:** Log in with your password to cancel deletion
If you log in during the 30-day window, your deletion request is automatically canceled and everything is restored.
## How to Temporarily Deactivate Instead
**Deactivation is reversible.** Your account is hidden but nothing is deleted.
### Steps to Deactivate:
1. Log in to Instagram via browser (desktop or mobile)
- **Note:** You cannot deactivate from the Instagram app
2. Go to your profile → **Edit Profile**
3. Scroll down → Click **Temporarily disable my account** (bottom right)
4. Select a reason from the dropdown
5. Re-enter your password
6. Click **Temporarily Disable Account**
### What Happens When Deactivated:
- ✅ Profile is hidden from searches
- ✅ Posts, comments, likes are hidden (but saved)
- ✅ You can reactivate anytime by logging back in
- ❌ DMs still visible to recipients (your name shows as "Instagram User")
**Limitation:** You can only deactivate once every 7 days. If you reactivate, you must wait a week before deactivating again.
## Delete vs Deactivate: Quick Comparison
| Feature | Delete | Deactivate |
|---------|--------|------------|
| **Reversible?** | No (after 30 days) | Yes (anytime) |
| **Data removed?** | Permanently | Hidden, not deleted |
| **How long?** | Forever | As long as you want |
| **Username?** | Becomes available | Reserved for you |
| **DMs?** | Erased after 30 days | Still visible |
| **Can do from app?** | No (browser only) | No (browser only) |
## Before You Delete: Download Your Data
Instagram lets you save everything before deletion:
1. Go to **Settings** → **Your Activity**
2. Click **Download or transfer information**
3. Select **Download to device**
4. Choose **All available information** or specific data
5. Instagram emails you a ZIP file (can take up to 14 days)
This includes:
- All photos and videos
- Stories and highlights
- Direct messages
- Comments and captions
- Profile information
**Tip:** If you're downloading your data because you want to start fresh with a new strategy, consider reviewing our guide on [optimal posting frequency](https://www.genviral.io/blog/how-often-should-you-post-on-instagram) before making a final decision to delete.
## Common Questions
**Can I delete my account from the Instagram app?**
No. Instagram requires you to use a web browser (desktop or mobile) to delete or deactivate accounts.
**What happens to my username after deletion?**
After the 30-day period ends, your username becomes available. Anyone can claim it.
**Can I recover a deleted account?**
Only within the 30-day grace period by logging back in. After 30 days, it's gone permanently and cannot be recovered.
**Do my DMs get deleted immediately?**
No. During the 30-day grace period, your DMs remain visible to recipients (your name shows as "Instagram User"). After 30 days, they're permanently deleted from your account, but recipients may still see past messages.
**Can I delete a Business or Creator account?**
Yes, but the process is the same as Personal accounts. Before deleting:
- Download your business insights (you'll lose them permanently)
- Unlink from Facebook, Shopify, or other connected platforms
- Remove payment methods
- All ad campaigns and performance data will be deleted
**How long does Instagram keep my data after deletion?**
Instagram removes most data from active servers after 30 days, but some copies may remain in backups for technical or legal reasons temporarily (up to 90 days according to Meta's policies).
**Can I delete without my password?**
No. You must log in to delete your account. If you forgot your password:
1. Click **Forgot password?** on the login page
2. Reset via email or phone number
3. Then proceed with deletion
**What if my account was hacked?**
Recover access first before attempting to delete:
- Use Instagram's account recovery via email, phone, or Facebook login
- Reset your password
- Enable two-factor authentication
- Then delete if needed
## Why People Delete Instagram
Common reasons (you'll have to select one during deletion):
- **Privacy concerns** - Want to control personal data (consider [turning off visible profile activity settings](https://www.genviral.io/blog/how-to-turn-off-profile-views-on-instagram) and [hiding your following list](https://www.genviral.io/blog/hide-instagram-following-list) as alternatives)
- **Time management** - Reduce screen time and social media addiction
- **Mental health** - Avoid comparison, negativity, or pressure
- **Low engagement** - Account not meeting business/personal goals
- **Platform change** - Moving to different social networks
- **Account consolidation** - Too many accounts to manage
## If You're Unsure: Try Deactivation First
**Not ready to permanently delete?** Deactivate instead.
Deactivation gives you:
- A break from Instagram without losing your data
- Time to see if you actually miss it
- The option to return whenever you want
You can keep your account deactivated for **as long as you want** - there's no time limit.
If after a few weeks or months you realize you don't need Instagram, you can always come back and delete permanently.
---
*Thinking about starting fresh instead? Before permanently deleting, consider optimizing your strategy first. To explore ways to earn from your account, see [how to make money with Instagram](https://www.genviral.io/blog/how-to-make-money-with-instagram). If the app eats your phone storage, try [clearing your Instagram cache](https://www.genviral.io/blog/how-to-clear-instagram-cache) first - it usually recovers several gigabytes. If you want to maintain an active presence without the daily grind, [Genviral](https://genviral.io) helps you schedule content in advance and stay consistent.*
---
Canonical HTML: https://www.genviral.io/blog/how-to-delete-instagram-account
# How to Delete Your TikTok Account (2026 Guide)
- To delete: Profile → Menu (≡) → Settings and privacy → Account → Deactivate or delete account → Delete account permanently. You'll verify your identity, then confirm.
- TikTok keeps your account in a 30-day grace period. Logging back in within that window cancels the deletion. After 30 days, your account and most associated data are permanently removed.
- Before you delete: download your data, withdraw any Creator Fund/TikTok Shop earnings, and save any videos you want to keep. Username may not be reusable immediately after deletion.
Deleting your TikTok account is a two-step process: you submit the request, then TikTok holds the account for 30 days before permanent removal. Here's exactly how to do it on mobile and desktop, plus what to handle before you pull the trigger.
## Before You Delete: What to Do First
Once the 30-day window closes, this is gone. Handle these first:
**1. Download your data.** TikTok lets you request a full archive of your videos, profile info, comments, messages, and login history. See TikTok's official guide on [requesting your data](https://support.tiktok.com/en/account-and-privacy/personalized-ads-and-data/requesting-your-data). Requests can take a few days to process, so start this before you delete.
**2. Save videos you want to keep.** Open each video → Share → Save video. Your drafts won't be in the export - see [where to find TikTok drafts](https://www.genviral.io/blog/where-to-find-tiktok-drafts) to grab them first.
**3. Withdraw any earnings.** If you're in the Creator Rewards Program or have TikTok Shop balances, transfer them out. See [how to make money with TikTok](https://www.genviral.io/blog/how-to-make-money-with-tiktok) for where balances live. Unwithdrawn balances are typically forfeited.
**4. Consider alternatives.** If a specific person is the problem, [block them](https://www.genviral.io/blog/how-to-block-someone-on-tiktok) instead. If you only want more browsing privacy, [turn off TikTok profile views](https://www.genviral.io/blog/how-to-turn-off-profile-views-on-tiktok). If your region is wrong, see [how to change TikTok account region](https://www.genviral.io/blog/how-to-change-tiktok-account-region). Deletion is permanent - these are not.
## How to Delete TikTok Account (Mobile)
**Step 1:** Open the TikTok app and log in to the account you want to delete.
**Step 2:** Tap **Profile** (bottom-right).
**Step 3:** Tap the **menu icon** (≡, top-right).
**Step 4:** Tap **Settings and privacy**.
**Step 5:** Tap **Account**.
**Step 6:** Tap **Deactivate or delete account**.
**Step 7:** Select **Delete account permanently**.
**Step 8:** Verify your identity. TikTok will send a 6-digit code to your phone number or email. Enter it.
**Step 9:** Read the warning, then tap **Continue** → **Delete account**.
**Done.** Your account is now deactivated and queued for permanent deletion in 30 days.
## How to Delete TikTok Account (Desktop)
**Step 1:** Go to [tiktok.com](https://www.tiktok.com) and log in.
**Step 2:** Click your **profile photo** (top-right).
**Step 3:** Click **Settings**.
**Step 4:** Click **Account control** → **Deactivate or delete account**.
**Step 5:** Click **Delete account permanently**.
**Step 6:** Enter the verification code sent to your phone or email.
**Step 7:** Confirm deletion.
**That's it.** The 30-day countdown starts immediately.
For TikTok's full official walkthrough, see their [deleting an account](https://support.tiktok.com/en/account-and-privacy/deleting-an-account) help page.
## The 30-Day Grace Period
After you submit deletion, your account enters a **30-day deactivation window**:
- Your profile, videos, and username become invisible to other users
- You can't be searched, tagged, or messaged
- **Logging back in within 30 days cancels the deletion** and restores everything
- After 30 days, the account and most associated data are permanently removed
**To cancel deletion:** Just open the app and log in with the same credentials before day 30. TikTok will ask if you want to restore the account.
## What Gets Deleted (and What Doesn't)
**Permanently removed after 30 days:**
- Your profile, username, and bio
- All videos you posted
- Your followers and following lists
- Your likes, favorites, and saved sounds
- Your drafts and private videos
**May persist:**
- Comments you left on other users' videos (some remain, attributed to a deleted user)
- Direct messages you sent - they stay in the other person's inbox
- Videos others reposted, duetted, or stitched from yours
- Data TikTok is legally required to retain (per their privacy policy)
## Username Reuse
Your username is **not immediately available** for reuse after deletion. TikTok holds it for a period (often well past the 30-day grace window) before releasing it back into the pool. If your goal is to free up a username to use on a new account, expect a wait.
## If You Can't Log In
You need to be logged in to delete an account. If you've lost access:
- **Forgot password:** Use TikTok's password reset flow with your phone/email
- **Lost phone number and email:** Submit a [TikTok support request](https://www.tiktok.com/legal/report/feedback) explaining the situation. They may verify ownership through other means.
- **Hacked account:** Report it as compromised first, then proceed with deletion once recovered
## Deactivate vs. Delete
TikTok's current flow merges these - when you tap "Deactivate or delete account," you choose between **temporary** (account hidden, easy to restore by logging in) and **permanent** (the 30-day countdown to full deletion). There's no separate indefinite deactivation anymore.
If you just need a break, log out and uninstall the app. Your account stays active and intact.
## Common Questions
**How long does TikTok account deletion take?**
30 days from submission. The account is hidden immediately, then permanently deleted after the grace period.
**Can I delete my TikTok account without logging in?**
No. You must verify identity through the logged-in flow or recover access first.
**Will my videos still show up after I delete?**
Videos others have reposted, stitched, or duetted may remain on those users' content. Your originals are removed.
**Can I get my account back after 30 days?**
No. Once the window closes, deletion is permanent and irreversible.
**Does deleting TikTok remove me from TikTok Shop?**
Yes. Seller accounts, orders history, and any associated balances are tied to the TikTok account. Settle balances and pending orders first.
**Will my phone number be reusable on a new account?**
Yes, after the 30-day window. Same with the email.
**What about Creator Rewards Program earnings?**
Withdraw before you delete. Balances below the payout threshold or left unclaimed are typically forfeited.
## Starting Over on TikTok
If you're deleting to start fresh, don't just sign up and start posting - new accounts get throttled if they behave too aggressively. See [how to warm up a TikTok account](https://www.genviral.io/blog/warm-up-tiktok-account) before posting. If you're targeting US viewers from outside the US, also see [how to target US users on TikTok](https://www.genviral.io/blog/target-us-users-on-tiktok).
## The Bottom Line
**Mobile:**
1. Profile
2. Menu (≡)
3. Settings and privacy
4. Account
5. Deactivate or delete account
6. Delete account permanently
7. Verify identity
8. Confirm
**Desktop:**
1. Settings
2. Account control
3. Deactivate or delete account
4. Delete account permanently
5. Verify identity
6. Confirm
**Key points:**
- 30-day grace period - log in to cancel
- Download your data and withdraw earnings first
- Username is held before it's released
- Deletion is permanent after day 30
For an alternative to deletion, see [how to block someone on TikTok](https://www.genviral.io/blog/how-to-block-someone-on-tiktok) or [how to change TikTok account region](https://www.genviral.io/blog/how-to-change-tiktok-account-region). To recover unposted content before you delete, see [where to find TikTok drafts](https://www.genviral.io/blog/where-to-find-tiktok-drafts) and [how to see saved videos on TikTok](https://www.genviral.io/blog/how-to-see-saved-videos-on-tiktok).
---
*Building a new TikTok presence after a reset? [Genviral](https://genviral.io) helps you schedule, post, and grow on TikTok, Instagram, Facebook, Pinterest, and more - without juggling tabs.*
---
Canonical HTML: https://www.genviral.io/blog/how-to-delete-tiktok-account
# How to Find Drafts on Facebook (2026 Guide)
- Personal profile drafts are accessed through notifications on Android or by opening the post composer on iPhone - there is no dedicated drafts folder. Personal drafts expire after 3 days.
- Facebook Page drafts are managed in Meta Business Suite: Content - Drafts - where you can edit, schedule, or delete them with no expiration limit.
- Drafts saved in Facebook's native composer don't sync between devices - a draft saved on your phone won't appear on desktop.
Facebook stores drafts differently depending on whether you're using a personal profile or a Page - and the location varies by device. Here's exactly where to find them in each case.
## Important: Personal Profiles vs. Facebook Pages
Facebook handles drafts differently depending on account type:
**Personal profiles:**
- Limited draft functionality
- No dedicated "Drafts folder"
- Drafts accessed through notifications or post composer
- Drafts expire after 3 days
**Facebook Pages:**
- Full draft management in Meta Business Suite
- Dedicated Drafts section
- Multiple drafts supported
- No expiration
## How to Find Drafts on Facebook (Personal Profile)
### On Android
Android offers the best draft experience for personal profiles.
**Method 1: Through notification**
**Step 1:** When you save a draft, you receive a push notification saying "Your draft was saved"
**Step 2:** Tap the notification
**Step 3:** Your draft opens
**Step 4:** Tap the back button to see all your saved drafts
**Method 2: Through the app**
**Step 1:** Open Facebook app
**Step 2:** Tap the notifications icon (bell)
**Step 3:** Look for "Your draft was saved" notification
**Step 4:** Tap to open your draft
**Important:** Drafts are automatically deleted after 3 days on Android.
### On iPhone
iPhone has more limited draft functionality.
**Step 1:** Open Facebook app
**Step 2:** Tap "What's on your mind?" at the top
**Step 3:** If you have a saved draft, it will appear automatically in the composer
**Alternative:** Look for "Finish your previous post?" notification at the top of your home page
**Important limitations:**
- iPhone only saves ONE draft at a time
- Creating a new draft deletes the previous one
- No dedicated drafts folder
- No notification system like Android
### On Desktop (Personal Profile)
**There is no drafts folder for personal profiles on desktop.**
If you start typing a post and close the window:
- Facebook asks "Keep Editing" or "Leave"
- If you select "Keep Editing," the draft stays in the composer
- If you close the browser or refresh, the draft is lost
**Workaround:** Type longer posts in a notes app first, then paste into Facebook.
## How to Find Drafts on Facebook Page
Facebook Pages have proper draft management through Meta Business Suite.
### On Desktop (Recommended)
**Step 1:** Go to facebook.com and log in
**Step 2:** Click "Pages" in the left menu
**Step 3:** Select your Page
**Step 4:** Click "Meta Business Suite" in the left menu
**Step 5:** Click "Content" in the left sidebar
**Step 6:** Click "Posts & reels"
**Step 7:** Click the "Drafts" tab
**Done.** You'll see all your saved drafts. Click any draft to edit, publish, schedule, or delete it. For finding scheduled posts instead of drafts, see [where to find scheduled posts on Facebook](https://www.genviral.io/blog/where-to-find-scheduled-posts-on-facebook).
**Direct URL:** You can also go directly to business.facebook.com and navigate to Content → Drafts.
### On Mobile (Facebook Page)
**Step 1:** Open Facebook app
**Step 2:** Tap Menu (☰) icon
**Step 3:** Tap "Pages"
**Step 4:** Select your Page
**Step 5:** Look for "Posts" tab
**Step 6:** Tap "Drafts"
**Note:** Meta Business Suite on mobile has limited draft management compared to desktop. For full functionality, use a computer.
## How to Save a Draft on Facebook
### Personal Profile (Mobile)
**Step 1:** Tap "What's on your mind?"
**Step 2:** Type your post
**Step 3:** Tap the back button (or X)
**Step 4:** Select "Save as draft" when prompted
**Step 5:** You'll receive a notification confirming the draft was saved
### Facebook Page (Desktop)
**Step 1:** Go to your Page
**Step 2:** Open Meta Business Suite
**Step 3:** Click "Create post"
**Step 4:** Write your post and add media
**Step 5:** Click "Save as draft" (instead of Publish)
**Step 6:** Draft saves to your Drafts folder
## How to Edit a Draft
### Personal Profile
**Step 1:** Access your draft (through notification or composer)
**Step 2:** Make your changes
**Step 3:** Either publish or save as draft again
### Facebook Page
**Step 1:** Go to Meta Business Suite → Content → Drafts
**Step 2:** Click on the draft you want to edit
**Step 3:** Click "Edit"
**Step 4:** Make your changes
**Step 5:** Save as draft, schedule, or publish
## How to Delete a Draft
### On Android (Personal Profile)
**Step 1:** Access your drafts through notification
**Step 2:** Tap the three-dot menu next to the draft
**Step 3:** Select "Discard draft"
**Step 4:** Confirm deletion
### On iPhone (Personal Profile)
**Step 1:** Open the draft in the composer
**Step 2:** Delete all text manually
**Step 3:** Close the composer
- Or simply create a new draft (replaces the old one)
### On Facebook Page
**Step 1:** Go to Meta Business Suite → Content → Drafts
**Step 2:** Select the draft
**Step 3:** Click "Delete" or the trash icon
**Step 4:** Confirm deletion
## Why Did My Facebook Draft Disappear?
**Common reasons:**
**1. Draft expired**
- Personal profile drafts last only 3 days
- After that, they're automatically deleted
**2. Created a new draft (iPhone)**
- iPhone only saves one draft
- New draft overwrites the previous one
**3. App was closed or refreshed**
- Drafts may not save if app crashes
- Desktop drafts are lost if browser closes
**4. Logged into different account**
- Drafts don't transfer between accounts
**5. App update or reinstall**
- Updates can sometimes clear drafts
**6. Facebook glitch**
- Platform issues occasionally cause draft loss
**Prevention tip:** For important posts, type in a notes app first, then paste into Facebook.
## Facebook Group Drafts
Facebook Groups have very basic draft functionality.
**How it works:**
- Start a post in a Group
- If interrupted, the draft stays in the Group's post composer
- Return to the same Group to find your draft
**Limitations:**
- No dedicated drafts folder for Groups
- Draft only accessible from that specific Group
- Refreshing or closing the app may delete the draft
- Only one draft per Group
**To access:**
1. Go to the Group where you saved the draft
2. Tap "Write something..."
3. Your draft should appear (if still saved)
## Drafts in Marketplace
Facebook Marketplace also supports drafts for listings.
**To find Marketplace drafts:**
**Step 1:** Open Facebook
**Step 2:** Go to Marketplace
**Step 3:** Tap your profile icon or "Your items"
**Step 4:** Look for "Drafts" section
**Step 5:** Tap to view and edit draft listings
## Tips for Managing Facebook Drafts
**Best practices:**
✓ **Don't rely on drafts for important content** - Copy text to a notes app as backup
✓ **Publish within 3 days** - Personal profile drafts expire
✓ **Use desktop for Page drafts** - Better functionality than mobile
✓ **One draft at a time on iPhone** - New drafts replace old ones
✓ **Check notifications quickly** - Draft notifications can get buried
✓ **Use Meta Business Suite** - Most reliable draft management for Pages
✓ **Keep Facebook app updated** - Updates improve draft stability
## Common Questions
**Is there a drafts folder on Facebook?**
For personal profiles, no. There's no dedicated drafts folder. On Android, you access drafts through notifications. On iPhone, drafts appear in the post composer. Facebook Pages have a proper Drafts section in Meta Business Suite.
**How long do Facebook drafts last?**
Personal profile drafts last 3 days before automatic deletion. Facebook Page drafts in Meta Business Suite don't expire and remain until you publish or delete them.
**Can I save multiple drafts on Facebook?**
On Android, yes - you can save multiple personal profile drafts. On iPhone, only one draft at a time (new drafts overwrite old ones). Facebook Pages can save unlimited drafts in Meta Business Suite.
**Why can't I find my draft on Facebook?**
Drafts may have expired (3-day limit), been overwritten (iPhone), or lost due to app closure. There's no recovery option for lost drafts. For important posts, always keep a backup copy.
**Do Facebook drafts sync across devices?**
Personal profile drafts do NOT sync across devices. A draft saved on your phone won't appear on your computer. Facebook Page drafts in Meta Business Suite sync across devices since they're stored on Facebook's servers.
**Can I schedule a draft on Facebook?**
For personal profiles, no - you can only save as draft or publish immediately. For Facebook Pages, yes - you can schedule drafts through Meta Business Suite. For finding scheduled posts, see our scheduling guide linked above.
**Where is Publishing Tools on Facebook?**
Publishing Tools has been moved to Meta Business Suite. Go to your Page → Click "Meta Business Suite" in the left menu → Navigate to Content → Drafts.
**Can other Page admins see my drafts?**
Yes. Facebook Page drafts in Meta Business Suite are visible to all Page admins and editors. Personal profile drafts are private and only visible to you. For managing Page admins, see [how to add admin to Facebook Page](https://www.genviral.io/blog/how-to-add-admin-to-facebook-page).
**How do I recover a deleted draft?**
Unfortunately, deleted drafts cannot be recovered. Facebook doesn't store backup copies. Always save important content externally before relying on Facebook's draft feature.
**Do Reels have drafts on Facebook?**
Yes. When creating a Reel, you can save it as a draft. Find Reel drafts in Meta Business Suite under Content → Reels → Drafts tab.
## The Bottom Line
Finding drafts on Facebook:
**Personal Profile:**
- **Android:** Tap "Your draft was saved" notification → Back button to see all drafts
- **iPhone:** Tap "What's on your mind?" → Draft appears automatically (only 1 draft saved)
- **Desktop:** No drafts folder - drafts only stay in open composer window
**Facebook Page:**
- Meta Business Suite → Content → Posts & reels → Drafts tab
- Desktop is recommended for full draft management
**Key points:**
- Personal profile drafts expire after 3 days
- iPhone only saves one draft at a time
- No drafts folder for personal profiles
- Facebook Pages have proper draft management
- Lost drafts cannot be recovered
- Always backup important content externally
**Pro tip:** For reliable content management across Facebook and other platforms, use a social media scheduling tool like [Genviral](https://genviral.io) to save drafts, schedule posts, and never lose your content.
For more Facebook tips, see [how to make money with Facebook](https://www.genviral.io/blog/how-to-make-money-with-facebook), [how to change email on Facebook](https://www.genviral.io/blog/how-to-change-email-on-facebook), [how to change name on Facebook](https://www.genviral.io/blog/how-to-change-name-on-facebook), [how to lock Facebook account](https://www.genviral.io/blog/how-to-lock-facebook-account), [how to view blocked Facebook friends](https://www.genviral.io/blog/how-to-view-blocked-facebook-friends), [how to see who shared my post on Facebook](https://www.genviral.io/blog/how-to-see-who-shared-my-post-on-facebook), and [how to comment anonymously on Facebook](https://www.genviral.io/blog/how-to-comment-anonymously-on-facebook).
---
*Managing content across multiple platforms? [Genviral's Facebook Scheduler](https://www.genviral.io/facebook-scheduler) helps you schedule and organize social media posts for Facebook, Instagram, TikTok, Pinterest, and more - with reliable draft saving that never expires and works across all your devices.*
---
Canonical HTML: https://www.genviral.io/blog/how-to-find-drafts-on-facebook
# How to Find Group Boards on Pinterest (2026 Complete Guide)
- Group boards are identified by multiple overlapping profile icons instead of one - search your niche keyword in Pinterest, filter by Boards, and look for that multi-avatar indicator.
- For new accounts under 1,000 followers, joining group boards is still a viable way to get initial content distribution; for established accounts, optimizing your own boards has more impact.
- PinGroupie.com is the most efficient way to find and filter group boards by category, follower count, and activity level before requesting to join.
Pinterest group boards are easy to spot once you know what to look for. This guide covers six proven methods to find the right ones for your niche - from Pinterest's own search to dedicated third-party tools.
## What Are Pinterest Group Boards?
Group boards (also called collaborative boards) are Pinterest boards with **multiple contributors** who can all add pins to the same board.
**Visual identification:**
- **Regular board:** Single profile picture
- **Group board:** Circle with multiple small profile pictures overlapping
**Key characteristics:**
✅ Multiple people can pin content
✅ Board owner controls permissions
✅ Often have more followers than regular boards
✅ Can have dozens (or hundreds) of contributors
✅ Used for collaboration and expanding reach
**Example:** A "Healthy Recipes" group board might have 50 food bloggers all pinning their recipes, giving each contributor access to the board's 10,000 followers.
**Group boards vs. private boards:** Group boards are designed for public reach with multiple contributors. If you want the opposite - a board only you and a small invited group can see - see [how to make a board on Pinterest private](https://www.genviral.io/blog/how-to-make-a-board-on-pinterest-private).
## Why Find Group Boards? (Are They Still Worth It in 2026?)
**The truth:** Group boards are less powerful than they were in 2018-2020, but they're NOT dead.
### When Group Boards Are Worth It:
**For new Pinterest accounts:**
- You have under 1,000 followers
- You're building initial authority
- You need exposure beyond your own audience
**For time-sensitive content:**
- Seasonal recipes (holiday content)
- Event planning boards
- Product launches
- Trending topics
**For niche collaboration:**
- Connecting with peers in your industry
- Building relationships with other creators
- Finding content creation partners
### When to Skip Group Boards:
❌ Your own boards already perform well
❌ You have a strong follower base (5,000+)
❌ Group boards are low-quality or spammy
❌ You don't have time to manage them
**The modern strategy:** Quality over quantity. Join 5-7 **highly relevant, active** group boards rather than 50 random ones.
## How to Identify Group Boards Visually
Before searching, you need to recognize them.
### On Desktop:
**Group board indicators:**
1. **Multiple profile icons** - Small circular icon showing 2-3 profile pictures
2. **Collaborator count** - Shows number of contributors
3. **"Join" button** - Some boards display this if accepting members
**Regular board:**
- Single profile picture
- Only the owner's name
### On Mobile (iOS/Android):
**Look for:**
- **Circular icon at bottom corner** of board thumbnail
- Multiple tiny profile pictures inside the circle
- This appears on the board preview before clicking
### Inside the Board:
Once you open any board:
- **Collaborators section** shows all contributor names
- **First profile picture** = board owner (always)
- Remaining pictures = collaborators
## Method 1: Pinterest Native Search (Free, Built-In)
The most straightforward method using Pinterest itself.
### Desktop Instructions:
**Step 1:** Go to Pinterest.com
- Log into your account
**Step 2:** Use the Search Bar
- Type your niche keyword
- Examples: "food blogging", "travel tips", "home decor", "digital marketing"
- Start broad, then narrow
**Step 3:** Filter Results to Boards
- Look at the dropdown menu next to search bar
- Currently shows "All Pins" by default
- Click it to reveal options
- Select **"Boards"**
**Step 4:** Browse Results
- Scroll through board results
- Look for the multiple-profile-icon indicator
- Group boards will have this circle icon
**Step 5:** Evaluate Each Board
- Click on promising boards
- Check number of collaborators
- Review recent pins (are they active?)
- Read board description for join instructions
### Mobile Instructions (iOS/Android):
**Step 1:** Open Pinterest App
- Tap search icon (magnifying glass)
**Step 2:** Enter Keyword
- Type your niche
- Example: "vegan recipes"
**Step 3:** Filter to Boards
- Tap "All Pins" dropdown at top
- Select "Boards" from menu
**Step 4:** Scroll and Identify
- Look for boards with the circular multi-profile icon
- This appears at bottom-left of board thumbnail
- Tap boards to see details
**Step 5:** Check Board Details
- Number of pins
- Number of followers
- Collaborator list
- Join instructions in description
### Tips for Better Search Results:
**Use specific keywords:**
- ❌ Too broad: "food"
- ✅ Better: "healthy meal prep"
- ✅ Even better: "keto meal prep recipes"
**Try variations:**
- "blogging tips group board"
- "travel bloggers collaborative board"
- "photography board with contributors"
**Leverage autosuggest:**
- Pinterest shows related searches
- Click these to discover niche-specific boards
## Method 2: PinGroupie (Most Popular Tool)
**Website:** pingroupie.com
**Cost:** Free
**Best for:** Quick searching with detailed stats
### What PinGroupie Shows:
- Board name and description
- Number of followers
- Number of collaborators
- Number of pins
- Average repins
- Last updated date
- Direct link to board
### How to Use PinGroupie:
**Step 1:** Go to pingroupie.com
- No account required
**Step 2:** Choose Search Method
**Option A - Category Search:**
- Click "Category" dropdown
- Select from 30+ categories:
- Food & Drink
- Travel
- Fashion
- Home Decor
- Business
- Technology
- etc.
- Click "Filter"
**Option B - Keyword Search:**
- Enter keyword in "Title" field
- Or enter keyword in "Description" field
- Or search both
- Click "Filter"
**Step 3:** Apply Filters
- Enable "Request to Join" filter (highly recommended)
- Enable "Exclude Stale Boards" (removes inactive boards)
- These filters save massive time
**Step 4:** Sort Results
- Click "OrderBy" dropdown
- Sort by:
- **Followers** (most popular)
- **Pins** (most active)
- **Collaborators** (size of team)
- **Average Repins** (engagement)
- **Followers/Collaborators Ratio** (efficiency)
**Step 5:** Analyze Boards
- Click board title to open on Pinterest
- Click creator icon to see owner profile
- Hover over description for details
### PinGroupie Pro Tips:
✅ **Always enable "Request to Join" filter** - These boards have clear instructions
✅ **Exclude stale boards** - Saves time on dead boards
✅ **Sort by followers first** - Start with popular boards
✅ **Check follower-to-collaborator ratio** - Aim for 50:1 or higher
**Warning:** PinGroupie's "Last Updated" shows when PinGroupie crawled the board, NOT when the board was last active. Always verify activity on Pinterest.
## Method 3: Follow Successful Competitors
The "spy on your peers" strategy.
### How It Works:
Find successful Pinterest users in your niche → see which group boards they've joined → join the same boards.
### Step-by-Step Process:
**Step 1:** Identify Top Pinners in Your Niche
- Search your main keyword on Pinterest
- Look at who ranks highly
- Check who has 10,000+ followers
- Find 5-10 relevant accounts
**Step 2:** Visit Their Profile
- Click on their profile picture
- Go to their full profile page
**Step 3:** Click "Saved" Tab
- Shows all boards they own and contribute to
- Scroll through their boards
**Step 4:** Identify Group Boards
- Look for the multi-profile icon
- Group boards appear mixed with personal boards
- They're often at the bottom of the profile
**Step 5:** Click on Group Boards
- Open each group board
- Check if it's still active
- Check if accepting new members
- Read description for instructions
**Step 6:** Create a Spreadsheet
- Board name
- URL
- Number of followers
- Number of collaborators
- Join instructions
- Owner contact info
- Applied? (Yes/No)
- Status (Pending/Accepted/Rejected)
### Why This Method Works:
- **Pre-vetted quality** - If successful pinners joined, boards are likely good
- **Niche-relevant** - Boards match your exact industry
- **Competitor analysis** - See what's working for others
- **Discover hidden gems** - Find boards not in directories
## Method 4: Facebook Groups for Bloggers
Many Pinterest users share group boards in Facebook communities.
### How to Use Facebook Groups:
**Step 1:** Search Facebook for Groups
- "Pinterest group boards"
- "[Your niche] Pinterest group boards"
- "Blogger Pinterest collaboration"
- "Pinterest marketing for [your industry]"
**Step 2:** Join Relevant Groups
- Look for active groups (100+ members)
- Read group rules
- Answer membership questions
**Step 3:** Search Within Groups
- Use group search function
- Search "group board"
- Search "collaborative board"
- Search "open board"
**Step 4:** Look for Pinned Posts
- Many groups have dedicated threads
- "Share your group boards here"
- "Open group boards list"
**Step 5:** Post Your Own Request (Optional)
- "Looking for [niche] group boards accepting contributors"
- Share what you offer in return
- Be specific about your niche
### Recommended Facebook Groups:
- Blogger group boards for your specific niche
- Pinterest marketing communities
- Content creator collaboration groups
- Niche-specific blogging groups
## Method 5: Check Board Owner Profiles
When you find ONE good group board, use it to find MORE.
### The Strategy:
**Step 1:** Find a Quality Group Board
- Use any method above
**Step 2:** Identify the Board Owner
- Click on the board
- Board owner = first profile picture shown
- Usually listed first in URL
**Step 3:** Visit Owner's Profile
- Click their profile picture
- Go to their main Pinterest page
**Step 4:** Browse Their Boards
- Scroll through all their boards
- Successful group board owners often manage MULTIPLE group boards
- Or they're members of many others
**Step 5:** Evaluate Their Other Boards
- Click each group board they own/contribute to
- Check if relevant to your niche
- See if accepting members
**Why this works:** People who manage one successful group board often manage several or know the community well.
## Method 6: Google Search for Curated Lists
Bloggers frequently publish "top group boards" lists.
### How to Search:
**Google search terms:**
- "Pinterest group boards for [your niche] 2025"
- "Best Pinterest group boards for [your niche]"
- "Open Pinterest group boards list"
- "[your niche] Pinterest group boards to join"
**Examples:**
- "Pinterest group boards for food bloggers"
- "Best travel Pinterest group boards 2025"
- "Open Pinterest group boards for digital marketing"
### What You'll Find:
- Blog posts with 50-100 curated boards
- Board links organized by category
- Recent updates (look for 2024-2025 posts)
- Sometimes join instructions included
### Caution:
❌ Many lists are outdated
❌ Boards may be closed to new members
❌ Some boards are now inactive
✅ Use as starting point, verify on Pinterest
## How to Evaluate Group Boards (Before Joining)
NOT all group boards are created equal. Many are low-quality.
### Quality Indicators (Green Flags):
✅ **Active recent pins** - Pins added in last 7 days
✅ **Clear board description** - Explains the theme
✅ **Join instructions provided** - Contact info or button
✅ **High follower count** - 1,000+ followers minimum
✅ **Reasonable collaborator count** - 10-100 (not 1,000+)
✅ **Good follower-to-collaborator ratio** - At least 50:1
✅ **Quality pins** - Well-designed, relevant content
✅ **Engaged community** - Comments, repins visible
✅ **Niche-specific** - Focused topic, not generic
### Red Flags (Avoid):
❌ **No recent activity** - Last pin is months old
❌ **Spam content** - Off-topic pins, low quality
❌ **Too many collaborators** - 500+ means your pins get buried
❌ **No board description** - Unclear purpose
❌ **No join instructions** - Board likely closed
❌ **Mixed unrelated topics** - Lack of focus
❌ **Dead engagement** - No repins, saves, or comments
### Calculate Follower-to-Collaborator Ratio:
**Formula:** Followers ÷ Collaborators = Ratio
**Examples:**
- 5,000 followers ÷ 50 collaborators = **100:1** (Excellent)
- 2,000 followers ÷ 100 collaborators = **20:1** (OK)
- 10,000 followers ÷ 1,000 collaborators = **10:1** (Too crowded)
**Aim for:** 50:1 or higher
### Check Recent Pin Activity:
**Step 1:** Open the group board
**Step 2:** Look at the most recent pins
**Step 3:** Check dates:
- Pins from today/this week = Active
- Pins from 1-2 months ago = Moderate
- Pins from 6+ months ago = Dead (skip it)
### Look at Pin Quality:
- Are pins visually appealing?
- Do they match the board's stated theme?
- Are they professional or spammy?
- Do pins have good text overlays?
## How to Join Group Boards (Quick Overview)
Once you've found quality boards, here's how to join:
### Most Common Methods:
**1. Follow Board Description Instructions**
- Most boards list requirements
- Usually: "Follow me + DM on Pinterest"
- Or: "Email [address] with your profile link"
**2. Click "Join" Button**
- Some boards have this enabled
- Click and wait for approval
- Appears under board description
**3. Contact Board Owner Directly**
- Find owner (first profile picture)
- Visit their profile for contact info
- Send polite message/email
**4. Fill Out Google Form**
- Some owners use forms to vet applicants
- Link usually in board description
### What to Include in Your Request:
✅ Your name
✅ Link to your Pinterest profile
✅ Brief explanation of your content
✅ Why you're a good fit for the board
✅ Confirmation you'll follow board rules
✅ Professional, friendly tone
**Example message:**
"Hi [Owner Name], I'm [Your Name], a [your niche] blogger with [X] Pinterest followers. I'd love to join your '[Board Name]' group board as I create content about [relevant topics]. My Pinterest profile: [URL]. I'll follow all board rules and contribute quality pins regularly. Thanks for considering!"
## Common Mistakes When Finding Group Boards
### Mistake 1: Joining Too Many Boards
❌ Joining 50+ boards
✅ Join 5-10 high-quality boards
**Why:** Managing too many boards dilutes your effort and Pinterest may see it as spam.
### Mistake 2: Ignoring Board Quality
❌ Joining any board that accepts you
✅ Vetting each board carefully
**Why:** Low-quality boards can hurt your Pinterest authority.
### Mistake 3: Not Reading Board Rules
❌ Pinning immediately without checking rules
✅ Reading description and following guidelines
**Why:** You'll get removed for violating unstated rules.
### Mistake 4: Focusing Only on Follower Count
❌ "This board has 100K followers, must be great!"
✅ Checking engagement, activity, and quality
**Why:** Follower count means nothing if the board is inactive.
### Mistake 5: Never Evaluating Performance
❌ Pin and forget
✅ Track which boards drive traffic
**Why:** You want to focus on boards that actually work.
### Mistake 6: Pinning Only Your Content
❌ Using group boards for self-promotion only
✅ Repinning from others, engaging with community
**Why:** Pinterest and board owners expect collaboration.
## How to Track Your Group Board Performance
Once you've joined boards, track what works.
### Use Pinterest Analytics:
**Step 1:** Go to Pinterest Analytics
- Available for business accounts only
- analytics.pinterest.com
**Step 2:** Check Pin Performance
- See which pins get the most engagement
- Filter by board
**Step 3:** Identify Top Boards
- Which group boards drive the most:
- Impressions
- Saves
- Clicks
- Outbound clicks
**Step 4:** Double Down on Winners
- Pin more to high-performing boards
- Leave underperforming boards
### Create a Tracking Spreadsheet:
**Columns:**
- Board name
- Date joined
- Pins added (last 30 days)
- Impressions
- Saves
- Clicks
- Engagement rate
- Keep? (Yes/No)
**Review monthly:** Which boards deliver results?
### Tools for Tracking:
**Tailwind (Paid):**
- Board Insights feature
- Shows performance by board
- Recommends best boards
**Pinterest Native Analytics (Free):**
- Basic metrics by board
- Pin performance data
## Quick Reference: All 6 Methods
| Method | Difficulty | Cost | Best For |
|--------|------------|------|----------|
| Pinterest Search | Easy | Free | Beginners, quick finds |
| PinGroupie | Easy | Free | Detailed stats, bulk searching |
| Follow Competitors | Medium | Free | Finding pre-vetted quality boards |
| Facebook Groups | Easy | Free | Networking, finding hidden boards |
| Board Owner Profiles | Medium | Free | Discovering board clusters |
| Google Search Lists | Easy | Free | Starting point, curated lists |
## Common Questions
**How many group boards should I join?**
Start with 5-7 highly relevant, active boards. Quality beats quantity. Monitor performance and drop underperformers after 30-60 days.
**Are group boards still effective in 2026?**
Yes, but less than before. They work best for new accounts, niche collaboration, and time-sensitive content. Your own boards should remain your primary focus.
**Can I find group boards without PinGroupie?**
Yes. Use Pinterest's native search (filter by "Boards") or check profiles of successful pinners in your niche. PinGroupie just speeds up the process.
**Why do some boards show in search but others don't?**
Pinterest's algorithm decides visibility. Private or less-engaged boards may not appear. Use multiple search methods to find hidden boards.
**How do I know if a board is accepting new members?**
Look for: (1) "Join" button under description, (2) join instructions in board description, or (3) "Request to Join" filter on PinGroupie showing "Yes."
**What if a board has no join instructions?**
The board is likely closed to new members. You can try contacting the owner directly via their website/blog, but response rates are low (under 50%).
**Do group boards still help with Pinterest SEO?**
Indirectly. While boards themselves aren't a ranking factor, increased engagement from group boards can boost your pin's performance in search.
**Should I create my own group board?**
If you're established in your niche (2,000+ followers), yes. It positions you as an authority and lets you control quality. Start small with 10-20 contributors.
**How can I tell if a board is spam?**
Red flags: Off-topic pins, no clear theme, 1,000+ collaborators, no activity in months, board description mentions unrelated products/services.
**What's the difference between collaborators and followers?**
Collaborators can add pins to the board. Followers just see the board's pins in their feed. A board might have 50 collaborators but 5,000 followers.
## The Bottom Line
Finding group boards on Pinterest in 2026 is straightforward once you know where to look:
**Best method for beginners:** Pinterest native search (filter to "Boards")
**Best method for speed:** PinGroupie.com with filters enabled
**Best method for quality:** Follow successful competitors in your niche
**Remember the key principles:**
1. **Quality over quantity** - 5 great boards beat 50 mediocre ones
2. **Evaluate before joining** - Check activity, engagement, and rules
3. **Track performance** - Monitor which boards drive actual results (crucial if you want to [make money with Pinterest](https://www.genviral.io/blog/how-to-make-money-with-pinterest))
4. **Focus on your own boards first** - Group boards complement, not replace
5. **Be selective** - Join only niche-relevant, active boards
**Managing your pins:** If you need to remove pins from group boards you've joined, see our guide on [how to unsave pins on Pinterest](https://www.genviral.io/blog/how-to-unsave-pins-on-pinterest). For creating interactive collages to share on group boards, see [how to make Pinterest collage](https://www.genviral.io/blog/how-to-make-pinterest-collage). One thing to note: you can only [merge Pinterest boards](https://www.genviral.io/blog/how-to-merge-pinterest-boards) you own - group boards you joined as a collaborator can't be merged, only left.
Group boards aren't the Pinterest goldmine they were in 2018, but they remain a valuable tool for new accounts and strategic collaboration. Use them wisely as part of a broader Pinterest strategy. For more advanced tactics, check out our [Pinterest tips and tricks guide](https://www.genviral.io/blog/pinterest-tips-and-tricks). To clean up your feed from AI-generated content, see [how to turn off AI posts on Pinterest](https://www.genviral.io/blog/how-to-turn-off-ai-posts-on-pinterest).
---
*Ready to level up your Pinterest strategy beyond group boards? [Genviral's Scheduler](https://www.genviral.io/pinterest-scheduler) helps you schedule pins, track engagement, and optimize your posting schedule - so you can focus on creating content that actually converts. For a complete posting strategy, see our [Pinterest posting strategy guide](https://www.genviral.io/blog/pinterest-posting-strategy).*
---
Canonical HTML: https://www.genviral.io/blog/how-to-find-group-boards-on-pinterest
# How to Get Spark Code on TikTok (2026 Guide)
- A Spark Code lets a brand promote your organic TikTok video as a paid Spark Ad - all likes, comments, and shares from the ad flow back to your original post, boosting your account's engagement.
- To generate: open your video - tap three dots - Ad settings - toggle on "Ad authorization" - tap "Generate code" - choose duration (7, 30, 60, or 365 days) - share the code with the brand.
- Brands enter the code in TikTok Ads Manager and can boost your video's reach, but cannot edit your content, caption, or creative. Your creative ownership is fully preserved.
- Spark Codes expire when the chosen duration ends - the brand's ad stops automatically, and you can generate a new code if you want to extend the partnership.
A TikTok Spark Code lets brands run your organic video as a paid ad while all engagement flows back to your original post. Here's how to generate one in under a minute.
## What Is a TikTok Spark Code?
A TikTok Spark Code (also called an authorization code or boost code) is a unique code that creators generate to allow brands to promote their videos as Spark Ads.
**How it works:**
- Creator posts an organic TikTok video
- Brand wants to promote that video as an ad
- Creator generates a Spark Code for that specific video
- Creator shares the code with the brand
- Brand enters the code in TikTok Ads Manager to run the ad
**Key points:**
- Spark Codes are video-specific (one code per video)
- Codes have an expiration date (7 to 365 days)
- Brands cannot edit the video or caption
- All engagement (likes, comments, shares) goes to the original post
- Creators keep full ownership of their content
## How to Get a Spark Code on TikTok (For Creators)
### Step 1: Enable Ad Authorization
Before generating any Spark Code, you must enable ad permissions in your account.
**How to enable:**
1. Open TikTok app
2. Go to your Profile
3. Tap the three lines (☰) menu
4. Tap "Settings and privacy"
5. Tap "Creator tools"
6. Tap "Ad settings"
7. Toggle on "Ad authorization"
**Note:** You only need to do this once. After enabling, you can generate codes for any of your videos.
### Step 2: Select the Video
1. Go to your Profile
2. Find the video you want to authorize for promotion
3. Tap on the video to open it
### Step 3: Open Ad Settings
1. Tap the three dots (⋯) on the right side of the video
2. Scroll through the menu options
3. Tap "Ad settings"
### Step 4: Toggle On Ad Authorization for This Video
1. In the Ad settings menu, toggle on "Ad authorization"
2. Read and accept TikTok's advertising terms
3. This authorizes the specific video for promotional use
### Step 5: Choose Authorization Duration
Select how long you want the brand to be able to use your video:
- **7 days** - Short-term campaigns
- **30 days** - Standard (default)
- **60 days** - Extended campaigns
- **365 days** - Long-term partnerships
**Tip:** Discuss with the brand beforehand how long they need access. For most campaigns, 30 or 60 days works well.
### Step 6: Generate the Code
1. Tap "Generate code"
2. TikTok creates a unique authorization code
3. The code appears on screen
**What a Spark Code looks like:**
```
#s63DdePaj9HjSv2BPcSrDfTxU2X506b2oiwchQ9PIspTLgroZKtjN7PPiFnF+qA=
```
### Step 7: Copy and Share the Code
1. Tap "Copy code"
2. Share the code with the brand via:
- TikTok DMs
- Email
- Text message
- Any other communication channel
**Done!** The brand can now use this code to promote your video as a Spark Ad.
## How to Manage Your Spark Codes
### View Active Codes
1. Go to the video
2. Tap three dots (⋯) → Ad settings
3. View your active authorization and remaining duration
### Extend a Code
If the brand needs more time:
1. Go to the video's Ad settings
2. Tap "Extend"
3. Select a new duration
4. The code validity extends
### Delete a Code
If you want to revoke authorization:
1. Go to the video's Ad settings
2. Tap "Delete code"
3. Confirm deletion
**Note:** Once deleted, the brand can no longer use that code. They'll need a new code if you want to continue the partnership.
## How Brands Use Spark Codes (For Advertisers)
If you're a brand that received a Spark Code from a creator, here's what to do:
### Step 1: Access TikTok Ads Manager
1. Log into TikTok Ads Manager (ads.tiktok.com)
2. Go to "Assets" or "Tools" in the top menu
3. Click "Creative" or "Creative Library"
### Step 2: Add the Spark Code
1. Click the "Spark Ads" tab
2. Click "Apply for Authorization" or "Add Post"
3. Paste the code from the creator
4. Click "Search" or "Confirm"
### Step 3: Preview and Confirm
1. The creator's video preview appears
2. Verify it's the correct video
3. Click "Confirm" to authorize
### Step 4: Create Your Ad Campaign
1. Create a new campaign
2. Select "Spark Ads" as your ad format
3. Choose the authorized video
4. Set your targeting, budget, and schedule
5. Add your destination URL and call-to-action
6. Publish your campaign
**Note:** You can batch authorize up to 20 video codes at a time.
## Spark Code Duration Options
| Duration | Best For |
|----------|----------|
| 7 days | Quick promotions, testing |
| 30 days | Standard campaigns (default) |
| 60 days | Extended campaigns |
| 365 days | Long-term partnerships, evergreen content |
**Important:** Once a code expires, the ad stops running. Discuss duration with the brand before generating the code.
## What Brands Can and Cannot Do
### Brands CAN:
- Promote the video to new audiences (including [US users](https://www.genviral.io/blog/target-us-users-on-tiktok))
- Add a call-to-action button
- Add a destination URL
- Target specific demographics (learn more about [TikTok region settings](https://www.genviral.io/blog/how-to-change-tiktok-account-region))
- Set ad budget and schedule
- Track ad performance
### Brands CANNOT:
- Edit the video content
- Change the caption
- Alter the creator's profile
- Remove or add hashtags
- Change the audio
This ensures Spark Ads remain authentic and match the original organic content.
## Benefits of Spark Codes
### For Creators:
- **Monetization** - Get paid by brands to authorize your content
- **[Growth](https://www.genviral.io/blog/tiktok-growth-strategies-for-saas)** - Reach new audiences through paid promotion
- **Engagement** - All likes, comments, and follows go to your original post
- **Control** - You decide which videos to authorize and for how long
- **Authenticity** - Your content stays unchanged
### For Brands:
- **Authenticity** - Ads look like organic content (like [slideshows](https://www.genviral.io/blog/how-to-make-a-slideshow-on-tiktok-pc)), not traditional ads
- **Trust** - Leverage creator's credibility with their audience
- **Performance** - Spark Ads have 30% higher completion rates than standard ads
- **Engagement** - 142% higher engagement rate vs. regular In-Feed Ads
- **Cost-effective** - 4.2% lower CPM than standard ads
## Common Issues and Troubleshooting
### "I can't find Ad settings"
**Solution:**
- Make sure you're on the video, not just your profile
- Tap the three dots (⋯) on the video itself
- Scroll through all options - Ad settings may be lower in the list
- Update your TikTok app to the latest version
### "Ad authorization toggle is missing"
**Solution:**
- Enable Creator tools first: Settings → Creator tools → Ad settings
- Some accounts may need to meet certain requirements
- Try updating the app
### "Code expired"
**Solution:**
- Generate a new code with a longer duration
- Coordinate with the brand on timing before generating
### "Brand says code doesn't work"
**Solution:**
- Double-check you copied the entire code (including special characters)
- Verify the code hasn't expired
- Make sure Ad authorization is still toggled on for that video
- Generate a new code if needed
### "I want to stop the ad"
**Solution:**
- Delete the Spark Code from your Ad settings
- The brand will no longer be able to run ads with that video
- Note: Existing ads may continue until the campaign ends or code expires
## Tips for Creators Working with Brands
**Before generating a code:**
✓ **Agree on duration** - Confirm how long the brand needs access
✓ **Discuss compensation** - Negotiate payment for authorizing your content
✓ **Review the brand** - Make sure you're comfortable being associated with them
✓ **Keep the video public** - Private videos become public when used as ads
✓ **Finalize your caption** - Brands can't edit it, so make sure it's correct
**After sharing the code:**
✓ **Track your video performance** - Watch for increased engagement
✓ **Prepare for new followers** - Spark Ads bring new audiences to your profile
✓ **Keep the video posted** - Don't delete it while the ad is running
## Tips for Brands Running Spark Ads
**Best practices:**
✓ **Request codes for multiple videos** - Test different content
✓ **Use longer durations** - 60+ days for extended campaigns
✓ **Organize your codes** - Track codes, creators, and expiration dates
✓ **Split test Spark Ads** - Compare performance vs. regular ads
✓ **Give creators creative freedom** - Authentic content (even from AI influencers) performs better
✓ **Communicate clearly** - Tell creators exactly what you need
## Common Questions
**Does the creator get paid automatically?**
No. Payment is arranged separately between the creator and brand. The Spark Code only authorizes promotion - it doesn't include compensation. Negotiate payment before sharing your code.
**Can I generate Spark Codes for any video?**
Yes, as long as you own the video and have Ad authorization enabled. You can generate codes for any of your public videos.
**What happens to engagement on the promoted video?**
All likes, comments, shares, and follows from the Spark Ad go to your original organic post. This helps grow your account even from paid promotion.
**Can multiple brands use the same video?**
Yes. You can generate separate codes for different brands to promote the same video, as long as the codes are valid.
**Will I know when my video is being promoted?**
You'll see increased views and engagement on your video. TikTok doesn't send a notification when a brand activates your code, but you can track performance in your analytics.
**Can I use Spark Codes on TikTok Stories?**
No. Spark Codes only work for regular TikTok videos, not Stories. For finding your saved Stories, see [how to find saved videos on TikTok](https://www.genviral.io/blog/how-to-see-saved-videos-on-tiktok).
**Do I need a business account to generate Spark Codes?**
No. Both personal and creator accounts can generate Spark Codes as long as Ad authorization is enabled.
**What if I delete the video?**
You cannot delete a video while it's being used as a Spark Ad. You must first un-authorize the video (delete the code), then you can delete the video.
## The Bottom Line
Getting a TikTok Spark Code:
**For Creators:**
1. Enable Ad authorization in Settings → Creator tools → Ad settings
2. Go to your video → Tap three dots (⋯) → Ad settings
3. Toggle on Ad authorization
4. Choose duration (7, 30, 60, or 365 days)
5. Tap "Generate code"
6. Copy and share with the brand
**For Brands:**
1. Request Spark Code from creator
2. Go to TikTok Ads Manager → Creative Library → Spark Ads
3. Paste the code → Confirm
4. Create your ad campaign
**Key points:**
- One code per video (video-specific)
- Codes expire (choose duration carefully)
- Brands cannot edit the content
- All engagement goes to the original post
- Negotiate payment separately
Spark Ads are one of the most effective ad formats on TikTok because they maintain authenticity while reaching new audiences. Whether you're a creator looking to monetize your content or a brand wanting to leverage influencer content, understanding Spark Codes is essential.
For more TikTok tips, see [how to make money with TikTok](https://www.genviral.io/blog/how-to-make-money-with-tiktok), [how to warm up a TikTok account](https://www.genviral.io/blog/warm-up-tiktok-account), [where to find TikTok drafts](https://www.genviral.io/blog/where-to-find-tiktok-drafts), [how to add link to TikTok bio](https://www.genviral.io/blog/how-to-add-link-to-tiktok-bio), [how to repost on TikTok](https://www.genviral.io/blog/how-to-repost-on-tiktok), [how to block someone on TikTok](https://www.genviral.io/blog/how-to-block-someone-on-tiktok), [how to see saved videos on TikTok](https://www.genviral.io/blog/how-to-see-saved-videos-on-tiktok), [why you can't follow people on TikTok](https://www.genviral.io/blog/why-cant-i-follow-people-on-tiktok), and [how to delete your TikTok account](https://www.genviral.io/blog/how-to-delete-tiktok-account).
---
*Managing your TikTok content alongside other platforms? [Genviral](https://genviral.io) helps you schedule and organize social media posts for TikTok, Instagram, Pinterest, and more - making it easy to plan your content strategy and track your best-performing videos for potential Spark Ad partnerships.*
---
Canonical HTML: https://www.genviral.io/blog/how-to-get-tiktok-spark-code
# How to Lock Facebook Account (Profile Lock Guide 2026)
- Facebook Profile Lock is a one-tap privacy shield: go to your profile, tap the three-dot menu next to "Edit Profile," select "Lock Profile," and confirm.
- When locked, non-friends cannot view your posts, photos, stories, or profile picture in full - and all previous public posts are automatically switched to "Friends Only."
- Profile Lock is only available in select countries - if you don't see the option, your region isn't supported yet. Use manual privacy settings as an alternative.
Facebook Profile Lock applies comprehensive privacy protections in a single tap - but the feature isn't available in every country. Here's how to use it and what it actually does.
## What Is Facebook Profile Lock?
Facebook Profile Lock is a privacy feature that instantly restricts what non-friends can see on your profile. Think of it as putting a one-click privacy shield around your entire Facebook presence.
When activated, Profile Lock automatically:
- Hides your timeline posts from non-friends
- Restricts who can see your photos and stories
- Prevents strangers from downloading or enlarging your profile picture
- Changes all previous public posts to "Friends Only"
- Requires approval before non-friends can tag you
- Shows a lock badge on your profile indicating enhanced privacy
**The key benefit:** Instead of manually adjusting dozens of individual privacy settings, Profile Lock applies comprehensive privacy protections with a single click.
## Is Facebook Profile Lock Available in Your Country?
**Critical Information:** Facebook Profile Lock is **NOT available worldwide**. This is a region-specific feature that Facebook has rolled out strategically in select countries.
### Countries Where Profile Lock IS Available (2026):
✅ **Asia & Pacific:**
- India
- Pakistan
- Bangladesh
- Afghanistan
- Myanmar
- Indonesia
- Philippines
- Australia
- New Zealand
✅ **Middle East:**
- United Arab Emirates (UAE)
- Saudi Arabia
- Iraq
- Turkey
✅ **Africa:**
- Egypt
- Sudan
- Morocco
✅ **Europe:**
- Ukraine
✅ **Latin America:**
- Brazil
- Mexico
### Countries Where Profile Lock Is NOT Available:
❌ United States
❌ Canada
❌ United Kingdom
❌ Most of Europe (except Ukraine)
❌ Most of Africa (except Egypt, Sudan, Morocco)
❌ Most of Latin America (except Brazil, Mexico)
**Why this limited availability?**
Facebook rolled out Profile Lock based on:
- Regional privacy concerns and data protection laws
- Countries with higher rates of online harassment
- User demand for enhanced privacy features
- Strategic market considerations
- Government regulations regarding internet use
**Important:** If you don't see the Profile Lock option, it's likely because your country doesn't have access to this feature yet, not because something is wrong with your account.
## What Happens When You Lock Your Facebook Profile
Understanding exactly what changes helps you decide if Profile Lock is right for you.
### What Non-Friends CAN See:
✅ Your name
✅ Profile picture (small thumbnail only - cannot enlarge, download, or share)
✅ Cover photo (small version only)
✅ Basic info (select fields from your About section)
✅ Mutual friends
✅ A lock badge indicating your profile is locked
### What Non-Friends CANNOT See:
❌ Your timeline posts
❌ Your photos and albums
❌ Your Stories
❌ Your tagged photos
❌ Your friend list (depending on privacy settings)
❌ Full-size profile or cover photos
❌ Most sections of your About info
### Automatic Changes That Occur:
**1. Past posts visibility:**
All your previous posts that were set to "Public" or "Friends of Friends" automatically change to "Friends Only." You don't need to edit them individually.
**2. Profile and cover photo protection:**
Non-friends can only see small thumbnails. They cannot:
- Click to enlarge
- Download or save
- Share to their timeline
- Zoom in to see details
**3. Tag review activation:**
Profile Lock automatically enables:
- **Timeline review** - You must approve posts you're tagged in before they appear on your timeline
- **Tag review** - Non-friends must get your approval before tagging you in posts or photos
**4. Stories visibility:**
Your Stories become visible to friends only, even if you previously shared them with "Public."
**5. Lock badge:**
A small lock icon appears on your profile, visible to everyone, indicating your profile is locked.
### What You Can Still Do:
✔️ Post normally (but only friends will see new posts)
✔️ Accept friend requests
✔️ Comment on public pages and groups (your comments remain visible)
✔️ Join groups
✔️ Message anyone
✔️ React to public posts
### What Stays Public:
⚠️ Content you share on:
- Public Facebook Pages
- Public Groups
- Facebook Marketplace posts
- Comments on public posts
- Shared albums (if you shared them before locking)
These remain visible because they're not on your personal timeline.
## How to Lock Your Facebook Profile (Mobile)
Most users lock their profiles through the mobile app. Here's the exact process.
### On Android:
**Step 1:** Open Facebook App
- Launch the Facebook app on your Android device
- Make sure you're logged in
**Step 2:** Go to Your Profile
- Tap the **menu icon** (three horizontal lines) in the top-right corner
- Tap your **name** or **profile picture** to open your profile
**Step 3:** Access Profile Lock
- On your profile page, tap the **three-dot menu (⋯)** next to "Edit Profile"
- You'll see a dropdown menu
**Step 4:** Select Lock Profile
- If available in your region, you'll see **"Lock Profile"** in the menu
- Tap on it
**Step 5:** Review and Confirm
- Facebook shows you what locking your profile does
- Read through the explanation
- Tap **"Lock Your Profile"** at the bottom to confirm
**Step 6:** Confirmation
- You'll see a message: "You Locked Your Profile"
- A lock badge now appears on your profile
- Tap **OK** to finish
### On iPhone/iPad (iOS):
**Step 1:** Open Facebook App
- Launch Facebook on your iOS device
**Step 2:** Navigate to Your Profile
- Tap the **menu icon** (three horizontal lines) in the bottom-right corner
- Tap your **name** to open your profile
**Step 3:** Find Profile Lock Option
- Tap the **three-dot menu (⋯)** beside "Edit Profile"
**Step 4:** Select and Confirm
- Tap **"Lock Profile"** from the menu
- Review the information Facebook provides
- Tap **"Lock Your Profile"** to confirm
**Alternative Method (Settings Menu):**
1. Go to **Settings & Privacy** → **Settings**
2. Scroll to **Audience and Visibility**
3. Tap **Profile Locking**
4. Turn on Lock Profile
5. Confirm your choice
## How to Lock Your Facebook Profile (Desktop)
Desktop users can also lock their profiles if the feature is available in their country.
**Step 1:** Log Into Facebook
- Open your web browser
- Go to [facebook.com](https://facebook.com)
- Log in to your account
**Step 2:** Navigate to Your Profile
- Click your **profile picture** or **name** in the top-right corner
- Click your **name** again to go to your profile page
**Step 3:** Access Profile Menu
- On your profile page, look for the **three-dot menu (•••)**
- This is located under your cover photo, to the right of the tabs (About, Photos, etc.)
- Click on it
**Step 4:** Select Lock Profile
- If available, you'll see **"Lock Profile"** in the dropdown menu
- Click on it
**Step 5:** Review and Confirm
- A popup explains what happens when you lock your profile
- Read through the information
- Click **"Lock Your Profile"** to confirm
**Step 6:** Verify
- Your profile now shows a lock badge
- Check your timeline to confirm settings have changed
- For finding draft posts, see [how to find drafts on Facebook](https://www.genviral.io/blog/how-to-find-drafts-on-facebook)
## How to Unlock Your Facebook Profile
Changed your mind? You can unlock your profile anytime and revert to your previous privacy settings.
### To Unlock (Mobile):
1. Open Facebook app
2. Go to your profile
3. Tap the **three-dot menu (⋯)** next to "Edit Profile"
4. Tap **"Unlock Profile"**
5. Confirm by tapping **"Unlock Profile"** in the popup
Your profile returns to your previous privacy settings before you locked it.
### To Unlock (Desktop):
1. Go to facebook.com
2. Open your profile
3. Click the **three-dot menu** under your cover photo
4. Select **"Unlock Profile"**
5. Confirm in the popup
**What happens when you unlock:**
- Your privacy settings revert to what they were before locking
- Public posts that you made before locking return to being public
- Non-friends can again see your timeline (based on your previous settings)
- The lock badge disappears from your profile
- Timeline and tag review features may turn off (depending on your previous settings)
## Why Profile Lock Option Is Not Showing
If you can't find the Profile Lock option, here are the most common reasons and solutions.
### Reason 1: Not Available in Your Country
**Most common reason:** The feature simply isn't available in your region yet.
**Check:** Review the [list of supported countries](#countries-where-profile-lock-is-available-2026) above.
**Solution:**
- Wait for Facebook to expand availability
- Use manual privacy settings (see alternatives section below)
- Check back periodically for updates
### Reason 2: Professional Mode is Enabled
Facebook's Professional Mode (for creators and public figures) is incompatible with Profile Lock.
**How to check if Professional Mode is on:**
1. Go to your profile
2. Look for "Professional dashboard" or creator tools
3. Check Settings → Professional Mode
**Solution:** Turn off Professional Mode:
1. Go to **Settings & Privacy** → **Settings**
2. Tap **Professional Mode**
3. Select **Switch to Personal Profile** or **Turn Off Professional Mode**
4. Confirm the change
5. Return to your profile to access Lock Profile
**Note:** Turning off Professional Mode removes access to creator insights, monetization tools, and professional features.
### Reason 3: Business or Creator Account Type
Facebook Pages and business accounts cannot use Profile Lock. This feature is only for personal profiles.
**Solution:** Profile Lock is not designed for business accounts. Use Page-specific privacy settings instead.
### Reason 4: Outdated App Version
An old version of the Facebook app may not include the Profile Lock feature.
**Solution:**
- **Android:** Open Google Play Store → Search "Facebook" → Tap "Update"
- **iOS:** Open App Store → Tap your profile icon → Scroll to Facebook → Tap "Update"
### Reason 5: Language Settings
Some users report the feature appears when using specific language settings.
**Workaround to try:**
1. Go to **Settings & Privacy** → **Settings**
2. Select **Language and Region**
3. Try changing language to **English (India)** or **English (UK)**
4. Restart the app
5. Check if Profile Lock appears
**Note:** This doesn't always work but worth trying if the feature should be available in your country.
### Reason 6: Account-Specific Rollout
Facebook sometimes rolls out features gradually, even within supported countries.
**Solution:** Be patient. Check back in a few days or weeks.
### Reason 7: Using Facebook Lite
The lite version may not have all features of the main app.
**Solution:** Try using the full Facebook app instead of Facebook Lite, or vice versa.
## Alternatives to Profile Lock (For Unsupported Countries)
If Profile Lock isn't available in your country, you can achieve similar privacy through manual settings. It takes more effort but provides comparable protection.
### Alternative 1: Limit Future Post Visibility
**Step 1:** Go to **Settings & Privacy** → **Settings**
**Step 2:** Tap **Privacy**
**Step 3:** Under "Your Activity," tap **Who can see your future posts?**
**Step 4:** Select **Friends**
This ensures all new posts are visible only to friends.
### Alternative 2: Limit Past Post Visibility
**Step 1:** Go to **Settings & Privacy** → **Settings**
**Step 2:** Tap **Privacy**
**Step 3:** Tap **Limit Past Posts**
**Step 4:** Select **Limit Old Posts**
**Step 5:** Confirm by tapping **Confirm**
This changes all previous public posts to Friends Only.
### Alternative 3: Restrict Profile Information
**Step 1:** Go to your profile and tap **About**
**Step 2:** For each section (Work, Education, Places Lived, etc.):
- Tap the **Edit** button
- Change visibility to **Only Me** or **Friends**
**Step 3:** Save changes for each section
### Alternative 4: Protect Profile Picture
**Step 1:** Go to your profile
**Step 2:** Tap your **profile picture**
**Step 3:** Tap **three-dot menu** → **Turn on Profile Picture Guard**
This prevents non-friends from downloading, sharing, or sending your profile picture.
**Note:** Profile Picture Guard is also region-specific. If unavailable, at least set profile picture privacy to Friends.
### Alternative 5: Control Who Can See Friend List
**Step 1:** Go to **Settings & Privacy** → **Settings**
**Step 2:** Tap **Privacy** → **How People Find and Contact You**
**Step 3:** Tap **Who can see your friends list?**
**Step 4:** Select **Only Me** or **Friends**
### Alternative 6: Enable Timeline and Tag Review
**Step 1:** Go to **Settings & Privacy** → **Settings**
**Step 2:** Tap **Privacy** → **Timeline and Tagging**
**Step 3:** Enable:
- **Review posts you're tagged in before the post appears on your timeline?** → **On**
- **Review tags people add to your posts before the tags appear on Facebook?** → **On**
### Alternative 7: Limit Who Can Send Friend Requests
**Step 1:** Go to **Settings & Privacy** → **Settings**
**Step 2:** Tap **How People Find and Contact You**
**Step 3:** Select **Who can send you friend requests?**
**Step 4:** Choose **Friends of Friends** (reduces random requests)
### Alternative 8: Control Story Sharing
**Step 1:** When posting a Story, tap **Privacy** icon
**Step 2:** Select **Friends** instead of Public
**Step 3:** For automatic setting: **Settings** → **Story Privacy** → **Friends**
### Alternative 9: Enable Two-Factor Authentication
While not strictly privacy, this protects your account from unauthorized access:
**Step 1:** **Settings & Privacy** → **Settings**
**Step 2:** **Security and Login**
**Step 3:** **Use two-factor authentication**
**Step 4:** Choose method (authentication app recommended)
**Note:** Keep your account contact information updated for security. See [how to change email on Facebook](https://www.genviral.io/blog/how-to-change-email-on-facebook) to update your email address.
### Alternative 10: Regular Privacy Checkup
Facebook offers a guided privacy review:
**Step 1:** **Settings & Privacy** → **Privacy Checkup**
**Step 2:** Follow guided steps to review:
- Who can see what you share
- How people find you
- Your data settings
- Ad preferences
## Benefits of Locking Your Facebook Profile
Understanding the advantages helps you decide if this feature is right for you.
**1. Enhanced Privacy Protection**
Your personal content stays between you and people you've explicitly accepted as friends.
**2. Reduced Harassment**
Strangers, stalkers, and trolls can't see or interact with your content.
**3. Control Over Image Use**
Non-friends cannot download, share, or misuse your profile pictures.
**4. One-Click Solution**
Instead of adjusting dozens of settings, one action locks everything down.
**5. Professional Boundaries**
Separate your personal Facebook from professional contacts or acquaintances.
**6. Safety for Vulnerable Users**
Particularly beneficial for:
- Women in regions with high online harassment
- Public figures avoiding unwanted attention
- Activists protecting their identity
- Minors staying safe online
- Domestic violence survivors
**7. Peace of Mind**
Know exactly who can see your posts without worrying about complex privacy settings. For managing who can interact with you, see [how to view blocked Facebook friends](https://www.genviral.io/blog/how-to-view-blocked-facebook-friends).
**8. Prevents Identity Theft**
Limited public information reduces risk of someone impersonating you.
## Drawbacks of Locking Your Facebook Profile
Profile Lock isn't for everyone. Consider these limitations:
**1. Reduced Discoverability**
- Old classmates or colleagues may have trouble finding you
- Networking becomes harder
- Can't grow a following organically
**2. Can't Post Publicly**
If you occasionally share public content, you'll need to unlock your profile first.
**3. Limited Regional Availability**
Not available in most countries, forcing manual privacy adjustments.
**4. Incompatible with Creator Features**
Can't use Professional Mode and Profile Lock simultaneously.
**5. Misconceptions About Protection**
Some users think Profile Lock provides more security than it actually does. It doesn't:
- Prevent screenshots
- Hide comments on public pages
- Protect content shared before locking (on public pages/groups)
- Make you invisible to search engines (your name may still appear)
**6. Friend Management Becomes Critical**
Once locked, your friend list becomes your content audience. Accepting unknown friend requests defeats the purpose.
## Common Questions
**Can I lock my Facebook profile if I'm in the USA?**
No. As of January 2026, Facebook Profile Lock is not available in the United States. You'll need to use manual privacy settings to achieve similar protection. Facebook has not announced when or if this feature will expand to the USA.
**Will my friends be notified when I lock my profile?**
No. Facebook does not send notifications to your friends when you lock your profile. However, they'll see a lock badge on your profile if they visit it. Your content visibility to friends doesn't change.
**Can I post publicly with a locked profile?**
No. When your profile is locked, all posts are automatically shared with "Friends Only." If you want to post something publicly, you'll need to unlock your profile first, make the public post, then lock it again.
**Does Profile Lock hide me from Facebook search?**
No. People can still find your name in Facebook search. However, when they click on your profile, they'll only see limited information because your profile is locked.
**Can I lock my Facebook Page instead of my profile?**
No. Profile Lock only works for personal profiles, not Facebook Pages. Pages use different privacy and visibility settings managed through Page settings.
**What happens to photos I'm tagged in on friends' posts?**
If your profile is locked, you can control whether tagged photos appear on your timeline through tag review. However, the photos still exist on your friend's timeline (visible based on their privacy settings). Non-friends cannot see tagged photos on YOUR profile.
**Can someone with a locked profile still see my posts?**
Yes, if they're your friend. Profile Lock only restricts what non-friends see on the locked profile - it doesn't affect what locked profile users can see on others' profiles.
**Is there a way to lock my profile if it's not available in my country?**
There's no official workaround. VPNs may show the option temporarily, but Facebook's systems detect your actual location based on multiple factors (not just IP address). Your best option is using manual privacy settings to achieve similar protection.
**Does locking my profile affect my Facebook Dating profile?**
Facebook Dating has separate privacy settings. Locking your main profile doesn't automatically hide your Dating profile. You'll need to manage Dating privacy separately.
**Can I partially lock my profile (lock some things but not others)?**
No. Profile Lock is an all-or-nothing feature. You can't selectively lock certain types of content. For granular control, use individual privacy settings instead of Profile Lock.
## The Bottom Line
Facebook Profile Lock is a powerful one-click privacy tool - but it's only available in select countries. If you're in India, Pakistan, UAE, Egypt, Indonesia, Philippines, Brazil, Mexico, or other supported regions, locking your profile provides instant comprehensive privacy protection perfect for reducing harassment and controlling your online presence.
**If Profile Lock IS available in your country:**
- Use it if you want maximum privacy
- It's reversible - you can unlock anytime
- Particularly valuable for women, activists, minors, and those facing harassment
**If Profile Lock is NOT available in your country:**
- Don't worry - manual privacy settings achieve 90% of the same protection
- Use the alternatives listed above
- Consider Profile Picture Guard if available
- Enable Timeline and Tag Review
- Set future posts to Friends Only
- Limit past posts visibility
Remember: No privacy setting makes you completely invisible on Facebook. The platform is designed for sharing. If you need absolute privacy, consider limiting what you share on social media altogether. For monetizing your presence, see [how to make money with Facebook](https://www.genviral.io/blog/how-to-make-money-with-facebook). For other Facebook account management tasks, check out our guides on [where to find scheduled posts on Facebook](https://www.genviral.io/blog/where-to-find-scheduled-posts-on-facebook), [how to change name on Facebook](https://www.genviral.io/blog/how-to-change-name-on-facebook), [how to add admin to Facebook Page](https://www.genviral.io/blog/how-to-add-admin-to-facebook-page), [how to see who shared my post on Facebook](https://www.genviral.io/blog/how-to-see-who-shared-my-post-on-facebook), and [how to comment anonymously on Facebook](https://www.genviral.io/blog/how-to-comment-anonymously-on-facebook).
---
*Maintaining consistent social media presence while managing privacy? [Genviral's Facebook Scheduler](https://www.genviral.io/facebook-scheduler) helps you schedule and manage Facebook content efficiently, letting you focus on engaging with your actual friends rather than worrying about privacy settings.*
---
Canonical HTML: https://www.genviral.io/blog/how-to-lock-facebook-account
# How to Make a Board on Pinterest Private
- Pinterest does not have a setting called "private board." The equivalent feature is called a **secret board**, and you turn it on by toggling **Keep this board secret** in the board's edit menu.
- On desktop, open the board → click the **three dots (…)** next to the board name → **Edit board** → toggle **Keep this board secret** → **Done**. On mobile, the toggle is labeled **Make this board secret**.
- Secret boards are hidden from your profile, your followers, search results, and the home feed. Only you and people you invite as collaborators can see them. You can flip the toggle back off at any time to make the board public again.
If you want a Pinterest board only you can see, you are looking for what Pinterest calls a **secret board**. There is no separate "private board" setting - the secret board toggle is the privacy control. This guide walks through how to convert an existing board, create a new one, invite collaborators, and reverse the change, on desktop and mobile.
## The Quick Answer
Pinterest uses the term **secret board** instead of "private board." A secret board is only visible to you and the collaborators you invite. According to [Pinterest's Help Center](https://help.pinterest.com/en/article/secret-boards), secret boards do not appear in search results, on your profile, or in other people's home feeds.
To make any board on Pinterest private:
1. Open the board
2. Click or tap the **three dots (…)** next to the board name
3. Select **Edit board**
4. Toggle on **Keep this board secret** (desktop) or **Make this board secret** (mobile)
5. Click or tap **Done**
The board immediately disappears from your public profile.
## Video Walkthrough
Prefer reading? The step-by-step walkthrough for desktop, iOS, and Android continues below.
## How to Make an Existing Board Private (Desktop)
### Steps:
1. Log in to [pinterest.com](https://pinterest.com)
2. Click your **profile picture** in the top-right corner.
3. Open the **board** you want to make private.
4. Click the **three dots (…)** next to the board name.
5. Select **Edit board**.
6. Scroll down and toggle on **Keep this board secret**.
7. Click **Done**.
The board is now hidden from everyone except you and any invited collaborators.
## How to Make an Existing Board Private (Mobile - iOS)
### Steps:
1. Open the Pinterest app on your iPhone.
2. Tap your **profile picture** in the bottom-right corner.
3. Tap **Boards** (or **Saved** if you are on a business account).
4. Open the board you want to make private.
5. Tap the **three dots (…)** in the top-right corner.
6. Tap **Edit board**.
7. Toggle on **Make this board secret**.
8. Tap **Done**.
## How to Make an Existing Board Private (Mobile - Android)
### Steps:
1. Open the Pinterest app.
2. Tap your **profile picture** in the bottom-right corner.
3. Tap **Boards**.
4. Open the board you want to make private.
5. Tap the **three dots (…)** in the top-right corner.
6. Tap **Edit board**.
7. Toggle on **Make this board secret**.
8. Tap **Done**.
## How to Create a New Secret Board From Scratch
If you have not created the board yet, you can mark it secret during creation so it is private from the very first pin.
### Desktop:
1. In the left navigation, click the **square-plus** icon.
2. Select **Board**.
3. Enter a board **name**.
4. Toggle on **Keep this board secret**.
5. Click **Create**.
### Mobile (iOS & Android):
1. Tap the **plus (+)** icon.
2. Select **Board**.
3. Enter a **name**.
4. Toggle on **Make this board secret**.
5. Tap **Create** in the top-right corner.
Per [Pinterest's Create a board guide](https://help.pinterest.com/en/article/create-a-board), the secret toggle appears in the same dialog as the name field, so you can mark it secret in a single step.
## Who Can See Your Secret Board
According to Pinterest's official help, a secret board is only visible to:
- **You** (the owner)
- **Collaborators** you explicitly invite
A secret board will not appear:
- On your public profile
- In Pinterest search results
- In other users' home feeds
- In the related-pins or "More from this user" surfaces shown to other people
Pinterest may still surface Pin suggestions on **your own** home feed based on what you save to a secret board. Those suggestions are only visible to you - they exist so the algorithm can keep recommending relevant content - but they do not expose the board itself.
## How to Invite Collaborators to a Secret Board
Secret boards are not strictly solo. You can invite specific people to view and contribute, which is useful for things like wedding planning, gift ideas, or private moodboards shared with a partner or client.
1. Open the secret board.
2. Click or tap the **plus (+)** icon near the board name (or the collaborator avatar area).
3. Search by **name**, **username**, or **email**, or use **Copy link** to share an invitation directly.
4. Send the invite.
Invitees must have a Pinterest account to accept. According to [Pinterest's group board documentation](https://help.pinterest.com/en/article/group-boards), they do not need to follow you, and you do not need to follow them. They will get an email or in-app notification about the invite.
Pinterest does not publish a hard cap on collaborator counts in its official help, so treat very large invite lists as an unknown - if you need a true group board, the standard group board flow is more appropriate.
## How to Make a Secret Board Public Again
You can reverse the change at any time.
### Desktop:
1. Open the secret board.
2. Click the **three dots (…)** next to the board name.
3. Select **Edit board**.
4. Toggle off **Keep this board secret**.
5. Click **Done**.
### Mobile (iOS & Android):
1. Open the secret board.
2. Tap the **three dots (…)** in the top-right corner.
3. Tap **Edit board**.
4. Toggle off **Make this board secret**.
5. Tap **Done**.
The board returns to your public profile and becomes visible in search.
## What Happens When You Save Pins to a Secret Board
A few behaviors change once a board is secret. From [Pinterest's Help Center](https://help.pinterest.com/en/article/secret-boards):
- **No notifications go out** to the original creator when you save one of their Pins to your secret board.
- **The Pin's save count does not increase** when you save it to a secret board.
- **Source attribution is hidden** for Pins saved from a secret board - the original creator will not see that the save came from you.
This is intentional. It lets people use secret boards as a true workspace - drafts, gift ideas, moodboards - without telling other creators what they are collecting.
## Limitations of Secret Boards
A few things secret boards cannot do, based on Pinterest's documentation:
- **You cannot promote a secret board as an ad.** Pinterest's ad products require public boards.
- **Pins on a secret board do not contribute to your public Pinterest stats.** Saves, impressions, and outbound clicks count differently than public board engagement.
- **A "section" within a board does not have its own privacy setting.** If a board is secret, all of its sections inherit that. There is no documented way to make a single section secret inside an otherwise-public board.
- **Profile privacy is a separate setting.** Making a board secret does not make your profile private, and vice versa - they are two different controls.
## Secret Boards vs. Profile Privacy vs. Protected Boards
Pinterest has three different privacy concepts that get confused all the time. Here is how they differ.
### Secret board
A single board hidden from everyone except you and invited collaborators. The rest of your profile remains public. This is what most people want when they search "how to make a board on Pinterest private."
### Private profile
A profile-level setting that hides your **entire** profile from search engines and from Pinterest's own search. According to [Pinterest's Help Center](https://help.pinterest.com/en/article/make-your-profile-private), you must be at least 16 years old to adjust profile visibility, and business accounts must convert to personal accounts before they can enable a private profile. Use this if you do not want strangers finding your account at all.
### Protected board (Business only)
A Pinterest Business feature that lives at the bottom of your profile. According to [Pinterest Business documentation](https://help.pinterest.com/en/business/article/protected-boards), Pins on a protected board can still surface in search and other users' home feeds, but the board itself is only accessible to people with a direct link. Protected boards are usually auto-generated by the bulk editor or the Shop the Look pin flow - they are not a manual setting you toggle.
If you want a board only you can see, you want a **secret board**, not a protected board.
## Common Questions
**Can other people see that I made a board secret?**
No. Once a board is secret, it disappears from your profile entirely. Followers will not get a notification that a board became secret. From their side, it just no longer exists on your profile.
**Will my followers stop following the board?**
Followers can no longer access a board after you make it secret. Public followers will lose visibility to the content. If you later turn the board back to public, it will reappear on your profile, but follower counts may not automatically restore.
**Can I make a section of a board secret without making the whole board secret?**
No. Pinterest does not document section-level privacy. Privacy is set at the board level, and all sections of a secret board inherit that setting.
**Do secret board pins still show up in my home feed recommendations?**
Pinterest may use your secret saves to refine the suggestions in your own home feed, but those suggestions are only visible to you. Other users will not see them.
**Can I have unlimited secret boards?**
Pinterest's current help documentation does not call out a hard limit. Older third-party guides sometimes cite a cap, but the official Pinterest help page on secret boards does not specify one as of 2026. If you hit a limit in your account, that is the authoritative source.
**If I save a pin from someone to my secret board, do they know?**
No. The original creator is not notified, the pin's save count does not increase, and source attribution is hidden. This is one of the main reasons people use secret boards for gift research and competitive moodboards.
**Will a secret board appear in Google search?**
No. Secret boards are excluded from Pinterest's own search and from external search engines.
**Can I convert a group board into a secret board?**
You can only change visibility on a board you own. If you are a collaborator on someone else's board, you cannot change its privacy setting - you would need to leave the board, and the owner would have to convert it.
**Does the secret toggle affect Pins I have already saved to that board?**
The Pins stay where they are. They just stop appearing publicly. If you flip the board back to public, they become visible again.
**Why would I make a board private instead of just deleting it?**
Deletion is permanent after a 7-day recovery window, and you lose every pin on the board. A secret board keeps everything intact while removing it from public view. If you are not sure whether you want it gone forever, secret is the safer move. See our guide on [how to delete a board on Pinterest](https://www.genviral.io/blog/how-to-delete-a-board-on-pinterest) for the difference between archiving, deleting, and making secret.
## The Bottom Line
There is no "private board" setting on Pinterest - the feature is called a **secret board**, and it is the answer to "how do I make this board private."
1. Open the board → three dots → **Edit board** → toggle **Keep this board secret** → **Done**.
2. Only you and invited collaborators can see it.
3. You can flip it back to public at any time.
4. Use a **private profile** if you want your whole account hidden, not just one board.
If you are also tidying up your Pinterest, see our guides on [how to delete a board on Pinterest](https://www.genviral.io/blog/how-to-delete-a-board-on-pinterest), [how to merge Pinterest boards](https://www.genviral.io/blog/how-to-merge-pinterest-boards), [how to recover deleted Pinterest boards](https://www.genviral.io/blog/how-to-recover-deleted-pinterest-boards), [how to unsave pins on Pinterest](https://www.genviral.io/blog/how-to-unsave-pins-on-pinterest), and [how to make a pin on Pinterest](https://www.genviral.io/blog/how-to-make-a-pin-on-pinterest). For board strategy once you are ready to go public, our [Pinterest tips and tricks](https://www.genviral.io/blog/pinterest-tips-and-tricks) and [Pinterest posting strategy](https://www.genviral.io/blog/pinterest-posting-strategy) guides cover what actually performs. To reach a wider audience, look at [how to find group boards on Pinterest](https://www.genviral.io/blog/how-to-find-group-boards-on-pinterest). And if you are using Pinterest commercially, see [how to make money with Pinterest](https://www.genviral.io/blog/how-to-make-money-with-pinterest) and [how to turn off AI posts on Pinterest](https://www.genviral.io/blog/how-to-turn-off-ai-posts-on-pinterest).
---
*Want to plan ahead instead of saving in secret? [Genviral's Pinterest Scheduler](https://www.genviral.io/pinterest-scheduler) lets you schedule pins across multiple boards and accounts in one place.*
---
Canonical HTML: https://www.genviral.io/blog/how-to-make-a-board-on-pinterest-private
# How to Make a Pin on Pinterest (Complete 2026 Guide)
- Create a pin on desktop by clicking Create, uploading an image or video, adding a keyword-rich title (first 40 chars show in feeds), description, destination URL, and selecting a board.
- Use the 2:3 aspect ratio (1000x1500px) for images and 9:16 for video pins - Pinterest recommends these for maximum distribution and may penalize other ratios.
- For best SEO, front-load your primary keyword in the pin title, write a 100-200 character description starting with that keyword, and always add alt text (shown to improve impressions by 25% and clicks by 123%).
Creating a pin on Pinterest is simple, but doing it right makes all the difference.
Whether you're sharing a recipe, promoting a blog post, or showcasing products, this guide covers everything you need to know about creating pins in 2026.
## How to Create a Pin on Desktop
According to [Pinterest's official Help Center](https://help.pinterest.com/en/article/create-a-pin-from-an-image-or-video), you can upload images or videos directly from your computer.
### Image Pin (Desktop):
1. Log in to [pinterest.com](https://pinterest.com)
2. Click **Create** (top left)
- *For business accounts: Click hamburger menu → Create → Create Pin*
3. Click the **upload icon** or drag and drop your image
- Upload up to **10 images** at once (each becomes a separate pin)
4. Add pin details:
- **Title:** Up to 100 characters (first 40 show in feeds)
- **Description:** Up to 500 characters
- **Link:** Add destination URL (your website, blog, product page)
- **Board:** Choose existing board or create new one (if you want to save pins privately, see [how to make a board on Pinterest private](https://www.genviral.io/blog/how-to-make-a-board-on-pinterest-private); to delete a board, see [how to delete a Pinterest board](https://www.genviral.io/blog/how-to-delete-a-board-on-pinterest))
- **Tag related topics:** Up to 10 topics for better discovery
- **Publish later:** Schedule up to 30 days ahead (business accounts only)
- **Advanced settings:** Turn comments/shopping recommendations on/off
5. Click **pencil icon** to edit image (add text, change aspect ratio, filters)
6. Click **Done** → **Publish**
### Video Pin (Desktop):
Same process as image pins, with these additions:
- Select **Edit cover** to choose video thumbnail
- Upload up to **10 videos** (MP4 or MOV format)
- Maximum file size: **20MB** (desktop), **32MB** (mobile app)
- Video length: Up to **5 minutes**
## How to Create a Pin on Mobile
### iOS/Android:
1. Open the Pinterest app
2. Tap the **+ icon** (bottom center)
3. Tap **Pin**
4. Select image/video from device
- Tap **camera icon** to take new photo or record video
- Select multiple images/videos to create a **video pin mashup**
5. Tap **Next**
6. Use editing tools (optional):
- Add text overlays
- Apply stickers and effects
- Add filters
- Draw on image
- Adjust colors
7. Tap **Next** when done editing
8. Add pin details:
- **Title**
- **Description** (can include hashtags, but keywords work better)
- **Link**
- **Tag products:** Up to 5 product tags per pin
- **Board**
- **Tag related topics**
- **Publish later** (business accounts)
9. Tap **Create**
## How to Create and Schedule Pins with Genviral
While Pinterest's native tools work great for individual pins, using a scheduling platform like [Genviral](https://genviral.io) streamlines your workflow when you need to create and schedule multiple pins consistently.
### Why Use a Pinterest Scheduler?
**Time Efficiency:**
- Batch create and schedule pins for weeks ahead
- No need to manually post every day
- Maintain consistent posting even when busy
**Better Organization:**
- Visual content calendar to see your entire Pinterest strategy
- Media library to store and reuse your pin graphics
- Manage multiple Pinterest accounts from one dashboard
**SEO Optimization:**
- Built-in keyword suggestions for pin titles and descriptions
- Optimize each pin for Pinterest search visibility
- Track which pins drive the most traffic
### How Genviral Works for Pinterest
**1. Connect Your Pinterest Account**
- Securely connect via OAuth (same secure method Pinterest uses)
- Support for both personal and business accounts
- Manage multiple Pinterest accounts if you have different brands
**2. Upload and Create Pins**
- Upload your pin graphics to Genviral's media library
- Write SEO-optimized titles and descriptions
- Add destination links to drive traffic to your website
- Select which board to pin to (or create new boards)
**3. Schedule Strategically**
- Use the visual calendar to plan your pinning schedule
- Schedule pins at optimal times when Pinterest users are most active
- Space out pins automatically to avoid spam filters
- Set up recurring schedules for seasonal campaigns
**4. Monitor Performance**
- Track which pins get the most saves and clicks
- See which boards drive the most traffic
- Identify your best-performing pin designs
### Key Features for Pinterest Marketers
**Multi-Account Management:**
Perfect for agencies or businesses managing multiple Pinterest accounts. Switch between accounts and boards seamlessly from one dashboard.
**Bulk Pin Upload:**
Upload multiple pin images at once and schedule them across different times and boards. Create a week's worth of pins in one session, then let Genviral handle the posting.
**Team Collaboration:**
If you work with a team, Genviral's workspace features let you collaborate on Pinterest content with role-based permissions and approval workflows.
**Cross-Platform Scheduling:**
Since Genviral supports multiple platforms, you can schedule the same content (or variations) to Pinterest, Instagram, TikTok, and other channels from one place.
### When to Use Genviral vs. Native Pinterest Tools
**Use Genviral when:**
- You need to schedule 3+ pins per day consistently
- You manage multiple Pinterest accounts or boards
- You want to batch create content on weekends and schedule for the week
- You need team collaboration features
- You're running seasonal campaigns that require advance planning
**Use Pinterest's native tools when:**
- You're posting 1-2 pins occasionally
- You prefer the native Pinterest interface
- You need Pinterest's built-in editing tools for quick tweaks
For most serious Pinterest marketers posting 3-5 pins daily, a scheduling tool like Genviral saves hours per week while maintaining the consistency Pinterest's algorithm rewards.
## Optimal Pin Sizes for 2026
Pinterest recommends a **2:3 aspect ratio** for optimal performance.
**Best dimensions:**
- **1000 x 1500 pixels** (recommended)
- **1080 x 1620 pixels** (high resolution alternative)
**Acceptable ratios:**
- **2:3** (1000 x 1500) - Standard, most recommended
- **1:1** (1000 x 1000) - Square, works but not ideal
- **9:16** (1080 x 1920) - Full-screen vertical video
**Avoid:**
- Pins longer than **1:2.1 ratio** will be truncated in feeds
- Extremely tall "giraffe pins" (8x or 10x taller than wide) are suppressed by Pinterest's algorithm
**File requirements:**
- Format: PNG or JPEG
- Max size: 20MB (desktop), 32MB (mobile)
- Minimum: 600 pixels wide for clarity
## Create Multiple Pins from One Upload
You can upload up to **10 images or videos** at once on desktop. Each file creates a separate pin, all with the same title, description, and board assignment. This is useful for batch creating pins from a photoshoot or blog post.
**Note:** To combine multiple images/videos into a single video pin, you must use the mobile app.
## Pin Creation Best Practices (2026 Update)
### 1. Design Quality
- **Use vertical formats** - 2:3 aspect ratio performs best
- **High-quality images** - Clear, well-lit, visually appealing
- **Text overlays** - Keep concise, use readable fonts
- **Branding** - Include logo or brand name (not overwhelming)
- **Diverse imagery** - Show products/ideas in realistic settings
### 2. Write for Discovery
Pinterest is a **visual search engine**, not social media. Optimize for search:
- **Use keywords** in titles and descriptions (not hashtags)
- **Front-load important info** - First 40 characters of title matter most
- **Be specific** - "Easy 15-Minute Vegan Dinner Recipes" beats "Dinner Ideas"
- **Add 10 topic tags** - Helps Pinterest categorize your pin
- **Optimize board names** - Use keyword-rich board titles
### 3. Add Destination Links
Always add a link to:
- Your blog post
- Product page
- Website landing page
- YouTube video
- Recipe page
Pins with links drive 3x more engagement and actually help your pin rank higher.
### 4. Pin to Relevant Boards
- Save pins to **keyword-optimized boards** matching your content
- Don't spam the same pin to every board you own
- Pinterest's 2026 algorithm penalizes repetitive pinning
### 5. Create Fresh Content
- **Don't just repin old content** with minor changes
- Create **3-5 unique pin designs** per piece of content
- Space them out over weeks/months
- Change both image AND font style to make truly "new" pins
### 6. Scheduling Strategy
- **Pin once to one relevant board**, then move to next pin design
- Avoid pinning same pin to 10+ boards in one day
- Use Pinterest's native scheduler or third-party tools
- Best times: Early morning (7-9 AM), evenings (8-11 PM)
For more advanced strategies on creating high-performing pins, optimizing text overlays, and leveraging Pinterest SEO, check out our [Pinterest tips and tricks guide](https://www.genviral.io/blog/pinterest-tips-and-tricks) with 15 proven tactics.
## Save Pins as Drafts
Pinterest allows you to save unfinished pins as drafts.
**Draft limitations:**
- Expire after **30 days**
- Cannot edit across devices (finish where you started)
- Need **100MB storage** on mobile device
- Desktop: Save up to **50 drafts**, publish all at once
- Mobile: One at a time
**To access drafts:**
**Desktop:** Create → Pin drafts section
**Mobile:** Tap + icon → Pin → Folder icon (bottom right)
## Common Pin Types
### 1. Standard Image Pin
Single image with title, description, and link.
### 2. Video Pin
Single video or multiple images/videos combined. Autoplays in feed.
### 3. Carousel Pin
Up to **5 images** in one swipeable pin. Great for:
- Step-by-step tutorials
- Product variations
- Multiple angles of same item
**To create:** Upload 2-5 images → Select "Carousel" option
### 4. Product Pin (Rich Pin)
Automatically syncs product info from your website:
- Price
- Availability
- Product details
- Buy button
**Requires:** Schema markup on your website + claimed domain
### 5. Recipe Pin (Rich Pin)
Auto-includes:
- Ingredients
- Cook time
- Servings
- Ratings
**Requires:** Recipe schema markup on your site
### 6. Article Pin (Rich Pin)
Shows:
- Headline
- Author
- Story description
**Requires:** Article schema markup on your site
## Schedule Pins in Advance
**Pinterest Native Scheduling** (Free for business accounts):
- Schedule up to **30 days ahead**
- Edit scheduled pins before they publish
- Limited to smaller queues
**How to schedule:**
1. Create pin as normal
2. Select **"Publish at a later date"**
3. Choose date and time
4. Click **Schedule**
## What You Cannot Edit After Publishing
Once a pin is published, you **cannot change:**
- Image or video content
- Audio (for video pins)
- Aspect ratio
**What you CAN edit:**
- Title
- Description
- Destination link
- Board location
- Comment settings
To change the image/video, you must create a new pin.
## Common Questions
**How many pins should I create per day?**
Quality over quantity. Aim for **3-5 high-quality pins per day** spread throughout the day. Pinterest's 2026 algorithm prioritizes fresh, original content over volume. Posting 30 identical pins to different boards is considered spam. For a complete posting strategy including seasonal campaigns and batch workflows, see our [Pinterest posting strategy guide](https://www.genviral.io/blog/pinterest-posting-strategy).
**Do hashtags work on Pinterest?**
Hashtags have limited value on Pinterest compared to keywords. Focus on using **keywords in titles, descriptions, and topic tags** instead. Pinterest is a search engine, not social media-keywords drive discovery, not hashtags.
**Can I delete a pin and repost it?**
Yes, but it's not recommended. When you delete a pin, you lose all engagement (saves, clicks, comments). It's better to create a new variation and leave the original live. Pins can drive traffic for months or years, so don't delete performing content. If you need to delete pins, see our guide on [how to delete Pinterest pins](https://www.genviral.io/blog/how-to-delete-a-pinterest-pin). For pins you've saved from others, see our guide on [how to unsave pins on Pinterest](https://www.genviral.io/blog/how-to-unsave-pins-on-pinterest).
**How long do pins last?**
Pins have a **long lifespan** compared to other platforms. A pin can continue driving traffic for months or even years after posting. The average pin lifespan is **3-4 months**, but popular pins can perform indefinitely.
**Should I use Pinterest's editing tools?**
Yes, for quick text overlays and basic edits. However, for professional-quality pins, use design tools like Canva or Adobe before uploading. Pinterest's native editor is convenient for last-minute tweaks, but dedicated design software offers more control.
**Can I make a pin without an image?**
No. Every pin requires either an image or video. Pinterest is a visual platform-text-only pins are not supported. If you want to share text-based content, create an image with text overlay using a design tool.
**What makes a pin go viral?**
No guaranteed formula, but high-performing pins typically have: **eye-catching visuals**, **clear value proposition**, **keyword-optimized titles**, **linked to quality content**, **posted to relevant boards**, and **shared during peak times**. Consistency matters more than virality-focus on steady growth.
**Do I need a business account to create pins?**
No, personal accounts can create pins. However, **business accounts** get: Pinterest Analytics, scheduling features, rich pins, product tagging, ad capabilities, and trend insights. It's free to convert, so it's worth upgrading if you're serious about Pinterest marketing. For more advanced strategies, check out our Pinterest tips and tricks guide with 15 proven tactics.
## Create Pins That Drive Traffic
Pinterest is unique-it's a visual discovery engine where people actively search for ideas, inspiration, and solutions. Every pin you create is an opportunity to:
- Drive traffic to your website
- Build brand awareness
- [Generate sales](https://www.genviral.io/blog/how-to-make-money-with-pinterest)
- Grow your audience
- Establish authority in your niche
The key is consistency. Create high-quality, keyword-optimized pins regularly, and Pinterest's algorithm will reward you with increased visibility and long-term traffic growth. To expand your reach beyond your own boards, consider joining [group boards on Pinterest](https://www.genviral.io/blog/how-to-find-group-boards-on-pinterest). For creating interactive collages, see [how to make Pinterest collage](https://www.genviral.io/blog/how-to-make-pinterest-collage). And when your board count gets out of hand, [merging Pinterest boards](https://www.genviral.io/blog/how-to-merge-pinterest-boards) is the cleanest way to consolidate.
---
*Want to streamline your Pinterest strategy? Create your pins in Canva, then use [Genviral](https://genviral.io/pinterest-scheduler) to schedule and post them automatically to Pinterest along with your other social channels. This keeps your Pinterest feed active even when you're busy, helping you maintain consistency and maximize reach.*
---
Canonical HTML: https://www.genviral.io/blog/how-to-make-a-pin-on-pinterest
# How to Make a Reel on Instagram (2026 Complete Guide)
## What Are Instagram Reels?
Instagram Reels are short-form vertical videos (up to 90 seconds) that appear in your feed, Explore page, and dedicated Reels tab. Since their launch in 2020 to compete with TikTok, Reels have become Instagram's fastest-growing feature and primary focus for algorithm promotion.
With Reels, you can:
- Create engaging short videos with music, effects, and text
- Reach a significantly larger audience than with regular posts
- Leverage trending sounds, effects, and challenges
- Build your brand's personality and showcase products
- Drive traffic to your profile, website, or products

## Why Reels Matter in 2025
Instagram's algorithm heavily favors Reels, with the format receiving **2.5x more engagement** and **3x more reach** than standard video posts. After the 2024 algorithm update, Reels now account for over 60% of content consumption time on Instagram, making them essential for any growth strategy.
## How to Make a Reel on Instagram: Step-by-Step Guide
### Step 1: Access the Reels Camera
Open Instagram and do one of the following:
- Tap the "+" at the top right, then select "Reel"
- Swipe right from your feed and select "Reels" at the bottom
- Tap the Reels tab and then the camera icon

### Step 2: Prepare Your Settings
Before recording, customize your Reel with these options:
- **Music**: Tap the music note to add a song from Instagram's library
- **Length**: Choose between 15, 30, 60, or 90 seconds
- **Speed**: Adjust recording speed (0.3x, 0.5x, 1x, 2x, 3x)
- **Effects**: Browse visual effects from Instagram's gallery
- **Timer**: Set a countdown for hands-free recording
- **Dual**: Use front and back cameras simultaneously
### Step 3: Record or Upload Your Content
You have two options:
**Option A: Record directly in the app**
- Hold the record button to capture footage
- Tap the record button to start and stop for multiple clips
- Use the timer for hands-free recording
**Option B: Upload existing videos/photos**
- Tap the gallery icon in the bottom left
- Select videos or photos to include in your Reel
- Adjust the length of each clip using the trimming tool

### Step 4: Edit Your Reel
After recording or uploading, enhance your Reel with:
- **Text**: Tap the "Aa" icon to add text with various fonts and animations
- **Stickers**: Add interactive elements, polls, or questions
- **Drawing tools**: Highlight or annotate parts of your Reel
- **Audio sync**: Adjust your visuals to match key moments in the music
- **Transitions**: Add smooth movements between clips or scenes
- **Filters**: Apply color grading to maintain your aesthetic
### Step 5: Add Caption and Share
- Write an engaging caption with relevant hashtags
- Tag people and add a location if relevant
- Choose a custom cover image (critical for profile grid appearance)
- Select whether to share to your feed as well as Reels
- Tap "Share" to publish your Reel
## How to Make a Reel with Photos on Instagram
Creating Reels isn't limited to video footage. Here's how to make a Reel using still photos:
1. Access the Reels camera as described above
2. Tap the gallery icon in the bottom left
3. Select multiple photos from your gallery (up to 10)
4. Adjust the duration each photo appears (0.5-5 seconds each)
5. Add transitions between photos (tap the transition icon)
6. Add music that complements your photo sequence
7. Customize with text overlays to tell your story
8. Apply consistent filters for a cohesive look
The key to engaging photo Reels is creating a smooth, dynamic flow between images with appropriate timing and transitions.

## How to Make a Reel on Instagram with Music
Music is essential for engaging Reels. Here's how to perfectly pair your visuals with audio:
1. After recording or uploading your content, tap the music note icon
2. Browse trending songs or search for specific tracks
3. Use the slider to select the specific segment of the song to use
4. Adjust clip timing to match key beats in the music
5. Consider adding text that appears in sync with the music
6. Use Instagram's auto-sync feature to match transitions to the beat
Pro tip: Using trending audio can significantly increase your Reel's discoverability, as Instagram promotes content that leverages popular sounds.
## How to Make a Trending Reel on Instagram
To create Reels that align with current trends:
1. **Use Instagram templates**:
- Go to a trending Reel you'd like to recreate
- Tap the "Use template" button at the bottom
- Follow the guided process to replace the original clips with yours
2. **Find trending audio**:
- Browse the Reels tab for content with high view counts
- When you find a Reel with audio you want to use, tap the sound name
- Select "Use audio" to create your own Reel with that sound
3. **Participate in challenges**:
- Look for hashtags with "challenge" in the name
- Create content that puts your unique spin on the challenge
- Include the challenge hashtag in your caption

## Instagram Reels Best Practices for 2025
### 1. Hook viewers in the first 3 seconds
Instagram's internal data shows that Reels keeping viewers past the 3-second mark see 68% higher completion rates. Start with a compelling question, surprising fact, or visually striking scene.
### 2. Embrace vertical 9:16 format
Design specifically for the full-screen vertical experience. Avoid horizontal footage or videos with large borders, as Instagram's 2024 algorithm update penalizes non-native formats.
### 3. Include on-screen text
Many viewers watch with sound off, so include captions or text overlays to convey your message visually. The new auto-caption feature has improved significantly in 2025.
### 4. Keep it concise and focused
While Reels can be up to 90 seconds, the sweet spot for engagement is 15-30 seconds. Focus on a single concept rather than trying to cover multiple topics.
### 5. Incorporate trending elements strategically
Use popular sounds, effects, and challenges, but add your unique perspective. The algorithm rewards original content that incorporates trending elements.
### 6. Post consistently
The Instagram algorithm favors accounts that regularly post Reels (3-5 times per week). Consistency signals to Instagram that you're an active creator.
## Common Instagram Reels Mistakes to Avoid
- **Recycling TikTok content with watermarks**: Instagram's algorithm deprioritizes content with visible watermarks from other platforms
- **Ignoring audio quality**: Poor audio dramatically reduces engagement, even with great visuals
- **Using too many effects**: Overloading with transitions and effects can distract from your message
- **Missing trends**: By the time a trend reaches mainstream awareness, it's often already fading
- **Neglecting analytics**: Not reviewing performance metrics to understand what resonates with your audience
## The Easier Way: Automating Reels with Genviral
Creating compelling Reels requires time, creativity, and technical skill. Genviral streamlines this process through AI automation.
### How Genviral Creates Instagram Reels
Genviral's AI platform revolutionizes Reels creation by:
1. **Automatically generating complete Reels** from a simple prompt or concept
2. **Selecting trending audio** that matches your content theme
3. **Creating dynamic text animations** timed perfectly with visuals
4. **Designing transition effects** for smooth flow between scenes
5. **Scheduling and posting directly** to your Instagram account
Instead of spending hours filming, editing, and optimizing Reels, Genviral produces professional-quality content in minutes.

### The Genviral Reels Workflow
1. Enter your Reel concept or topic
2. Select your preferred style and duration
3. Choose from AI-suggested music options
4. Review and approve the AI-generated Reel
5. Schedule for optimal posting time or post immediately
## Measuring Instagram Reels Success
Track these metrics to evaluate your Reels performance:
- **Plays**: Total number of times your Reel has been viewed
- **Accounts reached**: Unique users who saw your Reel
- **Likes and comments**: Direct engagement signals
- **Shares**: How many times users sent your Reel to others
- **Saves**: Perhaps the strongest signal of quality content
- **Profile visits**: Traffic to your profile from the Reel
- **Follow conversion rate**: New followers gained from Reel views
Instagram's Creator Studio provides detailed Reels analytics, including audience retention graphs showing exactly where viewers drop off. Profile visits in analytics are aggregate signals, not a named viewer list; if that distinction is confusing, see [how to turn off profile views on Instagram](https://www.genviral.io/blog/how-to-turn-off-profile-views-on-instagram).
## Final Thoughts
Instagram Reels represent the platform's future, offering unparalleled reach and engagement potential. While creating standout Reels requires skill and consistency, tools like Genviral make it possible to maintain a competitive Reels presence without extensive time investment.
By automating the creation, optimization, and posting of Reels, you can focus on strategy while still benefiting from Instagram's algorithmic preference for this format.
Whether you create Reels manually or leverage Genviral's AI-powered solution, incorporating this format into your Instagram strategy is non-negotiable for anyone serious about growth in 2025.
*If editing Reels on your phone is filling up your storage, see [how to clear Instagram cache](https://www.genviral.io/blog/how-to-clear-instagram-cache) to recover several gigabytes safely without losing local drafts.*
---
Canonical HTML: https://www.genviral.io/blog/how-to-make-a-reel-on-instagram
# How to Make TikTok Slideshows On Your PC (2026 Guide)
## Introduction
**TikTok doesn't allow slideshow creation on PC** - their desktop app only supports viewing and basic editing. However, you can create professional slideshow content on your computer using third-party tools like **Genviral**, then upload to TikTok. This guide shows you exactly how to create viral slideshow content from your PC.
**Want to see this in action?** Watch the complete walkthrough below:
## Why TikTok PC Slideshow Creation Doesn't Work
TikTok's desktop application is intentionally limited compared to their mobile app. Here's what you **can't** do on TikTok PC:
- ❌ Create slideshow posts
- ❌ Access slideshow templates
- ❌ Use slideshow-specific editing tools
- ❌ Add text overlays to multiple images
- ❌ Create carousel-style content
TikTok wants users to create content on mobile to maintain their mobile-first ecosystem and algorithm preferences. This also helps them combat bot behavior by ensuring activity is tied to a single mobile device.
## The Solution: Create Slideshows With Third-Party Tools
Instead of fighting TikTok's limitations, use **Genviral's text overlay slideshow creator** to build professional slideshow content on your PC, then upload to TikTok.
### What Genviral's Text Overlay Tool Offers
**🎨 Professional Text Overlays**
- AI-generated text that matches viral slideshow patterns
- Multiple font styles and sizes
- Customizable text positioning and colors
- Automatic text optimization for engagement
**📱 Mobile-Optimized Output**
- Perfect 9:16 aspect ratio for TikTok
- High-resolution exports ready for social media
- Multiple format options (images, videos)
**⚡ PC-Friendly Interface**
- Full desktop browser experience
- Drag-and-drop image uploads
- Real-time preview and editing
- Batch processing capabilities
## Step-by-Step: Creating TikTok Slideshows on PC
### Step 1: Set Up Your Genviral Account
1. **Visit Genviral.io** and create your account
2. **Choose your plan:** text overlay slideshows are available on all plans & you can create unlimited slideshows!
### Step 2: Start a New Text Overlay Slideshow
1. **Select "Text Overlay"** as your slideshow type from the dashboard or navbar
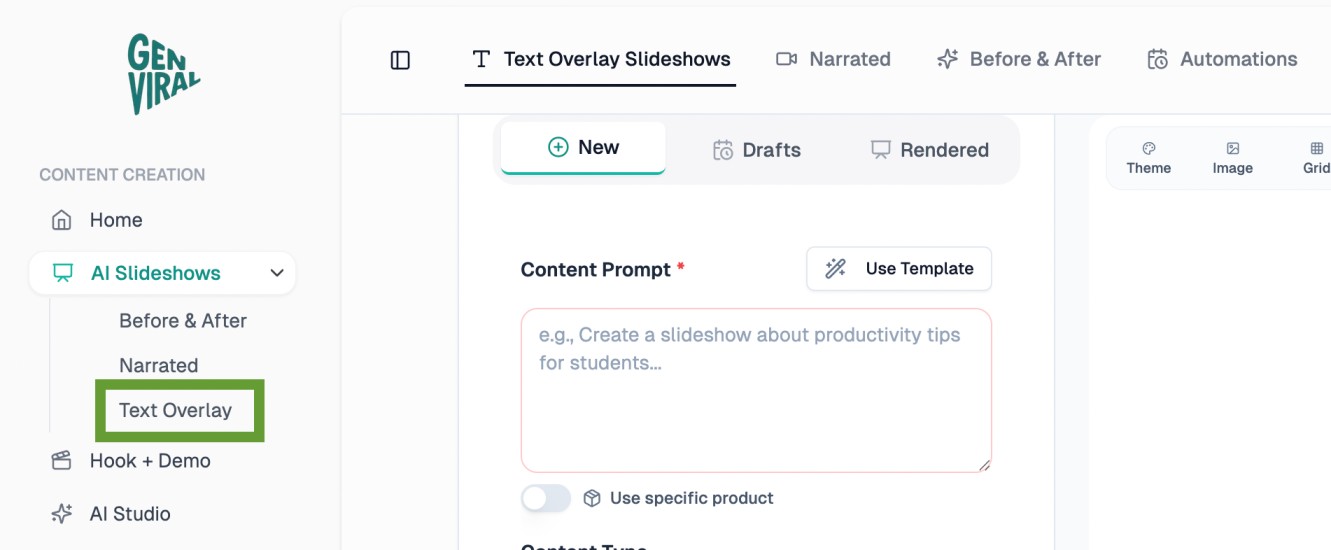
2. **Upload your images** (5-7 images work best for TikTok slideshows) or pick them from the community
### Step 3: Generate AI Text Overlays
1. **Enter your topic** in the prompt field (e.g., "5 productivity tips for entrepreneurs") & optionally connect your product (e.g., SaaS, app, ecommerce product)
2. **Choose your style** from available presets
3. **Click "Generate"** to create AI-powered text overlays
4. **Review and edit** the generated text as needed
Optionally, use a template (above the prompt section) to copy slideshows that are already working:
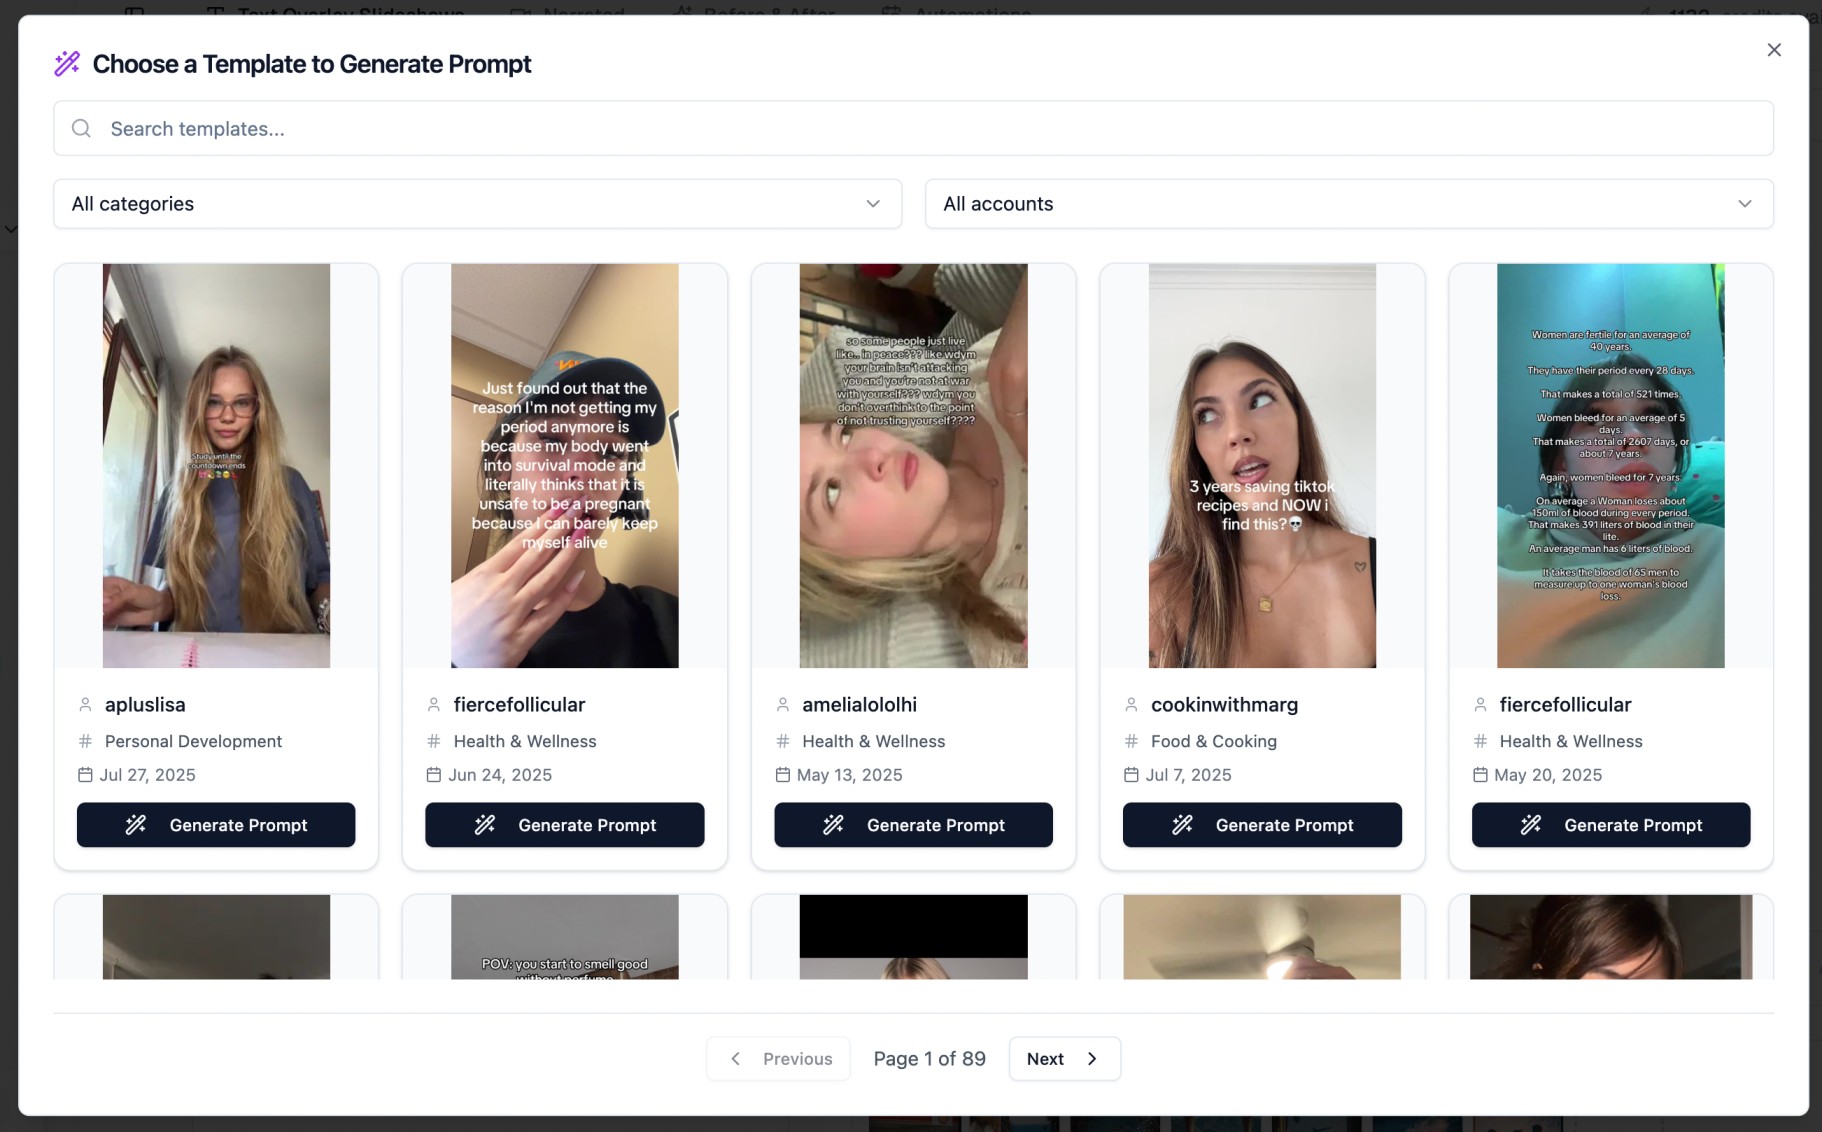
### Step 4: Customize Your Slideshow
**Text Customization:**
- Adjust font sizes and colors
- Reposition text elements
- Edit content to match your brand voice
- Add your own custom text
**Visual Enhancements:**
- Apply filters and effects
- Adjust image brightness/contrast
- Add brand colors and styling
- Ensure mobile-optimized layout
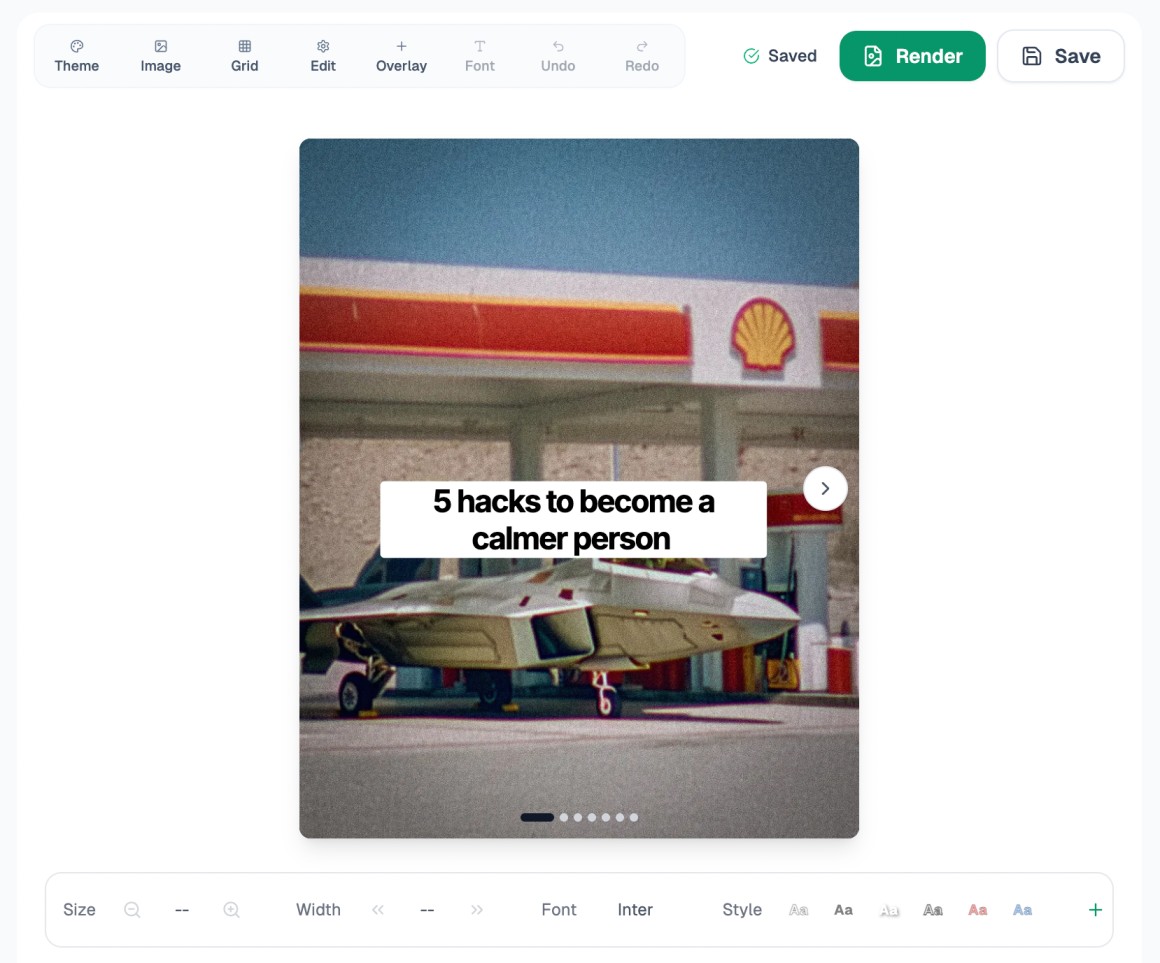
### Step 5: Export and Upload to TikTok
1. **Export your slideshow** as individual images or video
2. **Download to your computer**
3. **Open TikTok on your phone** (or use TikTok's web uploader)
4. **Upload your slideshow** as a new post (we recommend using upload as draft for better reach!)
5. **Add captions, hashtags, and music**
## Pro Tips for PC-Created TikTok Slideshows
### 1. Optimize for Mobile Viewing
Even though you're creating on PC, remember:
- **Text should be large and readable** on small screens
- **Keep text concise** - mobile users scroll quickly
- **Use high contrast** between text and background
- **Test on your phone** before publishing
### 2. Follow Viral Slideshow Patterns
**Hook Structure:**
- Start with a bold statement or question
- Use "How to..." or "Why..." formats
- Include numbers in your title (e.g., "5 Ways to...")
- Utilize Genviral's inspiration section to find winning formats:
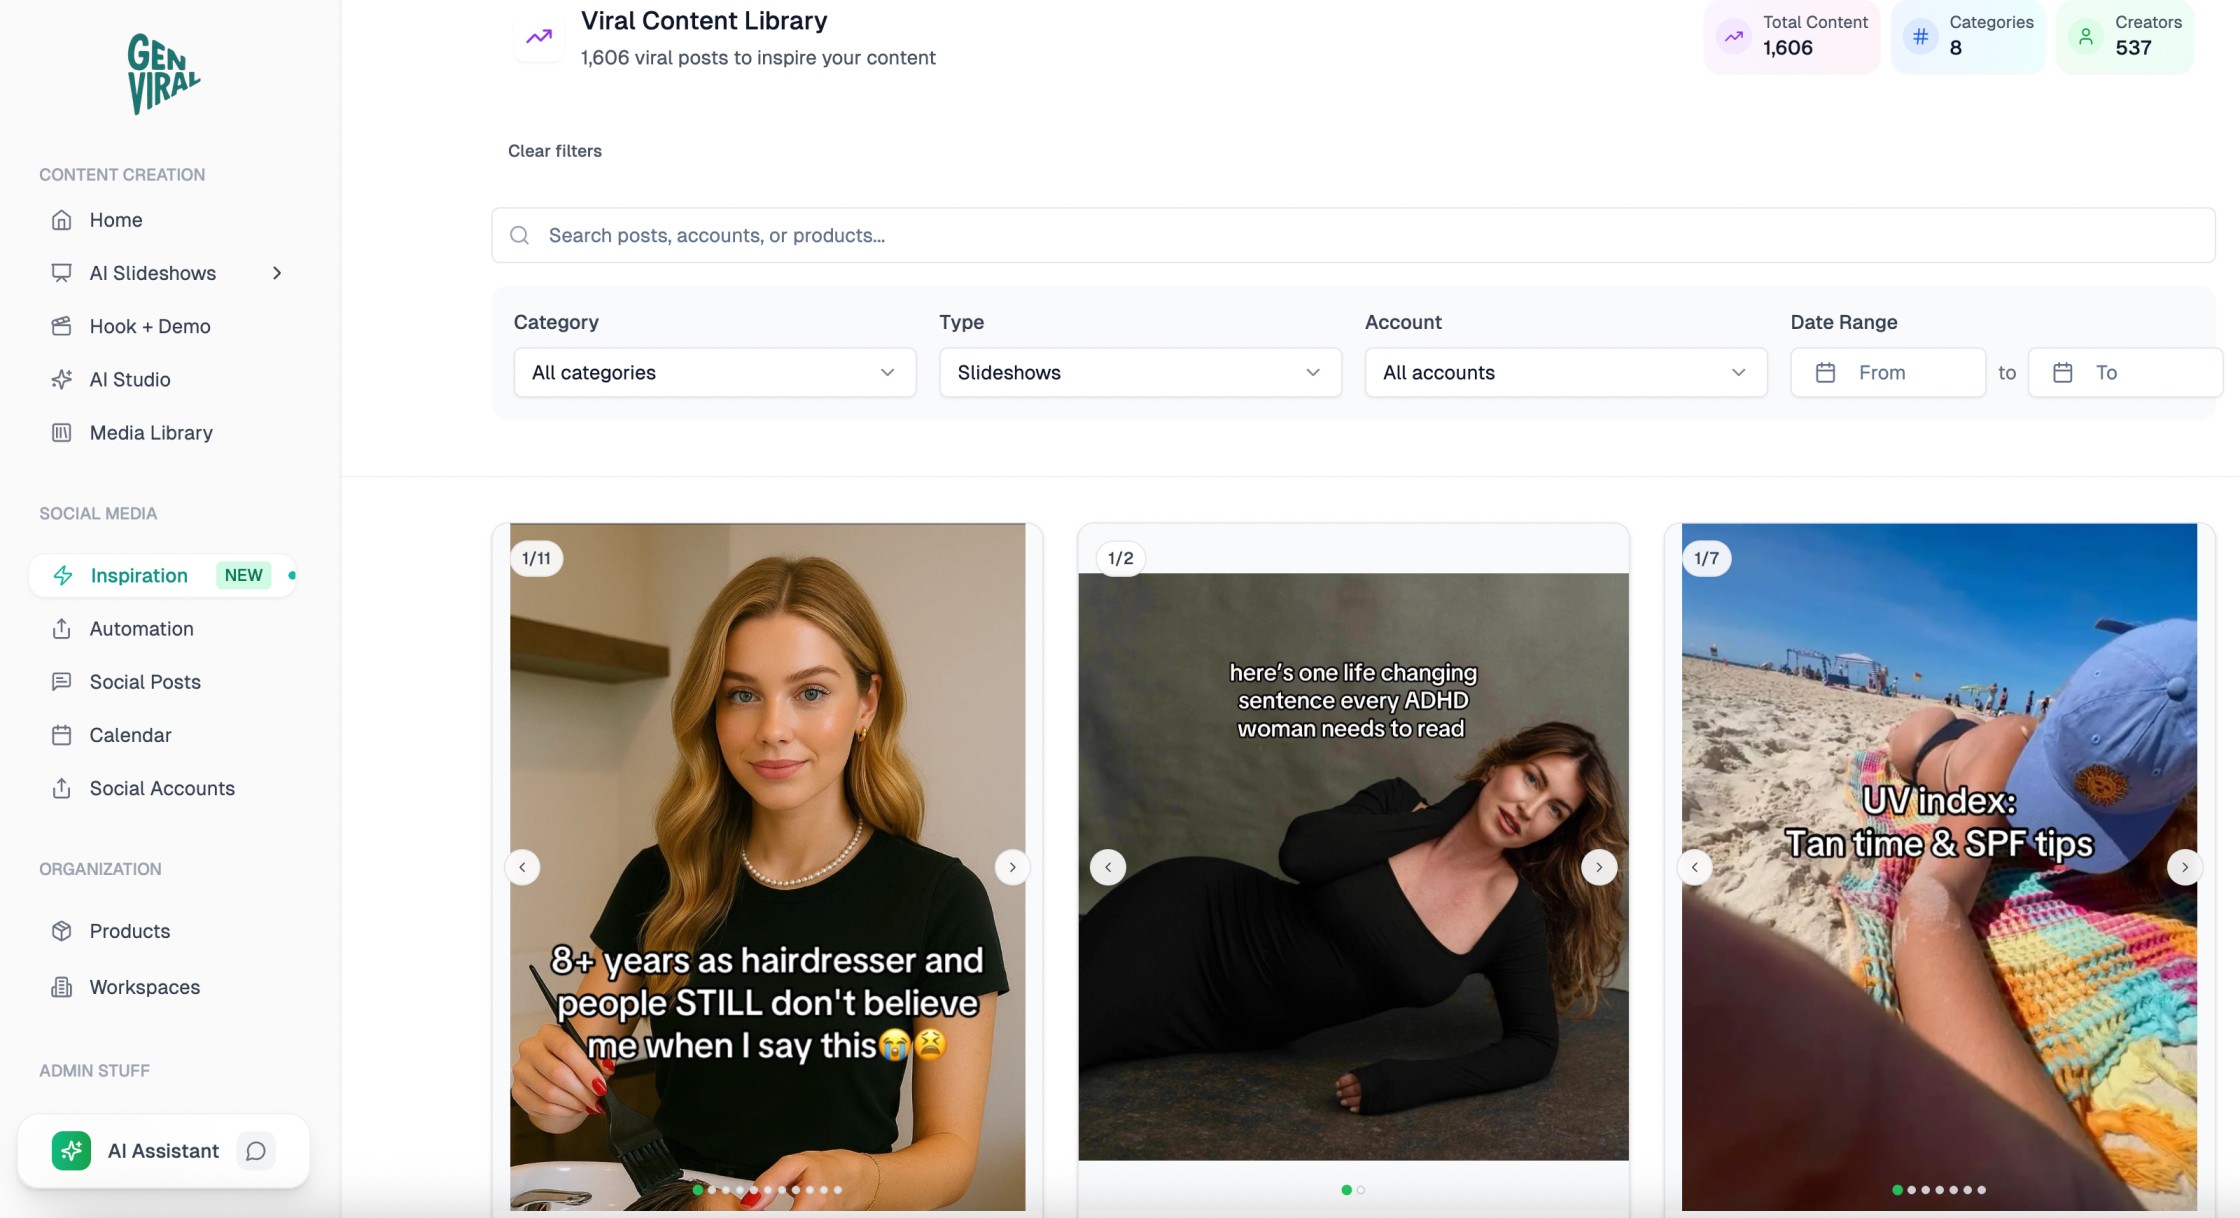
**Content Flow:**
- Problem → Solution → Action steps
- Question → Answer → Call-to-action
- Before → After → Transformation
### 3. Leverage PC Advantages
**Batch Creation:**
- Create multiple slideshows in one session
- Use consistent branding across all content
- Build a content library for future posts
**Professional Quality:**
- Access to high-resolution images
- Precise text positioning
- Advanced editing capabilities
- Brand consistency tools
## Common Mistakes to Avoid
**❌ Making Text Too Small**
- Mobile users can't read tiny text
- Use at least 24pt font size minimum
**❌ Overcrowding Slides**
- Keep one main message per slide
- Use white space effectively
- Don't cram too much information
**❌ Ignoring TikTok's Algorithm**
- Still need to post from mobile for best reach
- Use trending sounds and hashtags
- Engage with comments quickly
**❌ Poor Image Quality**
- Use high-resolution images
- Ensure good lighting and composition
- Avoid pixelated or blurry photos
**❌ Mass-Scheduling Content**
- Don't post more than 3 times per day (esp. when using third-party tools)
- Use draft mode on Genviral instead of direct scheduling
## Advanced PC Slideshow Strategies
### 1. Content Planning on PC
**Use spreadsheet tools** to plan your slideshow series:
- Track topics and themes
- Plan posting schedules
- Monitor performance metrics
- Organize image libraries
### 2. Brand Consistency
**Create templates** for consistent branding:
- Standard color schemes
- Font choices
- Logo placement
- Brand voice guidelines
### 3. A/B Testing
**Test different approaches:**
- Various text styles and lengths
- Different image selections
- Multiple hook formats
- Various call-to-action placements
## Measuring Success
Track these metrics for your PC-created slideshows:
**Engagement Metrics:**
- View completion rate
- Likes and comments
- Shares and saves
- Profile visits
**Content Performance:**
- Which text styles perform best
- Optimal slide count for your audience
- Best posting times
- Most effective hooks
## Getting Started Today
Ready to create professional TikTok slideshows on your PC?
1. **Sign up for Genviral** at genviral.io
2. **Upload your first set of images**
3. **Generate AI text overlays** for your topic
4. **Customize and export** your slideshow
5. **Upload to TikTok** and watch the engagement grow
## Final Thoughts
While TikTok doesn't support slideshow creation on PC, **Genviral's text overlay tool** gives you the best of both worlds: professional desktop creation with mobile-optimized output.
This approach lets you:
- **Create content efficiently** on your computer
- **Maintain professional quality** with precise control
- **Scale your content production** with batch processing
- **Stay competitive** with AI-optimized text overlays
Start creating viral TikTok slideshows from your PC today and never let platform limitations hold back your content strategy again. And if you're starting over on a fresh account before posting these slideshows, see [how to delete your TikTok account](https://www.genviral.io/blog/how-to-delete-tiktok-account) first.
---
_Ready to revolutionize your TikTok content creation? [Try Genviral's text overlay slideshow creator](https://genviral.io) and create professional slideshow content directly from your PC._
---
Canonical HTML: https://www.genviral.io/blog/how-to-make-a-slideshow-on-tiktok-pc
# How to Make Money with Facebook: 8 Proven Methods (2026)
- There are 8 monetization paths on Facebook, with entry points as low as 500 followers (Stars) and scaling up to 10K+ for the Content Monetization Program and Fan Subscriptions.
- The **Content Monetization Program** (launched August 2025) unifies Reels ads, in-stream ads, and performance bonuses into one dashboard - earning $0.10-$4.00 per 1K views, with higher rates for US/UK audiences.
- Fan Subscriptions pay you **100% of the fee on desktop purchases** - 100 subscribers at $9.99/month is nearly $1K in recurring income with zero platform cut.
- Facebook Marketplace reaches 1B+ monthly users with **zero fees for local pickup** sales and built-in profile trust that most marketplaces lack.
- For brand deals, engagement rate matters more than follower count - micro-creators (1K-10K followers) earn $50-$200 per post, while larger accounts can command $20K+.
Facebook isn't just for catching up with old friends anymore - it's a business platform with over 3 billion monthly active users and one of the most diverse monetization ecosystems online. From video ads and fan support to selling products and building paid communities, Facebook offers multiple paths to income for creators and entrepreneurs alike.
The opportunity is massive. Local businesses, content creators, coaches, and everyday entrepreneurs are earning real money on Facebook without needing millions of followers. What matters is strategy, consistency, and choosing the right monetization methods for your skills.
Here are eight proven ways to turn your Facebook presence into profit.
---
## 1. Facebook Content Monetization Program
In August 2025, Facebook rolled out its new Content Monetization Program, combining what used to be three separate revenue streams (in-stream ads, Reels ads, and performance bonuses) into one unified system. This makes earning from Facebook content simpler and more accessible.
**What you can monetize:**
- Long-form videos
- Facebook Reels
- Photos
- Text posts
- Stories
**How it works:**
You earn based on content performance - views, engagement, watch time, and plays. The program gives you a single dashboard to track earnings across all content types.
**Requirements:**
- 10,000+ followers
- 600,000 total minutes watched in the last 60 days
- At least 5 active videos
- 18+ years old
- Account in good standing (keep payout details current; [how to change email on Facebook](https://www.genviral.io/blog/how-to-change-email-on-facebook) if needed)
- Located in an eligible country
**What you can earn:**
Earnings vary based on niche, audience location, and engagement. Creators report earning anywhere from $0.10 to $4.00 per 1,000 views, with higher rates for audiences in the US, UK, and other tier-1 countries.
**Pro tip:** The program is currently invite-only and in beta. You can express interest through your Professional Dashboard under Monetization > Content Monetization. If you plan content in advance, [where to find scheduled posts on Facebook](https://www.genviral.io/blog/where-to-find-scheduled-posts-on-facebook) helps you see what's going live and when.
---
## 2. Facebook Stars
Facebook Stars is one of the most accessible monetization features - your audience can send you virtual Stars during live videos, Reels, and even regular video posts as a form of appreciation. Each Star equals $0.01.
**How it works:**
- Viewers purchase Stars with real money
- They send Stars during your content
- You accumulate Stars and cash out
**Requirements:**
- 500+ followers (for 30 consecutive days)
- 18+ years old
- Account in good standing
- Located in an eligible country
**What you can earn:**
While $0.01 per Star sounds small, creators with engaged audiences accumulate thousands of Stars per session. A creator receiving 5,000 Stars during a live stream earns $50 from that single session.
**Best content for Stars:**
- Live Q&As and AMAs
- Gaming streams
- Behind-the-scenes content
- Tutorials and how-tos
- Interactive challenges
**Pro tip:** Actively engage with viewers who send Stars - thank them by name, answer their questions, and give shoutouts. This encourages more Stars and builds loyalty. If you save posts to finish later, [how to find drafts on Facebook](https://www.genviral.io/blog/how-to-find-drafts-on-facebook) shows where they live so you can keep a steady flow of content.
---
## 3. Fan Subscriptions
Fan Subscriptions let your most loyal followers pay a monthly fee for exclusive content and perks. It's Facebook's version of a membership model.
**How it works:**
- Fans pay a monthly subscription (you set the price)
- They get access to exclusive content, badges, and perks
- You receive recurring income
**Requirements:**
- 10,000+ followers OR 250+ return viewers
- 18+ years old
- Consistent content publishing history
- Account in good standing
**Subscriber perks you can offer:**
- Exclusive posts and videos
- Subscriber-only live streams
- Special badges next to their names
- Behind-the-scenes content
- Direct messaging access
- Early access to content
**What you can earn:**
If subscribers pay via desktop, you keep 100% of the fee (minus taxes). Pricing typically ranges from $4.99 to $24.99 per month. With 100 subscribers at $9.99/month, that's nearly $1,000 in recurring monthly income.
**Pro tip:** Treat subscriptions as a relationship, not a transaction. Subscribers expect ongoing value, so plan exclusive content in advance and engage with them regularly.
---
## 4. Facebook Marketplace
Facebook Marketplace has over 1 billion monthly users and is one of the largest social commerce platforms globally. It's perfect for local selling with no listing fees for pickup transactions.
**What you can sell:**
- Furniture and home decor
- Electronics and gadgets
- Clothing and accessories
- Vehicles
- Sports equipment
- Collectibles and vintage items
- Handmade goods
Selling under your real name builds trust; if you need to update it, see [how to change name on Facebook](https://www.genviral.io/blog/how-to-change-name-on-facebook).
**Why Marketplace works:**
- No listing fees for local sales
- Built-in trust through Facebook profiles
- Massive local audience
- Easy communication through Messenger
**Fees:**
- Local pickup with cash: Free
- Shipped items: 5% fee (or $0.40 flat fee for items under $8)
**Best practices:**
- Use clear, well-lit photos from multiple angles
- Write detailed descriptions with relevant keywords
- Price competitively (research similar listings)
- Respond quickly to inquiries
- Meet in public places for safety
**What sells fast:**
Furniture, electronics, and clothing consistently rank as the fastest-selling items. Quality photos and honest descriptions make the biggest difference.
**Pro tip:** Join local buy/sell groups to cross-post your listings and reach more buyers. Refresh listings that haven't sold by creating new posts to push them back to the top.
---
## 5. Facebook Groups Monetization
Facebook Groups aren't just for community - they're powerful monetization tools. With the right strategy, a well-run group can generate significant income through multiple channels.
**Ways to monetize a Facebook Group:**
**Paid memberships:**
Create a free group to build community, then offer a premium tier with exclusive content, coaching, or resources. Use external payment tools to manage subscriptions, then grant access to a private group for paying members.
**Sell products and services:**
Use your group to promote digital products, courses, coaching, or physical goods. The trust you build through free content makes selling easier.
**Affiliate marketing:**
Share relevant products with affiliate links. Disclose partnerships and only recommend products that genuinely help your community.
**Brand partnerships:**
Brands pay to access engaged communities. As your group grows, you can charge for sponsored posts or exclusive promotions.
**Host paid events:**
Webinars, workshops, and virtual events can be promoted to your group and monetized through ticket sales. Some groups allow [commenting anonymously on Facebook](https://www.genviral.io/blog/how-to-comment-anonymously-on-facebook), which can help members ask sensitive questions; useful to know if you run or moderate communities.
**What you can earn:**
A focused group of 3,000-5,000 engaged members can be profitable with the right offers. Larger groups (10,000+) can command premium brand deals. Membership communities often charge $20-$100+ per month depending on the value provided.
**Pro tip:** Build trust before monetizing. Groups that deliver consistent free value can introduce paid offers naturally - members will already trust your recommendations.
---
## 6. Affiliate Marketing
Affiliate marketing on Facebook means promoting other companies' products and earning commission on sales made through your unique links. It's one of the most flexible ways to monetize without creating your own products.
**How it works:**
- Join affiliate programs (Amazon Associates, ShareASale, Impact, brand-specific programs)
- Share products through posts, Reels, or groups
- Earn commission when someone purchases through your link
**Where to promote affiliate products:**
- Facebook Page posts (if you run a Page with others, [how to add admin to Facebook page](https://www.genviral.io/blog/how-to-add-admin-to-facebook-page) keeps roles and access clear)
- Reels with product demonstrations
- Facebook Groups (with disclosure)
- Live videos with product reviews
- Stories with swipe-up links
**What you can earn:**
Commissions vary by program - typically 1-10% for retail products, up to 30-50% for digital products and software. High-ticket items or recurring subscriptions offer the best earning potential.
**Best practices:**
- Only promote products you genuinely recommend
- Disclose affiliate relationships (FTC requirement)
- Create helpful content around the product, not just ads
- Focus on solving problems for your audience
- Track which products and content types convert best
**Pro tip:** Product demonstrations and honest reviews convert better than generic promotions. Show the product in use, share your personal experience, and explain who it's best for.
---
## 7. Facebook Shops
If you sell physical products, Facebook Shops lets you create a storefront directly on Facebook. Customers can browse, save, and purchase without leaving the app.
**How it works:**
- Set up a Shop through Meta's Commerce Manager
- Upload your product catalog
- Customers discover products through your Page, Reels, and ads
- Checkout happens within Facebook (or via your website)
**What you can sell:**
- Physical products (apparel, accessories, home goods, beauty)
- Handmade items
- Print-on-demand merchandise
- Dropshipped products
**Why Facebook Shops work:**
- Seamless mobile shopping experience
- Products can appear in Reels and posts
- Integration with Instagram Shopping
- Access to Facebook's massive user base
- Can run targeted ads to your product catalog
**Fees:**
Facebook charges a selling fee (typically 5% per transaction or $0.40 minimum for orders under $8 when using Facebook checkout).
**Pro tip:** Use Facebook Reels to showcase products in action. Product demos, unboxings, and styling videos drive more engagement than static product shots.
---
## 8. Brand Partnerships and Sponsored Content
As your audience grows, brands will pay you to create content featuring their products. This works whether you have a Page, Group, or personal profile with Professional Mode enabled.
**How it works:**
- Brands pay you to create posts, Reels, or videos featuring their products
- You use Facebook's Branded Content Tool to tag the brand
- Content is labeled as "Paid Partnership"
**Where to find brand deals:**
- Brands reach out directly as your following grows
- Join influencer platforms (Creator.co, AspireIQ, Grin)
- Pitch brands that align with your content
- Facebook's Creator Marketplace connects creators with brands
**What you can earn:**
- Micro-creators (1K-10K followers): $50-$200 per post
- Small influencers (10K-50K followers): $200-$1,000 per post
- Mid-tier creators (50K-100K followers): $1,000-$5,000 per post
- Larger creators (100K+ followers): $5,000-$20,000+ per post
Rates depend on niche, engagement rate, and content format. Video content typically commands higher rates than static posts.
**Pro tip:** Engagement rate matters more than follower count. Brands increasingly prefer creators with smaller, highly engaged audiences over those with large but passive followings. To see how your posts spread, [how to see who shared my post on Facebook](https://www.genviral.io/blog/how-to-see-who-shared-my-post-on-facebook) helps you track shares and plan what to create next.
---
## Quick Comparison: Facebook Monetization Methods
| Method | Requirements | Typical Earnings | Best For |
|--------|-------------|------------------|----------|
| Content Monetization | 10K followers, 600K watch minutes | $0.10-$4/1K views | Video creators |
| Facebook Stars | 500 followers | $0.01 per Star | Live streamers |
| Fan Subscriptions | 10K followers or 250 return viewers | $4.99-$24.99/month per subscriber | Loyal audiences |
| Marketplace | Facebook account | Varies by products | Local sellers |
| Groups | Engaged community | $20-$100+/month per member | Community builders |
| Affiliate Marketing | No minimum | 1-50% commission | Content creators |
| Facebook Shops | Business account | Varies by products | E-commerce sellers |
| Brand Partnerships | Engaged audience | $50-$20K+ per post | Influencers |
---
## Keys to Facebook Monetization Success
Regardless of which methods you choose, these fundamentals apply:
**1. Build community first**
Facebook rewards engagement. Focus on building a loyal, interactive audience before pushing monetization. Communities beat follower counts every time.
**2. Diversify your income streams**
Don't rely on one method. Combine Stars with affiliate marketing. Add subscriptions to your content monetization. Multiple streams protect against algorithm changes and platform shifts.
**3. Stay consistent**
Post regularly, go live on a schedule, engage with comments. Facebook's algorithm favors consistent creators who keep people on the platform.
**4. Follow the rules**
Facebook has strict monetization policies. Violating Community Standards or Partner Monetization Policies can get you demonetized permanently. Know the rules and follow them. If you use a personal profile for business, [how to lock Facebook account](https://www.genviral.io/blog/how-to-lock-facebook-account) can add an extra privacy layer where the feature is available.
**5. Focus on value**
Every monetization method works better when you genuinely help your audience. Solve problems, entertain, educate - the money follows value.
**6. Track what works**
Use Meta Business Suite and Creator Studio to monitor performance. Double down on content types, topics, and formats that drive engagement and revenue. To keep your feed and DMs focused on supporters rather than trolls, [how to view blocked Facebook friends](https://www.genviral.io/blog/how-to-view-blocked-facebook-friends) lets you review and manage your block list.
---
## Final Thoughts
Facebook has evolved from a social network to a full business ecosystem. With 3 billion users and tools for video monetization, commerce, communities, and fan support, there's never been more opportunity to earn on the platform.
The key is choosing methods that match your strengths. If you love creating videos, focus on the Content Monetization Program and Reels. If you're a community builder, monetize through Groups and Subscriptions. If you sell products, leverage Marketplace and Facebook Shops.
Start with one or two methods, master them, and expand from there. The creators earning the most on Facebook treat it like a business - multiple revenue streams, consistent content, and a focus on serving their audience.
Ready to create content that converts? **[Genviral](https://genviral.io)** can help you plan, create, and schedule Facebook content that grows your audience and income. Try the [Facebook Scheduler](https://www.genviral.io/facebook-scheduler) to automate your posting.
## More Monetization Guides
Want to monetize other platforms? Check out our guides:
- [How to Make Money with TikTok](https://www.genviral.io/blog/how-to-make-money-with-tiktok)
- [How to Make Money with Instagram](https://www.genviral.io/blog/how-to-make-money-with-instagram)
- [How to Make Money with Pinterest](https://www.genviral.io/blog/how-to-make-money-with-pinterest)
- [How to Make Money with LinkedIn](https://www.genviral.io/blog/how-to-make-money-with-linkedin)
---
---
Canonical HTML: https://www.genviral.io/blog/how-to-make-money-with-facebook
# How to Make Money with Instagram: 11 Proven Methods (2026)
- Instagram has 11 monetization methods in 2026 - the fastest to revenue for most creators is brand partnerships, where micro-influencers (10K-50K followers) earn up to 60% higher engagement than mega-influencers, making them more valuable per-follower to brands.
- **Subscriptions** go up to $99.99/month per subscriber - just 100 subscribers at $9.99 = $1K/month in recurring income with strong retention.
- **UGC creation** requires zero followers: brands pay $50-$1,000 per video for authentic content used in their ads and Spark campaigns.
- **Reels are the discovery engine**: 60%+ of Reel views come from non-followers. Consistent Reels posting is the single fastest way to grow your audience and hit monetization thresholds.
- The smartest long-term play: use Instagram as a top-of-funnel, then convert audiences to an email list, coaching, or digital products you own outright - immune to algorithm changes.
Instagram has evolved from a photo-sharing app into a full-blown creator economy. With 2 billion daily active users and Reels accounting for 50% of time spent on the platform, the opportunities to earn real money have never been greater.
Here's what makes Instagram unique: you don't need millions of followers to start earning. Micro-influencers with 10,000-50,000 followers actually enjoy up to 60% higher engagement than celebrity creators. Brands increasingly value authentic connections over raw follower counts, opening doors for creators at every level.
Whether you're building a personal brand, selling products, or creating content, here are eleven proven ways to turn your Instagram presence into income.
---
## 1. Instagram Subscriptions
Instagram Subscriptions let your most loyal followers pay a monthly fee for exclusive content. It's recurring revenue directly from people who already love what you create.
**How it works:**
- You set a monthly price ($0.99 to $99.99)
- Subscribers get exclusive perks
- You earn recurring income each month
**What you can offer subscribers:**
- Subscriber-only posts and Reels
- Exclusive Stories and Lives
- Subscriber badges next to their names
- Behind-the-scenes content
- Direct access via DMs
**Requirements:**
- 10,000+ followers
- Professional (Creator or Business) account (to switch account type, see [how to switch to personal account on Instagram](https://www.genviral.io/blog/switch-to-personal-account-instagram))
- 18+ years old
- Located in an eligible country
- Comply with Partner Monetization Policies
Professional accounts can use aggregate profile activity as a monetization signal, but Instagram does not show a named list of profile viewers. If you are trying to separate analytics from privacy, read [how to turn off profile views on Instagram](https://www.genviral.io/blog/how-to-turn-off-profile-views-on-instagram).
**What you can earn:**
With pricing flexibility up to $99.99/month, even modest subscriber numbers add up. 100 subscribers at $9.99/month = nearly $1,000 in recurring monthly income.
**Pro tip:** Tease exclusive content on your main feed to show non-subscribers what they're missing. Create a clear value proposition - subscribers should know exactly what they're getting.
---
## 2. Brand Partnerships and Sponsored Content
Sponsored posts remain one of the most lucrative ways to monetize Instagram. Brands pay you to create content featuring their products, leveraging your audience and creative skills.
**How it works:**
- Brands pay you to create posts, Reels, or Stories featuring their products
- You use Instagram's Branded Content tools to disclose the partnership
- Content is labeled "Paid partnership with [Brand]"
**Where to find brand deals:**
- **Instagram's Creator Marketplace** - Brands discover and reach out to creators directly
- **Influencer platforms** - AspireIQ, Grin, Upfluence, Creator.co
- **Direct outreach** - Pitch brands that align with your niche
- **Inbound requests** - Brands contact you as your following grows
**What you can earn:**
- Nano-influencers (1K-10K): $50-$250 per post
- Micro-influencers (10K-50K): $250-$1,000 per post
- Mid-tier creators (50K-100K): $1,000-$5,000 per post
- Macro-influencers (100K-500K): $5,000-$10,000 per post
- Mega-influencers (500K+): $10,000-$100,000+ per post
**Key insight:** Engagement rate matters more than follower count. Brands increasingly prefer creators with smaller, highly engaged audiences over those with large but passive followings.
**Pro tip:** Don't overload your feed with sponsored content. If every post is a promo, engagement drops and future brand deals become harder to land.
---
## 3. Affiliate Marketing
Affiliate marketing lets you earn commission by promoting products you love. When followers purchase through your unique link or code, you get a percentage of the sale.
**How it works:**
- Join affiliate programs (Amazon Associates, ShareASale, Shopify Collabs, brand-specific programs)
- Share products through posts, Reels, Stories, or your bio link
- Earn commission on purchases made through your links
**Where to promote affiliate products:**
- Link Stickers in Stories (reposting stories helps when you want to reshare partner content)
- Link in bio (using tools like Linktree or Beacons)
- Product mentions in Reels and posts
- Captions with discount codes
- Live shopping demonstrations
**What you can earn:**
Commission rates vary widely:
- Retail products: 1-10%
- Beauty and fashion: 5-20%
- Digital products and software: 20-50%
- High-ticket items: Can be hundreds per sale
**Why Instagram works for affiliates:**
- 61% of Instagram users trust creator recommendations more than traditional ads
- Instagram's visual format is perfect for product demonstrations
- Users spend an average of 11.7 hours per month on the app
**Pro tip:** Only promote products you genuinely use and believe in. Authenticity drives conversions - audiences can spot inauthentic recommendations instantly.
---
## 4. Instagram Shop
If you sell physical products, Instagram Shop lets you create a storefront directly on your profile. Customers can browse, save, and purchase without leaving the app.
**How it works:**
- Set up a Shop through Meta Commerce Manager
- Upload your product catalog
- Tag products in posts, Reels, and Stories
- Customers checkout via your website
**What you can sell:**
- Physical products (apparel, accessories, beauty, home goods)
- Handmade items
- Print-on-demand merchandise
- Dropshipped products
**Why Instagram Shop works:**
- Seamless mobile shopping experience
- Products can be tagged directly in Reels
- Integration with Facebook Shop
- Access to Instagram's massive user base
- Can run targeted shopping ads
**Note:** As of September 2025, Instagram Shops primarily use website checkout rather than in-app checkout. Customers tap to buy and complete purchase on your website.
**Pro tip:** Use Reels to showcase products in action. Product demos, styling videos, and unboxings convert better than static product shots. New to Reels? Our Reels guide linked below walks you through the basics.
---
## 5. Live Badges
Instagram Live Badges let viewers support you financially during livestreams. It's one of the most accessible monetization features, available to creators with smaller followings.
**How it works:**
- Go Live on Instagram
- Viewers purchase badges ($0.99, $1.99, or $4.99)
- Badges appear as hearts next to their names
- You earn money from badge purchases
**Requirements:**
- 10,000+ followers (in most regions)
- Professional account
- 18+ years old
- Located in an eligible country
**Best content for earning badges:**
- Q&A sessions
- Behind-the-scenes content
- Tutorials and how-tos
- Interactive challenges
- Product reveals
- Live workshops
**What you can earn:**
Earnings depend on audience engagement. Active streamers with loyal audiences can earn hundreds per session. The key is creating interactive experiences that encourage viewers to show support.
**Pro tip:** Acknowledge badge purchasers by name during your Live. Thank them, answer their questions first, give them shoutouts. This encourages more purchases and builds loyalty.
---
## 6. Gifts on Reels
Instagram Gifts allow followers to send virtual gifts on your Reels as a form of appreciation. Fans purchase Stars and send them as gifts, which convert to real money.
**How it works:**
- Viewers buy Stars with real money
- They send gifts (Stars) on your Reels
- You earn $0.01 per Star
- Cash out when your balance reaches $25
**Requirements:**
- Professional account
- 500+ followers
- 18+ years old
- Located in an eligible country
- Account in good standing
**What you can earn:**
While $0.01 per Star sounds small, engaged audiences send thousands of Stars. To plan how much you post, our posting frequency guide (linked below) can help you stay consistent without burning out. A Reel that resonates can accumulate significant gifts over time.
**Pro tip:** Create Reels that inspire emotional connection - funny, inspiring, helpful, or deeply relatable content tends to receive more gifts.
---
## 7. User-Generated Content (UGC) Creation
Here's a method that doesn't require any followers: creating User-Generated Content for brands. You create Instagram-style content that brands use in their own marketing - not on your account.
**How it works:**
- Brands hire you to create photos and videos featuring their products
- You film authentic-looking content (unboxings, demos, testimonials)
- Brands use the content on their accounts and ads
- You get paid per piece of content
**Why brands love UGC:**
- 72% of consumers trust UGC more than traditional ads
- UGC performs better in ads - it feels authentic and relatable
- It's cheaper for brands than full-scale studio productions
**What you can earn:**
- Beginners: $50-$150 per video
- Experienced creators: $200-$500+ per video
- High-demand niches (tech, finance, beauty): $500-$1,000+ per video
**How to get started:**
- Build a UGC portfolio with sample videos
- Join UGC platforms (Billo, JoinBrands, Insense)
- Pitch brands directly with your portfolio
**Pro tip:** You don't need to post UGC on your own account. This means you can earn money purely from your content creation skills, without building a personal following.
---
## 8. Sell Digital Products
Instagram is an excellent platform for promoting digital products - especially if your content demonstrates expertise in a particular area.
**Digital products to sell:**
- E-books and guides
- Online courses
- Templates (Canva, Notion, spreadsheets)
- Presets (Lightroom, video editing)
- Printables and planners
- Stock photos and videos
**How to promote:**
- Share value-driven content that showcases your expertise (for feed posts and carousels, [how many photos can you post on Instagram](https://www.genviral.io/blog/how-many-photos-can-you-post-on-instagram) explains limits and options)
- Use Stories to tease product benefits
- Add product links to your bio
- Create Reels demonstrating your products
- Go Live to answer questions and soft-sell
**Where to host digital products:**
- Gumroad
- Teachable or Thinkific (for courses)
- Your own website
- Etsy (for templates and printables)
**Pro tip:** Bundle related products for higher-ticket sales. A fitness creator might bundle workout plans, meal prep guides, and progress trackers into a comprehensive package.
---
## 9. Coaching and Services
If you've built expertise in any area, Instagram can funnel clients to your coaching or service business. Your content demonstrates your knowledge, and interested followers become paying clients.
**Services you can offer:**
- 1:1 coaching or consulting
- Group coaching programs
- Workshops and webinars
- Freelance services (design, writing, photography, social media management)
- Done-for-you services
**How Instagram drives clients:**
- Your content showcases expertise and results
- Stories create personal connection
- Lives let potential clients "try before they buy"
- DMs become sales conversations
- Bio link directs to booking pages
**What you can charge:**
- Coaching sessions: $100-$500+ per hour
- Group programs: $500-$5,000+
- Workshops: $50-$500 per attendee
- Consulting retainers: $1,000-$10,000+ per month
**Pro tip:** Use Instagram Stories to share client wins, testimonials, and behind-the-scenes of your work process. Social proof drives inquiries.
---
## 10. Instagram Bonuses and Ad Revenue
Instagram offers performance-based bonuses and ad revenue sharing for creators who meet eligibility requirements. While these programs are often invite-only, they provide passive income for qualifying content.
**Types of programs:**
- **Reels Bonuses** - Earn based on Reel performance (views, engagement)
- **Ad Revenue Sharing** - Earn from ads displayed on your content
- **Performance Incentives** - Various Meta programs rewarding high-performing content
**Requirements (vary by program):**
- Professional account
- Strong engagement and consistent posting
- 10,000+ followers (for most programs)
- Located in eligible countries (US, Japan, South Korea, Canada primarily)
- Invite from Instagram
**What you can earn:**
- Reels ad revenue: $0.20-$2.00 per 1,000 eligible views
- Bonuses vary based on performance milestones
**Current status:** Instagram's bonus programs have evolved significantly. The platform continues testing new monetization models, with availability varying by region and creator tier.
**Pro tip:** Focus on creating engaging Reels with strong watch time. Even if you're not currently eligible for bonuses, high-performing content positions you for future invitations.
---
## 11. Sell Physical Products and Merchandise
If you've built a personal brand, merchandise lets you monetize that connection. Followers who love your content often want to support you through purchases.
**What you can sell:**
- Branded apparel (t-shirts, hoodies, hats)
- Accessories
- Physical products related to your niche
- Limited edition drops
- Collaboration products
**How to get started:**
- **Print-on-demand**: No inventory needed. Services like Printful or Printify print and ship when orders come in.
- **Traditional inventory**: Buy or create products in bulk for higher margins.
- **Collaborations**: Partner with existing brands to create co-branded products.
**How to promote:**
- Wear/use your merchandise in content
- Share the story behind products
- Create limited-time drops with urgency
- Use Instagram Shop to tag products
- Run giveaways to build excitement
**Pro tip:** Start with print-on-demand to test designs without financial risk. Once you know what sells, consider ordering inventory for better margins.
---
## Quick Comparison: Instagram Monetization Methods
| Method | Requirements | Typical Earnings | Best For |
|--------|-------------|------------------|----------|
| Subscriptions | 10K followers | $0.99-$99.99/month per subscriber | Creators with loyal audiences |
| Brand Partnerships | Engaged audience | $50-$100K+ per post | Influencers, niche creators |
| Affiliate Marketing | No minimum | 1-50% commission | Product-focused creators |
| Instagram Shop | Business account | Varies by products | E-commerce sellers |
| Live Badges | 10K followers | $0.99-$4.99 per badge | Engaging personalities |
| Gifts on Reels | 500 followers | $0.01 per Star | Content creators |
| UGC Creation | No followers needed | $50-$1,000 per video | Video creators |
| Digital Products | No minimum | Varies widely | Experts, educators |
| Coaching/Services | No minimum | $100-$10K+ per client | Consultants, experts |
| Bonuses/Ad Revenue | Invite only | $0.20-$2/1K views | High-performing creators |
| Merchandise | Engaged audience | Varies by products | Personal brands |
---
## Keys to Instagram Monetization Success
Regardless of which methods you choose, these fundamentals apply:
**1. Engagement beats follower count**
Micro-influencers with 10K-50K followers often earn more per post than accounts with millions of passive followers. Focus on building genuine connections.
**2. Diversify your income streams**
Don't rely on one method. Combine subscriptions with affiliate marketing. Stack brand deals with your own products. Multiple streams protect against algorithm changes.
**3. Create for Reels**
Reels account for 50% of time spent on Instagram. Over 60% of Reel views come from non-followers. This is your discovery engine - prioritize it.
**4. Stay consistent**
Post regularly, go Live on a schedule, engage with comments and DMs. The algorithm rewards consistency, and so do brand partners.
**5. Build off-platform**
Instagram is the discovery engine, but smart creators funnel audiences to owned platforms - email lists, websites, membership communities - where they control the relationship.
**6. Follow the rules**
Instagram has strict monetization policies. Violating Community Guidelines or Partner Monetization Policies can get you demonetized. Know the rules and follow them. To control who sees your connections, see [how to hide your Instagram following list](https://www.genviral.io/blog/hide-instagram-following-list); if you ever need to leave the platform, [how to delete your Instagram account](https://www.genviral.io/blog/how-to-delete-instagram-account) walks you through the steps.
---
## Final Thoughts
Instagram has transformed from a photo app into a genuine income platform. With subscriptions, badges, brand partnerships, shopping features, and bonus programs, creators have more ways to earn than ever before.
The key is choosing methods that match your strengths and audience. If you love going Live, lean into badges and real-time engagement. If you're a product person, build your Shop and create shoppable Reels. If you're an expert, funnel followers to coaching and courses.
Start with one or two methods, master them, and expand from there. The creators earning the most on Instagram treat it like a business - multiple revenue streams, consistent content, and a focus on genuine value for their audience.
Ready to create content that converts? **[Genviral](https://genviral.io)** can help you plan, create, and schedule Instagram content that grows your audience and income. Try the [Instagram Scheduler](https://www.genviral.io/instagram-scheduler) to automate your posting.
## Monetize Other Platforms Too
- [How to Make Money with TikTok](https://www.genviral.io/blog/how-to-make-money-with-tiktok)
- [How to Make Money with Facebook](https://www.genviral.io/blog/how-to-make-money-with-facebook)
- [How to Make Money with Pinterest](https://www.genviral.io/blog/how-to-make-money-with-pinterest)
- [How to Make Money with LinkedIn](https://www.genviral.io/blog/how-to-make-money-with-linkedin)
---
## More Instagram Tips
Looking for more ways to grow your Instagram presence? Check out our other guides:
- [How Often Should You Post on Instagram](https://www.genviral.io/blog/how-often-should-you-post-on-instagram)
- [How to Repost a Story on Instagram](https://www.genviral.io/blog/how-to-repost-story-on-instagram)
- [How to Make a Reel on Instagram](https://www.genviral.io/blog/how-to-make-a-reel-on-instagram)
- [How to Clear Instagram Cache](https://www.genviral.io/blog/how-to-clear-instagram-cache)
---
Canonical HTML: https://www.genviral.io/blog/how-to-make-money-with-instagram
# How to Make Money with LinkedIn: 9 Proven Methods (2026)
- LinkedIn's audience is decision-makers with real budgets - consulting and coaching rate a premium ($250-$1,500+/hour) because clients are B2B professionals actively seeking to invest in solutions.
- **Newsletters** grew 47% in engagement YoY on LinkedIn; 10K+ subscribers can command $500-$2,000 per sponsored mention and funnel directly into consulting leads.
- **LinkedIn Learning** instructors earn $1K-$5K upfront per course plus ongoing royalties - prolific instructors earn $20K-$50K+ annually in largely passive income.
- **B2B lead generation services** pay $1K-$5K+/month because LinkedIn drives 4 out of 5 B2B social media leads - businesses pay well for consistent, qualified pipeline.
- The compounding play: build your email list from LinkedIn traffic. Even 1,000 engaged B2B professionals on your list can generate $1K-$5K/month through products, services, and SaaS affiliate programs with recurring commissions.
LinkedIn isn't just for job hunting anymore - it's become a legitimate money-making platform. With over 1 billion users and a business-focused audience actively seeking professional solutions, LinkedIn offers unique monetization opportunities you won't find elsewhere.
What makes LinkedIn different? The intent. Unlike casual social platforms where people scroll passively, LinkedIn users are looking to advance their careers, grow their businesses, and solve professional problems. They're ready to invest in solutions - making the platform ideal for anyone selling expertise.
Whether you're a consultant, freelancer, coach, or content creator, here are nine proven ways to turn your LinkedIn presence into profit.
---
## 1. Offer Consulting and Coaching Services
The most direct path to earning money on LinkedIn is offering your expertise as a service. If you have knowledge that helps businesses or professionals solve problems, LinkedIn is the perfect place to find clients.
**How it works:**
- Position yourself as an expert through your profile and content
- Share insights that demonstrate your expertise
- Attract inquiries from people who need deeper help
- Convert followers into paying clients
**Services that sell well on LinkedIn:**
- Business consulting
- Executive coaching
- Career coaching
- Marketing strategy
- Sales training
- Leadership development
- Financial advisory
- HR and recruitment consulting
**Why LinkedIn works for consulting:**
LinkedIn's audience is filled with decision-makers - founders, executives, managers, and business owners who have budgets for professional services. They're actively seeking expertise to help their careers and businesses.
**What you can charge:**
- Entry-level consultants: $100-$250 per hour
- Experienced consultants: $250-$500 per hour
- Executive coaches: $500-$1,500+ per hour
- Retainer arrangements: $2,000-$15,000+ per month
**How to get started:**
Optimize your profile to clearly state who you help and how. Use the headline, About section, and Featured section to showcase your offer. Create content that demonstrates expertise, then use LinkedIn's CTA button and Calendly integration to book discovery calls directly from your profile.
---
## 2. Freelance Services
LinkedIn is a goldmine for freelancers. Businesses actively search the platform for service providers, and your profile functions as a constantly-visible portfolio.
**High-demand freelance services on LinkedIn:**
- Content writing and copywriting
- Graphic design and branding
- Video production and editing
- Web development
- Social media management
- SEO and digital marketing
- Virtual assistance
- Bookkeeping and accounting
**How to attract freelance clients:**
- Optimize your profile as a service page (not a resume)
- Showcase past work in the Featured section
- Share case studies and client results in posts
- Engage with potential clients' content
- Use LinkedIn's Services feature to list offerings
**What you can earn:**
Freelance rates vary by skill and experience:
- Writers: $50-$500+ per article
- Designers: $50-$200+ per hour
- Developers: $75-$250+ per hour
- Social media managers: $1,000-$5,000+ per month
**Pro tip:** LinkedIn's professional context means clients expect to pay professional rates. Don't undercharge - the platform attracts businesses with real budgets.
---
## 3. Brand Partnerships and Sponsored Content
As LinkedIn's creator economy grows, brands are paying creators to reach their professional audiences. If you've built a following around a specific niche, sponsored content can become a significant income stream.
**How it works:**
- Brands pay you to create posts featuring their products or services
- You maintain creative control while delivering their message
- Content is disclosed as sponsored or partnership
**What brands look for:**
- Clear niche focus (marketing, tech, leadership, HR, etc.)
- Engaged audience (comments and shares matter more than followers)
- Professional credibility
- Content quality and consistency
**What you can earn:**
According to industry data, mid-tier LinkedIn creators (15,000-30,000 followers) can command $1,500-$3,000 per sponsored post. Larger creators with 50,000+ followers earn significantly more.
Even smaller creators can land deals - brands increasingly value niche relevance and engagement over raw follower counts.
**How to attract sponsors:**
- Build authority in a specific professional niche
- Track and share your engagement metrics
- Create a media kit showing audience demographics
- Reach out directly to relevant brands
- Tag brands organically in relevant content
**Pro tip:** Authenticity matters on LinkedIn. Sponsored content that provides genuine value performs better than obvious advertisements. Use 3-5 relevant hashtags to extend reach.
---
## 4. LinkedIn Newsletters
LinkedIn Newsletters have exploded in popularity - engagement grew 47% between 2023 and 2024, with over 184,000 newsletters published. The platform automatically promotes your newsletter to connections and followers, giving it organic reach few platforms can match.
**How newsletters make money:**
- **Sponsorships** - Brands pay to be featured in your newsletter
- **Affiliate marketing** - Include affiliate links for relevant products
- **Lead generation** - Drive readers to your paid services
- **Premium subscriptions** - Offer paid versions with exclusive content
**Newsletter monetization path:**
1. Start free, delivering consistent value in your niche
2. Build subscriber base (LinkedIn helps with automatic promotion)
3. Once you have engaged readers, introduce monetization
4. Add sponsors, affiliate links, or premium tiers
**What you can earn:**
Newsletter sponsorship rates depend on subscriber count and engagement. Creators with 10,000+ subscribers can charge $500-$2,000+ per sponsored mention. The real power is using newsletters to drive leads into higher-ticket services.
**Best practices:**
- Choose a specific niche and stick to it
- Publish consistently (weekly or bi-weekly)
- Provide actionable insights, not just opinions
- Use compelling subject lines and hooks
- Include clear CTAs for your services or offers
---
## 5. Sell Digital Products
LinkedIn's professional audience is hungry for knowledge and tools that help them succeed. Digital products - ebooks, templates, courses, and guides - can generate significant income with minimal ongoing effort.
**Digital products that sell on LinkedIn:**
- E-books and guides
- Templates (spreadsheets, presentations, frameworks)
- Online courses
- Toolkits and resource bundles
- Checklists and cheat sheets
- Notion templates
- Swipe files
**How to promote digital products:**
- Share valuable content related to your product's topic
- Use your Featured section to showcase products
- Include product links in your newsletter
- Create carousel posts previewing your content
- Use Stories and Lives to demonstrate value
**Where to host products:**
- Gumroad (simple, creator-friendly)
- Teachable or Thinkific (for courses)
- Your own website
- Notion (for templates)
**What you can earn:**
- E-books: $10-$50 each
- Templates: $20-$100+ each
- Mini-courses: $50-$200
- Comprehensive courses: $200-$2,000+
**Pro tip:** Start with a low-priced product to build trust, then upsell to higher-ticket offerings or services.
---
## 6. LinkedIn Learning Instructor
LinkedIn Learning (formerly Lynda.com) is a premium course platform with millions of subscribers. If you're an expert in a business-related topic, becoming an instructor can generate substantial passive income.
**How it works:**
- Apply to become an instructor
- Work with LinkedIn's team to develop your course
- Receive upfront payment plus ongoing royalties
- Earn based on how many subscribers watch your content
**What you can earn:**
- Upfront payments: $1,000-$5,000 per course
- Royalties: 10-15% of course revenue based on viewership
- Top performers: $10,000-$50,000+ annually per course
- Prolific instructors: $20,000-$50,000+ per year from multiple courses
**Popular course topics:**
- Technology and software skills
- Data analytics and AI
- Project management
- Leadership and management
- Business communication
- Marketing and sales
- Design tools
- Finance and accounting
**How to apply:**
Fill out LinkedIn Learning's instructor application, submit a sample video, and demonstrate expertise in your field. The platform is selective but actively recruits instructors in high-demand topics.
**Pro tip:** Courses in trending skills (AI, data science, cloud computing) attract higher viewership and better royalties.
---
## 7. B2B Lead Generation Services
Many businesses struggle to generate leads on LinkedIn but know their ideal customers are there. If you understand LinkedIn prospecting, you can build a service helping companies connect with decision-makers.
**Services you can offer:**
- LinkedIn profile optimization
- Connection strategy and outreach
- Sales Navigator management
- Content creation for thought leadership
- LinkedIn advertising management
- Lead list building and research
**Who needs these services:**
- B2B companies targeting specific industries
- Agencies and consultants
- SaaS companies
- Recruiting firms
- Professional services firms
**What you can charge:**
- LinkedIn management: $500-$2,000+ per month
- Lead generation services: $1,000-$5,000+ per month
- Profile optimization: $200-$1,000 one-time
- LinkedIn ads management: $500-$2,500+ per month
**Why this is lucrative:**
LinkedIn is the #1 platform for B2B lead generation - 4 out of 5 B2B leads from social media come from LinkedIn. Businesses will pay well for someone who can deliver qualified leads consistently.
**Pro tip:** Start by mastering LinkedIn for your own lead generation. Document your results, then offer the same system to clients.
---
## 8. Affiliate Marketing
Affiliate marketing on LinkedIn means promoting products or services to your professional audience and earning commission on sales. Unlike casual platforms, LinkedIn's audience is ready to invest in tools and solutions that help their work.
**How it works:**
- Join affiliate programs for B2B products and services
- Share products naturally through content, articles, or newsletters
- Earn commission when your audience purchases through your links
**What sells well on LinkedIn:**
- Software and SaaS tools
- Business books
- Online courses
- Professional development programs
- Productivity tools
- Marketing and sales platforms
**Where to place affiliate links:**
- LinkedIn articles
- Newsletter content
- Your bio link
- Content with clear disclosure
**Best practices:**
- Only promote products you genuinely use and recommend
- Disclose affiliate relationships (required by FTC)
- Provide real value around the product, not just links
- Focus on products that solve problems for your specific audience
**What you can earn:**
B2B affiliate programs often offer higher commissions than consumer products:
- Software: 20-50% recurring commissions
- Courses: 30-50% per sale
- Books: 4-10% per sale (lower percentage, but volume can add up)
**Pro tip:** Recurring commission programs (common with SaaS) create passive income that compounds over time.
---
## 9. Build Your Email List
LinkedIn is excellent for building an audience, but the real monetization often happens off-platform through email. Your email list is an asset you own - no algorithm can take it away.
**How to build your list from LinkedIn:**
- Offer a lead magnet (free guide, template, checklist)
- Promote it through posts and your Featured section
- Drive traffic to a landing page
- Nurture subscribers with valuable emails
- Eventually sell products or services to your list
**What to offer as lead magnets:**
- Industry-specific guides
- Templates and frameworks
- Checklists and cheat sheets
- Free mini-courses
- Exclusive reports or data
**Why email is powerful:**
- Direct access to your audience (no algorithm)
- Higher conversion rates than social posts
- Ability to segment and personalize
- Platform for selling courses, coaching, or products
**What you can earn:**
Email list value depends on your niche and offer, but engaged professional lists can generate $1-$5+ per subscriber per month through products, services, and affiliate offers.
**Pro tip:** Even a small list of 1,000 engaged professionals can generate significant income if you're selling high-ticket services or products.
---
## Quick Comparison: LinkedIn Monetization Methods
| Method | Requirements | Typical Earnings | Best For |
|--------|-------------|------------------|----------|
| Consulting/Coaching | Expertise, optimized profile | $100-$1,500+/hour | Subject matter experts |
| Freelance Services | Portfolio, skills | $50-$250+/hour | Service providers |
| Brand Partnerships | Engaged following | $1,500-$3,000+ per post | Niche creators |
| Newsletters | Consistent publishing | $500-$2,000+ per sponsor | Content creators |
| Digital Products | Expertise, content creation | $10-$2,000+ per product | Educators, experts |
| LinkedIn Learning | Expert knowledge, approval | $10K-$50K+ annually | Industry experts |
| Lead Gen Services | LinkedIn expertise | $1,000-$5,000+/month | Marketing professionals |
| Affiliate Marketing | Audience trust | Varies (20-50% commission) | Content creators |
| Email List Building | Lead magnet, landing page | $1-$5+ per subscriber/month | Long-term builders |
---
## Keys to LinkedIn Monetization Success
Regardless of which methods you choose, these fundamentals apply:
**1. Optimize your profile as a landing page**
Your profile is your storefront. Use a client-focused headline, compelling About section, and clear call-to-action. The Featured section should showcase your best work and offers.
**2. Provide value before asking for anything**
LinkedIn rewards authenticity. Share insights, help people, and build trust before promoting offers. The creators who earn the most deliver consistent value first.
**3. Choose a specific niche**
Broad positioning kills conversion. "Marketing consultant" is forgettable. "LinkedIn growth strategist for B2B SaaS companies" attracts the right people and commands premium rates.
**4. Be consistent**
Post regularly, engage with others, and show up. LinkedIn's algorithm favors consistent creators, and so do potential clients. Stay within the character limit and format for readability so posts look sharp on desktop and mobile.
**5. Think long-term**
LinkedIn monetization compounds over time. The content you create today builds authority that pays dividends for years. Invest in relationships, not just transactions.
**6. Don't spam**
Mass connection requests and generic sales pitches hurt your reputation. Focus on genuine connection and value-driven outreach.
---
## Final Thoughts
LinkedIn has transformed from a professional network into a full-scale business platform. With tools for content creation, newsletters, events, and direct messaging, the opportunities to monetize have never been greater.
The key is choosing methods that match your expertise and goals. If you're a consultant, focus on building authority through content and converting followers into clients. If you're a creator, explore newsletters and brand partnerships. If you're a teacher, consider LinkedIn Learning.
Start with one method, master it, and expand from there. The professionals earning the most on LinkedIn treat it like a business - consistent presence, clear offers, and genuine value for their audience.
Ready to create content that attracts clients? **[Genviral](https://genviral.io)** can help you plan and create professional content that builds authority and drives business. Try the [LinkedIn Scheduler](https://www.genviral.io/linkedin-scheduler) to automate your posting.
## Free LinkedIn Tools
Use the LinkedIn tools mentioned throughout this guide to optimize your content - hashtag generator, hook generator, character counter, line breaker, and image resizer are all free and linked above.
## Monetize Other Platforms Too
- [How to Make Money with TikTok](https://www.genviral.io/blog/how-to-make-money-with-tiktok)
- [How to Make Money with Instagram](https://www.genviral.io/blog/how-to-make-money-with-instagram)
- [How to Make Money with Facebook](https://www.genviral.io/blog/how-to-make-money-with-facebook)
- [How to Make Money with Pinterest](https://www.genviral.io/blog/how-to-make-money-with-pinterest)
---
---
Canonical HTML: https://www.genviral.io/blog/how-to-make-money-with-linkedin
# How to Make Money with Pinterest: 7 Proven Methods (2026)
- Pinterest users have high purchase intent - they're actively searching for products to buy, not scrolling passively, which makes affiliate links and product pins convert far better than on TikTok or Instagram.
- Pins drive traffic for **months or years** because Pinterest is a search engine, not a feed - making it the most sustainable organic traffic source for bloggers, Etsy sellers, and digital product creators.
- **Affiliate marketing + digital products** (Etsy printables, Canva templates) is the fastest path to passive income - top Etsy digital sellers earn $10K-$50K/month, with Pinterest as the #1 traffic driver.
- **Pinterest management services** (VA/manager) pay $300-$1,500+/month per client with strong long-term retention - once clients see traffic results, they stay.
- No massive following required to start: even small accounts drive meaningful sales with properly optimized, keyword-rich pins linked directly to product pages or monetized blog posts.
Pinterest isn't just a place to save recipes and home decor ideas - it's a visual search engine with 578 million monthly active users actively looking to buy. Unlike other social platforms where people scroll passively, Pinterest users come with intent. They're planning purchases, researching products, and discovering brands.
Here's the best part: you don't need a massive following to make money on Pinterest. With the right strategy, even small accounts can drive significant traffic and revenue.
Here are seven proven ways to turn your Pinterest presence into income.
---
## 1. Affiliate Marketing
Affiliate marketing is one of the most accessible ways to make money on Pinterest. You promote products from other companies and earn a commission when someone purchases through your link.
**How it works:**
- Join affiliate programs (Amazon Associates, ShareASale, LTK, Impact, etc.)
- Create Pins featuring products you recommend
- Include your affiliate link in the Pin
- Earn commission when followers purchase
**Why Pinterest works for affiliates:**
Pinterest users are in discovery and shopping mode. They're actively searching for product recommendations, gift ideas, and solutions - making them more likely to click and buy than users on other platforms.
**Best practices:**
- Choose a specific niche (home decor, fashion, fitness, beauty work well)
- Create high-quality, vertical images (1000x1500 pixels)
- Write keyword-rich Pin descriptions
- Disclose affiliate relationships as required
- Link to a blog post or landing page rather than direct linking (Pinterest prefers this)
**Pro tip:** Create multiple Pins for the same product with different images and descriptions. Test what resonates with your audience. For competitor research and product moodboards you don't want public, save them to a secret board - see [how to make a board on Pinterest private](https://www.genviral.io/blog/how-to-make-a-board-on-pinterest-private).
---
## 2. Sell Digital Products
Digital products are perfect for Pinterest because they require no inventory, no shipping, and can be sold infinitely. Pinterest users actively search for printables, templates, and planners - making it an ideal platform for digital product sellers.
**Popular digital products to sell:**
- Printable planners and journals
- Social media templates (Canva)
- Resume templates
- Wall art and digital prints
- Budget spreadsheets
- Wedding invitations and party templates
- E-books and guides
- Notion templates
- Lightroom presets
**Where to sell:**
- Etsy (built-in audience, easy setup)
- Gumroad (simple and creator-friendly)
- Your own website (Shopify, WooCommerce)
- Payhip or SendOwl
**How to promote on Pinterest:**
1. Create beautiful Pins showcasing your products
2. Use mockups to show products in real-life settings
3. Link directly to your product listings
4. Create boards organized by product category
5. Pin consistently (5-10 Pins per day)
**Example:** Printable planners generate over 2 million monthly views on Etsy, with top sellers earning $10,000-$50,000 per month in passive income. Pinterest is the #1 traffic driver for Etsy digital product shops.
---
## 3. Drive Traffic to a Monetized Blog
If you have a blog monetized with display ads (like Mediavine, AdThrive, or Raptive), Pinterest can become your primary traffic source. Unlike social media traffic that disappears, Pinterest Pins can drive traffic for months or even years.
**How it works:**
- Create valuable blog content in popular Pinterest niches
- Design eye-catching Pins for each blog post
- Optimize for Pinterest SEO (keywords in titles, descriptions, boards)
- Watch traffic grow over time
**Best blog niches for Pinterest:**
- Food and recipes
- Home decor and DIY
- Personal finance
- Health and fitness
- Fashion and beauty
- Parenting and family
- Travel
- Crafts and hobbies
**Why it works:**
Pinterest is a search engine, not a social network. A well-optimized Pin can rank in Pinterest search results for years, driving consistent traffic to your blog long after you create it. This makes Pinterest traffic more sustainable than Instagram or TikTok, where content has a short lifespan.
**Pro tip:** Create multiple Pin designs for your best-performing blog posts. Fresh Pin designs signal to Pinterest that your content is new and relevant.
---
## 4. Offer Pinterest Management Services
Businesses know Pinterest drives traffic, but most don't have time to manage it themselves. That's where Pinterest Virtual Assistants (VAs) and Pinterest Managers come in.
**Services you can offer:**
- Pinterest account setup and optimization
- Pin design and creation
- Content scheduling (using Genviral's Pinterest Scheduler, Tailwind or Pinterest's native scheduler)
- Keyword research and SEO
- Analytics reporting
- Pinterest ads management
- Account audits and strategy
**Who needs Pinterest help:**
- Bloggers
- E-commerce shops
- Small businesses
- Coaches and course creators
- Etsy sellers
- Affiliate marketers
**What you can charge:**
- Beginners: $300-$500/month per client
- Experienced managers: $500-$1,500/month per client
- Pinterest ads specialists: $1,000-$3,000/month per client
**How to get started:**
1. Learn Pinterest marketing (free resources, courses, or certifications)
2. Build your own Pinterest account as a portfolio
3. Offer services on platforms like Upwork, Fiverr, or through networking
4. Join Pinterest VA communities to connect with potential clients
**Why it's lucrative:**
Once businesses see results from Pinterest, they're hooked. Pinterest VAs often maintain long-term client relationships, creating stable recurring income.
---
## 5. Sell Physical Products (E-commerce)
Pinterest is a powerful platform for e-commerce, especially for visual products. Over 85% of weekly Pinterest users have purchased something based on Pins they've seen from brands.
**How to sell physical products:**
- Set up a Pinterest Business account
- Enable Product Pins (Rich Pins that show real-time pricing and availability)
- Connect your product catalog
- Create shoppable Pins that link directly to checkout
**Products that sell well on Pinterest:**
- Home decor and furniture
- Fashion and accessories
- Beauty and skincare
- Handmade and artisan goods
- Party supplies and gifts
- Pet products
- Kitchen and cooking items
**Options for selling:**
- Etsy + Pinterest integration
- Shopify + Pinterest sales channel
- Your own website with Product Pins enabled
- Print-on-demand (Printful, Printify) for custom merchandise
**Pinterest advertising:**
Pinterest Ads let you place your products in users' home feeds, search results, and category pages. You only pay per click, and you can target users based on interests, keywords, and demographics. Businesses report strong ROI compared to other ad platforms because Pinterest users have high purchase intent.
---
## 6. Brand Partnerships and Sponsored Content
As your Pinterest following grows, brands may pay you to create content featuring their products. This is especially valuable if you've built authority in a specific niche.
**How Pinterest brand partnerships work:**
- Brands pay you to create Pins featuring their products
- You use Pinterest's "Paid Partnership" tool to disclose the relationship
- Sponsored Pins appear with your content, reaching your audience and beyond
**Who's eligible:**
Anyone with a Pinterest Business account can participate in branded content. Unlike other platforms that require huge followings, Pinterest allows creators of all sizes to work with brands. What matters most is engagement and content quality.
**How to land brand deals:**
- Build a strong, niche-focused Pinterest presence
- Pitch brands directly with your media kit
- Join influencer marketing platforms (AspireIQ, Grin, Creator.co)
- Showcase your engagement metrics and traffic stats
**What you can charge:**
Rates vary widely based on your audience size and engagement:
- Micro-influencers: $100-$500 per sponsored Pin
- Mid-tier creators: $500-$2,000 per campaign
- Established influencers: $2,000+ per campaign
**Pro tip:** Don't wait for brands to find you. Actively pitch brands whose products align with your content. A well-crafted pitch highlighting your Pinterest engagement can open doors.
---
## 7. Create and Sell Online Courses
If you've mastered Pinterest marketing, others will pay to learn from you. Online courses about Pinterest strategy, Pin design, or niche-specific Pinterest marketing can generate significant passive income.
**Course ideas:**
- Pinterest marketing for beginners
- Pinterest for Etsy sellers
- Pinterest SEO masterclass
- Pin design using Canva
- Pinterest for bloggers
- Pinterest ads for e-commerce
**Where to host courses:**
- Teachable
- Thinkific
- Kajabi
- Skillshare
- Your own website
**How Pinterest helps sell courses:**
- Create Pins that lead to free lead magnets (PDFs, checklists)
- Build an email list from Pinterest traffic
- Promote course launches through Pins
- Share student testimonials and success stories
**The compounding effect:**
You can use Pinterest to promote your Pinterest course. Create Pins about Pinterest tips and strategies, then funnel that traffic to your course. The platform itself becomes your marketing engine.
---
## Quick Comparison: Pinterest Monetization Methods
| Method | Startup Cost | Time to Income | Scalability |
|--------|--------------|----------------|-------------|
| Affiliate Marketing | Free | 1-3 months | High |
| Digital Products | Low ($0-$50) | 1-2 months | Very High |
| Blog + Ads | Medium ($100-$500) | 6-12 months | High |
| Pinterest VA Services | Free-Low | 1-2 months | Medium |
| E-commerce/Products | Medium-High | 1-3 months | High |
| Brand Partnerships | Free | 3-6 months | Medium |
| Online Courses | Medium ($100-$500) | 3-6 months | Very High |
---
## Keys to Pinterest Success
Regardless of which monetization method you choose, these fundamentals apply:
**1. Create high-quality visuals**
Pinterest is visual. Invest time in creating eye-catching, vertical Pins (1000x1500 pixels) with clear text overlays and professional design.
**2. Master Pinterest SEO**
Pinterest is a search engine. Use relevant keywords in your Pin titles, descriptions, and board names to help your content get discovered. Learn more about [Pinterest tips and tricks here](https://www.genviral.io/blog/pinterest-tips-and-tricks).
**3. Be consistent**
Pin regularly (at least 5-10 Pins per day) to maintain visibility. Use scheduling tools to stay consistent without spending hours on the platform. Review our [Pinterest posting strategy guide](https://www.genviral.io/blog/pinterest-posting-strategy) for more details.
**4. Focus on a niche**
Broad accounts struggle. Choose a specific niche and become known for that topic. This builds authority and attracts the right audience. If you have old overlapping boards diluting your topic relevance, see [how to merge Pinterest boards](https://www.genviral.io/blog/how-to-merge-pinterest-boards) to consolidate them.
**5. Think long-term**
Pinterest is a slow burn compared to other platforms. Pins can take weeks or months to gain traction, but the payoff is content that drives traffic for years.
**6. Track and optimize**
Use Pinterest Analytics to see what's working. Double down on Pin styles, topics, and formats that perform well.
---
## Start Making Money on Pinterest with Genviral
Pinterest success comes down to consistency, quality, and strategy. But creating fresh Pins, researching keywords, and staying on top of trends takes time - time most creators and businesses don't have.
That's where **[Genviral's Pinterest Scheduler](https://www.genviral.io/pinterest-scheduler)** comes in.
Genviral helps you create scroll-stopping Pinterest content faster. Whether you're promoting affiliate products, driving traffic to your blog, or selling digital products, Genviral streamlines the content creation process so you can focus on what matters: growing your income.
**With Genviral, you can:**
- Generate engaging Pin ideas optimized for your niche
- Create consistent content across Pinterest and other platforms
- Save hours on content planning and creation
- Stay ahead of trends with AI-powered insights
- Scale your Pinterest strategy without burning out
Stop spending hours on content creation. Start pinning smarter.
**Try Genviral free today →**
Whether you're just starting out or looking to scale your Pinterest income, Genviral gives you the tools to turn pins into profit-without the overwhelm.
---
## Final Thoughts
Pinterest is one of the most underrated platforms for making money online. While everyone's fighting for attention on Instagram and TikTok, smart creators are quietly building traffic and income streams on Pinterest.
The best part? You don't need to be famous, dance on camera, or post every day. Pinterest rewards quality content that helps people - and that content keeps working for you long after you create it.
Pick one monetization method that fits your skills and interests, commit to consistency, and watch the results compound over time.
Ready to turn your Pinterest presence into profit? Start with Genviral and make every Pin count.
**Get started with Genviral →**
## Monetize Other Platforms Too
- [How to Make Money with TikTok](https://www.genviral.io/blog/how-to-make-money-with-tiktok)
- [How to Make Money with Instagram](https://www.genviral.io/blog/how-to-make-money-with-instagram)
- [How to Make Money with Facebook](https://www.genviral.io/blog/how-to-make-money-with-facebook)
- [How to Make Money with LinkedIn](https://www.genviral.io/blog/how-to-make-money-with-linkedin)
---
Canonical HTML: https://www.genviral.io/blog/how-to-make-money-with-pinterest
# How to Make Money with TikTok: 9 Proven Methods (2026)
- There are 9 distinct monetization paths on TikTok in 2026 - the top earners stack at least 3 simultaneously rather than relying on any single stream.
- The **Creator Rewards Program** pays up to 20x more than the old Creator Fund ($0.40-$1.00 per 1K qualified views), but requires 10K followers and 100K views in the past 30 days.
- **TikTok Shop Affiliate** is the fastest-growing method: promote products, earn 5-30% commission per sale, no inventory needed. Mid-tier affiliates earn $2K-$24K/month.
- **UGC creation** requires zero followers - brands pay $100-$500 per video for authentic product demos they use in ads and Spark campaigns.
- A realistic starter stack: Creator Rewards + affiliate marketing + one brand deal per month. Diversify early; TikTok's monetization rules change fast.
TikTok isn't just for viral dances anymore-it's a serious money-making platform. With nearly 2 billion active users and an algorithm that rewards engaging content over follower count, TikTok offers opportunities for creators at every level to earn real income.
The best part? You don't need millions of followers to start making money. From TikTok's built-in monetization programs to brand deals and selling your own products, there are multiple paths to income on this platform.
Here are nine proven ways to turn your TikTok presence into profit.
---
## 1. TikTok Creator Rewards Program
The Creator Rewards Program (formerly the Creativity Program Beta) is TikTok's primary way to pay creators directly for their content. Unlike the old Creator Fund, this program offers significantly higher payouts-up to 20x more.
**How it works:**
- Create original videos at least 1 minute long
- Earn based on qualified views and engagement
- Get paid through RPM (Revenue Per Mille) model
**Requirements:**
- 18+ years old
- 10,000+ followers
- 100,000+ video views in the last 30 days
- Account in good standing
- Based in a supported country (US, UK, Germany, France, Japan, South Korea, Brazil, Mexico)
**What you can earn:**
- Average RPM: $0.40-$1.00 per 1,000 qualified views
- Top performers in lucrative niches: $2.50-$6.00 per 1,000 views
- 1 million views = approximately $400-$1,000 (vs. $20-$40 under the old Creator Fund)
**2025 update:** TikTok introduced "Additional Rewards" for videos that are especially well-crafted, engaging, and specialized-giving bonus payouts for premium content.
**Pro tip:** Focus on watch time and retention. TikTok rewards videos that keep viewers watching to the end, not just videos that get views.
---
## 2. TikTok Shop Affiliate Marketing
TikTok Shop Affiliate is one of the fastest-growing ways to earn on TikTok. You promote products from TikTok Shop and earn commission on every sale-without handling inventory or shipping.
**How it works:**
- Browse products in TikTok Shop's affiliate marketplace
- Add products to your videos or livestreams
- Earn commission (typically 5-30%) when viewers purchase
**Why it's powerful:**
- 78% of TikTok users have purchased products after seeing creator recommendations
- TikTok's in-app checkout means frictionless purchasing
- Affiliate links on TikTok have 160% higher engagement than Instagram
**What you can earn:**
- Beginners: $280+ monthly
- Mid-tier affiliates: $2,000-$24,000 monthly
- Top performers: $30,000+ daily (rare, but documented)
- Average commission rate: 13% (varies by category)
**Best niches for TikTok Shop affiliate:**
- Beauty and skincare
- Fashion and accessories
- Home and kitchen gadgets
- Tech accessories
- Health and wellness
**Pro tip:** Live selling converts 2-3x better than pre-recorded videos. Top affiliates dedicate 5-10 hours weekly to livestreams where they demo products in real-time.
---
## 3. Brand Partnerships and Sponsored Content
As your following grows, brands will pay you to create content featuring their products. This remains one of the most lucrative ways to monetize TikTok-and you don't need millions of followers.
**How it works:**
- Brands pay you directly to create videos featuring their products
- You maintain creative control while promoting their message
- Payments are negotiated per post or per campaign
**Where to find brand deals:**
- **TikTok Creator Marketplace** (TikTok One) - TikTok's official platform connecting brands with creators
- **Influencer platforms** - AspireIQ, Grin, Creator.co, Shopify Collabs
- **Direct outreach** - Pitch brands that align with your content
- **Inbound requests** - Brands reach out as your following grows
**What you can earn:**
- Micro-influencers (10K-50K followers): $100-$500 per post
- Mid-tier creators (50K-500K followers): $500-$5,000 per post
- Large creators (500K-1M followers): $5,000-$10,000 per post
- Top influencers (1M+ followers): $10,000-$100,000+ per post
**Key stat:** 66% of brands plan to repurpose micro-influencer content as TikTok Spark Ads, making smaller creators increasingly valuable.
**Pro tip:** Don't wait for brands to find you. Create a media kit showcasing your engagement metrics, audience demographics, and past collaborations-then actively pitch brands in your niche.
---
## 4. Sell Products Through TikTok Shop
If you have your own products (physical or digital), TikTok Shop lets you sell directly within the app. Viewers can purchase without ever leaving TikTok, making the path from discovery to checkout seamless.
**How it works:**
- Set up a TikTok Shop seller account
- List your products with images, descriptions, and pricing
- Create shoppable videos and livestreams
- Viewers buy directly in the app
**What you can sell:**
- Physical products (apparel, accessories, beauty, home goods)
- Handmade and artisan items
- Print-on-demand merchandise
- Dropshipped products
**Why TikTok Shop works:**
- 3 in 4 TikTok users consider buying products they see on the platform
- 83% say TikTok influences their purchasing decisions
- TikTok Shop generated $5.8 billion GMV in H1 2025 alone
**Success story:** Soo Slick generated over $1 million in creator affiliate sales with $50,000 from a single video.
**Pro tip:** Combine TikTok Shop with live selling. Top sellers report significantly higher conversion rates during livestreams compared to static product posts.
---
## 5. LIVE Gifts and Subscriptions
TikTok LIVE lets you earn money directly from viewers through virtual gifts and subscriptions. It's one of the most accessible monetization methods, requiring only 1,000 followers to start.
**How LIVE Gifts work:**
- Go live and engage with your audience
- Viewers send virtual gifts (purchased with TikTok coins)
- Gifts convert to Diamonds, which you cash out
**Requirements:**
- 1,000+ followers
- 18+ years old
- Account in good standing
**What you can earn:**
- Diamonds are worth approximately $0.005 each (1,000 Diamonds ≈ $5)
- Casual streamers: $50-$500 monthly
- Consistent streamers: $1,000-$5,000 monthly
- Top performers: $10,000+ monthly
- Record session: $2.1 million in 14 hours (extreme outlier)
**LIVE Subscriptions:**
TikTok also offers LIVE Subscriptions (similar to Twitch), where fans pay monthly for exclusive access and perks.
**Pro tip:** Consistency matters more than individual session performance. Regular streamers build dedicated audiences who return for scheduled sessions, creating predictable revenue.
---
## 6. TikTok Series (Paid Content)
TikTok Series lets you create exclusive, premium content that lives behind a paywall. It's ideal for educational content, tutorials, or in-depth storytelling.
**How it works:**
- Create a collection of videos (up to 80 videos, each up to 20 minutes)
- Set your price ($0.99 to $189.99)
- Viewers pay once to access the entire series
**Requirements:**
- 10,000+ followers (or proof of selling premium content elsewhere)
- 18+ years old
- Good account standing
**Best content for TikTok Series:**
- Online courses and tutorials
- Behind-the-scenes content
- Exclusive entertainment
- In-depth educational content
- Fitness programs
**Pro tip:** Tease your Series content with free videos on your main feed. Give enough value to build trust, then direct interested viewers to your paid content.
---
## 7. Drive Traffic to External Revenue Sources
TikTok is an incredible traffic driver. Even if you can't monetize directly on TikTok, you can funnel viewers to platforms where you're already earning money.
**Where to drive traffic:**
**Monetized YouTube channel:**
- Create TikToks that tease your YouTube content
- Build an audience that follows you across platforms
- Earn from YouTube ads, memberships, and Super Chats
**Blog with display ads:**
- Use TikTok to drive traffic to your blog
- Monetize with Mediavine, AdThrive, or Raptive
- A single viral TikTok can send thousands of visitors
**Email list:**
- Offer lead magnets (free guides, templates, checklists)
- Build an email list you own
- Sell products or services to your subscribers
**Podcast:**
- Promote episodes with short clips on TikTok
- Monetize through sponsorships and ads
**Pro tip:** TikTok content has a longer lifespan than other platforms. A video can go viral weeks or months after posting, continuously driving traffic to your external platforms.
---
## 8. Sell Digital Products and Services
TikTok is an excellent platform for promoting digital products and services-especially if your content demonstrates expertise in a particular area.
**Digital products to sell:**
- E-books and guides
- Online courses
- Templates (Canva, Notion, spreadsheets)
- Presets (Lightroom, video editing)
- Printables and planners
- Stock content (photos, videos, music)
**Services to sell:**
- Coaching and consulting
- Freelance services (design, writing, video editing)
- 1:1 sessions or group calls
- Done-for-you services
**How to promote:**
- Create content that showcases your expertise
- Use your bio link to direct followers to your products
- Go live to answer questions and soft-sell
- Share testimonials and results
**Example:** Creators who've mastered TikTok often sell courses teaching others how to grow on the platform. Meta? Yes. Profitable? Absolutely.
**Pro tip:** Use a link-in-bio tool (Linktree, Stan Store, Beacons) to direct followers to multiple products and services from a single link.
---
## 9. User-Generated Content (UGC) Creation
Here's a method that doesn't require any followers at all: creating User-Generated Content (UGC) for brands. You create TikTok-style videos that brands use in their own marketing-you get paid, they get authentic content.
**How it works:**
- Brands hire you to create videos featuring their products
- You film the content (usually product demos, unboxings, testimonials)
- Brands use the videos for their ads and organic content
- You get paid per video-often $100-$500+ each
**Why brands love UGC:**
- Authentic content outperforms polished ads
- UGC has higher engagement and conversion rates
- Brands can use your content as TikTok Spark Ads
**How to get started:**
- Build a UGC portfolio (create sample videos for products you already own)
- Join UGC platforms (Billo, JoinBrands, Insense)
- Pitch brands directly with your portfolio
- Post on TikTok about being a UGC creator (meta, but it works)
**What you can earn:**
- Beginners: $50-$150 per video
- Experienced UGC creators: $200-$500+ per video
- High-demand niches (tech, finance, beauty): $500-$1,000+ per video
**Pro tip:** You don't need to post UGC on your own account-brands use it on theirs. This means you can earn money without building a personal following.
---
## Quick Comparison: TikTok Monetization Methods
| Method | Requirements | Typical Earnings | Best For |
|--------|-------------|------------------|----------|
| Creator Rewards | 10K followers, 100K views | $0.40-$1/1K views | Established creators |
| TikTok Shop Affiliate | 1K-5K followers (varies) | 5-30% commission | Product-focused creators |
| Brand Partnerships | Engaged audience | $100-$100K/post | Niche influencers |
| TikTok Shop Seller | Business account | Varies widely | Product sellers |
| LIVE Gifts | 1K followers | $50-$10K+/month | Engaging personalities |
| TikTok Series | 10K followers | $0.99-$189.99/series | Educators, entertainers |
| External Traffic | No minimum | Varies | Bloggers, YouTubers |
| Digital Products | No minimum | Varies | Experts, creators |
| UGC Creation | No followers needed | $100-$500/video | Video creators |
---
## Keys to TikTok Monetization Success
Regardless of which methods you choose, these fundamentals apply:
**1. Stack multiple income streams**
The most successful TikTokers don't rely on one method. A typical month might include $800 from Creator Rewards, $2,000 from affiliate sales, $500 from a brand deal, and $300 from LIVE gifts.
**2. Focus on quality over quantity**
TikTok's algorithm rewards engaging, high-retention content. One great video outperforms ten mediocre ones.
**3. Pick a niche**
Creators who focus on specific topics build more loyal audiences-and attract brands willing to pay premium rates for access to that audience.
**4. Understand the algorithm**
TikTok prioritizes watch time, engagement, and content relevance. Create hooks that stop scrollers, and deliver value that keeps them watching.
**5. Be consistent**
Post regularly, go live on a schedule, and show up for your audience. Consistency builds trust and keeps you visible in the algorithm.
**6. Think long-term**
Building sustainable income takes time. Focus on providing value, growing your audience, and diversifying your revenue streams.
---
---
## Final Thoughts
TikTok has evolved from an entertainment app to a full-fledged business platform. With the Creator Rewards Program paying up to 20x more than the old Creator Fund, TikTok Shop generating billions in sales, and brands eager to partner with creators of all sizes, there's never been a better time to monetize your TikTok presence.
The key is diversification. Don't rely on a single income stream. Combine Creator Rewards with affiliate marketing. Stack brand deals with your own products. Drive traffic to platforms you control.
The creators winning in 2026 treat TikTok like a business-multiple revenue streams, consistent content, and a focus on providing value to their audience.
Ready to turn your TikTok into a money-making machine? Start with Genviral and make every video count.
**[Get started with Genviral →](https://genviral.io)**
---
## More TikTok Tips
Looking for more ways to grow your TikTok presence? Check out our other guides:
- [How to Get Spark Code on TikTok](https://www.genviral.io/blog/how-to-get-tiktok-spark-code)
- [How to Warm Up a TikTok Account](https://www.genviral.io/blog/warm-up-tiktok-account)
- [TikTok Growth Strategies for SaaS](https://www.genviral.io/blog/tiktok-growth-strategies-for-saas)
- [How to Create TikTok Slideshow Images with AI](https://www.genviral.io/blog/create-tiktok-slideshow-images-with-ai)
- [How to Make TikTok Slideshows on PC](https://www.genviral.io/blog/how-to-make-a-slideshow-on-tiktok-pc)
- [How to Add Link to TikTok Bio](https://www.genviral.io/blog/how-to-add-link-to-tiktok-bio)
- [How to Target US Users on TikTok](https://www.genviral.io/blog/target-us-users-on-tiktok)
- [How to Change TikTok Account Region](https://www.genviral.io/blog/how-to-change-tiktok-account-region)
- [How to Repost on TikTok](https://www.genviral.io/blog/how-to-repost-on-tiktok)
- [Where to Find TikTok Drafts](https://www.genviral.io/blog/where-to-find-tiktok-drafts)
- [How to See Saved Videos on TikTok](https://www.genviral.io/blog/how-to-see-saved-videos-on-tiktok)
- [How to Block Someone on TikTok](https://www.genviral.io/blog/how-to-block-someone-on-tiktok)
- [Why Can't I Follow People on TikTok](https://www.genviral.io/blog/why-cant-i-follow-people-on-tiktok)
- [How to Delete Your TikTok Account](https://www.genviral.io/blog/how-to-delete-tiktok-account)
## Monetize Other Platforms Too
- [How to Make Money with Instagram](https://www.genviral.io/blog/how-to-make-money-with-instagram)
- [How to Make Money with Facebook](https://www.genviral.io/blog/how-to-make-money-with-facebook)
- [How to Make Money with Pinterest](https://www.genviral.io/blog/how-to-make-money-with-pinterest)
- [How to Make Money with LinkedIn](https://www.genviral.io/blog/how-to-make-money-with-linkedin)
---
Canonical HTML: https://www.genviral.io/blog/how-to-make-money-with-tiktok
# How to Make Pinterest Collage (2026 Complete Guide)
- Pinterest collages are only available on mobile (iOS and Android) - open the app, tap +, select Collage, add images, cut out objects, arrange them, and publish.
- Each cutout in a collage links back to its original pin, making collages interactive and shoppable - useful for gift guides, outfit roundups, and room planning boards.
- Collages are a growing Pinterest format for vision boards and mood boards - viewers can click individual elements to explore the source pins, driving engagement and saves.
Creating a Pinterest collage is done entirely in the mobile app. Here's the step-by-step process from opening the tool to publishing your finished design.
## What is a Pinterest Collage?
Pinterest collages are **layered visual boards** where you combine multiple images or cutouts into one creative composition.
**Uses:**
- Vision boards
- Mood boards
- Product roundups
- Gift guides
- Room planning
- Outfit layouts
- Project inspiration
**Key feature:** Each cutout in your collage links back to its original Pin, making collages interactive and shoppable.
## Mobile: How to Make a Pinterest Collage (Primary Method)
Pinterest's collage feature works best on mobile (iOS and Android).
**Step 1:** Open Pinterest app
- Log in to your account
**Step 2:** Tap the + (plus) icon
- Located at bottom center of screen
**Step 3:** Select "Collage"
- Between Pin and Board options
**Step 4:** Tap + again to add content
- Opens selection menu
**Step 5:** Choose your images
- **More ideas:** Browse suggested Pins
- **Your boards:** Select from saved Pins (to find your saved pins, see [how to see liked pins on Pinterest](https://www.genviral.io/blog/how-to-see-liked-pins-on-pinterest))
- **Drafts:** Use saved drafts
- **Camera/Upload:** Add photos from device
**Step 6:** Create cutouts
- Tap a Pin to select it
- Use tools to cut out objects:
- **Auto-select:** Tap object to auto-detect
- **Manual:** Use add/erase tools
- **Shapes:** Cut in specific shapes (circle, heart, etc.)
- **Adjust:** Drag corners to resize
**Step 7:** Tap "Add" or "Add cutout"
**Step 8:** Repeat to add more cutouts
- Tap + to add more images
- Build your composition
**Step 9:** Arrange your collage
- Drag cutouts to position them
- Pinch to resize
- Rotate with two fingers
- Layer by dragging on top
- Tap cutout for options (duplicate, delete, edit)
**Step 10:** Add finishing touches (optional)
- Tap drawing tool to add illustrations
- Tap text tool to add words
- Change background color
**Step 11:** Tap "Next" (top-right)
**Step 12:** Add details
- **Title:** Name your collage
- **Description:** Add keywords for search
- **Board:** Select where to save (to find group boards, see [how to find group boards on Pinterest](https://www.genviral.io/blog/how-to-find-group-boards-on-pinterest))
- **Enable remixing:** Let others use your collage as template (optional)
**Step 13:** Tap "Publish"
**Done!** Your collage is now live as a Pin.
## Desktop: How to Make a Pinterest Collage
Desktop collage creation is now available (rolling out to all accounts).
**Step 1:** Go to business.facebook.com or pinterest.com
**Step 2:** Click menu (☰) in top-left
- Or click "Create" button
**Step 3:** Select "Create Collage"
- Under "Create content" section
**Step 4:** Enter the Collage Editor
**Step 5:** Add images
- Search for ideas
- Select from your boards
- Upload from computer
**Step 6:** Create cutouts
- Click on image
- Use selection tools
- Adjust and refine
**Step 7:** Arrange in editor
- Drag to position
- Resize as needed
- Layer elements
**Step 8:** Add text/design elements
**Step 9:** Click "Next"
**Step 10:** Add title, description, and board
**Step 11:** Click "Create" or "Publish"
**Note:** Desktop feature is still rolling out. If you don't see it yet, check back soon or use mobile.
## How to Remix an Existing Collage
Use someone else's collage as a starting point.
**Step 1:** Find a collage with remix enabled
- Look for scissor-paper icon on collage
**Step 2:** Tap the collage
**Step 3:** Tap "Remix"
- Bottom of the screen
**Step 4:** Edit the collage
- Add, remove, or rearrange cutouts
- Change design elements
**Step 5:** Publish your remix
- Original creator gets credit
- Your version links to original
**This helps:** Get inspiration and create faster while giving credit.
## Tips for Creating Eye-Catching Collages
**Design best practices:**
✓ Keep a consistent color palette
✓ Use high-quality images
✓ Don't overcrowd (3-7 cutouts ideal)
✓ Create visual balance
✓ Leave some negative space
✓ Use vertical orientation (2:3 or 9:16 ratio)
**For traffic and engagement:**
✓ Link collage to relevant content
✓ Use keywords in title/description
✓ Create themed collages (holidays, seasons)
✓ Make product roundups shoppable
✓ Enable remixing for more reach
**Content ideas:**
- Seasonal style guides
- Product comparisons
- Before/after transformations
- Color palette inspiration
- Travel destination boards
- Recipe ingredient layouts
## How to Find Your Saved Collages
**Step 1:** Go to your profile
- Tap profile picture
**Step 2:** Scroll to your Pins
- All published collages appear here
**Step 3:** Filter to collages (optional)
- Look for multi-layered Pins
**Or check the board** where you published them. If you need to recover a deleted board, see [how to recover deleted Pinterest boards](https://www.genviral.io/blog/how-to-recover-deleted-pinterest-boards).
## How to Edit a Published Collage
**Limited editing available:**
- ✓ Change title
- ✓ Change description
- ✓ Change board
- ✓ Toggle remix settings
- ❌ Can't change the collage design itself
**To edit design:**
You must create a new collage. Published collages can't be redesigned.
## Third-Party Tools for Pinterest Collages
If you prefer external design tools:
### Canva
- Pre-made Pinterest collage templates
- Easy drag-and-drop
- Free and paid options
- Export and upload to Pinterest
### Adobe Express
- Professional templates
- Design tools
- Direct Pinterest integration
### Shuffles (Pinterest app)
- Separate app by Pinterest
- AI-powered cutouts
- Connected to Pinterest account
- Creates collages that post to Pinterest
### PicCollage
- Simple mobile collage maker
- Free templates
- Export as image
**After creating externally:**
1. Download collage as image
2. Upload to Pinterest as regular Pin
3. Add title, description, link
**Note:** If you want to reduce AI-generated content in your feed, see [how to turn off AI posts on Pinterest](https://www.genviral.io/blog/how-to-turn-off-ai-posts-on-pinterest).
## Common Questions
**Is the Pinterest collage feature free?**
Yes. Creating collages is completely free on Pinterest. All features are included.
**Can I make collages on desktop?**
Yes, but the feature is still rolling out to all accounts. Mobile (iOS/Android) has full access.
**Do collages get more engagement than regular Pins?**
Generally, yes. Collages stand out in feeds and encourage interaction with individual cutouts.
**Can others see my collage drafts?**
No. Drafts are private until you publish them. If you want a published collage to stay private too, save it to a secret board - see [how to make a board on Pinterest private](https://www.genviral.io/blog/how-to-make-a-board-on-pinterest-private).
**What happens when someone clicks on a cutout?**
They see the original Pin that cutout came from, including any links or product info.
**Can I delete a published collage?**
Yes. Go to the collage Pin and delete it like any other Pin (three dots → Delete). For detailed instructions, see [how to delete a Pinterest pin](https://www.genviral.io/blog/how-to-delete-a-pinterest-pin).
**Do I need a business account?**
No. Personal accounts can create collages too. Business accounts get extra analytics.
**Can I use my own photos?**
Yes. Upload from your device using the camera/upload icon. To learn more about creating pins, see [how to make a pin on Pinterest](https://www.genviral.io/blog/how-to-make-a-pin-on-pinterest).
**What's the difference between a collage and a regular Pin?**
Collages are interactive-each cutout links to its source. Regular Pins link to one destination. For more Pinterest strategies, see [Pinterest posting strategy](https://www.genviral.io/blog/pinterest-posting-strategy) and [Pinterest tips and tricks](https://www.genviral.io/blog/pinterest-tips-and-tricks).
**Why can't I find the collage option?**
Make sure your app is updated. Desktop feature is still rolling out. Try mobile if desktop doesn't have it yet.
## The Bottom Line
Creating Pinterest collages is simple:
**Mobile (easiest):** + icon → Collage → Add images → Create cutouts → Arrange → Publish
**Desktop:** Create → Collage → Design → Publish
**Best practices:**
- Use 3-7 cutouts for balance
- Keep vertical orientation
- Add keywords to title/description
- Enable remixing for more reach
- Link to relevant content
Pinterest collages are perfect for mood boards, product guides, vision boards, and creative projects. They're free, interactive, and drive more engagement than standard Pins (which can help you [make money with Pinterest](https://www.genviral.io/blog/how-to-make-money-with-pinterest)). For managing your saved pins, see [how to unsave pins on Pinterest](https://www.genviral.io/blog/how-to-unsave-pins-on-pinterest), and for board management, see [how to delete a board on Pinterest](https://www.genviral.io/blog/how-to-delete-a-board-on-pinterest) or [how to merge Pinterest boards](https://www.genviral.io/blog/how-to-merge-pinterest-boards) to consolidate overlapping topics.
---
*Want to schedule your Pinterest content alongside other social platforms? [Genviral's Scheduler](https://www.genviral.io/pinterest-scheduler) helps you plan, create, and schedule pins across all your social accounts-saving you time while keeping your Pinterest presence consistent and engaging.*
---
Canonical HTML: https://www.genviral.io/blog/how-to-make-pinterest-collage
# How to Merge Pinterest Boards (and Sections): Step-by-Step
- Merging Pinterest boards moves all pins from one board into another and **deletes the original board** - it's not a true merge, it's a move-and-delete.
- Followers of the merged board **do not transfer** to the destination board, and merging cannot be undone (you'd have to recreate the board and move pins back one by one).
- You can merge boards or individual sections inside a board, on Web (click ⋯ → Merge), iOS, and Android - and you can also drag-and-drop one board onto another on desktop.
If your Pinterest profile is full of overlapping boards or duplicate sections, merging them is the fastest way to clean things up. But Pinterest's merge feature has a few non-obvious gotchas - followers don't transfer, privacy can flip from secret to public, and there's no undo button. Here's exactly how to do it correctly on every platform.
## Quick Facts
**⚠️ What you need to know first**, according to [Pinterest's official Help Center](https://help.pinterest.com/en/article/merge-boards-and-sections):
- Merging is **one-way**: the source board gets deleted, and all its pins move into the destination board.
- **Followers do not transfer** when you merge boards.
- If you merge a **secret board into a public board**, the pins become public (the destination board's privacy wins).
- **Merging is not reversible**. To undo it, you'd need to create a new board and move pins back one by one.
- You can also merge **board sections** the same way, inside a single board.
## How to Merge Boards (Desktop / Web)
1. Log in to [pinterest.com](https://pinterest.com)
2. Click your **profile picture** (top right) to open your profile
3. Click the **board** you want to merge into another one
4. Click the **three dots (⋯)** next to the board name
5. Select **Merge**
6. Click the **▼** dropdown next to **Pick a board** and choose the destination board
7. Click **Move Pins and Delete Board**
All pins from the source board are now in the destination board, and the source board is deleted.
### Alternative: Drag and Drop
You can also merge two boards directly from your profile grid:
1. Go to your profile and view your boards
2. **Drag** one board onto the center of another
3. Click **Move Pins and delete board** to confirm
This is faster if you can see both boards on screen.
## How to Merge Boards (Mobile)
### iOS
1. Open the **Pinterest app** and log in
2. Tap your **profile picture** (bottom right)
3. Tap the **board** you want to merge
4. Tap the **three dots (⋯)** in the top right
5. Tap **Merge**
6. **Pick a board** to merge with
7. Tap **Merge**
**Alternative:** Tap and hold the board on your profile, tap the edit icon, then swipe down and tap **Merge board**.
### Android
1. Open the **Pinterest app** and log in
2. Tap your **profile picture** (bottom right)
3. Tap the **board** you want to merge
4. Tap the **three dots (⋯)** in the top right
5. Tap **Merge boards**
6. Select a **destination board**
7. Tap **Merge**
**Alternative:** Tap and hold the board, tap the edit icon, then tap **Merge board**.
## How to Merge Board Sections (Web)
Sections are subfolders inside a board. If you have duplicate or overlapping sections, you can merge them the same way.
1. Log in to [pinterest.com](https://pinterest.com)
2. Open the **board** that contains the sections
3. **Hover** over the section you want to merge
4. Click the **pencil (edit) icon** in the bottom-right corner of the section's cover image
5. Select **Merge**
6. Click the **▼** dropdown next to **Pick a section** and choose the destination section
7. Click **Move Pins and delete section**
### Alternative: Drag and Drop Sections
Inside the board, drag one section onto another and confirm **Move Pins and delete section**.
## How to Merge Board Sections (Mobile)
### iOS
1. Open the **Pinterest app**
2. Tap your **profile picture** (bottom right)
3. Tap the **board** containing the sections
4. Tap the **section** you want to merge
5. Tap the **three dots (⋯)** in the top right
6. Tap **Merge**
7. Pick a **destination section**
8. Tap **Merge sections**
### Android
1. Open the **Pinterest app**
2. Tap your **profile picture** (bottom right)
3. Tap the **board** containing the sections
4. Tap the **section** you want to merge
5. Tap the **three dots (⋯)** in the top right
6. Tap **Merge**
7. Pick a **destination section**
8. Tap **Move Pins**
## What Actually Happens When You Merge
A Pinterest "merge" is really a **move-and-delete** under the hood. Here's what changes:
| Change | What happens |
|---|---|
| **Pins** | All pins from the source board move into the destination board |
| **Source board** | Deleted permanently |
| **Followers (source)** | Lost - they do **not** roll into the destination board's followers |
| **Followers (destination)** | Unchanged |
| **Board URL (source)** | Becomes a dead link |
| **Privacy** | Destination board's setting wins (secret + public = public) |
| **Collaborators (source)** | Lose access |
| **Sections** | Inside-board sections are preserved when merging sections; lost when merging entire boards (pins flatten into the destination) |
| **Reversible?** | No - rebuild manually |
This is why merging high-traffic boards is dangerous: you can vaporize a follower base in one click.
## Merge vs. Delete vs. Archive: Which to Use
| Action | Pins | Source board | Followers | Use when |
|---|---|---|---|---|
| **Merge** | Move to destination | Deleted | Lost | Consolidating duplicate/overlapping topics |
| **Delete** | Deleted | Deleted (7-day recovery) | Lost | Removing a board entirely |
| **Archive** | Preserved | Hidden, not deleted | Hidden | Temporarily hiding a board you may use again |
If you're unsure, **archive first**. You can always merge or delete later, but you can't unmerge.
For full details on each alternative, see:
- [How to delete a board on Pinterest](https://www.genviral.io/blog/how-to-delete-a-board-on-pinterest)
- [How to recover deleted Pinterest boards](https://www.genviral.io/blog/how-to-recover-deleted-pinterest-boards) (7-day window)
- [How to make a board on Pinterest private](https://www.genviral.io/blog/how-to-make-a-board-on-pinterest-private)
## Before You Merge: A Pre-Flight Checklist
Run through this list before you click **Move Pins and Delete Board**:
1. **Check the follower count on the source board.** If it has meaningful followers, merging will lose them. Consider archiving instead.
2. **Check privacy settings.** Merging a secret board into a public one makes those pins public. If any pins are private, move them out first.
3. **Save the board URL** if anything links to it externally. The URL dies when the board is deleted.
4. **Note your sections.** Sections inside the source board flatten into the destination (no more section structure). If you want to keep section organization, recreate the sections on the destination board first, then move pins manually.
5. **Check for group board status.** You cannot merge a group board you don't own. You can only [leave the group board](https://www.genviral.io/blog/how-to-find-group-boards-on-pinterest) or remove yourself as a collaborator.
6. **Confirm the destination board's topic.** Pinterest uses board titles and descriptions for SEO. Don't dilute a well-ranked board by dumping unrelated pins into it.
For the broader strategy side, see our [Pinterest tips and tricks](https://www.genviral.io/blog/pinterest-tips-and-tricks) and [Pinterest posting strategy](https://www.genviral.io/blog/pinterest-posting-strategy) guides.
## Common Mistakes to Avoid
**Merging boards with very different topics.** Pinterest's algorithm reads board titles, descriptions, and pin context. A board mixing recipes and home decor confuses the system and reduces distribution. Better to delete the weaker board or keep them separate.
**Merging your highest-traffic board into a weaker one.** Always merge **into** the board that has more followers and SEO authority, not out of it. The destination wins everything.
**Merging without backing up pin URLs.** If you have pins linked from external sites, those links can break if the destination board changes the canonical pin URL. Spot-check important pins after merging.
**Trying to merge across accounts.** You can only merge boards inside the same Pinterest account. To move pins between accounts, you have to manually save them - see [how to make a pin on Pinterest](https://www.genviral.io/blog/how-to-make-a-pin-on-pinterest).
**Merging instead of deleting empty boards.** If a board has no valuable pins, just [delete it](https://www.genviral.io/blog/how-to-delete-a-board-on-pinterest). Merging just to clean up adds clutter to the destination board.
## Common Questions
**Can I undo a merge on Pinterest?**
No. Pinterest doesn't have an undo button for merges. To restore the original board, you have to recreate it manually and move pins back one by one. This is the single biggest reason to double-check before confirming.
**Do followers transfer when I merge boards?**
No. Followers of the source (deleted) board are lost. Only the destination board's followers remain. This is Pinterest's official behavior, confirmed in the [help center](https://help.pinterest.com/en/article/merge-boards-and-sections).
**What happens to the source board's URL?**
It becomes a dead link. Any external sites, blog posts, or social profiles linking to that URL will return a 404. If the board had inbound links you cared about, archive it instead.
**Can I merge a secret board into a public board?**
Yes, but **all pins become public** in the process - the destination board's privacy setting applies. If you don't want pins exposed, change the destination board to secret first, or move pins out manually.
**Can I merge group boards?**
You can only merge group boards you **own**. If you're a collaborator, you can leave the board but not merge it. See our guide on [how to find group boards on Pinterest](https://www.genviral.io/blog/how-to-find-group-boards-on-pinterest) to identify which ones you can manage.
**Will merging hurt my Pinterest SEO?**
It depends. Consolidating two similar boards can **help** SEO by concentrating authority. Merging unrelated boards usually **hurts** SEO by diluting the destination board's topic relevance. Keep the topic tight.
**Can I merge boards in bulk?**
No. Pinterest only supports one-merge-at-a-time. Each merge requires clicking through the confirmation. If you have many duplicates, plan the order carefully so you don't end up merging into a board you later want to merge somewhere else.
**What happens to pin comments and reactions?**
Pin engagement (saves, comments, reactions) travels with the pin. The pin keeps its history; only the parent board changes.
**Can I merge a board with sections into a board without sections?**
Yes, but the section structure flattens. All pins land in the destination board's main feed, ungrouped. If you want to keep section structure, manually recreate the sections in the destination board, then move pins into them.
**Does merging affect my [liked pins](https://www.genviral.io/blog/how-to-see-liked-pins-on-pinterest) or [saved pins](https://www.genviral.io/blog/how-to-unsave-pins-on-pinterest)?**
No. Likes and saves are tied to individual pins, not boards. They survive a merge.
**Can I cancel a merge mid-process?**
Pinterest processes merges instantly. There's no in-progress state to cancel. Once you click the confirm button, it's done.
## When to Merge vs. When Not To
**Merge when:**
- You have two boards covering the same topic with overlapping pins
- One board is dead (no followers, no traffic) and the other is active on the same topic
- You're cleaning up after a profile refresh or rebrand
- Sections inside a board are too granular and need consolidating
**Don't merge when:**
- The source board has meaningful followers - archive instead
- Boards cover genuinely different topics - delete the weaker one or keep both
- You might want the board back later - archive instead
- The board is a group board you don't own - you can only leave
- The source board has external inbound links - the dead URL will hurt SEO
## Quick Win: Use Merge as Spring Cleaning
If your profile has 50+ boards from years of pinning, merging is the fastest way to tighten things up. A typical clean-up flow:
1. List all boards by topic.
2. Identify duplicates and near-duplicates.
3. Decide which board in each pair has more followers and better SEO - that's the destination.
4. Archive any board you're unsure about (don't merge or delete yet).
5. Merge the obvious duplicates one by one.
6. Review your sections inside surviving boards and merge any duplicates there too.
You'll usually cut your board count by 20-40% without losing pins. For ongoing organization tips, see [Pinterest tips and tricks](https://www.genviral.io/blog/pinterest-tips-and-tricks).
## Related Pinterest Guides
- [How to delete a board on Pinterest](https://www.genviral.io/blog/how-to-delete-a-board-on-pinterest) - when delete is the right choice instead of merge
- [How to recover deleted Pinterest boards](https://www.genviral.io/blog/how-to-recover-deleted-pinterest-boards) - the 7-day recovery window
- [How to make a board on Pinterest private](https://www.genviral.io/blog/how-to-make-a-board-on-pinterest-private) - hide a board without losing it
- [How to find group boards on Pinterest](https://www.genviral.io/blog/how-to-find-group-boards-on-pinterest) - identify boards you can't merge
- [How to make a pin on Pinterest](https://www.genviral.io/blog/how-to-make-a-pin-on-pinterest) - create new pins for your tidied boards
- [How to delete a Pinterest pin](https://www.genviral.io/blog/how-to-delete-a-pinterest-pin) - clean up individual pins
- [How to unsave pins on Pinterest](https://www.genviral.io/blog/how-to-unsave-pins-on-pinterest) - remove pins saved from others
- [How to see liked pins on Pinterest](https://www.genviral.io/blog/how-to-see-liked-pins-on-pinterest) - audit your liked pins before merging
- [How to make a Pinterest collage](https://www.genviral.io/blog/how-to-make-pinterest-collage) - turn merged pins into new content
- [How to turn off AI posts on Pinterest](https://www.genviral.io/blog/how-to-turn-off-ai-posts-on-pinterest) - related account control
- [Pinterest posting strategy](https://www.genviral.io/blog/pinterest-posting-strategy) - what to do after consolidating
- [Pinterest tips and tricks](https://www.genviral.io/blog/pinterest-tips-and-tricks) - keep your profile tidy long-term
- [Best Pinterest scheduler](https://www.genviral.io/blog/best-pinterest-scheduler) - automate your refreshed strategy
## Bottom Line
Merging Pinterest boards is the cleanest way to consolidate overlapping topics, but it's permanent and lossy: you lose the source board's followers, you can't undo it, and secret pins can flip to public. Always merge **into** your stronger board, archive anything you're unsure about, and never merge boards that cover genuinely different topics. For sections inside a board, the same rules apply at a smaller scale.
When you're done tidying, the next move is consistent posting on your surviving boards. That's where a [posting strategy](https://www.genviral.io/blog/pinterest-posting-strategy) and the right [scheduler](https://www.genviral.io/blog/best-pinterest-scheduler) matter most.
---
*Cleaning up your Pinterest profile and want to keep it active without manual pinning? [Genviral](https://genviral.io) helps you generate and schedule Pinterest content across multiple boards so your refreshed profile keeps growing.*
---
Canonical HTML: https://www.genviral.io/blog/how-to-merge-pinterest-boards
# How to Pin a Comment on TikTok in 2026
- **TikTok removed the ability to pin comments** during a 2025 app update. The **Pin comment** option is gone from the long-press menu for the vast majority of accounts on iPhone, Android, and web. TikTok has not published an official statement.
- **Old pinned comments still display** on videos that were pinned before the change. Only *new* pins are no longer possible.
- The de-facto replacement is the **First Comment** label - TikTok now highlights the first comment under any video in pink with a "First Comment" badge. Beat your audience to your own comment section and that comment effectively replaces a pin.
If you came here looking for a long-press → Pin comment tutorial, the short version is: **that option no longer exists** for most TikTok accounts as of 2026. TikTok quietly stripped comment pinning out of the app during a 2025 update, never published a changelog entry for it, and never confirmed whether it's coming back. This guide is the honest, current state of the feature plus the workaround creators are using to recover the same outcome.
## What Actually Changed
Long-pressing a comment on your own TikTok video used to surface five options: Reply, Like, Pin comment, Delete, and Report. As of the 2025 rollout, the menu now shows only **Reply, Like, Delete, and Report**. There is no Pin comment option in the bottom sheet, no Pin button in the comments tab, and no equivalent in TikTok Studio or the TikTok web app at tiktok.com.
This was confirmed across iOS, Android, and desktop, and has been picked up by mainstream coverage. TwistedSifter reported on the removal in September 2025, and the topic has accumulated millions of views across TikTok itself, with creators posting about the missing button under hashtags like #pinacomment.
A handful of accounts continue to report seeing Pin comment intermittently. That's consistent with a staged rollback or an A/B holdout group - if you still see it, treat it as a temporary leftover, not the long-term state of the feature.
## Did TikTok Say Why?
No. TikTok has not posted a release-note entry, a creator blog post, or a Help Center update explaining the removal. The community consensus is one of three theories:
- **Moderation cost.** Pinned comments amplify whatever they say, including misinformation, harassment, or content that violates community guidelines. Removing the surface reduces the moderation burden.
- **Abuse prevention.** Pinned comments were occasionally used to game engagement (paid pin promotions, follow-back schemes, link laundering through the comment of a viral video).
- **UI simplification ahead of a redesign.** TikTok's comment section has been reshuffled multiple times in 2025; the First Comment label (more below) may be the intended replacement.
None of these are confirmed. Treat them as plausible, not authoritative.
## What Happens to Comments That Were Already Pinned
If you pinned comments on older videos before the change, **they remain pinned**. The Pinned badge still shows at the top of the comments tab on those videos for every viewer, on every surface (mobile, web, embeds). You just can't add new ones, and if you unpin an existing pinned comment you cannot pin it back.
If you want to keep a legacy pinned comment, don't tap Unpin out of curiosity - there's no undo.
## The Workaround: The "First Comment" Label
The closest replacement is a newer TikTok feature that came online around the same time as the pinning removal: TikTok now displays the **first comment** under any video with a distinct **pink "First Comment" label**, anchoring it visually near the top of the comments tab.
Because *anyone* can be the first commenter, the play for creators is straightforward: **be the first person to comment on your own video**, with your CTA, FAQ, or hook.
This was popularized by @queenoftrendalerts and has since become the standard advice across creator communities. It's not identical to a pin - the comment doesn't outrank highly-liked comments forever, and a faster-fingered viewer can technically beat you to it - but in practice, if you post the comment within seconds of publishing the video, you'll claim the First Comment slot before any real-time viewer sees it.
### How to Claim the First Comment Slot
1. Post your video as usual from the TikTok app.
2. The moment it publishes, tap the **comments icon** on the video.
3. Type your CTA / FAQ / hook into the comment box and post it.
4. Refresh the comments tab. Your comment now sits at the top with the pink **First Comment** label.
If you have a large following and you're worried about being out-raced, write the comment text out in a notes app beforehand and paste it the instant the video goes live.
### What to Put in the First Comment
The same content patterns that worked for pinned comments still work for first comments. After analyzing thousands of high-performing videos, four patterns consistently outperform:
- **The FAQ first comment** - pre-empt the most-asked question. ("Yes, the link is in my bio.")
- **The hook first comment** - tease a follow-up video to keep viewers in your ecosystem.
- **The social-proof first comment** - quote a real viewer's positive experience. (Less effective than a real viewer doing it, but still works.)
- **The CTA first comment** - a clear next step. ("Comment 'recipe' and I'll DM it to you.")
## Other Ways to Anchor a Message Now That Pinning Is Gone
The First Comment label is the cleanest replacement, but it's not the only lever. If you've lost a pinning workflow, consider:
- **Lead with the answer in the caption.** The caption is the only piece of post-publish text TikTok still gives the creator full prominence on. Treat the first line of the caption like a pinned comment.
- **Reply to your own first comment** with the longer version. Replies stack underneath, so a First Comment + Creator Reply chain reads like a two-line pinned message.
- **Use on-screen text in the video itself.** Burned-in text outranks any comment system - it's literally on the video.
- **Republish-and-redirect.** If the original post is buried and you can't pin a correction, post a follow-up video that opens with the correction and use the original's caption to link to it.
## Will TikTok Bring Pinning Back?
Unknown. Features have come and gone on TikTok before, and the company doesn't pre-announce reversals. Two things to watch:
- **The First Comment label sticking around.** If TikTok keeps shipping refinements to it (e.g., extending it to multiple comments, or letting creators *designate* the First Comment), that's a signal it's meant as the replacement.
- **A Studio-side announcement.** If pinning returns, it's most likely to come back through TikTok Studio first (the desktop creator tool), since most other comment-management features now ship there before they hit the consumer app.
If you really need pin-style anchoring for a campaign or release, build the workflow around the **First Comment + caption + on-screen text** combination - those three are stable, and you can ship that workflow today.
## "But Some Tutorials Online Still Show How to Pin"
You'll find articles dated 2026 that walk through the long-press → Pin comment flow as if nothing changed. They're stale - most are syndicated reposts of older content with the year swapped in the title, written by sites that don't actually verify the feature is live. If a tutorial doesn't acknowledge the 2025 removal, it's working from outdated information.
The fastest way to check for yourself: open one of your own videos in the TikTok mobile app, long-press any comment, and look at the menu. If there's no Pin option, your account is on the post-removal build (which, at time of writing, is essentially all accounts).
## Troubleshooting
**I still see Pin comment on my account - what gives?**
A small number of accounts continue to see it. This is consistent with a partial rollback, a staged removal, or an A/B holdout. Use it while you have it; don't build your strategy around it staying.
**My old pinned comment disappeared.**
If a previously-pinned comment lost its Pinned badge, the most common causes are (a) the comment author deleted their comment, or (b) you accidentally tapped Unpin during the change-over window. Old pins cannot be re-pinned now that the feature is gone.
**Can I pin a comment on a TikTok LIVE?**
LIVE has its own pinned message system that's separate from feed videos. That one still works, resets at the end of the stream, and is unaffected by the 2025 removal.
**Can I pin in TikTok Studio or on the web app?**
No - and you never could. Pinning was mobile-only, and now it's effectively off everywhere.
**Is the "First Comment" label guaranteed?**
The First Comment label shows up on the first comment under a video as long as comments are enabled and the comment hasn't been deleted. If you delete your first comment, the label transfers to the next-earliest comment.
## The Bottom Line
TikTok removed comment pinning in 2025 without an official explanation. The Pin comment option is no longer in the long-press menu for the vast majority of accounts on any device. Old pinned comments still display, but you can't create new ones.
**Key takeaways:**
- **Pin comment is gone** from the long-press menu on iPhone, Android, web, and TikTok Studio as of the 2025 rollout.
- **Old pins remain** on videos that were pinned before the change - don't unpin them, you can't re-pin.
- The new lever is the **First Comment** label - comment on your own video first and TikTok will highlight it in pink with a First Comment badge.
- Combine **First Comment + caption first line + on-screen text** for the closest equivalent to the old pinned-comment workflow.
- Some accounts still see Pin comment intermittently. Treat it as a leftover, not a strategy.
For more TikTok creator tips that *are* current in 2026, see [how to block someone on TikTok](https://www.genviral.io/blog/how-to-block-someone-on-tiktok), [how to repost on TikTok](https://www.genviral.io/blog/how-to-repost-on-tiktok), [how to see saved videos on TikTok](https://www.genviral.io/blog/how-to-see-saved-videos-on-tiktok), [how to clear TikTok cache](https://www.genviral.io/blog/how-to-clear-tiktok-cache), [how to add a link to your TikTok bio](https://www.genviral.io/blog/how-to-add-link-to-tiktok-bio), and [where to find TikTok drafts](https://www.genviral.io/blog/where-to-find-tiktok-drafts).
---
*The First Comment hack only works if you're at your phone the second a video goes live - which is fine for one-off uploads but breaks the moment you're scheduling around launches, campaigns, or a real posting cadence. [Genviral's TikTok Scheduler](https://www.genviral.io/tiktok-scheduler) handles the desktop side of TikTok so you can plan, write, and queue from your PC, then jump to your phone only for the few mobile-only moments that still need it.*
---
Canonical HTML: https://www.genviral.io/blog/how-to-pin-a-comment-on-tiktok
# How to Recover Deleted Pinterest Boards (7-Day Window)
- You have exactly 7 days to restore a deleted Pinterest board via the "Recently deleted" section - after that it is permanently gone with no exceptions, not even via Pinterest Support.
- Recovery only works on desktop (web) or Android - the iOS Pinterest app does not support board restoration, so use a computer or Android device.
- If the 7-day window has passed, check Google Cache, the Wayback Machine, or your email history for saved pin links - you can't restore the board, but you may recover some content manually.
Pinterest keeps deleted boards recoverable for exactly 7 days before they're gone permanently. Here's how to restore yours - and what to try if the window has already passed.
## How to Recover a Deleted Board (Within 7 Days)
According to [Pinterest's official Help Center](https://help.pinterest.com/en/article/archive-or-delete-a-board), deleted boards are stored in the "Recently deleted" section for 7 days before permanent deletion.
### Desktop (Personal Account):
1. Log in to [pinterest.com](https://pinterest.com)
2. Click your **profile picture** (top right)
3. Click the **Saved** tab
4. Scroll down to **"Recently deleted boards"** section
5. Click **Restore Boards**
6. Select the board you want to recover
7. Click **Restore**
The board will immediately return to your profile page.
### Desktop (Business Account):
1. Log in to Pinterest
2. Click your **profile photo** (top right)
3. Navigate to the **Saved** tab
4. Scroll down to **"Recently deleted"** section
5. Click **Restore boards**
6. Select the board
7. Click **Restore**
### Android:
1. Open the Pinterest app
2. Tap your **profile picture** (bottom right)
3. Tap **Boards**
4. Scroll down to **"Recently deleted"** section
5. Tap **Restore**
6. Tap the board you want to restore
7. Tap **Restore** to confirm
### iOS (iPhone/iPad):
**Important:** According to Pinterest's official documentation, you **cannot restore boards on iOS devices**. You must use a desktop computer or Android device to recover deleted boards.
## What Happens After 7 Days?
**After 7 days, boards are permanently deleted.** There is no way to recover them through Pinterest's system. The platform does not store deleted boards beyond this grace period.
When a board is permanently deleted:
- All pins on the board are removed
- Board name and description are lost
- Collaborators lose access
- Board URL becomes inactive
- Content cannot be recovered through Pinterest
## Board Missing? Check These First
Before assuming your board was deleted, check these common causes:
### 1. Archived Boards
Pinterest allows you to archive boards. Archived boards are hidden from your public profile but not deleted.
**To find archived boards:**
**Desktop:**
- Go to your profile → Saved tab
- Scroll down to **"Archived boards"** section
- Look for your missing board
**Mobile:**
- Tap profile picture → Boards tab
- Scroll down to **"Archived boards"** section
**To unarchive:** Open the archived board → Three dots (...) → Unarchive
### 2. Wrong Pinterest Account
Many users have multiple Pinterest accounts (email, Facebook, Google, Apple sign-in). You might be logged into the wrong account.
**Check if you're on the right account:**
- Log out
- Try logging in with different methods:
- Email/password
- Facebook
- Google
- Apple
### 3. Group Board Removal
If the missing board was a **group board** (shared with others):
**You may have been removed by the board owner**, or **you left the board accidentally**.
**To rejoin:**
- Ask the board owner to re-invite you
- Once accepted, the board will reappear
- Check your email for the invitation
### 4. Pinterest Removed the Board
If your board violated Pinterest's Community Guidelines, it may have been removed by Pinterest.
**Check your email** for a message from Pinterest explaining why the board was removed. Subject line typically says: "We removed your board."
## Alternative Recovery Methods (After 7 Days)
If the 7-day window has passed, these methods might help recover some content-but not the full board structure:
### Method 1: Email Backup Links
When you share a board via email or social media, Pinterest sends a notification with the board link.
**Steps:**
1. Search your **email inbox** for the board name
2. Look for Pinterest notifications or share confirmations
3. Click the link in the email
4. If you see "This board has been deleted," there may be a **Restore** button (only within 7 days)
5. After 7 days, you can't restore but you might see the board URL for reference
### Method 2: Google Cache/Wayback Machine
If your board was public and popular, Google or the Wayback Machine might have cached it.
**Google Cache:**
1. Search Google for: `site:pinterest.com [your board name] [your username]`
2. Look for cached results
3. Click the three dots next to results → "Cached"
**Wayback Machine:**
1. Go to [web.archive.org](https://web.archive.org)
2. Enter your board's URL: `pinterest.com/[username]/[board-name]`
3. Check if there are saved snapshots
4. You can view and manually save pin images (but not restore the board)
### Method 3: Browser History
If you viewed pins from that board recently:
1. Check your **browser history** (Ctrl+H or Cmd+Y)
2. Search for "pinterest.com"
3. Find pins from the deleted board
4. Manually re-save them to a new board
### Method 4: Screenshots or Local Downloads
If you downloaded pins from the board or took screenshots:
- Check your **Downloads** folder
- Check **Screenshots** folder
- Look in cloud storage (Google Photos, iCloud)
## Archive vs. Delete: Know the Difference
| Feature | Archive | Delete |
|---------|---------|--------|
| **Visibility** | Hidden from public profile | Removed entirely |
| **Pins** | All pins preserved | All pins deleted |
| **Recovery** | Instant, anytime | 7 days only |
| **Board URL** | Still active | Becomes inactive |
| **Collaborators** | Retain access | Lose access |
| **Best for** | Temporary hiding | Permanent removal |
**Use Archive if:** You want to hide the board temporarily but keep the content.
**Use Delete if:** You're certain you never want the board again.
## How to Prevent Accidental Deletion
**1. Use Archive or make the board secret instead of deleting** if you're unsure - learn [how to make a board on Pinterest private](https://www.genviral.io/blog/how-to-make-a-board-on-pinterest-private) to hide it without the 7-day recovery risk
**2. Download your Pinterest data regularly:**
- Settings → Privacy and data → Request download of my data
- Pinterest will email you a file with all your pins and boards
**3. Create board backups:**
- Take screenshots of important boards
- Export pin links to a spreadsheet
- Save shared board links in your email
**4. Enable two-factor authentication** to prevent unauthorized deletions
**5. Double-check before confirming deletion** - Pinterest asks you to confirm twice
## Common Questions
**Can I recover a board after 7 days?**
No. Pinterest permanently deletes boards after 7 days. The "Recently deleted" section is the only official recovery method. After that window closes, the board is gone from Pinterest's servers.
**Why can't I see the "Recently deleted" section?**
If you haven't deleted any boards in the past 7 days, this section won't appear. It only shows up when there are deleted boards waiting to be recovered or permanently removed.
**Can I recover boards on my iPhone?**
No. According to Pinterest's official documentation, board recovery is only available on desktop (web browser) or Android devices. iOS users must access Pinterest through a web browser on a computer or use an Android device.
**What happens to pins when a board is deleted?**
All pins on the deleted board are also deleted. However, if other users saved (repinned) those pins to their own boards, their copies remain unaffected. Only your original board and your pins are removed. If you need to remove individual pins instead of entire boards, see our guide on [how to delete Pinterest pins](https://www.genviral.io/blog/how-to-delete-a-pinterest-pin). For pins you've saved from others, see [how to unsave pins on Pinterest](https://www.genviral.io/blog/how-to-unsave-pins-on-pinterest). To recreate pins after recovering a board, see our guide on [how to make a pin on Pinterest](https://www.genviral.io/blog/how-to-make-a-pin-on-pinterest). For step-by-step instructions on deleting boards, see our guide on [how to delete a Pinterest board](https://www.genviral.io/blog/how-to-delete-a-board-on-pinterest).
**Can I recover a board someone else deleted from a group board?**
No. Only the board owner can delete and restore boards. If someone deleted a group board you collaborated on, ask the owner to restore it within the 7-day window. After 7 days, even the owner cannot recover it.
**Does Pinterest support restore deleted boards beyond 7 days?**
No. Pinterest does not offer extended recovery options. Pinterest Support cannot retrieve boards deleted more than 7 days ago-the 7-day limit is firm and automated.
**Can I restore specific pins instead of the whole board?**
No. The "Recently deleted" section only allows full board restoration. Individual pins cannot be recovered once a board is deleted. You must restore the entire board or lose everything.
**Why was my board deleted automatically?**
Pinterest may delete boards that violate Community Guidelines (spam, copyright infringement, inappropriate content). You'll receive an email notification explaining the violation. Boards deleted by Pinterest cannot be restored, even within 7 days.
## What You Lose When a Board Is Permanently Deleted
After 7 days, these items are permanently lost:
- **All pins** on the board (images, videos, descriptions)
- **Board name** and description
- **Board category** and settings
- **Follower count** for that board
- **Collaborator access** (for group boards)
- **Board URL** (becomes a dead link)
- **Pin organization** within sections
- **Comments** on pins in that board
You **cannot recover:**
- The board structure
- Pin order and organization
- Board followers
- Engagement metrics
## Bottom Line
Pinterest gives you a **7-day grace period** to restore deleted boards through the "Recently deleted" section. This feature only works on desktop or Android-not on iOS devices. After 7 days, boards are permanently deleted with no recovery options.
If you're not sure whether to delete a board, use the **Archive** feature instead - or consider [merging it into another board](https://www.genviral.io/blog/how-to-merge-pinterest-boards) so you keep the pins without the clutter. Archived boards can be unhidden anytime without any consequences. Always double-check before confirming deletion, and consider downloading your Pinterest data regularly as a backup. If you just need to delete individual pins rather than whole boards, see the pin deletion guide linked above. To view content you've interacted with, see [how to see liked pins on Pinterest](https://www.genviral.io/blog/how-to-see-liked-pins-on-pinterest). For organizing your boards and pins effectively, see our [Pinterest tips and tricks guide](https://www.genviral.io/blog/pinterest-tips-and-tricks) and [Pinterest posting strategy](https://www.genviral.io/blog/pinterest-posting-strategy). To expand your reach, learn how to [find group boards on Pinterest](https://www.genviral.io/blog/how-to-find-group-boards-on-pinterest). For creating interactive collages, see [how to make Pinterest collage](https://www.genviral.io/blog/how-to-make-pinterest-collage).
---
*Want to organize your Pinterest better? Looking to manage your Pinterest content efficiently? [Genviral](https://genviral.io) helps you schedule and organize your Pinterest strategy across all your boards.*
---
Canonical HTML: https://www.genviral.io/blog/how-to-recover-deleted-pinterest-boards
# How to Repost on TikTok (2026 Guide)
- To repost: open any video, tap the Share arrow, and tap "Repost." The video appears on your followers' For You Page with your profile photo attached - it does not appear on your profile grid.
- Reposts give full credit to the original creator, all engagement (likes, comments, shares) stays on their post, and you can find your reposts in a dedicated Repost tab on your profile.
- To undo a repost: tap the Share arrow on the same video and tap "Remove repost" - the video is immediately removed from your followers' feeds.
TikTok's Repost feature lets you recommend videos to your followers without the video appearing on your own profile grid. Here's how it works and how to undo it.
## What Is Reposting on TikTok?
Reposting lets you share videos from other creators with your followers. It's TikTok's version of retweeting.
**Key points:**
- Reposted videos appear on your followers' For You feed
- Your profile photo and name appear on the video showing you reposted it
- The original creator keeps full credit
- Reposts don't appear on your main profile grid
- You can find your reposts in the Repost tab on your profile
Think of it like recommending a video to everyone who follows you.
## How to Repost on TikTok
**Method 1: Using the Share Button**
1. Open the TikTok app
2. Find a video you want to repost
3. Tap the **Share** button (arrow icon on the right side)
4. Tap **Repost** (yellow button)
5. Optional: Add a comment before reposting
**Method 2: Press and Hold**
1. Find a video you want to repost
2. Press and hold on the video
3. Tap **Repost** from the menu
**Method 3: From a Friend's Repost**
1. See a video a friend reposted
2. Tap their profile photo on the video
3. Tap **Repost**
**Done!** The video will now appear on your followers' For You Pages.
## Adding a Comment to Your Repost
You can add context or your thoughts when reposting:
1. After tapping Repost, look for the comment option
2. Type your comment (appears with your repost)
3. Tap the send/confirm button
Your comment shows alongside your profile when followers see the reposted video.
## How to Remove a Repost
Changed your mind? Here's how to undo a repost:
**Method 1: Via Share Button**
1. Find the video you reposted
2. Tap the **Share** button
3. Tap **Remove repost** (same spot where Repost was)
**Method 2: Press and Hold**
1. Find the reposted video
2. Press and hold on the video
3. Tap **Remove repost**
**Method 3: From Your Profile**
1. Go to your Profile
2. Tap the **Repost tab** (two arrows icon)
3. Find the video
4. Tap your profile photo on the video
5. Tap **Reposted** → **Remove repost**
The video will no longer appear as your repost on followers' feeds.
## Where to Find Your Reposts
Your reposts are stored in a dedicated tab on your profile:
1. Go to your Profile
2. Look for the **Repost tab** (two arrows icon below your bio)
3. Tap it to see all videos you've reposted
- For finding drafts instead, see [where to find TikTok drafts](https://www.genviral.io/blog/where-to-find-tiktok-drafts)
This tab is visible to others (unless you have a private account).
## What Happens When You Repost
**What your followers see:**
- The reposted video appears on their For You Page
- Your profile photo shows above the video
- A label indicates you reposted it
- They can see any comment you added
**What the original creator sees:**
- They do NOT get a notification that you reposted
- Reposts don't show as a separate metric in their analytics
- They only know if you're mutuals and see it on your profile
**Where reposts appear:**
- Your followers' For You feeds
- Friends' For You feeds (people you may know)
- Your Repost tab on your profile
- NOT on your main profile video grid
## Repost Privacy Settings
**Public account:**
- Anyone can see your Repost tab
- Reposts appear to all followers' feeds
**Private account:**
- Only approved followers can see your reposts
- Reposts only appear to your followers
**Adjusting repost visibility:**
1. Go to Profile → Settings and privacy
2. Tap **Privacy**
3. Find **Repost** settings
4. Adjust who can see your reposts
You can also prevent others from reposting YOUR videos:
1. Go to Settings and privacy → Privacy
2. Tap **Repost**
3. Toggle off **Video reposts**
## Why Can't I Repost on TikTok?
**Common reasons:**
**1. Creator disabled reposts**
Some creators turn off reposting for their videos. If you don't see the Repost option, the creator has disabled it.
**2. App needs updating**
Update TikTok to the latest version in the App Store or Google Play.
**3. Feature not available yet**
TikTok rolls out features gradually. If you don't have the repost button, check back later.
**4. Private account restrictions**
You can't repost videos from private accounts unless you follow them.
**5. Account restrictions**
If your account has been restricted for violating guidelines, some features may be limited.
**6. Clear cache and restart**
- For account limits that can block actions, see [why can't I follow people on TikTok](https://www.genviral.io/blog/why-cant-i-follow-people-on-tiktok)
*To clear TikTok cache:*
1. Go to Profile → Three lines (☰) → Settings and privacy
2. Tap **Cache & Cellular** → **Free up space**
3. Tap **Clear**
4. Restart the app
## Repost vs. Other Sharing Options
| Feature | What It Does | Where It Appears |
|---------|--------------|------------------|
| **Repost** | Shares to followers' FYP | Followers' For You feed |
| **Share to Story** | Adds video to your Story | Your Story (24 hours) |
| **Send to Friend** | DMs the video | Private message |
| **Copy Link** | Copies video URL | Anywhere you paste it |
| **Duet** | Creates split-screen video | Your profile as new video |
| **Stitch** | Uses clip in your video | Your profile as new video |
**Repost** is the quickest way to share without creating new content.
## How to Repost to Your TikTok Story
TikTok also lets you share videos to your Story:
1. Find a video you want to share
2. Tap the **Share** button
3. Tap **Repost to Story** (or "Add to Story")
4. Customize in the Story editor if desired
5. Post to your Story
The video appears in your Story for 24 hours.
## Can You Repost Your Own TikTok Videos?
The repost button is designed for sharing OTHER creators' content. However, if you want to reshare your own video:
**Option 1: Share to Story**
- Tap Share on your video → Add to Story
**Option 2: Reupload**
- Download your video → Upload as a new post
**Option 3: Pin the video**
- Go to your video → Tap three dots → Pin
- Pinned videos appear at the top of your profile
There's no native "repost your own video to FYP" feature, but these alternatives help boost visibility.
## Tips for Effective Reposting
**Do:**
✓ Repost content relevant to your audience
✓ Add comments to provide context
✓ Use reposts to support creators you admire
✓ Repost trending content to stay relevant
✓ Mix reposts with your original content
**Don't:**
✗ Spam reposts (too many floods your followers' feeds)
✗ Repost without watching the full video
✗ Repost content that doesn't align with your brand
✗ Expect the original creator to know you reposted
## Benefits of Reposting
**For you:**
- Stay active without creating new content
- Share valuable content with followers
- Build relationships with other creators
- Curate content for your audience
- Keep your followers engaged
**For the original creator:**
- Extended reach to new audiences
- More views on their video
- Potential new followers
- Community support
**For your followers:**
- Discover new content
- See your recommendations
- Find creators they might like
## Common Questions
**Does the creator know I reposted their video?**
No. TikTok doesn't send notifications when someone reposts your video. The only way they'd know is if they're your mutual and see it in your Repost tab or their followers' feeds.
**Do reposts show on my profile?**
Not on your main video grid. Reposts appear in a separate Repost tab on your profile. Others can see this tab unless you have a private account.
**Can I see who reposted my video?**
Not directly. TikTok doesn't provide a list of who reposted your content. Reposts are grouped with shares in analytics, not tracked separately.
**How do I stop people from reposting my videos?**
Go to Settings and privacy → Privacy → Repost → Toggle off "Video reposts." Others won't see the Repost option on your videos.
**Can I repost on desktop/computer?**
The repost feature is primarily available in the mobile app. Desktop functionality may be limited.
**Do reposts count as views for the creator?**
Yes. When your followers watch the reposted video, it counts as views for the original creator.
**Can I repost a video multiple times?**
No. You can only repost a video once. If you've already reposted it, you'll see "Remove repost" instead of "Repost."
**Why did my repost disappear?**
If the original creator deletes their video or makes their account private, the repost will no longer be available.
**Can I schedule reposts?**
No. TikTok doesn't have a native scheduling feature for reposts. You can only repost in real-time.
**Is there a limit to how many videos I can repost?**
TikTok doesn't publish an official limit, but excessive reposting in a short time may be flagged as spam. Use the feature naturally.
## Repost Not Working: Troubleshooting
**Step 1: Update the app**
- Go to App Store/Google Play → Search TikTok → Update
**Step 2: Clear cache**
- Settings and privacy → Cache & Cellular → Free up space → Clear
**Step 3: Check your connection**
- Ensure stable internet connection
**Step 4: Restart the app**
- Force close TikTok and reopen
**Step 5: Reinstall if needed**
- Delete and reinstall the app (you won't lose your account)
**Step 6: Check account status**
- Make sure your account isn't restricted
If the repost button still doesn't appear, the feature may not be available in your region yet.
## The Bottom Line
**To repost on TikTok:**
1. Find a video
2. Tap Share (arrow icon)
3. Tap Repost
**Key points:**
- Reposts appear on followers' For You Pages
- Original creator gets credit (and views)
- Creator doesn't get notified
- Find your reposts in the Repost tab on your profile
- Remove reposts anytime via Share → Remove repost
**Best uses:**
- Share content you love with followers
- Support other creators
- Stay active without creating new videos
- Curate valuable content for your audience
Reposting is a simple way to engage with the TikTok community while sharing great content with your followers.
For more TikTok tips, see [how to make money with TikTok](https://www.genviral.io/blog/how-to-make-money-with-tiktok), [how to add link to TikTok bio](https://www.genviral.io/blog/how-to-add-link-to-tiktok-bio), [how to get Spark Code on TikTok](https://www.genviral.io/blog/how-to-get-tiktok-spark-code), [where to find TikTok drafts](https://www.genviral.io/blog/where-to-find-tiktok-drafts), [how to see saved videos on TikTok](https://www.genviral.io/blog/how-to-see-saved-videos-on-tiktok), [how to block someone on TikTok](https://www.genviral.io/blog/how-to-block-someone-on-tiktok), [why can't I follow people on TikTok](https://www.genviral.io/blog/why-cant-i-follow-people-on-tiktok), and [how to delete your TikTok account](https://www.genviral.io/blog/how-to-delete-tiktok-account).
---
*Want to stay on top of trending TikTok content? [Genviral](https://genviral.io) helps you discover what's performing well across TikTok and other platforms - so you know what to create and what to share with your audience.*
---
Canonical HTML: https://www.genviral.io/blog/how-to-repost-on-tiktok
# How to Repost a Story on Instagram (3 Methods That Work)
- You can only officially repost a Story if someone tagged you in it - check your DMs for the mention notification, then tap "Add This to Your Story."
- If you weren't tagged, there's no native repost function - you'd need to screen-record and re-upload as a new Story, which doesn't credit the original creator.
- Stories you're tagged in expire from your reshare window after 24 hours - repost quickly or the option disappears from your notification.
## Method 1: Repost When You're Tagged (Official Method)
**This only works if:**
- Someone tagged you in their story
- Their account is public (or you follow them if private)
- They haven't disabled resharing in settings
### Steps:
1. **Check your DMs** - You'll get a notification: "@username mentioned you in their story"
2. **Tap the message** - Opens a preview of their story
3. **Tap "Add This to Your Story"** - Opens the story editor
4. **Customize (optional)** - Add text, stickers, GIFs, or filters
5. **Tap "Your Story"** to post
**Important:** According to [Instagram's Help Center](https://help.instagram.com/1013375002134043), you can only reshare if the account is public and they've allowed resharing. You have 24 hours to repost before the story expires.
The original creator's username stays visible automatically - don't cover it.
## Method 2: Repost Your Own Old Stories (From Archive)
Want to reshare one of your past stories? Instagram saves them in Archive.
### Steps:
1. Go to your profile → Tap the **menu (☰)** in top right
2. Select **Archive**
3. Make sure it says **"Stories Archive"** at the top (tap to switch if needed)
4. Find the story you want to repost
5. Tap it → Tap **Share** at the bottom
6. Choose **Your Story** or send to specific people
7. Customize and post
**Note:** Stories in Archive remain forever (unlike regular stories that disappear after 24 hours). You can repost them anytime.
## Method 3: Repost When You're NOT Tagged (Manual Method)
**You can't use Instagram's built-in feature if you weren't tagged.** Here are two workarounds:
### Option A: Screenshot or Screen Record
**For photos:**
1. Open the story you want to repost
2. Take a screenshot (varies by device)
3. Upload to your story from gallery
4. **Add credit** - Tag the original creator
**For videos:**
1. Open the story
2. Use your phone's screen recording feature
3. Upload the recording to your story
4. **Add credit** - Tag the original creator
**Critical:** Always ask permission first and give proper credit. Not doing so violates copyright and Instagram's community guidelines.
### Option B: Repost Feed Posts to Stories
If someone posted something to their feed (not a story), you can share it:
1. Find the post in your feed
2. Tap the **paper airplane icon** (Share button)
3. Select **"Add post to your story"**
4. Customize with text or stickers
5. Tap **Your Story** to post
Instagram automatically tags the original poster. This works for both single photos and carousel posts.
## Why You Can't Repost a Story
If you're tagged but can't repost, here's why:
**The account is private** and you don't follow them
- Solution: Follow them and wait for approval. If you're concerned about your own privacy settings, see our following list privacy guide below.
**Resharing is disabled** in their privacy settings
- Solution: Ask them to enable it or use screenshot method (with permission)
**The story expired** (older than 24 hours)
- Solution: Ask them to repost it or use Archive if it's your own
**You're using an outdated app**
- Solution: Update Instagram to the latest version
**The original story has restrictions**
- Some business/creator accounts disable story resharing
## Repost Etiquette & Best Practices
### Always Get Permission
Message the creator before reposting their content, especially for:
- Private accounts
- Personal or sensitive content
- Content you plan to use for business/marketing
### Give Proper Credit
- Keep the original username visible
- Add an extra mention/tag if you've cropped or edited
- Write a caption thanking or acknowledging them
### Don't Overdo It
Balance reposted content with original stories. Aim for:
- 70% original content
- 30% reposted/user-generated content
For optimal story engagement, aim for 1-2 Stories daily minimum (ideally 4+ for established accounts). Learn more about optimal posting frequency to balance Stories with feed posts and Reels.
### Customize Thoughtfully
Add value when reposting:
- Your reaction or commentary
- Context for why you're sharing
- Brand colors/fonts (for businesses)
- A question to drive engagement
## Common Questions
**Can I repost from the desktop version of Instagram?**
No. Instagram's desktop version doesn't support story reposting. You must use the mobile app.
**Does the original creator get notified when I repost their story?**
Yes, when you use Instagram's native "Add to Your Story" feature, they receive a notification that you've shared their story.
Story visibility is separate from profile browsing. If you are trying to understand what Instagram does and does not reveal when you view someone's profile, read [how to turn off profile views on Instagram](https://www.genviral.io/blog/how-to-turn-off-profile-views-on-instagram).
**Can I repost someone's story if they have a private account?**
Only if you follow them and they've approved you. Private accounts still allow tagged followers to repost unless they've disabled resharing entirely.
**How long do I have to repost a story I'm tagged in?**
24 hours from when they posted it. After that, the story expires and you can't repost it using Instagram's feature.
**What about third-party repost apps?**
They exist (like "Repost for Instagram" or "Story Reposter"), but:
- Many add watermarks or ads
- Some violate Instagram's terms of service
- They pose security risks by requiring login access
- Instagram may restrict or ban accounts using them
Manual methods (screenshot/screen record) are safer if you need to repost without a tag.
**Can I repost a story to my feed instead of my story?**
Not directly. You can:
- Screenshot the story
- Crop and edit it
- Post as a regular feed post
- Always credit the creator in the caption
**Do reposted stories count toward my 24-hour limit?**
Instagram doesn't have a strict limit on story posts per day, but excessive posting (100+ in quick succession) may trigger spam filters. Reposted stories count the same as original ones.
**Can I repost a Reel to my story?**
Yes! Tap the paper airplane icon under any Reel, then select "Add to Story." Instagram will show a preview of the Reel with the creator's username.
## Why Repost Stories?
**Build community** - Shows you value your followers' content
**Increase engagement** - User-generated content gets 28% higher engagement than brand content
**Save time** - Fills content gaps without creating from scratch
**Strengthen partnerships** - Great for brand collaborations and influencer marketing
**Social proof** - Customer testimonials and reviews in story format
**Extend content life** - Give feed posts a second chance by sharing to stories
For businesses especially, reposting user-generated content (UGC) is powerful. It builds trust, provides social proof, and encourages more customers to create content about your brand. Combine this with a consistent [posting frequency](https://www.genviral.io/blog/how-often-should-you-post-on-instagram) strategy for maximum impact. To turn your presence into income, see [how to make money with Instagram](https://www.genviral.io/blog/how-to-make-money-with-instagram).
---
## More Instagram Guides
- [How to Make a Reel on Instagram](https://www.genviral.io/blog/how-to-make-a-reel-on-instagram) - create Reels that get views
- [How Many Photos Can You Post on Instagram](https://www.genviral.io/blog/how-many-photos-can-you-post-on-instagram) - carousel and posting limits
- [Switch to Personal Account on Instagram](https://www.genviral.io/blog/switch-to-personal-account-instagram) - personal vs business accounts
- [Hide Your Instagram Following List](https://www.genviral.io/blog/hide-instagram-following-list) - privacy controls
- [How to Clear Instagram Cache](https://www.genviral.io/blog/how-to-clear-instagram-cache) - safely reclaim phone storage
*Looking to maximize your Instagram strategy? Want to maintain a consistent posting schedule without the daily grind? [Genviral's Instagram Scheduler](https://www.genviral.io/instagram-scheduler) lets you schedule stories in advance so you never miss a posting opportunity.*
---
Canonical HTML: https://www.genviral.io/blog/how-to-repost-story-on-instagram
# How to See Liked Pins on Pinterest
- Pinterest removed the like button in 2017 - saved pins (boards) replaced likes as the primary way to bookmark content you want to revisit.
- Your pre-2017 likes were moved to a private board called "Your Pinterest Likes" which is only visible to you - check your boards list to find it.
- Reactions (heart emoji) are still available, but only on pins in group boards and certain video or Story pins - they are not equivalent to the old public like system.
Pinterest removed the like button entirely in 2017 - which catches a lot of users off guard. Here's what replaced it and how to find your old liked pins.
## Why Pinterest Removed the Like Button
In April 2017, Pinterest eliminated the like button entirely. According to [Pinterest's official announcement](https://newsroom.pinterest.com/en/post/say-hello-to-an-improved-save-button), users were confused about the difference between "Save" and "Like," so Pinterest streamlined to just one action: **Save**.
**What changed:**
- **Before 2017:** You could both "Like" (heart icon) and "Save" (pin icon) content
- **After 2017:** Only "Save" button remains for regular pins
- **2019 Update:** Pinterest brought back reactions, but only for group boards and certain video/Story pins
## How to View Your Saved Pins (The New "Likes")
Since Pinterest removed likes, **saving pins to boards** is now the primary way to bookmark content you love.
### Desktop:
1. Log in to [pinterest.com](https://pinterest.com)
2. Click your **profile picture** (top right)
3. Click **Saved** tab
4. Browse all your boards and saved pins
### Mobile:
1. Open the Pinterest app
2. Tap your **profile picture** (bottom right)
3. Tap **Saved** tab
4. View all boards and pins you've saved
## What Happened to Old Likes?
When Pinterest removed the like button in 2017, all previously liked pins were automatically moved to a **secret board called "Your Pinterest Likes"** that only you can see.
**To find this board:**
1. Go to your profile
2. Scroll down to **Secret boards** section
3. Look for a board named **"Your Pinterest Likes"**
**Note:** This board only exists if you liked pins before June 2017. New users won't have it. If you can't find a board you're looking for, it may have been deleted - you have 7 days to recover it. See our guide on [how to recover deleted Pinterest boards](https://www.genviral.io/blog/how-to-recover-deleted-pinterest-boards). To create new pins to save, check out our guide on [how to make a pin on Pinterest](https://www.genviral.io/blog/how-to-make-a-pin-on-pinterest).
## Reactions on Pinterest (Limited Feature)
Pinterest does have a "reaction" feature, but it's **not the same as the old likes** and only works on specific content.
### Where Reactions Appear:
According to [Pinterest's Help Center](https://help.pinterest.com/en/article/reactions), you can react to:
- **Story Pins** (video format)
- **Video Pins**
- **Group board pins** (collaborative boards)
**You CANNOT react to:**
- Regular image pins
- Video ads or promoted content
- Most standard pins in your feed
### How to React:
**Desktop:**
- Click the **heart icon** at the top of an eligible pin
- Hold to see reaction options (for group boards)
**Mobile:**
- Tap the **reaction-heart icon**
- Hold to choose from reactions: heart, clap, lightbulb, question mark, thumbs down
**Important:** According to Pinterest, reactions **do not save the pin**. If you want to see it later, you must save it to a board.
## How to View Your Pinterest Activity History
While you can't see a list of "liked" pins, you can view pins you've recently looked at.
### View Recent Activity:
**Desktop:**
1. Log in to Pinterest
2. Click **Settings** (gear icon)
3. Select **Tune your home feed**
4. View **"Pins you looked at"** section (shows last 30 days)
**Mobile:**
1. Open Pinterest app
2. Tap **profile picture** → **three lines menu** (top right)
3. Tap **Settings**
4. Select **Tune your home feed**
5. View recent activity
**Note:** This shows viewing history, not likes or reactions.
## Search for Specific Saved Pins
If you're looking for something you saved but can't remember which board:
1. Use the Pinterest **search bar**
2. Type keywords related to the pin
3. Look for a filter option **"Saved by you"** or **"Your Pins"**
4. This shows only content you've saved
## Difference: Reactions vs. Saved Pins
| Feature | Reactions | Saved Pins |
|---------|-----------|------------|
| **Purpose** | Share opinion/feedback | Bookmark for later |
| **Visibility** | Others can see who reacted | Others can see your boards (unless secret) |
| **Saves the pin?** | NO - does not save | YES - saves to board |
| **Where available** | Video Pins, Story Pins, group boards only | All pins |
| **View your history** | Can't see list of reactions given | Can view all boards |
| **Still exists?** | Yes (limited) | Yes (main feature) |
## Common Questions
**Can I see a list of pins I've reacted to?**
No. According to user reports and Pinterest's current system, there's no dedicated section to view all pins you've reacted to. Reactions are meant as quick feedback, not bookmarks. If you want to see a pin again, save it to a board.
**What's the difference between saving and reacting?**
Saving adds a pin to one of your boards so you can find it later. Reacting is just expressing an opinion (like, love, question, etc.) but doesn't save the pin. Think of reactions like Instagram story reactions-they're fleeting.
**Can I still see who reacted to my pins?**
Yes, if you're a business account. Tap the **reaction-heart icon** on your pin to see who reacted and what reactions they used. Personal accounts can see reaction counts but limited details.
**Why can't I react to most pins?**
Pinterest only enables reactions on video content, Story Pins, and group board pins. The feature is not available on standard image pins in your main feed. This is intentional-Pinterest wants the focus on saving, not passive engagement.
**How do I view pins I saved a long time ago?**
Go to your profile → Saved tab → scroll through your boards. You can also organize boards chronologically by editing board settings, or use the search function with keywords to find specific saved pins.
**Is there a "Your Pinterest Likes" board for reactions?**
No. The "Your Pinterest Likes" board only contains likes from before 2017. Current reactions are not collected anywhere-they're just engagement signals, not saved bookmarks.
**Can I turn my "Your Pinterest Likes" board public?**
Yes. If you have this secret board, you can change its settings to make it public. Go to the board → three dots (...) → Board settings → toggle "Keep this board secret" off. This lets others see what you liked pre-2017. To go the other direction with any other board, see [how to make a board on Pinterest private](https://www.genviral.io/blog/how-to-make-a-board-on-pinterest-private).
**How far back does Pinterest activity history go?**
Pinterest's "Tune your home feed" section typically shows pins you've viewed in the last 30 days. Older viewing history is not accessible through Pinterest's interface.
## Why the Change Matters
Pinterest's shift from likes to saves reflects its positioning as a **visual discovery and planning tool** rather than a traditional social network. The company wants users to:
- Save actionable ideas (recipes, DIY, inspiration)
- Organize content into boards
- Actually use the content, not just passively scroll
This approach differentiates Pinterest from platforms like Instagram or Facebook where likes are central to engagement.
## Alternatives to "Liking" Pins
Since you can't like pins in the traditional sense:
**If you want to bookmark:** Save to a board (create a general "Inspiration" or "To Review Later" board)
**If you want to show appreciation:**
- Leave a comment
- React (if available on that pin type)
- Save the pin (creators get notified)
**If you want to organize loosely:** Create a secret board called "Quick Saves" or "Maybe" for pins you're not sure about yet. If you need to remove pins you've saved, see our guide on [how to unsave pins on Pinterest](https://www.genviral.io/blog/how-to-unsave-pins-on-pinterest). For more organization strategies, see our [Pinterest tips and tricks guide](https://www.genviral.io/blog/pinterest-tips-and-tricks) and [Pinterest posting strategy](https://www.genviral.io/blog/pinterest-posting-strategy). To expand your reach, consider joining [group boards on Pinterest](https://www.genviral.io/blog/how-to-find-group-boards-on-pinterest). For creating interactive collages with your saved pins, see [how to make Pinterest collage](https://www.genviral.io/blog/how-to-make-pinterest-collage). If your boards are overlapping after months of saving, see [how to merge Pinterest boards](https://www.genviral.io/blog/how-to-merge-pinterest-boards) to consolidate.
## Bottom Line
Pinterest doesn't have traditional "likes" anymore-it's all about **saving pins to boards**. Reactions exist but are limited to specific pin types and don't save content. If you're looking for that recipe, DIY idea, or travel destination you "liked," check your saved boards instead. That's where all your Pinterest bookmarks live now. If AI-generated content is cluttering your feed, learn [how to turn off AI posts on Pinterest](https://www.genviral.io/blog/how-to-turn-off-ai-posts-on-pinterest). Ready to monetize? See [how to make money with Pinterest](https://www.genviral.io/blog/how-to-make-money-with-pinterest).
---
*Looking to optimize your Pinterest strategy? Need help managing multiple accounts? [Genviral's Scheduler](https://www.genviral.io/pinterest-scheduler) helps you schedule and organize Pinterest content across all your boards.*
---
Canonical HTML: https://www.genviral.io/blog/how-to-see-liked-pins-on-pinterest
# How to See Saved Videos on TikTok (2026 Guide)
- Saved (favorited) videos live in the Favorites section of your profile - tap the bookmark or flag icon below your bio to access them.
- You can organize saved videos into Collections (custom folders) - tap + inside Favorites to create a new Collection and keep content categorized by topic.
- Favorites are private by default - only you can see what you've saved unless you change visibility settings in your privacy options.
All videos you've saved on TikTok are stored in your Favorites section, accessible directly from your profile. You can also organize them into Collections to keep everything easy to find.
## Where Are Saved Videos on TikTok?
Saved videos are in your **Favorites** section on your profile.
**Location:**
- Profile page → Below bio → **Favorites icon** (bookmark/flag symbol)
- Appears between your profile info and video grid
- Shows all videos you've bookmarked
## How to See Saved Videos on Mobile
**Step 1:** Open TikTok app
**Step 2:** Tap "Profile" (Me)
- Bottom-right corner
- Note: If you're having account issues, see [why can't I follow people on TikTok](https://www.genviral.io/blog/why-cant-i-follow-people-on-tiktok)
**Step 3:** Find the Favorites icon
- Below your profile bio
- Looks like a bookmark or flag
- Located next to other profile icons
**Step 4:** Tap the Favorites/bookmark icon
**Step 5:** View your saved videos
- All bookmarked videos appear here
- Scroll through the list
**Done.** All your saved TikToks in one place.
## How to Save Videos to Favorites
**While watching a video:**
**Step 1:** Tap the bookmark icon
- Right side of screen
- Below the share button
- Looks like a flag or ribbon
**Step 2:** Video is instantly saved
- Icon turns yellow/gold
- No confirmation needed
**Step 3:** (Optional) Choose a Collection
- Tap "Add to Collection"
- Select existing collection or create new one
**That's it.** The video is now in your Favorites.
## How to See Saved Videos on Desktop
**Step 1:** Go to tiktok.com
- Log in to your account
**Step 2:** Click your profile picture
- Top-right corner
**Step 3:** Look below your profile info
**Step 4:** Click "Favorites"
- Under your username/bio
**Step 5:** View saved videos
- All bookmarked content appears
**Note:** Desktop has limited features compared to mobile app.
## Understanding Favorites vs Likes
**Favorites (Bookmarks):**
- ✓ Private by default (only you see them)
- ✓ Organized in one place
- ✓ Can create Collections
- ✓ Use: Save for later viewing
- Icon: Bookmark/flag
**Liked videos:**
- ✓ Shows on your profile (public)
- ✓ Influences your For You page
- ✓ Shows algorithm your interests
- ✓ Use: Support creators + personalize feed
- Icon: Heart
**Key difference:** Favorites are for organization, Likes are for engagement.
## How to Organize Saved Videos with Collections
Collections help you categorize saved videos by topic.
### Create a Collection
**Step 1:** Go to Favorites
**Step 2:** Tap "Collections" tab
- At the top of the Favorites page
**Step 3:** Tap "+ Create new collection"
**Step 4:** Name your collection
- Examples: "Recipes", "Workouts", "Comedy", "DIY"
**Step 5:** Choose privacy
- **Private:** Only you can see
- **Public:** Others can view
**Step 6:** Tap "Create"
### Add Videos to a Collection
**Method 1: While saving**
- Tap bookmark icon
- Tap "Add to Collection"
- Select collection
**Method 2: From Favorites**
- Go to Favorites
- Tap video you want to organize
- Tap three dots (...)
- "Add to Collection"
- Choose collection
### Manage Collections
**View a collection:**
- Favorites → Collections tab → Tap collection name
**Remove video from collection:**
- Open collection → Tap "Manage" → Select videos → Remove
**Delete a collection:**
- Collections tab → Hold collection name → "Delete"
## What Else Can You Save on TikTok?
Besides videos, you can save:
**Sounds:**
- Tap sound name on video → "Add to Favorites"
**Effects:**
- Tap effect icon on video → "Add to Favorites"
**Hashtags:**
- Tap hashtag → "Add to Favorites"
**Comments:**
- Long-press comment → "Add to Favorites"
**Locations:**
- Tap location pin → "Add to Favorites"
**Products (TikTok Shop):**
- Tap product tag → Bookmark icon
**Access all saved items:**
- Favorites → Tabs for Videos, Sounds, Effects, etc.
## Can't Find the Bookmark Icon?
**Common reasons:**
### 1. Update needed
- Update TikTok to latest version
- App Store/Play Store → Update
- Note: Region settings may affect app features (see [how to change TikTok account region](https://www.genviral.io/blog/how-to-change-tiktok-account-region))
### 2. Feature moved
- TikTok changes UI frequently
- Check right side of video for bookmark
- Look for flag/ribbon icon
### 3. Technical glitch
- Close and restart app
- Clear cache: Settings → Clear cache
- Reinstall app if problem persists
### 4. Account issue
- Some accounts may have features temporarily hidden
- Usually returns after app update
**Current location (2026):** Bookmark icon is on the right side of videos, below the share button.
## How to Find Specific Saved Videos
**If you have many saved videos:**
**Use Collections:**
- Organize by category from the start
- Makes finding specific videos easier
**Search within Favorites:**
- Some TikTok versions allow search
- Look for search bar at top of Favorites
**Remember creator:**
- Tap video → See creator's name
- Visit their profile to find it
**Check watch history:**
- Profile → Settings → Privacy → Watch history
- Shows recently watched (even if not saved)
## Are Saved Videos Private?
**Yes, by default.**
**Privacy details:**
- Favorites are private (only you see them)
- Others cannot see what you've saved
- Unless you make a Collection public
**To make a Collection public:**
- Create/edit collection → Toggle "Public"
- Others can then view that collection on your profile
**Liked videos are public** and show on your profile (unless you change privacy settings).
## What Happens If Creator Deletes Video?
**Video disappears from your Favorites.**
- If creator deletes their video, it's removed from TikTok entirely
- Also disappears from your saved list
- No way to recover it
**Tip:** Download important videos to your device as backup. For managing your unpublished content, see [where to find TikTok drafts](https://www.genviral.io/blog/where-to-find-tiktok-drafts).
## How to Download Saved Videos
To keep a permanent copy:
**Step 1:** Open saved video
**Step 2:** Tap "Share" button
**Step 3:** Tap "Save video"
**Step 4:** Video downloads to camera roll
**Note:**
- Some videos can't be downloaded (creator's setting)
- Downloaded videos may have watermark
- Respect copyright when reusing content
- For creating your own content, see [how to make a slideshow on TikTok PC](https://www.genviral.io/blog/how-to-make-a-slideshow-on-tiktok-pc)
## Troubleshooting
**Favorites not showing:**
- Update app
- Restart app
- Clear cache
- Check internet connection
**Videos disappeared:**
- Creator may have deleted them
- Check if you're in correct account
- Look in correct tab (Videos vs Sounds vs Effects)
**Can't save videos:**
- Check bookmark icon exists on video
- Update app
- Some videos may have saving disabled by creator
**Collections not working:**
- Feature may be rolling out gradually
- Update to latest version
- Try on mobile (desktop has fewer features)
## Common Questions
**How many videos can I save?**
No official limit, but thousands of saved videos may slow the app.
**Can I save videos from private accounts?**
Only if you follow them and they've approved you.
**Do creators know when I save their video?**
No. Saving to Favorites is private. (Different from Likes, which they can see.)
**Can I share my Collections?**
Yes, if you make them public. Others can then view and save from your collection.
**What's the difference between "Save video" and bookmark?**
"Save video" downloads to device. Bookmark saves to TikTok Favorites (stays online).
**Can I access saved videos without internet?**
No. Favorites require internet. Download videos to watch offline.
**Are saved videos backed up?**
No. They're tied to your account. If you delete your account, saved videos are gone.
**Can I save videos in multiple Collections?**
Not currently. Each video can only be in one Collection at a time.
**Why did TikTok move the Favorites location?**
TikTok frequently updates its interface. Features move around as the app evolves.
**Can I export my list of saved videos?**
Not directly through TikTok. Third-party tools may offer this, but use caution. For creating AI-generated images for your content, see [how to create TikTok slideshow images with AI](https://www.genviral.io/blog/create-tiktok-slideshow-images-with-ai).
## The Bottom Line
Finding saved TikTok videos:
**Mobile:** Profile → Favorites icon (bookmark) → View videos
**Desktop:** Profile → Favorites → View videos
**Best practices:**
- Use Collections to organize by category
- Keep Favorites private or make specific collections public
- Download important videos as backup
- Regularly review and remove old saves
Saved videos make it easy to revisit content you love without endless scrolling. For adding a link to your bio, see [how to add link to TikTok bio](https://www.genviral.io/blog/how-to-add-link-to-tiktok-bio). For sharing others' videos, see [how to repost on TikTok](https://www.genviral.io/blog/how-to-repost-on-tiktok). For growth strategies, see [TikTok growth strategies for SaaS](https://www.genviral.io/blog/tiktok-growth-strategies-for-saas), and for targeting specific audiences, see [how to target US users on TikTok](https://www.genviral.io/blog/target-us-users-on-tiktok). For managing unwanted interactions, see [how to block someone on TikTok](https://www.genviral.io/blog/how-to-block-someone-on-tiktok). To boost your own content, check out [how to get a TikTok Spark Code](https://www.genviral.io/blog/how-to-get-tiktok-spark-code) and [how to make money with TikTok](https://www.genviral.io/blog/how-to-make-money-with-tiktok). If you're closing the account entirely, save your favorites first - see [how to delete your TikTok account](https://www.genviral.io/blog/how-to-delete-tiktok-account).
---
*Want a better way to organize and schedule your TikTok content? [Genviral](https://genviral.io) helps you plan and post across all social platforms with cloud-based content management-so you never lose track of what you want to share.*
---
Canonical HTML: https://www.genviral.io/blog/how-to-see-saved-videos-on-tiktok
# How to See Who Shared My Post on Facebook (2026 Guide)
- Click the share count number (e.g. "5 Shares") below your post to see who shared it - but only people who shared publicly and whose privacy settings allow it will appear.
- Many shares are hidden by Facebook's privacy system: friends-only shares, private group shares, and Messenger shares all count toward the total number but won't show individual names.
- The share count shown is always accurate (includes all shares), but the name list is always incomplete due to privacy restrictions - there's no way to see 100% of sharers.
You can see who shared your Facebook post, but Facebook's privacy system means the list is always incomplete. Here's how to check - and exactly what the share count does and doesn't show you.
## Understanding Facebook Share Visibility
Before learning how to check, you need to understand what Facebook will and won't show you.
**What you CAN see:**
- ✅ Total number of shares (all shares counted)
- ✅ Names of people who shared publicly
- ✅ Public shares from friends
- ✅ Shares visible based on mutual privacy settings
**What you CANNOT see:**
- ❌ People who shared to "Friends Only"
- ❌ Shares in private groups you're not in
- ❌ Shares via Messenger (doesn't count as a share)
- ❌ Shares to custom audiences that exclude you
- ❌ Shares from people who blocked you
- ❌ Shares to Stories (tracked separately)
**The critical point:** If your post shows "20 Shares" but you only see 4 names, this is completely normal. The other 16 people shared privately, and Facebook protects their privacy.
## Why Share Counts and Visible Names Don't Match
This is the #1 source of confusion. Here's exactly how it works:
### The Share Count Includes:
- Public shares
- Friends-only shares
- Custom audience shares
- Group shares (public and private)
- Story shares (sometimes)
**Total:** All shares, regardless of privacy
### The Visible Names Show:
- ONLY public shares
- ONLY shares where you're in the audience
- ONLY shares from non-blocked users
**Result:** Usually 20-40% of total shares
### Example Scenario:
Your post has **10 shares**:
- 2 people shared publicly → **You can see their names**
- 5 people shared to "Friends" → **Hidden from you**
- 2 people shared in a private group → **Hidden from you**
- 1 person sent via Messenger → **Doesn't count, so actually 9 shares**
You see: "9 Shares" with only 2 names visible.
**This is normal.** Facebook prioritizes user privacy over share transparency.
## How to See Who Shared Your Post (Desktop)
Desktop works for personal profile posts, but the UI is inconsistent and **often does not show a sharers list at all** - especially on Page posts and in Facebook's newer UI rollouts. If desktop fails, jump to the mobile method below.
### Method 1: Click Share Count (Personal Profile Posts)
**Step 1:** Go to Facebook.com
- Log into your account
- Navigate to your profile or timeline
**Step 2:** Find Your Post
- Scroll to locate the post
- Or use search to find older posts
**Step 3:** Look Below the Post
- You'll see engagement metrics
- Look for the number next to the curved arrow icon
- Example: "7 Shares"
**Step 4:** Click the Share Number (not the icon)
- Click directly on the "7 Shares" *text*, not the arrow icon
- Clicking the arrow icon opens the "share this post yourself" menu instead - that is not what you want
- If the share count isn't separately clickable in your UI variant, this method won't work - use mobile
**Step 5:** View the List
- See names and profile pictures
- See when they shared
- See any comment they added
**If nothing appears or only the share menu opens:**
- You may be on a UI variant where the share count is not clickable on desktop
- The post is a **Page post** - desktop does not expose a sharers list for Page posts; use Meta Business Suite or mobile
- All shares were private (Friends-only, group, Messenger)
- The post has no public shares yet
### Method for Page Admins: Meta Business Suite
If the post is from a **Facebook Page** (you see "Boost post" or "See insights and ads" under it), the desktop post UI will not show you a sharers list. Use Business Suite instead:
- **Step 1:** Go to business.facebook.com and select your Page
- **Step 2:** Open **Content** → find the post
- **Step 3:** Open the post's insights and look for the **Shares** breakdown
- **Note:** You'll still only see public sharers; private shares remain hidden by Facebook
### Method 2: Check Notifications
**Step 1:** Click the Bell Icon
- Located at the top of Facebook
- Opens your notifications panel
**Step 2:** Look for Share Notifications
- Scroll through recent notifications
- Look for "[Name] shared your post"
- Click "See All" for older notifications
**Step 3:** Click the Notification
- Takes you to their shared version
- Shows any comments they added
**Note:** Only public shares generate notifications.
### Method 3: Check Email Notifications
If email notifications are enabled:
- **Step 1:** Open your email inbox
- **Step 2:** Search for "Facebook" or "shared"
- **Step 3:** Look for share notification emails
- **Step 4:** Click to see details
## How to See Who Shared Your Post (Mobile)
The process is nearly identical on iPhone and Android - and in many cases mobile is **more reliable than desktop** for surfacing the sharers list.
### On iPhone:
**Step 1:** Open Facebook App
- Launch the app
- Ensure you're logged in
**Step 2:** Go to Your Profile
- Tap the menu icon (three lines) in bottom-right
- Tap your name/profile picture
**Step 3:** Find the Post
- Scroll through your timeline
- Or use search to find it
**Step 4:** Tap Share Count
- Below the post, tap the share number
- Example: "12 Shares"
**Step 5:** View Who Shared
- List appears with visible sharers
- Swipe to see all names
**If blank screen:**
- All shares are private
- Privacy restrictions
- App bug (update app)
### On Android:
**Step 1:** Open Facebook App
**Step 2:** Navigate to Profile
- Tap menu (three lines) in top-right
- Tap your profile picture
**Step 3:** Locate Post
- Find the specific post
**Step 4:** Tap Share Count
- Tap the number next to share icon
**Step 5:** See List
- View public sharers
- Scroll if multiple
### Check Notifications (Mobile):
**Step 1:** Tap the bell icon
**Step 2:** Scroll through notifications
**Step 3:** Look for "[Name] shared your post"
**Step 4:** Tap to view details
## How to See Who Shared Your Facebook Page Post
If you manage a Facebook Page, you have additional options.
### Method 1: Click Share Count (Same as Personal Posts)
1. Go to your Page
2. Find the post
3. Click share count
4. View public sharers
### Method 2: Use Meta Business Suite
**Step 1:** Go to business.facebook.com
- Sign in with your account
- Select your Page
**Step 2:** Click "Content" in Left Sidebar
**Step 3:** Select Your Post
- Choose the post you want to check
- Or filter by date range
**Step 4:** View Share Data
- See total shares
- Click for breakdown
- View public sharers
**Step 5:** Check Insights
- See share demographics
- View share trends over time
- Compare to other posts
**What Page Insights Show:**
- Total share count
- Demographics (age, gender, location)
- Share trends
- **Still doesn't show:** Private sharer names
## How to Check If a Specific Person Shared Your Post
Sometimes you want to know if one particular person shared it.
### Method: Check Their Timeline
**Step 1:** Go to Their Profile
- Search for their name
- Click on their profile
**Step 2:** Look Through Their Posts
- Scroll down their timeline
- Click "Posts" filter on left (if available)
**Step 3:** Look for Your Content
- If they shared it publicly, you'll see it
- It will appear as a shared post with your original content
**Step 4:** Verify It's Your Post
- Check the content matches
- See if they added any comment
**If you don't see it:**
- They didn't share it
- They shared it privately
- They deleted the share
- They shared to an audience that excludes you
## Why You Can't See Who Shared (Common Scenarios)
### Scenario 1: Shows "15 Shares" But No Names
**Why:** All 15 people shared privately.
**Breakdown:**
- 8 shared to "Friends Only"
- 4 shared in private groups
- 3 shared to custom lists
**Your view:** Share count only, no names
**Solution:** None. Privacy settings working as intended.
### Scenario 2: Clicking Share Count Shows Nothing
**Possible causes:**
1. All shares are private
2. App glitch
3. Browser cache issue
4. You're not included in any sharer's audience
**Solutions:**
- Refresh the page
- Try desktop if on mobile (or vice versa)
- Update Facebook app
- Clear browser cache
- Wait and check later
### Scenario 3: Some Names Appear, Others Don't
**Why:** Mixed privacy settings.
**Example:**
- 3 people shared publicly (you see them)
- 7 people shared privately (hidden)
**Result:** "10 Shares" with 3 visible names
### Scenario 4: Friend Says They Shared But You Can't See
**Possible reasons:**
- They shared to "Friends" (not public)
- They shared to their Story
- They sent it via Messenger
- They shared to a group
- They deleted the share
**How to verify:**
- Ask them to check their timeline
- Have them show you the share
- Ask how they shared it
### Scenario 5: Page Posts Show Fewer Names Than Personal Posts
**Why:** Facebook Pages have stricter visibility rules.
**Reality:**
- Page posts often show share counts only
- Fewer individual names displayed
- Use Meta Business Suite for better data
## Can You See Who Shared Privately? (The Truth)
**Short answer: No. Absolutely not.**
**Long answer:**
Many users ask:
- "How do I see hidden shares?"
- "Is there a trick to reveal private sharers?"
- "Can apps show me who shared privately?"
**The reality:**
❌ No legitimate method exists
❌ Third-party apps claiming to show this are scams
❌ Facebook's API blocks private share data
❌ No browser extensions work
❌ No hacks or workarounds exist
**Why Facebook hides this:**
Privacy is a core user right. If people knew their private shares would be exposed:
- They'd stop sharing content
- Trust in the platform would erode
- Privacy violations would occur
Facebook prioritizes individual privacy over content creator curiosity.
## How to Increase Visible Shares
Want to see MORE sharers? Optimize your privacy settings.
### 1. Make Your Post Public
**Before posting:**
- Select audience dropdown
- Choose **Public** instead of Friends
- Publish
**For existing posts:**
**Step 1:** Find the post
**Step 2:** Click three dots (•••)
**Step 3:** Select "Edit post"
**Step 4:** Change audience to **Public**
**Step 5:** Save
**Result:** Public posts get more public shares.
### 2. Encourage Public Sharing
In your post, write:
- "Please share publicly if you agree!"
- "Feel free to share this publicly"
Can't force it, but encouragement helps.
### 3. Use a Facebook Page
**For content creators:**
- Pages get better share visibility
- Access to Meta Business Suite insights
- Demographic data available
- More professional analytics
### 4. Enable Share Notifications
**Step 1:** Settings & Privacy → Settings
**Step 2:** Notifications
**Step 3:** Posts, Stories and Comments
**Step 4:** Enable share notifications
**Result:** Immediate alerts for public shares.
## Third-Party Tools: What Works and What Doesn't
### What Doesn't Work (Scams):
❌ Apps claiming to "reveal hidden sharers"
❌ Browser extensions for "secret share tracking"
❌ Websites asking for your login to "unlock shares"
❌ Tools promising "full share transparency"
**Why they're dangerous:**
- Steal your login credentials
- Install malware
- Violate Facebook's terms
- Don't actually work
### What Does Work (Legitimate):
✅ **Meta Business Suite** - Official Facebook tool for Pages
✅ **Facebook Page Insights** - Built-in analytics
✅ **Google Analytics** - Track link clicks with UTM parameters
✅ **Hootsuite/Buffer** - Track public engagement metrics
**What they show:**
- Public share counts
- Share demographics
- Engagement trends
- Referral traffic
**What they can't show:**
- Private sharer names
- Hidden share details
- Blocked user activity
## Common Questions
**Why does my share count keep changing?**
People are sharing and unsharing, deleted accounts are removed, or Facebook is updating the count. Share numbers fluctuate naturally.
**Can I see who shared my photo?**
Yes, same method as posts. Click the share count below your photo. Privacy rules apply the same way.
**Will I be notified every time someone shares?**
Only for public shares or shares where you're in their audience. Private shares don't trigger notifications.
**Can someone share my post without me knowing?**
Yes. If they share privately (friends, custom list, groups), you'll see the share count increase but won't see their name.
**Does Facebook hide shares intentionally?**
No. Facebook respects user privacy settings. If someone shares privately, their privacy settings prevent their name from appearing.
**Can I prevent people from sharing my posts?**
Yes. Set your post to "Only Me" to prevent all sharing. Or use "Friends" to limit sharing to your friend list only. For more control over who can interact with you, see [how to view blocked Facebook friends](https://www.genviral.io/blog/how-to-view-blocked-facebook-friends).
**What's the difference between resharing to Timeline vs. Story?**
Timeline shares appear in your share count and can show the sharer's name. Story shares are temporary, tracked separately, and don't always appear in share counts.
**Do shares in groups count toward the total?**
Yes, both public and private group shares count, but you'll only see names if you're in the group or the share was public.
**Can Facebook Page admins see more than personal profiles?**
Yes, admins get aggregate demographics via Insights, but they still can't see names of private sharers.
**Is there a limit to how many shares Facebook shows?**
There's no specific limit, but Facebook may truncate very long lists or show shares in batches. For hundreds of shares, you may not see all names even if they're public.
## The Bottom Line
Seeing who shared your Facebook post is possible for public shares only. Click the share count below your post to view names of people who shared publicly. However, most shares remain hidden due to privacy settings - this is by design, not a bug.
**Key takeaways:**
- **Share count ≠ visible names** - Count includes all shares, names show only public ones
- **Privacy is paramount** - You cannot bypass privacy settings
- **30-40% visibility is normal** - Seeing less than half of sharers is typical
- **Public posts help** - Set posts to Public for maximum transparency
- **No magic tools exist** - Legitimate tools respect privacy; others are scams
- **Pages get better data** - Use Facebook Pages for analytics if you're a creator
**Remember:** If someone wanted you to know they shared your post, they'd share it publicly. Respecting privacy settings maintains trust across Facebook's 3 billion users. For monetizing your presence, see [how to make money with Facebook](https://www.genviral.io/blog/how-to-make-money-with-facebook). For more Facebook account management tips, see our guides on [how to change email on Facebook](https://www.genviral.io/blog/how-to-change-email-on-facebook), [where to find scheduled posts on Facebook](https://www.genviral.io/blog/where-to-find-scheduled-posts-on-facebook), [how to find drafts on Facebook](https://www.genviral.io/blog/how-to-find-drafts-on-facebook), [how to lock Facebook account](https://www.genviral.io/blog/how-to-lock-facebook-account), [how to change name on Facebook](https://www.genviral.io/blog/how-to-change-name-on-facebook), [how to add admin to Facebook Page](https://www.genviral.io/blog/how-to-add-admin-to-facebook-page), and [how to comment anonymously on Facebook](https://www.genviral.io/blog/how-to-comment-anonymously-on-facebook).
---
*Want better insights into your Facebook content performance? [Genviral's Facebook Scheduler](https://www.genviral.io/facebook-scheduler) helps you schedule posts and track engagement metrics, showing you which content resonates most - helping you create more shareable posts naturally.*
---
Canonical HTML: https://www.genviral.io/blog/how-to-see-who-shared-my-post-on-facebook
# How to Turn Off AI Posts on Pinterest (2026 Update)
- You can't fully eliminate AI posts from Pinterest, but you can reduce them by opening **Refine your recommendations** and toggling off the **AI content** categories you do not want in your feed. Some accounts still label this area as **GenAI interests**.
- On desktop, the current flow is usually `Profile -> Settings -> Refine your recommendations -> AI content`, though some accounts still surface it from the bottom-left more-options menu. On mobile, open `Profile -> Settings -> Refine your recommendations -> AI content`.
- The change is not perfect or instant. Pinterest should start showing fewer AI Pins after the algorithm recalibrates, and you can reinforce it by using **See less like this** on individual Pins.
Pinterest has been flooded with AI-generated images, making it harder to find real, authentic inspiration. The good news is that Pinterest now gives you a direct way to reduce how much of that content shows up in your feed, and the video above walks through the exact taps on both desktop and mobile.
## The Quick Answer
**You can't completely eliminate AI posts on Pinterest**, but you can significantly reduce them using the **AI content** controls inside **Refine your recommendations**. Pinterest's current help documentation also still references **GenAI interests** on some surfaces, so if you do not see **AI content**, look for the older label instead.
## How to Turn Off AI Posts (Desktop)
### Steps:
1. Log in to Pinterest at [pinterest.com](https://pinterest.com)
2. Click on your profile in the top right.
3. Select **Settings**
4. Choose **Refine your recommendations**
5. Click the **AI content** tab
If you do not see that label, look for **GenAI interests** instead. Pinterest's official help still uses both names across devices and account types.
6. **Toggle OFF** all categories where you don't want AI content:
- Architecture
- Entertainment
- Female fashion
- Food and drinks
- Health
- Male fashion
- and any other categories Pinterest shows on your account
7. Pinterest should begin showing fewer AI Pins in those categories over time.
**If you do not see it under Settings:** Pinterest's [official Help Center](https://help.pinterest.com/en/article/tune-your-home-feed) still documents another desktop path: open the more-options menu in the bottom-left corner, then select **Refine your recommendations** directly.
## How to Turn Off AI Posts (Mobile - Android)
### Steps:
1. Open the Pinterest app
2. Tap your **profile picture** (bottom right)
3. Tap your **profile photo** again (top left)
4. Select **Refine your recommendations**
5. Tap the **AI content** tab
If your app still shows the older label, tap **GenAI interests** instead.
6. **Toggle OFF** each category you don't want AI content in
**For business accounts or the newer app layout:** Tap your profile → three dots in the top-right → **Settings** → **Refine your recommendations** → **AI content**
## How to Turn Off AI Posts (Mobile - iOS/iPhone)
### Steps:
1. Open the Pinterest app
2. Tap your **profile picture** (bottom right)
3. Tap your **profile photo** again (top left)
4. Select **Refine your recommendations**
5. Tap the **AI content** tab
If your app still shows the older label, tap **GenAI interests** instead.
6. **Toggle OFF** each category you don't want AI content in
**For business accounts or the newer app layout:** Tap your profile → three dots in the top-right → **Settings** → **Refine your recommendations** → **AI content**
## What Else You Can Do to Reduce AI Content
### 1. Stop Your Data from Training Pinterest's AI
Pinterest uses your saved content to train "Pinterest Canvas," their AI image generator. You can opt out:
**Desktop:**
1. Settings → **Privacy and data**
2. **Uncheck** "Use your data to train Pinterest Canvas"
3. Click **Save**
**Mobile (iOS & Android):**
1. Profile → Profile photo → **Privacy and data**
2. **Toggle OFF** "Use your data to train Pinterest Canvas"
**Note:** Users under 18 are automatically opted out and cannot opt in.
### 2. Hide Individual AI Pins
When you spot an AI-generated image:
1. Tap the **three dots (...)** on the Pin
2. Select **"Hide Pin"**, **"Not interested"**, or **"See less like this"**
This trains Pinterest's algorithm to show you less of that type of content.
**To remove AI pins you've already saved:** If you've saved AI-generated pins to your boards and want to remove them, see our guide on [how to unsave pins on Pinterest](https://www.genviral.io/blog/how-to-unsave-pins-on-pinterest).
### 3. Refine Other Recommendations
While in "Refine your recommendations," you can also:
- **Activity:** Turn off recommendations based on Pins you've viewed
- **Boards:** Turn off recommendations from specific boards
- **Interests:** Remove topics you no longer want to see
- **Following:** Review and unfollow accounts posting AI content
## How Pinterest Detects AI Content
According to [Pinterest's AI labeling documentation](https://help.pinterest.com/en/article/gen-ai-labels), Pinterest identifies AI-generated images by:
**Analyzing metadata** - Checking IPTC metadata standards that indicate AI generation
**Using classifiers** - Automated systems detect AI content even without metadata
**Labeling** - When detected, Pinterest shows an "AI modified" label at the bottom left when you click on a Pin
However, Pinterest acknowledges the system isn't perfect. In practice, AI images can still slip through, especially when creators remove metadata or when a generated image looks close enough to a real photo to avoid detection.
## Important Limitations
### You'll See Fewer, Not Zero, AI Posts
Pinterest's official language says you'll see **"fewer"** AI posts, not that they'll be completely eliminated. The system:
- Only reduces AI content in eligible image Pins
- Doesn't apply to all categories (some are missing)
- Depends on accurate AI detection
- Won't affect AI content in ads
That matches the real-world limitation shown in the video: a single image is much harder to classify than AI video, so some content will still get through.
### Categories Vary By Account
Pinterest does not show the exact same AI-content categories to every user. In the current UI, you may see categories such as:
- Architecture
- Entertainment
- Female fashion
- Food and drinks
- Health
- Male fashion
Other accounts may still show the earlier GenAI-interest category set instead. The important part is simple: turn off every category Pinterest gives you if you want the strongest filter.
### It Takes Time to Work
After turning off the AI-content settings:
- Allow **1-2 days** for the algorithm to adjust
- Continue hiding individual AI Pins to reinforce preferences
- The feed learns from your ongoing behavior
## Common Questions
**Why can't I see the AI content or GenAI interests option?**
Possible reasons:
1. **App needs updating** - Update to the latest Pinterest version from your app store
2. **Gradual rollout** - The feature may not have reached your account yet (try signing out and back in)
3. **Try desktop** - Access via web browser at pinterest.com instead
4. **Check both labels** - Settings → Refine your recommendations → **AI content** or **GenAI interests**
**Does this remove AI content from ads?**
No. The AI-content controls only apply to organic Pins, not paid advertising. Ads with AI content will still appear, but you can see if an ad was AI-generated by clicking "Why am I seeing this ad?"
**Can I turn AI content back on?**
Yes. Just go back to **AI content** or **GenAI interests** and toggle categories back ON if you want to see AI-generated content again.
**Will this affect pins I've already saved?**
No. This only controls what new content appears in your feed going forward. Pins you've already saved remain unchanged. If you want to keep a curated board of real, non-AI inspiration that only you can see, move it to a secret board - see [how to make a board on Pinterest private](https://www.genviral.io/blog/how-to-make-a-board-on-pinterest-private).
**Does turning this off help reduce AI content site-wide?**
It only affects your personal feed. Other users will still see AI content unless they adjust their own settings.
**What about AI-generated text or descriptions?**
These controls only apply to AI-generated images. Pinterest doesn't currently have filters for AI-written descriptions or captions.
**Can content creators appeal if their real photos get labeled as AI?**
Yes. According to [Pinterest's Gen AI labels documentation](https://help.pinterest.com/en/article/gen-ai-labels), if your authentic content gets incorrectly labeled as AI-generated, you can appeal through Pinterest's help center.
**Do these settings sync across devices?**
Yes. In the walkthrough above, changes made on desktop show up on mobile as well, and Pinterest should keep those recommendation settings synced across devices.
## Why Pinterest Added This Feature
In October 2024, Pinterest faced mounting criticism about the influx of AI-generated content - what users called "AI slop" - degrading the platform's core value of finding real-world inspiration.
According to Matt Madrigal, Pinterest's Chief Technology Officer:
*"With our new GenAI controls, we're empowering people to personalize their Pinterest experience more than ever - striking the right balance between human creativity and AI innovation."*
The platform acknowledged that **57% of all online content is now AI-generated**, and users demanded more control over their feeds.
## The Bottom Line
Turning off AI posts on Pinterest isn't perfect, but it's a significant improvement:
1. **Use the AI content or GenAI interests settings** to reduce AI Pins in the categories Pinterest offers on your account
2. **Opt out of AI training** to stop your content from training Pinterest Canvas
3. **Hide individual AI Pins** or tap **See less like this** to train the algorithm
4. **Give it time** - the algorithm needs 1-2 days to adjust
For the best results, combine all three methods and continue curating your feed by hiding AI content when you see it.
If you're looking for a specific pin you saved, check out our guide on [how to see liked pins on Pinterest](https://www.genviral.io/blog/how-to-see-liked-pins-on-pinterest) to find pins in your boards and activity history. To remove pins you no longer want, see [how to delete a Pinterest pin](https://www.genviral.io/blog/how-to-delete-a-pinterest-pin). To create high-quality, authentic pins that stand out from AI content, see our guide on [how to make a pin on Pinterest](https://www.genviral.io/blog/how-to-make-a-pin-on-pinterest) and our [Pinterest tips and tricks](https://www.genviral.io/blog/pinterest-tips-and-tricks) for design best practices. For creating interactive collages, see [how to make Pinterest collage](https://www.genviral.io/blog/how-to-make-pinterest-collage). To expand your reach, consider joining [group boards on Pinterest](https://www.genviral.io/blog/how-to-find-group-boards-on-pinterest). To clean up overlapping boards on your profile, see [how to merge Pinterest boards](https://www.genviral.io/blog/how-to-merge-pinterest-boards). Ready to monetize? See [how to make money with Pinterest](https://www.genviral.io/blog/how-to-make-money-with-pinterest).
---
*Want to optimize your Pinterest strategy? If you're managing multiple social platforms, [Genviral's Scheduler](https://www.genviral.io/pinterest-scheduler) helps you schedule pins and posts across all your accounts in one place.*
---
Canonical HTML: https://www.genviral.io/blog/how-to-turn-off-ai-posts-on-pinterest
# How to Turn Off Profile Views on Instagram (2026 Guide)
- Instagram does **not** have a TikTok-style Profile view history setting. People cannot open Instagram and see a normal list of everyone who viewed their profile.
- You can still reduce visibility by turning off **Activity Status**, making your account **private**, hiding Stories from specific people, or blocking accounts.
- Professional accounts may see aggregate profile activity in Insights, but they do not get a named list of profile viewers.
## Quick Answer
You cannot turn off profile views on Instagram the way you can on TikTok, because Instagram does not offer a public **Profile view history** feature.
If your goal is "do not let someone know I looked at their Instagram profile," there is no profile-view toggle to disable. Instagram does not show a normal list of profile visitors.
What you can turn off instead:
- **Activity Status:** hides when you are active or were recently active.
- **Private Account:** limits your posts, Reels, followers list, and following list to approved followers.
- **Story visibility:** stops selected people from seeing your future Stories and Lives.
- **Block:** prevents a specific account from seeing or interacting with your profile.
Instagram's official Help Center has a central page for [managing visibility and privacy on Instagram](https://help.instagram.com/116024195217477). The key thing to understand is that these are account privacy controls, not a profile-view-history switch.
If you came from our TikTok guide, this is the main difference: [TikTok has a Profile view history toggle](https://www.genviral.io/blog/how-to-turn-off-profile-views-on-tiktok). Instagram does not.
## Can People See If You View Their Instagram Profile?
No, not through a profile-viewer list.
Someone can usually see your activity only when you do something visible, such as:
- watching their Instagram Story
- joining or interacting with their Live
- liking a post
- commenting
- following them
- sending a DM
- reacting to a Story
- appearing in shared activity like tags, mentions, or mutual interactions
Simply opening someone's Instagram profile is different. Instagram does not give regular users a named "these people viewed your profile" list.
That is why a lot of Reddit threads about [Instagram profile views](https://www.reddit.com/search/?q=instagram%20profile%20views) get messy fast. People often mix up profile views, Story viewers, professional account Insights, suggested accounts, and third-party "profile viewer" apps. Treat forum answers as useful for spotting confusion, not as Instagram policy.
## What Instagram Does Show
Here is the practical split:
| Instagram area | Can they see your name? | What it means |
| --- | --- | --- |
| **Profile visit** | No normal viewer list | Opening a profile by itself does not expose you in a profile-view list |
| **Story view** | Yes | Story owners can see who viewed their Story |
| **Live interaction** | Yes | Joining or interacting can be visible |
| **Post/Reel view** | Usually no named viewer list | Creators see counts and aggregate performance, not every viewer's name |
| **Professional Insights** | No named profile-view list | Business/Creator accounts may see aggregate visits, reach, and engagement |
| **Activity Status** | Yes, if enabled | People you message may see when you are active or recently active |
So if you are trying to "turn off profile views on Instagram," the closest real privacy move is to turn off Activity Status and tighten who can see your account.
## Turn Off Activity Status on Instagram
Activity Status is not the same as profile views, but it is the setting people most often mean when they want to browse more privately.
On the Instagram app:
1. Open Instagram.
2. Tap your **profile picture** in the bottom-right corner.
3. Tap the **three lines** in the top-right corner.
4. Tap **Messages and story replies**.
5. Tap **Show Activity Status**.
6. Toggle **Show Activity Status** off.
When this is off, people you message should not see when you are active or recently active. The trade-off is reciprocal: you also lose the ability to see other people's activity status.
This does not hide Story views, likes, comments, follows, or DMs.
## Make Your Instagram Account Private
If you want fewer people to inspect your profile, make the account private.
On the Instagram app:
1. Open Instagram and go to your profile.
2. Tap the **three lines** in the top-right corner.
3. Tap **Account privacy**.
4. Toggle **Private account** on.
A private account means people must request to follow you. Non-followers can still see limited public profile information like your username, profile picture, bio, and follower/following counts, but they cannot freely browse your posts and Reels.
Private accounts are also the real fix if you are worried about people seeing your connections. We cover that in more detail in [how to hide your Instagram following list](https://www.genviral.io/blog/hide-instagram-following-list).
## What If You Have a Business or Creator Account?
Business and Creator accounts are built for reach and analytics, not maximum privacy. If you want to make your account private, you may need to [switch to a Personal account on Instagram](https://www.genviral.io/blog/switch-to-personal-account-instagram) first.
There is one important analytics detail: professional accounts can see aggregate performance, including profile activity in Insights or the Professional Dashboard. That does not mean they can see a named list of everyone who viewed the profile.
If you switch from professional to personal, you may lose access to Insights, ads, contact buttons, and scheduling features. Save anything important before changing account type.
## Hide Stories From Specific People
If the real problem is Story visibility, use Instagram's Story privacy settings.
On the Instagram app:
1. Open Instagram and go to your profile.
2. Tap the **three lines** in the top-right corner.
3. Tap **Hide story and live**.
4. Choose the people you want to hide future Stories and Lives from.
This does not erase past Story views. It only changes who can see your future Stories and Lives.
If you mostly use Stories for content distribution, read [how to repost a Story on Instagram](https://www.genviral.io/blog/how-to-repost-story-on-instagram) so you know which actions are visible and which ones are just sharing workflows.
## Block Someone If You Need Real Separation
If one specific person is the issue, blocking is stronger than changing general privacy settings.
To block someone:
1. Open their Instagram profile.
2. Tap the **three dots** in the top-right corner.
3. Tap **Block**.
4. Confirm.
Blocking prevents that account from seeing your profile in the normal way, messaging you, following you, or interacting with your content. If privacy concerns are severe enough that you are considering leaving the platform, compare this with [deleting or deactivating your Instagram account](https://www.genviral.io/blog/how-to-delete-instagram-account) before making the permanent move.
## Do Not Use Instagram Profile Viewer Apps
Avoid third-party apps or websites that claim they can show who viewed your Instagram profile.
They usually cannot deliver what they promise, and they can put your account at risk by asking for login access, scraping your data, or pushing you into suspicious downloads. This category has a long history of shady apps. Wired covered one example when a popular "who viewed your Instagram" style app was [pulled after security concerns](https://www.wired.com/story/malware-infected-instagent-pulled-from-app-store/).
If an app claims it can reveal secret Instagram profile viewers, treat it as a red flag.
## Instagram vs TikTok Profile Views
This keyword is confusing because TikTok and Instagram behave differently.
| Platform | Has a profile-view history toggle? | What to do |
| --- | --- | --- |
| **TikTok** | Yes | Turn off Profile view history from Viewers or Privacy settings |
| **Instagram** | No | Turn off Activity Status and tighten privacy settings instead |
On TikTok, profile views are a specific feature. On Instagram, "profile views" usually means one of three things: someone looked at your profile, Story viewer lists, or aggregate Insights on a professional account.
For the TikTok version, use our guide on [how to turn off profile views on TikTok](https://www.genviral.io/blog/how-to-turn-off-profile-views-on-tiktok).
## Common Questions
**Can I see who viewed my Instagram profile?**
No. Instagram does not provide a normal list of profile viewers.
**Can someone see if I viewed their Instagram profile?**
Not just from opening their profile. They may see you if you view their Story, interact with a Live, like, comment, follow, message, or otherwise take a visible action.
**Does turning off Activity Status hide profile views?**
No. Activity Status only hides active/recently active indicators. It does not affect Story views, likes, comments, follows, or DMs.
**Can Business accounts see who viewed their profile?**
They can see aggregate Insights, not a named list of every profile viewer.
**Can I turn off profile views on Instagram desktop?**
There is no profile-view setting on desktop because there is no Instagram profile-view-history feature to disable.
**Does making my account private hide my profile completely?**
No. A private account limits content visibility, but people may still see your username, profile picture, bio, and follower/following counts.
**Will blocking someone remove my past Story view?**
Do not rely on blocking as an undo button for past activity. It is best for stopping future access and interaction.
## The Bottom Line
You do not need to turn off profile views on Instagram because Instagram does not have a TikTok-style profile-view history feature.
For more privacy, do this instead:
1. Turn off **Activity Status**.
2. Make your account **private** if you do not need public reach.
3. Hide Stories and Lives from specific people.
4. Block accounts that should not see or contact you.
5. Avoid third-party "profile viewer" apps.
If you are cleaning up your Instagram privacy overall, start with [hiding your following list](https://www.genviral.io/blog/hide-instagram-following-list), [switching to a Personal account](https://www.genviral.io/blog/switch-to-personal-account-instagram), and [clearing Instagram cache](https://www.genviral.io/blog/how-to-clear-instagram-cache) if the app is behaving strangely after settings changes.
---
*Running Instagram as a creator or business? [Genviral's Instagram Scheduler](https://www.genviral.io/instagram-scheduler) helps you plan, schedule, and publish content consistently while you keep privacy-sensitive browsing separate from your posting workflow.*
---
Canonical HTML: https://www.genviral.io/blog/how-to-turn-off-profile-views-on-instagram
# How to Turn Off Profile Views on TikTok (2026 Guide)
- To turn off profile views on TikTok from your profile, tap the **Viewers** icon, tap the **gear icon**, then toggle **Viewer history** off.
- You can also go through **Profile -> Menu (three lines) -> Settings and privacy -> Privacy**, scroll to **Viewers**, then turn **Viewer history** off.
- When the setting is off, you cannot see who viewed your profile, and other eligible users should not see you in their Profile view history. It does **not** hide video views, likes, comments, follows, or messages.
TikTok's Profile view history feature is useful when you want to know who is checking your page. It is less fun when you are the one casually checking someone else's page and suddenly realize your visit may be visible too.
Here is the short version: turn off **Profile view history** before browsing profiles you do not want to appear on. If it was already on, assume your visit may have been visible if the other person also had the feature enabled.
## Quick Answer
Open TikTok on your phone, then go to:
**Method 1:** Profile -> **Viewers icon** -> **gear icon** -> **Viewer history** -> Off
**Method 2:** Profile -> **Menu (three lines)** -> **Settings and privacy** -> **Privacy** -> **Viewers** -> **Viewer history** -> Off
There does not appear to be a reliable desktop/PC path for this setting. Use the TikTok mobile app.
TikTok has an official Help Center page for [Profile view history](https://support.tiktok.com/en/account-and-privacy/account-privacy-settings/tiktok-profile-visit-history). The important privacy trade-off is simple: profile views are reciprocal. If you want to see who viewed you, you have to allow eligible people to see when you viewed them.
## Method 1: Turn Off Profile Views From Your Profile
This is the fastest path if the **Viewers** icon is visible on your profile.
1. Open the TikTok app.
2. Tap **Profile** in the bottom-right corner.
3. Tap the **Viewers** icon near the top-right of your profile. It looks like small footprints.
4. On the **Profile views** screen, tap the **gear icon** in the top-right corner.
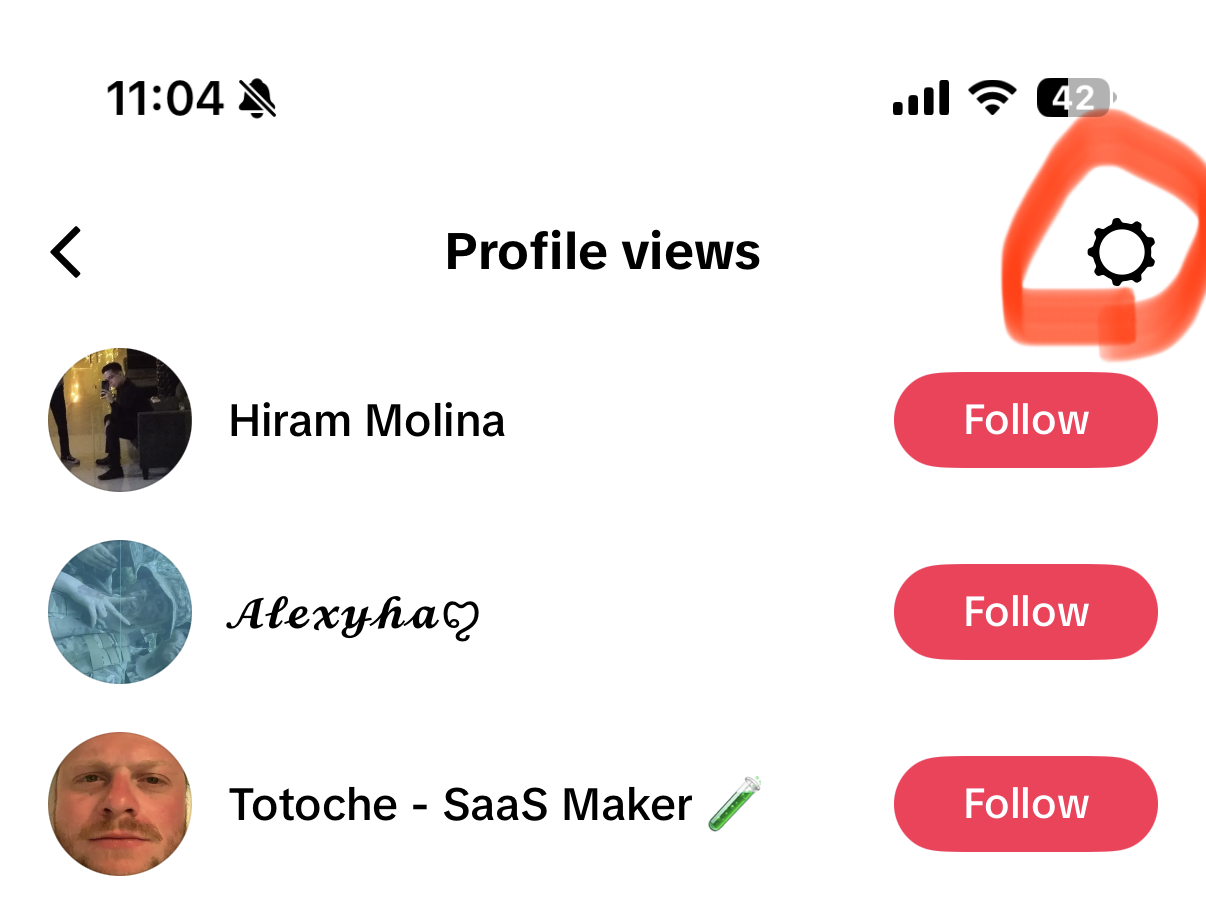
5. Toggle **Viewer history** off.
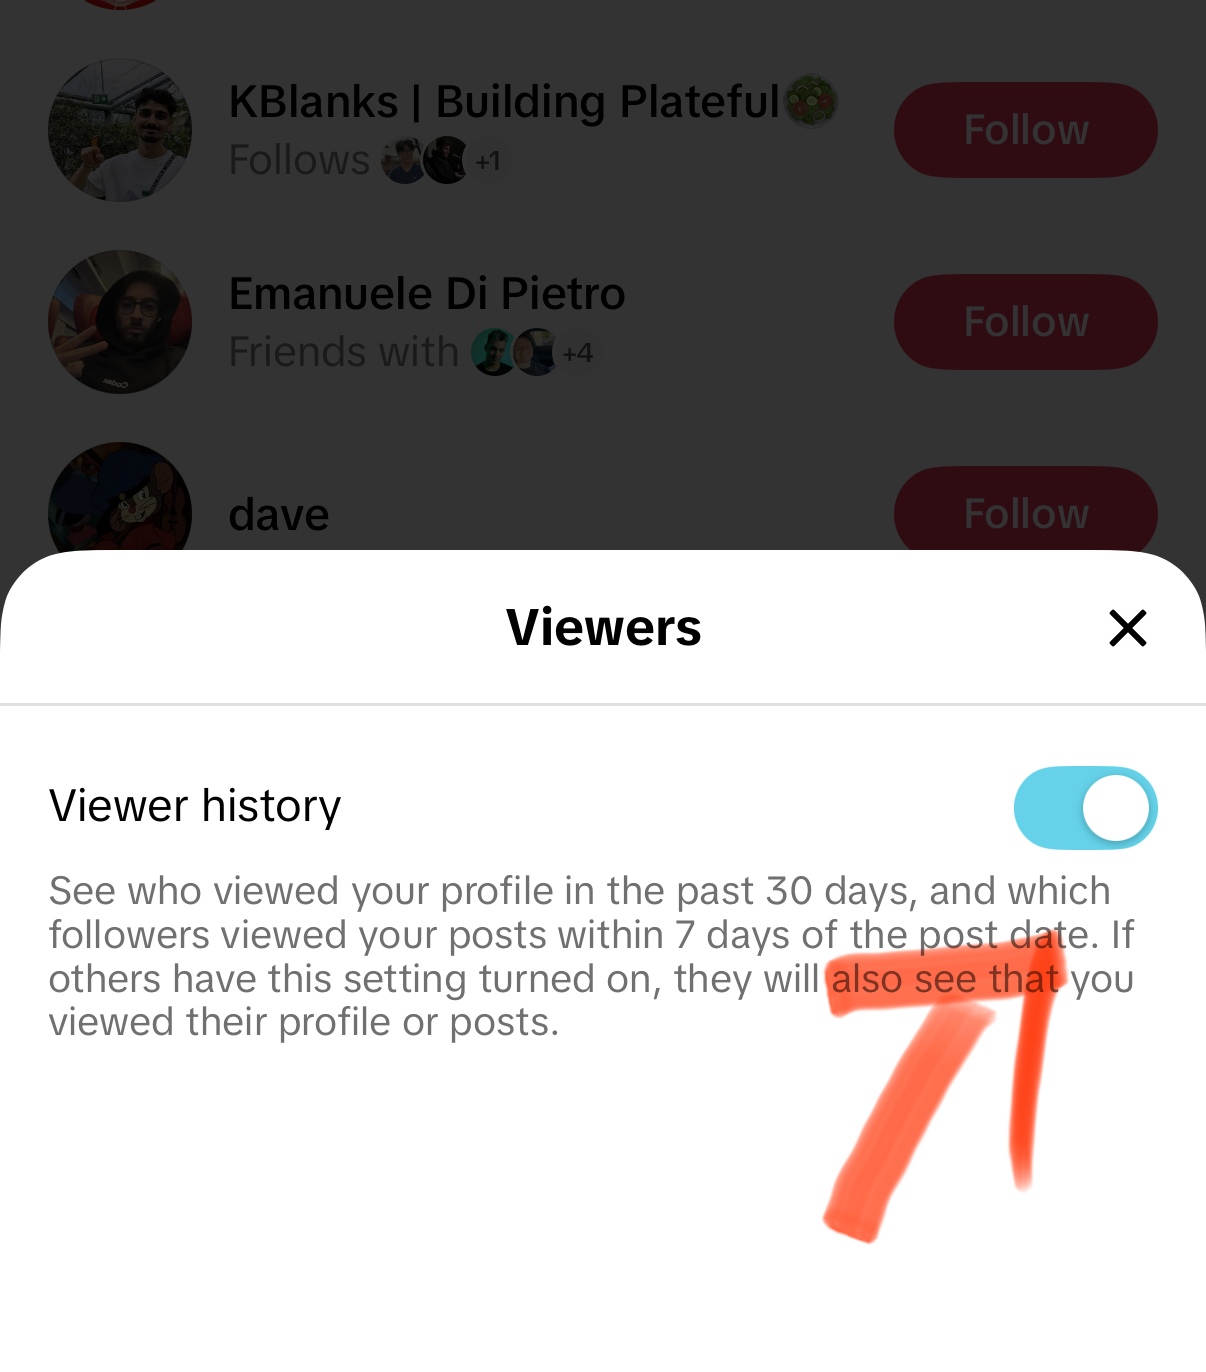
Once the toggle is off, TikTok will stop showing your profile view list. You can turn it back on later from the same screen.
## Method 2: Turn Off Profile Views From Settings and Privacy
Use this path if you do not want to open the Profile views list first.
1. Open TikTok and tap **Profile**.
2. Tap the **Menu** icon, the three lines in the top-right corner.
3. Tap **Settings and privacy**.
4. Tap **Privacy**.
5. Scroll down to **Viewers** and tap it.
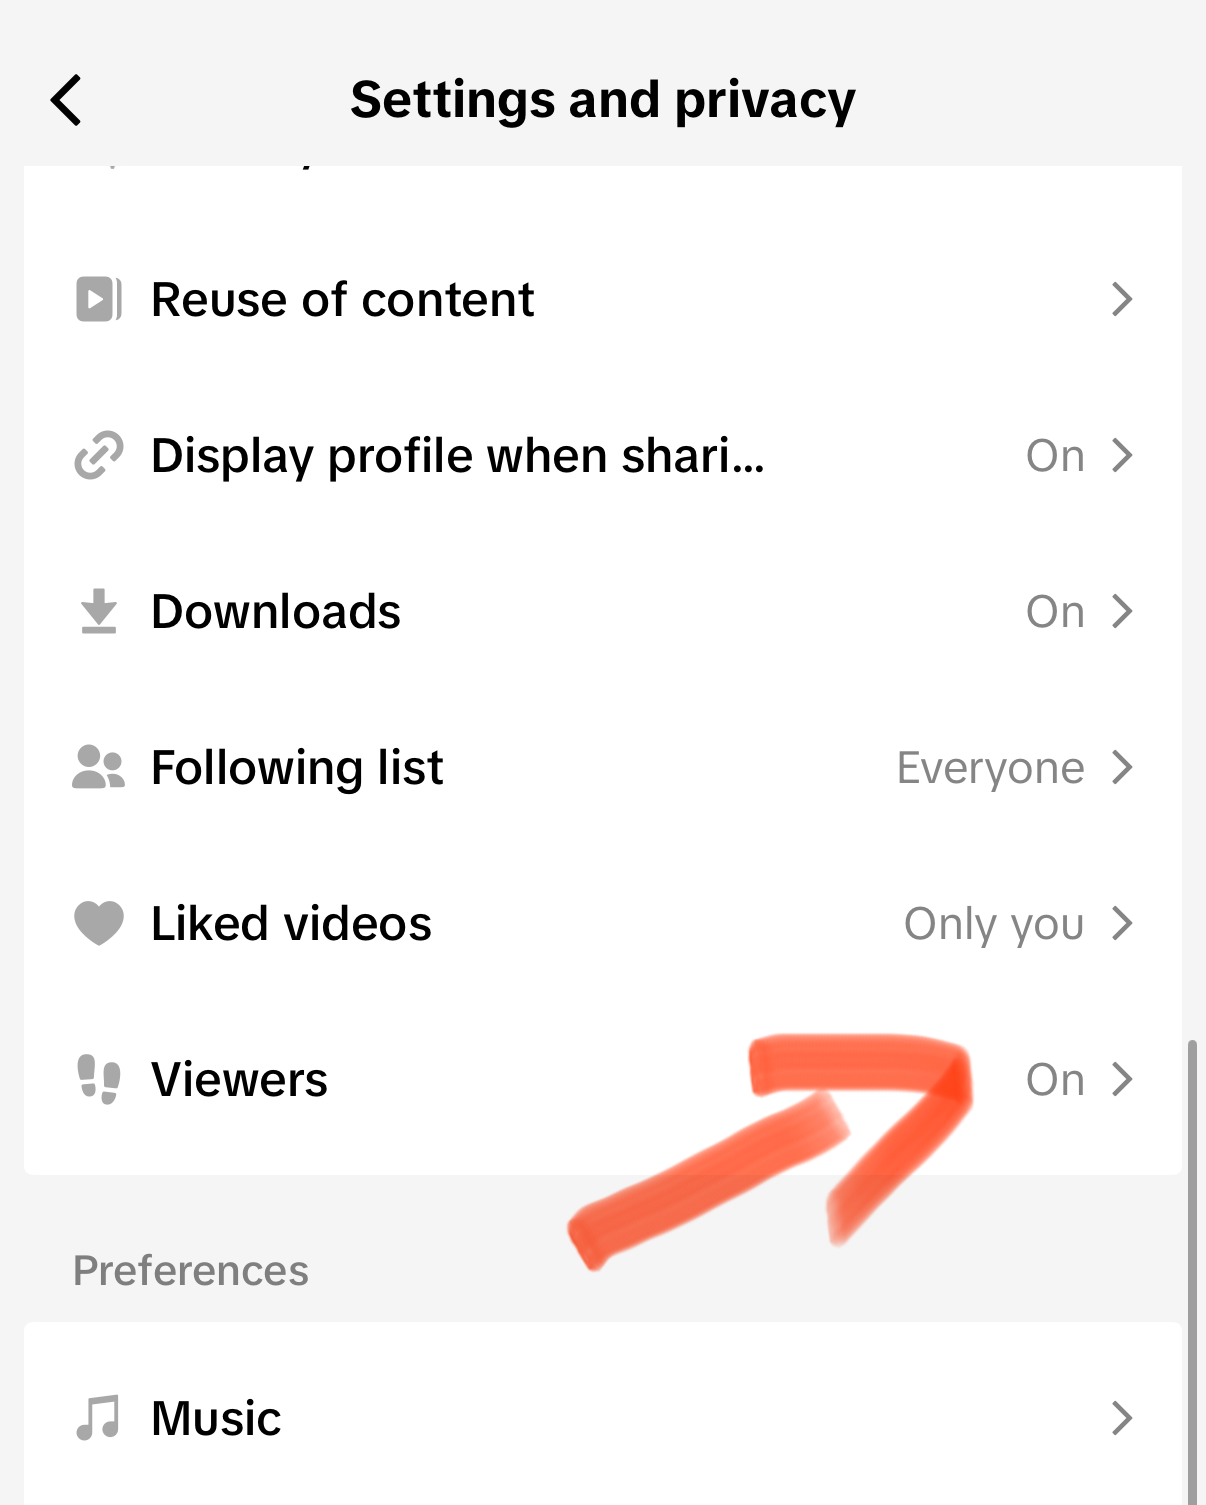
6. Toggle **Viewer history** off.
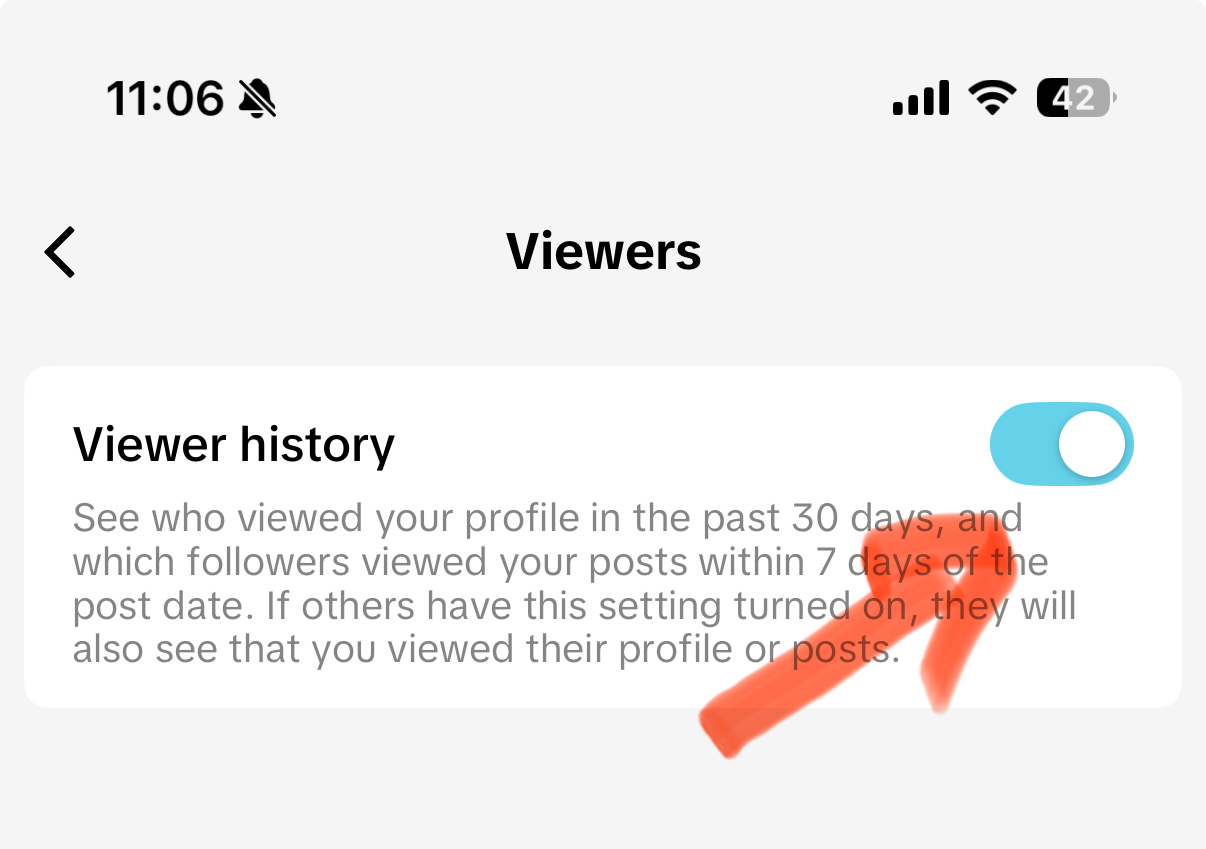
This is the same setting as Method 1, just reached through the full privacy menu. Lifewire's walkthrough of [how TikTok profile views work](https://www.lifewire.com/see-who-viewed-your-tiktok-5271090) also points users to the profile-view screen and gear icon when disabling it.
## What Happens When You Turn Profile Views Off?
Turning off Profile view history changes two things:
- **You cannot see who viewed your profile.** Your viewer list disappears while the feature is off.
- **Other people should not see your profile visits through Profile view history.** The feature is reciprocal, so opting out removes you from that visibility loop.
It does **not** make your whole TikTok account private. People may still see your videos, public comments, likes, reposts, follow activity, and profile if your account is public. If a specific person is the issue, [blocking them on TikTok](https://www.genviral.io/blog/how-to-block-someone-on-tiktok) is stronger than turning off profile views.
## Will Someone Know I Viewed Their TikTok Profile?
They can only see your profile visit if all of these are true:
1. Your **Profile view history** was on when you viewed them.
2. Their **Profile view history** was on too.
3. The view happened within TikTok's profile-view window, commonly shown as the last 30 days.
4. Both accounts are eligible for the feature.
TikTok does not send a normal push notification that says you viewed someone's profile. The visibility lives inside the Profile views screen. That distinction matters: it is not a loud alert, but it can still be seen by someone checking their viewer list.
This is also the core confusion in community threads. Reddit users regularly ask versions of "can they see I viewed them?" in TikTok help forums and search results, but those answers are anecdotal. Use the official setting as the source of truth, and treat [Reddit discussions about TikTok profile view history](https://www.reddit.com/search/?q=tiktok%20profile%20view%20history) as useful for spotting common confusion, not as policy.
## Does Turning It Off Remove a Past View?
Do not rely on it as an undo button.
If you viewed someone while both accounts had Profile view history enabled, there is a chance your visit was already visible. Turning the setting off is still the right move for future browsing, but if the situation is sensitive, assume the earlier view may have been seen.
For future privacy, turn the setting off **before** viewing profiles.
## Why You Might Not See the Viewers Setting
If **Viewers** or the profile **Viewers** icon is missing, it is usually one of these:
- Your TikTok app needs an update.
- Your account is not eligible for the feature.
- The feature is unavailable in your region or account type.
- TikTok is testing a different layout on your account.
- You are looking on desktop, where TikTok privacy settings are more limited.
Profile view history has also historically been limited by age and follower count. Lifewire notes that users may be unable to access it if they are under 16 or have 5,000+ followers. TikTok can change eligibility rules, so if the button is missing, update the app first, then check again from the mobile app rather than desktop.
If TikTok settings are behaving strangely after an update, clearing cache can help. Use the safe in-app method in our [TikTok cache guide](https://www.genviral.io/blog/how-to-clear-tiktok-cache), and avoid clearing app data if you have local drafts you care about.
## Profile Views vs Post View History
TikTok has two similarly named settings, and they are easy to mix up:
| Setting | What it affects | Why it matters |
| --- | --- | --- |
| **Profile view history** | Whether eligible users can see profile visits | Controls whether your profile visits participate in the viewer list |
| **Post view history** | Whether people can see that you watched their posts in certain contexts | Separate from profile visits |
If your goal is "do not show that I looked at their profile," turn off **Viewer history**. If your goal is "do not show that I watched a specific post," check TikTok's separate official page for [Post view history](https://support.tiktok.com/en/account-and-privacy/account-privacy-settings/tiktok-post-view-history).
## Should Creators Leave Profile Views On?
For casual personal accounts, turning it off is usually the easiest privacy win.
For creators, it depends. Profile views can reveal warm leads: people checking your page after watching a video, clicking your bio, or considering a follow. If you use TikTok for growth, profile visits are a small signal that your content is driving curiosity. In that case, you may want to leave it on while you are actively tracking content performance, then turn it off when browsing privately.
If you are optimizing your creator profile, also make sure your bio and link are doing real work. See [how to add a link to your TikTok bio](https://www.genviral.io/blog/how-to-add-link-to-tiktok-bio) if your profile traffic is not converting.
## Better Privacy Settings to Pair With It
Turning off profile views is only one privacy control. If you want a quieter account overall, pair it with these:
- **Private account:** Settings and privacy -> Privacy -> Private account. This limits your videos to approved followers.
- **Blocked accounts:** Block people who should not see or interact with you. Start with [how to block someone on TikTok](https://www.genviral.io/blog/how-to-block-someone-on-tiktok).
- **Suggested account controls:** Review whether TikTok can suggest your account to contacts, Facebook friends, mutual connections, and people who open links you share.
- **Comment and mention limits:** Restrict who can comment, mention, tag, Duet, or Stitch your content.
- **Saved content hygiene:** If you are cleaning up your activity, see [how to see saved videos on TikTok](https://www.genviral.io/blog/how-to-see-saved-videos-on-tiktok) and remove anything you do not want tied to your account behavior.
If you are done with the account entirely, profile-view settings are not enough. Read [how to delete your TikTok account](https://www.genviral.io/blog/how-to-delete-tiktok-account) before deleting, especially if you need to save drafts, downloads, or account data first.
## Common Questions
**Can I turn profile views back on later?**
Yes. Go back to **Viewers** and switch **Viewer history** on again.
**Will I appear in someone's profile views if mine is off?**
You should not participate in Profile view history while your setting is off. For sensitive situations, turn it off before viewing profiles rather than after.
**Does TikTok notify people when I view their profile?**
No standard notification is sent. If Profile view history is enabled for both accounts, they may see you inside their viewer list.
**Can I see who viewed my profile while mine is off?**
No. Turning it off removes your access to the viewer list.
**Does a private account hide profile views?**
A private account controls who can follow and view your content. It is stronger than Profile view history for content privacy, but you should still turn Profile view history off if you do not want profile visits visible.
**Can I turn off profile views on desktop?**
Use the mobile app. I do not see a dependable PC/desktop path for this setting, and TikTok's desktop settings are more limited than the phone app.
## The Bottom Line
To turn off profile views on TikTok:
**Fast way:** Profile -> Viewers icon -> gear icon -> **Viewer history** off.
**Settings way:** Profile -> Menu (three lines) -> Settings and privacy -> Privacy -> **Viewers** -> **Viewer history** off.
That stops you from seeing your own profile-view list, and it should stop other eligible users from seeing your profile visits through that same feature. For stronger privacy, combine it with blocking, a private account, and tighter comment, mention, Duet, and Stitch controls.
For more TikTok account control, see [how to clear TikTok cache](https://www.genviral.io/blog/how-to-clear-tiktok-cache), [how to block someone on TikTok](https://www.genviral.io/blog/how-to-block-someone-on-tiktok), [how to change TikTok account region](https://www.genviral.io/blog/how-to-change-tiktok-account-region), [how to repost on TikTok](https://www.genviral.io/blog/how-to-repost-on-tiktok), and [where to find TikTok drafts](https://www.genviral.io/blog/where-to-find-tiktok-drafts).
---
*Running TikTok as a creator instead of just browsing? [Genviral's TikTok Scheduler](https://www.genviral.io/tiktok-scheduler) helps you plan, schedule, and publish TikTok content from your desktop while keeping the messy mobile-app work to a minimum.*
---
Canonical HTML: https://www.genviral.io/blog/how-to-turn-off-profile-views-on-tiktok
# How to Unsave Pins on Pinterest (2026 Quick Guide)
- To unsave (delete) a pin: open it, click the three dots, select Edit Pin, scroll to Delete this Pin, and confirm. Deleted pins cannot be recovered.
- To delete multiple pins at once, open the board, click the three dots on the board view, select Organize, check the pins you want to remove, and click the trash icon.
- If you want to temporarily hide a pin without losing it, move it to a secret board instead of deleting it - deletion is permanent. See [how to make a board on Pinterest private](https://www.genviral.io/blog/how-to-make-a-board-on-pinterest-private) if you don't have a secret board yet.
Removing saved pins from Pinterest is straightforward whether you're deleting one pin or cleaning out an entire board. Here's how to do both.
## Desktop: How to Unsave a Single Pin
**Step 1:** Go to your profile
- Click your profile picture (top-right corner)
**Step 2:** Open the board
- Click the board containing the pin
**Step 3:** Open the pin
- Click on the pin you want to delete
**Step 4:** Click the three dots (...)
- Located in the bottom-right corner of the pin
**Step 5:** Select "Edit Pin"
**Step 6:** Click "Delete this Pin"
- Found at the bottom of the edit menu
**Step 7:** Confirm deletion
- Click "Delete" again when prompted
**Done.** The pin is permanently deleted. For more detailed instructions on deleting pins, including bulk deletion methods, see our guide on [how to delete a Pinterest pin](https://www.genviral.io/blog/how-to-delete-a-pinterest-pin).
## Mobile (iOS/Android): How to Unsave a Single Pin
**Step 1:** Tap your profile picture
- Located in bottom-right corner
**Step 2:** Open the board
- Tap the board with the pin
**Step 3:** Find the pin
- Scroll to locate it
**Step 4:** Long-press the pin
- Hold your finger on it for 1-2 seconds
**Step 5:** Tap the pencil icon (Edit)
- Appears in the options
**Step 6:** Tap "Delete this Pin"
- At the bottom of the screen
**Step 7:** Confirm
- Tap "Delete" again
**Done.** The pin is removed.
## How to Delete Multiple Pins at Once
### Desktop:
**Step 1:** Go to your profile and open the board
**Step 2:** Click "Organize"
- Button appears below the board name
**Step 3:** Select pins
- Click each pin you want to delete
- A checkmark appears on selected pins
**Step 4:** Click the trash can icon
- Appears at the bottom after selecting pins
**Step 5:** Confirm deletion
- Click "Delete" when prompted
**All selected pins are deleted.**
### Mobile:
**Step 1:** Open the board in the app
**Step 2:** Tap "Organize"
- Located at bottom-left of screen
**Step 3:** Tap pins to select
- Black outline appears around selected pins
**Step 4:** Tap the trash can icon
**Step 5:** Tap "Delete" to confirm
**All selected pins are removed.**
## "Unsave" vs "Delete" - What's the Difference?
**They mean the same thing.** Both remove the pin from your board.
**"Unsave" appears:**
- Immediately after saving a pin
- For a few seconds only
- Allows quick undo
**"Delete" appears:**
- After the unsave window closes
- In the Edit Pin menu
- Same result as unsave
**Important:** Once deleted, pins **cannot be recovered.** They're permanently gone.
## What Happens When You Delete a Pin?
**If you saved someone else's pin:**
- Removed from YOUR board only
- Still exists on Pinterest
- Original pin unaffected
- Other people's saves remain
**If you created the pin yourself:**
- Removed from your board
- Still exists on Pinterest if others repinned it
- Your original is deleted
- Repins by others stay active
## Common Questions
**Can I recover a deleted pin?**
No. Once deleted, it's permanently gone. Save important pins elsewhere before deleting.
**Will deleting a pin notify anyone?**
No. Deletions are silent. No one is notified when you remove a pin from your board.
**Can I delete pins from the "All Pins" view?**
No. You must go into the specific board to delete pins. Bulk delete only works within individual boards.
**Why can't I delete some pins in a group board?**
You can only delete pins YOU added to a group board. Pins added by other collaborators can only be deleted by them or the board owner.
**Is there a limit to how many pins I can delete?**
No official limit, but deleting hundreds at once might trigger Pinterest's spam filters temporarily.
**Can I hide a pin instead of deleting it?**
Yes. Use the "Archive" feature instead. Go to Edit Pin → Archive. You can unarchive later if you change your mind.
**How do I delete an entire board with all its pins?**
Go to the board → click the pencil icon → scroll down → click "Delete board." You have 7 days to restore it before permanent deletion. For step-by-step instructions, see our guide on [how to delete a Pinterest board](https://www.genviral.io/blog/how-to-delete-a-board-on-pinterest). If you've already deleted a board, you can recover it within 7 days using our [recovery guide](https://www.genviral.io/blog/how-to-recover-deleted-pinterest-boards).
## Tips for Managing Pins
**Before deleting:**
✓ Double-check it's the right pin
✓ Consider archiving instead (reversible)
✓ Download the image if you want to keep it
**When to delete pins:**
- Duplicate pins
- Outdated content
- Off-topic pins on your boards
- Broken links
- Accidental saves
- AI-generated content you want to remove (learn how to [turn off AI posts on Pinterest](https://www.genviral.io/blog/how-to-turn-off-ai-posts-on-pinterest))
**Alternative to deleting:**
- **Move pins** to different boards (three dots → Move)
- **Archive pins** to hide them temporarily
- **Create "Misc" board** for pins you're unsure about
For creating new pins to replace deleted ones, see our guide on [how to make a pin on Pinterest](https://www.genviral.io/blog/how-to-make-a-pin-on-pinterest). Need to permanently delete a pin instead? See our pin deletion guide linked above.
**Regular cleanup:**
- Review boards quarterly
- Remove pins that no longer fit
- Keep boards focused and organized
For more Pinterest optimization strategies, check out our [Pinterest tips and tricks guide](https://www.genviral.io/blog/pinterest-tips-and-tricks) and [Pinterest posting strategy](https://www.genviral.io/blog/pinterest-posting-strategy). To expand your reach, consider joining [group boards on Pinterest](https://www.genviral.io/blog/how-to-find-group-boards-on-pinterest). If you're looking for pins you've saved, see our guide on [how to see liked pins on Pinterest](https://www.genviral.io/blog/how-to-see-liked-pins-on-pinterest). For creating interactive collages, see [how to make Pinterest collage](https://www.genviral.io/blog/how-to-make-pinterest-collage). Cleaning up at the board level instead of pin by pin? See [how to merge Pinterest boards](https://www.genviral.io/blog/how-to-merge-pinterest-boards).
---
*Managing multiple Pinterest accounts or need to schedule pins in bulk? [Genviral](https://genviral.io) helps you organize, schedule, and optimize your Pinterest content from one simple dashboard so you spend less time on admin and more time creating.*
---
Canonical HTML: https://www.genviral.io/blog/how-to-unsave-pins-on-pinterest
# How to Use OpenClaw to Automate Your Social Media
- OpenClaw can run your entire social media pipeline without manual work - from AI-generated slideshows to multi-platform posting, performance analytics, and self-improving content strategy.
- The [Genviral Partner API](https://docs.genviral.io/api-reference/introduction) is the posting and content layer: 42+ commands covering accounts, slideshows, posts, image packs, templates, and analytics across TikTok, Instagram, YouTube, Facebook, Pinterest, and LinkedIn.
- Setup takes 4 steps: get an API key from [genviral.io/api-keys](https://www.genviral.io/api-keys), install the [Genviral Skill for OpenClaw](https://github.com/fdarkaou/genviral-skill), connect your social accounts, and generate your first slideshow.
- The feedback loop is self-improving: OpenClaw reads analytics data after each posting cycle and adjusts hooks, formats, and timing for the next batch.
- Every API-generated post shows up in your Genviral dashboard calendar with full audit trail - source-tagged so you know what was automated.
OpenClaw is getting good enough to handle full social media workflows end to end. The tasks are well-defined, the inputs and outputs are predictable, and the volume of repetitive work is high enough that automation pays off fast.
This guide walks through how to connect OpenClaw to a social media API so it can handle content creation, scheduling, posting, and performance review on its own. We'll use the [Genviral API](https://docs.genviral.io/api-reference/introduction) as the posting and content layer - the same setup we used to post our first OpenClaw-generated slideshow to [our TikTok](https://www.tiktok.com/@genviral8), which hit 25,000 views.
## Quick Facts
**What you need:**
- OpenClaw set up on your device
- A Genviral account for the posting API and content tools
- Social accounts connected to your Genviral workspace
- An API key from the Genviral dashboard
## How the Setup Works
For OpenClaw to run a social media pipeline, it needs three things: a way to create content, a way to distribute it, and a way to read back performance data so it can improve over time.
The Genviral Partner API covers all three. It exposes the same pipeline the Genviral dashboard uses internally - so anything you can do manually in the product, OpenClaw can do programmatically. Posts, analytics, retries, and audit logs all stay in sync between the API and the dashboard.
The [Genviral Skill for OpenClaw](https://github.com/fdarkaou/genviral-skill) is a pre-built wrapper around that API with 42+ commands organized into six categories: accounts, slideshows, posts, image packs, templates, and analytics. Installing it gives OpenClaw a full vocabulary for the entire content lifecycle without writing any integration code.
## Step 1: Get Your API Key
Keys are single-scope credentials - either workspace-scoped or personal-scoped. For most setups, workspace-scoped is the right choice: it ties the key to a specific team workspace and gives OpenClaw access to all accounts, credits, and post history within that workspace. Personal keys work for solo use without a workspace.
1. Sign in and go to [genviral.io/api-keys](https://www.genviral.io/api-keys)
2. Select the key scope (Workspace for team usage, Personal for solo)
3. Generate a new key
4. Store it somewhere safe - it's only shown once
Keys follow the format `gva_live_x1y2z3.abcd1234` and go in the `Authorization` header:
```
Authorization: Bearer gva_live_x1y2z3.abcd1234
```
The scope boundary is enforced on every request - a workspace key can only see and act on resources within that workspace. There's no fallback to unscoped data, which matters if you're managing multiple clients or projects.
## Step 2: Install the Skill
Add the [Genviral Skill](https://github.com/fdarkaou/genviral-skill) to OpenClaw and pass it your API key. That's the full setup. The skill connects to `https://www.genviral.io/api/partner/v1` and OpenClaw can start issuing commands immediately.
If you prefer to work directly with the API - for example, to integrate into your own tooling or scripts - the [full API reference](https://docs.genviral.io/api-reference/introduction) and a [Postman collection](https://www.genviral.io/postman-collection.json) are available.
## Step 3: Connect Your Social Accounts
Before OpenClaw can post anything, it needs to know which accounts are available. Run:
```
$genviral accounts list
```
This returns both hosted creator accounts and any accounts you've connected directly - TikTok, Instagram, YouTube, Facebook, Pinterest, and LinkedIn. OpenClaw can cache these IDs and reference them in every subsequent post command.
## Step 4: Generate a Slideshow
The core content format is the slideshow - a carousel or short-form video that OpenClaw generates from a prompt, a set of background images, or a saved template.
Generate one:
```
$genviral slideshow generate
```
Render it to produce the final output:
```
$genviral slideshow render sl_8x2k
```
Have OpenClaw review it before publishing:
```
$genviral slideshow review sl_8x2k
```
Update any element if needed:
```
$genviral slideshow update sl_8x2k
```
A few things worth knowing here. OpenClaw can generate slideshows from whatever images you give it - your own photos, uploaded brand assets, or image packs you've organized in advance. Using authentic, varied images matters: TikTok's duplicate content filters are sensitive, so the more distinct your visuals, the better the reach. A good pattern is to have OpenClaw analyze each uploaded image and assign it a descriptive name so the library stays searchable as it grows.
**Media limits to keep in mind:**
- Slideshows support 1–35 images (JPG/JPEG/PNG), each under 5MB
- ~9:16 aspect ratio is recommended for TikTok and Instagram
- Videos must be MP4/MOV/M4V/AVI, under 100MB, and between 15–60 seconds
- Captions are capped at 500 characters across all platforms
## Step 5: Post to Your Platforms
Publishing is a single command. Have OpenClaw post to everything at once:
```
$genviral post create --accounts all
```
Or pick specific platforms:
```
$genviral post create --accounts tt,ig
```
You can also add a `scheduled_at` timestamp to batch content in advance - useful if you want OpenClaw to generate a week's worth of posts in one session and drip them out on a schedule.
If a post fails on one platform, OpenClaw can retry it without affecting the others:
```
$genviral post retry
```
Every post OpenClaw makes through the API shows up immediately in the dashboard calendar with `metadata.source = "partner_api"`, so you have a full audit trail even when it's running autonomously.
### TikTok: Draft mode vs. direct post
TikTok gives you two publish modes that behave very differently. `DIRECT_POST` publishes immediately. `MEDIA_UPLOAD` uploads the slideshow to your TikTok inbox as a draft - you then open TikTok, add a trending sound, and publish manually.
For photo carousels specifically, sound selection has an outsized effect on reach, so the typical pattern is `MEDIA_UPLOAD` for TikTok and `DIRECT_POST` for every other platform. The skill handles this via flags, but if you're calling the raw API directly, you set it in the `tiktok` object:
```json
{
"tiktok": {
"post_mode": "MEDIA_UPLOAD",
"privacy_level": "SELF_ONLY"
}
}
```
One important constraint: music URLs (for adding trending sounds programmatically) are only supported when all accounts in the request are TikTok accounts. Including any Instagram account in the same request will block the music field, so target platforms separately if you need platform-specific music settings.
### Tracking posts with `external_id`
The API accepts an optional `external_id` field on every post request - a correlation ID you define. If OpenClaw is running multiple campaigns or you want to map posts back to your own tracking system, set this to something meaningful (e.g., `campaign-spring-2026-day3`). It's returned in the post response and stored alongside the post in the dashboard.
## Step 6: Read Analytics and Adjust
After posts go live, OpenClaw can pull performance data:
```
$genviral analytics summary
```
This returns views, likes, and engagement rates across all platforms. For post-level detail:
```
$genviral analytics posts
```
You can also set targets for OpenClaw to track over time:
```
$genviral analytics target add
```
The useful part is that OpenClaw can actually interpret this data rather than just log it. It can compare hook styles, content formats, and posting times across posts, identify what's correlating with higher engagement, and adjust its approach for the next batch. This is what makes the loop self-improving - each cycle informs the next one.
**Analytics coverage by platform:**
| Platform | Posting | Analytics |
|----------|---------|-----------|
| TikTok | Yes | Yes |
| Instagram | Yes | Yes |
| YouTube | Yes | Yes |
| Facebook | Yes | - |
| Pinterest | Yes | - |
| LinkedIn | Yes | - |
Analytics (views, likes, comments, shares, engagement rate) are currently available for TikTok, Instagram, and YouTube. Facebook, Pinterest, and LinkedIn support posting but don't return analytics data yet. For the feedback loop to work automatically, it's worth having at least one of the analytics-enabled platforms in your mix.
## The Full Pipeline
Once everything is connected, OpenClaw runs a repeating cycle:
1. **Generate** - create slideshows from prompts, image packs, or templates
2. **Post** - distribute to all connected platforms on a schedule
3. **Analyze** - pull views, likes, engagement rates, follower growth
4. **Improve** - adjust hooks, formats, and timing based on what performed
5. **Repeat**
You check in weekly, review what OpenClaw flagged, and the system handles the rest. The practical result is consistent posting across six platforms without a content team behind it.
## Keeping Posts On-Brand
Two features help OpenClaw stay consistent at scale. Image packs let you group reusable visual assets that OpenClaw pulls from when generating slideshows:
```
$genviral pack create
$genviral pack list
```
Templates let you save a winning slideshow format so OpenClaw can reuse it with fresh content:
```
$genviral template create
$genviral template list
```
Between these two, OpenClaw produces content that looks intentional and consistent rather than generated on the fly - which matters both for brand perception and for TikTok and Instagram's content quality signals.
## Common Questions
**Can OpenClaw run fully without human input?**
Yes. Once connected, OpenClaw handles generation, posting, and analytics review on its own. Most people check in once a week to review performance and update the brief if needed.
**What about media uploads?**
You can upload images and video directly to the Genviral CDN from OpenClaw's chat interface - or from WhatsApp, Telegram, wherever you're working. The skill handles the upload and returns a URL OpenClaw can reference in future slideshow commands.
**Which platforms are supported?**
TikTok, Instagram, YouTube, Facebook, Pinterest, and LinkedIn.
**What if a post fails?**
`$genviral post retry` lets OpenClaw retry failed deliveries individually without touching successful ones.
**Do I need the skill, or can OpenClaw use the API directly?**
Either works. The skill is faster to set up and better suited for OpenClaw's conversational workflow. The raw API is better if you're building a custom integration or want fine-grained control over request logic.
## Getting Started
The Genviral API and OpenClaw Skill are available on all paid Genviral plans, starting at $29/month on the Creator tier.
- [Genviral Skill for OpenClaw on GitHub](https://github.com/fdarkaou/genviral-skill)
- [API Documentation](https://docs.genviral.io/api-reference/introduction)
- [Postman Collection](https://www.genviral.io/postman-collection.json)
- [API Keys](https://www.genviral.io/api-keys)
- [Genviral dashboard](https://www.genviral.io/auth)
---
## Related Guides
- [15 Best OpenClaw Skills for Social Media Marketing](https://www.genviral.io/blog/best-openclaw-skills-social-media)
- [How to Automate LinkedIn Posting with OpenClaw and Genviral](https://www.genviral.io/blog/openclaw-linkedin)
- [How to Automate Facebook Posting with OpenClaw and Genviral](https://www.genviral.io/blog/openclaw-facebook)
- [How to Automate TikTok Posting with OpenClaw and Genviral](https://www.genviral.io/blog/openclaw-tiktok)
- [How to Automate Pinterest Posting with OpenClaw and Genviral](https://www.genviral.io/blog/openclaw-pinterest)
- [How to Automate Instagram Posting with OpenClaw and Genviral](https://www.genviral.io/blog/openclaw-instagram)
- [How to Automate YouTube Posting with OpenClaw and Genviral](https://www.genviral.io/blog/openclaw-youtube)
*We built this workflow ourselves and posted our first OpenClaw-generated slideshow to [our TikTok](https://www.tiktok.com/@genviral8) - it hit 25,000 views. [Genviral](https://genviral.io) is the platform behind the posting and content layer described in this guide.*
---
Canonical HTML: https://www.genviral.io/blog/how-to-use-openclaw
# How to View Blocked Facebook Friends (2026 Quick Guide)
- Your full blocked list is at Settings and Privacy - Settings - Blocking - "See your blocked list" (or go directly to facebook.com/settings?tab=blocking).
- Blocked users are not notified - they simply can't find you, message you, or tag you. Old message threads stay visible on both sides but no new messages can be sent.
- After unblocking someone, you cannot re-block them for 48 hours, and you're automatically unfriended - a new friend request is needed to reconnect.
Your Facebook blocked list is tucked inside account settings - here's exactly where to find it, how to manage it, and what blocking actually does on both sides.
## Desktop: How to View Blocked Friends
**Step 1:** Go to facebook.com
- Log in to your account
**Step 2:** Click your profile picture
- Located in top-right corner
**Step 3:** Click "Settings & Privacy"
- Appears in dropdown menu
**Step 4:** Click "Settings"
- Note: If you need to change your name, see [how to change name on Facebook](https://www.genviral.io/blog/how-to-change-name-on-facebook)
- To update your email address, see [how to change email on Facebook](https://www.genviral.io/blog/how-to-change-email-on-facebook)
**Step 5:** Click "Blocking" in left sidebar
- Under "Audience and Visibility" section
- Or scroll down to find it
**Step 6:** Click "See your blocked list"
- Under "Block users" section
**Done.** You'll see all people you've blocked.
**Quick link:** You can also go directly to: facebook.com/settings?tab=blocking
## Mobile: How to View Blocked Friends
### On iPhone/iOS:
**Step 1:** Open Facebook app
- Log in if needed
**Step 2:** Tap menu icon (☰)
- Located in bottom-right corner
- Three horizontal lines
**Step 3:** Scroll down and tap "Settings & Privacy"
**Step 4:** Tap "Settings"
**Step 5:** Scroll to "Audience and Visibility"
**Step 6:** Tap "Blocking"
**Done.** Your blocked list appears here.
### On Android:
**Step 1:** Open Facebook app
**Step 2:** Tap menu icon (☰)
- Top-right corner (three horizontal lines)
**Step 3:** Tap "Settings & Privacy"
**Step 4:** Tap "Settings"
**Step 5:** Find "Audience and Visibility"
**Step 6:** Tap "Blocking"
**Done.** All blocked users display.
## What You'll See in Your Blocked List
Your blocked list shows:
- **Full names** of blocked people
- **Profile pictures** (small thumbnails)
- **"Unblock" button** next to each name
- **"Add to blocked list" option** at top
**Note:** The list is **private**-only you can see it. No one else knows who you've blocked.
## How to Unblock Someone
**Step 1:** Find the person in your blocked list
- Follow steps above to access blocked list
**Step 2:** Click/tap "Unblock" next to their name
**Step 3:** Confirm by clicking "Unblock" again
- Facebook asks you to confirm
**Done.** They're unblocked immediately.
**Important restrictions after unblocking:**
- You **cannot re-block** them for **48 hours**
- You're automatically **unfriended** (not re-friended)
- You must send a new friend request to reconnect
- They can now message you and see your public posts
## What Happens When You Block Someone?
**They CANNOT:**
❌ See your profile, posts, or timeline
❌ Send you friend requests
❌ Send you messages on Messenger
❌ Tag you in posts, photos, or comments
❌ Find you in Facebook search
❌ See you in mutual friends' lists
❌ Invite you to events or groups
**You CANNOT:**
❌ See their profile or posts
❌ Message them
❌ Tag them
❌ Find them in search
**What REMAINS:**
✓ Old message threads (visible but can't reply)
✓ Past comments on mutual friends' posts (visible)
✓ You're both automatically unfriended
**Privacy note:** Facebook does **NOT** notify them you blocked them. For additional privacy protection, learn [how to lock your Facebook account](https://www.genviral.io/blog/how-to-lock-facebook-account).
## Other Blocking Options on Facebook
Besides blocking users, Facebook offers other blocking features:
### 1. Block Messages (Messenger)
- Block someone only on Messenger
- They can still see your profile
- Found in: Blocking settings → "Block messages"
### 2. Block App Invites
- Stop receiving game/app invites from specific people
- Found in: Blocking settings → "Block app invites"
### 3. Block Event Invites
- Block event invitations from certain people
- Found in: Blocking settings → "Block event invites"
### 4. Block Pages
- Block specific Facebook Pages
- Found in: Blocking settings → "Block Pages"
- For managing Page access, see [how to add admin to Facebook Page](https://www.genviral.io/blog/how-to-add-admin-to-facebook-page)
### 5. Restricted List
- Different from blocking
- They remain friends but can't see your posts
- Found in: Privacy settings → "Restricted list"
## Blocked vs. Unfriended vs. Restricted
Understanding the differences:
### Blocked:
- **Most restrictive**
- Can't see each other at all
- Automatically unfriended
- No interaction possible
### Unfriended:
- **Medium restriction**
- They can still see your public posts
- They can send friend requests
- You can still message (if settings allow)
### Restricted:
- **Least restrictive**
- Still friends on Facebook
- They only see your public posts
- You remain connected
## Common Issues and Solutions
**Problem: "Can't find Blocking in settings"**
**Solutions:**
- Update Facebook app to latest version
- Look under "Audience and Visibility" section
- Try desktop instead of mobile
- Use direct link: facebook.com/settings?tab=blocking
**Problem: "Blocked list is empty but I know I blocked someone"**
**Possible reasons:**
- You restricted them instead of blocking
- You blocked them on Messenger only (different list)
- They deactivated/deleted their account
- You unfriended instead of blocked
**Check:**
- Restricted list (in Privacy settings)
- Block messages list (in Blocking settings)
**Problem: "Can't unblock someone"**
**Solutions:**
- Wait 48 hours if you recently unblocked them
- Clear app cache/cookies
- Update Facebook app
- Try from desktop instead
**Problem: "Person still appears after unblocking"**
**Explanation:**
- Unblocking is instant
- BUT you're still unfriended
- They must accept a new friend request
- They can now see your public posts only
## Tips for Managing Your Blocked List
**Regular review:**
✓ Check blocked list every 3-6 months
✓ Unblock people if circumstances changed
✓ Remove accidental blocks
**Before blocking:**
- Consider unfriending or restricting first
- Remember: can't re-block for 48 hours after unblocking
- Blocking is very visible to the blocked person
**Privacy tip:**
- Blocking is private (they won't get notified)
- BUT they'll notice they can't find you
- They'll see message delivery fails
**Alternatives to blocking:**
1. **Unfollow** - Stop seeing their posts, stay friends
2. **Restrict** - Limit what they see, stay friends
3. **Unfriend** - Remove friendship, they can still see public posts
4. **Manage post visibility** - Learn [where to find scheduled posts on Facebook](https://www.genviral.io/blog/where-to-find-scheduled-posts-on-facebook) to control when content appears
5. **Find drafts** - For locating saved draft posts, see [how to find drafts on Facebook](https://www.genviral.io/blog/how-to-find-drafts-on-facebook)
## Common Questions
**How do I know if someone blocked me on Facebook?**
You can't find their profile in search, can't message them, and mutual friends may not show them. However, they might have deactivated their account instead.
**Can I see who blocked me on Facebook?**
No. Facebook doesn't provide a feature to see who blocked you. It's intentionally private.
**Will someone know if I view their profile after unblocking them?**
No. Facebook doesn't notify users about profile views, whether blocked or not.
**Can I block someone without unfriending them first?**
Yes, but blocking automatically unfriends them. There's no way to block and stay friends.
**How many people can I block on Facebook?**
There's no official limit, but blocking thousands of people may affect account performance.
**Can blocked people still see old messages?**
Yes. Message history remains visible to both people, but no new messages can be sent.
**Will blocking someone delete our message history?**
No. Messages remain in both people's Messenger, but you can't send new ones.
**If I block someone, will their comments on mutual friends' posts disappear?**
No. Past comments remain visible on mutual friends' posts. Future comments won't be visible to each other. For commenting options, see [how to comment anonymously on Facebook](https://www.genviral.io/blog/how-to-comment-anonymously-on-facebook).
**Can I block someone temporarily?**
Not officially, but you can unblock after any period. Remember: 48-hour restriction before re-blocking.
**What happens to photos they tagged me in?**
Tags are removed when you block someone. Photos remain but without your tag.
## The Bottom Line
Viewing your blocked friends on Facebook is simple:
**Desktop:** Settings & Privacy → Settings → Blocking → "See your blocked list"
**Mobile:** Menu (☰) → Settings & Privacy → Settings → Blocking
**Key reminders:**
- Your blocked list is **private** (only you can see it)
- Unblocking is **instant** but you can't re-block for **48 hours**
- Blocking automatically **unfriends** both of you
- Blocked people are **NOT notified** when you block them
Review your blocked list periodically to ensure you haven't accidentally blocked someone or to give people a second chance. Blocking is a powerful privacy tool-use it wisely. For monetizing your presence, see [how to make money with Facebook](https://www.genviral.io/blog/how-to-make-money-with-facebook). For tracking engagement on your posts, see [how to see who shared my post on Facebook](https://www.genviral.io/blog/how-to-see-who-shared-my-post-on-facebook).
---
*Managing privacy across multiple social media platforms? [Genviral's Facebook Scheduler](https://www.genviral.io/facebook-scheduler) helps you schedule content, manage interactions, and maintain your online presence - all while keeping your digital boundaries in check.*
---
Canonical HTML: https://www.genviral.io/blog/how-to-view-blocked-facebook-friends
# How to Automate Facebook Posting with OpenClaw
- We use OpenClaw agents to automatically post infographics to Facebook on a recurring schedule - the goal is to have an active page before running ads, which improves trust and conversions.
- Setup requires three things: the [Genviral Skill GitHub repo](https://github.com/fdarkaou/genviral-skill), the [API documentation](https://docs.genviral.io/api-reference/introduction), and an [API key](https://www.genviral.io/api-keys).
- Split your skill MD files by endpoint category (posts, studio AI, etc.) so your agent only loads what it needs per run - this saves a lot of tokens.
- The same mechanics also work for posting Reels and videos to Facebook, not just images.
- Connect your Facebook account in Genviral first, then walk through the setup step by step with your agent.
## Why We Automate Facebook
The idea is straightforward. When you run paid ads on Facebook, people click through to your page. If the page looks empty or inactive, trust drops and so do conversions. So we use OpenClaw to post infographics with captions to our Genviral Facebook page on a near-daily basis - that way the page looks actively maintained when someone lands on it from an ad.
Here's one of the posts our agent generated and published automatically:
This is mostly filler content - infographics about social media tips, automation workflows, and content strategy. The point isn't to go viral with these posts. The point is that when someone sees an ad, clicks to our Facebook page, and sees consistent content, they're more likely to trust us and convert.
The same approach works for Reels and videos too, not just image posts.
If you prefer to work inside Claude, the companion [Claude Facebook automation guide](https://www.genviral.io/blog/claude-facebook-automation) covers the MCP connector and the path from one reviewed video post to a recurring Claude Cowork task.
## What You Need
Three things to feed your OpenClaw agent:
1. **The GitHub repo** - [github.com/fdarkaou/genviral-skill](https://github.com/fdarkaou/genviral-skill) (also linked in the Genviral homepage footer)
2. **The API documentation** - [docs.genviral.io](https://docs.genviral.io/api-reference/introduction)
3. **An API key** - generate one at [genviral.io/api-keys](https://www.genviral.io/api-keys) (requires an active subscription)
You can feed all three to your agent in a single message. It works with any chatbot that supports OpenClaw: Telegram, WhatsApp, or whatever you prefer.
## Step 1: Organize Your Skill Files
This is the single biggest token saver. When you set up the Genviral skill, **create separate MD files for each endpoint category**:
```
genviral-skill/
├── files/
├── folders/
├── studio-ai/
├── posts/
├── slideshows/
├── packs/
├── templates/
└── analytics/
```
Why does this matter? If your Facebook agent only posts images with captions, it doesn't need the slideshows endpoint, the templates endpoint, or the analytics endpoint loaded on every run. By splitting things up, you avoid loading the entire API docs each time - which saves a lot of tokens and by extension a lot of money.
For a Facebook image posting agent, you'll typically need **Posts**, **Studio AI** (for image generation), and maybe **Packs** (if using image packs). That's it.
## Step 2: Connect Your Facebook Account in Genviral
Before your agent can post anything, you need to connect your Facebook account in the Genviral dashboard.
1. Go to the **Social Posts** section
2. Click **Manage Accounts**
3. Click **Connect** and add your Facebook account (and Instagram if you want to post to both simultaneously)
4. Create a test post manually to verify the connection works
This initial account connection has to happen in Genviral. Once connected, your OpenClaw agent can reference the account by ID when creating posts through the API.
## Step 3: Let Your Agent Familiarize Itself
If you already have other automations running (like we had Pinterest and TikTok), tell your agent to familiarize itself with your existing setup first. This way it understands your content style, posting patterns, and how things are structured before building the Facebook flow.
If this is your first automation, just feed the agent the skill files, the API docs, and your API key, then tell it to set up the Genviral skill and configure the Facebook automation.
## Step 4: Walk Through the Setup Step by Step
This is a general best practice with AI agents, but especially important here. Instead of trying to configure everything in one prompt, tell your agent:
> "I want to post to Facebook automatically. Please ask me step-by-step questions about each part of the setup."
The agent will then ask you about:
- **Account selection** - which Facebook account (and optionally Instagram) to post to
- **Content type** - images, videos, or both
- **Image style** - what visual direction, which AI model to use (e.g., Nano Banana 2, GPT Image 1.5)
- **Aspect ratio** - square, landscape, or portrait depending on your content type
- **Caption format** - tone, length, hashtags, call-to-action
- **Scheduling** - how often, what times (we post every second day)
- **Approval flow** - publish directly or review each post first
Answer each question, and the agent configures itself accordingly.
## Step 5: Review a Sample Post
Before going autonomous, have the agent **create at least one sample post in chat** so you can review it.
Check:
- Is the image quality acceptable?
- Does the caption match your brand voice?
- Are the hashtags relevant?
- Are there any visual artifacts? (If so, add negative prompts to prevent them in future generations)
If something looks off, tell the agent what to fix. Once you're satisfied, test the full end-to-end flow by publishing one real post through the agent.
## Step 6: Test the End-to-End Flow
Before setting up the cron job, publish one post through the agent to test the full pipeline:
1. Agent generates the image via the [Studio endpoint](https://docs.genviral.io/api-reference/generate-studio-image)
2. Agent creates the post with caption, hashtags, and scheduling
3. Post is published to Facebook via the [Posts endpoint](https://docs.genviral.io/api-reference/create-post)
4. Post appears in your Genviral dashboard calendar tagged with `source: partner_api`
If the post goes through successfully and looks good on Facebook, you're ready to automate.
## Step 7: Set Up the Cron Job
Once everything checks out, configure your agent to run on a schedule. For our setup, we post **every second day** - a new infographic is generated and published automatically without any intervention.
The agent will:
1. Generate a new image using the Studio endpoint
2. Write a caption with relevant hashtags
3. Publish to Facebook (and optionally Instagram) via the Posts endpoint
4. Repeat on your chosen schedule
Every automated post shows up in your Genviral dashboard calendar, so you always have a full audit trail of what was posted and when.
## Posting to Facebook and Instagram Together
Since we also run an Instagram automation with the same goal (pre-filling the page before running ads), we often post the same infographic to both platforms in a single API call. The Genviral API supports multi-account posting - just include both the Facebook and Instagram account IDs in the same request.
This is especially efficient because you generate the image once and distribute it to both platforms. The captions and hashtags can differ per platform if needed, but for filler content like ours, we keep them the same.
## Tips From Our Setup
A few things we've learned running this:
- **Do it manually first.** Before automating, use the Genviral dashboard to create and post content manually. Familiarize yourself with the functionality - the API is a programmatic extension of what the product can do, so if you know how to use the product, you'll be much more capable with the API.
- **Split your skill files.** This keeps coming up because it matters that much. Don't load the entire API docs every run. Only give the agent the endpoints it actually needs.
- **Use step-by-step confirmation.** Have the agent ask you about each part of the setup individually. Don't try to configure everything in one prompt.
- **Filler content vs. viral content.** If you're using this to pre-fill your page (like we do), the bar for quality is "looks professional and on-brand." If you're trying to go viral, you really want to understand the intricacies of what works on Facebook and validate formats manually before automating.
- **Review weekly.** Even fully automated, check in once a week. Skim the dashboard, spot-check a few posts, and adjust if needed.
## Getting Started
Full disclosure - I'm one of the founders of Genviral, so I'm biased. But we built this because we needed it ourselves, and the approach of pre-filling brand pages before running ads has worked well for us across both Facebook and Instagram.
To get started:
1. Sign up at [genviral.io](https://www.genviral.io/auth)
2. Connect your Facebook account under Social Posts
3. Generate an API key at [genviral.io/api-keys](https://www.genviral.io/api-keys)
4. Install the [Genviral Skill](https://github.com/fdarkaou/genviral-skill) in OpenClaw
5. Feed it the [API docs](https://docs.genviral.io/api-reference/introduction)
6. Walk through the setup step by step
7. Validate, then automate
The Genviral API and OpenClaw Skill are available on all paid plans, starting at $29/month on the Creator tier.
- [Genviral Skill for OpenClaw on GitHub](https://github.com/fdarkaou/genviral-skill)
- [API Documentation](https://docs.genviral.io/api-reference/introduction)
- [Postman Collection](https://www.genviral.io/postman-collection.json)
- [API Keys](https://www.genviral.io/api-keys)
If you have any questions, drop them in the comments on the video or reach out through our support chat or Discord community. We're also happy to hop on a call to help set this up - that offer stands for every Genviral customer.
---
## Related Guides
- [Claude Facebook Automation with Claude Cowork](https://www.genviral.io/blog/claude-facebook-automation)
- [How to Automate Facebook Posting with Hermes Agent](https://www.genviral.io/blog/hermes-agent-facebook)
- [How to Use OpenClaw to Automate Your Social Media (Full Guide)](https://www.genviral.io/blog/how-to-use-openclaw)
- [15 Best OpenClaw Skills for Social Media Marketing](https://www.genviral.io/blog/best-openclaw-skills-social-media)
- [How to Automate LinkedIn Posting with OpenClaw and Genviral](https://www.genviral.io/blog/openclaw-linkedin)
- [How to Automate Instagram Posting with OpenClaw and Genviral](https://www.genviral.io/blog/openclaw-instagram)
- [How to Automate Pinterest Posting with OpenClaw and Genviral](https://www.genviral.io/blog/openclaw-pinterest)
- [How to Automate TikTok Posting with OpenClaw and Genviral](https://www.genviral.io/blog/openclaw-tiktok)
- [How to Automate YouTube Posting with OpenClaw and Genviral](https://www.genviral.io/blog/openclaw-youtube)
---
Canonical HTML: https://www.genviral.io/blog/openclaw-facebook
# How to Automate Instagram Posting with OpenClaw
- We use OpenClaw agents to automatically post social media infographics to Instagram on a near-daily basis - the goal is to have an active-looking page before running ads, which improves conversions.
- Setup requires three things: the [Genviral Skill GitHub repo](https://github.com/fdarkaou/genviral-skill), the [API documentation](https://docs.genviral.io/api-reference/introduction), and an [API key](https://www.genviral.io/api-keys).
- Split your skill MD files by endpoint category (posts, slideshows, analytics, etc.) so your agent only loads what it needs - this saves a lot of tokens.
- Always have the agent create a sample post in chat first so you can review quality before going fully autonomous.
- Once you're happy with the output, set up a cron job and let it run on autopilot.
## Why We Automate Instagram
The idea behind this setup is simple. When you run paid ads on Instagram, people click through to your profile. If the page looks empty or inactive, conversions drop. So we use OpenClaw to post social media infographics to our brand page on a near-daily basis - that way the account looks actively maintained when someone lands on it from an ad.
Here's one of the posts our agent generated and published automatically:
This works alongside our existing Pinterest and TikTok automations. Same concept, different platform.
If you prefer to work inside Claude instead of running OpenClaw, the same publishing layer also supports a [Claude to Instagram workflow with MCP and Claude Cowork](https://www.genviral.io/blog/claude-instagram-automation).
## What You Need
Three things to feed your OpenClaw agent:
1. **The GitHub repo** - [github.com/fdarkaou/genviral-skill](https://github.com/fdarkaou/genviral-skill) (also linked in the Genviral homepage footer)
2. **The API documentation** - [docs.genviral.io](https://docs.genviral.io/api-reference/introduction)
3. **An API key** - generate one at [genviral.io/api-keys](https://www.genviral.io/api-keys) (requires an active subscription)
The API docs cover far more than just Instagram. You can create TikTok slideshows, generate AI content via the Studio endpoint, find viral videos through the Trends endpoint, analyze performance, and more. But for this specific setup, you only need a subset of the endpoints.
## Step 1: Organize Your Skill Files
This is critical for keeping costs down. When you set up the Genviral skill, **create separate MD files for each endpoint category**:
```
genviral-skill/
├── files/
├── folders/
├── studio-ai/
├── posts/
├── slideshows/
├── packs/
├── templates/
└── analytics/
```
Why does this matter? Your Instagram posting agent doesn't need the templates endpoint, the packs endpoint, or the slideshow endpoint. It really just needs **Posts**, **Studio AI** (for image generation), and maybe **Files**. By splitting things up, you avoid loading the entire API docs on every run - which saves a lot of tokens and by extension a lot of money.
## Step 2: Connect Your Instagram Account in Genviral
Before your agent can post anything, you need to connect your Instagram account in the Genviral dashboard.
1. Go to the **Social Posts** section
2. Click **Manage Accounts**
3. Click **Connect** and add your Instagram account
4. Create a few test posts manually over two to three days
That last point is important. When you post manually first, you build a small corpus of data that your agent can reference. It gives the agent context on what kind of content you've been posting, what style you're going for, and how things are structured. You don't need to do this for long - two or three days is enough.
## Step 3: Let Your Agent Familiarize Itself
If you already have other automations running (like we had Pinterest and TikTok), tell your agent to familiarize itself with your existing setup first. This way it understands your content style, posting patterns, and how things are structured before building the Instagram flow.
If this is your first automation, just feed the agent the skill files, the API docs, and your API key, then tell it to set up the Genviral skill and configure the Instagram automation.
## Step 4: Have the Agent Ask You Questions
This is a general best practice with AI agents, but especially important here. Instead of trying to configure everything in one go, ask your agent to **confirm each step of the process with you**:
> "I want to post to Instagram automatically. Please ask me step-by-step questions about each part of the setup."
The agent will then ask you about:
- **Content type** - infographics, photos, carousels, reels?
- **Image style** - what visual direction are you going for?
- **Caption format** - tone, length, hashtags?
- **Scheduling** - how often, what times?
- **Account selection** - which Instagram account in your workspace?
- **Approval flow** - do you want to review each post first, or fully automated?
Answer each question, and the agent configures itself accordingly.
## Step 5: Review a Sample Post
Before going autonomous, have the agent **create at least one sample post in chat** so you can review it. This is where you catch quality issues early.
Check:
- Is the image quality good?
- Are there any visual artifacts? (We caught duplicate logos on our first attempt and added a negative prompt to prevent it)
- Is the caption well-written?
- Are the hashtags relevant?
If something looks off, tell the agent what to fix. Add negative prompts or style adjustments so it checks itself on future generations. Once you're satisfied with the quality, move to the next step.
## Step 6: Test the End-to-End Flow
Before setting up the cron job, publish one post through the agent to test the full pipeline:
1. Agent generates the image via the [Studio endpoint](https://docs.genviral.io/api-reference/generate-studio-image)
2. Agent creates the post with caption, hashtags, and scheduling
3. Post is published to Instagram via the [Posts endpoint](https://docs.genviral.io/api-reference/create-post)
4. Post appears in your Genviral dashboard calendar tagged with `source: partner_api`
If the post goes through successfully and looks good on Instagram, you're ready to automate.
## Step 7: Set Up the Cron Job
Once everything checks out, configure your agent to run on a schedule. Tell it to go ahead and run as a cron job in an automated manner.
The agent will:
1. Generate a new image using the Studio endpoint
2. Write a caption with relevant hashtags
3. Publish to Instagram via the Posts endpoint
4. Repeat on your chosen schedule
Every automated post shows up in your Genviral dashboard calendar, so you always have a full audit trail of what was posted and when.
## Beyond Image Posts
This tutorial focused on infographic-style image posts, but you're not limited to that. Depending on your setup, you can also:
- **Create AI videos** using the Studio endpoint and post them as Reels
- **Bring your own images** from your OpenClaw environment
- **Generate slideshows** using the [Slideshows endpoint](https://docs.genviral.io/api-reference/create-slideshow) and post them as carousels
- **Mix content types** - alternate between images, videos, and carousels on a schedule
It all depends on how you configure your agent and what endpoints you give it access to.
## Tips From Our Setup
A few things we've learned running this:
- **Post manually first.** Spend a few days posting through the Genviral dashboard before automating. Understand the content flow, see what looks good, and build that reference corpus for your agent.
- **Split your skill files.** Don't load the entire API docs every run. Only give the agent the endpoints it actually needs. This is the single biggest token saver.
- **Use step-by-step confirmation.** Have the agent ask you about each part of the setup individually. Don't try to configure everything in one prompt.
- **Add negative prompts.** If you spot visual artifacts in generated images, tell the agent to add self-checks. It learns and applies them to future generations.
- **Pre-fill before ads.** The whole point for us is that when someone clicks an ad and lands on the Instagram page, there's real content there. Even a few weeks of consistent posts makes a difference.
- **Review weekly.** Even fully automated, check in once a week. Skim the dashboard, spot-check a few posts, and adjust if needed.
## Getting Started
Full disclosure - I'm one of the founders of Genviral, so I'm biased. But we built this because we needed it ourselves, and the approach of pre-filling brand pages before running ads has worked well for us.
To get started:
1. Sign up at [genviral.io](https://www.genviral.io/auth)
2. Connect your Instagram account under Social Posts
3. Generate an API key at [genviral.io/api-keys](https://www.genviral.io/api-keys)
4. Install the [Genviral Skill](https://github.com/fdarkaou/genviral-skill) in OpenClaw
5. Feed it the [API docs](https://docs.genviral.io/api-reference/introduction)
6. Walk through the setup step by step
7. Validate, then automate
The Genviral API and OpenClaw Skill are available on all paid plans, starting at $29/month on the Creator tier.
- [Genviral Skill for OpenClaw on GitHub](https://github.com/fdarkaou/genviral-skill)
- [API Documentation](https://docs.genviral.io/api-reference/introduction)
- [Postman Collection](https://www.genviral.io/postman-collection.json)
- [API Keys](https://www.genviral.io/api-keys)
If you have any questions, drop a comment on the YouTube video or reach out through our support chat or Discord community. We're also happy to hop on a call to help set this up - that offer stands for every Genviral customer.
---
## Related Guides
- [How to Connect Claude to Instagram and Automate Posting](https://www.genviral.io/blog/claude-instagram-automation)
- [How to Use OpenClaw to Automate Your Social Media (Full Guide)](https://www.genviral.io/blog/how-to-use-openclaw)
- [15 Best OpenClaw Skills for Social Media Marketing](https://www.genviral.io/blog/best-openclaw-skills-social-media)
- [How to Automate LinkedIn Posting with OpenClaw and Genviral](https://www.genviral.io/blog/openclaw-linkedin)
- [How to Automate Facebook Posting with OpenClaw and Genviral](https://www.genviral.io/blog/openclaw-facebook)
- [How to Automate Pinterest Posting with OpenClaw and Genviral](https://www.genviral.io/blog/openclaw-pinterest)
- [How to Automate TikTok Posting with OpenClaw and Genviral](https://www.genviral.io/blog/openclaw-tiktok)
- [How to Automate YouTube Posting with OpenClaw and Genviral](https://www.genviral.io/blog/openclaw-youtube)
---
Canonical HTML: https://www.genviral.io/blog/openclaw-instagram
# How to Automate LinkedIn Posting with OpenClaw
- Your OpenClaw agent can create and publish LinkedIn posts on your behalf without you ever logging into LinkedIn.
- Setup requires three things: the [Genviral Skill GitHub repo](https://github.com/fdarkaou/genviral-skill), the [API documentation](https://docs.genviral.io/api-reference/introduction), and an [API key](https://www.genviral.io/api-keys).
- Split your skill MD files by endpoint category (posts, studio AI, analytics, etc.) so your agent only loads what it needs per run - this saves a lot of tokens.
- Connect your personal LinkedIn account in the Genviral dashboard first. Company pages are not yet supported - only personal profiles.
- Walk through the setup step by step with your agent rather than trying to configure everything in one prompt.
## Why LinkedIn
LinkedIn is where professional audiences live. Whether you're building a personal brand, sharing thought leadership, or promoting your product, consistent posting is what drives visibility. But logging in every day, writing posts, and hitting publish is a grind - especially if you're already managing content on TikTok, Instagram, YouTube, Pinterest, and Facebook.
An OpenClaw agent connected to Genviral handles this for you. It can write text posts, create carousels using the Studio AI endpoint, and publish directly to your LinkedIn profile - all without you opening LinkedIn once.
## What You Need
Three things to feed your OpenClaw agent:
1. **The GitHub repo** - [github.com/fdarkaou/genviral-skill](https://github.com/fdarkaou/genviral-skill) (also linked in the Genviral homepage footer)
2. **The API documentation** - [docs.genviral.io](https://docs.genviral.io/api-reference/introduction)
3. **An API key** - generate one at [genviral.io/api-keys](https://www.genviral.io/api-keys) (requires an active subscription)
You can feed all three to your agent in a single message. It works with any chatbot that supports OpenClaw: Telegram, WhatsApp, or whatever you prefer.
## Step 1: Organize Your Skill Files
This is the single biggest token saver. When you set up the Genviral skill, **create separate MD files for each endpoint category**:
```
genviral-skill/
├── files/
├── folders/
├── studio-ai/
├── posts/
├── slideshows/
├── packs/
├── templates/
└── analytics/
```
Why does this matter? If you tell your agent to create a LinkedIn post, it will scan the entire API documentation every time unless you split things up. That burns through tokens fast. For most LinkedIn workflows, you only need the **Posts** endpoint. If you're creating carousels or images with AI, add **Studio AI**. If you want to analyze performance, add **Analytics**. That's it - skip the rest.
## Step 2: Connect Your LinkedIn Account in Genviral
Before your agent can post anything, you need to connect your LinkedIn account in the Genviral dashboard.
1. Go to the **Social Posts** section
2. Click **Manage Accounts**
3. Click **Connect** and add your LinkedIn account
4. Create a test post manually to verify the connection works
**Important:** Genviral supports both personal LinkedIn profiles and LinkedIn public pages. If your agent needs to post to a brand presence, you can use a connected public page instead of limiting the workflow to personal profiles.
Once connected, your OpenClaw agent can reference the account by ID when creating posts through the API.
## Step 3: Let Your Agent Familiarize Itself
If you already have other automations running (like we have for Pinterest, TikTok, Instagram, Facebook, and YouTube), tell your agent to familiarize itself with your existing setup first. This way it understands your content style, posting patterns, and how things are structured before building the LinkedIn flow.
If this is your first automation, just feed the agent the skill files, the API docs, and your API key, then tell it to set up the Genviral skill and configure the LinkedIn automation.
## Step 4: Walk Through the Setup Step by Step
This is a general best practice with AI agents, but especially important here. Instead of trying to configure everything in one prompt, tell your agent:
> "I want to post to LinkedIn automatically. Please ask me step-by-step questions about each part of the setup."
The agent will then ask you about:
- **Account selection** - which LinkedIn profile to post to
- **Content type** - text posts, carousels, image posts, or a mix
- **Content source** - writing original content, repurposing from other platforms, or generating with AI
- **Tone and style** - professional, casual, storytelling, data-driven
- **Scheduling** - how often, what days and times
- **Approval flow** - publish directly or review each post first
Answer each question, and the agent configures itself accordingly.
## Step 5: Review a Sample Post
Before going autonomous, have the agent **create at least one sample post in chat** so you can review it.
Check:
- Does the tone match your LinkedIn voice?
- Is the post length appropriate? (LinkedIn rewards longer, thoughtful posts)
- Are hashtags relevant and not overdone?
- If it's a carousel, do the slides flow well and look clean?
If something looks off, tell the agent what to fix. Once you're satisfied, test the full end-to-end flow by publishing one real post through the agent.
## Step 6: Test the End-to-End Flow
Before setting up the cron job, publish one post through the agent to test the full pipeline:
1. Agent writes or generates the post content
2. Agent creates the post with text, images, or carousel
3. Post is published to LinkedIn via the [Posts endpoint](https://docs.genviral.io/api-reference/create-post)
4. Post appears in your Genviral dashboard calendar tagged with `source: partner_api`
If the post goes through successfully and looks good on LinkedIn, you're ready to automate.
## Step 7: Set Up the Cron Job
Once everything checks out, configure your agent to run on a schedule. The agent will:
1. Generate or source the content
2. Write the post copy, format it for LinkedIn
3. Publish to LinkedIn via the Posts endpoint
4. Repeat on your chosen schedule
Every automated post shows up in your Genviral dashboard calendar, so you always have a full audit trail of what was posted and when.
## Content Ideas for LinkedIn Automation
LinkedIn rewards specific types of content. Here are some workflows that work well with an OpenClaw agent:
- **Text posts with insights** - Your agent can write daily posts based on topics or themes you define. Great for thought leadership.
- **Carousels** - Use the Studio AI endpoint to generate carousel slides. LinkedIn's algorithm heavily favors carousels for engagement.
- **Repurposed content** - If you're already creating content for other platforms, your agent can adapt it for LinkedIn's professional tone.
- **Data-driven posts** - Feed your agent analytics data and have it create posts highlighting trends, learnings, or results.
## Personal Profiles vs. Public Pages
The LinkedIn integration supports **personal profiles and LinkedIn public pages**. That means you can run personal-brand posting, company visibility, and brand publishing from the same Genviral workflow.
For most use cases, personal profiles still drive the strongest reach. Public pages are there when you also need a dedicated brand presence or want your agent to publish directly to a company-facing account.
## Tips From Our Setup
A few things we've learned:
- **Split your skill files.** This keeps coming up because it matters that much. Don't load the entire API docs every run. Only give the agent the endpoints it actually needs.
- **Use step-by-step confirmation.** Have the agent ask you about each part of the setup individually. Don't try to configure everything in one prompt.
- **Optimize for LinkedIn's format.** LinkedIn posts that perform well tend to be longer, use line breaks for readability, and tell a story or share a specific insight. Tell your agent to write in that style.
- **Set up Telegram notifications.** We use Telegram to get confirmations about every automated post. It's a quick way to monitor without logging into anything.
- **Start with text posts.** They're the simplest to get right and don't require any image generation. Once your workflow is solid, add carousels and images.
- **Review weekly.** Even fully automated, check in once a week. Skim the dashboard, spot-check a few posts, and adjust if needed.
## Getting Started
Full disclosure - I'm one of the founders of Genviral, so I'm biased. But we built this because our customers kept asking for LinkedIn support, and it's now one of the fastest-growing use cases for the API.
To get started:
1. Sign up at [genviral.io](https://www.genviral.io/auth)
2. Connect your LinkedIn account under Social Posts
3. Generate an API key at [genviral.io/api-keys](https://www.genviral.io/api-keys)
4. Install the [Genviral Skill](https://github.com/fdarkaou/genviral-skill) in OpenClaw
5. Feed it the [API docs](https://docs.genviral.io/api-reference/introduction)
6. Walk through the setup step by step
7. Validate, then automate
The Genviral API and OpenClaw Skill are available on all paid plans, starting at $29/month on the Creator tier.
- [Genviral Skill for OpenClaw on GitHub](https://github.com/fdarkaou/genviral-skill)
- [API Documentation](https://docs.genviral.io/api-reference/introduction)
- [Postman Collection](https://www.genviral.io/postman-collection.json)
- [API Keys](https://www.genviral.io/api-keys)
If you have any questions, drop them in the comments on the video or reach out through our support chat on the homepage. We're also happy to hop on a call to help set this up - that offer stands for every Genviral customer.
---
## Related Guides
- [How to Use OpenClaw to Automate Your Social Media (Full Guide)](https://www.genviral.io/blog/how-to-use-openclaw)
- [15 Best OpenClaw Skills for Social Media Marketing](https://www.genviral.io/blog/best-openclaw-skills-social-media)
- [How to Automate Facebook Posting with OpenClaw and Genviral](https://www.genviral.io/blog/openclaw-facebook)
- [How to Automate Instagram Posting with OpenClaw and Genviral](https://www.genviral.io/blog/openclaw-instagram)
- [How to Automate TikTok Posting with OpenClaw and Genviral](https://www.genviral.io/blog/openclaw-tiktok)
- [How to Automate Pinterest Posting with OpenClaw and Genviral](https://www.genviral.io/blog/openclaw-pinterest)
- [How to Automate YouTube Posting with OpenClaw and Genviral](https://www.genviral.io/blog/openclaw-youtube)
---
Canonical HTML: https://www.genviral.io/blog/openclaw-linkedin
# How to Automate Pinterest Posting with OpenClaw
- We currently run 4-5 Pinterest accounts fully automated with OpenClaw agents posting every 4-5 hours - no manual work involved.
- Setup requires three things: the [Genviral Skill GitHub repo](https://github.com/fdarkaou/genviral-skill), the [API documentation](https://docs.genviral.io/api-reference/introduction), and an [API key](https://www.genviral.io/api-keys).
- The key to saving tokens (and money) is organizing your skill MD files by endpoint - your Pinterest agent doesn't need the slideshows or templates docs.
- Always validate quality manually first before going fully autonomous. Have the agent create one test post in chat so you can review it.
- Once you're happy with the output, set up a cron job and let it run.
## Proof It Works
Before we dive into the setup, let me show you the results. One of our accounts is [Pantry AI](https://www.pinterest.com/pantryai/) - a cooking app where we publish one-page cookbook recipes. Four steps, different recipes, all generated and posted automatically. The analytics speak for themselves.
And this isn't the only account. We're currently running four to five different Pinterest accounts, each with different visual styles. All fully automated.
## What You Need
Three things to feed your OpenClaw agent:
1. **The GitHub repo** - [github.com/fdarkaou/genviral-skill](https://github.com/fdarkaou/genviral-skill) (also linked in the Genviral homepage footer)
2. **The API documentation** - [docs.genviral.io](https://docs.genviral.io/api-reference/introduction)
3. **An API key** - generate one at [genviral.io/api-keys](https://www.genviral.io/api-keys)
The API docs cover far more than just Pinterest. You can create TikTok slideshows, generate AI content via the Studio endpoint, find viral videos through the Trends endpoint, analyze performance across platforms, and more. But for this specific setup, we only need a subset.
## Step 1: Organize Your Skill Files
This is critical for keeping costs down. When you feed the API docs to your agent, tell it to **create separate MD files for each endpoint category**. Your file structure should look something like:
```
genviral-skill/
├── files/
├── folders/
├── studio-ai/
├── posts/
├── slideshows/
├── packs/
├── templates/
└── analytics/
```
Why does this matter? Your Pinterest agent probably doesn't need the templates endpoint, the packs endpoint, or the slideshow endpoint. It really just needs **Posts**, **Studio AI** (for image generation), and maybe **Files**. By splitting things up, you save a lot of tokens - and by extension, a lot of money.
## Step 2: Connect Your Pinterest Account in Genviral
Before your agent can post anything, you need to connect your Pinterest account in the Genviral dashboard.
1. Go to the **Social Posts** section
2. Click **Manage Accounts**
3. Click **Connect** and add your Pinterest account(s)
4. Create a test post manually - click **New Post**, select your Pinterest account, and publish one pin
That last step is important. When you make that first post, Genviral reads all the boards on your account. This means your agent will be able to reference your boards by name when posting.
## Step 3: Talk to Your Agent (Step by Step)
Here's where most people go wrong: they try to set everything up in one go. Instead, have a conversation with your agent and walk through it step by step.
Tell your agent something like:
> "I want to post to Pinterest automatically. Please ask me step-by-step questions on how we can set this up."
The agent will then ask you:
- **Which Pinterest account?** (username, account ID)
- **Personal account or workspace?**
- **What image style are you going for?**
- **What boards should it post to?**
- **Do you want approval before each post, or fully automated?**
Answer each question, and the agent will configure itself accordingly.
## Step 4: Prepare Your Reference Images
This is really important and often overlooked. Your agent needs to know what visual style to use when creating content. The way we handle this:
- Create a folder of **reference images** that represent your desired style
- Tell the agent: "Pick reference images from this folder"
- The AI uses these as style guides when generating new pins via the [Studio endpoint](https://docs.genviral.io/api-reference/generate-studio-image)
For our Pantry AI account, we had detailed image prompts already dialed in that consistently produce good-looking one-page recipe infographics. The more specific your prompt and references, the more consistent the output.
## Step 5: Specify Your Boards
Since you connected your Pinterest account in Step 2, your agent now has access to your board list. Hard-code these into your agent's configuration:
> "These are my boards: [Recipe Infographics, Quick Meals, Desserts]. Post to these boards based on the recipe category."
The agent will map content to the right board automatically. This is hard-coded into the agent's logic, so it doesn't need to figure it out each time.
## Step 6: Validate Before You Automate
Before you flip the switch to fully autonomous, have the agent **create at least one post in the chat** so you can review it.
Check:
- Is the image quality good?
- Is the pin description accurate?
- Are the tags relevant?
- Is it posting to the right board?
We're dealing with AI and automation here. You want to make sure there's a baseline level of quality before you remove yourself from the loop. Once you're happy with the output, you can trust it to run on its own.
## Step 7: Set Up the Cron Job
Once everything looks good, configure your agent to run on a schedule. For our accounts, we post **every 4-5 hours** - a new pin is generated and published automatically without any intervention.
The agent uses cron jobs to:
1. Generate a new image using the Studio endpoint
2. Create a post with the right board, tags, title, and link
3. Publish to Pinterest via the [Posts endpoint](https://docs.genviral.io/api-reference/create-post)
4. Repeat on schedule
Every automated post shows up in your Genviral dashboard calendar tagged with `source: partner_api`, so you always have a full audit trail.
## Pinterest Post Settings
When posting via the API, you can configure Pinterest-specific settings:
| Setting | Description |
|---------|-------------|
| `board_id` | Which board to pin to |
| `title` | Pin title (max 100 characters) |
| `link` | Destination URL when someone clicks the pin |
| `tags` | Up to 30 tags for discovery |
These are passed in the `pinterest` object when creating a post. Your agent handles this automatically once configured.
## Tips From Running 4-5 Accounts
A few things we've learned:
- **Do it manually first.** Before automating, post manually for a week. Understand what works, what the rhythm feels like, and what your audience responds to.
- **Different styles per account.** Each of our accounts has a distinct visual identity. Don't use the same prompts across accounts.
- **Detailed prompts win.** The more specific your image generation prompt, the more consistent the output. Vague prompts = inconsistent quality.
- **Reference images are non-negotiable.** Always give the AI something to work from. It's the difference between "looks AI-generated" and "looks intentional."
- **Review weekly.** Even fully automated, check in once a week. Skim the dashboard, spot-check a few pins, and adjust if needed.
## Getting Started
Full disclosure - I'm one of the founders of Genviral, so I'm biased. But we built this because we needed it ourselves, and the results on our own accounts speak to how well it works.
To get started:
1. Sign up at [genviral.io](https://www.genviral.io/auth)
2. Connect your Pinterest account under Social Posts
3. Generate an API key at [genviral.io/api-keys](https://www.genviral.io/api-keys)
4. Install the [Genviral Skill](https://github.com/fdarkaou/genviral-skill) in OpenClaw
5. Feed it the [API docs](https://docs.genviral.io/api-reference/introduction)
6. Walk through the setup step by step
7. Validate, then automate
The Genviral API and OpenClaw Skill are available on all paid plans, starting at $29/month on the Creator tier.
- [Genviral Skill for OpenClaw on GitHub](https://github.com/fdarkaou/genviral-skill)
- [API Documentation](https://docs.genviral.io/api-reference/introduction)
- [Postman Collection](https://www.genviral.io/postman-collection.json)
- [API Keys](https://www.genviral.io/api-keys)
If you have any questions, reach out - happy to help.
---
## Related Guides
- [How to Automate Pinterest Posting with Hermes Agent](https://www.genviral.io/blog/hermes-agent-pinterest)
- [How to Use OpenClaw to Automate Your Social Media (Full Guide)](https://www.genviral.io/blog/how-to-use-openclaw)
- [15 Best OpenClaw Skills for Social Media Marketing](https://www.genviral.io/blog/best-openclaw-skills-social-media)
- [How to Automate LinkedIn Posting with OpenClaw and Genviral](https://www.genviral.io/blog/openclaw-linkedin)
- [How to Automate Facebook Posting with OpenClaw and Genviral](https://www.genviral.io/blog/openclaw-facebook)
- [How to Automate Instagram Posting with OpenClaw and Genviral](https://www.genviral.io/blog/openclaw-instagram)
- [How to Automate TikTok Posting with OpenClaw and Genviral](https://www.genviral.io/blog/openclaw-tiktok)
- [How to Automate YouTube Posting with OpenClaw and Genviral](https://www.genviral.io/blog/openclaw-youtube)
- [Pinterest Posting Strategy](https://www.genviral.io/blog/pinterest-posting-strategy)
- [Pinterest Tips and Tricks](https://www.genviral.io/blog/pinterest-tips-and-tricks)
- [How to Make a Board on Pinterest Private](https://www.genviral.io/blog/how-to-make-a-board-on-pinterest-private)
- [How to Make Money with Pinterest](https://www.genviral.io/blog/how-to-make-money-with-pinterest)
---
Canonical HTML: https://www.genviral.io/blog/openclaw-pinterest
# How to Automate TikTok Posting with OpenClaw
- We use OpenClaw agents to automatically generate and post TikTok slideshows (like three-page cookbook recipes) on a recurring schedule with zero manual work.
- Setup requires three things: the [Genviral Skill GitHub repo](https://github.com/fdarkaou/genviral-skill), the [API documentation](https://docs.genviral.io/api-reference/introduction), and an [API key](https://www.genviral.io/api-keys).
- Split your skill MD files by endpoint category (posts, slideshows, studio AI, etc.) so your agent only loads what it needs per run. This saves a lot of tokens.
- Set up image packs and reference images in Genviral before automating. The AI uses these to keep your visual style consistent across posts.
- Only automate content formats you've already validated manually. The AI is great at scaling proven formats, not discovering new ones.
## Proof It Works
Before we get into setup, here's what this looks like in practice. One of the accounts we run is a cooking page that publishes automated three-page cookbook recipes: an introduction slide, an ingredients list, and the cooking instructions. All generated and posted by an OpenClaw agent connected to Genviral.
This post alone has over 7,000 views, and the entire account runs without any manual intervention. The same approach works for videos too, not just slideshows.
## What You Need
Three things to feed your OpenClaw agent:
1. **The GitHub repo** - [github.com/fdarkaou/genviral-skill](https://github.com/fdarkaou/genviral-skill) (also linked in the Genviral homepage footer)
2. **The API documentation** - [docs.genviral.io](https://docs.genviral.io/api-reference/introduction)
3. **An API key** - generate one at [genviral.io/api-keys](https://www.genviral.io/api-keys) (requires an active subscription)
You can feed all three to your agent in a single message. It works with any chatbot that supports OpenClaw: Telegram, WhatsApp, or whatever you prefer. The mechanics are the same.
## Step 1: Organize Your Skill Files
This is the single biggest token saver. When you set up the Genviral skill, **create separate MD files for each endpoint category**:
```
genviral-skill/
├── files/
├── folders/
├── studio-ai/
├── posts/
├── slideshows/
├── packs/
├── templates/
└── analytics/
```
Why does this matter? If your TikTok agent only posts slideshows, it doesn't need the templates endpoint or the analytics endpoint loaded on every run. By splitting things up, you avoid loading the entire API docs each time, which saves a lot of tokens and by extension a lot of money.
In your skill MD file, reference only the specific endpoint files that your automation actually needs. For a TikTok slideshow agent, that's typically **Slideshows**, **Studio AI** (for image generation), **Packs** (for image packs), and **Posts**.
## Step 2: Set Up Your Image Packs and Reference Images
This step is critical and often overlooked. Before your agent can create slideshows, it needs visual assets to work with.
In the Genviral dashboard:
1. Go to **Media Library** and then **Image Packs**
2. Create your packs and **name them descriptively**. The AI reads pack names and folder names to understand what the images are about
3. Upload reference images that represent your desired visual style
Genviral uses AI in the background to analyze and enrich the metadata of your images. But good naming on your end makes a huge difference. For example, instead of "Pack 1", use "Cookbook Recipe Cards - Warm Tones" so the agent knows exactly what it's working with.
If you're generating images rather than using pre-made ones (like we do with Nano Banana 2), your reference images serve as style guides. The AI uses them to keep a consistent look across all generated content.
## Step 3: Connect Your TikTok Account in Genviral
Before your agent can post anything, connect your TikTok account in the Genviral dashboard.
1. Go to the **Social Posts** section
2. Click **Manage Accounts**
3. Click **Connect** and add your TikTok account
4. Create a test post manually to verify the connection works
## Step 4: Walk Through the Setup Step by Step
This is where having a conversation with your agent pays off. Instead of trying to configure everything in one prompt, tell your agent:
> "I want to post TikTok slideshows automatically. Please walk me through the setup step by step and ask me to specify each part of the configuration."
The agent will then ask you about:
- **Account selection** - which TikTok account to post to
- **Content type** - slideshows, videos, or both
- **Image generation** - use image packs, generate with AI Studio, or bring your own
- **Image style** - which reference images or prompts to use
- **Slideshow format** - how many slides, what structure (intro + ingredients + instructions, etc.)
- **Caption format** - tone, length, hashtags
- **Posting mode** - publish directly or upload as draft for your review
- **Schedule** - how often, what times
Answer each question, and the agent configures itself accordingly.
## Step 5: Choose Your Content Pipeline
Depending on what you want to post, there are a few different paths:
### Slideshows (what we use)
Use the [Slideshows endpoint](https://docs.genviral.io/api-reference/create-slideshow) to create multi-slide posts. This is what we use for the cookbook recipes. The agent generates images, assembles them into a slideshow, writes a caption, and posts to TikTok.
### Videos
If you already have videos (maybe your OpenClaw agent is connected to Google Drive, Canva, or another source), use the file upload function and the [Posts endpoint](https://docs.genviral.io/api-reference/create-post) to publish them directly.
### AI-Generated Images and Videos
Use the [Studio endpoint](https://docs.genviral.io/api-reference/generate-studio-image) to generate content with AI models. Available models include Nano Banana 2, Kling, Sora 2, and all other leading models listed in the API docs.
## Step 6: Validate Before You Automate
Before flipping the switch, have the agent **create at least one sample post in chat** so you can review it.
Check:
- Is the image quality acceptable?
- Does the slideshow flow make sense?
- Is the caption well-written?
- Are there any visual artifacts? (If so, add negative prompts to prevent them in future generations)
If something looks off, tell the agent what to fix. Once you're satisfied, test the full end-to-end flow by publishing one real post through the agent. You can use draft mode for this if you want to review it on TikTok before it goes live.
## Step 7: Set Up the Cron Job
Once everything checks out, tell the agent to set up a cron job. The agent will:
1. Generate images using the Studio endpoint (or pull from image packs)
2. Assemble them into a slideshow
3. Write a caption with relevant hashtags
4. Publish to TikTok via the Posts endpoint
5. Repeat on your chosen schedule
Every automated post shows up in your Genviral dashboard calendar tagged with `source: partner_api`, so you always have a full audit trail.
## Bonus: Connect Analytics for Recursive Improvement
One of the more powerful things you can do is connect your analytics within Genviral (under the **Analytics** tab). Once connected, your agent has access to performance data and can:
- Analyze which posts are performing well
- Look at what captions, formats, and styles drive the most views
- Recursively improve future content based on what the data shows
This turns your automation from "set it and forget it" into something that actually gets better over time.
## Tips From Our Setup
A few things we've learned running this:
- **Only automate proven formats.** If you already have a content template that works (like our three-page cookbook recipes), the AI is excellent at scaling it. But if you're still figuring out what format resonates with your audience, do that manually first. The AI is not as good at discovering new formats as it is at replicating and scaling existing ones.
- **Split your skill files.** This keeps coming up because it matters that much. Don't load the entire API docs every run.
- **Name everything descriptively.** Image packs, folders, reference images. The better the naming, the better the AI understands what to pick and how to use it.
- **Use step-by-step confirmation.** Have the agent ask you about each part of the setup individually. Don't try to configure everything in one prompt.
- **Draft mode is your friend.** When starting out, have the agent upload as drafts so you can review on TikTok before anything goes live.
- **Review weekly.** Even fully automated, check in once a week. Skim the dashboard, spot-check a few posts, and adjust if needed.
## Getting Started
Full disclosure: I'm one of the founders of Genviral, so I'm biased. But we built this because we needed it ourselves, and the cookbook recipe account is one of many we run this way.
To get started:
1. Sign up at [genviral.io](https://www.genviral.io/auth)
2. Set up your image packs and reference images in the Media Library
3. Connect your TikTok account under Social Posts
4. Generate an API key at [genviral.io/api-keys](https://www.genviral.io/api-keys)
5. Install the [Genviral Skill](https://github.com/fdarkaou/genviral-skill) in OpenClaw
6. Feed it the [API docs](https://docs.genviral.io/api-reference/introduction)
7. Walk through the setup step by step
8. Validate, then automate
The Genviral API and OpenClaw Skill are available on all paid plans, starting at $29/month on the Creator tier.
If you need help setting things up, you can book a call with me via our landing page. It's completely free for subscribers. We also have a [Knowledge Base](https://www.genviral.io/knowledge-base) with video tutorials covering slideshows, image packs, templates, automations, and more.
- [Genviral Skill for OpenClaw on GitHub](https://github.com/fdarkaou/genviral-skill)
- [API Documentation](https://docs.genviral.io/api-reference/introduction)
- [Postman Collection](https://www.genviral.io/postman-collection.json)
- [API Keys](https://www.genviral.io/api-keys)
If you have any questions, drop them in the comments on the video or reach out through our support chat or Discord community.
---
## Related Guides
- [How to Use OpenClaw to Automate Your Social Media (Full Guide)](https://www.genviral.io/blog/how-to-use-openclaw)
- [How to Automate TikTok Posting with Hermes Agent](https://www.genviral.io/blog/hermes-agent-tiktok)
- [15 Best OpenClaw Skills for Social Media Marketing](https://www.genviral.io/blog/best-openclaw-skills-social-media)
- [How to Automate LinkedIn Posting with OpenClaw and Genviral](https://www.genviral.io/blog/openclaw-linkedin)
- [How to Automate Facebook Posting with OpenClaw and Genviral](https://www.genviral.io/blog/openclaw-facebook)
- [How to Automate Pinterest Posting with OpenClaw and Genviral](https://www.genviral.io/blog/openclaw-pinterest)
- [How to Automate Instagram Posting with OpenClaw and Genviral](https://www.genviral.io/blog/openclaw-instagram)
- [How to Automate YouTube Posting with OpenClaw and Genviral](https://www.genviral.io/blog/openclaw-youtube)
- [How to Delete Your TikTok Account](https://www.genviral.io/blog/how-to-delete-tiktok-account)
---
Canonical HTML: https://www.genviral.io/blog/openclaw-tiktok
# How to Automate YouTube Posting with OpenClaw
- Most customers use this to cross-post short-form videos from TikTok and Instagram to YouTube Shorts - the agent handles the distribution automatically.
- Setup requires three things: the [Genviral Skill GitHub repo](https://github.com/fdarkaou/genviral-skill), the [API documentation](https://docs.genviral.io/api-reference/introduction), and an [API key](https://www.genviral.io/api-keys).
- Split your skill MD files by endpoint category (posts, studio AI, analytics, etc.) so your agent only loads what it needs per run - this saves a lot of tokens.
- Connect your YouTube account in the Genviral dashboard first, then walk through the setup step by step with your agent.
- The API also exposes YouTube analytics, so your agent can analyze which videos are performing well and adjust its strategy over time.
## Why YouTube
The most common use case we see from our customer base is cross-posting. People already have content creation engines running for TikTok and Instagram - short-form videos, Reels, slideshows - and they want that same content distributed to YouTube Shorts without doing it manually. An OpenClaw agent connected to Genviral handles this automatically.
Beyond cross-posting, the Genviral API also exposes YouTube analytics. This means your agent can pull performance data, analyze which videos are doing well, understand why, and use that information to inform future content decisions. It turns a simple distribution tool into something that gets smarter over time.
## What You Need
Three things to feed your OpenClaw agent:
1. **The GitHub repo** - [github.com/fdarkaou/genviral-skill](https://github.com/fdarkaou/genviral-skill) (also linked in the Genviral homepage footer)
2. **The API documentation** - [docs.genviral.io](https://docs.genviral.io/api-reference/introduction)
3. **An API key** - generate one at [genviral.io/api-keys](https://www.genviral.io/api-keys) (requires an active subscription)
You can feed all three to your agent in a single message. It works with any chatbot that supports OpenClaw: Telegram, WhatsApp, or whatever you prefer.
## Step 1: Organize Your Skill Files
This is the single biggest token saver. When you set up the Genviral skill, **create separate MD files for each endpoint category**:
```
genviral-skill/
├── files/
├── folders/
├── studio-ai/
├── posts/
├── slideshows/
├── packs/
├── templates/
└── analytics/
```
Why does this matter? If your YouTube agent only cross-posts videos, it doesn't need the slideshows endpoint, the templates endpoint, or the packs endpoint loaded on every run. By splitting things up, you avoid loading the entire API docs each time - which saves a lot of tokens and by extension a lot of money.
For a YouTube cross-posting agent, you'll typically need **Posts** and maybe **Analytics**. If you're also generating content with AI, add **Studio AI**. That's it.
## Step 2: Connect Your YouTube Account in Genviral
Before your agent can post anything, you need to connect your YouTube account in the Genviral dashboard.
1. Go to the **Social Posts** section
2. Click **Manage Accounts**
3. Click **Connect** and add your YouTube account
4. Create a test post manually to verify the connection works
This initial account connection has to happen in Genviral. Once connected, your OpenClaw agent can reference the account by ID when creating posts through the API.
## Step 3: Let Your Agent Familiarize Itself
If you already have other automations running (like we have for Pinterest, TikTok, Instagram, and Facebook), tell your agent to familiarize itself with your existing setup first. This way it understands your content style, posting patterns, and how things are structured before building the YouTube flow.
If this is your first automation, just feed the agent the skill files, the API docs, and your API key, then tell it to set up the Genviral skill and configure the YouTube automation.
## Step 4: Walk Through the Setup Step by Step
This is a general best practice with AI agents, but especially important here. Instead of trying to configure everything in one prompt, tell your agent:
> "I want to post to YouTube automatically. Please ask me step-by-step questions about each part of the setup."
The agent will then ask you about:
- **Account selection** - which YouTube account to post to
- **Content source** - cross-posting from other platforms, uploading your own videos, or generating with AI
- **Video format** - Shorts, long-form, or both
- **Title and description format** - tone, length, keywords, hashtags
- **Scheduling** - how often, what times
- **Approval flow** - publish directly or review each post first
Answer each question, and the agent configures itself accordingly.
## Step 5: Review a Sample Post
Before going autonomous, have the agent **create at least one sample post in chat** so you can review it.
Check:
- Is the video the right format and quality?
- Does the title accurately describe the content?
- Is the description well-written with relevant keywords?
- Are the tags appropriate?
If something looks off, tell the agent what to fix. Once you're satisfied, test the full end-to-end flow by publishing one real post through the agent.
## Step 6: Test the End-to-End Flow
Before setting up the cron job, publish one post through the agent to test the full pipeline:
1. Agent selects or generates the video content
2. Agent creates the post with title, description, and tags
3. Post is published to YouTube via the [Posts endpoint](https://docs.genviral.io/api-reference/create-post)
4. Post appears in your Genviral dashboard calendar tagged with `source: partner_api`
If the post goes through successfully and looks good on YouTube, you're ready to automate.
## Step 7: Set Up the Cron Job
Once everything checks out, configure your agent to run on a schedule. The agent will:
1. Pull or generate the video content
2. Write a title, description, and tags
3. Publish to YouTube via the Posts endpoint
4. Repeat on your chosen schedule
Every automated post shows up in your Genviral dashboard calendar, so you always have a full audit trail of what was posted and when.
## Cross-Posting From Other Platforms
This is by far the most common setup we see. If you're already running automations for TikTok, Instagram, or Facebook, adding YouTube is straightforward. Your agent already has the content - it just needs to distribute it to one more platform.
The Genviral API supports multi-account posting, so you can include YouTube alongside your other platforms in the same request. This is especially efficient because you generate the content once and distribute it everywhere. Titles, descriptions, and tags can differ per platform if needed.
## Connect Analytics for Smarter Content
One of the more powerful things you can do is connect your YouTube analytics within Genviral (under the **Analytics** tab). Once connected, your agent has access to performance data and can:
- Analyze which videos are getting the most views and engagement
- Identify patterns in what's working (topics, formats, posting times)
- Adjust future content based on what the data shows
This turns your automation from "post and forget" into something that recursively improves. The agent can tell you what's performing well, why it thinks those videos are working, and use that to inform the next batch of content.
## Tips From Our Setup
A few things we've learned:
- **Cross-post proven content.** If a video is already doing well on TikTok or Instagram, it's a strong candidate for YouTube Shorts. Don't guess - use data.
- **Split your skill files.** This keeps coming up because it matters that much. Don't load the entire API docs every run. Only give the agent the endpoints it actually needs.
- **Use step-by-step confirmation.** Have the agent ask you about each part of the setup individually. Don't try to configure everything in one prompt.
- **Platform-specific metadata.** YouTube titles and descriptions should be optimized for YouTube search, not just copied from TikTok captions. Tell your agent to adjust the metadata per platform.
- **Review weekly.** Even fully automated, check in once a week. Skim the dashboard, spot-check a few posts, and adjust if needed.
- **Start with Shorts.** If you're cross-posting short-form content, YouTube Shorts is the natural fit. Long-form YouTube automation is a different game entirely.
## Getting Started
Full disclosure - I'm one of the founders of Genviral, so I'm biased. But we built this because our customers kept asking for it, and cross-posting to YouTube is now one of the most common use cases for the API.
To get started:
1. Sign up at [genviral.io](https://www.genviral.io/auth)
2. Connect your YouTube account under Social Posts
3. Generate an API key at [genviral.io/api-keys](https://www.genviral.io/api-keys)
4. Install the [Genviral Skill](https://github.com/fdarkaou/genviral-skill) in OpenClaw
5. Feed it the [API docs](https://docs.genviral.io/api-reference/introduction)
6. Walk through the setup step by step
7. Validate, then automate
The Genviral API and OpenClaw Skill are available on all paid plans, starting at $29/month on the Creator tier.
- [Genviral Skill for OpenClaw on GitHub](https://github.com/fdarkaou/genviral-skill)
- [API Documentation](https://docs.genviral.io/api-reference/introduction)
- [Postman Collection](https://www.genviral.io/postman-collection.json)
- [API Keys](https://www.genviral.io/api-keys)
If you have any questions, drop them in the comments on the video or reach out through our support chat on the homepage. We're also happy to hop on a call to help set this up - that offer stands for every Genviral customer.
---
## Related Guides
- [Claude YouTube Automation: Schedule Shorts with Claude Cowork](https://www.genviral.io/blog/claude-youtube-automation)
- [How to Automate YouTube Shorts Posting with Hermes Agent](https://www.genviral.io/blog/hermes-agent-youtube)
- [How to Use OpenClaw to Automate Your Social Media (Full Guide)](https://www.genviral.io/blog/how-to-use-openclaw)
- [15 Best OpenClaw Skills for Social Media Marketing](https://www.genviral.io/blog/best-openclaw-skills-social-media)
- [How to Automate LinkedIn Posting with OpenClaw and Genviral](https://www.genviral.io/blog/openclaw-linkedin)
- [How to Automate Facebook Posting with OpenClaw and Genviral](https://www.genviral.io/blog/openclaw-facebook)
- [How to Automate Instagram Posting with OpenClaw and Genviral](https://www.genviral.io/blog/openclaw-instagram)
- [How to Automate TikTok Posting with OpenClaw and Genviral](https://www.genviral.io/blog/openclaw-tiktok)
- [How to Automate Pinterest Posting with OpenClaw and Genviral](https://www.genviral.io/blog/openclaw-pinterest)
---
Canonical HTML: https://www.genviral.io/blog/openclaw-youtube
# Pinterest Posting Strategy 2026: How Often Should You Post?
- Pinterest works like a search engine, not a social feed - pins drive traffic for months or years, so consistency compounds over time in a way that Instagram and TikTok don't.
- **New accounts (0-6 months):** 3-5 fresh pins daily. Pinterest puts new accounts in a 60-90 day trust sandbox; steady daily activity gets you out faster.
- **Established accounts (6+ months):** 5-10 fresh pins daily. Top 1% of viral pins drive 50%+ of all traffic, so volume gives you more lottery tickets.
- **Seasonal campaigns** should start 45-90 days before peak - 45% of Pinterest users plan holidays 60+ days in advance. Post Christmas content in October, Valentine's in December.
- The most efficient workflow: batch-create 21-70 pins on Sunday in one 2-3 hour session, then schedule throughout the week. Never miss a day without spending time daily.
## TL;DR
Pinterest posting frequency in 2026:
- **New accounts (0 - 6 months)**: 3 - 5 fresh pins daily, focus on consistency
- **Established accounts (6+ months)**: 5 - 10 fresh pins daily, focus on quality
- **Seasonal campaigns**: 7 - 14 pins weekly, start 45 - 90 days before peak
- **Key insight**: Batch create on Sunday, schedule for the week
## Why Posting Frequency Matters on Pinterest
Unlike Instagram or TikTok, **Pinterest works like a search engine**. Your pins can drive traffic for months or years after posting. However, consistent posting signals to Pinterest that you're an active creator.
According to Tailwind's 2026 Benchmark Study of 1.2 million pins, **fresh content drives 90%+ of website traffic**. The algorithm heavily prioritizes new pins (Creates) over saves.
## New Accounts (0 - 6 Months): 3 - 5 Fresh Pins Daily
### Focus: Consistency Over Quantity
When starting on Pinterest, steady activity matters more than volume.
**Why This Range Works:**
- Pinterest puts new accounts in a 60 - 90 day "trust sandbox"
- Limited initial distribution while algorithm evaluates content
- Consistent daily activity helps you escape faster
**What Counts as "Fresh":**
- New image or video (not previously uploaded)
- Unique design with different graphics and text
- Can create multiple fresh pins for same URL by changing design
### Best Practices
**Establish Your Rhythm**
- Don't post 15 pins one day, then nothing for a week
- Pinterest rewards steady, predictable activity
- 3 pins daily = 21 pins per week
- 5 pins daily = 35 pins per week
**Mix Your Content**
- 70% your own content (blog posts, products)
- 30% curated from others in your niche
- Variety in formats: image pins, video pins, infographics
**Optimize Every Pin**
- Keyword-rich titles (front-load keywords)
- Descriptions: 100-200 characters
- Alt text on every pin (+25% impressions, +123% clicks)
- Relevant board placement
## Established Accounts (6+ Months): 5-10 Fresh Pins Daily
### Focus: Quality Content You Know Works
After 6 months of consistent activity, increase volume while maintaining quality.
**Why Volume Increases Now:**
- Escaped the trust sandbox
- Pinterest knows your content categories
- Better chance of initial distribution
- You understand what resonates
### The Numbers Game
**Top 1% of viral pins = 50%+ of all traffic**
This means:
- Most pins won't go viral (that's okay)
- More fresh content = more chances at viral pins
- Quality matters, but volume gives you more opportunities
### Use Your Analytics
By month 6, identify:
- Pin designs that get most saves
- Topics that drive most clicks
- Best-performing boards
- Optimal posting times
**Then create more of what works.**
## Seasonal Campaigns: 7-14 Pins Weekly, Start 45-90 Days Early
### Pinterest Users Plan Ahead
**45% of Pinterest users plan holidays 60+ days in advance.** This completely changes how seasonal content works.
### Seasonal Timeline
| Season | Start Pinning | Peak Search |
|--------|--------------|-------------|
| Christmas | October | Nov-Dec |
| Valentine's Day | December | Jan-Feb |
| Easter/Spring | February | Mar-Apr |
| Back to School | June | Jul-Aug |
| Halloween/Fall | July | Sep-Oct |
| Thanksgiving | September | Oct-Nov |
### Campaign Structure
**12-9 Weeks Before Peak:**
- 7 pins per week
- Introduce seasonal themes
- Establish seasonal boards
**8-4 Weeks Before Peak:**
- 10 pins per week
- Ramp up frequency
- Mix trending and evergreen content
**3-0 Weeks Before Peak:**
- 14 pins per week
- Focus on last-minute content
- Capitalize on peak searches
## What NOT to Do
### ❌ Posting 50 Times One Day, Then Nothing
This tanks accounts. Pinterest sees it as:
- Potential bot behavior
- Spam activity
- Inconsistent creator
**Fix:** Steady daily rhythm beats irregular bursts.
### ❌ Only Pinning Your Own Content
Pinterest rewards accounts that provide platform value.
**Fix:** 70/30 rule (70% your content, 30% curated)
### ❌ Ignoring Seasonal Opportunities
Posting holiday content when everyone else does means you've already missed the window.
**Fix:** Plan 45-90 days ahead using the timeline above.
## The Batch Creation Workflow
### Why Sunday Batch Creation Works
**Time Efficiency:**
- 2-3 hours on Sunday vs 20-30 min every day
- Deep work state for better creative output
- See entire week's content at once
**Better Performance:**
- Schedule for optimal posting times
- Never miss a day
- Maintain perfect consistency
### Simple Batch Workflow
**Sunday Session (2-3 hours):**
1. **Review analytics** (15 min)
- What worked last week?
- Any patterns in top pins?
2. **Create 21-70 pin designs** (90-120 min)
- Multiple designs per blog post/product
- Vary layouts, colors, text
3. **Schedule throughout week** (30 min)
- Spread evenly across 7 days
- Post at optimal times
- Mix topics and formats
## Measuring Success
### Key Metrics
**Engagement:**
- Saves (strongest quality signal)
- Clicks to website
- Impressions
- Close-ups
**Traffic:**
- Referral traffic in Google Analytics
- Conversion rate
- Time on site
- Learn more about [how to make money with Pinterest](https://www.genviral.io/blog/how-to-make-money-with-pinterest) once you have traffic.
### What to Expect
**Month 1-3:** 100-500 monthly visitors
- Focus on consistency, not results
**Month 4-6:** 500-2,000 monthly visitors
- Identify what works
**Month 7-12:** 2,000-10,000+ monthly visitors
- Double down on successful content
**Year 2+:** Exponential growth
- Old pins gain traction over time
## Your Action Plan
**New Account Checklist:**
- Set up 10-20 keyword-optimized boards (start them as secret boards while you fill them - see [how to make a board on Pinterest private](https://www.genviral.io/blog/how-to-make-a-board-on-pinterest-private))
- Post 3-5 fresh pins daily
- Mix 70% your content, 30% curated
- Optimize every pin (title, description, alt text)
- If you accidentally delete a board while organizing, you have 7 days to recover it - see [how to recover deleted Pinterest boards](https://www.genviral.io/blog/how-to-recover-deleted-pinterest-boards)
- Learn the basics of pin creation with our guide on [how to make a pin on Pinterest](https://www.genviral.io/blog/how-to-make-a-pin-on-pinterest)
- To clean up your boards, see our guide on [how to delete a Pinterest board](https://www.genviral.io/blog/how-to-delete-a-board-on-pinterest) or [how to merge Pinterest boards](https://www.genviral.io/blog/how-to-merge-pinterest-boards) to consolidate overlapping topics
- To remove individual pins you've saved, see [how to unsave pins on Pinterest](https://www.genviral.io/blog/how-to-unsave-pins-on-pinterest)
- Expand your reach by joining relevant [group boards on Pinterest](https://www.genviral.io/blog/how-to-find-group-boards-on-pinterest)
**Established Account Checklist:**
- Increase to 5-10 fresh pins daily
- Review analytics weekly
- Create variations of top performers
- Implement Sunday batch workflow
- For advanced optimization techniques, see our [Pinterest tips and tricks guide](https://www.genviral.io/blog/pinterest-tips-and-tricks)
**Seasonal Campaign Checklist:**
- Plan 90 days in advance
- Start pinning 45-90 days before peak
- Ramp to 7-14 pins weekly
- Create season-specific boards
## Final Thoughts
The #1 factor in Pinterest success isn't perfect pins - it's **consistent, quality posting over time**.
Pinterest rewards:
- Reliable daily activity
- Fresh, valuable content
- Long-term thinking (months, not days)
Start with 3 pins daily. Build consistency. Scale as you grow.
Remember: Pins you create today drive traffic for months or years. That's the compound interest of Pinterest marketing. For detailed pin creation instructions, see our guide on [how to make a pin on Pinterest](https://www.genviral.io/blog/how-to-make-a-pin-on-pinterest). For creating interactive collages, see [how to make Pinterest collage](https://www.genviral.io/blog/how-to-make-pinterest-collage). To remove underperforming content, see [how to delete a Pinterest pin](https://www.genviral.io/blog/how-to-delete-a-pinterest-pin). When you're ready to monetize your traffic, read [how to make money with Pinterest](https://www.genviral.io/blog/how-to-make-money-with-pinterest).
---
*Want to maintain a consistent Pinterest posting schedule? [Genviral's Pinterest Scheduler](https://www.genviral.io/pinterest-scheduler) helps you create and schedule pins to keep your account active without daily manual work.*
---
Canonical HTML: https://www.genviral.io/blog/pinterest-posting-strategy
# Pinterest Tips and Tricks 2026: 15 Proven Strategies
- Pinterest is a search engine, not a social feed - fresh pin designs (new image, layout, and text overlay) drive 90%+ of website traffic, while saves and repins have minimal impact in 2026.
- Keywords in pin titles, descriptions, and board names are the top ranking factor - hashtags now contribute only 1% of ranking power and should be deprioritized in favor of long-tail keyword phrases.
- Create 3-5 completely different pin designs for each blog post or product - the top 1% of pins drive 50%+ of all traffic, so volume of distinct designs is how you increase your odds of going viral.
- Video pins (6-15 seconds, 9:16 ratio) get 2x the engagement of static images. Seasonal content must launch 45-90 days before peak because 45% of Pinterest users plan holidays 60+ days in advance.
- The 2:3 aspect ratio (1000x1500px) is essential in 2026 - Pinterest's algorithm penalizes other ratios. Space pins to the same URL at least 72 hours apart to avoid spam filters.
## Introduction
Pinterest isn't just another social media platform - it's a **visual search engine** with 537 million monthly active users actively looking for ideas, solutions, and products. Unlike Instagram or TikTok where content disappears in 24-48 hours, your pins can drive traffic for months or even years. If you're looking to monetize, check out our guide on [how to make money with Pinterest](https://www.genviral.io/blog/how-to-make-money-with-pinterest). (If you're also managing Instagram, our guide on [how often to post on Instagram](https://www.genviral.io/blog/how-often-should-you-post-on-instagram) can help you balance both platforms effectively.)
But success on Pinterest in 2026 requires more than just pretty images. The algorithm has evolved, priorities have shifted, and what worked in 2024 won't cut it anymore.
This guide covers 15 proven Pinterest tips and tricks that are working right now in 2026 - no outdated advice, just strategies backed by recent data and real results.
## 1. Create Fresh Pins, Not Just Variations
**The #1 rule in 2026: Pinterest heavily favors fresh content.**
According to Tailwind's 2026 Benchmark Study analyzing over 1.2 million pins, **fresh pins (Creates) drive 90%+ of website traffic** compared to saves or repins. For step-by-step instructions on creating pins, see our complete guide on [how to make a pin on Pinterest](https://www.genviral.io/blog/how-to-make-a-pin-on-pinterest).
### What Makes a Pin "Fresh"?
A truly fresh pin requires:
- **New image** (not previously uploaded by anyone)
- **Different design and layout**
- **Unique text overlay**
- **Fresh perspective or angle**
### What Doesn't Count as Fresh
Simply changing the text overlay on the same background image isn't enough. Pinterest wants genuinely new visual content.
**Pro Tip:** For each blog post or product, create 3-5 completely different pin designs with different:
- Background images
- Color schemes
- Text overlay styles
- Layouts and compositions
This multiplies your chances of creating a viral pin while staying within Pinterest's fresh content guidelines.
## 2. Master the Art of Compelling Text Overlays
Your pin's text overlay is your headline, elevator pitch, and call-to-action combined. It determines whether someone engages or keeps scrolling.
### Text Overlay Best Practices
**Use benefit-driven language:**
- ❌ "Apple Pie Recipe"
- ✅ "Easy, Delicious Apple Pie Recipe – Ready In 1 Hour"
**Think like an advertiser:**
- Focus on outcomes: "Save $500 on Groceries This Month"
- Promise speed: "Get Organized in 15 Minutes"
- Solve problems: "Fix Your Sleep Schedule Tonight"
**Keep it readable:**
- Use bold, legible fonts (avoid script fonts - Pinterest can't read them)
- 3-7 words for main text is ideal
- Ensure text is readable on mobile devices
- Add drop shadows if text is on busy backgrounds
### Text Placement Options
**Centered text:** Works best for landscape images or quotes
**Vertical text:** Modern look, use for non-keyword text like branding
**Offset text:** Add to corners without covering the focal point
**White space frames:** Create breathing room around your main image
## 3. Optimize for Pinterest SEO with Keywords
Pinterest is a search engine first, social platform second. Keywords are everything.
### Where to Place Keywords
1. **Pin title** (40% of ranking power)
2. **Pin description first 100 characters** (30% of ranking power)
3. **Board names** (20% of ranking power)
4. **Alt text** (+25% impressions, +123% clicks when used)
5. **Image file names** before uploading
### How to Find the Right Keywords
**Use Pinterest's built-in tools:**
- Type keywords in the search bar and note auto-suggestions
- Check Pinterest Trends tool for rising search terms
- Look at related searches at the bottom of results
**Think long-tail and specific:**
- ❌ "Marketing tips"
- ✅ "Instagram Reels marketing strategy for coaches" (For Instagram-specific strategies, see our Instagram posting frequency guide linked above)
**Pro Tip:** Hashtags have minimal impact in 2026 (only 1% of ranking power). If you use them, limit to 2-5 relevant ones. Focus 99% of effort on keywords instead.
## 4. Use the Optimal Pin Dimensions
In 2026, Pinterest strongly recommends the **2:3 aspect ratio** for pins.
### Standard Pin Size: 1000 x 1500 pixels
This vertical format:
- Takes up more screen real estate on mobile
- Gets better engagement than square or horizontal
- Displays properly across all devices
### Other Accepted Formats
- **Video pins:** 1080 x 1920 pixels (9:16 ratio)
- **Longer pins:** Up to 1000 x 2100 pixels (use for infographics)
- **File types:** PNG for quality, JPG for smaller file sizes
**Important:** Pinterest's algorithm may penalize pins that don't follow the 2:3 ratio. Other ratios "may negatively impact performance" according to official Pinterest guidance.
## 5. Space Out Your Pins (Don't Batch-Pin to Same Board)
One of the biggest mistakes creators make: creating 5 pins for one blog post and pinning them all to the same board on the same day.
**This triggers spam filters.**
### The Right Approach
If you have 5 pins for one piece of content:
- Day 1: Pin A to relevant board
- Day 2: Pin B to relevant board
- Day 3: Pin C to relevant board
- Continue spacing out by 24+ hours between each
**Even better:** Wait 72 hours between pins to the same URL to avoid any spam flags.
## 6. Post Consistently (3-5 Fresh Pins Daily)
Consistency beats volume. Pinterest rewards accounts that show up reliably every day.
### Recommended Posting Frequency
**New accounts (0-6 months):** 3-5 fresh pins daily
**Established accounts (6+ months):** 5-10 fresh pins daily
**Seasonal campaigns:** 7-14 pins weekly
For a complete posting strategy including timing, batch workflows, and seasonal planning, see our [Pinterest posting strategy guide](https://www.genviral.io/blog/pinterest-posting-strategy).
### Batch Creation Workflow
Instead of creating pins daily:
1. Set aside 2-3 hours on Sunday
2. Create 21-35 pin designs
3. Schedule throughout the week
4. Maintain perfect consistency without daily work
## 7. Leverage Video Pins for Higher Engagement
Video pins are growing fast on Pinterest and deliver **2x more engagement** than static images.
### Video Pin Best Practices
- **Length:** 6-15 seconds is optimal (up to 90 seconds allowed)
- **Format:** Vertical (9:16 ratio) performs best
- **Hook:** Grab attention in first 3 seconds
- **Sound:** Most users watch without sound - add captions or text overlays
- **File size:** Max 100MB
Video pins work especially well for:
- Product demonstrations
- Recipe tutorials
- Step-by-step how-tos
- Before-and-after transformations
If you already create content for [Instagram Reels](https://www.genviral.io/blog/how-to-make-a-reel-on-instagram) or [TikTok slideshows](https://www.genviral.io/blog/how-to-make-a-slideshow-on-tiktok-pc), repurpose them for Pinterest!
## 8. Optimize Board Organization and Names
Boards matter more than you think - **25% of Pinterest's SEO traffic goes to boards**.
### Board Best Practices
**Create 10-20 boards minimum** to establish your niche
**Use keyword-first naming:**
- ✅ "Social Media Marketing Tips for Small Business"
- ❌ "My Favorite Marketing Stuff"
**Write keyword-rich descriptions** for every board
**Add 50+ pins before making boards public** - keep new boards as secret boards while you fill them; see [how to make a board on Pinterest private](https://www.genviral.io/blog/how-to-make-a-board-on-pinterest-private)
**Mix 70% your content, 30% curated pins**
### Board Organization Tips
Create boards around:
- Specific keyword themes
- Seasonal content
- Product categories
- Audience pain points
Avoid overly broad boards. "Recipes" is too generic - "Easy 30-Minute Weeknight Dinners" is specific and searchable. If you have overlapping boards that should be combined, see [how to merge Pinterest boards](https://www.genviral.io/blog/how-to-merge-pinterest-boards) - it preserves all the pins in one place. If you accidentally delete a board while organizing, you have 7 days to recover it - learn [how to recover deleted Pinterest boards](https://www.genviral.io/blog/how-to-recover-deleted-pinterest-boards). For individual pin management, see our guide on [how to delete Pinterest pins](https://www.genviral.io/blog/how-to-delete-a-pinterest-pin). For instructions on deleting entire boards, see our guide on [how to delete a Pinterest board](https://www.genviral.io/blog/how-to-delete-a-board-on-pinterest). To expand your reach, learn how to [find group boards on Pinterest](https://www.genviral.io/blog/how-to-find-group-boards-on-pinterest).
## 9. Start Seasonal Content 45-90 Days Early
Pinterest users are planners. **45% of users start planning holidays 60+ days in advance.**
### Seasonal Posting Timeline
| Season | Start Pinning | Peak Search |
|--------|--------------|-------------|
| Christmas | October | Nov-Dec |
| Valentine's Day | December | Jan-Feb |
| Easter/Spring | February | Mar-Apr |
| Back to School | June | Jul-Aug |
| Halloween | July | Sep-Oct |
| Thanksgiving | September | Oct-Nov |
If you wait until everyone else is posting holiday content, you've already lost. The algorithm picks winners early.
## 10. Create Multiple Designs for Each Piece of Content
Since the top 1% of pins drive 50%+ of all traffic, creating multiple variations increases your odds of hitting that winning combination.
### The Strategy
For each blog post or product, create 3-5 completely different pins:
**Pin 1:** Bright, colorful with bold text
**Pin 2:** Minimalist with lots of white space
**Pin 3:** Dark mode with contrasting text
**Pin 4:** Infographic style with data points
**Pin 5:** Lifestyle image with subtle overlay
Test different:
- Images and photos
- Color schemes
- Text overlay styles
- Layouts and compositions
Pinterest's algorithm will naturally favor the version that gets more engagement.
## 11. Make Text Overlay Dynamic and Action-Oriented
Boring text overlays kill engagement. Your text needs to stop the scroll.
### High-Converting Text Overlay Formulas
**Numbers work:** "7 Ways to...", "3 Simple Steps to..."
**Time promises:** "In 10 Minutes", "This Week"
**Results-focused:** "That Actually Work", "Without Spending $$$"
**Problem-solving:** "Fix Your...", "Stop...", "Avoid..."
**Examples:**
- "7 Instagram Growth Hacks That Actually Work"
- "Fix Your Sleep Schedule in 3 Days"
- "Organize Your Entire Closet in 2 Hours"
**Avoid:**
- Generic descriptions without benefits
- Clickbait that doesn't deliver
- All caps (looks spammy)
- Overly long text that's hard to read quickly
## 12. Use High-Quality, Vibrant Images
Pinterest is a visual platform. Image quality directly impacts performance.
### Image Best Practices
**Colors:** Bright, vibrant colors perform better than dark or muted
**Clarity:** High-resolution, sharp images only
**Composition:** Clear focal point, not cluttered
**Contrast:** Text should pop against background
**Authenticity:** Real photos outperform generic stock images
**Pro Tip:** Consider investing in paid stock images instead of free ones. The difference in quality and uniqueness can significantly boost visibility.
## 13. Add Your Branding (But Keep It Subtle)
Consistent branding builds recognition and trust over time.
### Branding Elements to Include
- **Logo:** Small, in corner (don't obscure main image)
- **Colors:** Use consistent brand colors across pins
- **Fonts:** Stick to 1-2 fonts maximum
- **Style:** Maintain recognizable visual style
**Important:** Your branding should be subtle. The content and value proposition should dominate - not your logo.
## 14. Write Descriptions That Convert
Your pin description isn't just SEO - it's a sales pitch.
### Description Formula
**Opening (first 100 chars):** Most important for SEO
- Include primary keyword naturally
- Hook with a benefit or question
**Middle:** Expand on value
- What will they learn/get?
- Why does it matter?
- Any social proof or results?
**End:** Clear call-to-action
- "Click to learn more"
- "Save this for later"
- "Get the free template"
**Length:** 100-200 characters is ideal, up to 500 allowed
## 15. Test, Measure, and Optimize
Pinterest success requires continuous optimization based on data.
### Key Metrics to Track
**Engagement signals:**
- Saves (strongest quality indicator)
- Clicks to your website
- Close-ups (users viewing full pin)
- Comments and reactions
**Traffic metrics:**
- Referral traffic in Google Analytics
- Conversion rate of Pinterest visitors
- Time on site
- Pages per session
### What to Test
- Different pin designs for same content
- Various text overlay styles
- Multiple keyword approaches
- Different posting times
- Board organization strategies
Run tests for 2-4 weeks minimum before making conclusions. Pinterest is a long-term platform - don't judge results too quickly.
## Bonus Tip: Avoid These Common Mistakes
### ❌ Using TikTok Videos with Watermarks
Pinterest's algorithm deprioritizes content with visible watermarks from other platforms. Authentic, original pins perform better than repurposed content with watermarks. As Pinterest users increasingly turn off AI-generated content in their feeds, the demand for authentic, original content is higher than ever.
### ❌ Horizontal or Square Pins
Vertical format (2:3 ratio) is strongly preferred. Other ratios may hurt performance.
### ❌ Posting Only Your Own Content
Mix in 30% curated content to provide value and avoid looking spammy.
### ❌ Ignoring Mobile Optimization
80% of Pinterest users are on mobile. If your text isn't readable on phone screens, you're losing traffic.
### ❌ Giving Up Too Early
Pins can take 1-2 years to reach peak viral performance. Pinterest is a long-term strategy. For a complete posting frequency strategy, see our Pinterest posting strategy guide linked above.
**Managing your content:** As you optimize your Pinterest strategy, you may need to clean up old or underperforming pins. Learn how to [unsave pins on Pinterest](https://www.genviral.io/blog/how-to-unsave-pins-on-pinterest) to keep your boards organized.
## Implementing Your Pinterest Strategy
Ready to put these tips into action?
**Week 1:** Set up your boards and profile optimization
**Week 2:** Create your first batch of 10-15 fresh pins
**Week 3:** Establish consistent posting rhythm
**Week 4:** Start tracking metrics and testing variations
Remember: Pinterest rewards consistency over perfection. Start with 3 pins daily and build from there.
## Final Thoughts
Pinterest in 2026 is all about fresh content, strategic keyword optimization, and consistent quality. The platform offers something no other social media can: **evergreen traffic that compounds over time**.
Implement these 15 tips systematically, track your results, and adjust based on what works for your specific audience and niche.
The creators and businesses winning on Pinterest aren't necessarily the ones with the best designs - they're the ones who understand how the platform works and optimize accordingly.
Start implementing these strategies today, and watch your Pinterest traffic grow month after month. For creating interactive collages that drive engagement, see [how to make Pinterest collage](https://www.genviral.io/blog/how-to-make-pinterest-collage). Want to clean up your feed? Learn [how to turn off AI posts on Pinterest](https://www.genviral.io/blog/how-to-turn-off-ai-posts-on-pinterest). To manage your saved content, see [how to see liked pins on Pinterest](https://www.genviral.io/blog/how-to-see-liked-pins-on-pinterest). And when you're ready to monetize, check out our Pinterest monetization guide linked above.
---
*Want to maintain a consistent Pinterest presence without spending hours daily? [Genviral's Pinterest Scheduler](https://www.genviral.io/pinterest-scheduler) helps you schedule pins to keep your account active while you focus on creating great content.*
---
Canonical HTML: https://www.genviral.io/blog/pinterest-tips-and-tricks
# How to Schedule Posts to Mastodon (2026 Guide)
- Mastodon does **not** have native post scheduling in its web or mobile apps, even though scheduling has been exposed in its API for years.
- A native scheduling pull request has been open on Mastodon's open-source repo since 2019, but it still hasn't shipped, so you need a third-party tool.
- [Genviral's Mastodon scheduler](https://www.genviral.io/mastodon-scheduler) lets you create and schedule content to Mastodon (and every other major platform) from one place.
- Setup is two steps: connect your Mastodon account under **Manage accounts**, then create a **new post**, pick a time, and schedule it.
- This guide turns the video walkthrough into a written, step-by-step tutorial.
If you've ever tried to schedule a post on Mastodon, you've probably hit the same wall everyone does: there's no schedule button. Mastodon is a fantastic, open, federated network, but its native posting composer only gives you images, polls, content warnings, and emojis. Scheduling simply isn't there.
In the video above, I walk through exactly how to get around that. This guide turns that walkthrough into a written, step-by-step tutorial you can follow along with.
## Why Mastodon Has No Native Scheduling
Here's the part that surprises most people: **Mastodon's API has supported scheduled statuses for years.** Developers can already publish a post with a future timestamp through the API. The feature exists at the platform level - it's just never been surfaced in the official apps.
There's a pull request to add native scheduling to Mastodon's open-source codebase that has been open since 2019. Years later, it's still open and unmerged. There's never been a clear official reason why it hasn't shipped.
The practical takeaway: because the capability lives in the API but not the UI, third-party tools have stepped in to fill the gap. (Mastodon is far from the only network where this is true - see our roundup of the [best social media APIs](https://www.genviral.io/blog/best-social-media-apis) for how other platforms expose posting.) If you want to plan and schedule Mastodon posts, you'll need one of them.
## What You Need
To follow this tutorial you'll need:
1. A Mastodon account on any instance (for example `@you@mastodon.social`)
2. A Genviral account - this is the third-party scheduler we'll use to connect to Mastodon's API
Genviral is the tool we operate, and it lets you create and schedule content to all major social platforms - Mastodon included - from a single dashboard.
## Step 1: Connect Your Mastodon Account
Once you've signed up and logged in:
1. Go to the **Social Post** section.
2. Click **Manage accounts**.
3. Choose to connect a new **Mastodon** account.
Mastodon is federated, so the connection needs to know which instance you're on. You'll do this by entering your Mastodon handle.
To find it, open your Mastodon profile and copy your full handle - it looks like `@yourname@yourinstance.social`. Paste that in and click **Continue**.
You'll be redirected to Mastodon's standard authentication screen, where you approve the connection. Once you authorize it, you're sent back to Genviral and your account is connected. That's the entire setup - you only do it once per account.
## Step 2: Create and Schedule a Post
With your account connected, scheduling is quick:
1. Staying in the **Social Post** section, click **New post**.
2. Select your connected **Mastodon** account as the destination.
3. Type your post content in the composer.
4. Pick your scheduling time - for example, **tomorrow at 9:00 AM**.
5. Click **Schedule**.
That's it. Your post now appears in the queue at the time you chose, and Genviral will publish it to Mastodon automatically - no need to keep a tab open or be online when it goes out.
## Tips for Scheduling on Mastodon
A few things worth keeping in mind once you're scheduling regularly:
- **Mind the character limit.** Most Mastodon instances default to 500 characters, but some raise or lower this. Write to the limit of the instance you're posting to.
- **Use content warnings where appropriate.** The Mastodon community values content warnings (CWs) for sensitive or spoiler content. If your scheduler supports CWs, use them - it's good etiquette on the network.
- **Post when your instance is active.** Mastodon doesn't rank posts with an algorithm; the timeline is chronological. That makes timing matter more than on algorithmic feeds - schedule for when your followers are actually online.
- **Add alt text to images.** Accessibility is a strong cultural norm on Mastodon. Describe your images so everyone can engage with your posts.
- **Schedule across instances and platforms at once.** If you're active on Mastodon plus other networks, you can queue the same idea to all of them from one place instead of reposting manually. Once your cadence is steady, you can take it further and [automate your social media posting](https://www.genviral.io/blog/hermes-agent-social-media) entirely.
## Frequently Asked Questions
### Can you schedule posts natively on Mastodon?
No. As of 2026, neither the Mastodon web app nor the official mobile apps include a scheduling button. Scheduled statuses exist in the Mastodon API, but the feature has never been exposed in the official user interface, so you need a third-party tool.
### Is it safe to connect a third-party scheduler to Mastodon?
Yes, when you connect through Mastodon's official OAuth screen. You're not handing over your password - you're authorizing an app via Mastodon's standard authentication flow, and you can revoke that access at any time from your Mastodon account settings.
### Do I need to be online when a scheduled post goes out?
No. Once a post is scheduled, the publishing happens server-side. You can close the tab, shut down your computer, and the post will still go out at the time you set.
### Which Mastodon instances are supported?
Because Mastodon is federated and uses a shared API, you connect by entering your full handle (`@you@yourinstance.social`), which works across instances rather than being limited to a single one.
## Wrapping Up
Mastodon's missing scheduler is one of those long-standing gaps that's unlikely to close soon - the native PR has sat open since 2019. The good news is that the API already supports it, so a third-party tool gets you full scheduling today.
Connect your account once, write your post, pick a time, and you're done. If you have questions about Mastodon scheduling or anything else social-media related, drop a comment on the video or reach out to us at Genviral - we publish daily videos on social media content and are happy to help.
Ready to schedule your first Mastodon post? [Get started with Genviral](https://www.genviral.io/).
---
Canonical HTML: https://www.genviral.io/blog/schedule-to-mastodon
# How to Schedule Posts to Telegram (2026 Guide)
- Telegram has native scheduled messages: write a post, open the send-button menu or calendar option, choose a future date and time, and Telegram sends it later.
- Telegram's own API documentation describes scheduled messages as a server-side schedule queue, so the post can still go out after you schedule it.
- Native scheduling is fine for one channel or a few posts, but it gets messy when you manage many Telegram updates, multiple channels, or a wider social calendar.
- [Genviral's Telegram scheduler](https://www.genviral.io/telegram-scheduler) gives you a cleaner content calendar and lets you schedule Telegram alongside TikTok, Instagram, YouTube, Facebook, LinkedIn, Pinterest, X, Bluesky, Threads, and Mastodon.
- To connect Telegram to Genviral, create a bot in BotFather, add it as an admin to your channel or group, then paste the bot token and channel username or `t.me` link into Genviral.
Telegram is one of the easier platforms to schedule manually because scheduled messages are built directly into the app. If you only run one channel and queue the occasional update, the native scheduler may be enough.
But Telegram scheduling gets harder once you plan more than a few posts. Scheduled messages live inside the individual channel or group where you created them, not in a broader editorial calendar. If you are planning launches, recurring broadcasts, daily community posts, or cross-platform content, that quickly turns into a lot of clicking around.
In the video above, I walk through both workflows: scheduling directly inside Telegram, then scheduling Telegram posts from Genviral so the channel fits into the same calendar as the rest of your social content.
## Can You Schedule Posts Natively on Telegram?
Yes. Telegram has native scheduled messages.
Telegram's official launch post says to use the send-button menu in a chat and choose the schedule option. Telegram's developer documentation also confirms that scheduled messages and media are added to a server-side schedule queue and sent automatically at the chosen time.
In plain English: once Telegram accepts the scheduled message, it is not just a local reminder on your phone. It is queued by Telegram for that chat, group, supergroup, or channel.
Useful official references:
- [Telegram's official scheduled messages announcement](https://telegram.org/blog/scheduled-reminders-themes)
- [Telegram Core API scheduled messages documentation](https://core.telegram.org/api/scheduled-messages)
- [Telegram Bot API documentation](https://core.telegram.org/bots/api)
- [BotFather documentation for bot creation and tokens](https://core.telegram.org/bots/features#botfather)
## How to Schedule a Telegram Post Natively
The exact button placement varies a little by Telegram client, but the native flow is simple.
1. Open the Telegram channel, group, or chat where you want the post to go.
2. Type your message or prepare your media post.
3. Open the send-button menu. On mobile, this is usually a long press on the send button. On desktop, use the send-button menu or the calendar option when it appears.
4. Choose **Schedule Message**.
5. Pick the date and time.
6. Confirm the schedule.
Telegram will show the scheduled message inside that chat's scheduled-message area. In the video, the example post is scheduled for June 18, then appears as a scheduled post in the Telegram channel.
## Where Native Telegram Scheduling Falls Short
Native Telegram scheduling works. The issue is not that Telegram lacks the feature; the issue is that the native workflow is still very chat-by-chat.
That creates a few practical problems:
- **No unified content calendar.** Scheduled posts are attached to the specific Telegram chat, group, or channel.
- **Harder campaign planning.** If you schedule several launch posts, reminders, and follow-ups, the queue can feel cluttered.
- **No cross-platform workflow.** Telegram scheduling does not help you adapt the same campaign to TikTok, Instagram, YouTube, LinkedIn, Facebook, X, Pinterest, Bluesky, Threads, or Mastodon.
- **Limited team visibility.** If your team plans content outside Telegram, the native queue is easy to miss.
- **Awkward bulk planning.** Native scheduling is comfortable one post at a time, but not ideal for building weeks of posts in one session.
That is why a third-party scheduler is useful even though Telegram has a native scheduler. You are not replacing Telegram because it cannot schedule. You are replacing the cramped workflow around scheduling.
## How Genviral Schedules Telegram Posts
[Genviral](https://www.genviral.io/telegram-scheduler) lets you create and schedule Telegram posts from the same social-posting dashboard you use for other platforms.
For Telegram, Genviral uses a bot-based connection. That means you create a Telegram bot through BotFather, add that bot to the channel or group it should post into, and then let Genviral send scheduled posts through that bot at the time you choose.
One important technical detail: Telegram's lower-level Core API has a `schedule_date` field for scheduled messages, but the public Bot API `sendMessage` method does not expose a native scheduling parameter. Bot-based schedulers therefore keep the schedule in their own system and call Telegram at publish time. For creators, the result is the same practical outcome: you pick a future time, and the post goes live automatically.
## What You Need
Before you start, you need:
1. A Telegram channel or group you control
2. A Genviral account
3. Access to [BotFather](https://t.me/BotFather) in Telegram
4. The public channel username or public `t.me` link for the destination
For Genviral's current connect flow, use a public Telegram username like `@genviralio` or a link like `https://t.me/genviralio`. Do not paste the bot username, the display name from the channel header, or a private invite link like `https://t.me/+...`.
## Step 1: Create a Telegram Bot in BotFather
Open Telegram and search for **@BotFather**. BotFather is Telegram's official bot for creating and managing bots.
Then:
1. Start a chat with BotFather.
2. Send `/newbot`.
3. Give the bot a display name.
4. Choose a unique bot username. Telegram requires bot usernames to end in `bot`.
5. Copy the token BotFather gives you.
Keep that token private. Telegram's own BotFather docs are very direct about this: anyone with the token can control the bot through the Bot API.
## Step 2: Add the Bot to Your Telegram Channel or Group
Now go back to the Telegram channel or group where you want Genviral to post.
For a channel:
1. Open the channel settings.
2. Add the bot you just created.
3. Promote the bot to admin.
4. Make sure it has permission to post messages.
For a group, add the bot to the group and give it the permissions needed for the type of messages you want it to send.
This step matters. A bot token alone is not enough; the bot must be allowed to post in the destination.
## Step 3: Connect Telegram in Genviral
Once the bot is ready:
1. Open Genviral.
2. Go to **Social Post**.
3. Click **Manage accounts**.
4. Choose **Telegram**.
5. Paste the BotFather token.
6. Add the channel username or public `t.me` link.
7. Click **Connect**.
The channel name field is the destination channel or group, not the bot name. In the video, this is the part I call out as especially important because mixing up the bot username and the channel username is the most common setup mistake.
## Step 4: Create and Schedule Your Telegram Post
With Telegram connected, scheduling is straightforward:
1. Go back to **Social Post**.
2. Click **New post**.
3. Select Telegram as the destination.
4. Choose your connected Telegram channel or group.
5. Write your message and attach media if needed.
6. Pick a future date and time.
7. Click **Schedule**.
You can also publish immediately to test the connection. In the video, I publish a quick test post first, wait for it to propagate, then confirm it appears inside the Telegram channel.
## Tips for Telegram Scheduling
- **Run one test post first.** Before scheduling a campaign, publish a short test message so you know the bot token, permissions, and channel username are correct.
- **Use the channel username, not the bot username.** The bot sends the post. The channel or group is where the post goes.
- **Keep the BotFather token secure.** If a token leaks, regenerate it in BotFather and reconnect Telegram in Genviral.
- **Use native scheduling for one-off posts.** If you only need to schedule one message in one channel, Telegram's built-in scheduler is perfectly fine.
- **Use a calendar for recurring content.** If you are posting daily or managing multiple platforms, Genviral's calendar is much easier to review than checking every Telegram queue manually.
- **Respect Telegram formatting limits.** Telegram text posts support long messages, but media captions are shorter. Genviral enforces Telegram's posting constraints before publishing.
## Native Telegram vs Genviral
| Workflow | Best for | Main limitation |
|---|---|---|
| Telegram native scheduler | One-off posts, reminders, simple channel updates | Queue lives inside each chat or channel |
| Genviral Telegram scheduler | Campaigns, recurring posts, multi-platform scheduling, team calendars | Requires a BotFather bot and channel admin setup |
If Telegram is your only channel and you schedule occasionally, start with the native scheduler. If Telegram is part of a broader content operation, use Genviral so you can plan the whole publishing calendar in one place.
## Frequently Asked Questions
### Does Telegram have native post scheduling?
Yes. Telegram supports scheduled messages natively. Open the send-button menu or calendar option, choose the schedule action, then pick the date and time.
### Can I schedule Telegram channel posts?
Yes. Telegram's scheduled-message system applies to chats and channels, and the Core API documentation describes separate schedule queues for each chat, supergroup, and channel.
### Do I need to be online when a Telegram scheduled message goes out?
Telegram's developer documentation describes scheduled messages as server-side queue entries. That means the message is queued by Telegram for the selected chat and sent at the scheduled time.
### Why use Genviral if Telegram already has scheduling?
Use Genviral when you want a real content calendar, recurring planning, or cross-platform scheduling. Native Telegram scheduling is useful, but it is still organized around one chat or channel at a time.
### Can a Telegram bot schedule messages natively through the Bot API?
The public Bot API `sendMessage` method sends text messages but does not include Telegram Core API's `schedule_date` parameter. Bot-based schedulers typically store the future schedule themselves, then send the message through the bot when the scheduled time arrives.
### What permissions does the Telegram bot need?
For a channel, add the bot as an admin and give it permission to post messages. For a group, add the bot and grant the permissions needed for the content type you want it to send.
### What should I paste into Genviral: bot name or channel name?
Paste the BotFather token in the token field, then paste the destination channel username or public `t.me` link in the channel field. Do not paste the bot username as the channel destination.
## Wrapping Up
Telegram's native scheduler is good for quick, simple scheduling. Write the message, pick the future time, and Telegram queues it for that chat or channel.
For a serious publishing workflow, though, the native queue gets cramped. Genviral lets you connect Telegram once, schedule posts from a proper calendar, and manage Telegram alongside the rest of your social platforms.
Ready to schedule Telegram from the same dashboard as the rest of your content? [Try Genviral's Telegram scheduler](https://www.genviral.io/telegram-scheduler).
---
Canonical HTML: https://www.genviral.io/blog/schedule-to-telegram
# How to Switch to Personal Account on Instagram (2026 Guide)
- Switch to Personal: Profile - three lines - Settings and Privacy - For Professionals - Business (or Creator) tools and controls - Switch account type - Switch to Personal.
- When you switch to Personal, you lose access to Instagram Insights, the professional bio link, scheduling tools, and monetization features like badges and subscriptions.
- You can switch back to Business or Creator at any time with no data loss - the switch is fully reversible, so it's safe to test both modes.
Whether you're simplifying your social media presence or no longer need business tools, switching back to a personal Instagram account takes less than 5 minutes.
## How to Switch to Personal Account (Mobile)
**Works for both:** Business and Creator accounts
### Steps:
1. Open Instagram and tap your **profile picture** (bottom right)
2. Tap the **three lines (☰)** in the top right corner
3. Select **Settings and Privacy**
4. Scroll to **For Professionals** section
5. Tap **Business tools and controls** (or **Creator tools and controls**)
6. Scroll down and tap **Switch account type**
7. Select **Switch to Personal Account**
8. Tap **Switch Back** to confirm
Your account switches immediately. You may need to restart the app for all changes to take effect.
## How to Switch to Personal Account (Desktop)
### Steps:
1. Go to [instagram.com](https://instagram.com) and log in
2. Click **More** (bottom left)
3. Select **Settings**
4. Scroll down to **Business tools and controls** or **Creator tools and controls**
5. Click **Switch to Personal Account**
6. Click **Switch Back** in the confirmation popup
## What You Lose When Switching
**⚠️ Important:** These features disappear permanently when you switch:
### Instagram Insights
- All analytics data is **deleted permanently**
- Cannot be recovered, even if you switch back to professional later
- Includes past post performance, reach, engagement metrics, follower demographics
### Contact Buttons
- Email, phone, and address buttons removed from profile
- Followers can't directly contact you via profile buttons
### Promotional Tools
- Can't boost posts or run ads
- Can't use Instagram Shopping features
- Can't access product tagging
### Business Features
- Meta Business Suite access removed
- Third-party scheduling tools with auto-post won't work
- Can't connect to Facebook Business Page for cross-posting
### Category Label
- Professional category (e.g., "Blogger," "Artist," "Restaurant") removed from profile
**✅ What You Keep:**
- All posts, Stories, Reels, and Highlights
- All followers and people you follow
- Profile picture, bio, and username
- Direct messages
- Saved posts and collections
## Why Switch to Personal Account?
### Privacy Control
Business and Creator accounts **cannot be set to private**. Personal accounts can:
- Make profile private (only approved followers see posts)
- Control who follows you
- Hide content from non-followers
Once you switch to a personal account, you unlock additional privacy features like hiding your following list from non-followers, which is impossible with Business or Creator accounts that must remain public.
If your privacy concern is profile browsing specifically, read [how to turn off profile views on Instagram](https://www.genviral.io/blog/how-to-turn-off-profile-views-on-instagram) before switching. Instagram does not have a TikTok-style profile-view history toggle, so you may only need Activity Status, Story visibility, or blocking controls.
### Simpler Interface
No cluttered business tools, analytics, or promotional features. Just straightforward posting and engagement.
### More Authentic Engagement
Without business tools, interactions feel more genuine and less transactional - better for personal brands or casual users.
### No Accidental Ad Spend
Can't accidentally boost posts or run ads that cost money.
## Before You Switch: Save Your Data
**Critical:** Once you switch, all Insights data is gone forever.
### Export Your Analytics:
**Method 1 - Screenshots:**
- Go to Insights
- Screenshot important metrics (follower growth, top posts, demographics)
**Method 2 - Third-party Tools:**
- Use tools like Meta Business Suite to export data
- Download reports before switching
**What to save:**
- Follower demographics (age, gender, location)
- Post reach and engagement rates
- Best posting times
- Top performing content
## Common Issues & Solutions
**Can't find "Switch Account Type" option?**
Possible reasons:
1. **Facebook Page linked** - Unlink your Facebook Page first (Settings → Accounts Center → Remove connected account)
2. **Active ads running** - Pause or delete all active ad campaigns
3. **Instagram Shopping enabled** - Disable shopping features first
4. **App outdated** - Update Instagram to latest version
5. **Try desktop** - Use instagram.com instead of the app
**Switch keeps failing?**
- Log out and log back in
- Clear app cache (Android: Settings → Apps → Instagram → Clear Cache)
- Uninstall and reinstall Instagram
- Wait a few hours and try again (Instagram may be experiencing issues)
**Lost access to scheduling tools?**
Third-party scheduling tools (like Genviral, Later, Buffer) require API access that works differently for personal accounts. Most tools only support auto-posting for Business/Creator accounts. Personal accounts typically need manual posting.
## How to Switch Back to Business/Creator Account
Changed your mind? You can switch back anytime.
### To Business Account:
1. Profile → Menu (☰) → **Settings**
2. **Account type and tools** → **Switch to Professional Account**
3. Choose **Business**
4. Select your category → **Done**
5. Add contact info (optional)
6. Connect Facebook Page (optional)
7. Tap **Complete your profile**
### To Creator Account:
Same steps, but choose **Creator** instead of Business in step 3.
**Note:** You can switch between account types as often as you want. Instagram doesn't limit this, but your Insights data resets each time you switch away from professional accounts.
## Personal vs Business vs Creator: Quick Comparison
| Feature | Personal | Business | Creator |
|---------|----------|----------|---------|
| **Privacy** | Can be private | Always public | Always public |
| **Insights** | ❌ | ✅ Full analytics | ✅ Limited analytics |
| **Ads/Promotions** | ❌ | ✅ | ✅ |
| **Contact buttons** | ❌ | ✅ | ✅ |
| **Instagram Shopping** | ❌ | ✅ | ❌ |
| **Category label** | ❌ | ✅ | ✅ |
| **Branded content tools** | ❌ | ❌ | ✅ |
| **DM filters** | Basic | Advanced | Advanced |
| **Best for** | Personal use | Businesses, brands | Influencers, artists |
## Common Questions
**Will I lose followers when switching to personal?**
No. Your follower count and followers stay exactly the same. They won't be notified of the switch.
**Can I make my personal account private?**
Yes! This is one of the main benefits. Go to Settings → Privacy → Account Privacy → Toggle Private Account ON.
**How often can I switch between account types?**
As many times as you want. Instagram doesn't have a limit, but your Insights data is deleted each time you switch to personal.
**Can I use hashtags on a private personal account?**
Yes, but only your approved followers will see your hashtagged posts. Your posts won't appear in public hashtag searches.
**What happens to my scheduled posts?**
Posts scheduled through Meta Business Suite or third-party tools may fail to post automatically. You'll need to post them manually or reschedule after switching.
**Do I need to re-verify if I get verified again?**
If you're verified, you might lose your verification badge when switching to personal. Verification is tied to professional accounts in many cases. You'd need to reapply after switching back.
**Can I still collaborate with brands as a personal account?**
Technically yes, but you lose access to branded content tools and can't tag brand partners officially. Most brands prefer working with Business or Creator accounts that have analytics.
**What if I manage multiple businesses?**
Personal accounts don't support business features. Consider keeping a Business account for each business or use Instagram's account switching feature to manage up to 5 accounts.
## Should You Switch?
**Switch to Personal if:**
- You want privacy (private account feature)
- You don't need analytics or insights
- You're not selling products or running ads
- You want a simpler, cleaner interface
- You're using Instagram casually for friends/family
**Keep Business/Creator if:**
- You need analytics to track performance
- You're growing a brand or business
- You want to run ads or boost posts
- You sell products via Instagram Shopping
- You collaborate with brands (need branded content tools)
- You schedule posts with third-party tools
## The Bottom Line
Switching from Business or Creator to Personal account is permanent until you switch back - and all your Insights data is deleted forever. Make sure to export any important analytics before switching.
The process takes less than 5 minutes, and you can always switch back later if you change your mind. Your followers, posts, and content stay intact-only the professional features disappear.
---
## More Instagram Guides
- [How to Make a Reel on Instagram](https://www.genviral.io/blog/how-to-make-a-reel-on-instagram) - Reels work on all account types
- [How Many Photos Can You Post on Instagram](https://www.genviral.io/blog/how-many-photos-can-you-post-on-instagram) - carousel limits explained
- [Hide Your Instagram Following List](https://www.genviral.io/blog/hide-instagram-following-list) - privacy settings by account type
- [How to Clear Instagram Cache](https://www.genviral.io/blog/how-to-clear-instagram-cache) - reclaim phone storage from the IG app
*Looking to optimize your Instagram strategy? Check out our guides on [how often to post on Instagram](https://www.genviral.io/blog/how-often-should-you-post-on-instagram) and [reposting Instagram stories](https://www.genviral.io/blog/how-to-repost-story-on-instagram). To monetize your account, see [how to make money with Instagram](https://www.genviral.io/blog/how-to-make-money-with-instagram). If you're managing a Business account and need help scheduling content, [Genviral's Instagram Scheduler](https://www.genviral.io/instagram-scheduler) helps you plan and schedule posts in advance to maintain consistency.*
---
Canonical HTML: https://www.genviral.io/blog/switch-to-personal-account-instagram
# How to Target US Users on TikTok (2026 Ultimate Guide)
## Introduction
You don't need a US phone or presence to hit the US For You Page. Just follow these non-obvious steps - verified across three clean devices using NordVPN to fool TikTok's algorithm into thinking you're stateside.
This guide gives you clear timelines, do's and don'ts, and bonus optimization tips.
**Want a video summary of this article?** Watch the complete walkthrough below:
## 1. Start with a Clean Device
- **Use a brand-new or factory-reset phone**, preferably an iPhone.
- **Install and activate a US-based VPN**, e.g., ProtonVPN (NY server) or NordVPN.
- Remove the SIM card.
- Turn off Location Services for TikTok: `Settings → Privacy → Location → Never`
## 2. 4–7 Day Warm-Up (Before Posting)
Act like a real user. Warm-up phase is critical, especially for slideshow accounts.
If you want the fuller account-health version of this process for brand-new accounts, see [How to Warm Up a TikTok Account](https://www.genviral.io/blog/warm-up-tiktok-account).
| Day | Scrolling Time | Likes | Comments | Follows |
|-----|----------------|--------|----------|---------|
| 1 | 20 min | 5–10 | 0 | 0 |
| 2 | 20 min | 15–20 | 0 | 2 |
| 3 | 15 min | 20 | 2 | 5 |
| 4+ | 20 min | 20 | 2 | 3 |
If you're not getting slideshow posts on your FYP, you're not ready to post yet. Spend time liking, saving, and consuming slideshow-style content that looks like what you'll post yourself.
## 3. Cook Your Faceless Slideshow Content
### Download High-Contrast Images
Get aesthetic photos from Pinterest or create them within the Genviral AI Studio. Don't just grab the top results-scroll deeper and find less obvious, low-like images.
Use the same images repeatedly to build a recognizable aesthetic. Your **first opening image** is the most important: make it bold, dark, and easy to overlay text on.
### Repurpose Viral Hooks
Don't reinvent the wheel. Scroll your FYP, find slideshow posts that recently went viral, and rework their hooks. Use ChatGPT to rewrite them in your tone.
### Posting Schedule
Start with **one post per day.** Once warmed up, post **twice daily (morning and night).**
### Value-First Slideshows
Make 5–6 slides. The first slide should deliver your best value or a controversial point. More than 6 slides? Usually overkill.
### Call to Action (CTA)
Add a CTA as the last or second-to-last slide. Frame it like a friendly recommendation-"If this helped, check out [Your App Name]."
Use a sticker of your app logo so people recognize it if they search on the App Store.
## 4. Why This Works
TikTok optimizes for behavioral and device signals:
- **US IP:** through VPN
- **Clean metadata:** no prior TikTok signals
- **Behavior:** human-like interaction, not spammy
- **Location:** no mismatches between device and app settings
This blend makes your account look like an authentic US-based user.
## 5. Common Pitfalls
- Posting before your FYP shows slideshows
- Over-engaging during warm-up
- Leaving location ON during setup
## 6. FAQs
- **Do I need a dedicated VPN IP?** No, shared servers work.
- **US phone number required?** No, just use an email like Gmail.
- **Android vs iPhone?** Both work, but iPhones seem to leak less data. On Android, clear Play Store cache first.
## 7. Advanced Tips
One device = one account. Don’t switch VPN servers during warm-up or early posts.
After ~20–30 manual posts, you can automate with Genviral.
## 8. Quick Recap
- Clean phone
- US VPN
- No SIM
- Location off
- Warm-up 4–7 days + FYP check for slideshows
- THEN start posting
## Next Moves
Ready to automate your TikTok slideshow empire?
Turn this into a Genviral blog post, LinkedIn carousel, or TikTok script. Let’s get your app in front of US users.
If your current TikTok account isn't tagged US and won't budge, the cleanest reset is [deleting it](https://www.genviral.io/blog/how-to-delete-tiktok-account) and starting over with the setup above.
---
Canonical HTML: https://www.genviral.io/blog/target-us-users-on-tiktok
# TikTok Growth Strategies for SaaS Products
## From Zero to $20K MRR with TikTok Marketing
Recent case studies from successful SaaS products demonstrate the power of TikTok as an acquisition channel. Companies like Turbolearn AI ($80K MRR in 117 days), Feynman AI ($8K MRR in 30 days with 12M views), and Glam AI ($20K MRR in 34 days) have all leveraged strategic TikTok marketing to rapidly scale.
The most successful approaches focus on consistent content output across multiple accounts, strategic creator partnerships, and content formats that showcase the product's unique value proposition.
## Effective Content Formats for SaaS
The most effective content formats for SaaS products on TikTok typically fall into these categories:
1. **Faceless demos** - Screen recordings showing the product solving real problems
2. **Before/after transformations** - Showing the pain point and how your product solves it
3. **Short tutorials** - Quick, valuable how-to content that demonstrates expertise
4. **Social proof compilations** - User testimonials and reviews in slideshow format
For AI products specifically, highlighting unique capabilities through faceless slideshows has proven particularly effective, as demonstrated by Glam AI's rise to #5 on the App Store (Lifestyle category).
## Multi-Account Strategy and Attribution
For serious TikTok marketing campaigns, managing multiple accounts is often necessary to test different angles and maximize reach. The consensus among growth marketers is that you can safely manage up to five accounts per device.
When measuring success across multiple accounts, focus on these key metrics:
- Views-to-install conversion rate
- Cost per acquired user (if working with creators)
- Content virality ratio (viral views vs. initial follower-based views)
- Engagement-to-conversion pipeline performance
Attribution remains challenging with TikTok organic marketing. The most effective approach combines:
- Custom landing pages for each creator/account
- UTM parameters where possible
- In-app "How did you hear about us?" surveys
- Correlation analysis between posting spikes and download/signup spikes
## Working with Creators
The most effective payment structure for creator collaborations splits payments:
- 50% upfront
- 50% based on performance metrics
This aligns incentives while protecting both parties. For full-time creators, expect rates ranging from $300-$3,000 per post depending on follower count, engagement rate, and niche relevance.
When creating content at scale, consider using a network of creators rather than a single account. This approach:
- Diversifies risk from potential shadowbans
- Allows testing of different audience segments
- Creates natural social proof through multiple voices
## Best Practices for Account Management
When managing TikTok accounts for growth:
1. When content underperforms, privatize rather than delete it to preserve account health (if an entire account is too far gone, see [how to delete your TikTok account](https://www.genviral.io/blog/how-to-delete-tiktok-account))
2. If shadowbanned, continue posting but reduce frequency while the account recovers
3. New accounts should be properly "warmed up" before aggressive posting
4. For US targeting, set up accounts with US region settings and App Store accounts
By implementing these strategies with consistency and careful measurement, SaaS products can achieve the rapid growth demonstrated by recent success stories in the space.
---
Canonical HTML: https://www.genviral.io/blog/tiktok-growth-strategies-for-saas
# How to Warm Up an Instagram Account (2026 7-Day Guide)
- Instagram leans on Meta's full device and identity graph, so a fresh account on a new phone gets close inspection from day one. The warm-up exists to make that inspection clean.
- The cycle is **7 days**. Day 1 creates the profile and lands your first photo. Day 7 is your first Reel. Everything in between is gated.
- The order is fixed: profile -> scroll -> follow -> like -> Story -> comment likes -> comments -> DM -> Reel. Skipping a stage is the fastest way to trigger an action block.
- Day-1 setup matters more than most guides admit: create the account on mobile data (4G/5G, not home Wi-Fi), switch to a Creator Account, and finish the bio with no links.
- Do not connect Threads during warm-up, and keep the first uploads unique, brand-safe, and not recycled from another Instagram page.
- Links wait longer than most people want. The safest cold-account version is no bio link until roughly Day 30+, not Day 8.
- VPNs and proxies are not a clean workaround for warm-up. They can make the account look less like a normal consumer setup and more like an operated one.
- If you are replacing a recently banned or suspended account, do not recreate the old profile too literally. Reusing the same profile photo, username pattern, contact graph, and content too fast is one of the most common 2026 Reddit warning signs.
- If you get action-blocked, do not log out and do not panic-DM support. Stop all activity for 48-72 hours, then resume at half the volume that triggered the block.
If you are spinning up a fresh Instagram account to market a product, a persona, or a brand, warming it up before you publish is the highest-leverage thing you can do. This guide is the Instagram counterpart to our [TikTok warm-up guide](https://www.genviral.io/blog/warm-up-tiktok-account), and the cycle length is similar - 7 days vs TikTok's 5 - but the rules in between are very different.
The video above is aimed at AI influencer accounts, but the warm-up logic translates cleanly to any fresh persona, creator, or brand account: create the account cleanly, make it look complete, train the Explore/feed signals with niche activity, then publish your first Reel only after the account has a week of normal behavior behind it.
Creators in 2026 keep reporting the same painful pattern: action-blocked the moment they publish the first piece of content on a brand-new account. The 7-day cycle below exists to prevent that, by building enough device, behavior, and content history that Instagram classifies the account as a real user before you go anywhere near Reels.
If you already have an aged Instagram account with real history, this is not your playbook. The warm-up here is built for accounts that are new enough that Instagram is still deciding whether you look like a real person or an automation farm.
## Why Instagram Warm-Up Is Different From TikTok
TikTok and Instagram both try to detect bot-like behavior, but they look at very different signals.
TikTok leans heavily on watch-time and in-feed behavior. Instagram leans on Meta's much older and much deeper identity graph - Facebook history, WhatsApp, device IDs, ad targeting, login fingerprints, and cross-app behavior. That means Instagram has more historical data to compare you against, and a brand-new account on a brand-new phone behaves nothing like the millions of "normal" accounts in that graph.
The consequence is simple: **new Instagram accounts get action-blocked much faster than new TikTok accounts** if you push them. The day count is only slightly longer than TikTok's, but the content gating is much stricter - **no Reels until Day 7, no Threads connection during warm-up, and no bio link until much later**. The day-by-day cadence below is what consistently survives that gate.
Another useful way to think about this is **trust score**. Instagram is constantly weighing whether the account looks like a real person or an operated setup. Device identity, IP quality, account-creation method, content timing, and early engagement patterns all feed that judgment. That is why VPNs and proxies are a bad warm-up foundation: even when they appear to work, they can still push the account away from the "normal consumer" bucket you want.
## Who This Guide Is For
This process is for:
- a brand-new Instagram account
- someone trying to market a product, persona, service, or brand
- a person who wants to maximize reach and avoid action blocks from a fresh start
This is **not** for:
- an aged account with real posting history
- an account already in good standing
- a device that has burned through previous IG accounts
If you fall into the last bucket, the answer is not "warm up harder." It is "stop creating new accounts on that device." Meta connects accounts through device-level fingerprints far better than people assume, and the most common reason a warm-up fails is that the device itself is already flagged.
## The Mindset: Behave Like A Real Person Discovering Instagram
The single biggest mistake people make is treating warm-up as a checklist of actions to perform. Instagram is not looking at whether you completed a checklist. It is looking at whether your **rhythm** looks like a real human discovering the app.
Real humans:
- open the app, scroll, get distracted, close the app
- like things they actually find interesting, not every fifth post on cue
- watch Stories, sometimes reply, sometimes ignore
- follow a few people they know first, then maybe a creator, then drift
- do not edit their bio four times on day one
- do not DM ten strangers before they have a single follower
The 7-day cycle below mirrors that pattern. If you find yourself "completing today's actions" mechanically, you are doing it wrong.
## If You Burned Accounts On This Device, Stop
Before you even open Instagram, be honest about the device. If you have previously had Instagram accounts banned, shadowbanned, or hit with repeated action blocks on this phone:
- a fresh account on the same device will probably get flagged faster, not slower
- changing the email, name, and phone number does not fix the underlying fingerprint
- repeatedly creating new accounts on a flagged device usually trains Meta to flag the next one even sooner
If you genuinely need a clean start, you need a clean device, not just a clean account. This is the same warning that applies to TikTok, but Instagram enforces it harder because the cross-app device graph is older and richer.
That is not just theory. In a February 2026 Reddit thread, users described replacement accounts getting hit quickly on the same phone, while browser-based creation looked less risky than creating directly in the app. That is anecdotal, not a platform rule, but it lines up with the broader pattern that **app/device trust matters as much as account behavior** on Instagram in 2026. You can read that thread here: I want to make a new account!!!.
## Day 1: Setup, Profile, And First Photo
Day 1 is the only day with a fixed setup checklist. Get everything below done in the order listed before you do any scrolling.
**Do:**
- create the account on **mobile data (4G/5G), not home Wi-Fi**. A new account on a fresh IP that has never carried any Instagram traffic before is one of the cleanest day-1 signals you can give.
- add a realistic full name, a one- to two-sentence bio with **no links**, and a real-looking profile photo (not a stock asset, not an obvious AI render with weird hands)
- switch to a **Creator Account** in settings - this is what most accounts marketing a persona or brand end up on anyway, and doing it on day 1 is cleaner than switching mid-warm-up
- scroll the feed and Explore, and watch **at least 10-15 Reels** the whole way through
- like a few posts (5-ish, not 30)
- follow **5-10 niche accounts**, spaced over the session - not in one tap-tap-tap burst
- post one unique, on-brand aesthetic photo - this is your first piece of content and it should fit the look you intend to build
**Do not:**
- skip writing comments today - that starts on Day 4
- do not add any links anywhere on the profile
- do not connect Threads yet
- do not post recycled or watermarked content from another Instagram page
- do not run a VPN or proxy during warm-up
- do not post a Reel
## Day 2: Stories Begin
Day 2 introduces Stories and a second feed post. Keep interaction simple: watch, like posts, follow slowly, publish one Story, and leave comment behavior for Day 3.
**Do:**
- scroll feed and watch 10-20 Reels
- like 5+ posts across different accounts (not 5 from the same creator)
- post one on-brand Story
- post one on-brand photo
- follow another 5-10 niche accounts, spaced out
**Do not:**
- do not post Reels
- do not write comments yet
- do not like comments yet
- do not add any links
- do not connect Threads
## Day 3: Start Liking Comments
Day 3 is where comment interaction begins, but only lightly. The video keeps full written comments off the table for one more day; today is for liking a few comments under posts you actually watched.
**Do:**
- like 10+ posts across the day
- like around 3 comments naturally, the way you would on any account you actually used
- post one Story
- post one photo
- follow another 5-10 niche accounts
**Do not:**
- do not post Reels
- do not write full comments yet
- do not add any links
- do not connect Threads
This is a small distinction, but it matters. Liking a few comments is a softer signal than suddenly writing replies everywhere. It lets the account look social without jumping straight into the behavior Instagram often watches most closely on fresh accounts.
## Day 4: Start Commenting
Day 4 is where written comments begin. The rule is not "how many" - it is **what kind**.
**Do:**
- watch and like 10-15 more posts
- follow naturally (no fixed count any more - just whoever genuinely fits)
- post another Story
- like around 3 comments if it feels natural
- write your first **1-3 genuine comments** under posts you actually watched
**Do not:**
- do not post Reels
- do not add any links
- do not connect Threads
Genuine comments are the part most people get wrong. A useful test: if your comment could be copy-pasted under any other post in the niche and still make sense, it reads like automation. Good comments are:
- relevant to the specific video, not the topic
- specific to something the creator actually said or did
- not only emojis
- not one-word replies
- not the same phrase over and over
Instagram is not only tracking that you commented. It cares what kind of comment behavior you display.
## Day 5: Let The Persona Show
Day 5 is when the account stops looking like "any new user" and starts looking like *this* user.
**Do:**
- watch and like 10-15 more posts
- post another Story - this one can show more of the persona, voice, or aesthetic you are building
- follow naturally
- reply to any DMs or comments you have received
**Do not:**
- do not post Reels
- do not add any links
- do not connect Threads
If you have received zero DMs or comments by Day 5, that is normal. Do not invent fake replies to yourself.
## Day 6: Hold The Pattern
Day 6 is a deliberately quiet day. The goal is to prove the account is steady, not just front-loaded.
**Do:**
- watch and like naturally - no fixed count
- post another on-brand Story
- follow naturally
- reply to any DMs or comments
**Do not:**
- do not post Reels
- do not add any links
- do not connect Threads
## Day 7: Your First Reel
Day 7 is the unlock day. The 7 days of feed posts, Stories, and engagement have given Instagram enough signal to classify the account, and Reels can now go up without immediately tripping the system.
**Do:**
- post your first brand-safe Reel
- like, comment, and engage **15-20 times** spread across the app over the day
- post another Story
**Do not:**
- do not add any links yet - the safest cold-account version waits until roughly Day 30+
- do not connect Threads yet
For your first Reel, [How to Make a Reel on Instagram](https://www.genviral.io/blog/how-to-make-a-reel-on-instagram) covers the format that pulls the most reach from a cold start. Reels currently get more new-account distribution than feed posts or carousels, which is why the cycle saves them for last - they get the most distribution, so they need the most warm-up runway behind them.
## After Day 7: Easing Into Cadence
Once Day 7 is clean and the first Reel goes up without an action block, you can ramp - but not fast.
- keep the bio link off until roughly Day 30+ on cold persona accounts; if you must add one earlier, treat it as a risk, not a normal step
- post one Reel every 2-3 days, not daily, for the next two weeks
- keep hashtags to 3-5 per post, all genuinely relevant
- engage with comments on your own posts within the first hour
- avoid editing post captions repeatedly after publishing - Instagram weights post-publish edits suspiciously on new accounts
- connect Threads only after the account has survived the warm-up and initial ramp cleanly
The first 10-20 posts after Day 7 should all be manual. Connecting a scheduler during the warm-up week, or even in the first ramp week after, is one of the most common ways accounts that survived Day 7 still get action-blocked in week 2.
## 2026 Daily Action Ceilings (Don't Cross These)
The numbers below are ceilings, not targets. The 7-day cycle above keeps you well below them on purpose.
**A newly warmed account (Day 1-30):**
- follows: ~5-10 per hour, ~30-50 per day
- likes: ~10-15 per hour, ~70-150 per day
- comments: ~2-3 per hour, ~10-30 per day
- DMs: ~2-4 per hour, ~10-30 per day
- aim for **under 150 total actions per day** in the first month, including the warm-up week
**An aged, established account:**
- follows: up to ~20 per hour, 300-500 per day
- likes: up to ~40-60 per hour, ~1,000 per day
- comments: ~8-12 per hour, 100-150 per day
- DMs: ~5-10 per hour, 50-150 per day
For the published reference behind those ceilings, the Social Champ Instagram limits guide keeps its 2026 numbers reasonably current. The higher per-day numbers you see quoted in other guides almost always apply to **aged accounts only**. A newly warmed account in its first 30 days should be running at the lower band, not the upper one.
## If You Get Action-Blocked
If Instagram pops the "Action Blocked" or "We Restrict Certain Activity" dialog, do not panic, and do not do any of the following:
- do not log out and back in
- do not switch to a different IP
- do not appeal repeatedly
- do not delete and reinstall the app
- do not switch devices
All of those make the block worse. Instagram is watching how you respond.
The recovery pattern that consistently works:
1. Stop **every** action immediately - no likes, no follows, no comments, no DMs
2. Leave the account logged in on the same device
3. Wait **48-72 hours**
4. Resume at roughly 50% of the volume you were running when the block triggered
5. Avoid the specific action type that triggered the block for another 48 hours after that
If you keep hitting blocks even after recovery, treat that as a signal the device itself is flagged, not just the account. At that point the warm-up is not the problem.
## Common Warm-Up Mistakes
The mistakes below are the ones that show up over and over:
- **posting a Reel before Day 7 - the #1 reported cause of instant action blocks on fresh accounts in 2026**
- creating the account on home Wi-Fi instead of mobile data
- skipping the Creator Account switch and toggling it mid-warm-up
- adding a bio link before the account has real history, especially before Day 30 on cold persona accounts
- connecting Threads during the warm-up week
- uploading recycled, watermarked, or previously used Instagram content as your first posts
- using suggestive or edge-case content before the account has trust
- writing comments before any baseline scrolling and liking activity
- spamming generic, copy-paste-style comments instead of specific ones
- following 30+ accounts within the first 24 hours instead of pacing 5-10
- editing the bio more than once per day
- DMing strangers before any DMs or comments have come in
- running a follow/unfollow tool during warm-up
- connecting a scheduler during the 7-day cycle
- warming the account through a VPN or proxy, especially one that rotates IPs
- logging in and out across devices
The single biggest one is impatience: compressing the 7-day cycle into 3-4 days because nothing bad has happened yet.
## A Subtle Point: Warm-Up Does Not Replace Good Content
Warm-up gives the account a fair chance. It does not make weak content perform.
Instagram tests new content with a small initial audience and only expands distribution if the early signals are strong - watch time, replays, saves, shares, and profile visits. Those profile visits are aggregate performance signals, not a named viewer list; see [how to turn off profile views on Instagram](https://www.genviral.io/blog/how-to-turn-off-profile-views-on-instagram) if you want the privacy distinction. If your Day 7 Reel does not earn those signals, no amount of warming will save the account.
The real formula is:
- a cleanly warmed account
- correct niche calibration from the Day 1-3 follow and watch activity
- a strong Day 7 Reel
If you want a deeper read on how often to publish once the cycle is done, [How Often Should You Post on Instagram](https://www.genviral.io/blog/how-often-should-you-post-on-instagram) is the right follow-up.
## After Warm-Up: When To Schedule And Automate
Once the account has cleared its first 10-20 manual posts after Day 7 without any action blocks, scheduling becomes much safer.
That is where a platform like [Genviral](https://www.genviral.io/) fits in. The 7-day warm-up itself has to stay manual - there is no scheduler in the world that warms an account for you without leaving fingerprints. But once Instagram has classified the account as a real, engaged user, automation becomes a productivity tool instead of a risk.
For the scheduling side specifically, our [Instagram Scheduler](https://www.genviral.io/instagram-scheduler) is the natural next step after warm-up.
## Quick 7-Day Recap
The simplified version of the cycle:
1. **Day 1:** mobile data, complete profile (no link), Creator Account, watch 10-15 Reels, like a few, follow 5-10 niche, post one photo. No comments, no link.
2. **Day 2:** watch 10-20 Reels, like 5+, post one Story, post one photo, follow 5-10 more. No Reels, no comments, no comment likes.
3. **Day 3:** like 10+, like around 3 comments, one Story, one photo, follow 5-10. No full written comments yet.
4. **Day 4:** watch and like 10-15, follow naturally, one Story, like a few comments, write **1-3 genuine comments**.
5. **Day 5:** watch and like 10-15, one Story (let the persona show), follow naturally, reply to anything you receive.
6. **Day 6:** watch and like naturally, one Story, follow naturally, reply to DMs/comments. Hold the pattern.
7. **Day 7:** post your **first brand-safe Reel**, engage 15-20 times across the app, post one more Story. Still no bio link.
Then keep posts manual through the next 10-20 publishes, keep the bio link off until roughly Day 30+ for the safest cold-account ramp, and only connect a scheduler once that ramp is clean.
## Related Guides
- [How to Warm Up a TikTok Account](https://www.genviral.io/blog/warm-up-tiktok-account)
- [How Often Should You Post on Instagram](https://www.genviral.io/blog/how-often-should-you-post-on-instagram)
- [How Many Photos Can You Post on Instagram](https://www.genviral.io/blog/how-many-photos-can-you-post-on-instagram)
- [How to Make a Reel on Instagram](https://www.genviral.io/blog/how-to-make-a-reel-on-instagram)
- [How to Repost a Story on Instagram](https://www.genviral.io/blog/how-to-repost-story-on-instagram)
- [Switch to a Personal Account on Instagram](https://www.genviral.io/blog/switch-to-personal-account-instagram)
- [How to Hide Your Instagram Following List](https://www.genviral.io/blog/hide-instagram-following-list)
- [How to Clear Instagram Cache](https://www.genviral.io/blog/how-to-clear-instagram-cache)
- [How to Make Money with Instagram](https://www.genviral.io/blog/how-to-make-money-with-instagram)
- [How to Delete Your Instagram Account](https://www.genviral.io/blog/how-to-delete-instagram-account)
---
Canonical HTML: https://www.genviral.io/blog/warm-up-instagram-account
# How to Warm Up a TikTok Account (2026 Complete Guide)
- TikTok warm-up is not about tricking the algorithm. It is about making a brand-new account behave like a genuine user long enough for TikTok to trust it.
- The workflow in this guide is built for **newly created TikTok accounts**, not old or already-aged accounts. If you already have an established account, the game is different.
- The core warm-up takes about **5 days**: scroll first, then search your niche, then test follows, then test profile edits, then start posting manually.
- TikTok appears to use many different trust signals beyond content itself, including device, IP/network quality, region, account behavior, and how naturally the account interacts with the platform.
- VPNs and proxies are not a clean warm-up shortcut. Even when they work temporarily, they can make the account look less like a normal consumer device and more like an operated setup.
- If you already burned an account on a device, the safest recommendation is to **recover that account** instead of repeatedly creating new ones on the same phone.
If you want to publish successfully on TikTok from a brand-new account, warming the account up first is one of the most important things you can do. This guide is based on the video above and is specifically for people creating fresh TikTok accounts to market a product, service, or brand.
If you already have an aged account with real history on it, this is not the same game. This warm-up process is for accounts that are new enough that TikTok is still deciding whether you look like a real user or a spammer.
## Why TikTok Warm-Up Exists
The best way to think about TikTok is that almost nobody is reviewing your account manually. TikTok is using machine-learning systems and large sets of signals to decide:
- whether you are a genuine user
- what region you belong to
- what topics you care about
- whether your content deserves to be shown to more people
That means TikTok is not only looking at follower count or whether you uploaded a video. It can likely evaluate signals such as:
- phone and device identity
- internet connection, location, and whether the network looks normal or proxied
- account behavior over time
- what content you watch and how long you watch it
- what you search for
- whether you comment, like, bookmark, or follow like a normal person
The point of the warm-up is to help those systems classify you as a real user before you start publishing at scale.
One useful way to think about all of this is **trust score**. You can picture it as the platform's running estimate of whether your account and device look like a normal person or an operated setup. Device identity, IP quality, account-creation method, early behavior, and even the content you post can all push that score up or down. That is also why VPNs and proxies are a weak foundation for warm-up: even if they work for a while, they introduce an extra signal that does not look as clean as normal home or mobile traffic.
## Who This Guide Is For
This process is for:
- a brand-new TikTok account
- someone trying to market a business, service, or product
- a person who wants to maximize reach from a fresh start
This is **not** primarily for:
- an old established account
- an account already in good standing with posting history
- a device that has already burned through multiple bad TikTok accounts
That distinction matters. The transcript is very clear that if you have already burned accounts before, TikTok may be able to connect that behavior through device and account-level signals.
## Before You Start: Think Like a Genuine User
The correct mindset for TikTok warm-up is not "how do I game the algorithm?"
It is: **how do I behave like a genuine person who actually uses TikTok for entertainment and interest?**
That means:
- you scroll naturally
- you do not immediately optimize everything
- you do not spam follows or edits
- you do not instantly connect automation tools
- you let TikTok learn what niche you care about
If you watch how a normal person uses TikTok, they usually do not act like a marketer. They scroll, watch, search, occasionally like, occasionally save, and only sometimes comment. That is the behavior pattern you want the account to resemble.
## If You Burned an Account Before, Do Not Keep Creating New Ones
This is one of the most important warnings in the whole video.
If you previously had TikTok accounts banned, suppressed, or otherwise "cooked," the recommendation is:
- do not keep spinning up new accounts on the same device
- try to recover the original account instead
The reasoning is that TikTok may be able to connect accounts through multiple signals, not just the obvious ones. Even if you change the email, there may still be device and behavior fingerprints that tie the new account back to the old one.
If you truly need a fresh start after burning accounts, the video’s guidance implies you may need a different phone and a cleaner setup, not just a new email address.
## Day 1: Create the Account and Mostly Scroll
On day one, create the account and send strong baseline human signals.
Recommended setup signals:
- use your email
- add a phone number if possible
- import contacts
- give TikTok access to your photo library
The logic is simple: a genuine user tends to connect real-world data and permissions. A spammer at scale usually avoids the parts that create friction or traceability.
After the account is created, spend **5 to 15 minutes** scrolling through content.
On day one, the main job is:
- scroll
- watch videos mostly to completion
- lightly engage only if something genuinely matches your interest
Do not try to force the account into heavy activity immediately.
## Day 2: Scroll More and Start Searching Your Niche
On the second day, keep scrolling, but now begin teaching TikTok what you actually care about.
Search for niche-specific keywords. For example, if you are in cooking, search things like:
- protein dinners
- quick recipes
- easy meal prep
If you are in SaaS, fitness, beauty, travel, or another niche, use the equivalent topic terms.
This matters because TikTok is not only learning that you are human. It is also learning **what audience bucket you belong in**. If the system understands your interests, it becomes more likely that your future content gets shown to the right interest group.
On day two, you can also begin:
- liking niche-relevant content
- bookmarking niche-relevant content
Keep it natural. The point is not to perform every possible action. The point is to build a believable interest profile.
## Day 3: Test Follows and Leave Your First Real Comments
Day three is the first real account-health check.
Start following a few profiles in your niche. After you follow someone, go back to your own profile and confirm that the follow actually stuck. If it shows correctly, that is a good sign the account is in healthy standing.
You should also begin leaving your first comments, but they need to be **genuine comments**. That means:
- not only emojis
- not one-word replies
- not the same phrase over and over
Good comments are:
- relevant to the video
- specific
- funny in a human way
- additive to the conversation
This is another trust test. TikTok is not only tracking that you commented. It likely cares what kind of comment behavior you display.
## Day 4: Test Bio, Profile Image, and Profile Updates
Day four is the second health check.
Update the account profile:
- profile image
- bio
- other basic profile information
Then refresh and confirm the edits actually save.
If your updates do **not** persist, treat that as a warning sign. According to the workflow in the video, that usually means TikTok still does not like or trust the account enough yet. When that happens, go back to the warm-up basics:
- more scrolling
- more watching to completion
- more natural niche engagement
Do not brute-force your way forward by posting anyway.
## Day 5: Start Posting Manually
Day five is where content creation begins.
The recommendation in the video is very clear:
- **do not connect a third-party scheduler immediately**
- **post manually first**
Schedulers are not necessarily bad, but they are still another signal. If the account goes from zero history to instantly looking automated, that can work against you.
The safer pattern is:
1. warm the account first
2. publish manually
3. prove to TikTok that the account behaves like a real user
4. only then introduce automation later
The specific recommendation here is that the **first 10 to 20 posts** should be done manually before you start automating through a platform like Genviral.
## What to Avoid During Warm-Up
A few no-go behaviors are called out directly or implied strongly by the transcript:
- do not post immediately on a fresh account
- do not spam follows
- do not aggressively change the bio, profile image, and settings on day one
- do not skip almost everything you watch
- do not connect schedulers immediately
- do not warm up through a VPN or proxy and assume it is "safer" than normal traffic
- do not create new accounts repeatedly after burning old ones
Again, the standard is not perfection. It is simply to avoid behavior that looks obviously synthetic or operationally aggressive.
## Regional Targeting Still Matters
The video also makes an important clarification: warming up your account does **not** magically let you target any country you want.
TikTok distributes content regionally. If you are in one country and want to target a different one, that requires additional setup and is a separate problem from simple warm-up.
A VPN also does not solve that cleanly. Changing your apparent IP is not the same thing as looking like a real in-region user with consistent device, network, and behavior signals.
So warm-up helps build trust and account health. It does not, by itself, solve geo-targeting.
If that is your goal, the related guide is [How to Target US Users on TikTok](https://www.genviral.io/blog/target-us-users-on-tiktok).
## How Many TikTok Accounts Per Phone?
The transcript gives a practical range rather than a hard rule:
- roughly **4 to 6 TikTok accounts per phone** is the usual rate
Some people do more, but the video’s larger point is that this is not a number you should push casually. TikTok’s evaluation of device trust, content quality, and account quality all interact here.
That means once again: protect good accounts, and recover them when possible instead of treating accounts as disposable.
## A Subtle but Important Point: Content Quality Still Matters More
Warm-up helps you avoid sabotaging the account before you start.
But TikTok is still largely meritocratic after that. If your content is weak, follower count alone will not save it. The platform tests videos with a smaller audience first, then expands distribution if the engagement signals are strong enough.
So the real formula is:
- healthy account
- good niche calibration
- strong content quality
Warm-up does not replace good content. It just gives good content a fair chance.
## After Warm-Up: When to Automate
Once the account is stable and the first manual posts have gone out, then automation becomes much safer.
That is where a platform like [Genviral](https://www.genviral.io/) fits naturally. The warm-up itself should stay manual, but once the account has proven to TikTok that it behaves like a genuine account, you can start layering in automation more carefully.
If you want the scheduling side after the warm-up stage, [Best TikTok Scheduler](https://www.genviral.io/blog/best-tiktok-scheduler) is the best follow-up read.
## Quick 5-Day Recap
Here is the simplified version of the process:
1. **Day 1:** create the account, connect normal user permissions, and mostly scroll
2. **Day 2:** keep scrolling and search for niche keywords
3. **Day 3:** begin following niche accounts and leave real comments
4. **Day 4:** update your bio, profile image, and profile details, then confirm they stick
5. **Day 5:** publish manually, not through a scheduler
Then continue posting manually for the first **10 to 20 posts** before bringing in automation.
## Related Guides
- [Best TikTok Scheduler](https://www.genviral.io/blog/best-tiktok-scheduler)
- [How to Make Money with TikTok](https://www.genviral.io/blog/how-to-make-money-with-tiktok)
- [How to Get TikTok Spark Code](https://www.genviral.io/blog/how-to-get-tiktok-spark-code)
- [Where to Find TikTok Drafts](https://www.genviral.io/blog/where-to-find-tiktok-drafts)
- [How to Repost on TikTok](https://www.genviral.io/blog/how-to-repost-on-tiktok)
- [Why Can't I Follow People on TikTok?](https://www.genviral.io/blog/why-cant-i-follow-people-on-tiktok)
- [How to Target US Users on TikTok](https://www.genviral.io/blog/target-us-users-on-tiktok)
- [TikTok Growth Strategies for SaaS](https://www.genviral.io/blog/tiktok-growth-strategies-for-saas)
- [How to Delete Your TikTok Account](https://www.genviral.io/blog/how-to-delete-tiktok-account)
---
Canonical HTML: https://www.genviral.io/blog/warm-up-tiktok-account
# Where to Find Scheduled Posts on Facebook (2026 Guide)
- Scheduled posts for Facebook Pages live in Meta Business Suite: go to business.facebook.com - Planner (calendar view) or Content - Posts and Reels - Scheduled tab (list view).
- Personal profile scheduled posts are accessed differently: tap "What's on your mind?", click the scheduling clock icon, and previously scheduled posts show under "Scheduled posts" in the dropdown.
- You can edit, reschedule, or delete scheduled posts at any time before they publish - changes take effect immediately.
Where your scheduled Facebook posts live depends on whether you're managing a Page or a personal profile - the two have completely different locations. Here's how to find them in both cases.
## Method 1: Meta Business Suite Planner (Calendar View)
The Planner shows your scheduled posts in a visual calendar layout.
**Desktop:**
**Step 1:** Go to business.facebook.com
- Log in with your Facebook credentials
**Step 2:** Click "Planner" in the left menu
- Located in the left sidebar
**Step 3:** View your calendar
- See all scheduled posts by date
- Posts appear on their scheduled dates
- Click any post to view, edit, or reschedule
**What you'll see:**
- Calendar with scheduled posts
- Post previews
- Scheduled dates and times
- Both Facebook and Instagram posts (if connected)
**Mobile (Meta Business Suite app):**
**Step 1:** Open the Meta Business Suite app
**Step 2:** Tap "Planner" at the bottom
**Step 3:** Browse the calendar
- Swipe through dates
- Tap posts to manage them
## Method 2: Content Tab (List View)
The Content tab shows scheduled posts in a list format.
**Desktop:**
**Step 1:** Go to business.facebook.com
**Step 2:** Click "Content" in the left menu
**Step 3:** Click "Posts & reels"
**Step 4:** Click the "Scheduled" tab
- Located at the top of the screen
- Shows all upcoming posts in chronological order
**Step 5:** Manage posts
- Click three dots (...) on any post
- Options: Edit, Reschedule, Duplicate, or Delete
**Mobile:**
**Step 1:** Open Meta Business Suite app
**Step 2:** Tap "Content"
**Step 3:** Tap "Posts & reels"
**Step 4:** Tap "Scheduled"
- View all upcoming posts
## Method 3: Facebook Mobile App (For Business Pages)
If you scheduled directly through the Facebook app, find them here.
**Step 1:** Open the Facebook app
**Step 2:** Go to your Business Page
- Tap the menu icon (three lines)
- Select your Page
**Step 3:** Tap "More"
- Located below your page info
**Step 4:** Scroll and tap "Scheduled Posts"
- View all posts scheduled through the app
**Note:** This only shows posts scheduled through the Facebook mobile app, NOT posts scheduled through Meta Business Suite.
## Method 4: Third-Party Scheduling Tools
If you used a third-party tool, scheduled posts are in that tool's dashboard.
**Common platforms:**
- **Hootsuite:** Publisher → Planner
- **Buffer:** Publishing → Calendar
- **Sprout Social:** Publishing → Calendar
- **Later:** Calendar view
- **Metricool:** Planner tab
- **SocialPilot:** Content → Calendar
- **Genviral:** Posts → Scheduled
**Important:** Posts scheduled via third-party tools **will NOT appear** in Meta Business Suite until they're published.
## How to Edit a Scheduled Post
**In Meta Business Suite:**
**Step 1:** Find the post (Planner or Content → Scheduled)
**Step 2:** Click the post to open it
**Step 3:** Click the three dots (...) in the top-right
**Step 4:** Select "Edit Post"
**Step 5:** Make your changes
- Update caption, media, or settings
**Step 6:** Click "Save" or "Reschedule"
- Choose "Save" to keep the same schedule
- Choose "Reschedule" to change the date/time
## How to Delete a Scheduled Post
**Step 1:** Find the post (Planner or Scheduled tab)
**Step 2:** Click three dots (...) on the post
**Step 3:** Select "Delete Post"
**Step 4:** Confirm deletion
- The post is permanently removed from the queue
## Common Issues and Solutions
**Problem: "I can't find my scheduled posts"**
**Possible causes:**
1. **Looking in the wrong place** - Check both Planner AND Content → Scheduled
2. **Scheduled via third-party tool** - Check the tool you used, not Meta Business Suite
3. **Scheduled on wrong page** - Switch to the correct Facebook page in the top-left dropdown
4. **Post already published** - Check Published tab instead of Scheduled
5. **Draft instead of scheduled** - Look under "Drafts" in Content tab. For finding drafts, see [how to find drafts on Facebook](https://www.genviral.io/blog/how-to-find-drafts-on-facebook)
**Problem: "Scheduled tab is empty"**
**Solutions:**
- Verify you're viewing the correct Facebook Page
- Check if posts were scheduled through the Facebook app (use Method 3)
- Check third-party tools if you use them
- Posts may have already published (check Published tab)
**Problem: "Can't edit scheduled post"**
**Solutions:**
- Ensure you have Admin or Editor permissions
- Update Meta Business Suite or Facebook app
- Clear browser cache/cookies
- Try from desktop instead of mobile
## Tips for Managing Scheduled Posts
**Best practices:**
✓ Review scheduled posts weekly
✓ Check posts before they go live
✓ Update time-sensitive content
✓ Delete outdated promotional posts
✓ Use Planner for visual overview
**Stay organized:**
- Label posts by campaign or theme
- Schedule during audience peak hours
- Maintain a content calendar outside of Facebook
- Set reminders to review upcoming posts
- Check scheduled posts after world events
**Scheduling limits:**
- Meta Business Suite: 30-75 days in advance (varies)
- Facebook mobile app: 30 days in advance
- Third-party tools: Often longer (90+ days)
## Common Questions
**Where are scheduled posts stored on Facebook?**
In Meta Business Suite under Planner (calendar view) or Content → Scheduled (list view). Posts scheduled via the Facebook app are under your page's "Scheduled Posts" section.
**Can I see scheduled posts on my personal Facebook profile?**
No. Scheduling is only available for Business Pages, not personal profiles. Personal profiles don't have scheduling capabilities through Facebook natively.
**Why don't I see scheduled posts in Meta Business Suite?**
If you scheduled posts through a third-party tool (like Hootsuite or Buffer), they won't appear in Meta Business Suite until published. Check the tool you used.
**How far in advance can I schedule Facebook posts?**
Meta Business Suite allows scheduling up to 30-75 days ahead (exact limit varies by account). Third-party tools often allow scheduling 90+ days or more.
**Can I schedule posts for multiple Facebook pages?**
Yes. In Meta Business Suite, select the page from the dropdown in the top-left corner, then view that page's scheduled posts.
**Do scheduled posts appear in my Activity Log?**
Not until they're published. Scheduled posts don't appear in your Activity Log, only published posts do.
**Can other page admins see my scheduled posts?**
Yes. All admins, editors, and anyone with page access can see and edit scheduled posts in Meta Business Suite.
**What happens if I delete a scheduled post?**
It's permanently removed from the schedule and won't be published. This action cannot be undone.
**Can I bulk edit scheduled posts?**
Not in Meta Business Suite. You must edit each post individually. Third-party tools may offer bulk editing features.
**Will Facebook notify me before a scheduled post goes live?**
No. Scheduled posts publish automatically without notification. Review your schedule regularly to stay updated.
## The Bottom Line
Finding scheduled Facebook posts is straightforward once you know where to look:
**Primary locations:**
1. **Meta Business Suite → Planner** (calendar view)
2. **Meta Business Suite → Content → Scheduled** (list view)
3. **Facebook App → Page → More → Scheduled Posts** (mobile-scheduled only)
4. **Third-party tool dashboard** (if used for scheduling)
**Quick checklist:**
✓ Check you're on the correct Facebook Page
✓ Look in both Planner and Content tabs
✓ Remember posts scheduled via third-party tools won't show in Meta Business Suite
✓ Verify posts haven't already published (check Published tab)
Managing scheduled content is essential for maintaining a consistent Facebook presence. Review your schedule weekly, edit posts as needed, and stay flexible for timely updates. For monetizing your presence, see [how to make money with Facebook](https://www.genviral.io/blog/how-to-make-money-with-facebook). For more Facebook account management tips, see our guides on [how to change email on Facebook](https://www.genviral.io/blog/how-to-change-email-on-facebook), [how to view blocked Facebook friends](https://www.genviral.io/blog/how-to-view-blocked-facebook-friends), [how to see who shared my post on Facebook](https://www.genviral.io/blog/how-to-see-who-shared-my-post-on-facebook), [how to comment anonymously on Facebook](https://www.genviral.io/blog/how-to-comment-anonymously-on-facebook), [how to lock Facebook account](https://www.genviral.io/blog/how-to-lock-facebook-account), [how to change name on Facebook](https://www.genviral.io/blog/how-to-change-name-on-facebook), and [how to add admin to Facebook Page](https://www.genviral.io/blog/how-to-add-admin-to-facebook-page).
If you want to automate the publishing side instead of only monitoring the queue, compare [Facebook scheduling with Claude Cowork](https://www.genviral.io/blog/claude-facebook-automation) and [Facebook posting with Hermes Agent](https://www.genviral.io/blog/hermes-agent-facebook).
---
*Managing scheduled posts across multiple social platforms? [Genviral's Facebook Scheduler](https://www.genviral.io/facebook-scheduler) helps you schedule, organize, and track content for Facebook, Instagram, TikTok, Pinterest, and more - all from one dashboard, so you never lose track of what's posting when.*
---
Canonical HTML: https://www.genviral.io/blog/where-to-find-scheduled-posts-on-facebook
# Where to Find TikTok Drafts (2026 Quick Guide)
- TikTok drafts live in the Drafts folder on your profile page - it's the first thumbnail (top-left) above your posted videos grid, not a hidden menu.
- Drafts are stored locally on your device, not TikTok's cloud - they won't transfer to a new phone and are permanently lost if you uninstall the app or clear app data.
- To back up important drafts, post them with "Only me" privacy and "Save to device" enabled - the video saves to your camera roll and the private post can be deleted afterward.
TikTok drafts are stored locally on your device and accessed directly from your profile page. Here's exactly where to find them and what to know before they disappear.
**Prefer to watch?** This quick walkthrough shows where your drafts live and how to create one:
## Where Are TikTok Drafts Located?
TikTok drafts are in your **Drafts folder** on your profile page.
**Location:**
- **Profile tab** → **Drafts thumbnail** (first box, top-left)
- Appears above your posted videos
- Shows gray folder icon with "Drafts" label
- Number indicates how many drafts you have
## How to Find Your Drafts
**Step 1:** Open TikTok app
**Step 2:** Tap "Profile" (Me)
- Bottom-right corner icon
- Or tap your profile picture
**Step 3:** Look at top-left of your videos grid
- First thumbnail isn't your latest post
- It's your Drafts folder
- Note: If you're having account issues, see [why can't I follow people on TikTok](https://www.genviral.io/blog/why-cant-i-follow-people-on-tiktok)
**Step 4:** Tap the Drafts folder
- Opens all your saved drafts
**Step 5:** Select any draft to edit or post
**That's it.** All your unpublished videos are stored here.
## How to Create a TikTok Draft
If you don't have any drafts yet, here's how to save one:
**Step 1:** Tap the **"+"** button to start a new post
**Step 2:** Record or upload the video you want to save
**Step 3:** Tap **"Next"** to move to the post screen
**Step 4:** Tap **"Drafts"** (instead of "Post")
- Your video is saved to the Drafts folder
- Nothing is published or shared
**Step 5:** Find it later on your profile in the Drafts folder
The draft keeps all your edits, effects, and captions so you can finish and post it whenever you're ready.
## What You'll See in Drafts
**Each draft shows:**
- Thumbnail preview
- Duration of video
- Date saved
- Tap to open for editing
**Drafts are:**
- ✓ Private (only you can see them)
- ✓ Editable (can change before posting)
- ✓ Stored locally on your device
- ✓ Not synced to TikTok's cloud
## How to Find Drafts on Desktop
TikTok drafts are **mobile-only**.
**Desktop limitations:**
- Can't create drafts on desktop
- Can't view drafts on tiktok.com
- Can't access drafts in web browser
- Must use mobile app
**Workaround:** Access drafts only through TikTok mobile app (iOS or Android).
## Why Can't I Find My Drafts?
**Common reasons:**
### 1. No drafts saved yet
- Make sure you actually saved videos as drafts
- When posting, tap "Drafts" (not "Post")
### 2. Wrong account
- Check you're logged into the correct account
- Drafts don't transfer between accounts
### 3. App needs update
- Update TikTok to latest version
- Go to App Store/Play Store → Update
- Note: Region settings may affect app features (see [how to change TikTok account region](https://www.genviral.io/blog/how-to-change-tiktok-account-region))
### 4. Drafts folder is empty
- All drafts may have been posted
- Check your posted videos
### 5. Device changed
- Drafts don't transfer between devices
- Stored locally, not in cloud
- See "Drafts Disappeared" section below
## Drafts Disappeared? Here's Why
**Drafts are stored locally on your device** (not TikTok's servers).
**Drafts get deleted if:**
**1. App was uninstalled/reinstalled**
- Deleting app removes all drafts permanently
- No way to recover them
**2. Cleared app data/cache**
- Storage cleaner apps may delete drafts
- "Clear cache" in settings removes drafts
- Cannot be recovered
**3. Switched to new device**
- Drafts don't sync between devices
- Not saved to your TikTok account
- Each device has separate drafts
**4. Phone was reset**
- Factory reset deletes all local data
- Drafts are gone permanently
**Important:** Once deleted this way, **drafts cannot be recovered**. TikTok doesn't back them up.
## How to Save Drafts to Camera Roll (Backup)
Protect your drafts by saving them to your phone.
**Step 1:** Open Drafts folder
**Step 2:** Tap the draft you want to save
**Step 3:** Tap "Next"
**Step 4:** Set privacy to "Only me"
- Tap "Who can watch this video"
- Select "Only me"
**Step 5:** Tap "More options" (three dots)
**Step 6:** Enable "Save to device"
**Step 7:** Tap "Post"
**Result:**
- Video posts to TikTok (only visible to you)
- Video saves to camera roll
- Now you have a backup copy
**Then:** Delete the private post if you want. The copy remains in camera roll.
## How to Transfer Drafts to New Phone
**TikTok doesn't transfer drafts.** But you can save them first:
**Before switching phones:**
**Step 1:** Save each draft to camera roll (method above)
**Step 2:** Transfer videos to new phone
- Via iCloud, Google Photos, or cloud storage
- Or AirDrop/direct transfer
**Step 3:** On new phone, upload videos as new posts
- Can edit again before posting
- For creating slideshows, see [how to make a slideshow on TikTok PC](https://www.genviral.io/blog/how-to-make-a-slideshow-on-tiktok-pc)
**Cannot transfer:** Editing work, effects, or draft metadata. Only the video file transfers.
## How to Access TikTok Studio Drafts
**TikTok Studio** (desktop creator tool) has different drafts.
**Location:**
- Go to TikTok Studio website
- Log in
- Check "Content" or "Drafts" section
**Note:** These are separate from mobile app drafts. TikTok Studio drafts are for desktop creators and don't sync with mobile drafts. For targeting specific audiences, see [how to target US users on TikTok](https://www.genviral.io/blog/target-us-users-on-tiktok).
## Managing Your Drafts
**Best practices:**
✓ **Regularly review drafts** - Delete old/unused ones to free storage
✓ **Backup important drafts** - Save to camera roll if valuable
✓ **Don't rely on drafts long-term** - They can disappear unexpectedly
✓ **Finish and post** - Don't hoard dozens of drafts
✓ **Check storage** - Too many drafts use phone storage
## How to Delete a Draft
**Step 1:** Open Drafts folder
**Step 2:** Tap and hold the draft
- Or tap "Select" (top-right)
**Step 3:** Select draft(s) to delete
**Step 4:** Tap trash/delete icon
**Step 5:** Confirm deletion
**Done.** Draft is permanently deleted.
## Common Questions
**Are drafts backed up to TikTok cloud?**
No. Drafts are stored locally on your device only. TikTok doesn't sync them to the cloud.
**Can I access drafts from another phone?**
No. Drafts are device-specific. To access on another device, save drafts to camera roll first, then transfer.
**Do drafts expire?**
No expiration date. Drafts stay until you delete them, post them, or the app data is cleared.
**Can others see my drafts?**
No. Drafts are completely private until you post them.
**Why is my Drafts folder not showing?**
Either you have no drafts saved, or the app needs updating. Make sure you're on the latest TikTok version.
**What's the maximum number of drafts?**
No official limit, but hundreds of drafts will slow down the app and use significant storage.
**Can I edit a draft after saving?**
Yes. Tap the draft, make changes, then save again or post.
**Do drafts save audio/effects?**
Yes. All edits, effects, filters, text, and audio are saved with the draft. For creating AI-generated images for your content, see [how to create TikTok slideshow images with AI](https://www.genviral.io/blog/create-tiktok-slideshow-images-with-ai).
**Can I recover deleted drafts?**
No. Once deleted (or app data is cleared), drafts cannot be recovered.
**Do drafts count as posted videos?**
No. Drafts don't appear on your profile or count toward your video count until posted.
## The Bottom Line
Finding TikTok drafts:
**Mobile:** Profile → Drafts folder (top-left thumbnail)
**Desktop:** Not available (mobile only)
**Key points:**
- Drafts stored locally on device
- Don't sync between devices or cloud
- Deleted if app uninstalled or data cleared
- Backup important drafts to camera roll
- Accessible only through mobile app
TikTok drafts are convenient but fragile-save important videos to your camera roll for safekeeping. For more TikTok tips, see [how to make money with TikTok](https://www.genviral.io/blog/how-to-make-money-with-tiktok), [how to see saved videos on TikTok](https://www.genviral.io/blog/how-to-see-saved-videos-on-tiktok), [how to add link to TikTok bio](https://www.genviral.io/blog/how-to-add-link-to-tiktok-bio), [how to repost on TikTok](https://www.genviral.io/blog/how-to-repost-on-tiktok), [how to block someone on TikTok](https://www.genviral.io/blog/how-to-block-someone-on-tiktok), [how to get a TikTok Spark Code](https://www.genviral.io/blog/how-to-get-tiktok-spark-code), [tiktok growth strategies for saas](https://www.genviral.io/blog/tiktok-growth-strategies-for-saas), and [how to delete your TikTok account](https://www.genviral.io/blog/how-to-delete-tiktok-account) (drafts disappear with the account - back them up first).
---
*Looking to schedule and plan your TikTok content more reliably? [Genviral](https://genviral.io) helps you schedule TikTok videos across all platforms, with cloud-based storage so your content never disappears-making it easier to maintain a consistent posting schedule.*
---
Canonical HTML: https://www.genviral.io/blog/where-to-find-tiktok-drafts
# Why Can't I Follow People on TikTok? 2026 Guide
## TL;DR
TikTok blocks you from following when you:
- Exceed ≈ 200 follows in 24h or ≈ 15 in one burst
- Hit the lifetime cap of 10,000 accounts
- Trigger the "following too fast" spam filter (24h block)
- Use a brand-new or unverified profile
- Violate Community Guidelines
- Run an outdated app, flaky network, or VPN
Quick fixes: slow down, wait 24h, verify the account, update the app, clear cache, check connection, or contact support.
## How TikTok's Follow System Works
TikTok throttles follow actions to stop bots and spam. The controls operate on three layers: _per-burst_, _per-day_, and _lifetime_ caps. When any limit is tripped, the app quietly blocks further follows and sometimes shows the "Following too fast" error.
## Common Reasons You Can't Follow (and the Fix)
| Reason | What Happens | Quick Fix |
| ------------------------------------- | ---------------------------------------------------------------------- | ----------------------------------------------------------- |
| **Daily limit hit (≈ 200)** | Button turns gray or pops "Limit reached" | Wait 24h, then pace follows |
| **Burst limit hit (≈ 15 in seconds)** | "Following too fast" alert; 5-30 min cooldown | Pause 15 min before following again |
| **Lifetime cap (10k accounts)** | New follow fails silently | Unfollow inactive accounts or open a second profile |
| **24h spam block** | You can't follow, like, or comment | Wait it out; reduce fast repetitive actions |
| **Brand-new / unverified account** | Follows capped at very low numbers | Verify phone/email; keep activity natural for a week |
| **Community-Guideline strikes** | Shadowban or feature limits | Review violations → "Inbox › From TikTok" → Appeal if wrong |
| **Out-of-date app cache** | Glitches block follow action | Update app; Settings › Cache › Clear |
| **Weak internet / aggressive VPN** | Requests time-out | Switch to stable Wi-Fi; disable VPN for a test |
| **Regional policy blocks** | Certain regions may restrict follows after the 2025 US shutdown ripple | Use official app in your country; avoid US-routed VPNs |
## Step-by-Step Troubleshooting Checklist
1. **Check limits first**
- Count today's follows; if > 180, stop until tomorrow
- If lifetime follows ≈ 9,900, prune the list
2. **Wait 30 min – 24h**
- 90% of "can't follow" cases self-clear after the cooldown
3. **Verify & secure the account**
- Settings › Account › Identity → add phone, email, 2-FA
4. **Clear cache & update app**
- Settings › Free up space → Clear; then update via App Store/Play Store
5. **Test network**
- Switch between Wi-Fi ↔︎ mobile data; disable VPN/proxy
6. **Review violations**
- Inbox › Notifications › From TikTok → resolve any strikes
7. **Contact support**
- Profile › ☰ › Settings & privacy › Report a problem → "Follow/Like/Comment"
## Best Practices to Avoid Future Blocks
- **Follow ≤ 10 accounts every 10 min**
- **Cap daily follows at 150-180 to stay safe**
- **Unfollow in batches of < 50 per day**
- **Diversify actions** (watch, comment, create) to look human
- **Avoid mass-follow/unfollow tools**; they break limits instantly
## FAQ
| Question | Answer |
| -------------------------------------- | ------------------------------------------------------------------------------------------- |
| _Is the 200-per-day limit official?_ | TikTok never publishes exact numbers, but user tests and help-center messages confirm ≈ 200 |
| _Can I raise the limits?_ | No. Limits are global. Verification only removes the new-account throttle |
| _What if I'm stuck for days?_ | You likely have a guideline strike. Appeal or wait 72h |
| _Does deleting and reinstalling help?_ | It clears cache faults but won't bypass real blocks |
## Key Takeaways
- Follow caps are **behavioral**, not personal
- **Pace and variety** keep your account healthy
- When in doubt, **wait 24h**-time fixes most follow blocks
If your account is permanently restricted and waiting won't fix it, see [how to delete your TikTok account](https://www.genviral.io/blog/how-to-delete-tiktok-account) and start fresh.
---
Canonical HTML: https://www.genviral.io/blog/why-cant-i-follow-people-on-tiktok
# Viktor
Co-founder of Genviral. Occasional writer, sometimes even funny. Also loves to start conmpanies (weird, I know).
## Articles by Viktor
- [How to Turn Off Profile Views on Instagram (2026 Guide)](https://www.genviral.io/blog/how-to-turn-off-profile-views-on-instagram) (2026-08-27)
- [How to Turn Off Profile Views on TikTok (2026 Guide)](https://www.genviral.io/blog/how-to-turn-off-profile-views-on-tiktok) (2026-08-26)
- [How to Schedule Posts to Telegram (2026 Guide)](https://www.genviral.io/blog/schedule-to-telegram) (2026-08-24)
- [How to Schedule Posts to Mastodon (2026 Guide)](https://www.genviral.io/blog/schedule-to-mastodon) (2026-08-23)
- [How to Warm Up an Instagram Account (2026 7-Day Guide)](https://www.genviral.io/blog/warm-up-instagram-account) (2026-08-22)
- [How to Pin a Comment on TikTok in 2026](https://www.genviral.io/blog/how-to-pin-a-comment-on-tiktok) (2026-08-20)
- [How to Merge Pinterest Boards (and Sections): Step-by-Step](https://www.genviral.io/blog/how-to-merge-pinterest-boards) (2026-08-18)
- [How to Clear TikTok Cache (2026 Guide for Phone and PC)](https://www.genviral.io/blog/how-to-clear-tiktok-cache) (2026-08-17)
- [How to Warm Up a TikTok Account (2026 Complete Guide)](https://www.genviral.io/blog/warm-up-tiktok-account) (2026-08-14)
- [How to Automate Pinterest Posting with Hermes Agent](https://www.genviral.io/blog/hermes-agent-pinterest) (2026-08-13)
- [How to Automate Facebook Posting with Hermes Agent](https://www.genviral.io/blog/hermes-agent-facebook) (2026-08-12)
- [How to Automate TikTok Posting with Hermes Agent](https://www.genviral.io/blog/hermes-agent-tiktok) (2026-08-09)
- [Hermes Agent Social Media: How to Automate Posting](https://www.genviral.io/blog/hermes-agent-social-media) (2026-08-08)
- [7 Best LinkedIn Schedulers in 2026 (Researched & Ranked)](https://www.genviral.io/blog/best-linkedin-scheduler) (2026-08-07)
- [9 Best Pinterest Schedulers in 2026 (Researched & Ranked)](https://www.genviral.io/blog/best-pinterest-scheduler) (2026-08-06)
- [12 Best TikTok Schedulers in 2026 (Tested & Compared)](https://www.genviral.io/blog/best-tiktok-scheduler) (2026-08-05)
- [How to Automate YouTube Posting with OpenClaw](https://www.genviral.io/blog/openclaw-youtube) (2026-08-01)
- [How to Automate Facebook Posting with OpenClaw](https://www.genviral.io/blog/openclaw-facebook) (2026-07-31)
- [How to Automate TikTok Posting with OpenClaw](https://www.genviral.io/blog/openclaw-tiktok) (2026-07-30)
- [How to Automate Instagram Posting with OpenClaw](https://www.genviral.io/blog/openclaw-instagram) (2026-07-29)
- [15 Best OpenClaw Skills for Social Media Marketing in 2026](https://www.genviral.io/blog/best-openclaw-skills-social-media) (2026-07-28)
- [How to Automate Pinterest Posting with OpenClaw](https://www.genviral.io/blog/openclaw-pinterest) (2026-07-27)
- [How to Make Money with Instagram: 11 Proven Methods (2026)](https://www.genviral.io/blog/how-to-make-money-with-instagram) (2026-07-24)
- [How to Make Money with Facebook: 8 Proven Methods (2026)](https://www.genviral.io/blog/how-to-make-money-with-facebook) (2026-07-23)
- [How to Make Money with TikTok: 9 Proven Methods (2026)](https://www.genviral.io/blog/how-to-make-money-with-tiktok) (2026-07-22)
- [How to Make Money with Pinterest: 7 Proven Methods (2026)](https://www.genviral.io/blog/how-to-make-money-with-pinterest) (2026-07-21)
- [How to Repost on TikTok (2026 Guide)](https://www.genviral.io/blog/how-to-repost-on-tiktok) (2026-07-20)
- [How to Add Link to TikTok Bio (2026 Guide)](https://www.genviral.io/blog/how-to-add-link-to-tiktok-bio) (2026-07-19)
- [How to Get Spark Code on TikTok (2026 Guide)](https://www.genviral.io/blog/how-to-get-tiktok-spark-code) (2026-07-18)
- [How to Find Drafts on Facebook (2026 Guide)](https://www.genviral.io/blog/how-to-find-drafts-on-facebook) (2026-07-17)
- [How to Block Someone on TikTok (2026 Guide)](https://www.genviral.io/blog/how-to-block-someone-on-tiktok) (2026-07-16)
- [How to See Saved Videos on TikTok (2026 Guide)](https://www.genviral.io/blog/how-to-see-saved-videos-on-tiktok) (2026-07-15)
- [Where to Find TikTok Drafts (2026 Quick Guide)](https://www.genviral.io/blog/where-to-find-tiktok-drafts) (2026-07-14)
- [How to Change Email on Facebook (2026 Quick Guide)](https://www.genviral.io/blog/how-to-change-email-on-facebook) (2026-07-13)
- [How to View Blocked Facebook Friends (2026 Quick Guide)](https://www.genviral.io/blog/how-to-view-blocked-facebook-friends) (2026-07-12)
- [Where to Find Scheduled Posts on Facebook (2026 Guide)](https://www.genviral.io/blog/where-to-find-scheduled-posts-on-facebook) (2026-07-11)
- [How to Unsave Pins on Pinterest (2026 Quick Guide)](https://www.genviral.io/blog/how-to-unsave-pins-on-pinterest) (2026-07-10)
- [How to Comment Anonymously on Facebook (2026 Guide)](https://www.genviral.io/blog/how-to-comment-anonymously-on-facebook) (2026-07-07)
- [How to Lock Facebook Account (Profile Lock Guide 2026)](https://www.genviral.io/blog/how-to-lock-facebook-account) (2026-07-06)
- [How to Make Pinterest Collage (2026 Complete Guide)](https://www.genviral.io/blog/how-to-make-pinterest-collage) (2026-07-03)
- [How to Change TikTok Account Region](https://www.genviral.io/blog/how-to-change-tiktok-account-region) (2026-07-02)
- [How to Delete a Board on Pinterest (Desktop & Mobile)](https://www.genviral.io/blog/how-to-delete-a-board-on-pinterest) (2026-07-01)
- [How to Make a Pin on Pinterest (Complete 2026 Guide)](https://www.genviral.io/blog/how-to-make-a-pin-on-pinterest) (2026-06-30)
- [How to See Liked Pins on Pinterest](https://www.genviral.io/blog/how-to-see-liked-pins-on-pinterest) (2026-06-28)
- [How to Delete a Pinterest Pin (Single or Bulk)](https://www.genviral.io/blog/how-to-delete-a-pinterest-pin) (2026-06-27)
- [How to Switch to Personal Account on Instagram (2026 Guide)](https://www.genviral.io/blog/switch-to-personal-account-instagram) (2026-06-26)
- [How to Turn Off AI Posts on Pinterest (2026 Update)](https://www.genviral.io/blog/how-to-turn-off-ai-posts-on-pinterest) (2026-06-25)
- [How to Repost a Story on Instagram (3 Methods That Work)](https://www.genviral.io/blog/how-to-repost-story-on-instagram) (2026-06-24)
- [How to Delete Instagram Account (Permanent & Temporary)](https://www.genviral.io/blog/how-to-delete-instagram-account) (2026-06-23)
- [How to Hide Your Following List on Instagram (2026 Guide)](https://www.genviral.io/blog/hide-instagram-following-list) (2026-06-22)
- [How Many Photos Can You Post on Instagram? (2026 Update)](https://www.genviral.io/blog/how-many-photos-can-you-post-on-instagram) (2026-06-21)
- [How Often Should You Post on Instagram in 2026?](https://www.genviral.io/blog/how-often-should-you-post-on-instagram) (2026-06-20)
- [Pinterest Tips and Tricks 2026: 15 Proven Strategies](https://www.genviral.io/blog/pinterest-tips-and-tricks) (2026-06-19)
- [How to Create TikTok Slideshow Images with AI (2026 Guide)](https://www.genviral.io/blog/create-tiktok-slideshow-images-with-ai) (2026-06-17)
- [How to Make TikTok Slideshows On Your PC (2026 Guide)](https://www.genviral.io/blog/how-to-make-a-slideshow-on-tiktok-pc) (2026-06-16)
---
Canonical HTML: https://www.genviral.io/blog/author/viktor
# Fekri
Co-founder of Genviral. Builder, founder, father
## Articles by Fekri
- [Best Social Media Data APIs in 2026 (Compared for Developers)](https://www.genviral.io/blog/best-social-media-data-apis) (2026-09-30)
- [How to Connect Claude to Instagram and Automate Posting](https://www.genviral.io/blog/claude-instagram-automation) (2026-09-02)
- [Claude Facebook Automation: How to Schedule Posts with Claude Cowork](https://www.genviral.io/blog/claude-facebook-automation) (2026-09-01)
- [Claude YouTube Automation: Schedule Shorts with Claude Cowork](https://www.genviral.io/blog/claude-youtube-automation) (2026-08-31)
- [6 Best Social Media CLI Tools for Posting & Automation](https://www.genviral.io/blog/best-social-media-cli) (2026-08-25)
- [How to Clear Instagram Cache (2026 Guide for Phone and PC)](https://www.genviral.io/blog/how-to-clear-instagram-cache) (2026-08-21)
- [How to Clear Facebook Cache (2026 Guide for Phone and PC)](https://www.genviral.io/blog/how-to-clear-facebook-cache) (2026-08-19)
- [How to Delete Your TikTok Account (2026 Guide)](https://www.genviral.io/blog/how-to-delete-tiktok-account) (2026-08-16)
- [How to Make a Board on Pinterest Private](https://www.genviral.io/blog/how-to-make-a-board-on-pinterest-private) (2026-08-15)
- [How to Automate YouTube Shorts Posting with Hermes Agent](https://www.genviral.io/blog/hermes-agent-youtube) (2026-08-11)
- [How to Automate Instagram Posting with Hermes Agent](https://www.genviral.io/blog/hermes-agent-instagram) (2026-08-10)
- [10 Best Social Media APIs for Posting & Automation](https://www.genviral.io/blog/best-social-media-apis) (2026-08-04)
- [How to Create Infographics with AI: Step-by-Step Guide](https://www.genviral.io/blog/how-to-create-infographics-with-ai) (2026-08-03)
- [How to Automate LinkedIn Posting with OpenClaw](https://www.genviral.io/blog/openclaw-linkedin) (2026-08-02)
- [How to Use OpenClaw to Automate Your Social Media](https://www.genviral.io/blog/how-to-use-openclaw) (2026-07-26)
- [How to Make Money with LinkedIn: 9 Proven Methods (2026)](https://www.genviral.io/blog/how-to-make-money-with-linkedin) (2026-07-25)
- [How to Find Group Boards on Pinterest (2026 Complete Guide)](https://www.genviral.io/blog/how-to-find-group-boards-on-pinterest) (2026-07-09)
- [How to See Who Shared My Post on Facebook (2026 Guide)](https://www.genviral.io/blog/how-to-see-who-shared-my-post-on-facebook) (2026-07-08)
- [How to Add Admin to Facebook Page (Desktop & Mobile 2026)](https://www.genviral.io/blog/how-to-add-admin-to-facebook-page) (2026-07-05)
- [How to Change Name on Facebook (Desktop & Mobile 2026)](https://www.genviral.io/blog/how-to-change-name-on-facebook) (2026-07-04)
- [How to Recover Deleted Pinterest Boards (7-Day Window)](https://www.genviral.io/blog/how-to-recover-deleted-pinterest-boards) (2026-06-29)
- [Pinterest Posting Strategy 2026: How Often Should You Post?](https://www.genviral.io/blog/pinterest-posting-strategy) (2026-06-18)
- [How to Target US Users on TikTok (2026 Ultimate Guide)](https://www.genviral.io/blog/target-us-users-on-tiktok) (2026-06-15)
- [How to Make a Reel on Instagram (2026 Complete Guide)](https://www.genviral.io/blog/how-to-make-a-reel-on-instagram) (2026-06-14)
- [Why Can't I Follow People on TikTok? 2026 Guide](https://www.genviral.io/blog/why-cant-i-follow-people-on-tiktok) (2026-06-13)
---
Canonical HTML: https://www.genviral.io/blog/author/fekri
# Miguel
Co-founder effortlessbacklinks.com. Co-founder effortlessbacklinks.com
## Articles by Miguel
- [TikTok Growth Strategies for SaaS Products](https://www.genviral.io/blog/tiktok-growth-strategies-for-saas) (2026-06-12)
---
Canonical HTML: https://www.genviral.io/blog/author/miguel